Base Game Trick Room Team for Regulation D Doubles (No Home Pokemon)
◓ Starter Tera Raid: 7☆ Torterra (03/13~03/19)!
✬ Pokemon HOME Dex Completion Shiny Rewards:
┗ Meloetta | Manaphy | Enamorus | Keldeo | Meltan
▶︎ Share codes and team up for Blueberry Quests!
▶︎ Game8 Tera Raid Damage Calculator | Game8 Discord
★ The DLC Epilogue is now available! ▶︎ How to Start
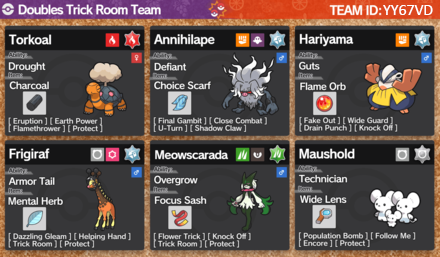
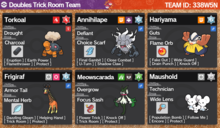
This is a strategy guide and complete explanation of an alternative Trick Room Doubles Team with Pokemon available in the base game for Ranked Battle in Pokemon Scarlet and Violet (SV). Read on for the team's rental code and tips on how to use this team effectively in competitive play, recommended movesets and best builds, and strategies and synergies for each Pokemon.
List of Contents
Trick Room Team Summary and Rental Code
 |
|
| Rental Code | YY67VD |
|---|---|
This team is able to consistenty set up Trick Room. With lots of Pokemon that can enable Trick Room and abuse Trick Room, this team is sure to be enjoyable for anybody who wants to play a Trick Room team.
Trick Room Team Movesets & Best Builds
Trick Room Sweeper Torkoal Moveset & Best Build
| Nature | Quiet (+Sp. Atk, -Spe) |
|---|---|
| EV Spread | 252 HP / 252 Sp. Atk / 4 Sp. Def IVs: 0 Atk / 0 Spe |
| Final Stat Values | 177 HP / 160 Def / 150 Sp. Atk / 91 Sp. Def / 22 Spe |
| Ability | Drought |
| Tera Type |

|
| Held Item | Charcoal |
| Moveset | ・
Eruption
・ Earth Power ・ Flamethrower ・ Protect |
Torkoal is possibly Scarlet and Violet's premier Trick Room Sweeper, who truly shines when it is allowed to burn through entire teams with Eruption
Torkoal is an Offensive powerhouse once it gets going, and it is difficult to stop once in Trick Room.
An important thing to remember when playing Torkoal is that it is slower than Amoonguss, who can put it to sleep outside Trick Room with Spore.
Final Gambit Annihilape Moveset and Best Build
| Nature | Jolly (+Spe, -Sp. Atk) |
|---|---|
| EV Spread | 252 HP / 52 Atk / 204 Spe |
| Final Stat Values | 217 HP / 142 Atk / 100 Def / 110 Sp. Def / 149 Spe (223 with Choice Scarf) |
| Ability | Defiant |
| Tera Type |

|
| Held Item | Choice Scarf |
| Moveset | ・
Final Gambit
・ Close Combat ・ U-turn ・ Shadow Claw |
With 252 HP EVs, Annihilape has 2 more HP than Hippowdon, allowing it to OHKO it with Final Gambit.
Final Gambit Annihilape is useful for trading Pokemon 1-to-1. This is great for enabling Trick Room for your team, by taking out a key Pokemon from your opponent's side of the field.
On games where you have to start Farigiraf and Hariyama, Annihilape can function as an anchor who can knock out low HP Pokemon late-game, who it can outspeed outside of Trick Room thanks to Choice Scarf.
204 Speed EVs puts Annihilape at 223 Speed with Choice Scarf. This allows it to outspeed most Pokemon (Electrode or slower Pokemon) if they have no speed modifiers like Tailwind or Choice Scarf.
Shadow Claw is chosen as Annihilape's Ghost STAB move over Rage Fist because of its higher base power, and because Annihilape will usually be attacking first.
Something to consider when using Final Gambit is that it does not KO Amoonguss if it is heavily invested in HP, which Amoonguss usually are.
Guts Hariyama Moveset and Best Build
| Nature | Brave (+Atk, -Spe) |
|---|---|
| EV Spread | 28 HP / 252 Atk / 228 Sp. Def IVs: 0 Spe |
| Final Stat Values | 223 HP / 189 Atk (283 with Guts) / 80 Def / 109 Sp. Def / 49 Spe |
| Ability | Guts |
| Tera Type |

|
| Held Item | Flame Orb |
| Moveset | ・
Fake Out
・ Wide Guard ・ Drain Punch ・ Knock Off |
Hariyama is a powerful Trick Room sweeper who can also help enable it by supporting its partner with Fake Out. Fake Out also affords Hariyama a turn to activate its Flame Orb and give itself an Attack boost from Guts.
Steel is Hariyama's Tera Type of choice because it helps Hariyama resist moves that its Fighting Typing may be weak against, making it even harder to KO.
Knock Off is a strong move on its own but it is also disruptive. It is great for removing Berries, Choice Items, Eviolites from Murkrows, as well as OHKO-ing most Gholdengo.
Wide Guard is a great defensive move especially in Ranked Battles, but it may be less useful in Open Team Sheets tournaments since opponents can play around it.
Lastly, Drain Punch is a good recovery option able to deal good damage even on neutral hits.
Trick Room Setter Farigiraf Moveset & Best Build
| Nature | Sassy (+Sp. Def, -Spe) |
|---|---|
| EV Spread | 252 HP / 108 Sp. Atk / 148 Spe IVs: 0 Atk, 0 Spe |
| Final Stat Values | 227 HP / 90 Def / 144 Sp. Atk / 119 Sp. Def / 58 Spe |
| Ability | Armor Tail |
| Tera Type |

|
| Held Item | Mental Herb |
| Moveset | ・
Dazzling Gleam
・ Helping Hand ・ Trick Room ・ Protect |
Farigiraf is a reliable Trick Room setter who can protect itself and its partner from Priority Moves thanks to its Armor Tail Ability. Torkoal and Hariyama find a great teammate in Farigiraf, who can consistently set Trick Room for them.
Protect is in this set to protect Farigiraf from getting double targetted, while Dazzling Gleam and Hyper Voice are solid Spread Moves.
Mental Herb is the Item of choice because it protects Farigiraf from non-Priority Taunt.
It can Terastallize into a Steel-type if it is under threat of getting OHKOd and ensure that Trick Room goes up.
Physically Offensive Meowscarada Moveset & Best Build
| Nature | Jolly (+Spe, -Sp.Atk) |
|---|---|
| EV Spread | Atk 252 / Spe 252 / Sp.Def 4 |
| Final Stat Values | HP 151 / Atk 162 / Def 90 / Sp.Def 91 / Spe 192 |
| Ability | Overgrow |
| Tera Type |

|
| Held Item | Focus Sash |
| Moveset | ・
Flower Trick
・ Knock Off ・ Trick Room ・ Protect |
Meowscarada with Trick Room is a fun Trick Room setter option for Ranked Battle. While it does not flourish in Trick Room itself, it can reliably set it up for teammates because it is immune to Prankster Taunt thanks to its Dark typing, and Spore thanks to its Grass typing.
Meowscarada can also function as a late-game sweeper who can be a fast option outside of Trick Room.
Focus Sash works in conjunction with its Overgrow Ability, giving Meowscarada an Overgrow boost to its Flower Trick when it is down to 1 HP.
Support Maushold Moveset & Best Build
| Nature | Jolly (+Spe, -Sp. Atk) |
|---|---|
| EV Spread | 4 HP / 252 Atk / 252 Spe |
| Final Stat Values | 150 HP / 127 Atk / 90 Def / 95 Sp. Def /179 Spe |
| Ability | Technician |
| Tera Type |

|
| Held Item | Wide Lens |
| Moveset | ・
Population Bomb
・ Follow Me ・ Encore ・ Protect |
Wide Lens is Maushold's item of choice, ensuring that Population Bomb hits as many times as possible.
Maushold can run through unprepared teams with its powerful Population Bomb. On turns when it cannot knock something out, it can support its teammates with its great selection of support moves.
Trick Room Doubles Team Strategies and Synergies
Best Four to Bring into Battle
Farigiraf and Hariyama Lead
 Farigiraf Farigiraf |
 Hariyama Hariyama |
 Torkoal Torkoal |
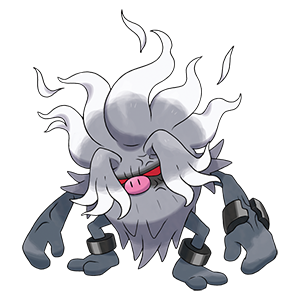 Annihilape Annihilape |
Farigiraf and Hariyama can almost always set Trick Room up successfully. Hariyama is often a good choice to lead with as it can Fake Out Pokemon who might want to OHKO Farigiraf.
It can also Fake Out an opposing Amoonguss who might want to Spore Farigiraf because it cannot protect itself from Spore.
Under Trick Room, Amoonguss will outspeed both Farigiraf and Hariyama, so it is fine to let Farigiraf get KOd or have it use Helping Hand on Hariyama for a powerful Knock Off into Amoonguss.
Farigiraf and Hariyama are also good to lead into Murkrow and Gholdengo teams, where Hariyama can flinch Murkrow on the first turn or Wide Guard to protect the team from Make it Rain.
When in Trick Room, Hariyama can Knock Off to OHKO Gholdengo (or Drain Punch if it Terastallizes into Steel), while Farigiraf can 3HKO Murkrow with Dazzling Gleam.
Farigiraf and Annihilape Lead
 Farigiraf Farigiraf |
 Annihilape Annihilape |
 Torkoal Torkoal |
 Hariyama Hariyama |
Annihilape is a good Pokemon to lead with when we see Arcanine in Team Preview.
Hariyama in particular does not like getting Intimidated, and having Annihilape take it out with Final Gambit can swing momentum in your favor.
Forcing a 3-vs-3 in Trick Room will almost always be in your favor provided Trick Room goes up successfully.
Meowscarada and Hariyama Lead
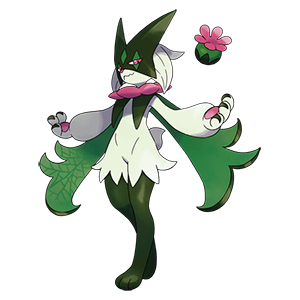 Meowscarada Meowscarada |
 Hariyama Hariyama |
 Torkoal Torkoal |
 Farigiraf Farigiraf |
These two are good to lead with if you are particularly wary of both Spore and Prankster Taunt. Hariyama can protect Meowscarada from getting double-targetted with Fake Out, while Meowscarada sets up Trick Room on the first turn.
Meowscarada can then get KOd to safely let a teammate switch in, or switch it out in preparation for a late-game sweep later on.
Maushold and Farigiraf Lead
 Maushold Maushold |
 Farigiraf Farigiraf |
 Hariyama Hariyama |
 Torkoal Torkoal |
Maushold, being the least used Pokemon in the team, can make an appearance against certain opposing team compositions.
Against teams with both Maushold and Final Gambit Annihilape, Maushold will have to Follow Me on Turn 1 to direct the Final Gambit into itself, while Farigiraf Terastallizes into Steel to survive Population Bomb.
While this forces you to sacrifice a Pokemon and Terastallization, having Trick Room set up with powerful sweepers in the back can help spell victory for this team.
Maushold and Annihilape Lead
 Maushold Maushold |
 Annihilape Annihilape |
 Hariyama Hariyama |
 Farigiraf Farigiraf |
Maushold and Annihilape are good to lead against Indeedee-F and Armarouge teams. Annihilape can Final Gambit into Indeedee-F, while Maushold Population Bombs Armarouge.
Leading with these two saves you from complicated Trick Room vs Trick Room lead matchups.
When to Terastallize
Boost STAB Moves
 Torkoal Torkoal Tera Type: 
|
 Meowscarada Meowscarada Tera Type: 
|
 Maushold Maushold Tera Type: 
|
Torkoal, Meowscarada, and Maushold can all Terastallize offensively to give their STAB moves an extra boost. Of the three, Torkoal will be Terastallizing most often in order to dish out even more powerful Eruptions in Trick Room.
Use to Remove Weaknesses
 Farigiraf Farigiraf Tera Type: 
|
 Hariyama Hariyama Tera Type: 
|
 Annihilape Annihilape Tera Type: 
|
Farigiraf, Hariyama, and Annihilape all have Steel Tera Types. This is because Steel is an excellent defensive Tera Type with few weaknesses and plenty of resistances, and it also allows these Pokemon to resist otherwise super-effective moves.
Beware of Counter Weather
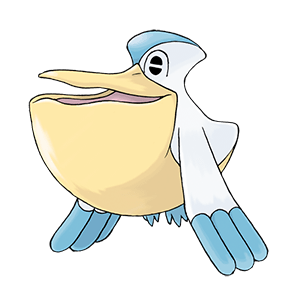 Pelipper Pelipper Drizzle |
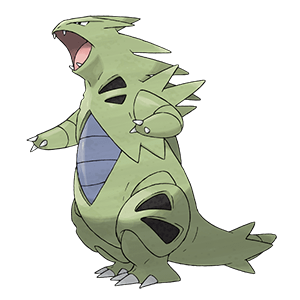 Tyranitar Tyranitar Sand Stream |
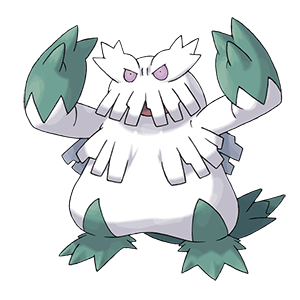 Abomasnow Abomasnow Snow Warning |
Countering Torkoal's Weather is a sure-fire way to mitigate its damage output while giving added benefits to their own teams.
Consider switching Torkoal out when anticipating an opposing Weather Pokemon to switch in, or switch Torkoal in strategically to have weather in your favor.
Pokemon Scarlet and Violet Related Guides

VGC Rental Teams for Competitive Battle
All Rental Teams
Rental Team Lists
Comment
We've fixed the code, thank you for bringing this to our attention!
Author
Base Game Trick Room Team for Regulation D Doubles (No Home Pokemon)
Rankings
Gaming News
Popular Games

Genshin Impact Walkthrough & Guides Wiki

Umamusume: Pretty Derby Walkthrough & Guides Wiki

Pokemon Pokopia Walkthrough & Guides Wiki

Honkai: Star Rail Walkthrough & Guides Wiki

Monster Hunter Stories 3: Twisted Reflection Walkthrough & Guides Wiki

Arknights: Endfield Walkthrough & Guides Wiki

Wuthering Waves Walkthrough & Guides Wiki

Zenless Zone Zero Walkthrough & Guides Wiki

Pokemon TCG Pocket (PTCGP) Strategies & Guides Wiki

Monster Hunter Wilds Walkthrough & Guides Wiki
Recommended Games

Diablo 4: Vessel of Hatred Walkthrough & Guides Wiki

Cyberpunk 2077: Ultimate Edition Walkthrough & Guides Wiki

Fire Emblem Heroes (FEH) Walkthrough & Guides Wiki

Yu-Gi-Oh! Master Duel Walkthrough & Guides Wiki

Super Smash Bros. Ultimate Walkthrough & Guides Wiki

Pokemon Brilliant Diamond and Shining Pearl (BDSP) Walkthrough & Guides Wiki

Elden Ring Shadow of the Erdtree Walkthrough & Guides Wiki

Monster Hunter World Walkthrough & Guides Wiki

The Legend of Zelda: Tears of the Kingdom Walkthrough & Guides Wiki

Persona 3 Reload Walkthrough & Guides Wiki
All rights reserved
©2022 Pokémon. TM, ®Nintendo.
The copyrights of videos of games used in our content and other intellectual property rights belong to the provider of the game.
The contents we provide on this site were created personally by members of the Game8 editorial department.
We refuse the right to reuse or repost content taken without our permission such as data or images to other sites.


 Swords Dance Rental Team
 Best Defensive Rental Team
 Best Offensive Rental Team
 Best Balanced Rental Team
 Garganacl Rental Team
 Hearthflame Ogerpon Rental Team
 Munkidori Rental Team
 Wellspring Ogerpon Rental Team
 Cornerstone Ogerpon & Okidogi Rental Team
 Teal Ogerpon Rental Team
 Fezandipiti Rental Team
 Snow & Hearthflame Ogerpon Rental Team
 Bloodmoon Ursaluna Rental Team
 Teal Mask DLC Rental Team
 Iron Crown Rental Team
 Indigo Disk DLC Rental Team
 Best Team for Kitakami Prologue Cup
 Best Ogerpon Doubles Rental Team
 Best Ursaluna Doubles Team
 Best Rain Rental Team
 Best Rillaboom Rental Team
 Best Trick Room Sun Rental Team
 Hisuian Goodra Doubles Rental Team
 Best Balanced Doubles Rental Team
 Base Game Trick Room Rental Team
 Best Offensive Doubles Rental Team
 Best Treasures of Ruin Doubles Team
 Best Protosynthesis Sun Doubles Team
 Contrary Hydrapple Doubles Rental Team
 Best Raging Bolt Doubles Team


![Monster Hunter Stories 3 Review [First Impressions] | Simply Rejuvenating](https://img.game8.co/4438641/2a31b7702bd70e78ec8efd24661dacda.jpeg/thumb)


what is the code the code isn’t working for me