Dondozo Movesets and Best Builds
◓ Starter Tera Raid: 7☆ Torterra (03/13~03/19)!
✬ Pokemon HOME Dex Completion Shiny Rewards:
┗ Meloetta | Manaphy | Enamorus | Keldeo | Meltan
▶︎ Share codes and team up for Blueberry Quests!
▶︎ Game8 Tera Raid Damage Calculator | Game8 Discord
★ The DLC Epilogue is now available! ▶︎ How to Start
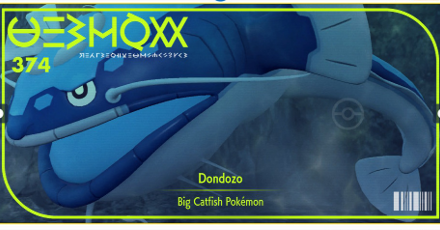
This is a guide to movesets and best builds for using Dondozo in competitive play for the games Pokemon Scarlet and Violet (SV). Read on for tips on the best Nature, EV spreads, Movesets, Tera Type, and Held Items to use with Dondozo, as well as its strengths and weaknesses.
| Dondozo - Related Guides | |
|---|---|
 Evolution and Learnset Evolution and Learnset |
 Moveset for Ranked Battle Moveset for Ranked Battle |
| Titan Guide | |
List of Contents
Dondozo Base Stats, Type, Abilities and Weaknesses
| Paldea #374 | Type | |
|---|---|---|
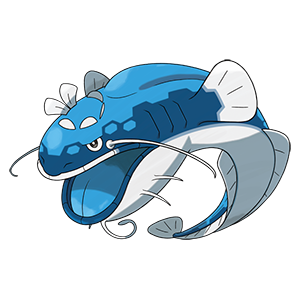 Dondozo Dondozo
|

|
|
| Abilities | ||
|
Unaware Oblivious Water Veil (Hidden) |
||
| Weak to: | ||
| (2x) | 

|
|
| Damaged Normally By: |
(1x) | 


|
| Resists: | (0.5x) | 


|
| Ability Name | Description | |
|---|---|---|
| Unaware | The user ignores the opponent's stat changes when attacking. | |
| Oblivious | The user cannot be infatuated, intimidated, or be taunted. | |
| Water Veil (Hidden) |
The user can't get burned. | |
Base Stats
| Stat | Value | Rank |
|---|---|---|
| HP | 150 | 10 |
| Atk | 100 | 201 |
| Def | 115 | 63 |
| SpAtk | 65 | 415 |
| SpDef | 65 | 439 |
| Speed | 35 | 716 |
| Total | 530 | 169 |
| Stat | Max | 0Nat | 0EV | -Nat | Min |
|---|---|---|---|---|---|
| HP | 257 | 257 | 225 | 225 | 210 |
| Atk | 167 | 152 | 120 | 108 | 94 |
| Def | 183 | 167 | 135 | 121 | 108 |
| SpAtk | 128 | 117 | 85 | 76 | 63 |
| SpDef | 128 | 117 | 85 | 76 | 63 |
| Spd | 95 | 87 | 55 | 49 | 36 |
- Max: Max IVs & EVs and a stat-boosting Nature
- 0Nat: Max IVs & EVs and a neutral Nature
- 0EV: Max IVs, 0 EVs, and a neutral Nature
- -Nat: Max IVs, 0 EVs, and a stat-reducing Nature
- Min: 0 IVs & EVs, and a stat-reducing Nature
Best Nature for Dondozo
| Best Natures | ||
|---|---|---|
| Impish (+Def, -Sp. Atk) |
Relaxed (+Def, -Spe) |
|
Singles Movesets for Dondozo
| Dondozo | Recommendation |
|---|---|
| Physical Wall | ★★★★★ |
| Dondozo Trick-Room Sweeper | ★★★ |
Physical Wall Moveset & Best Build
| Nature | Impish (+Def, -Sp. Atk) |
|---|---|
| EV Spread | HP 252 / Def 252 / Sp. Def 4 |
| Final Stat Values | HP 257 / Atk 120 / Def 183 / Sp. Def 86 / Speed 55 |
| Ability | Unaware |
| Tera Type |
|
| Held Item | Leftovers |
| Moveset | ・
Wave Crash
・ Fissure ・ Yawn ・ Protect |
Summary
Ability and Held Item
|
|
||
|---|---|---|
| Ability | Held Item | |
| Unaware |
|
|
Unaware is used on this build so that Dondozo can ignore any stat changes on the opponent's side of the field. Note that this also ignores debuffs like the defense drops from Close Combat or the Sp. Atk drop from Make It Rain.
Leftovers allows for Dondozo to passively heal back some health each turn. This item is especially good on Dondozo because of its massive HP stat.
Moves Breakdown
| Wave Crash | Fissure |
| Yawn | Protect |
Wave Crash is Dondozo's strongest Water-type STAB move with the only downside of having recoil damage.
Fissure allows Dondozo to look for knockouts on opposing walls or Pokemon that it cannot threaten with Wave Crash.
Yawn forces the opposing Pokemon to switch out, or fall asleep. If they're asleep, Dondozo can use those turns to look for knockouts with Wave Crash or Fissure.
Protect lets Dondozo stall out turns and heal itself with Leftovers.
Best Tera Type: Fairy
| Fairy Tera Type Matchup | ||
|---|---|---|
| Weak to: | ||
| (2x) |
|
|
| Damaged Normally By: |
(1x) |
|
| Resists: | (0.5x) |
|
| Immune to: | (0x) |
|
Fairy is the best Tera Type for this build because it is one of the best defensive typings in the game.
EV Spread and Nature
A full 252 EVs are put into its HP and Defense to maximize Dondozo's physical bulk and recovery from Leftovers. The extra 4 EVs are placed in its Sp. Def to help round out its bulk.
An Impish nature is preferred to maximize Dondozo's Defense stat.
Other Viable Moves
| Liquidation | Weaker than Wave Crash, but doesn't cause recoil damage. |
|---|---|
|
Rest
+ Sleep Talk |
This combo replaces Yawn + Protect. Rest allows Dondozo to go to sleep and heal itself back to max HP. While it's asleep, Sleep Talk is used to look Fissure OHKOs or to get decent damage off with Wave Crash. |
Key Damage Calculations
Defensive EV Investment: 4 Def |
Wave Crash 78-93 (50.3 - 60%) Guaranteed 2HKO OHKO if Ogerpon Tera'd |
No Defensive EV Investment |
Wave Crash 109-129 (83.8 - 99.2%) Guaranteed 2HKO |
Defensive EV Investment: 252 HP |
Wave Crash 116-140 (54.7 - 66%) Guaranteed 2HKO |
Offensive EV Investment: 252 Atk |
Horn Leech 98-116 (38.1 - 45.1%) Guaranteed 3HKO after Leftovers recovery 31.6 - 37.4% HP Recovered |
Offensive EV Investment: 252 Sp. Atk |
Moonblast 117-138 (45.5 - 53.6%) 2% Chance to 2HKO after Leftovers recovery |
Offensive EV Investment: 252 Sp. Atk |
Blood Moon 187-222 (72.7 - 86.3%) Guaranteed 2HKO after Leftovers recovery |
Game8's Competitive Damage Calculator
Dondozo Trick Room Moveset & Best Build
| Nature | Relaxed (+Def, -Spe) |
|---|---|
| EV Spread | 252 HP / 252 Def / 4 Sp. Def |
| Final Stat Values | 257 HP / 120 Atk / 183 Def / 86 Sp. Def / 55 Spe |
| Ability | Unaware |
| Tera Type |
OR
|
| Held Item | Leftovers |
| Moveset | ・
Curse
・ Wave Crash ・ Body Press ・ Earthquake |
Trick Room Sweeper
In a Trick Room Team, Dondozo can take advantage of its very low speed stat and move first against most Pokemon. Many of the notable exceptions that are slower than Dondozo have a bad matchup against it including Garganacl, Torkoal, and Coalossal. On top of this, Dondozo is a Bulky Physical Wall with a decent Attack stat to back up its very high HP and Defense stats. It gains access to Body Press, which allows it to utilize its high Defense stat in the damage calculation, opening up the potential for a bulky Trick Room sweeper strategy.
Great Move Pool
Wave Crash, Earthquake, Body Press and Heavy Slam are just some of the damaging options Dondozo has access to. When Terastallized, Dondozo can get a further boost on these attacks, allowing it to fill a niche role as a mixed attacker with defensive coverage.
Earthquake and Body Press are two great coverage options, with Earthquake dealing super-effective damage to Electric Types and Body Press using Dondozo's high Defense stat instead of its Attack stat in the damage calculation.
Outspeed and OHKO S and A Tier Threats
Earthquake + Ground Tera Type OR 1 Curse Attack boost also allows it to 2-Hit KO Gholdengo, while Body Press allows it to OHKO Meowscarada after one Curse Defense boost as a Water Type or no setup as a Fighting Tera Type.
Other Viable Moves
| Protect | Can be used to get a turn of healing from Leftovers, as well as scope out information such as Tera Type, moves, etc. |
|---|---|
| Heavy Slam | Damage is calculated based on the weight difference, with the heavier Dondozo being relative to the Pokemon, the more damage dealt. As Dondozo is one of the heavier Pokemon in the game, it can deal a lot of damage against its lighter opponents. |
Doubles Movesets for Dondozo
| Dondozo | Recommendation |
|---|---|
| Late-Game Wall | ★★★★★ |
Late-Game Wall Moveset & Best Build
| Nature | Jolly Nature (+Spe, -Sp. Atk) |
|---|---|
| EV Spread | 252 Atk / 44 Sp. Def / 212 Spe |
| Final Stat Values | 225 HP / 152 Atk / 135 Def / 91 Sp. Def / 90 Spe |
| Ability | Unaware |
| Tera Type |
|
| Held Item | Rocky Helmet |
| Moveset | ・
Order Up
・ Earthquake ・ Substitute ・ Protect |
Dondozo with 212 Speed EVs can outspeed notable Pokemon like Maushold and Garchomp at +2 (After Tatsugiri's Commander Ability triggers). Order Up and Earthquake are staple moves for Dondozo, giving it the option to hit single targets or use a Spread Move. Substitute is good for passive turns, while Protect lets Dondozo recover HP with Leftovers.
Grass Tera Type is used to give Dondozo immunity to Spore and Rage Powder, while also giving it a resistance to Electric.
Alternatively, a Steel Tera type can make Dondozo immune to Clear Smog, or a Dragon Tera type can give it plenty of resistances.
Other Viable Moves
| Wave Crash | Wave Crash is an excellent STAB Move for Dondozo, with a downside that Dondozo can comfortably ignore. |
|---|
How to Use Dondozo Effectively
A Versatile Physical Wall
Dondozo functions as a bulky physical wall, first and foremost. It has great HP and Defense Stats, combined with decent SP. Def and Attack stats. It also has access to the move Curse via egg move, allowing it to increase its Defense and Attack even further. It can function well in regular offensive teams, rain teams, Trick Room teams and even Stall and Phasing teams.
Can Deal Large Damage Thanks to Curse, High Defense and Body Press
Dondozo is not lacking when it comes to offense. It has a high base power STAB move in Wave Crash. Dondozo also has Body Press, which allows it to take advantage of its natural bulk and any Curse boosts to output large damage, which when Terastallized is enough to OHKO most Fighting weak Pokemon.
Great Counter to Sweepers and Other Walls
Dondozo's Ability, Unaware, allows it to ignore opposing Pokemon's stat changes when receiving or dealing damage. This makes it a great safe swap into a Pokemon that has setup attacking boosts such as Swords Dance or Quiver Dance, as these stat changes do not affect the damage dealt to Dondozo. It also makes Dondozo a great choice against opposing Walls, as it ignores any Defense increases from moves such as Bulk Up or Curse.
A Powerful Sweeper with Tatsugiri
In Doubles, Dondozo can function as a powerful bulky attacker after getting a Commander boost from Tatsugiri.
Key Damage Calculations
The following calculations are with full Attack investment with a Jolly nature and +3 Attack from Commander and Order Up boosts.
Defensive EV Investment: HP 252 | Def 252 (Impish) |
Wave Crash 1028-1212 (478.1 - 563.7%) Guaranteed OHKO |
Defensive EV Investment: HP 252 | Def 4 (Adamant) |
Order Up 368-434 (185.8 - 219.1%) Guaranteed OHKO |
Defensive EV Investment: HP 252 | Def 252 (Bold) |
Earthquake 478-564 (304.4 - 359.2%) Guaranteed OHKO |
How to Build a Team with Dondozo
Thanks to Dondozo's versatility and bulk, it is easy to fit into any team, but particularly a team that could utilize its Water Typing or bulk.
Sample Singles Team
| Hazards Lead | Defensive Pivot | Special Attacker |
|---|---|---|
 Glimmora Glimmora
|
Dondozo
|
 Flutter Mane Flutter Mane
|
Glimmora can set up Toxic Spikes and Stealth Rocks to allow Dondozo to outlast opponents with the healing from Leftovers and stall from Yawn and Protect.
Flutter Mane is used in the back as a fast sweeper to knock out whatever Pokemon are left standing on the opponent's team.
Sample Doubles Team
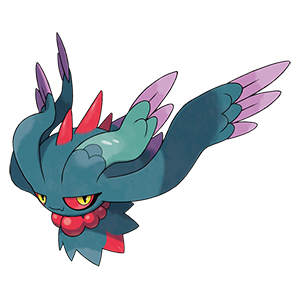
| Lead Support | Special Attacker |
|---|---|
 Murkrow Murkrow
|
 Tatsugiri Tatsugiri
|
| Physical Attacker | Physical Attacker |
|
Dondozo
|
 Flamigo Flamigo
|
This is an alternative Doubles team that is generally safer to setup but takes a few more turns. Both the Curly or Stretchy form are great options for Tatsugiri depending on whether your team needs more Attack or Speed.
How to Setup and Sweep
| 1 | ・Setup Perish Song with Murkrow ・Use Substitute to protect Tatsugiri from attacks Perish Count at 3 at the end of the turn |
|---|---|
| 2 | ・Setup Tailwind with Murkrow ・Use Protect to stall with Tatsugiri Perish Count at 2 at the end of the turn |
| 3 | ・Switch out Murkrow with Dondozo so that the latter gets the Commander boost from Tatsugiri Perish Count at 1 at the end of the turn |
| 4 | ・Boost Dondozo's stats with Order Up. Curly Form Tatsugiri will raise Dondozo's Attack, while Stretchy Form Tatsugiri raises its Speed Perish Count at 0 at the end of the turn |
| 5 | ・Once Tatsugiri faints, switch in Flamigo who will get all of Dondozo's stat boosts with its Costar Ability. |
Counters for Dondozo
Take Advantage of its Lower Special Defense
Dondozo is a bulky Physical Wall with only average Sp. Def. Using Special Attacks that hit for its weaknesses of Grass and Electric will be your best bet to bring it down.
Best Pokemon to Use
| Pokemon | Description |
|---|---|
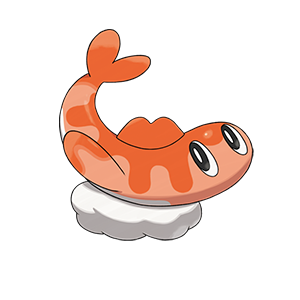
 Iron Bundle Iron Bundle
|
Ranking: ★★★★★
・Outspeeds and deals large STAB super-effective Special damage with Freeze-Dry. ・Has a good Defense stat and resists Wave Crash. ▶️ Iron Bundle Best Movesets |
 Gholdengo Gholdengo
|
Ranking: ★★★★★
・Can OHKO Dondozo with max Sp. Atk + Choice Specs Thunderbolt. ・Often has Tera Water that resists Wave Crash, or Tera Flying making it immune to Fissure. ▶️ Gholdengo Best Movesets |
 Amoonguss Amoonguss
|
Ranking: ★★★★
・Can clear Dondozo's stat boosts with Clear Smog. ・Comfortable tanks Wave Crash's damage. ・Can put Dondozo to sleep with Spore, rendering it useless. ▶️ Amoonguss Best Movesets |
How to Get Dondozo's Curse Egg Move
Dondozo learns Curse as an egg move, so in order to get Curse on Dondozo, first you need a Pokemon that knows the move. You will then need to make sure Dondozo has an empty move slot and give it a Mirror Herb.
Finally, set up a picnic with both Dondozo and the Pokemon that knows the egg move in your party and the move will be transferred to Dondozo (the other Pokemon still retains its moveset). Unlike previous generations, egg moves can now be transferred regardless of egg group, species or gender.
How to Learn and Transfer Egg Moves
Pokemon That Learn Curse
Learn by Default
 Slowpoke Slowpoke
|
 Galarian Slowpoke Galarian Slowpoke
|
 Slowbro Slowbro
|
 Galarian Slowbro Galarian Slowbro
|
 Slowking Slowking
|
 Galarian Slowking Galarian Slowking
|
 Zangoose Zangoose
|
 Chandelure Chandelure
|
Learn by Level Up
 Gastly
 Haunter
 Gengar
 Pineco
 Forretress
 Numel
Numel Camerupt
 Torkoal
 Shuppet
 Banette
 Duskull
 Dusclops
 Regirock
 Regice
 Registeel
 Turtwig
 Grotle
 Torterra
 Spiritomb
 Dusknoir
 Hisuian Zorua
 Hisuian Zoroark
 Litwick
 Lampent
 Golett
 Golurk
 Goomy
Goomy Sliggoo
 Hisuian Sliggoo
 Goodra
 Hisuian Goodra
 Phantump
 Trevenant
 Bergmite
 Avalugg
 Hisuian Avalugg
 Appletun
 Polteageist
 Pincurchin
 Bramblin
 Brambleghast
Learn by Evolution
| No Pokemon currently learn this move via this method. |
Learn by TM
 Bulbasaur
 Ivysaur
 Venusaur
 Sandshrew
 Alolan Sandshrew
 Sandslash
 Alolan Sandslash
 Diglett
 Dugtrio
 Alolan Dugtrio
 Alolan Meowth
 Galarian Meowth
 Alolan Persian
 Mankey
 Primeape
 Growlithe
 Arcanine
 Geodude
 Alolan Geodude
 Graveler
 Alolan Graveler
 Golem
Golem Alolan Golem
 Seel
Seel Dewgong
 Grimer
 Alolan Grimer
 Muk
Muk Alolan Muk
 Drowzee
 Hypno
Hypno Electrode
 Hisuian Electrode
 Exeggcute
 Exeggutor
 Alolan Exeggutor
 Koffing
 Weezing
 Galarian Weezing
 Rhyhorn
 Rhydon
 Magmar
 Tauros
 Paldean Tauros (Fighting Form)
 Paldean Tauros (Fighting/Fire Form)
 Paldean Tauros (Fighting/Water Form)
 Lapras
 Eevee
Eevee Vaporeon
 Jolteon
 Flareon
 Snorlax
 Mewtwo
 Mew
Mew Chikorita
 Bayleef
 Meganium
 Cyndaquil
 Quilava
 Typhlosion
 Hisuian Typhlosion
 Totodile
 Croconaw
 Feraligatr
 Noctowl
 Chinchou
 Lanturn
 Sudowoodo
 Sunkern
 Sunflora
 Wooper
 Paldean Wooper
 Quagsire
 Espeon
 Umbreon
 Misdreavus
 Dunsparce
 Snubbull
 Granbull
 Qwilfish
 Hisuian Qwilfish
 Scizor
 Heracross
 Slugma
 Magcargo
 Swinub
 Piloswine
 Skarmory
 Phanpy
 Donphan
 Stantler
 Magby
Magby Larvitar
 Pupitar
 Tyranitar
 Lugia
Lugia Torchic
 Combusken
 Blaziken
 Mudkip
 Marshtomp
 Swampert
 Seedot
 Nuzleaf
 Shiftry
 Slakoth
 Vigoroth
 Slaking
 Hariyama
 Nosepass
 Gulpin
 Swalot
 Cacnea
 Cacturne
 Seviper
 Whiscash
 Tropius
 Chimecho
 Cranidos
 Rampardos
 Shieldon
 Bastiodon
 Shellos (East Sea)
 Gastrodon (East Sea)
 Drifloon
 Drifblim
 Mismagius
 Chingling
 Bonsly
 Munchlax
 Hippopotas
 Hippowdon
 Snover
 Abomasnow
 Rhyperior
 Magmortar
 Leafeon
 Glaceon
 Mamoswine
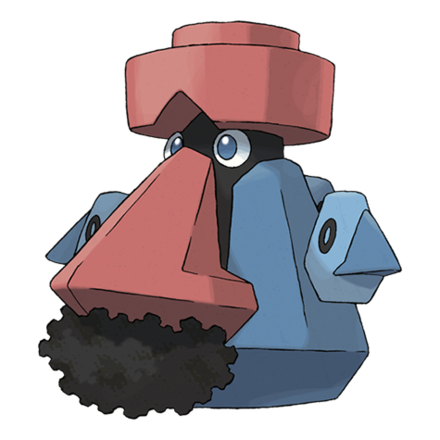 Probopass
 Froslass
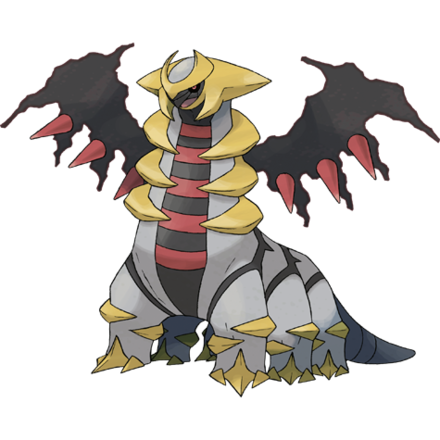 Giratina (Altered Forme)
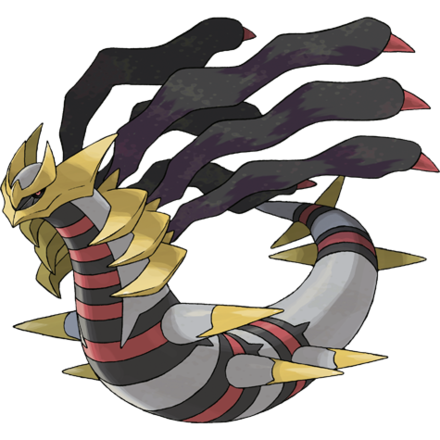 Giratina (Origin Forme)
 Darkrai
 Tepig
Tepig Pignite
 Emboar
 Drilbur
 Excadrill
 Timburr
 Gurdurr
 Conkeldurr
 Sandile
 Krokorok
 Krookodile
 Scraggy
 Scrafty
 Sawsbuck
 Beartic
 Chespin
 Quilladin
 Chesnaught
 Sylveon
 Decidueye
 Gumshoos
 Mudbray
 Mudsdale
 Passimian
 Sandygast
 Palossand
 Komala
 Mimikyu
 Skwovet
 Greedent
 Corviknight
 Rolycoly
 Carkol
 Coalossal
 Sinistea
 Perrserker
 Stonjourner
 Cufant
 Copperajah
 Dreepy
 Drakloak
 Dragapult
 Glastrier
 Spectrier
 Calyrex (Ice Rider)
 Calyrex (Shadow Rider)
 Wyrdeer
 Ursaluna
 Overqwil
 Fuecoco
 Crocalor
 Skeledirge
 Lechonk
 Oinkologne (Female)
 Oinkologne (Male)
 Nacli
Nacli Naclstack
 Garganacl
 Ceruledge
 Mabosstiff
 Bombirdier
 Varoom
 Revavroom
 Orthworm
 Cetoddle
 Cetitan
 Annihilape
 Clodsire
 Farigiraf
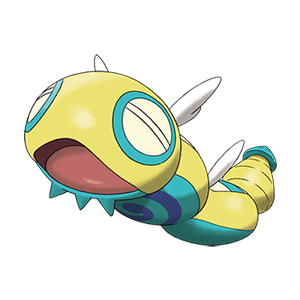 Dudunsparce
 Slither Wing
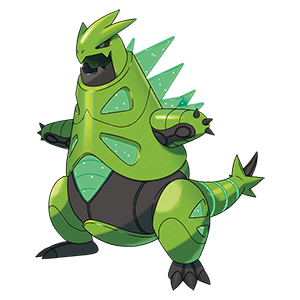 Iron Thorns
 Sinistcha
 Okidogi
 Hydrapple
 Pecharunt
Pokemon Scarlet and Violet Related Guides
 Movesets & Best Builds for Ranked Battle
## Banned/Restricted Builds
Movesets & Best Builds for Ranked Battle
## Banned/Restricted Builds
| Mythical/Restricted Builds |
|---|
|
|
| New Indigo Disk Pokemon Builds |
|---|
|
|
| New Indigo Disk Pokemon Builds |
|---|
|
|
| Returning Indigo Disk Pokemon Builds |
|---|
|
|
| All Teal Mask DLC Builds |
|---|
|
|
| All Pokemon HOME Builds |
|---|
|
|
| All Treasures of Ruin Builds |
|---|
|
|
| All Paradox Pokemon Builds |
|---|
|
|
| All Other Gen 9 Meta Pokemon Builds |
|---|
|
|
| All Gen 1~8 Meta Pokemon Builds |
|---|
|
|
| All Off-Meta Pokemon Builds |
|---|
|
|
This is a guide to movesets and best builds for using Dondozo in competitive play for the games Pokemon Scarlet and Violet (SV). Read on for tips on the best Nature, EV spreads, Movesets, Tera Type, and Held Items to use with Dondozo, as well as its strengths and weaknesses.
| Dondozo - Related Guides | |
|---|---|
| Evolution and Learnset |
Moveset for Ranked Battle |
| Titan Guide | |
List of Contents
Dondozo Base Stats, Type, Abilities and Weaknesses
| Paldea #374 | Type | |
|---|---|---|
|
Dondozo
|
|
|
| Abilities | ||
|
Unaware Oblivious Water Veil (Hidden) |
||
| Weak to: | ||
| (2x) |
|
|
| Damaged Normally By: |
(1x) |
|
| Resists: | (0.5x) |
|
| Ability Name | Description | |
|---|---|---|
| Unaware | The user ignores the opponent's stat changes when attacking. | |
| Oblivious | The user cannot be infatuated, intimidated, or be taunted. | |
| Water Veil (Hidden) |
The user can't get burned. | |
Base Stats
| Stat | Value | Rank |
|---|---|---|
| HP | 150 | 10 |
| Atk | 100 | 201 |
| Def | 115 | 63 |
| SpAtk | 65 | 415 |
| SpDef | 65 | 439 |
| Speed | 35 | 716 |
| Total | 530 | 169 |
| Stat | Max | 0Nat | 0EV | -Nat | Min |
|---|---|---|---|---|---|
| HP | 257 | 257 | 225 | 225 | 210 |
| Atk | 167 | 152 | 120 | 108 | 94 |
| Def | 183 | 167 | 135 | 121 | 108 |
| SpAtk | 128 | 117 | 85 | 76 | 63 |
| SpDef | 128 | 117 | 85 | 76 | 63 |
| Spd | 95 | 87 | 55 | 49 | 36 |
- Max: Max IVs & EVs and a stat-boosting Nature
- 0Nat: Max IVs & EVs and a neutral Nature
- 0EV: Max IVs, 0 EVs, and a neutral Nature
- -Nat: Max IVs, 0 EVs, and a stat-reducing Nature
- Min: 0 IVs & EVs, and a stat-reducing Nature
Best Nature for Dondozo
| Best Natures | ||
|---|---|---|
| Impish (+Def, -Sp. Atk) |
Relaxed (+Def, -Spe) |
|
Singles Movesets for Dondozo
| Dondozo | Recommendation |
|---|---|
| Physical Wall | ★★★★★ |
| Dondozo Trick-Room Sweeper | ★★★ |
Physical Wall Moveset & Best Build
| Nature | Impish (+Def, -Sp. Atk) |
|---|---|
| EV Spread | HP 252 / Def 252 / Sp. Def 4 |
| Final Stat Values | HP 257 / Atk 120 / Def 183 / Sp. Def 86 / Speed 55 |
| Ability | Unaware |
| Tera Type |
|
| Held Item | Leftovers |
| Moveset | ・
Wave Crash
・ Fissure ・ Yawn ・ Protect |
Summary
Ability and Held Item
|
|
||
|---|---|---|
| Ability | Held Item | |
| Unaware |
|
|
Unaware is used on this build so that Dondozo can ignore any stat changes on the opponent's side of the field. Note that this also ignores debuffs like the defense drops from Close Combat or the Sp. Atk drop from Make It Rain.
Leftovers allows for Dondozo to passively heal back some health each turn. This item is especially good on Dondozo because of its massive HP stat.
Moves Breakdown
| Wave Crash | Fissure |
| Yawn | Protect |
Wave Crash is Dondozo's strongest Water-type STAB move with the only downside of having recoil damage.
Fissure allows Dondozo to look for knockouts on opposing walls or Pokemon that it cannot threaten with Wave Crash.
Yawn forces the opposing Pokemon to switch out, or fall asleep. If they're asleep, Dondozo can use those turns to look for knockouts with Wave Crash or Fissure.
Protect lets Dondozo stall out turns and heal itself with Leftovers.
Best Tera Type: Fairy
| Fairy Tera Type Matchup | ||
|---|---|---|
| Weak to: | ||
| (2x) |
|
|
| Damaged Normally By: |
(1x) |
|
| Resists: | (0.5x) |
|
| Immune to: | (0x) |
|
Fairy is the best Tera Type for this build because it is one of the best defensive typings in the game.
EV Spread and Nature
A full 252 EVs are put into its HP and Defense to maximize Dondozo's physical bulk and recovery from Leftovers. The extra 4 EVs are placed in its Sp. Def to help round out its bulk.
An Impish nature is preferred to maximize Dondozo's Defense stat.
Other Viable Moves
| Liquidation | Weaker than Wave Crash, but doesn't cause recoil damage. |
|---|---|
|
Rest
+ Sleep Talk |
This combo replaces Yawn + Protect. Rest allows Dondozo to go to sleep and heal itself back to max HP. While it's asleep, Sleep Talk is used to look Fissure OHKOs or to get decent damage off with Wave Crash. |
Key Damage Calculations
Defensive EV Investment: 4 Def |
Wave Crash 78-93 (50.3 - 60%) Guaranteed 2HKO OHKO if Ogerpon Tera'd |
No Defensive EV Investment |
Wave Crash 109-129 (83.8 - 99.2%) Guaranteed 2HKO |
Defensive EV Investment: 252 HP |
Wave Crash 116-140 (54.7 - 66%) Guaranteed 2HKO |
Offensive EV Investment: 252 Atk |
Horn Leech 98-116 (38.1 - 45.1%) Guaranteed 3HKO after Leftovers recovery 31.6 - 37.4% HP Recovered |
Offensive EV Investment: 252 Sp. Atk |
Moonblast 117-138 (45.5 - 53.6%) 2% Chance to 2HKO after Leftovers recovery |
Offensive EV Investment: 252 Sp. Atk |
Blood Moon 187-222 (72.7 - 86.3%) Guaranteed 2HKO after Leftovers recovery |
Game8's Competitive Damage Calculator
Dondozo Trick Room Moveset & Best Build
| Nature | Relaxed (+Def, -Spe) |
|---|---|
| EV Spread | 252 HP / 252 Def / 4 Sp. Def |
| Final Stat Values | 257 HP / 120 Atk / 183 Def / 86 Sp. Def / 55 Spe |
| Ability | Unaware |
| Tera Type |
OR
|
| Held Item | Leftovers |
| Moveset | ・
Curse
・ Wave Crash ・ Body Press ・ Earthquake |
Trick Room Sweeper
In a Trick Room Team, Dondozo can take advantage of its very low speed stat and move first against most Pokemon. Many of the notable exceptions that are slower than Dondozo have a bad matchup against it including Garganacl, Torkoal, and Coalossal. On top of this, Dondozo is a Bulky Physical Wall with a decent Attack stat to back up its very high HP and Defense stats. It gains access to Body Press, which allows it to utilize its high Defense stat in the damage calculation, opening up the potential for a bulky Trick Room sweeper strategy.
Great Move Pool
Wave Crash, Earthquake, Body Press and Heavy Slam are just some of the damaging options Dondozo has access to. When Terastallized, Dondozo can get a further boost on these attacks, allowing it to fill a niche role as a mixed attacker with defensive coverage.
Earthquake and Body Press are two great coverage options, with Earthquake dealing super-effective damage to Electric Types and Body Press using Dondozo's high Defense stat instead of its Attack stat in the damage calculation.
Outspeed and OHKO S and A Tier Threats
Earthquake + Ground Tera Type OR 1 Curse Attack boost also allows it to 2-Hit KO Gholdengo, while Body Press allows it to OHKO Meowscarada after one Curse Defense boost as a Water Type or no setup as a Fighting Tera Type.
Other Viable Moves
| Protect | Can be used to get a turn of healing from Leftovers, as well as scope out information such as Tera Type, moves, etc. |
|---|---|
| Heavy Slam | Damage is calculated based on the weight difference, with the heavier Dondozo being relative to the Pokemon, the more damage dealt. As Dondozo is one of the heavier Pokemon in the game, it can deal a lot of damage against its lighter opponents. |
Doubles Movesets for Dondozo
| Dondozo | Recommendation |
|---|---|
| Late-Game Wall | ★★★★★ |
Late-Game Wall Moveset & Best Build
| Nature | Jolly Nature (+Spe, -Sp. Atk) |
|---|---|
| EV Spread | 252 Atk / 44 Sp. Def / 212 Spe |
| Final Stat Values | 225 HP / 152 Atk / 135 Def / 91 Sp. Def / 90 Spe |
| Ability | Unaware |
| Tera Type |
|
| Held Item | Leftovers |
| Moveset | ・
Order Up
・ Earthquake ・ Substitute ・ Protect |
Dondozo with 212 Speed EVs can outspeed notable Pokemon like Maushold and Garchomp at +2 (After Tatsugiri's Commander Ability triggers). Order Up and Earthquake are staple moves for Dondozo, giving it the option to hit single targets or use a Spread Move. Substitute is good for passive turns, while Protect lets Dondozo recover HP with Leftovers.
Grass Tera Type is used to give Dondozo immunity to Spore and Rage Powder, while also giving it a resistance to Electric.
Alternatively, a Steel Tera type can make Dondozo immune to Clear Smog, or a Dragon Tera type can give it plenty of resistances.
Other Viable Moves
| Wave Crash | Wave Crash is an excellent STAB Move for Dondozo, with a downside that Dondozo can comfortably ignore. |
|---|
How to Use Dondozo Effectively
A Versatile Physical Wall
Dondozo functions as a bulky physical wall, first and foremost. It has great HP and Defense Stats, combined with decent SP. Def and Attack stats. It also has access to the move Curse via egg move, allowing it to increase its Defense and Attack even further. It can function well in regular offensive teams, rain teams, Trick Room teams and even Stall and Phasing teams.
Can Deal Large Damage Thanks to Curse, High Defense and Body Press
Dondozo is not lacking when it comes to offense. It has a high base power STAB move in Wave Crash. Dondozo also has Body Press, which allows it to take advantage of its natural bulk and any Curse boosts to output large damage, which when Terastallized is enough to OHKO most Fighting weak Pokemon.
Great Counter to Sweepers and Other Walls
Dondozo's Ability, Unaware, allows it to ignore opposing Pokemon's stat changes when receiving or dealing damage. This makes it a great safe swap into a Pokemon that has setup attacking boosts such as Swords Dance or Quiver Dance, as these stat changes do not affect the damage dealt to Dondozo. It also makes Dondozo a great choice against opposing Walls, as it ignores any Defense increases from moves such as Bulk Up or Curse.
A Powerful Sweeper with Tatsugiri
In Doubles, Dondozo can function as a powerful bulky attacker after getting a Commander boost from Tatsugiri.
Key Damage Calculations
The following calculations are with full Attack investment with a Jolly nature and +3 Attack from Commander and Order Up boosts.
Defensive EV Investment: HP 252 | Def 252 (Impish) |
Wave Crash 1028-1212 (478.1 - 563.7%) Guaranteed OHKO |
Defensive EV Investment: HP 252 | Def 4 (Adamant) |
Order Up 368-434 (185.8 - 219.1%) Guaranteed OHKO |
Defensive EV Investment: HP 252 | Def 252 (Bold) |
Earthquake 478-564 (304.4 - 359.2%) Guaranteed OHKO |
How to Build a Team with Dondozo
Thanks to Dondozo's versatility and bulk, it is easy to fit into any team, but particularly a team that could utilize its Water Typing or bulk.
Sample Singles Team
| Hazards Lead | Defensive Pivot | Special Attacker |
|---|---|---|
|
Glimmora
|
Dondozo
|
Flutter Mane
|
Glimmora can set up Toxic Spikes and Stealth Rocks to allow Dondozo to outlast opponents with the healing from Leftovers and stall from Yawn and Protect.
Flutter Mane is used in the back as a fast sweeper to knock out whatever Pokemon are left standing on the opponent's team.
Sample Doubles Build with Tatsugiri
| Lead Support | Special Attacker |
|---|---|
|
Murkrow
|
Tatsugiri
|
| Physical Attacker | Physical Attacker |
|
Dondozo
|
Flamigo
|
This is an alternative Doubles team that is generally safer to setup but takes a few more turns. Both the Curly or Stretchy form are great options for Tatsugiri depending on whether your team needs more Attack or Speed.
How to Setup and Sweep
| 1 | ・Setup Perish Song with Murkrow ・Use Substitute to protect Tatsugiri from attacks Perish Count at 3 at the end of the turn |
|---|---|
| 2 | ・Setup Tailwind with Murkrow ・Use Protect to stall with Tatsugiri Perish Count at 2 at the end of the turn |
| 3 | ・Switch out Murkrow with Dondozo so that the latter gets the Commander boost from Tatsugiri Perish Count at 1 at the end of the turn |
| 4 | ・Boost Dondozo's stats with Order Up. Curly Form Tatsugiri will raise Dondozo's Attack, while Stretchy Form Tatsugiri raises its Speed Perish Count at 0 at the end of the turn |
| 5 | ・Once Tatsugiri faints, switch in Flamigo who will get all of Dondozo's stat boosts with its Costar Ability. |
Counters for Dondozo
Take Advantage of its Lower Special Defense
Dondozo is a bulky Physical Wall with only average Sp. Def. Using Special Attacks that hit for its weaknesses of Grass and Electric will be your best bet to bring it down.
Best Pokemon to Use
| Pokemon | Description |
|---|---|
|
Iron Bundle
|
Ranking: ★★★★★
・Outspeeds and deals large STAB super-effective Special damage with Freeze-Dry. ・Has a good Defense stat and resists Wave Crash. ▶️ Iron Bundle Best Movesets |
|
Gholdengo
|
Ranking: ★★★★★
・Can OHKO Dondozo with max Sp. Atk + Choice Specs Thunderbolt. ・Often has Tera Water that resists Wave Crash, or Tera Flying making it immune to Fissure. ▶️ Gholdengo Best Movesets |
|
Amoonguss
|
Ranking: ★★★★
・Can clear Dondozo's stat boosts with Clear Smog. ・Comfortable tanks Wave Crash's damage. ・Can put Dondozo to sleep with Spore, rendering it useless. ▶️ Amoonguss Best Movesets |
How to Get Dondozo's Curse Egg Move
Dondozo learns Curse as an egg move, so in order to get Curse on Dondozo, first you need a Pokemon that knows the move. You will then need to make sure Dondozo has an empty move slot and give it a Mirror Herb.
Finally, set up a picnic with both Dondozo and the Pokemon that knows the egg move in your party and the move will be transferred to Dondozo (the other Pokemon still retains its moveset). Unlike previous generations, egg moves can now be transferred regardless of egg group, species or gender.
How to Learn and Transfer Egg Moves
Pokemon That Learn Curse
Learn by Default
|
Slowpoke
|
Galarian Slowpoke
|
Slowbro
|
Galarian Slowbro
|
|
Slowking
|
Galarian Slowking
|
Zangoose
|
Chandelure
|
Learn by Level Up
Learn by Evolution
| No Pokemon currently learn this move via this method. |
Learn by TM
Pokemon Scarlet and Violet Related Guides
Movesets & Best Builds for Ranked Battle
Banned/Restricted Builds
| Mythical/Restricted Builds |
|---|
|
|
Ranked Battle Regulation J: Rules and Banned Pokemon
All Indigo Disk DLC Builds for Ranked Battle
New Indigo Disk Pokemon Builds
| New Indigo Disk Pokemon Builds |
|---|
|
|
Snack Legendary Builds
| New Indigo Disk Pokemon Builds |
|---|
|
|
Returning Indigo Disk Pokemon Builds
| Returning Indigo Disk Pokemon Builds |
|---|
|
|
Blueberry Pokedex: List of All Indigo Disk Pokemon
All Teal Mask DLC Builds for Ranked Battle
| All Teal Mask DLC Builds |
|---|
|
|
Kitakami Pokedex: List of All Teal Mask DLC Pokemon
All Pokemon HOME Builds for Ranked Battle
| All Pokemon HOME Builds |
|---|
|
|
All Pokemon HOME Transferable Pokemon
All Treasures of Ruin Builds for Ranked Battle
| All Treasures of Ruin Builds |
|---|
|
|
Best Treasures of Ruin Builds for Ranked Battle and Raids
All Paradox Pokemon Builds for Ranked Battle
| All Paradox Pokemon Builds |
|---|
|
|
Paradox Pokemon Builds for Competitive Battles and Tera Raids
All Other Gen 9 Meta Pokemon Builds for Ranked Battle
| All Other Gen 9 Meta Pokemon Builds |
|---|
|
|
Gen 9 Pokemon: All New Pokemon
All Gen 1~8 Meta Pokemon Builds for Ranked Battle
| All Gen 1~8 Meta Pokemon Builds |
|---|
|
|
All Off-Meta Builds for Ranked Battle
| All Off-Meta Pokemon Builds |
|---|
|
|
Author

Dondozo Movesets and Best Builds
Rankings
Gaming News


![Monster Hunter Stories 3 Review [First Impressions] | Simply Rejuvenating](https://img.game8.co/4438641/2a31b7702bd70e78ec8efd24661dacda.jpeg/thumb)
Popular Games

Genshin Impact Walkthrough & Guides Wiki
Honkai: Star Rail Walkthrough & Guides Wiki
Umamusume: Pretty Derby Walkthrough & Guides Wiki
Pokemon Pokopia Walkthrough & Guides Wiki
Resident Evil Requiem (RE9) Walkthrough & Guides Wiki
Monster Hunter Wilds Walkthrough & Guides Wiki
Wuthering Waves Walkthrough & Guides Wiki
Arknights: Endfield Walkthrough & Guides Wiki
Pokemon FireRed and LeafGreen (FRLG) Walkthrough & Guides Wiki
Pokemon TCG Pocket (PTCGP) Strategies & Guides Wiki


Recommended Games
Diablo 4: Vessel of Hatred Walkthrough & Guides Wiki
Cyberpunk 2077: Ultimate Edition Walkthrough & Guides Wiki
Fire Emblem Heroes (FEH) Walkthrough & Guides Wiki
Yu-Gi-Oh! Master Duel Walkthrough & Guides Wiki
Super Smash Bros. Ultimate Walkthrough & Guides Wiki
Pokemon Brilliant Diamond and Shining Pearl (BDSP) Walkthrough & Guides Wiki
Elden Ring Shadow of the Erdtree Walkthrough & Guides Wiki
Monster Hunter World Walkthrough & Guides Wiki
The Legend of Zelda: Tears of the Kingdom Walkthrough & Guides Wiki
Persona 3 Reload Walkthrough & Guides Wiki


All rights reserved
©2022 Pokémon. TM, ®Nintendo.
The copyrights of videos of games used in our content and other intellectual property rights belong to the provider of the game.
The contents we provide on this site were created personally by members of the Game8 editorial department.
We refuse the right to reuse or repost content taken without our permission such as data or images to other sites.
How is Magnezone immune to earthquake?