Best Solo and Team Strategies for Decidueye Round 2 Raids
◓ Starter Tera Raid: 7☆ Empoleon (03/27~04/02)!
✬ Pokemon HOME Dex Completion Shiny Rewards:
┗ Meloetta | Manaphy | Enamorus | Keldeo | Meltan
▶︎ Share codes and team up for Blueberry Quests!
▶︎ Game8 Tera Raid Damage Calculator | Game8 Discord
★ The DLC Epilogue is now available! ▶︎ How to Start

Defeat the 7-Star Unrivaled Decidueye in the fastest way possible solo or with friends by using the best counter strategies! Read on to learn the best solo and team strategies against the 7-Star Decidueye!
List of Contents
7-Star Decidueye Solo and OHKO Strategies
Event Decidueye Typing, Moves and General Information
 7☆ Decidueye 7☆ Decidueye |
Raid Behaviour and Timings | ||||
|---|---|---|---|---|---|
| Turn 2 | Removes Your Buffs Feather Dance |
||||
| Turn 4 | Removes Stat Drops Tera Energy Shield Swords Dance |
||||
| 50% HP |
Air Cutter
x2 Increased chance to Attack twice per turn |
||||
| Stats | |||||
| HP | 78 |
||||
| Atk | 107 |
||||
| Def | 75 |
||||
| SpAtk | 100 |
||||
| SpDef | 100 |
||||
| Speed | 70 |
||||
| Total | 530 |
||||
| Moveset | |||||
| Regular Moves | Extra Moves | ||||
| ・
Brave Bird
・ Low Kick ・ Spirit Shackle ・ Leaf Blade |
・
Air Cutter
・ Feather Dance ・ Swords Dance |
||||

The special Unrivaled Decidueye Event is a 7-Star Tera Raid against Decidueye with a Flying Tera Type. In the second round of this event, 7-Star Raids are available from March 24th, 00:00 UTC until March 26th, 23:59 UTC.
The Unrivaled Decidueye runs a mostly Physical attacking set, dealing devastating damage with a tera-boosted Brave Bird and amazing coverage in its movepool like Spirit Shackle and Low Kick. Be careful also as once it puts up its shield it has a high chance of hitting your pokemon with two moves consecutively.
For this raid, it is smart to bring a special attacking Electric-type like Miraidon or Bellibolt. These Pokemon resists a good amount of Decidueye's moves while also dealing super-effective damage in return.
7-Star Decidueye Tera Raid Event
Best Solo Strategies for Decidueye Tera Raid
| Best Decidueye Tera Raid Counters | ||
|---|---|---|
 Miraidon Miraidon |
 Bellibolt Bellibolt |
 Iron Hands Iron Hands |
How to Solo and OHKO 6 and 7-Star Tera Raids
Miraidon
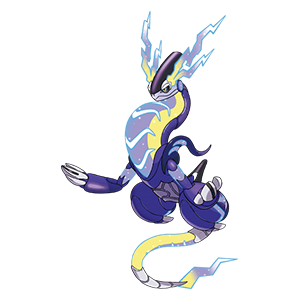 Miraidon Miraidon  
|
Tera Type | Nature | ||||
|---|---|---|---|---|---|---|
|
|
Modest (↑SpA, ↓Atk) |
|||||
| EV Spread | ||||||
| HP: 252 |
Sp. Atk: 252 |
Def: 4 |
||||
| Ability | Moveset | |||||
| Hadron Engine | ・
Parabolic Charge
・ Metal Sound ・ Electro Drift ・ Charge |
|||||
| Held Item | ||||||
|
|
||||||
Summary
Miraidon's unique typing allows it to resist Decidueye's STAB Grass and Flying-type moves. Paired with its amazing stats, it should be able to go up against Decidueye with relative ease.
Offensively, Miraidon can use Electro Drift and Parabolic Charge to deal Super Effective damage against Decidueye. Both moves benefit from STAB and Electric Terrain, making Miraidon a deadly attacker for this raid. Metal Sound and Charge both drastically improve Miraidon's damage output, so take time to set up these moves as well.
As it will play the role of special attacker, a Modest Nature would benefit Miraidon. You can also let it hold Life Orb to deal 30% increased damage with Electro Drift.
Tera Raid Strategy
| Miraidon Tera Raid Turn-by-Turn Counter Strategy | |
|---|---|
| Turns 1~2 | 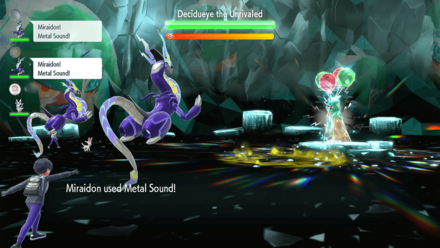 |
| Turn 3 | 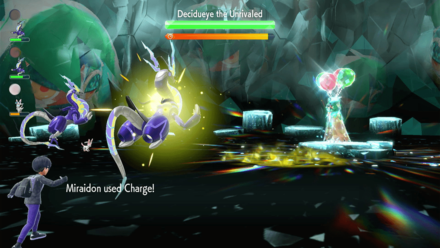 |
| Turn 4 |  |
Start the battle by using Metal Sound to lower Decidueye's Sp. Def by 4 stages.
By using Charge, Electro Drift's Base Power is then increased to 200, and with Decidueye's lowered Sp. Def stat, using Electro Drift should result in a OHKO.
Since Decidueye puts up its Energy Shield, and removes debuffs at around Turn 4, or around 80% HP, speed is key, and doing the raid with AI teammates instead may yield better results.
Key Damage Calculations
(Max HP x30) |
Electro Drift (200 BP, Electric Terrain, Life Orb) 6,691 ~ 7,872 (75.10 ~ 88.35%) |
Note: Results in OHKO thanks to damage of AI Pokemon during your initial setup
4 Turns to Beat
Following our build and the strategy above, it should take you around 4 turns to defeat the raid Pokemon. It will take 3 turns to complete your setup, and one additional turn to defeat the raid Pokemon.
Note that this is an approximate value only, and other factors, such as the raid Pokemon removing buffs or debuffs, may affect the actual outcome.
Best Miraidon Build for Decidueye Tera Raid
Bellibolt
 Bellibolt Bellibolt
|
Tera Type | Nature | ||||
|---|---|---|---|---|---|---|
|
|
Quiet (↑Sp.Atk, ↓Spe) |
|||||
| EV Spread | ||||||
| HP: 128 |
Sp.Atk: 252 |
Def 128 |
||||
| Ability | Moveset | |||||
| Electromorphosis | ・
Parabolic Charge
・ Electric Terrain ・ Reflect ・ Acid Spray |
|||||
| Held Item | ||||||
|
|
||||||
Summary
Bellibolt is able to counter Decidueye effectively thanks to its natural bulk, on top of its Electromorphosis, which doubles the damage of its Electric-type moves after being hit.
Offensively, Bellibolt can deal massive super-effective damage with Parabolic Charge after lowering its Special Defense with Acid Spray.
Giving it a Quiet Nature will ensure that Bellibolt attacks before Decidueye. You can also give it a Magnet to boost the power of Parabolic Charge.
This build can take on the raid alone if the set up is done correctly.
Tera Raid Strategy
| Bellibolt Tera Raid Turn-by-Turn Counter Strategy | |
|---|---|
| Turn 1 | 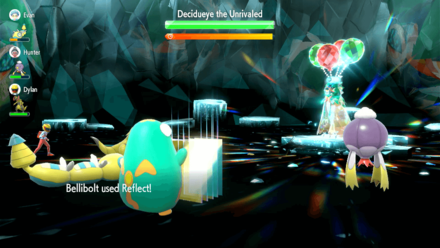 Use Reflect to boost your team's defense against Physical Attacks. |
| Turns 2~3 | 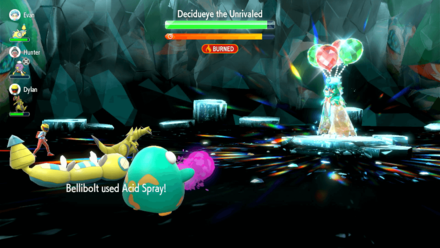 Use Acid Spray to lower Decidueye's Sp. Def stat. |
| Turn 4 | 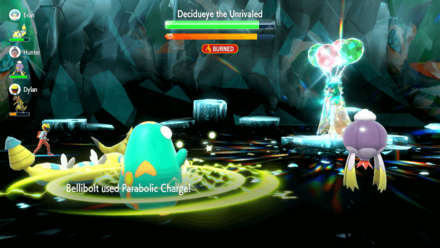 Use Parabolic Charge to deal super-effective damage, and recover HP. |
| Turns 5~6 |  After Decidueye removes debuffs, use Acid Spray to lower its Sp. Def again. |
| Turn 7 | 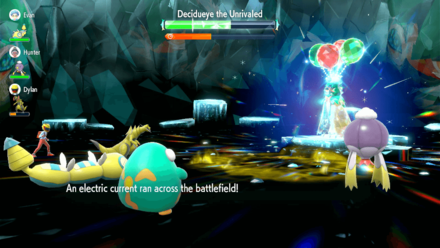 Use Electric Terrain to boost the power of Electric-type moves. |
| Turns 8+ | 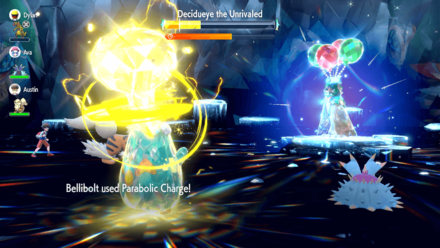 Terastallize and repeatedly use Parabolic Charge to finish the raid. |
Start the battle by using Reflect, since Decidueye is mainly a Physical Attacker. From there, use Acid Spray twice to reduce Decidueye's Sp. Def stat by 4 stages, allowing you to deal decent damage with Parabolic Charge before it puts up its energy shield.
After Decidueye puts up its Energy Shield, use Acid Spray twice again to lower its Sp. Def stat by 4 stages again. After that, use Electric Terrain to boost Parabolic Charge's damage for the next 5 turns.
Once you complete your setup, Terastallize and repeatedly use Parabolic Charge until you defeat Decidueye.
Key Damage Calculations
(Max HP x30) |
Parabolic Charge (130 BP, Magnet, Electric Tera) 2,536 ~ 2,984 (28.46 ~ 33.49%) |
||||
8910 HP (Max HP x30) |
Parabolic Charge (130 BP, Magnet, Electric Tera) 1,776 ~ 2,089 (19.93 ~ 23.45%) |
||||
| Move | No Boosts | +2 Atk | |||
| 121 ~ 144 (28.6 ~ 34.1%) Possible 3-Hit KO |
243 ~ 286 (57.5 ~ 67.7%) Possible 2-Hit KO |
||||
| 90 ~ 107 (21.3 ~ 25.3%) Possible 4-Hit KO |
180 ~ 212 (42.6 ~ 50.2%) Possible 3-Hit KO |
||||
| 38 ~ 45 (9 ~ 10.6%) Possible 10-Hit KO |
- | ||||
| 109 ~ 129 (25.8 ~ 30.5%) Possible 4-Hit KO |
216 ~ 255 (55.1 ~ 60.4%) Possible 2-Hit KO |
||||
9~11 Turns to Beat
Following our build and the strategy above, it should take you around 9~11 turns to defeat the raid Pokemon. It will take around 7 turns to complete your setup, and a few more turns of dealing damage to defeat the raid Pokemon.
Note that this is an approximate value only, and other factors, such as the raid Pokemon removing buffs or debuffs earlier, may affect the actual outcome.
Best Bellibolt Build for Decidueye Tera Raid
Iron Hands
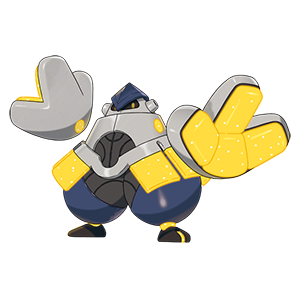 Iron Hands Iron Hands 
|
Tera Type | Nature | ||||
|---|---|---|---|---|---|---|
|
|
Adamant (↑Atk, ↓SpA) |
|||||
| EV Spread | ||||||
| HP: 252 |
Atk: 252 |
Def: 4 |
||||
| Ability | Moveset | |||||
| Quark Drive | ・
Swords Dance
・ Thunder Punch ・ Rock Tomb ・ Electric Terrain |
|||||
| Held Item | ||||||
|
|
||||||
Summary
Iron Hands is able to take Decidueye head on thanks to its typing which allows it to receive neutral damage from Grass, Flying and Ghost-type moves. Iron Hands also has decent defensive stats, allowing it to safely set up Swords Dance against Decidueye. Swords Dance is used over Belly Drum, as Decidueye is able to deal neutral damage against Iron Hands with Brave Bird, Low Kick, Spirit Shackle, and Air Cutter.
Offensively, Iron Hands can deal respectable Super Effective damage with Thunder Punch. Electric Terrain allows Iron Hands to boost the damage of Thunder Punch further, while also activating Quark Drive for an additional Attack boost.
As it will play the role of physical attacker, an Adamant Nature would benefit Iron Hands. You can also let it hold a Shell Bell to recover some HP after dealing damage.
Tera Raid Strategy
| Iron Hands Tera Raid Turn-by-Turn Counter Strategy | |
|---|---|
| Turn 1 |  |
| Optional | 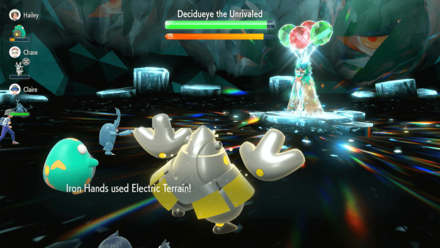 |
| Turns 2 | 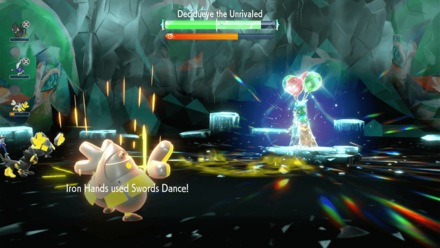 Use Swords Dance to raise Iron Hands' Attack stat. Be sure to do this after Decidueye resets your side's stats. Use Swords Dance to raise Iron Hands' Attack stat. Be sure to do this after Decidueye resets your side's stats. |
| Turn 3+ | 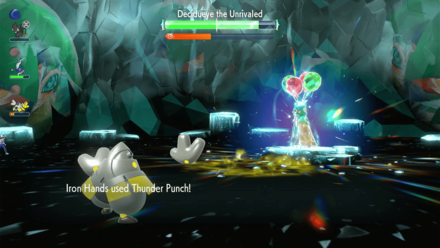 |
Start the battle by using Thunder Punch to immediately deal damage to Decidueye. You can also opt to deal damage using Rock Tomb early on, to reduce Decidueye's speed, allowing you to Attack before it.
Ideally, having a teammate set up Electric Terrain would be best so you can focus on dealing damage with Thunder Punch, but when playing solo, you can set it up yourself to boost your damage output.
Since this build makes use of Swords Dance and Thunder Punch, the drawback is that you will not be hitting as hard as you would if you were running Belly Drum.
Key Damage Calculations
(Max HP x30) |
Thunder Punch (+2 Atk, Electric Terrain) 1,224 ~ 1,440 (13.74 ~ 16.16%) |
||||
8910 HP (Max HP x30) |
Thunder Punch (+2 Atk, Electric Terrain, Electric Tera) 1,142 ~ 1,344 (12.82 ~ 15.08%) |
||||
| Move | No Boosts | +2 Atk | |||
| 106 ~ 126 (20.7 ~ 24.6%) Possible 5-Hit KO |
211 ~ 249 (41.2 ~ 48.6%) Possible 3-Hit KO |
||||
| 94 ~ 111 (18.3 ~ 21.6%) Possible 5-Hit KO |
187 ~ 221 (36.5 ~ 43.1%) Possible 3-Hit KO |
||||
| 90 ~ 106 (17.5 ~ 20.7%) Possible 5-Hit KO |
- | ||||
| 94 ~ 112 (18.3 ~ 21.8%) Possible 5-Hit KO |
187 ~ 222 (36.5 ~ 43.3%) Possible 3-Hit KO |
||||
Best Iron Hands Build for Decidueye Tera Raid
Best Team Strategies for Decidueye Tera Raid
| One-Shot Teams for Decidueye Raid Event | ||
|---|---|---|
| Miraidon and Magnezone | Miraidon Team Strategy | Anger Point Crabominable |
6-Star Tera Raid Boss Team Strategy Guides
Miraidon and Magnezone One-Shot Strategy
This one-shot strategy requires a dedicated team with a Support Magnezone to lower Decidueye's Sp. Def with Metal Sound, and boost Miraidon's damage with Helping Hand.
| Miraidon OHKO Counter Strategy for 7-Star Decidueye | ||
|---|---|---|
| Turns |  Support Magnezone Support Magnezone |
Charge Miraidon |
| #1 | Metal Sound | Metal Sound |
| #2 | Metal Sound | Charge |
| #3 | Helping Hand | Electro Drift |
How to One Shot Decidueye
Turn 1
Assuming that the Decidueye will not use any form of debilitating status move on its free turn, the general idea is to lower its Sp. Def stat by 6 stages, and one shot it on the third turn.
The Magnezone should start by using Metal Sound to start lowering Decidueye's Sp. Def stat.
Miraidon should use Charge to double Electro Drift's base power in preparation for turn 2.
Turn 2
For the second turn, Magnezone should keep using Metal Sound to reach -4 Sp. Def on Decidueye.
Miraidon should then use Electro Drift which should result in a One-Hit KO.
By turn 3, Magnezone should now use Helping Hand to further increase the damage of Electro Drift.
Key Damage Calculations
(Max HP x30) |
Electro Drift (200 BP, Electric Terrain, Life Orb) 6,691 ~ 7,872 (75.10 ~ 88.35%) |
Note: Results in OHKO thanks to damage of AI Pokemon during your initial setup
2 Turns to Beat
Following our build and the strategy above, it should take you around 2 turns to defeat the raid Pokemon. With just 2 players and a simple setup, It will be a guaranteed KO by round two.
Miraidon One-Shot Team Strategy
This strategy makes use of Florges' Symbiosis, and Chi-Yu's Beads of Ruins ability to empower Miraidon as much as possible, and defeat Decidueye in one hit
This a slightly modified one-shot set up from Reddit user Shiromi55.
| Crabominable Counter Strategy for 7-Star Decidueye | ||||
|---|---|---|---|---|
| Turns |  Fake Tears Support Fake Tears Support |
 Symbiosis Support Symbiosis Support |
 Beads of Ruin Support Beads of Ruin Support |
Special Carry |
| #1 | Fake Tears | Fairy Wind | Go All Out! Cheer | Electro Drift |
How to One-Shot Decidueye
At the start of the raid, Umbreon should use Fake Tears to lower Decidueye's Sp. Def stat by two stages.
Florges should use Fairy Wind to deal minimal Fairy-type damage to all Pokemon on the field, activating Miraidon's Weakness Policy, and Florges Symbiosis, passing the Choice Specs onto Miraidon.
Chi-Yu should then use the Go All Out! Cheer to maximize the team's damage.
With all the stat boosts prepared, Miraidon should use Electro Drift to wipe out Decidueye in just one turn.
Key Damage Calculations
(Max HP x30) |
Electro Drift (+2 Sp. Atk, Choice Specs) 8,526 ~ 10,032 (95.69 ~ 112.59%) 75% Chance to OHKO |
Anger Point Crabominable One-Shot Strategy
This strategy makes use of Crabominable's Anger Point ability to immediately get +6 Attack, and defeat Decidueye in one hit.
This a slightly modified one-shot set up conceptualized by SkiddyJ (@SkiddyJ_all_day).
| Crabominable Counter Strategy for 7-Star Decidueye | ||||
|---|---|---|---|---|
| Turns | 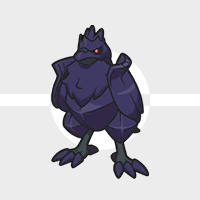 Screech Support Screech Support |
Screech Support |
 Crit Support Crit Support |
 Physical Carry Physical Carry |
| #1 | Screech | Screech |
Frost Breath
(on Crabominable) |
Ice Hammer |
How to One-Shot Decidueye
At the start of the raid, both Corviknight should use Screech to lower Decidueye's Defense by 4 stages.
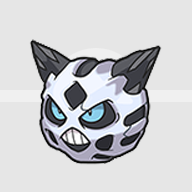
Glalie should then use Frost Breath on Crabominable, to activate its Anger Point.
With all the stat boosts prepared, Crabominable should use Ice Hammer to wipe out Decidueye in just one turn.
Key Damage Calculations
(Max HP x30) |
Ice Hammer (+6 Atk, Choice Band) 8,274 ~ 9,737 (92.86 ~ 109.28%) 56.25% Chance to OHKO |
Pokemon Scarlet and Violet Related Guides

Tera Raid Guides
Tera Raid Battle Mechanics Explained
Tera Raid Level Guides
How to Increase Tera Raid Star Level
Tera Raid Boss Guides
| Tera Raid Boss Guides | ||
|---|---|---|
5 and 6-Star Tera Raid Boss Guides
Raid Event Boss Strategies
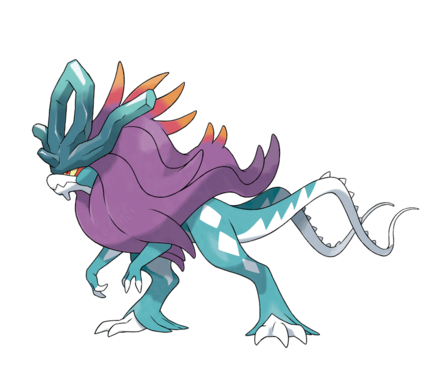 5☆ Walking Wake
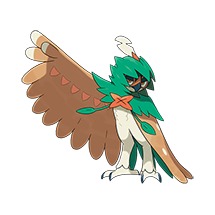 7☆ Decidueye
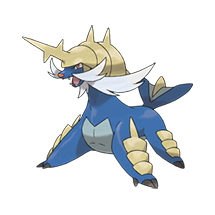 7☆ Samurott
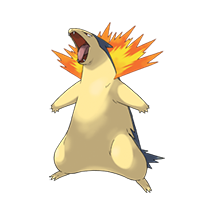 7☆ Typhlosion
 7☆ Meowscarada
 7☆ Skeledirge
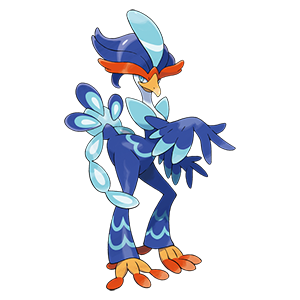 7☆ Quaquaval
Tera Raid Builds
Indigo Disk Raid Builds
| All Indigo Disk Raid Builds |
|---|
Teal Mask Raid Builds
| All Teal Mask Raid Builds |
|---|
Pokemon HOME Raid Builds
| All Pokemon HOME Raid Builds |
|---|
Paradox Pokemon Raid Builds
| All Paradox Pokemon Raid Builds |
|---|
Base Game Raid Builds
| All Base Game Tera Raid Builds |
|---|
Best Pokemon for Tera Raid Battles
Tera Raid Counters Per Tera Type
| Best Pokemon For Raids Per Tera Type | |||||
|---|---|---|---|---|---|
 Grass Grass |
 Water Water |
 Fire Fire |
 Electric Electric |
 Ice Ice |
 Fighting Fighting |
 Ground Ground |
 Poison Poison |
 Flying Flying |
 Psychic Psychic |
 Bug Bug |
 Rock Rock |
 Ghost Ghost |
 Dragon Dragon |
 Dark Dark |
 Steel Steel |
 Fairy Fairy |
 Normal Normal |
Author

Best Solo and Team Strategies for Decidueye Round 2 Raids
Rankings

Gaming News


![Nova Roma Review [Early Access] | Newer, Better, and More Confusing](https://img.game8.co/4455512/2cbf8926e9a1c72a3ff056088f801ef4.png/thumb)
Popular Games

Genshin Impact Walkthrough & Guides Wiki
Umamusume: Pretty Derby Walkthrough & Guides Wiki
Crimson Desert Walkthrough & Guides Wiki
Monster Hunter Stories 3: Twisted Reflection Walkthrough & Guides Wiki
Honkai: Star Rail Walkthrough & Guides Wiki
Pokemon Pokopia Walkthrough & Guides Wiki
The Seven Deadly Sins: Origin Walkthrough & Guides Wiki
Wuthering Waves Walkthrough & Guides Wiki
Zenless Zone Zero Walkthrough & Guides Wiki
Arknights: Endfield Walkthrough & Guides Wiki


Recommended Games
Fire Emblem Heroes (FEH) Walkthrough & Guides Wiki
Diablo 4: Vessel of Hatred Walkthrough & Guides Wiki
Cyberpunk 2077: Ultimate Edition Walkthrough & Guides Wiki
Yu-Gi-Oh! Master Duel Walkthrough & Guides Wiki
Super Smash Bros. Ultimate Walkthrough & Guides Wiki
Pokemon Brilliant Diamond and Shining Pearl (BDSP) Walkthrough & Guides Wiki
Elden Ring Shadow of the Erdtree Walkthrough & Guides Wiki
Monster Hunter World Walkthrough & Guides Wiki
The Legend of Zelda: Tears of the Kingdom Walkthrough & Guides Wiki
Persona 3 Reload Walkthrough & Guides Wiki


All rights reserved
©2022 Pokémon. TM, ®Nintendo.
The copyrights of videos of games used in our content and other intellectual property rights belong to the provider of the game.
The contents we provide on this site were created personally by members of the Game8 editorial department.
We refuse the right to reuse or repost content taken without our permission such as data or images to other sites.