Sunbreak Sword and Shield Builds (Master Rank SNS)
★ All Title Updates now available for ALL PLATFORMS!
┗ Title Update 4 | Title Update 5 | Bonus Update
┗ Check out all our Best Builds For Every Weapon!
┗ TU4 Monsters: Velkhana | Risen C.G. Valstrax
┗ TU5 Monsters: Amatsu | Risen Shagaru Magala
┗ Bonus Update Monster: Primordial Malzeno
This is a guide to the best builds and equipment for Sword and Shield (SNS) in Monster Hunter Rise (MH Rise): Sunbreak. Learn about the best Sword and Shield for Master Rank, and the best Skills and Armor pieces to use with the Sword and Shield for Master Rank from the early game until the end game!
| All Sword and Shield Guides | ||
|---|---|---|
 Trees & Full List Trees & Full List |
 How to Use How to Use |
 Best Builds Best Builds |
List of Contents
Sword & Shield Builds List & Progression
This is a quick section summarizing all the Sword & Shield builds in this page. It is arranged from newest to oldest, and MR build progression is from bottom to top.
Click on the build name to see the build!
| Master Rank | Anomlay Rank | Title Update | Build Name |
|---|---|---|---|
| MR180+ | AR241+ | TU5 | Heaven-Sent Embolden Poison |
| MR160+ | AR201+ | TU5 | Heaven-Sent, Dragon Conversion Elemental SnS |
| MR180+ | AR201+ | TU5 | Frenzied Bloodlust Elemental SnS |
| MR160+ | AR201+ | TU4 | Dragon Conversion w/ Dragonheart |
| MR160+ | AR201+ | TU4 | Dragon Conversion SnS |
| MR160+ | AR161+ | TU4 | Frostcraft Velkhana |
| MR140+ | AR101+ | TU3 | TU3 Elemental SnS |
| MR110+ | - | TU2 | Phecda's Asterism Grinder Boost |
| MR110+ | - | TU2 | Lunatic Rose Bloodlust Poison |
| MR6+ | - | TU3 | Chaotic Bloodlust |
| MR6+ | - | TU2 | TU2 Elemental SnS |
| MR6+ | - | TU2 | Phecda's Asterism MR Climber |
| MR6+ | - | Base | Royal Order Dereliction |
| MR3-6 | - | Base | Nightbloom+ All-Rounder |
| MR3-6 | - | Base | Nightbloom Critical Climber |
| MR1-2 | - | Base | Kamura Warrior Sword Raw Slugger |
Ultra Endgame MR Build: MR 100+
Heaven-Sent Embolden Poison Build
| Weapon | ATK | DEF | Affinity |
|---|---|---|---|
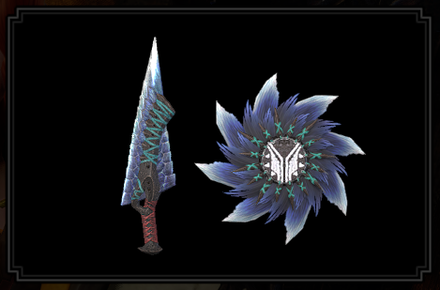 Phecda's Asterism Phecda's Asterism
 |
340 | 0 | 0% |
| Element / Status |
Slots | Rampage Slots | |
| ④②ー | ① |
| Armor | Slots | Skills | |
|---|---|---|---|
|
|
③②ー | ||
|
|
④④① |
Critical Boost Lv. 1
Heaven-Sent Lv. 1
|
|
|
|
④②① | ||
|
|
④②ー | ||
|
|
④③ー | ||
| Talisman | Attack Boost Lv. 3 with a ③② slot or better | ||
| Rampage Decoration |
|
||
| Decorations | |||
| Skills | |
|---|---|
| Rampage Skill | Swap between Wyvern Exploit, Anti-Aerial Species, Anti-Aquatic Species, or Fanged Exploit depending on the monster. |
|
Attack Boost Lv.7
| Guard Lv.5
Critical Eye Lv.4 | Critical Boost Lv.3 Weakness Exploit Lv.3 | Offensive Guard Lv.3 Stun Resistance Lv.3 | Grinder (S) Lv.3 Chameleos Blessing Lv.3 | Embolden Lv.2 Wirebug Whisperer Lv.1 | Coalescence Lv.1 Bloodlust Lv.1 | Foray Lv.1 Burst Lv.1 | Buildup Boost Lv.1 Powder Mantle Lv.1 | Heaven-Sent Lv.1 Frenzied Bloodlust Lv.1 |
|
Build Merits and Augments
| Weapon Augments | |
|---|---|
| Armor Augments |
Armor Augments for this build are not necessary. However, feel free to add as you please once you get comfortable with your build! Generally, you'd want to get better skills and more slots for your armor.
For damage, aim for any of the following: ● Buildup Boost ● Critical Eye ● Poison Attack ● Status Trigger For comfort, aim for any of the following: ● Intrepid Heart ● Wind Mantle ● Embolden ● Shockproof (add as decoration, multiplayer only) |
| Build Merits and Notes |
|---|
| The Phecda's Asterism remains a powerful option for raw damage in Sunbreak's endgame, even after having its sharpness extended with additional anomaly slots. By dropping Protective Polish, it's still possible to burn through sharpness to reach blue before Grinder (S) runs out of time. Heaven-Sent also gives the option to sharpen back to purple with a Switch Skill Swap, eliminating the need for other sharpness skills as long as you don't get knocked back often. Adding Intrepid Heart through a skill or slot augment is highly recommended to maintain this buff more easily.
Also new to this build is the addition of Embolden, which reduces knockback more when paired with max-level Guard. This allows us to activate Offensive Guard consistently with either Metsu Shoryugeki or a Guard Slash. Guard Slash is notable as it can be chained to a Perfect Rush, scoring big damage when used properly. Due to the nature of Embolden, this is best used when playing solo or with followers that don't draw aggro. While it can also be used in multiplayer hunts, it's far from ideal since the monster will not constantly target you. |
Heaven-Sent Dragon Conversion
Elemental Sword and Shield
(TU5 Build; MR160+)
| Weapon | ATK | DEF | Affinity |
|---|---|---|---|
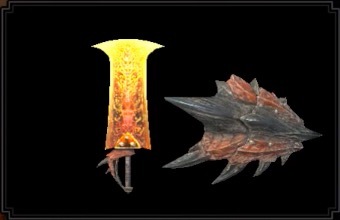 Enspirited Ifrit Enspirited Ifrit
 |
330 | 0 | 0% |
| Element / Status |
Slots | Rampage Slots | |
| ーーー | ③ |
| Decorations |
Rampage Decoration:
*Depending on Talisman: or |
|
|---|---|---|
| Weapon | ATK | DEF | Affinity |
|---|---|---|---|
 Agamemnon Agamemnon
 |
320 | 0 | 0% |
| Element / Status |
Slots | Rampage Slots | |
| ③ーー | ③ |
| Decorations |
Rampage Decoration:
*Depending on Talisman: or |
|
|---|---|---|
| Weapon | ATK | DEF | Affinity |
|---|---|---|---|
 Atomic Mind Atomic Mind
 |
310 | 0 | 0% |
| Element / Status |
Slots | Rampage Slots | |
| ーーー | ② |
| Decorations |
Rampage Decoration:
Depending on Monster Type: *Depending on Talisman: or |
|
|---|---|---|
| Weapon | ATK | DEF | Affinity |
|---|---|---|---|
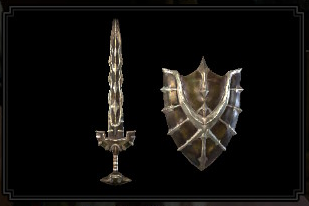 Daora's Maelstrom Daora's Maelstrom
 |
310 | 0 | 10% |
| Element / Status |
Slots | Rampage Slots | |
| ①ーー | ③ |
| Decorations |
Rampage Decoration:
*Depending on Talisman: or |
|
|---|---|---|
| Weapon | ATK | DEF | Affinity |
|---|---|---|---|
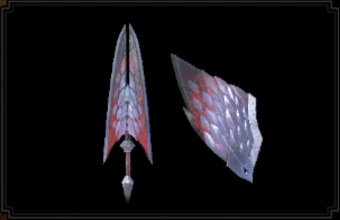 Gates of Heaven Gates of Heaven
 |
340 | 0 | 0% |
| Element / Status |
Slots | Rampage Slots | |
| ③ーー | ② |
| Decorations |
Rampage Decoration:
Depending on Monster Type: *Depending on Talisman: or |
|
|---|---|---|
* = check Secondary Talisman Skill below.
Recommended Armor Loadout
| Armor | Slots | Skills | |
|---|---|---|---|
|
|
④②ー | ||
|
|
④④① |
Critical Boost Lv. 1
Heaven-Sent Lv. 1
|
|
|
|
④④① |
Latent Power Lv. 1
Heaven-Sent Lv. 1
|
|
|
|
④①① | ||
|
|
④④ー |
Critical Boost Lv. 2
Heaven-Sent Lv. 1
|
|
| Talisman |
Weakness Exploit 2 with a ②① slot Secondary Skill Recommendations: Offensive Guard 2 see Note on Build Merits |
||
| Skills | |
|---|---|
| Rampage Skill | Element Exploit to increase elemental damage against monsters weak to each element Thunder and Dragon Build: Swap between Wyvern Exploit, Anti-Aerial Species, Anti-Aquatic Species, or Fanged Exploit depending on the monster. |
|
Element Attack Lv.5
Attack Boost Lv. 4 | Critical Eye Lv.4 Critical Boost Lv.3 | Weakness Exploit Lv.3 Latent Power Lv.3 | Stamina Surge Lv.3 Offensive Guard Lv.3 | Embolden Lv.3 Heaven-Sent Lv.3 | Critical Element Lv.2 Intrepid Heart Lv.1-2 | Dragon Conversion Lv.2 Shock Absorber Lv.1 Burst Lv.2 (only for Dragon Build) With Recommended Secondary Skill on Talisman: Burst Lv.2 Element Exploit Lv.2 (only for Dragon Build) For the Fire Build: Teostra Blessing Lv.2 For the Water and Ice Build: Kushala Blessing Lv.2 For Thunder and Dragon Build: Defiance Lv.1 For Water Build: Handicraft Lv.1 |
|
Build Merits and Augments
| Weapon Augments | |
|---|---|
| Armor Augments |
Armor Augments for this build are not necessary. However, feel free to add as you please once you get comfortable with your build! Generally, you'd want to get better skills and more slots for your armor.
Replaceable skills already on the armor: ● Stamina Surge For damage, aim for any of the following: ● Dragon Conversion (to max it out) ● Powder Mantle ● Offensive Guard ● Critical Element ● Burst For comfort, aim for any of the following: ● Guard |
| Build Merits |
|---|
| *Note: Thanks to the new Qurious Melding introduced in Title Update 5, it's now easier to acquire great-value charms. For this build, try and meld for a talisman with an Offensive Guard Lv.2. This makes it possible to slot in Burst to all builds and, for the Dragon Build, slot in Critical Element, increasing your DPS further. However, keep in mind that this is not a requirement and the build can still work without a secondary skill on the talisman recommended above.
In Free Title Update 5, the heavenly armor of Amatsu descended from the skies. Three pieces of this armor introduced a new skill; Heaven-Sent. This skill bestows its users powers when they manage to not get caught in any attacks. At level 3, it prevents sharpness loss and allows you to recover some after switching scrolls. This is perfect for the Sword and Shield playstyle, which usually depletes sharpness fast with each combo. Risen Crimson Glow Valstrax's armor skill, Dragon Conversion, converts elemental resistances you get from attacking with the Blue Swap Scroll to elemental damage when you switch to the Red Swap Scroll. This is a powerful skill to use with elemental builds and for weapons that are able to land hits continuously. Be sure to start fights with the Blue Swap Scroll first and switch to Red only when the elemental resistance logo appears at the top of your health bar. Take extra care when fighting with the Red Swap Scroll as all of your elemental resistances will be 0. High affinity benefits the Sword and Shield greatly. For this reason, we slotted in Critical Eye, along with max levels of Critical Boost and Weakness Exploit. When the level 3 Latent Power activates, this build reaches 100% affinity on weakspots. With two levels of Critical Element, this combination will quickly bring the monster's health down to zero. The build maxes out Offensive Guard and Embolden. With this skill combination, we recommend a playstyle of Guard Points and executing a Metsu Shoryugeki perfectly to get a boost in your DPS. Be aggressive as much as possible with this build! |
Frenzied Bloodlust Elemental Sword and Shield (TU5 Build; MR180+)
| Weapon | ATK | DEF | Affinity |
|---|---|---|---|
 Kaktus Gedeihen Kaktus Gedeihen
 |
310 | 0 | 15% |
| Element / Status |
Slots | Rampage Slots | |
| ④①① | ③ |
| Decorations |
Rampage Decoration:
*Depending on Talisman: or |
|
|---|---|---|
| Weapon | ATK | DEF | Affinity |
|---|---|---|---|
 Agamemnon Agamemnon
 |
320 | 0 | 0% |
| Element / Status |
Slots | Rampage Slots | |
| ③ーー | ③ |
| Decorations |
Rampage Decoration:
*Depending on Talisman: or |
|
|---|---|---|
| Weapon | ATK | DEF | Affinity |
|---|---|---|---|
 Atomic Mind Atomic Mind
 |
310 | 0 | 0% |
| Element / Status |
Slots | Rampage Slots | |
| ーーー | ② |
| Decorations |
Rampage Decoration:
Depending on Monster Type: *Depending on Talisman: or |
|
|---|---|---|
| Weapon | ATK | DEF | Affinity |
|---|---|---|---|
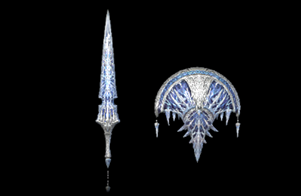 Noble Ana Palas Noble Ana Palas
 |
340 | 0 | 0% |
| Element / Status |
Slots | Rampage Slots | |
| ④①ー | ③ |
| Decorations |
Rampage Decoration:
*Depending on Talisman: or |
|
|---|---|---|
| Weapon | ATK | DEF | Affinity |
|---|---|---|---|
 Gates of Heaven Gates of Heaven
 |
340 | 0 | 0% |
| Element / Status |
Slots | Rampage Slots | |
| ③ーー | ② |
| Decorations |
Rampage Decoration:
Depending on Monster Type: *Depending on Talisman: or |
|
|---|---|---|
* = check Secondary Talisman Skill below.
Recommended Armor Loadout
| Armor | Slots | Skills | |
|---|---|---|---|
|
|
③②① |
Wirebug Whisperer Lv. 3
Wind Mantle Lv. 1
|
|
|
|
④④① |
Critical Boost Lv. 1
Heaven-Sent Lv. 1
|
|
|
|
④①① | ||
|
|
④②ー | ||
|
|
④③① | ||
| Talisman |
Critical Eye 3 with a ②① slot Secondary Skill Recommendations: Offensive Guard 2 see Note on Build Merits |
||
| Skills | |
|---|---|
| Rampage Skill | Element Exploit to increase elemental damage against monsters weak to each element Thunder and Dragon Build: Swap between Wyvern Exploit, Anti-Aerial Species, Anti-Aquatic Species, or Fanged Exploit depending on the monster. |
|
Element Attack Lv.5
Critical Eye Lv.5 | Attack Boost Lv. 4 Critical Boost Lv.3 | Offensive Guard Lv.3 Wirebug Whisperer Lv.3 | Embolden Lv.3 Burst Lv.3 | Weakness Exploit Lv.2 Latent Power Lv.2 | Bloodlust Lv.2 Frenzied Bloodlust Lv.2 | Coalescence Lv.1 Wind Mantle Lv.1 | Heaven-Sent Lv.1 Strife Lv.1 | Shock Absorber Lv.1 Intrepid Heart Lv.1-2 (except for the Thunder Build) With Recommended Secondary Skill on Talisman: Critical Element Lv.2 see Build Merits Fire, Ice, and Dragon Build: Defiance Lv.1-2 Fire Build: Teostra Blessing Lv.2 Water and Ice Build: Kushala Blessing Lv.2 |
|
Build Merits and Augments
| Weapon Augments | |
|---|---|
| Armor Augments |
Armor Augments for this build are not necessary. However, feel free to add as you please once you get comfortable with your build! Generally, you'd want to get better skills and more slots for your armor.
Replaceable skills already on the armor: ● Strife For damage, aim for any of the following: ● Dragon Conversion ● Powder Mantle ● Offensive Guard ● Critical Element For comfort, aim for any of the following: ● Guard |
| Build Merits |
|---|
| *Note: Thanks to the new Qurious Melding introduced in Title Update 5, it's now easier to acquire great-value charms. If you acquire the recommended charm with an Offensive Guard Lv.2 as a secondary, swap out the Guardian Jewel+ 4 with a Crit Element Jewel+ 4. This will equip the Critical Element skill, further improving your DPS with this build. However, keep in mind that this is not a requirement and the build can still work without a secondary skill on the talisman recommended above.
TU5 also introduced the armor of Risen Shagaru Magala, with the unique skill, Frenzied Bloodlust. This skill allows you to have one extra wirebug after overcoming the Frenzy Virus. The build is also equipped with the Wind Mantle skill and a level 3 Wirebug Whisperer from the Risen Kushala Daora Armor. Combining this all of this will grant you access to a lot of wirebugs, making any silkbind attacks more readily available. Hack away with the Sword and Shield! In Free Title Update 5, the heavenly armor of Amatsu descended from the skies. Three pieces of this armor introduced a new skill; Heaven-Sent. This skill bestows its users powers when they manage to not get caught in any attacks. Sharpness managing skills were omitted in this build because you would only need to swap scrolls to restore sharpness. However, this build only has a level of Heaven-Sent, so keep on your toes and try not to get hit to activate this skill. For this reason, we recommend utilizing Guard Point while fighting. High affinity benefits the Sword and Shield greatly. For this reason, we focused on Critical Eye to get more critical hits in, and Critical Boost to amplify the damage. This will quickly bring the monster's health down to zero. With Bloodlust inherent in the build, we opted to not max out Weakness Exploit to not overshoot for affinity. The build also maxes out Offensive Guard, which can increase your damage values after a Guard Point or a successful Metsu Shoryugeki. |
TU4 Dragon Conversion with Dragonheart Sword and Shield Build (MR160+)
| Weapon | ATK | DEF | Affinity |
|---|---|---|---|
 Gates of Heaven Gates of Heaven
 |
340 | 0 | 0% |
| Element / Status |
Slots | Rampage Slots | |
| ③ーー | ② |
| Armor | Slots | Skills | |
|---|---|---|---|
|
|
④②ー | ||
|
|
④④ー | ||
|
|
④①① | ||
|
|
④①① | ||
|
|
④③ー | ||
| Talisman | Weakness Exploit 2 with a ②① slot | ||
| Rampage Decoration | |||
| Decorations | |||
| Skills | |
|---|---|
| Rampage Skill | Valstrax Soul to increase dragon element damage when Dragonheart activates |
|
Attack Boost Lv.7 | Dragon Attack Lv.5
Dragonheart Lv.5 | Latent Power Lv.4 Critical Boost Lv.3 | Weakness Exploit Lv.3 Stamina Surge Lv.3 | Offensive Guard Lv.3 Dragon Resistance Lv.3 | Stun Resistance Lv.3 Dragon Conversion Lv.3 | Intrepid Heart Lv.2 Flinch Free Lv.1 |
|
Build Merits and Augments
| Weapon Augments | |
|---|---|
| Armor Augments |
Armor Augments for this build are not necessary. However, feel free to add as you please once you get comfortable with your build! Generally, you'd want to get better skills and more slots for your armor.
For damage, aim for any of the following: ● Furious ● Powder Mantle ● Critical Element For comfort, aim for any of the following: ● Wind Mantle ● Guard |
| Build Merits and Notes |
|---|
| Risen Crimson Glow Valstrax's armor introduced a new skill called Dragon Conversion. This skill converts elemental resistances you get from attacking with the Blue Swap Scroll to elemental damage when you switch to the Red Swap Scroll. This is a powerful skill to use with elemental builds and for weapons that are able to land hits continuosly. Be sure to start fights with this build with the Blue Swap Scroll first and switch to Red only when the elemental resistance logo appears at the top of your health bar. Also take extra care when fighting with the Red Swap Scroll as your elemental resistances will all be 0.
A skill that synergizes well with Dragon Conversion is Dragonheart, which can now be slotted in after Title Update 4! When the skill is activated, it will provide you 50 Elemental resistances. With the mechanic that Dragon Conversion has, this will then be converted to elemental values after you swap to the Red Scroll, increasing your overall dps! There's no better way to round out this build than using the final upgrade of the Crimson Glow Valstrax Sword and Shield! It has high dragon element values with it plus it's large white sharpness negates the need to frequently sharpen. To make this more effective, we slotted in the Valstrax Soul Rampage Skill to further increase elemental damage while dragonblighted by the Dragonheart skill (yep, lots of dragons!). This build also benefits from the Offensive Guard skill when you use the Sword and Shield's Silkbind Attack, Metsu Shoryugeki. This will deal significant damage and can knock out a monster if done multiple times (even once, if the monster is susceptible!). |
Dragon Conversion Elemental Sword and Shield Builds (MR160+)
Elemental Sword and Shield Selections
| Weapon | ATK | DEF | Affinity |
|---|---|---|---|
 Enspirited Ifrit Enspirited Ifrit
 |
330 | 0 | 0% |
| Element / Status |
Slots | Rampage Slots | |
| ーーー | ③ |
| Weapon | ATK | DEF | Affinity |
|---|---|---|---|
 Agamemnon Agamemnon
 |
320 | 0 | 0% |
| Element / Status |
Slots | Rampage Slots | |
| ③ーー | ③ |
| Weapon | ATK | DEF | Affinity |
|---|---|---|---|
 Atomic Mind Atomic Mind
 |
310 | 0 | 0% |
| Element / Status |
Slots | Rampage Slots | |
| ーーー | ② |
| Weapon | ATK | DEF | Affinity |
|---|---|---|---|
 Daora's Maelstrom Daora's Maelstrom
 |
310 | 0 | 10% |
| Element / Status |
Slots | Rampage Slots | |
| ①ーー | ③ |
| Armor | Slots | Skills | |
|---|---|---|---|
|
|
④②ー | ||
|
|
④④ー | ||
|
|
④①① | ||
|
|
④①① | ||
|
|
④③ー | ||
| Talisman | Weakness Exploit 2 with a ②① slot | ||
| Rampage Decoration |
For Fire, Water, and Ice SnS:
For Thunder SnS: |
||
| Decorations |
Hard Element Jewel+ 4 x1
Element Jewel 1 x1 For Fire, Water, and Thunder SnS: For Fire SnS: For Water SnS: For Ice SnS: For Water and Ice SnS: For Ice and Thunder SnS: For Thunder SnS: |
||
| Skills | |
|---|---|
| Rampage Skill | Element Exploit to increase elemental damage against monsters weak to ice For Thunder SnS: Swap between Wyvern Exploit, Anti-Aerial Species, Anti-Aquatic Species, or Fanged Exploit depending on the monster. |
|
Element Attack Lv.5
Attack Boost Lv.7 | Latent Power Lv.5 (Lv.4 for Ice SnS) Critical Boost Lv.3 | Weakness Exploit Lv.3 Stamina Surge Lv.3 | Offensive Guard Lv.3 Dragon Resistance Lv.3 | Stun Resistance Lv.3 Critical Element Lv.2 (Lv.3 for Ice SnS) Dragon Conversion Lv.3 | Element Exploit Lv. 2 Burst Lv. 2 | Flinch Free Lv.1 Intrepid Heart Lv.1 (Lv.2 for Ice and Thunder SnS) For Fire SnS: Teostra Blessing Lv.2 For Water and Ice SnS: Kushala Blessing Lv.2 For Water SnS: Handicraft Lv.1 For Thunder SnS: Spiribird's Call Lv.1 |
|
Build Merits and Augments
| Weapon Augments | For Fire and Ice SnS |
|---|---|
| For Water and Thunder SnS | |
| Armor Augments |
Armor Augments for this build are not necessary. However, feel free to add as you please once you get comfortable with your build! Generally, you'd want to get better skills and more slots for your armor.
For damage, aim for any of the following: ● Furious ● Powder Mantle ● Critical Element For comfort, aim for any of the following: ● Wind Mantle ● Guard |
| Build Merits and Notes |
|---|
| Risen Crimson Glow Valstrax's armor introduced a new skill called Dragon Conversion. This skill converts elemental resistances you get from attacking with the Blue Swap Scroll to elemental damage when you switch to the Red Swap Scroll. This is a powerful skill to use with elemental builds and for weapons that are able to land hits continuosly. Be sure to start fights with this build with the Blue Swap Scroll first and switch to Red only when the elemental resistance logo appears at the top of your health bar. Also take extra care when fighting with the Red Swap Scroll as your elemental resistances will all be 0.
For weapon choice, Sword and Shields with high elemental values were chosen to further optimize the element gained from Dragon Conversion. After all, the higher the values, the higher the damage! These builds deal 100% affinity to weakspots while Latent Power is active; for the Ice SnS build, however, we chose to omit a point in this skill and instead maxed out Critical Element because of Daora's Maelstrom's inherent 10% affinity. This build also benefits from the Offensive Guard skill when you use the Sword and Shield's Silkbind Attack, Metsu Shoryugeki. This will deal significant damage and can knock out a monster if done multiple times (even once, if the monster is susceptible!). |
Frostcraft Velkhana Sword and Shield Build
| Weapon | ATK | DEF | Affinity |
|---|---|---|---|
 Noble Ana Palas Noble Ana Palas
 |
340 | 0 | 0% |
| Element / Status |
Slots | Rampage Slots | |
| ④①ー | ③ |
| Armor | Slots | Skills | |
|---|---|---|---|
|
|
③②ー | ||
|
|
④②① |
Quick Sheathe Lv. 3
Frostcraft Lv. 1
|
|
|
|
③②① |
Critical Draw Lv. 3
Frostcraft Lv. 1
|
|
|
|
③③② |
Focus Lv. 3
Frostcraft Lv. 1
|
|
|
|
④③ー | ||
| Talisman | Critical Eye 3 with a ②① slot | ||
| Rampage Decoration | |||
| Decorations | |||
| Skills | |
|---|---|
| Rampage Skill | Kushala Daora Soul to increase affinity during combos or Element Exploit to increase elemental damage against monsters weak to ice |
|
Critical Eye Lv.7 | Attack Boost Lv.6
Critical Boost Lv.3 | Weakness Exploit Lv.3 Focus Lv.3 | Offensive Guard Lv.3 Critical Draw Lv.3 | Quick Sheathe Lv.3 Stun Resistance Lv.3 | Kushala Blessing Lv.3 Frostcraft Lv.3 | Razor Sharp Lv. 1 Spare Shot Lv. 1 | Flinch Free Lv.1 |
|
Build Merits and Augments
| Weapon Augments | |
|---|---|
| Armor Augments |
Armor Augments for this build are not necessary. However, feel free to add as you please once you get comfortable with your build! Generally, you'd want to get better skills and more slots for your armor.
For damage, aim for any of the following: ● Powder Mantle For comfort, aim for any of the following: ● Wind Mantle ● Guard |
| Build Merits and Notes |
|---|
| Title Update 4 saw the chilling return of the Frostcraft skill from the Velkhana armor set! Stay frosty during your hunts with this powerful skill which gives you an attack buff as long as you keep the gauge at the upper left side of your screen full. Do this by sheathing your weapon.
For weapon choice, the Noble Ana Palas Sword and Shield fits the build perfectly. As it's one of Velkhana's Weapons, it has faster Frostcraft gauge charge speed compared to other weapons. This will make the attack buffs from the Frostcraft skill frequently available, contributing greatly to your dps! To further improve damage, we also slotted in two levels of Kushala Blessing, which increases ice damage by 10%. This makes this build viable for monsters susceptible to the ice element, powerhouses such as Rajang, Furious Rajang, or Seething Bazelgeuse. This build also benefits from the Offensive Guard skill when you use the Sword and Shield's Silkbind Attack, Metsu Shoryugeki. This will deal significant damage and can knock out a monster if done multiple times (even once, if the monster is susceptible!). |
TU3 Elemental Sword and Shield Builds
Fire Elemental Sword and Shield
| Weapon | ATK | DEF | Affinity |
|---|---|---|---|
 Enspirited Ifrit Enspirited Ifrit
 |
330 | 0 | 0% |
| Element / Status |
Slots | Rampage Slots | |
| ーーー | ③ |
| Armor | Slots | Skills | |
|---|---|---|---|
|
|
③②ー | ||
|
|
③①ー | ||
|
|
④④ー | ||
|
|
④③ー | ||
|
|
④ーー | ||
| Talisman | Attack Boost Lv.3, with a ② slot or better | ||
| Rampage Decoration | |||
| Decoration |
|
||
| Skills | |
|---|---|
|
Attack Boost Lv.7 | Critical Eye Lv.7
Fire Attack Lv.5 | Master's Touch Lv.3 Critical Boost Lv.3 | Weakness Exploit Lv.3 Ballistics Lv.3 | Offensive Guard Lv.3 Flinch Free Lv. 3 | Teostra Blessing Lv.2 Powder Mantle Lv.2 | Strife Lv.1 |
| Build Merits and Notes |
|---|
| Powder Mantle provides an explosive boost to your damage. With the Sword and Shield's fast-paced attacks, it will be easy to activate this skill, even with one point in! We focused on maxing out the Attack Boost skill, as the explosive damage from Powder Mantle scales with your raw attack value.
Have Metsu Shoryugeki on your main scroll and Destroyer Oil on your other scroll. Using Metsu Shoryugeki can activate Offensive Guard when timed correctly. Free Title Update 3 updated the Destroyer Oil to recover sharpness when used, so it's an important Switch Skill for Sword and Shield. For the Weapon Augmentations, we recommend going for Lv.2 Attack Boost and Lv.4 Elemental Boost. This build assumes that no Armor Augmentations have been made. |
Water, Ice, and Thunder Sword and Shield
| Weapon | ATK | DEF | Affinity |
|---|---|---|---|
 Agamemnon Agamemnon
 |
320 | 0 | 0% |
| Element / Status |
Slots | Rampage Slots | |
| ③ーー | ③ |
| Decorations |
|
|
|---|---|---|
| Weapon | ATK | DEF | Affinity |
|---|---|---|---|
 Daora's Maelstrom Daora's Maelstrom
 |
310 | 0 | 10% |
| Element / Status |
Slots | Rampage Slots | |
| ①ーー | ③ |
| Decorations |
|
|
|---|---|---|
| Weapon | ATK | DEF | Affinity |
|---|---|---|---|
 Atomic Mind Atomic Mind
 |
310 | 0 | 0% |
| Element / Status |
Slots | Rampage Slots | |
| ーーー | ② |
| Decorations |
|
|
|---|---|---|
| Armor | Slots | Skills | |
|---|---|---|---|
|
|
③②ー | ||
|
|
③②① | ||
|
|
④②① | ||
|
|
④③ー | ||
|
|
④ーー | ||
| Talisman | Attack Boost Lv.3, with a ② slot (additional ① slot for the Water Sword and Shield) | ||
| Rampage Decoration | |||
| Skills | |
|---|---|
|
Elemental Attack Lv.5 | Attack Boost Lv.7
Critical Eye Lv.5 | Master's Touch Lv.3 Critical Boost Lv.3 | Weakness Exploit Lv.3 Offensive Guard Lv.3 | Flinch Free Lv. 3 Kushala Blessing Lv.3 | Powder Mantle Lv.2 Razor Sharp Lv.2 | Spare Shot Lv.2 Ballistics Lv.2 | Peak Peformance Lv.1 Burst Lv.1 Handicraft Lv.1 (Water Sword and Shield only) |
| Build Merits and Notes |
|---|
| Powder Mantle provides an explosive boost to your damage. With the Sword and Shield's fast-paced attacks, it will be easy to activate this skill, even with one point in! We focused on maxing out the Attack Boost skill, as the explosive damage from Powder Mantle scales with your raw attack value.
Have Metsu Shoryugeki on your main scroll and Destroyer Oil on your other scroll. Using Metsu Shoryugeki can activate Offensive Guard when timed correctly. Free Title Update 3 updated the Destroyer Oil to recover sharpness when used, so it's an important Switch Skill for Sword and Shield. Weapon Augmentations ▶ For the Agamemnon Water SnS, we highly recommend Lv.2 Sharpness Boost. This will ensure that you will hit purple with the build above. Then, for further elemental damage, go for a Lv.3 Elemental Boost. ▶ For the Atomic Mind Thunder SnS, we recommended the Rampage Slot Upgrade to slot in the Elembane Jewel. Otherwise, you can go for Lv.3 Elemental Boost and a Lv.2 Sharpness Boost. ▶ For the Daora's Maelstrom Ice SnS, we recommend going for Lv.2 Attack Boost and Lv.4 Elemental Boost. This build assumes that no Armor Augmentations have been made. |
Dragon Elemental Sword and Shield
| Weapon | ATK | DEF | Affinity |
|---|---|---|---|
 Gates of Heaven Gates of Heaven
 |
340 | 0 | 0% |
| Element / Status |
Slots | Rampage Slots | |
| ③ーー | ② |
| Armor | Slots | Skills | |
|---|---|---|---|
|
|
④①① | ||
|
|
②②ー | ||
|
|
④②① | ||
|
|
③①ー | ||
|
|
④ーー | ||
| Talisman | Attack Boost Lv.3, with a ②① slot | ||
| Rampage Decoration | |||
| Decoration |
|
||
| Skills | |
|---|---|
|
Attack Boost Lv.7 | Critical Eye Lv.7
Dragon Attack Lv.5 | Critical Element Lv.3 Critical Boost Lv.3 | Weakness Exploit Lv.3 Offensive Guard Lv.3 | Flinch Free Lv. 3 Recovery Up Lv.3 | Windproof Lv.3 Defiance Lv.3 | Kushala Blessing Lv.2 Powder Mantle Lv.1 | Burst Lv.1 Peak Peformance Lv.1 |
| Build Merits and Notes |
|---|
| Powder Mantle provides an explosive boost to your damage. With the Sword and Shield's fast-paced attacks, it will be easy to activate this skill, even with one point in! We focused on maxing out the Attack Boost skill, as the explosive damage from Powder Mantle scales with your raw attack value.
Have Metsu Shoryugeki on your main scroll and Destroyer Oil on your other scroll. Using Metsu Shoryugeki can activate Offensive Guard when timed correctly. Free Title Update 3 updated the Destroyer Oil to recover sharpness when used, so it's an important Switch Skill for Sword and Shield. Compared to the earlier Elemental Sword and Shield builds, we recommend not putting Master's Touch for the Gates of Heaven Sword and Shield. Its large white sharpness can last you a whole fight without sharpening if done correctly. For the Weapon Augmentations, we recommend upgrading the Rampage Slot to slot in an Elembane Jewel. Otherwise, Lv.2 Attack Boost and Lv.4 Elemental Boost is a comfortable choice. This build assumes that no Armor Augmentations have been made. |
Phecda's Asterism Grinder Boost
| Weapon | ATK | DEF | Affinity |
|---|---|---|---|
 Phecda's Asterism Phecda's Asterism
 |
340 | 0 | 0% |
| Element / Status |
Slots | Rampage Slots | |
| ④②ー | ① |
| Armor | Slots | Skills | |
|---|---|---|---|
|
|
②②ー |
Critical Eye Lv. 2
Wirebug Whisperer Lv. 1
|
|
|
|
③②ー | ||
|
|
④②① | ||
|
|
②ーー | ||
|
|
④①① | ||
| Talisman | Attack Boost 3 with ② slot or better | ||
| Rampage Decoration |
|
||
| Decorations |
|
||
| Skills | |
|---|---|
| Rampage Skill | Swap between Wyvern Exploit, Anti-Aerial Species, Anti-Aquatic Species, or Fanged Exploit depending on the monster. |
Critical Eye Lv.7 | Attack Boost Lv.4
Weakness Exploit Lv.3 | Critical Boost Lv.3 Speed Sharpening Lv.3 | Grinder (S) Lv.3 Evade Extender Lv.2 | Blight Resistance Lv.2 Protective Polish Lv.2 | Wirebug Whisperer Lv.1 Resentment Lv.1 | Burst Lv.1 Buildup Boost Lv.1 | Chameleos Blessing Lv.1 Foray Lv.1 | Flinch Free Lv.1 |
|
| Build Merits and Notes |
|---|
| The Phecda's Asterism was a strange weapon when it first released since it had short purple and white sharpness and barely any poison to actually inflict the status consistently. Naturally, Grinder (S) is a good pairing for it, enabling a large boost whenever you sharpened from blue to purple. Title Update 2 introduces Buildup Boost as a way to take advantage of the poison without needing to actually poison the monster. When built with typical SnS skills, you'll end up with a strong set that can beat pure raw builds.
For augments, get the Rampage Slot Upgrade to fit in the anti-species jewels and fill the rest with Attack Boost. |
Lunatic Rose Bloodlust Poison
| Weapon | ATK | DEF | Affinity |
|---|---|---|---|
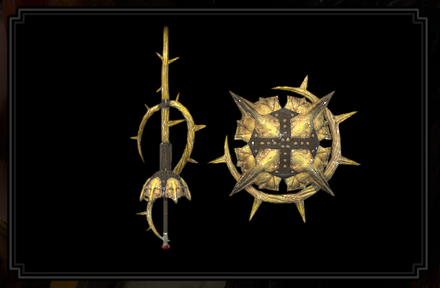 Lunatic Rose Lunatic Rose
 |
320 | 0 | 30% |
| Element / Status |
Slots | Rampage Slots | |
| ③ーー | ② |
| Armor | Slots | Skills | |
|---|---|---|---|
|
|
③ーー |
Coalescence Lv. 2
Bloodlust Lv. 1
|
|
|
|
②②ー | ||
|
|
④②① | ||
|
|
④ーー |
Weakness Exploit Lv. 1
Burst Lv. 2
|
|
|
|
④ーー | ||
| Talisman | Attack Boost 3 with ② slot or better | ||
| Rampage Decoration |
|
||
| Decorations |
|
||
| Skills | |
|---|---|
| Rampage Skill | Swap between Wyvern Exploit, Anti-Aerial Species, Anti-Aquatic Species, or Fanged Exploit depending on the monster. |
Attack Boost Lv.7 | Critical Boost Lv.3
Weakness Exploit Lv.3 | Master's Touch Lv.3 Offensive Guard Lv.3 | Flinch Free Lv.3 Burst Lv.2 | Wirebug Whisperer Lv.2 Coalescence Lv.2 | Marathon Runner Lv.2 Charge Master Lv.1 | Buildup Boost Lv.1 Chameleos Blessing Lv.1 | Speed Sharpening Lv.1 Bloodlust Lv.1 | Foray Lv.1 |
|
| Build Merits |
|---|
| This build takes advantage of the Lunatic Rose's high innate affinity and Poison status to consistently put out high damage. Attack Boost, Critical Boost, Offensive Guard, and Burst are used to boost the weapon's overall damage output. In addition, Bloodlust and Weakness Exploit allow the weapon to always critically hit on weakspots. To round out the build, it also features max Master's Touch and Speed Sharpening to keep your sharpness high and allow you to stay on the offensive.
New to this build is the inclusion of Buildup Boost over Poison Attack to give a slight bump to the effective damage. The Risen Mizuha Sleeves also comes with Foray, which will be handy once the monster gets poisoned. If you don't have access to Risen Chameleos yet, use the Onmyo Tekkou instead. To upgrade this build further, we recommend adding Attack Boost Augments to the weapon to improve overall damage output. |
Endgame MR Build: MR 6+
Chaotic Bloodlust Sword and Shield Build
| Weapon | ATK | DEF | Affinity |
|---|---|---|---|
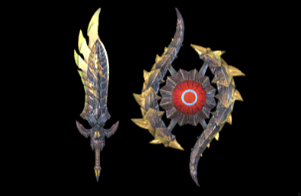 Lügen/Vérité Lügen/Vérité
 |
340 | 0 | -30% / 15% |
| Element / Status |
Slots | Rampage Slots | |
| ③①ー | ② |
| Weapon Augments | ||
|---|---|---|
| Rampage Decoration |
|
|
| Armor | Slots | Skills | |
|---|---|---|---|
|
|
③ーー |
Coalescence Lv. 2
Bloodlust Lv. 1
|
|
|
|
③①ー | ||
|
|
④②① | ||
|
|
③①① | ||
|
|
④ーー | ||
| Talisman | Attack Boost 3 with a ②① slot | ||
| Decorations |
|
||
| Skills | |
|---|---|
| Rampage Skill | Swap between Wyvern Exploit, Anti-Aerial Species, Anti-Aquatic Species, or Fanged Exploit depending on the monster. |
|
Attack Boost Lv.7 | Critical Boost Lv.3
Handicraft Lv.3 | Protective Polish Lv.3 Offensive Guard Lv.3 | Speed Sharpening Lv.3 Flinch Free Lv.3 | Defiance Lv.3 Critical Eye Lv.2 | Weakness Exploit Lv.2 Spread Up Lv.2 | Coalescence Lv.2 Peak Performance Lv.1 | Bloodlust Lv.1 Sneak Attack Lv.1 | Burst Lv.1 Strife Lv.1 |
|
| Build Merits and Notes |
|---|
| Bloodlust can activate quickly with your Sword and Shield combos! This build utilizes the powerup this skill provides. We focused on maxing Attack Boost, since you'll be getting more than 100% affinity with Bloodlust synergized with Weakness Exploit. Dealing continuous damage on a monsters' weakspot will yield significant damage, especially with Burst, allowing you to finish off the monster with ease!
For comfort, we maxed out the Protective Polish and Speed Sharpening skills. Sharpening before taking a fight will allow you do your combos without worrying about losing your purple sharpness. However, if you are at the right anomaly level and comfortable with the playstyle of using Destroyer Oil whenever your sharpness dips, we recommend swapping out the Sharp Jewels and replace it with Mastery Jewels (Jewel+ 4 and 2). These builds assume that no Armor Augmentations have been made. |
Elemental Sword and Shield Builds
| Weapon | ATK | DEF | Affinity |
|---|---|---|---|
 Enspirited Ifrit Enspirited Ifrit
 |
330 | 0 | 0% |
| Element / Status |
Slots | Rampage Slots | |
| ーーー | ③ |
| Weapon | ATK | DEF | Affinity |
|---|---|---|---|
 Agamemnon Agamemnon
 |
320 | 0 | 0% |
| Element / Status |
Slots | Rampage Slots | |
| ③ーー | ③ |
| Weapon | ATK | DEF | Affinity |
|---|---|---|---|
 Atomic Mind Atomic Mind
 |
310 | 0 | 0% |
| Element / Status |
Slots | Rampage Slots | |
| ーーー | ② |
| Weapon | ATK | DEF | Affinity |
|---|---|---|---|
 Daora's Maelstrom Daora's Maelstrom
 |
310 | 0 | 10% |
| Element / Status |
Slots | Rampage Slots | |
| ①ーー | ③ |
Dragon Sword and Shield Selection
| Weapon | ATK | DEF | Affinity |
|---|---|---|---|
 Secta Tre Black Secta Tre Black
 |
330 | 0 | 0% |
| Element / Status |
Slots | Rampage Slots | |
| ④②① | ③ |
| Weapon | ATK | DEF | Affinity |
|---|---|---|---|
 Gates of Heaven Gates of Heaven
 |
340 | 0 | 0% |
| Element / Status |
Slots | Rampage Slots | |
| ③ーー | ② |
Gates of Heaven is only available at MR 70+ after defeating Master Rank Crimson Glow Valstrax.
| Weapon Augments | ||
|---|---|---|
| Rampage Decoration |
For Thunder and Gates of Heaven SnS: |
|
| Armor | Slots | Skills | |
|---|---|---|---|
|
|
③②ー | ||
|
|
③①ー | ||
|
|
④②① | ||
|
|
④ーー |
Weakness Exploit Lv. 1
Burst Lv. 2
|
|
|
|
④ーー | ||
| Talisman | Critical Eye 3 with a ②① slot | ||
| Decorations |
Hard Element Jewel 3 x1
Element Jewel 1 x2 (except Ice and Secta Tre Black SnS) For Water SnS Build: For Ice and Secta Tre Black Build: Dragon Builds: |
||
| Skills | |
|---|---|
| Rampage Skill | Element Exploit to increase elemental damage against each element For Thunder and Gates of Heaven Build: Swap between Wyvern Exploit, Anti-Aerial Species, Anti-Aquatic Species, or Fanged Exploit depending on the monster. |
|
Element Attack Lv.5
Critical Eye Lv.7 | Attack Boost Lv.4-5 Critical Boost Lv.3 | Weakness Exploit Lv.3 Critical Element Lv.3 | Offensive Guard Lv.3 Flinch Free Lv.3 | Burst Lv.3 Peak Performance Lv. 1 | Strife Lv.1 Spare Shot Lv.1 Razor Sharp Lv.1 (Lv.3 for Dragon Builds) Handicraft Lv.1 (for Water SnS only) Spiribird's Call Lv.1 (except Ice and Secta Tre Black SnS) Speed Sharpening Lv.2 (for Ice and Secta Tre Black Build) |
|
| Build Merits and Notes |
|---|
| In Sunbreak, elemental builds are a must! Element-focused builds will deal serious damage, especially to monsters weak to a specific one. With this build, we maxed out Critical Eye and slotted in Critical Element to boost elemental values. Along with skills like Attack Boost, Weakness Exploit, and Burst, this will ensure significant damage during your continuous combos!
Offensive Guard will amp the damage you can do after doing a Metsu Shoryugeki. Also, with this build, sharpness will decrease fast due to the nature of the Sword and Shield. For this reason, we recommend equipping Metsu Shoryugeki on your off-hand scroll and equipping Destroyer Oil on your main scroll. This way, you can do a Metsu Shoryugeki on openings (e.g., roars, KOs, and traps) then switching to restore your sharpness while doing your combos. These builds assume that no Armor Augmentations have been made. |
Phecda's Asterism MR Climber
| Weapon | ATK | DEF | Affinity |
|---|---|---|---|
 Phecda's Asterism Phecda's Asterism
 |
340 | 0 | 0% |
| Element / Status |
Slots | Rampage Slots | |
| ④②ー | ① |
| Weapon Augments |
|---|
| Armor | Slots | Skills | |
|---|---|---|---|
|
|
①①① |
Critical Eye Lv. 3
Critical Boost Lv. 1
|
|
|
|
③②① | ||
|
|
②②② | ||
|
|
②②① | ||
|
|
④ーー | ||
| Talisman | Attack Boost 3 with ② slot or better | ||
| Rampage Decoration |
|
||
| Decorations | |||
| Skills | |
|---|---|
| Rampage Skill | Swap between Wyvern Exploit, Anti-Aerial Species, Anti-Aquatic Species, or Fanged Exploit depending on the monster. |
|
Attack Boost Lv.5 |
Agitator Lv.5
Critical Eye Lv.5 | Speed Sharpening Lv.3 Critical Boost Lv.3 | Weakness Exploit Lv.3 Stamina Surge Lv.3 | Flinch Free Lv. 3 Embolden Lv.3 | Grinder (S) Lv.3 Protective Polish Lv.2 | Offensive Guard Lv.2 Stun Resistance Lv.2 | Adrenaline Rush Lv.1 Foray Lv. 1 | Burst Lv.1 |
|
| Build Merits and Notes |
|---|
| This build is intended for optimised solo MR grinding. Whenever you are targeted by the monster, Embolden activates, and it becomes more likely that Agitator will activate. High levels of both Attack Boost and Critical Eye, along with max points in Critical Boost and Weakness Exploit further increase your offense. As our weapon has a quick attack speed and the poison status, we opted to include value points in both Foray and Burst for even more damage. The combination of Protective Polish, and Speed Sharpening offset our weapon's low amount of purple sharpness. Grinder (S) is also included since both our weapon's Purple and White sharpness are low enough to satisfy its activation conditions. Our build features status buildup, so consider taking Drill Slash Combo for easier application of poison. This build naturally has Offensive Guard Lv.2. This skill is prevalently slotted by experienced SnS hunters that utilize the Metsu Shoryugeki Switch Skill becase the attack buff from a perfectly-timed Metsu Shoryugeki stacks with the boost received from Offensive Guard. If you intend on running Metsu Shoryugeki, replacing the Polisher Pro Jewel 3 with a Guardian Jewel 3 can be considered. This build can scale into higher MR levels once you unlock Risen Elder Dragons. Jewels such as the Haze Jewel 1, and some armor pieces could further optimize this build. |
Royal Order Dereliction Raw
| Weapon | ATK | DEF | Affinity |
|---|---|---|---|
 Royal Order's Sword+ Royal Order's Sword+
 |
320 | 50 | 10% |
| Element / Status |
Slots | Rampage Slots | |
-
|
②①ー | ② |
| Armor | Slots | Skills | |
|---|---|---|---|
|
|
①①① |
Critical Eye Lv. 3
Critical Boost Lv. 1
|
|
|
|
③②ー | ||
|
|
②①ー | ||
|
|
②ーー | ||
|
|
③②② |
Resentment Lv. 1
Dereliction Lv. 1
|
|
| Talisman | Attack Boost 3 with ② slot or better | ||
| Rampage Decoration |
|
||
| Decorations |
|
||
| Skills | |
|---|---|
| Rampage Skill | Swap between Wyvern Exploit, Anti-Aerial Species, Anti-Aquatic Species, or Fanged Exploit depending on the monster. |
Critical Eye Lv.7 | Attack Boost Lv.6
Critical Boost Lv.3 | Weakness Exploit Lv.3 Offensive Guard Lv.3 | Speed Sharpening Lv.3 Resentment Lv.2 | Evade Extender Lv.2 Stun Resistance Lv.2 | Affinity Sliding Lv.1 Spread Up Lv.1 | Flinch Free Lv.1 Dereliction Lv.1 | Burst Lv.1 |
|
| Build Merits and Notes |
|---|
| This build using the Royal Order's Sword+ focuses on mixing high raw damage with comfort and utility. Attack Boost, Critical Boost, Offensive Guard, Burst, and Dereliction's Blue Scroll ability are used to boost the weapon's damage output. In addition, Critical Eye and Weakness Exploit are used to allow the weapon to always critically hit on weakspots due to its innate 10% affinity. For added utility and survivability, the build also features Evade Extender, Speed Sharpening, and Stun Resistance. When using this build, always swap to your Blue Scroll when the hunt begins as Dereliction will only provide increased attack and stun potency when on the Blue Scroll. In addition, to help mitigate the health drain from Dereliction, we recommend eating Gourmet Fish and the Hide-and-Seek Dango as they both provide health regeneration over time. |
Master Rank Build (Mid Game): MR 3-6
Nightbloom+ All-Rounder
| Weapon | ATK | DEF | Affinity |
|---|---|---|---|
 Nightbloom+ Nightbloom+
 |
280 | 0 | 30% |
| Element / Status |
Slots | Rampage Slots | |
-
|
②ーー | ① |
| Armor | Slots | Skills | |
|---|---|---|---|
|
|
②②ー |
Weakness Exploit Lv. 1
Wirebug Whisperer Lv. 2
|
|
|
|
③ーー |
Protective Polish Lv. 2
Speed Sharpening Lv. 2
|
|
|
|
④ーー | ||
|
|
④①① |
Attack Boost Lv. 2
|
|
|
|
①①① | ||
| Talisman | Attack Boost 3 with ② slot or better | ||
| Rampage Decoration | |||
| Decorations |
|
||
| Skills | |
|---|---|
| Rampage Skill | Spiribird Doubled |
Attack Boost Lv.7 | Defense Boost Lv.7
Critical Boost Lv.3 | Weakness Exploit Lv.3 Protective Polish Lv.3 | Stun Resistance Lv.3 Speed Sharpening Lv.3 | Flinch Free Lv.3 Wirebug Whisperer Lv.3 | Latent Power Lv.2 Blight Resistance Lv.1 | Diversion Lv.1 |
|
| Build Merits and Notes |
|---|
| This is an all-rounder Sword and Shield build, featuring the high affinity of Nightbloom+ with max Attack Boost, Critical Boost, and Weakness Exploit. On the defensive side, this build also runs max Defense Boost, Stun Resistance, and Flinch Free, allowing it to take as many hits as it dishes out. To round the build out, max Protective Polish, Speed Sharpening, and Wirebug Whisperer are included to sustain your offense as long as possible. |
Nightbloom Critical Climber
| Weapon | ATK | DEF | Affinity |
|---|---|---|---|
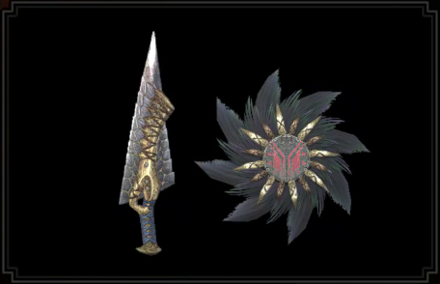 Nightbloom Nightbloom
 |
250 | 0 | 30% |
| Element / Status |
Slots | Rampage Slots | |
-
|
②ーー | ① |
| Armor | Slots | Skills | |
|---|---|---|---|
|
|
③ーー | ||
|
|
①①① | ||
|
|
②ーー |
Attack Boost Lv. 2
Earplugs Lv. 2
|
|
|
|
②ーー | ||
|
|
②①ー | ||
| Talisman | Attack Boost 3 with ② slot or better | ||
| Rampage Decoration | |||
| Decorations |
|
||
| Skills | |
|---|---|
| Rampage Skill | Spiribird Doubled |
Attack Boost Lv.6 | Critical Eye Lv.4
Critical Boost Lv.3 | Weakness Exploit Lv.3 Protective Polish Lv.3 | Stun Resistance Lv.3 Speed Sharpening Lv.3 | Thunder Attack Lv.2 Earplugs Lv.2 | Evade Extender Lv.2 Latent Power Lv.1 | Critical Element Lv.1 Constitution Lv.1 | Flinch Free Lv.1 |
|
| Build Merits and Notes |
|---|
| This build focuses on optimizing Nightbloom's innate 30% Affinity with Critical Eye and Weakness Exploit while also offering many utility and comfort skills such as Protective Polish, Speed Sharpening, and Evade Extender. In addition, this build only uses materials from MR3 and MR4, making it a great midpoint set to climb with after completing MR2. |
Master Rank Build (Early Game): MR 1-2
Kamura Warrior Sword Raw Slugger
| Weapon | ATK | DEF | Affinity |
|---|---|---|---|
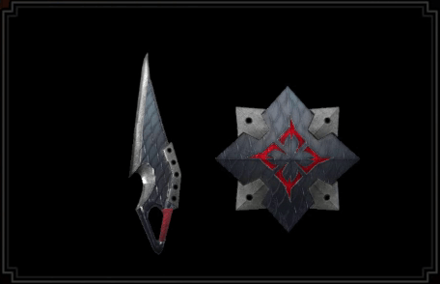 Kamura Warrior Sword Kamura Warrior Sword
 |
250 | 0 | 0% |
| Element / Status |
Slots | Rampage Slots | |
-
|
④①ー | ② |
| Armor | Slots | Skills | |
|---|---|---|---|
|
|
③ーー | ||
|
|
①ーー | ||
|
|
①ーー | ||
|
|
④①① |
Attack Boost Lv. 2
|
|
|
|
①①ー |
Attack Boost Lv. 2
Critical Eye Lv. 2
|
|
| Talisman | Weakness Exploit 2 with ② slot or better | ||
| Rampage Decoration |
|
||
| Decorations |
|
||
| Skills | |
|---|---|
| Rampage Skill | Swap between Wyvern Exploit, Anti-Aerial Species, Anti-Aquatic Species, or Fanged Exploit depending on the monster. |
Attack Boost Lv. 7 | Critical Eye Lv.4
Critical Boost Lv. 3 | Defense Boost Lv.3 Slugger Lv. 3 | Stun Resistance Lv.3 Weakness Exploit Lv.3 | Recovery Speed Lv.2 Agitator Lv.1 | Evade Window Lv.1 Flinch Free Lv.1 | Focus Lv.1 |
| Build Merits and Notes |
|---|
| A well-rounded Sword and Shield build great for starting out in Sunbreak's Master Rank. This build features high raw damage with Attack Boost, stun power with Slugger, and increased weak spot Affinity with Weakness Exploit. The build also offers some added survivability with Stun Resistance and Defense Boost. |
Best Skills for Sword and Shield
Best Damage Skills
These skills make it possible to deal extra damage! Aim for these skills for maximum DPS to defeat those monsters easier and finish those quests faster!
| Best Skills | Explanation |
|---|---|
| Weakness Exploit ★★★ |
A staple skill for any meta build. Increases affinity when hitting enemy weakspots, which the Sword and Shield does very often. Synergizes with Critical Eye and Critical Boost. |
| Critical Boost ★★★ |
Amplifies critical damage by 5% per level, synergizing with Critical Eye and Weakness Exploit for critical-focused Sword and Shield builds. |
| Critical Eye ★★★ |
Critical Eye increases Affinity, working hand-in-hand with Sword and Shield builds being mostly critical-focused. |
| Attack Boost ★★★ |
More damage is always welcome for the Sword and Shield. Max this skill out whenever possible or aim for 4 levels. |
| Element Attack ★★★ |
Sunbreak featured buffs for elemental damage, making elemental builds viable. Max out this skill to increase damage against monsters. Fire | Water | Ice | Thunder | Dragon |
| Offensive Guard ★★★ |
This skill further amps your damage whenever you pull off a successful Metsu Shoryugeki. |
| Burst ★★★ |
The Sword and Shield's fast-paced attacks allow this skill to shine to its full potential. Max it out whenever possible, but a single point is enough for most fights. Available in Sunbreak Base Game |
| Element Exploit ★★ |
Amplify your elemental damage against monsters weak to a specific element with this skill. A single point of it is enough to deal significant damage. Available in Sunbreak Free Title Update 1 |
| Critical Element ★★ |
Improve your overall DPS with more elemental damage during critical hits! |
| Slugger ★★ |
Makes it easier to stun monsters, working hand-in-hand with the weapon's various shield bash moves. |
| Dragon Conversion ★★ |
When activated, this skill from the Risen Crimson Glow Valstrax Armor will benefit elemental builds, increasing DPS even further! Available in Sunbreak Free Title Update 4 |
| Powder Mantle ★★ |
This skill from the Risen Teostra Armor provides the Sword and Shield with additional blast damage every time it activates, contributing greatly to DPS. Available in Sunbreak Free Title Update 3 |
| Dereliction ★ |
Using the Red Scroll increases the Sword and Shield's elemental values while using the Blue Scroll increases both attack and stun potency, improving overall damage. Just be wary of your health! Available in Sunbreak Base Game |
| Bloodlust ★ |
Overcome the Frenzy Virus to power up with this skill; best paired with Coalescence. Available in Sunbreak Base Game |
Best Comfort Skills
These are skills that make managing weapon mechanics a lot easier. Damage is only part of the equation - taking time to slot in comfort skills that increase consistency & comfort will also increase overall DPS!
| Best Skills | Explanation |
|---|---|
| Protective Polish ★★★ |
Due to the Sword and Shield's fast-attacking nature, it will deplete sharpness fast. Always consider maxing this skill out to keep your sharpness high, up to a maximum of 90 seconds! |
| Master's Touch ★★ |
Every time a critical strike hits, this skill prevents your weapon from losing sharpness. This is an ideal skill for most high affinity builds and for weapons with manageable sharpness (e.g., Gates of Heaven) |
| Razor Sharp ★★ |
Another sharpness managing skill to consider with the Sword and Shield. |
| Speed Sharpening ★★ |
Reduces a cycle for sharpening with each level. Synergizes well with the Protective Polish skill. |
| Wirebug Whisperer ★★ |
Using Metsu Shoryugeki during your combos costs 2 Wirebugs and recharges slowly. Focusing on this skill will make the Wirebugs more readily available. Best paired with Wind Mantle. |
| Wind Mantle ★★ |
This skill from the Risen Kushala Armor will recharge your Wirebugs faster, giving you more utility with your Sword and Shield. Available in Sunbreak Free Title Update 3 |
| Defiance ★★ |
Three levels of this skill prevent most roars, tremors, and winds from interrupting your charged attacks. The Cornerstone Jewel is a level 1 decoration, so slot it in whenever possible! Available in Sunbreak Free Title Update 1 |
| Flinch Free ★★ |
Useful especially in multiplayer where minor attacks can interrupt your attacks, especially when trying to charge your weapon! |
| Guard ★ |
When paired with Embolden, this skill is useful in guarding strong attacks, which can make transitioning into the Perfect Rush combo easier. |
| Handicraft ★ |
Some endgame Sword and Shields tend to have a lot of room for improvement regarding their sharpness. Slot this skill in only when necessary! |
| Intrepid Heart ★ |
Whenever the gauge above your health bar is full, this skill can be useful in preventing monster attacks from interrupting your combos, making it possible to pull off an extra charged attack before you can regroup. Available in Sunbreak Free Title Update 2 |
Monster Hunter Rise Related Guides

|
• Weapons marked withNEW have been updated. • Weapons withUP have been reviewed and does not warrant an updated build from the Bonus Update. |
| All Weapon Build Guides | |
|---|---|
NEW Low Rank | High Rank Master Rank |
NEW Low Rank | High Rank Master Rank |
NEW Low Rank | High Rank Master Rank |
NEW Low Rank | High Rank Master Rank |
NEW Low Rank | High Rank Master Rank |
NEW Low Rank | High Rank Master Rank |
NEW Low Rank | High Rank Master Rank |
NEW Low Rank | High Rank Master Rank |
NEW Low Rank | High Rank Master Rank |
NEW Low Rank | High Rank Master Rank |
NEW Low Rank | High Rank Master Rank |
NEW Low Rank | High Rank Master Rank |
NEW Low Rank | High Rank Master Rank |
UP Low Rank | High Rank Master Rank |
Other Builds
| Other Build Guides | |
|---|---|
| General High Rank Builds and Best Equipment | Buddy Equipment Builds Palico | Palamute |
Author
Sunbreak Sword and Shield Builds (Master Rank SNS)
improvement survey
03/2026
improving Game8's site?

Your answers will help us to improve our website.
Note: Please be sure not to enter any kind of personal information into your response.

We hope you continue to make use of Game8.
Rankings
- We could not find the message board you were looking for.
Gaming News
Popular Games

Genshin Impact Walkthrough & Guides Wiki

Honkai: Star Rail Walkthrough & Guides Wiki

Umamusume: Pretty Derby Walkthrough & Guides Wiki

Pokemon Pokopia Walkthrough & Guides Wiki

Resident Evil Requiem (RE9) Walkthrough & Guides Wiki

Monster Hunter Wilds Walkthrough & Guides Wiki

Wuthering Waves Walkthrough & Guides Wiki

Arknights: Endfield Walkthrough & Guides Wiki

Pokemon FireRed and LeafGreen (FRLG) Walkthrough & Guides Wiki

Pokemon TCG Pocket (PTCGP) Strategies & Guides Wiki
Recommended Games

Diablo 4: Vessel of Hatred Walkthrough & Guides Wiki

Cyberpunk 2077: Ultimate Edition Walkthrough & Guides Wiki

Fire Emblem Heroes (FEH) Walkthrough & Guides Wiki

Yu-Gi-Oh! Master Duel Walkthrough & Guides Wiki

Super Smash Bros. Ultimate Walkthrough & Guides Wiki

Pokemon Brilliant Diamond and Shining Pearl (BDSP) Walkthrough & Guides Wiki

Elden Ring Shadow of the Erdtree Walkthrough & Guides Wiki

Monster Hunter World Walkthrough & Guides Wiki

The Legend of Zelda: Tears of the Kingdom Walkthrough & Guides Wiki

Persona 3 Reload Walkthrough & Guides Wiki
All rights reserved
©CAPCOM CO., LTD. ALL RIGHTS RESERVED.
The copyrights of videos of games used in our content and other intellectual property rights belong to the provider of the game.
The contents we provide on this site were created personally by members of the Game8 editorial department.
We refuse the right to reuse or repost content taken without our permission such as data or images to other sites.


![Monster Hunter Stories 3 Review [First Impressions] | Simply Rejuvenating](https://img.game8.co/4438641/2a31b7702bd70e78ec8efd24661dacda.jpeg/thumb)


VeryMuch appreciate if, you could make build for SNS support!!!