Sunbreak Lance Guide: Combos, Controls and Moveset
★ All Title Updates now available for ALL PLATFORMS!
┗ Title Update 4 | Title Update 5 | Bonus Update
┗ Check out all our Best Builds For Every Weapon!
┗ TU4 Monsters: Velkhana | Risen C.G. Valstrax
┗ TU5 Monsters: Amatsu | Risen Shagaru Magala
┗ Bonus Update Monster: Primordial Malzeno
This is a guide to the Lance, a weapon in Monster Hunter Rise: Sunbreak (MH Rise). Read on to learn about new Lance controls and combos, how to use the Lance charge and the Lance Dash Attack as well as details on Lance Switch Skills.
| All Lance Guides | ||
|---|---|---|
 Trees & Full List Trees & Full List |
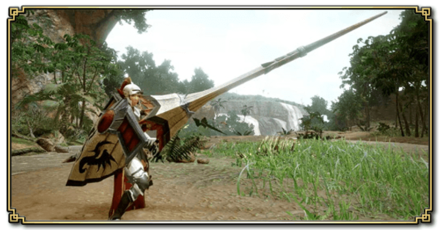 How to Use How to Use |
 Best Builds Best Builds |
List of Contents
Lance Balance Changes
Update 15.0
| Lance Balance Changes and Fixes (Update 15.0) |
|---|
| ・Changed the effect duration of the lance's Anchor Rage from 20 seconds to 30. |
Update 10.0
| Lance Balance Changes and Fixes (Update 10.0) |
|---|
| ・ Adjusted all of the following weapon actions: ・ Mid Thrust I & II: Attack power increased ・ Mid Thrust III: Attack power increased; Elemental scaling increased ・ High Thrust I & II: Attack power increased ・ High Thrust III: Attack power increased; Elemental scaling increased ・ Wide Sweep: Attack power increased ・ Charged Wide Sweep: Attack power increased ・ Leaping Thrust (1st Hit): Attack power increased; Elemental scaling increased; Status effect scaling increased ・ Leaping Thrust (2nd & 3rd Hits): Attack power increased; Elemental scaling increased; Status effect scaling slightly increased ・ Dash Attack & Midair Dash Attack Loop: Elemental scaling slightly increased; Status effect scaling slightly increased ・ Cross Sweep (1st Hit): Attack power increased; Elemental scaling increased ・ Cross Sweep (2nd Hit): Attack power increased; Elemental scaling increased ・ Counter-thrust (Strong): Attack power increased; Elemental scaling increased ・ Insta-Block: The window of time for a successful Insta-Block has been increased. ・ Insta-Block: You can know combo into Silkbind attacks after a successful Insta-Block. ・ Twin Vine: Now only costs one Wirebug Gauge. Also, blocking power is increased and stamina consumption is reduced while the kunai is connected to the monster. ・ Twin Vine: Closed Jump (which is usable when the kunai connects you to a monster during Twin Vine) now aims for the point where the kunai is connected to the monster. ・ Anchor Rage: The attack power increase effect now lasts longer. ・ Anchor Rage: The amount of attack power increase is now determined by the power value of the attack you receive instead of the size of the guard reaction it causes. ・ Guard Dash: Fixed a bug where you couldn't perform a Guard Dash when your frame rate dropped due to the delay between Insta-Block and Guard Dash being too short. ・ Guard Thrust: Fixed a bug where sometimes you could not perform a Guard Thrust directly after moving while guarding. |
Lance received a lot of buffs in this patch - from increased damage, elemental scaling, easier Insta-Block execution, and Twin Vine costing 1 Wirebug - Lance is awesome to use now!
It's now a very comfortable weapon to use damage-wise, albeit still can't keep up gameplay-wise with other weapons as all weapons have counterattacks now like the Lance.
Lance New Sunbreak Attacks and Moves
Official Lance Preview Video
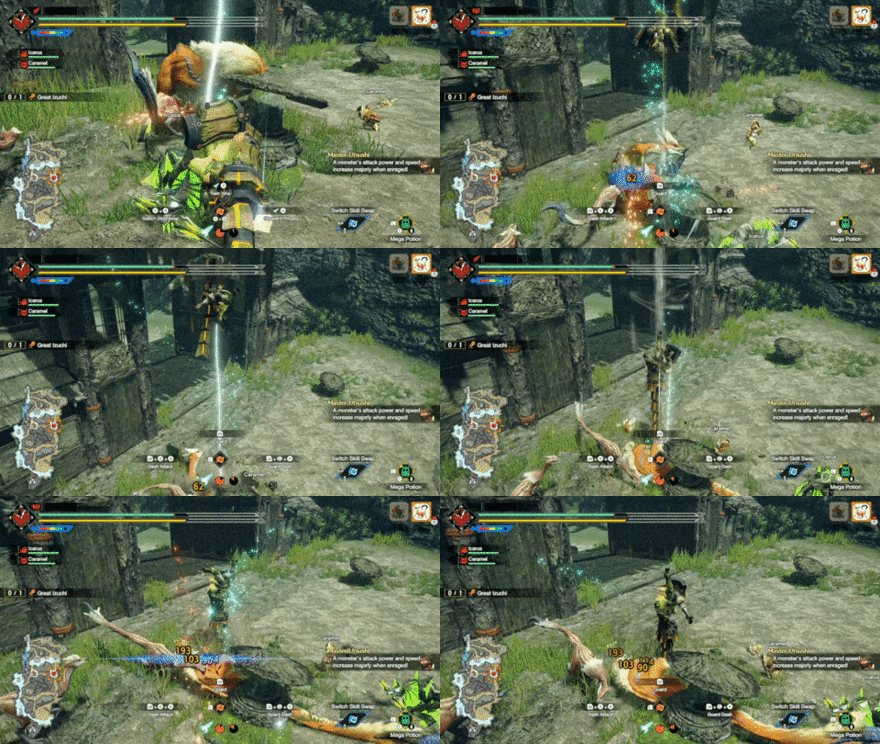
Silkbind Attack: Skyward Thrust
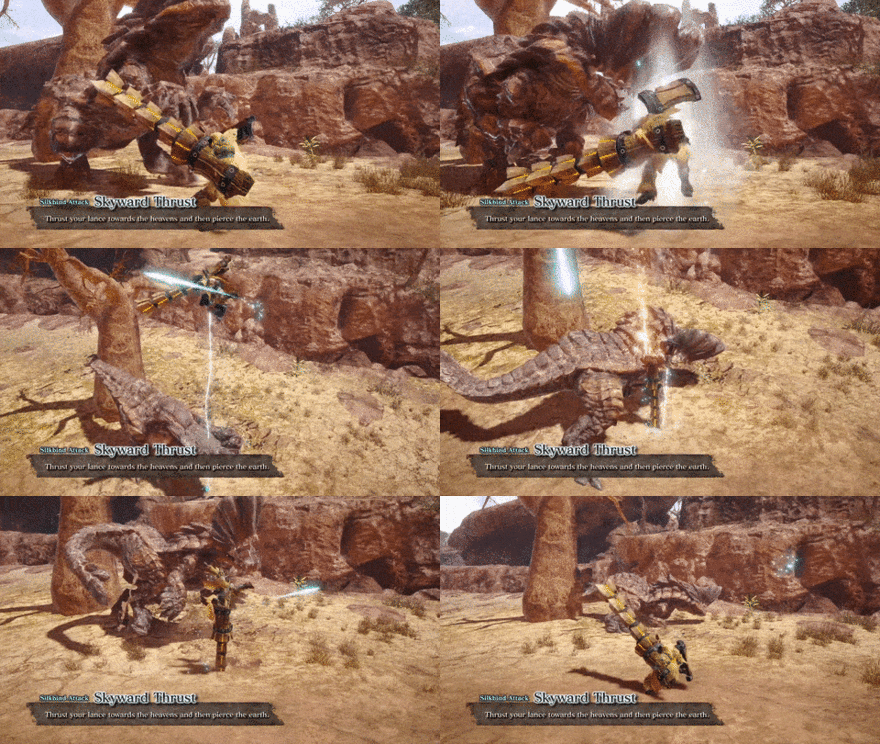
The hunter launches to the air with a Wirebug then thursts the Lance downward. The upward strike can also stun the monster. The downward thrust hits multiple times.
Switch Skill: Shield Tackle
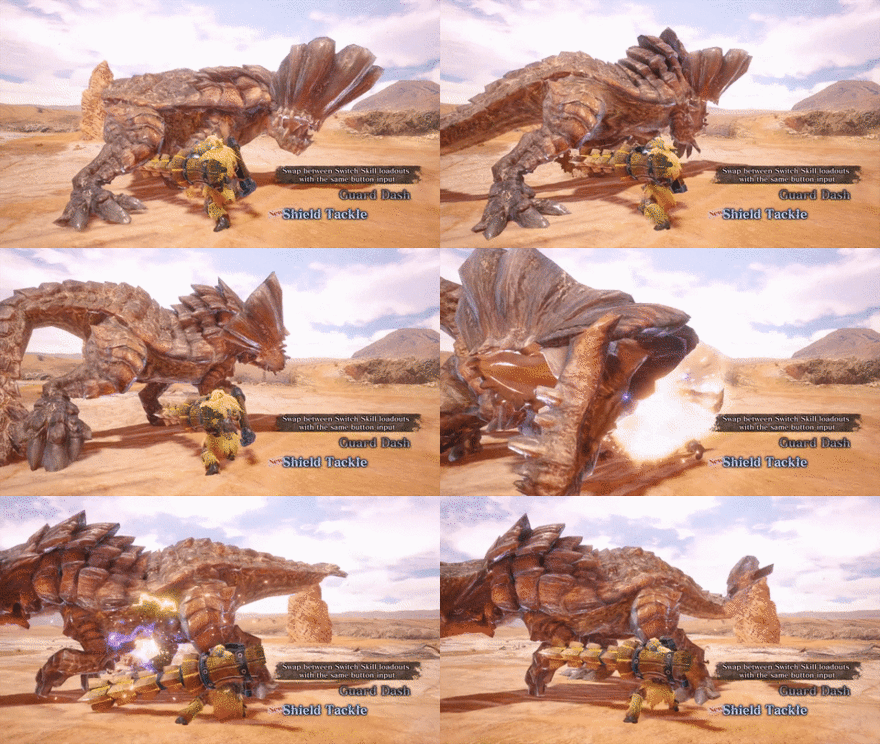
This Switch Skill allows the hunter to charge forward with the shield. This can immediately be followed up with thrusting attacks.
Silkbind Attack: Sheathing Retreat
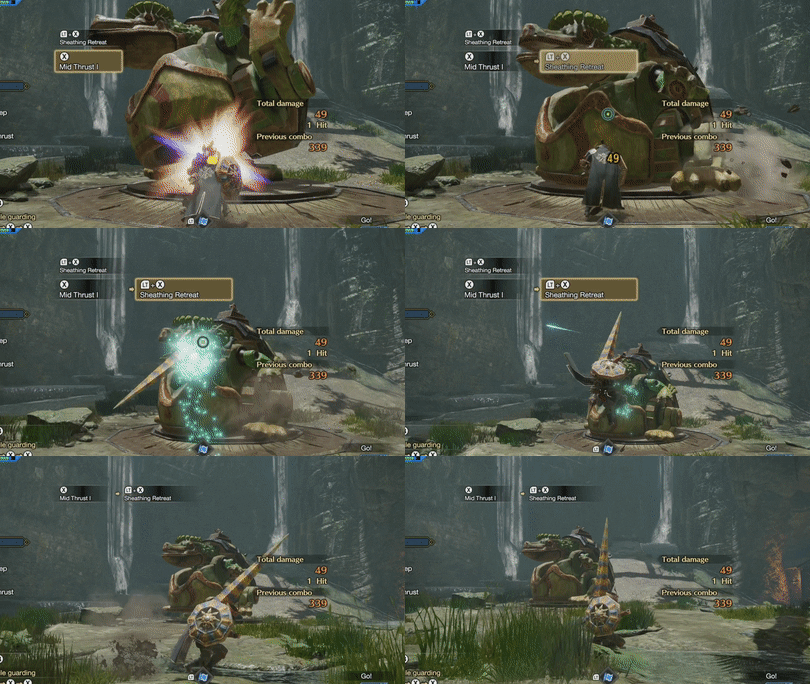
Not introduced in any trailer, Sheathing Retreat is an additional Silkbind Attack added to the Sunbreak Expansion.
This silkbind attack is a quick and easy way for Lance users to create a gap between the monster and themselves, especially when they're in a huge disadvantage.
Monster Hunter Rise: Sunbreak
Release Date and New Monsters
How Good is the Lance?
Tier List Ranking
| MHRise Ranking | → | Sunbreak Ranking |
|---|---|---|
(S - A - B) 3 Level Tier |
(SS - S - A) 3 Level Tier |
The Lance received a significant damage buff across all its moves and that's a welcome addition but its new moves and Switch Skills however, have been lackluster at most.
The improvements on Insta-Block though gives Lance an easier wirebug-free option of countering moves. Shield Tackle gives the Lance a quick combo-reset tool that improves the weapon's overall DPS.
Lance Strengths
One of the Best Weapons for Guarding
The Lance is top tier when it comes to guarding. It can tank almost all monster attacks with minimal damage to the hunter!
Can Counterattack After Guarding
The Lance can also counterattack after absorbing damage from a guard. Use this wisely for maximum damage!
Long Reach and High Aim
Being physically long gives Lance the advantage with reach. It can easily reach heads position high up like Anjanath or Jyuratodus!
This is further improved by the new Silkbind Attack for the weapon which was added in Sunbreak. Using Skyward Thrust sends the hunter high in the sky for more verticality and strikes down vertically, which can be used both as an evasion option and and as an attack!
Lance Weaknesses
A Poor Mobility Weapon
The Lance provides poor mobility while hunting. When unsheathed, the Lance will slow down the hunter to a crawl leaving him unable to properly reposition.
No High DPS Attacks
The Lance also does not have any attack that dishes high damage. It relies on consistent poke damage while guarding monster attacks.
Easily Interrupted by Allies
When playing with allies, Lance users can be tripped by certain attacks (from Long Swords and Gunlances, for example). Because of this, Lance users have to incorporate the Flinch Free skill into Lance builds.
Lance Controls
| Controls | Action | |
|---|---|---|
| PC |
PS |
Mid Thrust |
| Switch |
Xbox |
|
| PC |
PS |
High Thrust |
| Switch |
Xbox |
|
| PC Left Click + Right Click |
PS Triangle + Circle |
Wide Sweep |
| Switch X + A |
Xbox Y + B |
|
| PC MB4 + Directional Button + Left Click |
PS R2 + Left Stick + Triangle |
Guard Dash |
| Switch zR + Left Stick + X |
Xbox RT + Left Stick + Y |
|
| PC MB4 + Left Click + Right Click |
PS Triangle + Circle |
Dash Attack |
| Switch zR + X + A |
Xbox RT + Y + B |
|
| PC MB4 + Right Click |
PS R2 + Circle |
Counter-thrust |
| Switch zR + A |
Xbox RT + B |
|
| PC |
PS |
Guard |
| Switch |
Xbox |
|
| PC Middle Click + Left Click |
PS L2 + Triangle |
Twin Vine (Kunai Jab) |
| Switch zL + X |
Xbox LT + Y |
|
| PC Middle Click + Space |
PS L2 + X |
Twin Vine (Launch while guarding) |
| Switch zL + B |
Xbox LT + A |
|
| PC Middle Click + Right Click |
PS L2 + Circle |
Anchor Rage |
| Switch zL + A |
Xbox LT + B |
|
Useful Combos
| Basic Combo | |||
|---|---|---|---|
| Mid Thrust I | Mid Thrust II | Mid Thrust III | Backstep |
| Closing Attacks While Guarding | |||
|---|---|---|---|
| Guard Dash | Leaping Thrust | Mid Thrust II | Mid Thrust III |
| |
|||
| Endless Thrusting Combo | |||
|---|---|---|---|
| Cancel Thrust | High Thrust I | High Thrust II | Cancel Thrust |
Lance Silkbind Attacks
Skyward Thrust
| Switch Controls | zL + A |
|---|---|
| PC Controls | Middle Click + Right Click |
| PS Controls | L2 + Circle |
| Xbox Controls | LT + B |
The user launches themselves with a Wirebug up in the air and falls straight down, dealing multiple hits to any monster that is unfortunate enough to catch the fall. This launch can be used to dodge vertically, which can save the user from hard-hitting swipe attacks.
This move costs one Wirebug charge and has a medium recovery speed.
Twin Vine
Twin Vine Attach

| Switch Controls | zL + X |
|---|---|
| PC Controls | Middle Click + Left Click |
| PS Controls | L2 + Triangle |
| Xbox Controls | LT + Y |
The first action of the Twin Vine Silkbind Attack tethers you and a target where you will be able to walk a few feet away from the monster. The wire will turn red upon reaching the max distance before it breaks.
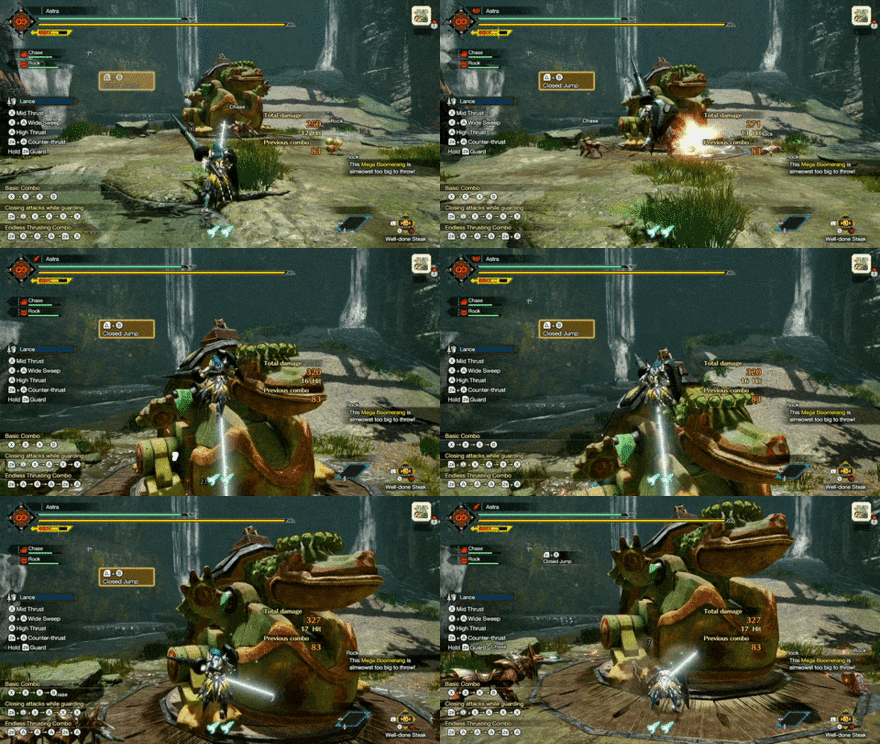
Twin Vine Closed Jump
| Switch Controls | zL + B |
|---|---|
| PC Controls | Middle Click + Space |
| PS Controls | L2 + X |
| Xbox Controls | LT + A |
While connected, you can freely jump back towards the tethered monster to close the gap faster.
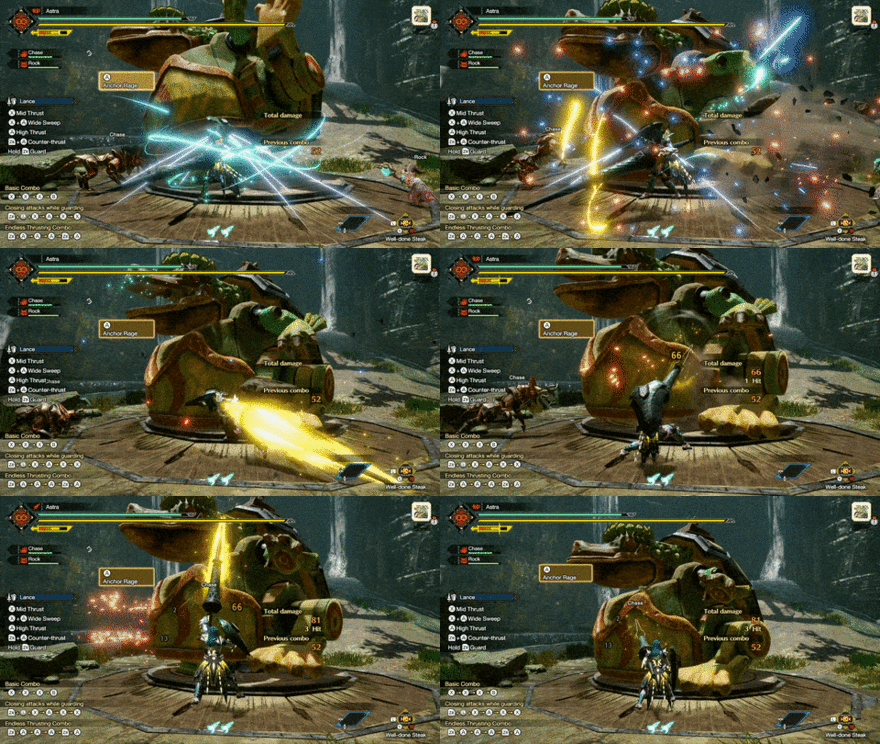
Anchor Rage
| Switch Controls | zL + A |
|---|---|
| PC Controls | Middle Click + Right Click |
| PS Controls | L2 + Circle |
| Xbox Controls | LT + B |
Anchor Rage is a Silkbind Attack that increases your attack damage when hit by a monster's attack. The attack increase also depends on the power of the attack received!
Spiral Thrust

| Switch Controls | zL + A |
|---|---|
| PC Controls | Middle Click + Right Click |
| PS Controls | L2 + Circle |
| Xbox Controls | LT + B |
A quick two-step move, Spiral Thrust allows the user to change their position and aim for a counterattack.
The attack starts with a counter, using the shield to parry an attack, then sends the user flying forward with the Wirebug. This can catch targets off guard and leave them vulnerable.
If an attack is successfully countered using Spiral Thrust then a temporary attack buff will be granted and the Lance will glow for the duration.
Sheathing Retreat

| Switch Controls | zL + A |
|---|---|
| PC Controls | Middle Click + Right Click |
| PS Controls | L2 + Circle |
| Xbox Controls | LT + B |
Lance users are not supposed to sheath their weapons because they need to guard everything. However, there are certain instances that you need to reposition and so that's when you'll use Sheathing Retreat. It's a very safe and quick retreat option for when your Guard is not gonna cut it anymore!
Lance Switch Skills
Switch Skills are unlocked with different conditions as you progress in the game. Base game MHRise provides Hunters with three (3) slots of Switch Skills, with the Sunbreak expansion adding two (2) more.
Note: Skills in red are exclusive to the Sunbreak expansion.
| Skill Slot | Switch Skill Choices |
|---|---|
| 1 | ・ Guard ・ Insta-Block |
| 2 | ・ Dash Attack ・ Shield Charge |
| 3 | ・ Guard Dash ・ Shield Tackle |
| 4 | ・ Anchor Rage ・ Spiral Thrust ・ Skyward Thrust |
| 5 | ・ Twin Vine ・ Sheathing Retreat |
Switch Skills Guide: How to Unlock Switch Skills
Spiral Thrust

| Switched With | |
|---|---|
| Anchor Rage | |
| Description | |
| Two-step maneuver to counterattack. Uses the shield to parry then uses Wirebugs to pull you forward. Sucessful counters will grant an attack buff and increase the damage of the follow up thrusts. Reposition using the Left Analog after the first dash or halt altogether. Wirebug Gauge Recovery Speed: Medium Wirebug Cost: 1 |
|
| Controls | |
A two-step Lance dash maneuver that blocks an incoming attack from the start and allows you to dash attack twice with your Lance. We recommend getting this because it helps with Lance's lack of mobility.
Shield Charge

| Switched With | |
|---|---|
| Dash Attack | |
| Description | |
| A charging attack with the shield up. Can only dash for a limited amount of time while fending off attacks with the shield. Crashing into a monster deals shield-based blunt damage. | |
| Controls | |
Hold zR → X + A → X → A
Hold MB4 → Left Click + Right Click → Left Click → Right Click
Hold R2 → Triangle + Circle → Triangle → Circle
Hold RT → Y + B → Y → B |
|
This skill replaces your usual Lance dash attack with a dash while holding your shield. Attacks met while dashing will be blocked and you will continue dashing. You can end the dash with a Shield Bash for big blunt damage. You can't use it for a long time like the Lance Dash though, and you can only dash for a short while with the shield.
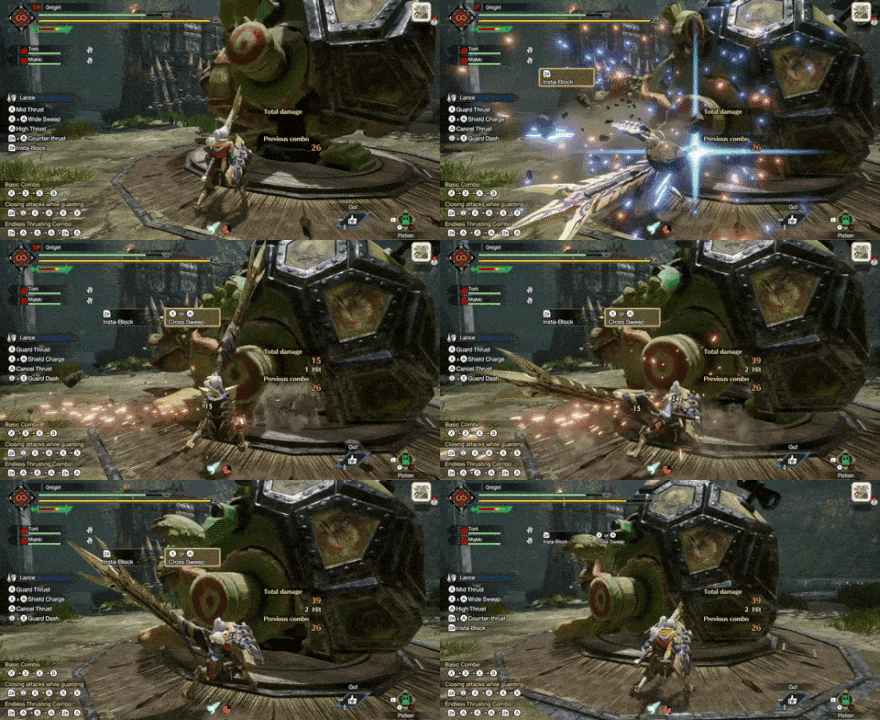
Insta-Block
| Switched With | |
|---|---|
| Guard | |
| Description | |
| Swings your shield in an arch to parry attacks. Time your guard just before a monster hits you to follow-up with a Cross Slash. Great for countering right after blocking. | |
| Controls | |
| Press After a successful Insta-Block, pressing X, Left Click, Triangle, or Y will lead into a Cross Sweep. |
|
The greatest counterattack move by the Lance. Your hunter will swing the shield in an arch anticipating an attack. Time it properly before it hits and you can have the opportunity to follow it up with a Cross Slash (A or Right Click).
Shield Tackle

| Switched With | |
|---|---|
| Guard Dash | |
| Description | |
| A technique where you charge forward with your shield raised. You will be able to follow up with a variety of thrusting attacks afterwards. | |
| Controls | |
Press X afterwards for a Mid Thrust I Press A afterwards for a Mid Thrust II Press Left Click afterwards for a Mid Thrust I Press Right Click afterwards for a Mid Thrust II Press Triangle afterwards for a Mid Thrust I Press Circle afterwards for a Mid Thrust II Press Y afterwards for a Mid Thrust I Press B afterwards for a Mid Thrust II |
|
A shorter, guard dash with the shield up. This does not allow you to reposition as well as Guard Dash but the move can block attack and deal stun damage when it hits monsters. Use this skill when you're fighting slow monsters that does not move too much.
However, you can combo this move with Twin Vine to keep yourself near the monster without relying on Guard Dash.
Skyward Thrust

| Switched With | |
|---|---|
| Anchor Rage | |
| Description | |
| A technique where a Wirebug launches you high into the air. Thrust your Lance towards the heavens and then pierce downwards. The falling portion of the attack inflicts multiple hits. Wirebug Gauge Recovery Speed: Medium Wirebug Cost: 1 |
|
| Controls | |
A great damage tool from the Lance, this attack pulls you upward then pulls you back down the earth to deal multiple instances of damage. Use this to deal a great deal of damage to enemies!
Sheathing Retreat

| Switched With | |
|---|---|
| Twin Vine | |
| Description | |
| Automatically sheathes your weapon while using a Wirebug to pull you backwards out of harms way. Effective for strategic retreats. Wirebug Gauge Recovery Speed: Slow Wirebug Cost: 1 |
|
| Controls | |
Lance users are not supposed to sheath their weapons because they need to guard everything. However, there are certain instances that you need to reposition and so that's when you'll use Sheathing Retreat. It's a very safe and quick retreat option for when your Guard is not gonna cut it anymore!
Lance Attacks and Moves
High / Mid Thrust
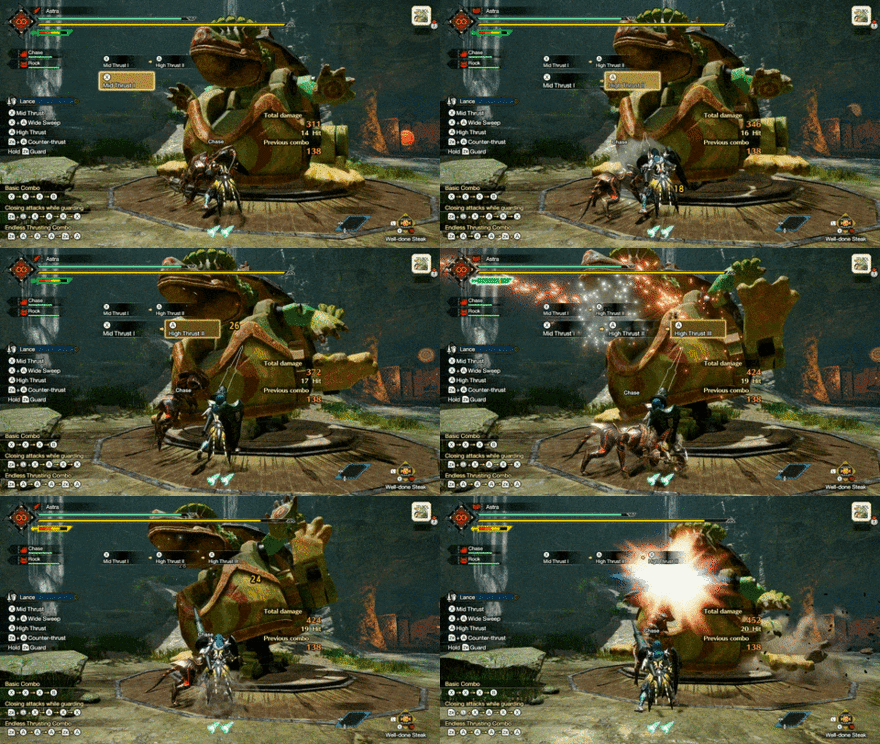
| Switch Controls | For mid thrust, press For high thrust, press |
|---|---|
| PC Controls | For mid thrust, press For high thrust, press |
| PS Controls | For mid thrust, press For high thrust, press |
| Xbox Controls | For mid thrust, press For high thrust, press |
This is the bread-and-butter move of the Lance. As a Lance user, you can mix any of the two types of thrusts consecutively up to three times. After three thrusts, the motion will reset unless you cancel it using a cancel thrust (zR + A, MB4 + Right Click, R2 + Circle, or RT + B) or by dodging (B, Space, X, or A).
This is important to know this because when you don't cancel after three thrusts, the downtime before you can attack again is very long.
Improved Backstep Distance

The Lance's Backstep distance has been improves in Rise and the distance covered by the move is increased. This helps in mobility and avoiding attacks.
| Switch Controls | While weapons are unsheathed, |
|---|---|
| PC Controls | While weapons are unsheathed, |
| PS Controls | While weapons are unsheathed, |
| Xbox Controls | While weapons are unsheathed, |
Wide Sweep Charge Attack

| Switch Controls | Hold Hold X + A then release |
|---|---|
| PC Controls | Hold Hold Left Click + Right Click then release |
| PS Controls | Hold Hold Triangle + Circle then release |
| Xbox Controls | Hold Hold Y + B then release |
Doing a Wide Sweep with the Lance allows you to charge the attack before it releases automatically. This is Lance's most powerful attack so you should use it at all times when there is an opening.
Guard
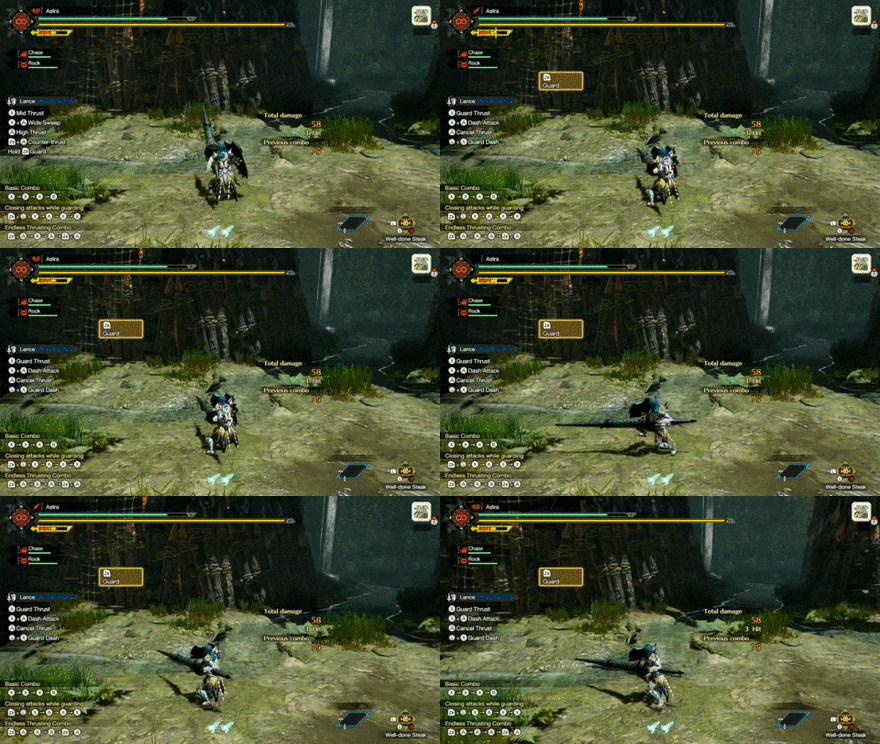
| Switch Controls | Hold |
|---|---|
| PC Controls | Hold |
| PS Controls | Hold |
| Xbox Controls | Hold |
Hold zR, Mouse Button 4, R2 or RT to guard. You can slowly move around while holding your shield up high.
Counter-thrust
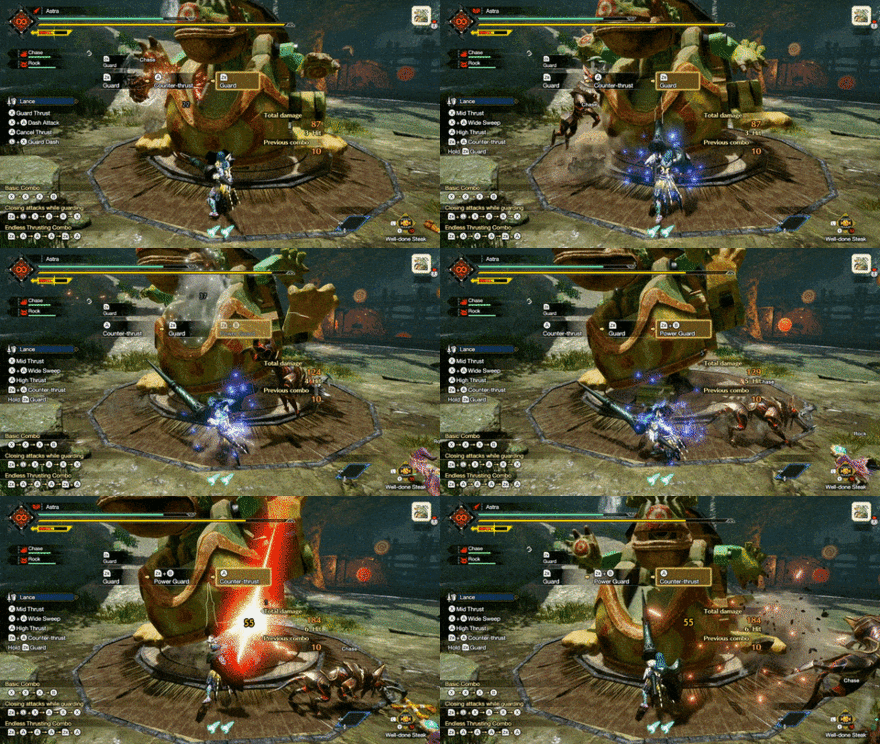
| Switch Controls | While holding Guard or Power Guard, |
|---|---|
| PC Controls | While holding Guard or Power Guard, |
| PS Controls | While holding Guard or Power Guard, |
| Xbox Controls | While holding Guard or Power Guard, |
This is a charged counterattack against enemy attacks. Press A, Right Click, Circle, or B while guarding or Power Guarding to dish out a powerful counterattack after receiving an enemy attack.
If used while guarding, the attack will be executed after a short duration, unless you are hit with an attack wherein you will perform a High Thrust instead.
If used while Power Guarding, the attack will be immediately used.
Power Guard
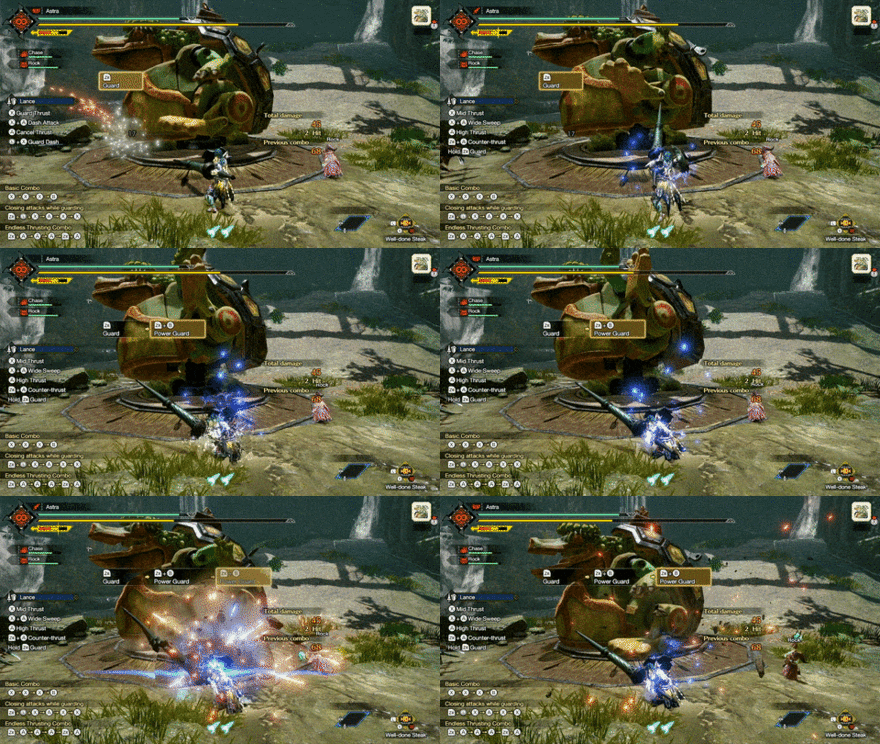
| Switch Controls | While charging Counter-thrust, |
|---|---|
| PC Controls | While charging Counter-thrust, |
| PS Controls | While charging Counter-thrust, |
| Xbox Controls | While charging Counter-thrust, |
The Power Guard is a returning move that allows you to greatly withstand and reduce the stun time of attacks. It is one of the best counter tools of the Lance against enemy monsters if timed correctly, although it uses up your stamina while it is active.
To Power Guard, charge up a Counter-thrust while guarding and press zR + B or Mouse Button 4 + Space.
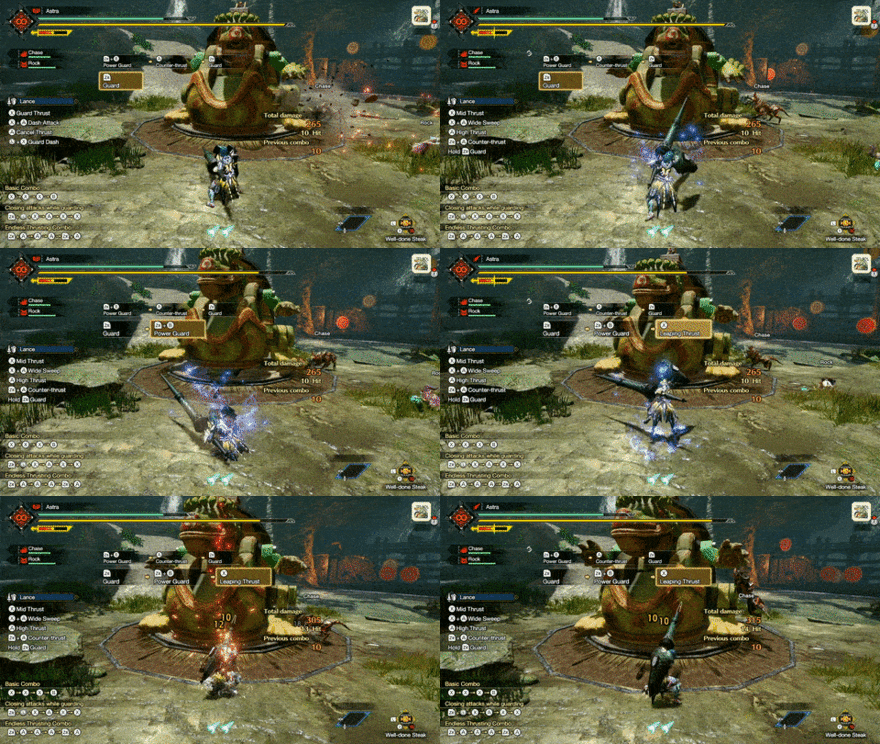
Leaping Thrust
| Switch Controls | While holding Power Guard, |
After Guard Dash, |
|---|---|---|
| PC Controls | While holding Power Guard, |
After Guard Dash, |
| PS Controls | While holding Power Guard, |
After Guard Dash, |
| Xbox Controls | While holding Power Guard, |
After Guard Dash, |
While Power Guarding, press X, Left Click, Triangle, Y to execute a Leaping Thrust, which is good for closing gaps between you and the enemy.
Leaping Thrust can also be used after using Guard Dash by pressing A, Right Click, Circle, B. This can be used to execute combos.
Guard Dash

| Switch Controls | zR + Left Stick + X
Follow up with X for a Shield Attack or A for a Leaping Thrust. |
|---|---|
| PC Controls | MB4 + Directional Button + Left Click Follow up with Left Click for a Shield Attack or Right Click for a Leaping Thrust |
| PS Controls | R2 + Left Stick + Triangle
Follow up with Triangle for a Shield Attack or Circle for a Leaping Thrust. |
| Xbox Controls | RT + Left Stick + Y
Follow up with Y for a Shield Attack or B for a Leaping Thrust. |
One of the main mobility moves in the Lance's arsenal, Guard Dashing is an important move to know if you want to learn Lance. This not only closes the gap between you and the monster, but the initial Guard Dash motion (where the shield is in front of you) can also block enemy attacks!
Lance Dash Attack (Lance Charge)

While in the air or unsheathed, you can execute a Lance Dash Attack (or Lance Charge as called by some) that enables you to dash forward. You can change direction ever so slightly using the Left Analog Stick and hop sideways using B.
You will consume stamina as you dash and will stop when you run out, hit a wall, or execute an attack by pressing X or Left Click.
| Switch Controls | While in the air, While unsheathed, You may turn slightly using the Left Analog Stick and to hop sideways press B. |
|---|---|
| PC Controls | While in the air, While unsheathed, You may turn slightly using the WASD buttons and to hop sideways press Space. |
| PS Controls | While in the air, While unsheathed, You may turn slightly using the Left Analog Stick and to hop sideways press A. |
| Xbox Controls | While in the air, While unsheathed, You may turn slightly using the Left Analog Stick and to hop sideways press A. |
Recommended Combos for the Lance
Basic Thrust Triple Combo

| Switch Controls | X ➡ X ➡ X ➡ B |
|---|---|
| PC Controls | Left Click ➡ Left Click ➡ Left Click ➡ Space |
| PS Controls | Triangle ➡ Triangle ➡ Triangle ➡ X |
| Xbox Controls | Y ➡ Y ➡ Y ➡ A |
This is Lance's bread-and-butter move. As a Lance user, you will use this combo more often than not. The consistency and frequency of using this combo will maximize your damage as a Lance main!
Attack While Guarding

| Switch Controls | zR + A ➡ B ➡ X ➡ zR + Left Stick + X |
|---|---|
| PC Controls | MB4 + Right Click ➡ Space ➡ Left Click ➡ MB4 + Directional Button + Left Click |
| PS Controls | R2 + Circle ➡ Triangle ➡ Triangle ➡ R2 + Left Stick + Triangle |
| Xbox Controls | RT + B ➡ A ➡ Y ➡ RT + Left Stick + Y |
This is a combo that allows you to connect Guard Dash by striking after Power Guard. This can be used even when an enemy is attacking you!
Tips on How to Use the Lance
Stay Beside the Monster
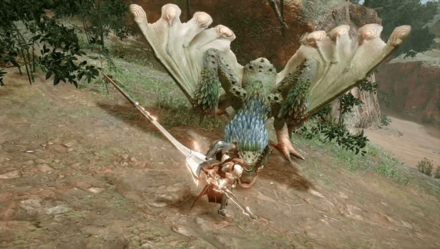
The power of the Lance relies on consistent poke damage so you must be beside the monster at all times. Learning to play very aggressively while knowing when to guard is the sign of a good Lance player.
Use Anchor Rage When Possible

The Anchor Rage gives the Lance a much-needed attack boost. Use it whenever possible to mitigate the low DPS disadvantage!
Always Guard Against Attacks
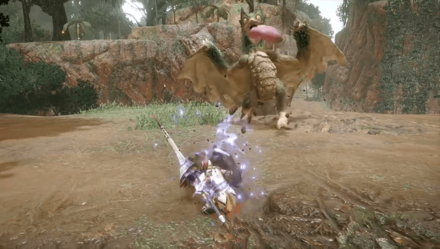
It is not advisable to sheathe your weapon every time you reposition yourself. Use Lance's guard to tank enemy attacks to maximize your DPS!
Make Sure to Always Use Charged Sweep When Possible

This is one of the highest damage moves from Lance. When there is an opening, charge up your Lance and sweep away! The DPS boost from this move is too good to pass up.
Make Full Use of the Counter-thrust
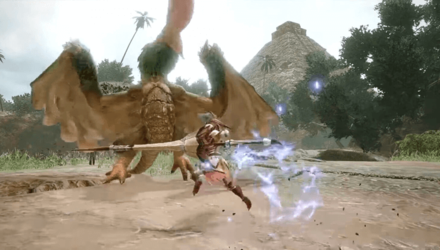
The Lance has the capability to counter-thrust after successfully guarding against an attack. As mentioned earlier, consistent damage is the key to using the Lance so counter-thrusting is one way to convert defense into offense!
Sheathe Your Weapon Only When Needed!
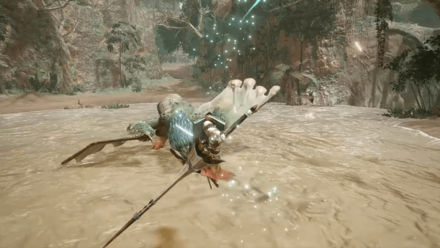
If you need to reposition, always do it while the Lance is sheathed. When unsheathed, the Lance reduces you to a crawl making moving painfully slow. To reposition while unsheathed, use Twin Vine to dash towards the monster!
Changes from MHW: Iceborne
Backstep Distance After Attack

The backstep distance after an attack is increased therefore you can reposition more easily.
You Can Execute a Charged Sweep

| Switch Controls | Hold |
|---|---|
| PC Controls | Hold |
| PS Controls | Hold |
| Xbox Controls | Hold |
A new move that opens up new high damage opportunities for the Lance. Use this whenever possible like when the monster is downed, trapped, stunned, or asleep.
Monster Hunter Rise (MH Rise) Related Guides

| Weapon Type Guides | ||
|---|---|---|
 Weapons and Weapon Types Weapons and Weapon Types |
 Weapon Type Tier List Weapon Type Tier List |
 Builds for Each Weapon Type Builds for Each Weapon Type |
Melee Weapon Guides
| Melee Weapons | ||
|---|---|---|
Guide | Weapon Tree |
Guide | Weapon Tree |
Guide | Weapon Tree |
Guide | Weapon Tree |
Guide | Weapon Tree |
Guide | Weapon Tree |
Guide | Weapon Tree |
Guide | Weapon Tree | Melodies |
Guide | Weapon Tree |
Guide | Weapon Tree |
Guide | Weapon Tree | Kinsects |
|
Ranged Weapon Guides
| Ranged Weapons | ||
|---|---|---|
Guide | Weapon Tree |
Guide | Weapon Tree |
Guide | Weapon Tree |
Author
Sunbreak Lance Guide: Combos, Controls and Moveset
improvement survey
03/2026
improving Game8's site?

Your answers will help us to improve our website.
Note: Please be sure not to enter any kind of personal information into your response.

We hope you continue to make use of Game8.
Rankings
- We could not find the message board you were looking for.
Gaming News
Popular Games

Genshin Impact Walkthrough & Guides Wiki

Honkai: Star Rail Walkthrough & Guides Wiki

Umamusume: Pretty Derby Walkthrough & Guides Wiki

Pokemon Pokopia Walkthrough & Guides Wiki

Resident Evil Requiem (RE9) Walkthrough & Guides Wiki

Monster Hunter Wilds Walkthrough & Guides Wiki

Wuthering Waves Walkthrough & Guides Wiki

Arknights: Endfield Walkthrough & Guides Wiki

Pokemon FireRed and LeafGreen (FRLG) Walkthrough & Guides Wiki

Pokemon TCG Pocket (PTCGP) Strategies & Guides Wiki
Recommended Games

Diablo 4: Vessel of Hatred Walkthrough & Guides Wiki

Cyberpunk 2077: Ultimate Edition Walkthrough & Guides Wiki

Fire Emblem Heroes (FEH) Walkthrough & Guides Wiki

Yu-Gi-Oh! Master Duel Walkthrough & Guides Wiki

Super Smash Bros. Ultimate Walkthrough & Guides Wiki

Pokemon Brilliant Diamond and Shining Pearl (BDSP) Walkthrough & Guides Wiki

Elden Ring Shadow of the Erdtree Walkthrough & Guides Wiki

Monster Hunter World Walkthrough & Guides Wiki

The Legend of Zelda: Tears of the Kingdom Walkthrough & Guides Wiki

Persona 3 Reload Walkthrough & Guides Wiki
All rights reserved
©CAPCOM CO., LTD. ALL RIGHTS RESERVED.
The copyrights of videos of games used in our content and other intellectual property rights belong to the provider of the game.
The contents we provide on this site were created personally by members of the Game8 editorial department.
We refuse the right to reuse or repost content taken without our permission such as data or images to other sites.


![Monster Hunter Stories 3 Review [First Impressions] | Simply Rejuvenating](https://img.game8.co/4438641/2a31b7702bd70e78ec8efd24661dacda.jpeg/thumb)


