Training Area: Features and How to Unlock
★ All Title Updates now available for ALL PLATFORMS!
┗ Title Update 4 | Title Update 5 | Bonus Update
┗ Check out all our Best Builds For Every Weapon!
┗ TU4 Monsters: Velkhana | Risen C.G. Valstrax
┗ TU5 Monsters: Amatsu | Risen Shagaru Magala
┗ Bonus Update Monster: Primordial Malzeno
This is an article about the Training Area in Monster Hunter Rise (MH Rise). Read on to learn how to unlock the training area, and its features, including how to make the dummy attack, where to find the secret mural, and more!
How to Unlock the Training Area
Go to the Buddy Plaza then Move to the Training Area
The Training Area can be unlocked for the first time by first going to the Buddy Plaza. Buddy Expert Shirubei will introduce you to all Buddy Plaza facilities including the ferry to get to the Training Area.
Approach the boat then move to the Training Area! Once you've been to the Training Area for the first time, Training Area fast travel via the Village Map will be unlocked.
Accessed Through the Village Map

The Training Area cannot be selected for fast travel until you visit it for the first time. After unlocking it, you can press and hold the minus button (-) (Switch), Left Touchpad (Playstation), Menu Button (Xbox), or M (PC) to access the Kamura Village Map. Choose Training Area from the options to fast travel!
Training Area Has Access to Different Locations

You can go straight to Kamura Village, Elgado Outpost, the Gathering Hub, and your Room by talking to the Training Area Palico!
Training Area Features
Make the Training Dummy Attack
| Stomp | Projectile |
|---|---|
 |
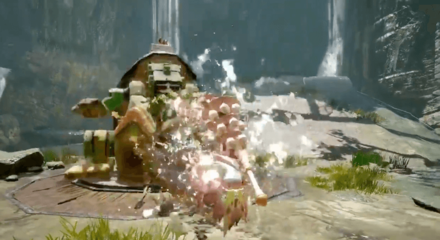 |
Toadversary, the training dummy, can be set to attack hunters! You can enable this feature by going to the Training Options under the Quests settings from the main menu or by talking to Sekirei the Trainer. You can then choose between a melee attack (Stomp), ranged attack (Projectile), or Gas/Roars under Actions.
This is a huge help, especially with practicing the timings for all the counterattack moves and Silkbind attacks introduced in Monster Hunter Rise (MH Rise).
Test Out Your Weapons
You may use the Training Area to test out your weapon and armor builds so you can take down monsters more efficiently! This can also be a training ground for when you want to get used to a certain new weapon you want to try!
You may also change weapon types on the fly! Just interact with the Item Box near the entrance and choose Manage Equipment.
Practice Your Switch Skills

With the introduction of Switch Skills, the Training Area conveniently has an Item Box that allows you to customize your Switch Skill build on the fly. Just interact with the Item Box and choose Change Switch Skill.
Switch Skills Guide: How to Use Switch Skills
Practice in Multiplayer

In Monster Hunter World, only one player can enter the Training Area. In Monster Hunter Rise (MH Rise), you will be able to practice in the Training Area with your friends!
How to Play Online: Local Co-op and Demo Multiplayer
Unlimited Items
While in the Training Area, all your items will not be consumed. This is useful when you want to know the effects of certain consumables like Dash Juice or Demon Powder on your overall playstyle. Your Bow Coatings and Bowgun ammo don't get consumed too!
Test the Capabilities of Your Buddies

The Hunter (or Hunters, in multiplayer) can bring Buddies inside the Training Area. You can even make adjustments to their skills and equipment with the provided Buddy Board. This is a great way to test out different Buddy loadouts for you to use!
Practice Your Gunner Skills
Ranged weapons (Bow, Light Bowgun, and Heavy Bowgun) can be practiced here without wasting resources like ammo and coatings. Improve your aim and damage dealt here!
Adjust Settings from the Training Area Arena

You can change the different settings for Toadversary and the target range by accessing a menu while inside the Training Area.
To do this, head over to the Start Menu by holding the Plus (+) button (Switch), Right Touchpad (Playstation), tapping the Menu Button (Xbox), or Esc then go to Quests Tab (Tab 2) → Training Options. From there you may choose to change Settings for:
- Head Position
- Direction the Dummy is facing
- If the Dummy will track the player
- Set the action setting for the Dummy (Standby, Projectile Attack, Stomp, Gas/Roars)
- Set the type and additional properties for the Dummy's attacks
- Set whether the Targets for the Firing Range are moving or not
- Set the number of Wirebugs (2, 3, Infinite)
Petalace Buffs are Maxed Out

The Training Area automatically assumes you have max Spiribird buffs for your Petalace. This means your attack can be up to 20 higher than usual with a Demon Petalace. Make sure to keep this in mind when testing out damage!
Best Petalaces and How to Upgrade
Training Area Facilities
Toadversary, the Tetranadon Dummy

There is a huge dummy in the middle of the Training Area called Toadversary, which resembles a Tetranadon. The dummy's action will depend on the Training Options set by the player!
The Dummy is Affected by Status

When hit with blunt weapons, the dummy can be stunned. This can effectively give you an estimate of how effective your blunt attacks can be. It is also affected by status, such as Poison and Paralysis. Do note that status buildup appears to reset to normal, making it not fully representative of actual hunts.
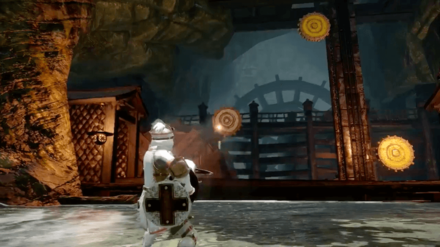
Gunner Practice Range

A practice range for gunners (LBG and HBG users rejoice!) is present in the Training Area. This can help refine your aim before fighting the real deal!
Cannon and Ballista Practice
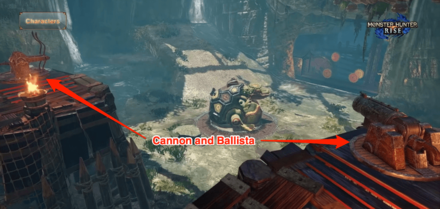
Cannons and Ballistae are present in the Training Area. You can use these to practice when you need to use them in Rampages or in fights with them such as Thunder Serpent Narwa.
Training Area Secret Mural

There is a secret mural on top of the waterfall behind the dummy in the Training Area. The mural looks centuries old and may hold secrets regarding the Rampage!
How to Get to the Training Area Secret Mural
Use The Infinite Wirebugs Option
| Wiredash to the Mural | |
|---|---|
 |
|
| Input | |
| Switch | |
| Playstation | |
| XBox | |
| PC | |
The fastest way to get to the mural on top of the waterfall is to set the Wirebug Gauge to Infinite Use in the Training Options then wiredash your way to the top! We suggest spamming zL + zR (Switch), L2 + R2 (Playstation), Left Trigger + Right Trigger (Xbox), or Middle Click + MB4 (PC) then point the reticle towards the top of the waterfall!
Secret Mural Drawings
The drawings on the secret mural depict the people of Kamura fighting against the Rampage. Not only that, there are silhouettes of specific monsters impressed on the mural - with the six of them confirmed to have Apex versions in MH Rise!
| Arzuros |  |
|---|---|
| Rathian |  |
| Mizutsune |  |
| Rathalos |  |
| Diablos |  |
| Zinogre |  |
| Valstrax |  |
Monster Hunter Rise Related Guides
Comment
Pretty sure the training area has access to the training area
Author

Training Area: Features and How to Unlock
Rankings
- We could not find the message board you were looking for.
Gaming News


![Monster Hunter Stories 3 Review [First Impressions] | Simply Rejuvenating](https://img.game8.co/4438641/2a31b7702bd70e78ec8efd24661dacda.jpeg/thumb)
Popular Games

Genshin Impact Walkthrough & Guides Wiki
Honkai: Star Rail Walkthrough & Guides Wiki
Umamusume: Pretty Derby Walkthrough & Guides Wiki
Pokemon Pokopia Walkthrough & Guides Wiki
Resident Evil Requiem (RE9) Walkthrough & Guides Wiki
Monster Hunter Wilds Walkthrough & Guides Wiki
Wuthering Waves Walkthrough & Guides Wiki
Arknights: Endfield Walkthrough & Guides Wiki
Pokemon FireRed and LeafGreen (FRLG) Walkthrough & Guides Wiki
Pokemon TCG Pocket (PTCGP) Strategies & Guides Wiki


Recommended Games
Diablo 4: Vessel of Hatred Walkthrough & Guides Wiki
Cyberpunk 2077: Ultimate Edition Walkthrough & Guides Wiki
Fire Emblem Heroes (FEH) Walkthrough & Guides Wiki
Yu-Gi-Oh! Master Duel Walkthrough & Guides Wiki
Super Smash Bros. Ultimate Walkthrough & Guides Wiki
Pokemon Brilliant Diamond and Shining Pearl (BDSP) Walkthrough & Guides Wiki
Elden Ring Shadow of the Erdtree Walkthrough & Guides Wiki
Monster Hunter World Walkthrough & Guides Wiki
The Legend of Zelda: Tears of the Kingdom Walkthrough & Guides Wiki
Persona 3 Reload Walkthrough & Guides Wiki


All rights reserved
©CAPCOM CO., LTD. ALL RIGHTS RESERVED.
The copyrights of videos of games used in our content and other intellectual property rights belong to the provider of the game.
The contents we provide on this site were created personally by members of the Game8 editorial department.
We refuse the right to reuse or repost content taken without our permission such as data or images to other sites.
how do you open the training menu options without talking to the cat by the storage box?