Sunbreak Almudron: Weakness and Drops
★ All Title Updates now available for ALL PLATFORMS!
┗ Title Update 4 | Title Update 5 | Bonus Update
┗ Check out all our Best Builds For Every Weapon!
┗ TU4 Monsters: Velkhana | Risen C.G. Valstrax
┗ TU5 Monsters: Amatsu | Risen Shagaru Magala
┗ Bonus Update Monster: Primordial Malzeno

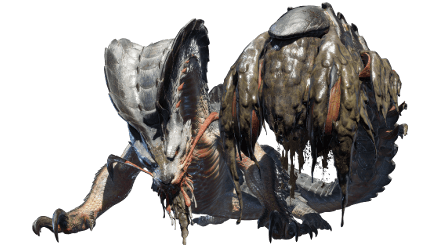
This is a hunting guide for Almudron, a Large Monster in Monster Hunter Rise (MH Rise), and the Sunbreak DLC. Read on to learn Almudron's weaknesses, forgeable weapons and armor, drops, and attack patterns for Master Rank!
 Almudron Guide Almudron Guide
|
 Magma Almudron Guide Magma Almudron Guide
|
 Almudron Weapons Almudron Weapons
|
 Almudron Armor Almudron Armor
|
List of Contents
Almudron Weakness and Notes
| Almudron オロミドロ |
|||
|---|---|---|---|
 |
|||
| Type | Leviathan | ||
| Threat Level | 7/10 | Rampage Type | ー |
| Major Weakness | Other Weakness | ||
| Blight / Elemental Damage | Abnormal Status | ー | |
| Characteristics | |||
| As its name implies, Almudron spends a great deal of time lurking in mud—at least until it emerges to smother approaching prey. From its tail oozes a strange golden fluid, which Almudron uses to dissolve the ground beneath its prey, arresting them in a mire so that it can drag them under. When enraged, it produces more fluid, turning the mud golden. When you see gold, watch out! | |||
How to Unlock Almudron
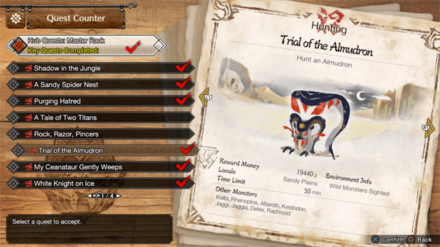
Complete A Rocky Rampage in Master Rank
| Quest Name | Monster/Unlock |
|---|---|
| Trial of the Almudron (Key Quest) |
|
| Unlock Conditions: Finish the Quest "A Rocky Rampage" |
MR Almudron is unlocked by completing the Urgent Quest A Rocky Rampage and reaching MR 3 in the Sunbreak expansion.
MR Grinding Guide:
How to Get from MR 6 to MR 100 Fast
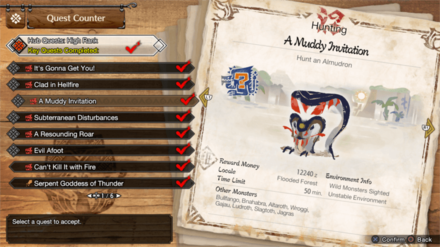
Complete Can't Kill It with Fire in High Rank
| Quest Name | Monster/Unlock |
|---|---|
|
A Muddy Invitation
(Key Quest) |
|
| Unlock Conditions: Finish the Quest "Can't Kill It with Fire" |
High Rank Almudron is unlocked by completing the Urgent Quest Can't Kill It with Fire and reaching HR 7.
Hunter Rank Farm Guide:
How to Get from HR 7 to HR 100 Fast
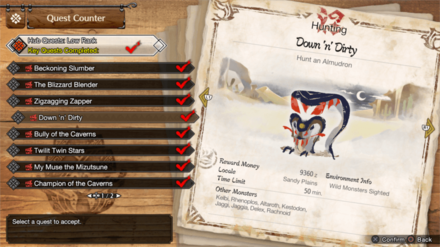
Reach HR 3 in Low Rank
| Quest Name | Monster/Unlock |
|---|---|
|
Down 'n' Dirty
(Key Quest) |
|
| Unlock Conditions: Clear ★5 Village Special License Test 2 |
Low Rank Almudron is unlocked by completing the ★5 Village Special License Test 2 and reaching HR 3.
Almudron Weakness and Resistance
| 41 | 40 | 32 | 21 |
| 0 | 8 | 17 | 6 |
Bold are the recommended Weapon Type and Elemental Damage.
Almudron Weapon Damage Breakdown
| Part | |||
|---|---|---|---|
| Head | 55 | 64 | 55 |
| Foreleg | 23 | 24 | 20 |
| Abdomen | 40 | 55 | 35 |
| Back | 25 | 30 | 20 |
| Hind Leg | 25 | 25 | 20 |
| Tail | 55 | 30 | 35 |
| Tail Tip | 65 | 55 | 40 |
| Overall | 41 | 40 | 32 |
Almudron Elemental Weakness Breakdown
| Part | |||||
|---|---|---|---|---|---|
| Head | 20 | 0 | 10 | 20 | 5 |
| Foreleg | 30 | 0 | 5 | 25 | 5 |
| Abdomen | 20 | 0 | 5 | 15 | 5 |
| Back | 15 | 0 | 5 | 10 | 5 |
| Hind Leg | 10 | 0 | 5 | 10 | 5 |
| Tail | 25 | 0 | 10 | 20 | 5 |
| Tail Tip | 25 | 0 | 15 | 20 | 15 |
| Overall | 21 | 0 | 8 | 17 | 6 |
Higher numbers indicate higher potential damage to the monster.
Almudron Hunting Tips

The mud-covered tail is what makes this species strong; attacking this outer layer will chip away at it, so removing this muddy shroud should be your priority. The gold-glimmering mud is harmful to the touch, so mind the color of your surroundings while hunting these beasts.
Status Effect Vulnerabilities
| Poison | Stun | Paralysis | Sleep |
|---|---|---|---|
| ★ | ★ | ★ | ★ |
| Blast | Exhaust | Fireblight | Waterblight |
| -- | ★ | ★★ | ★ |
| Thunderblight | Iceblight | ||
| ★ | ★ | ||
If an ailment has more stars it means that it has better effectiveness.
Item Vulnerabilities
| Pitfall Trap | Shock Trap | Flash Bomb |
|---|---|---|
| ◯ | ◯ | ◯ |
| Sonic Bomb | Meat Effects | Dung Bomb |
| ✕ | ✕ | ◯ |
◯ = Vulnerable; ✕ = Fully Resistant; ▲ = Situational
Kinsect Extracts
| Monster Part | Extract |
|---|---|
| Head |
|
| Foreleg |
|
| Abdomen |
|
| Back |
|
| Hind Leg |
|
| Tail |
|
| Tail Tip |
|
Red = Attack Increase, White = Movement Boost, Orange = Anti-knockback When Attacking
Almudron Locations and Quests
Almudron Known Habitat
| Map | Starting Area | Visited Areas | Rest Area |
|---|---|---|---|
 Shrine Ruins Shrine Ruins
|
9 / 10 / 13 | 1 / 2 / 6 / 9 / 10 / 13 | 10 |
 Sandy Plains Sandy Plains
|
5 / 7 / 11 | 3 / 5 / 6 / 7 / 8 / 11 | 2 |
 Flooded Forest Flooded Forest
|
7 | 1 / 2 / 4 / 5 / 6 / 7 / 10 / 11 / 14 | 11 / 14 |
Almudron Quest Appearances
| Quest Type | Lvl | Quest Name |
|---|---|---|
| Anomaly Quest | A★4 | Anomaly Research: Almudron |
| Follower Quest | M★3 | A Muddy Revival |
| Hub Quest | M★3 | Trial of the Almudron (Key Quest) |
| Hub Quest | M★3 | Desert Lost and Found |
| Support Survey | M★3 | Operation Almudron |
| Event Quest | M★4 | A Mysterious Purr-esent |
| Hub Quest | M★4 | Quit Spooking My Lunch! |
| Quest Type | Lvl | Quest Name |
|---|---|---|
| Event Quest | ★7 | Almudron: Fashion Victim |
| Event Quest | ★7 | Rampage: Muddi Gras |
| Event Quest | ★7 | USJ - Shrine Showdown! |
| Hub Quest | ★7 | Ruckus in the Ruins |
| Hub Quest | ★7 | A Muddy Invitation (Key Quest) |
| Hub Quest | ★7 | Master Utsushi's Challenge Part 1 |
| Quest Type | Lvl | Quest Name |
|---|---|---|
| Hub Quest | ★3 | Tail to Tail |
| Hub Quest | ★3 | Down 'n' Dirty (Key Quest) |
| Urgent Village Quest | ★6 | Hermit of the Swamp |
| Village Quest | ★6 | Special License Quest 3 |
How to Beat Almudron
| Almudron Tips | ||
|---|---|---|
|
|
Use Mud Platforms to Your Advantage

You can sometimes use Almudron's mud against it! While normally acting as potentially dangerous traps, Almudron's mud can occasionally create structures you can climb on.
Use these structures to perform aerial attacks or to dodge the waves of muck Almudron sends out with some of its attacks.
Recognize Almudron's Half-Submerged Stance

Almudron usually goes into its Half-Submerged Stance after the following attacks:
| Half-Submerged Stance Attacks | ||
|---|---|---|
| Transitional Tail Slam | Mud Rush | Mud Pillar Assault |
In this stance, most of Almudron's body is submerged beneath the waters, leaving only its tail, forelegs, and head exposed. Surprisingly, the safest area during this stance is the gap between its tail and forelegs, as doing so only leaves you vulnerable to very few of its attacks.
Alternatively, you can also position yourself behind its head when it takes this stance to deal damage to its back if you need to break it.
Break Almudron's Mud Ball
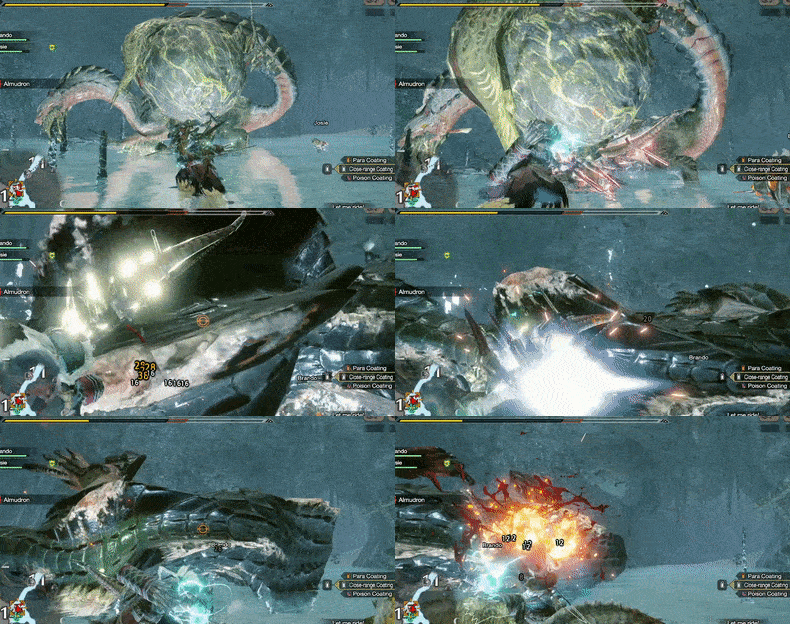
When Almudron forms a mud ball on its tail, it improves the damage of each of its Tail Attacks and allows it to use its Mud Ball Hammer. Breaking the mud ball not only makes the fight against Almudron easier but doing so can also knock it down!
Stay Near Almudron's Hind Legs
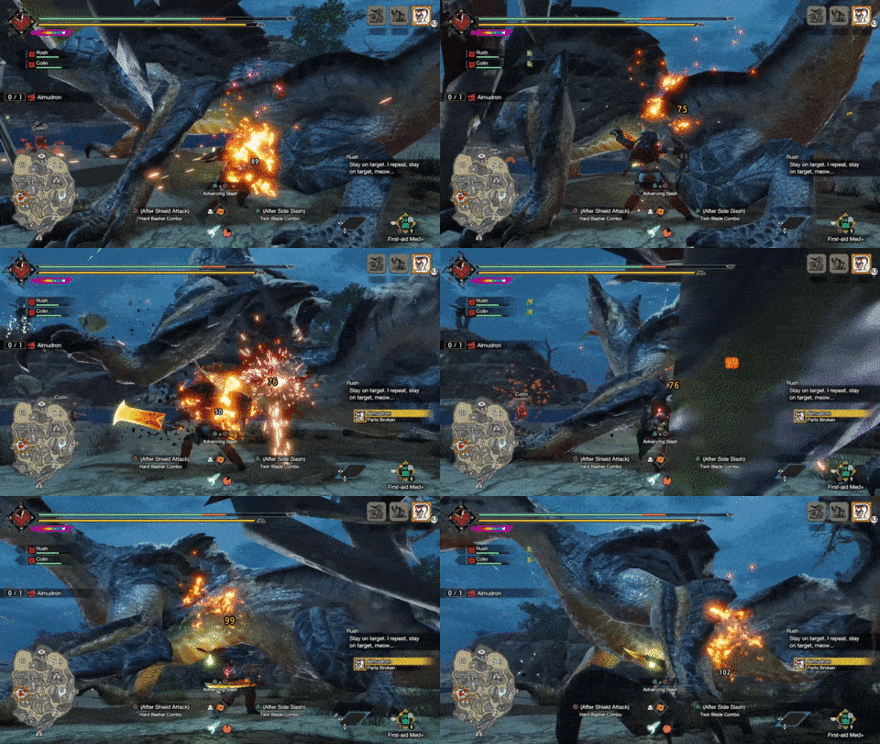
Positioning around Almudron's hind legs is a great way to safely deal damage since most of its attacks originate from its head or tail.
Bring Nulberries

Many of Almudron's attacks can inflict Waterblight on impact, which slows down stamina recovery. Negate this potentially deadly status ailment by bringing Nulberries to the hunt.
You can also check your base camp's Supply Box at the start of the hunt for any free Nulberries.
Use Meat Bait to Attract Giganha
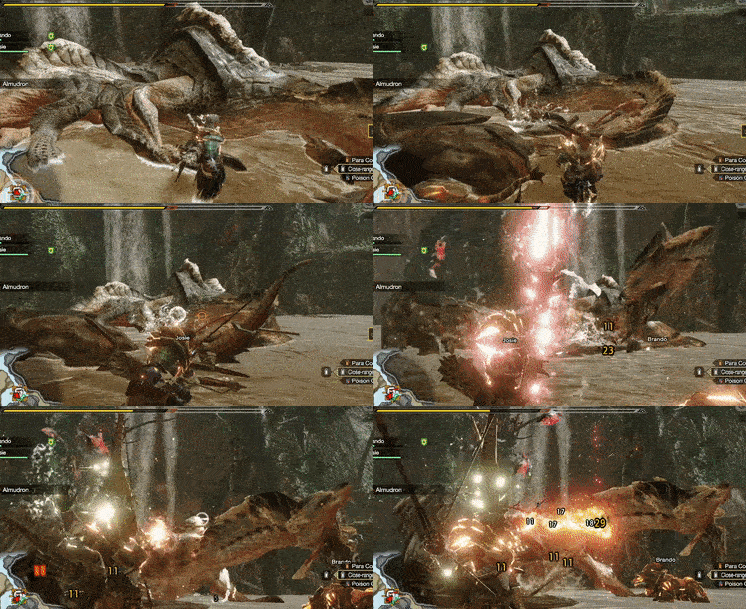
Be on the lookout for Giganha-infested waters, as these particular fish can help you in the fight against Almudron! Place Meat Bait directly under Almudron whenever it's knocked down or when you're sure it won't move away.
After placing the bait, Giganha will shortly attack the immediate area, dealing damage and staggering Almudron in place for a few seconds. You can use this window of opportunity to dish out your heaviest against it!
Be sure to always check your base camp's Supply Box for Meat Bait before starting the fight!
Almudron Master Rank Attack Patterns
In addition to its attacks in Low and High Rank quests, Almudron uses the following attacks in Master Rank.
| Name | Description |
|---|---|
| Mud Launch Combo | Almudron launches the hunter into the air with a block of mud before following up its attack with a strong tail jab. |
| Retreating Tail Slam | Almudron dives backward, slamming its tail down and causing small pockets of mud to explode around the immediate area. |
| Jab and Lunge Combo | Almudron performs a quick Tail Jab before rearing back to lunge at the hunter. |
Mud Launch Combo
| Mud Launch Combo Attack Information |
|---|
 Mud Launch Combo: Almudron causes a block of mud to forcefully rise from beneath the hunter, launching them into the air. It follows up this attack with a strong tail jab, dealing heavy damage on contact. Pay attention to muck stirring beneath your feet and move out of the rising mud's way to avoid getting hit by this attack. |
Retreating Tail Slam
| Retreating Tail Slam Attack Information |
|---|
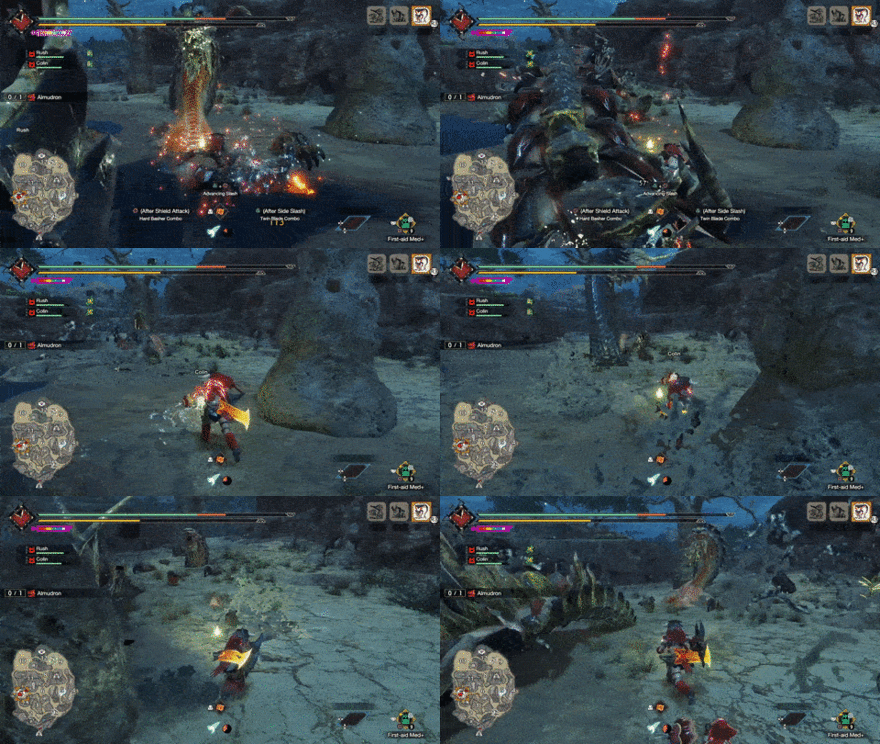 Retreating Tail Slam: While in its Half-Submerged Stance, Almudron dives backward to slam its tail down, causing small pockets of mud to explode around the immediate area. This attack often occurs after the player closes the gap following Almudron's Transitional Tail Slam. |
Jab and Lunge Combo
| Jab and Lunge Combo Attack Information |
|---|
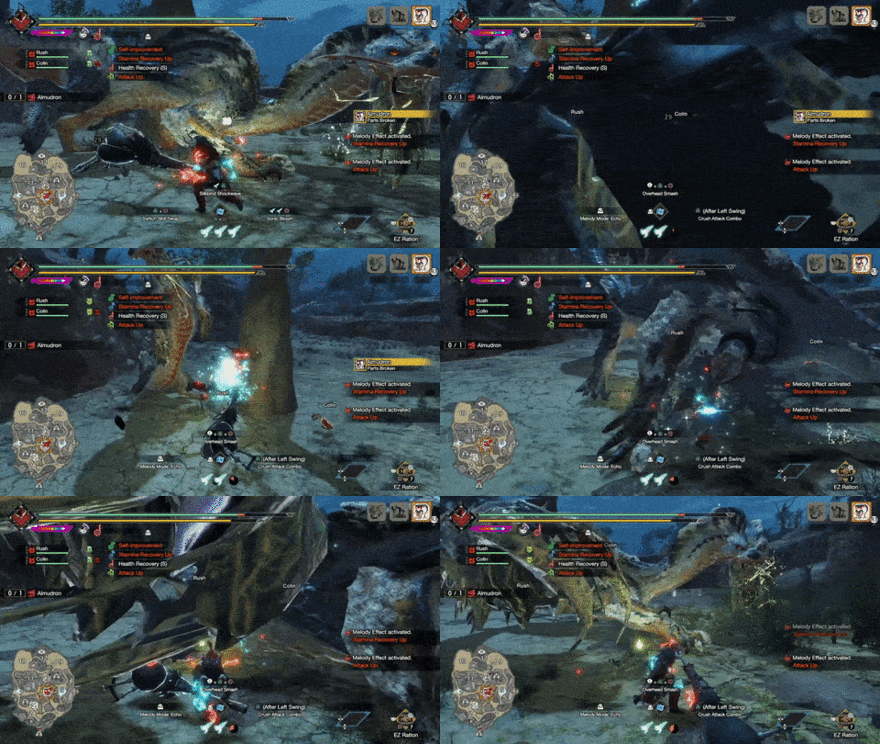 Jab and Lunge Combo: Almudron performs a quick Tail Jab before rearing back to lunge at the hunter, knocking them away and dealing moderate damage on hit. Evading perpendicular to the path of each attack in this combo to avoid getting hit. |
Almudron General Attack Patterns
Almudron uses the following attacks in Low and High Rank quests.
| Name | Description |
|---|---|
| Golden Mud | Almudron releases golden mud that deals damage over time as long as hunters stay inside it. |
| Lunging Attacks | Almudron uses its insanely long body to quickly lunge at unsuspecting hunters who think they're safe from a distance. This attack has several variations. |
| Mud Attacks | Almudron can use mud in a variety of ways to deal damage and inflict Waterblight on hunters. This attack has several variations. |
| Tail Attacks | Almudron uses its massive tail to hit hunters from a distance or knock them away when they get too close. This attack has several variations. |
| Whirlpool | Almudron creates a whirlpool, dragging any hunter caught towards the center before launching out of the water. |
| Mud Ball | Almudron spins in place, scattering mud as it forms a large mud ball at the tip of its tail. |
| Mud Ball Hammer | With the camera panning out, Almudron jumps up to slam its mud ball on top of the hunter, dealing massive damage and inflicting Waterblight. |
Golden Mud
| Golden Mud Attack Information |
|---|
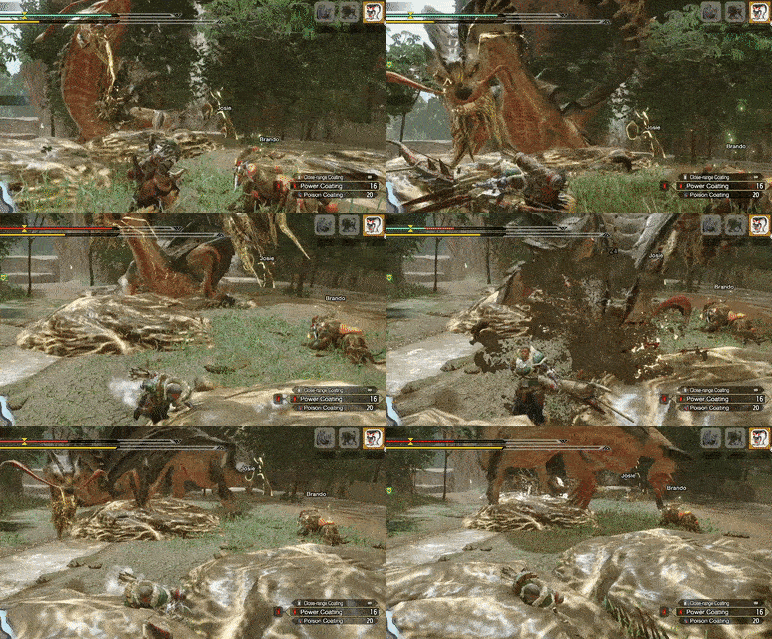 Golden Mud: Similar to Barroth and Jyuratodus, Almudron can fling mud around the area to hinder hunters' movements. However, hunters should also beware of Almudron's Golden Mud. The glimmering muck slows down hunters and deals damage over time, so avoid getting caught in these mud puddles as much as possible. |
Lunging Attacks
Almudron uses its insanely long body to quickly lunge at unsuspecting hunters who think they're safe from a distance.
| Lunging Attack Variations |
|---|
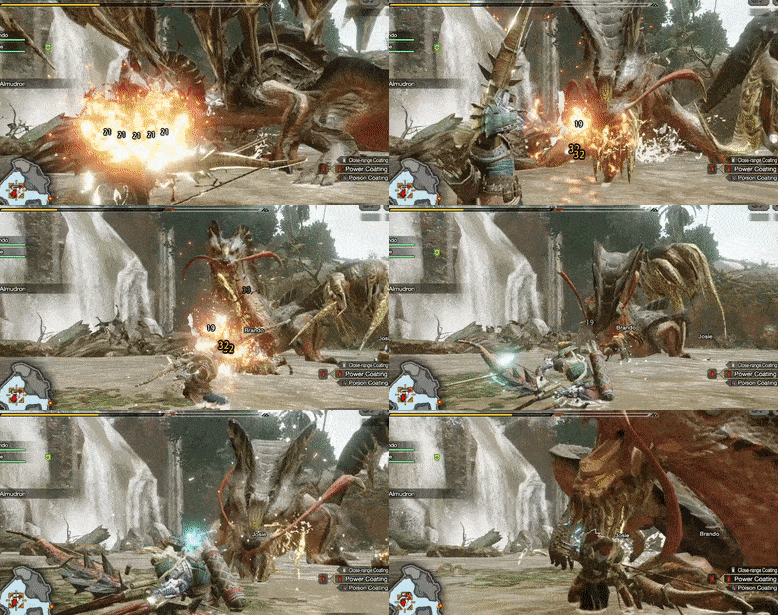 Quick Bite: Almudron lunges forward and bites at its target, dealing moderate damage and tripping hunters on contact. This particular variation can cover a very long distance, so always stay on your toes! This attack can be followed-up by a Tail Slam, so prepare to evade again after dodging Almudron's bite. |
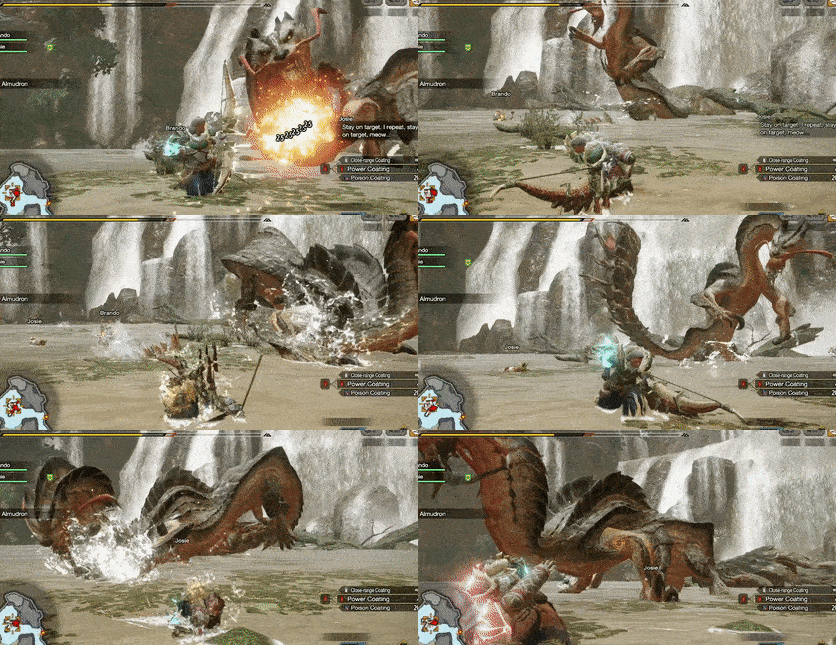 Double Foreleg Slam: Almudron performs two alternating foreleg slams towards the hunter in a diagonal pattern, with each slam covering a long distance. |
 Foreleg Slam Tail Swipe Combo: Almudron slams one of its forelegs on top of the hunter before performing a quick Tail Swipe. Note that the Tail Swipe can send a wave of mud outwards, so distant hunters should still remain alert when Almudron performs this move. |
Mud Attacks
Almudron can use mud in a variety of ways to deal damage and inflict Waterblight on hunters.
| Mud Attack Variations |
|---|
 Mud Pockets: Almudron plants its two forelegs into the ground, causing small pockets of mud to explode around the immediate area. These pockets transform into Mud Traps or Golden Mud Traps after the attack. |
 Mud Fling: Almudron positions its tail on either side before flicking it upward to unleash a wave of mud towards the target. It is important to note that Mud Traps or Golden Mud Traps can form as the column travels toward the target. |
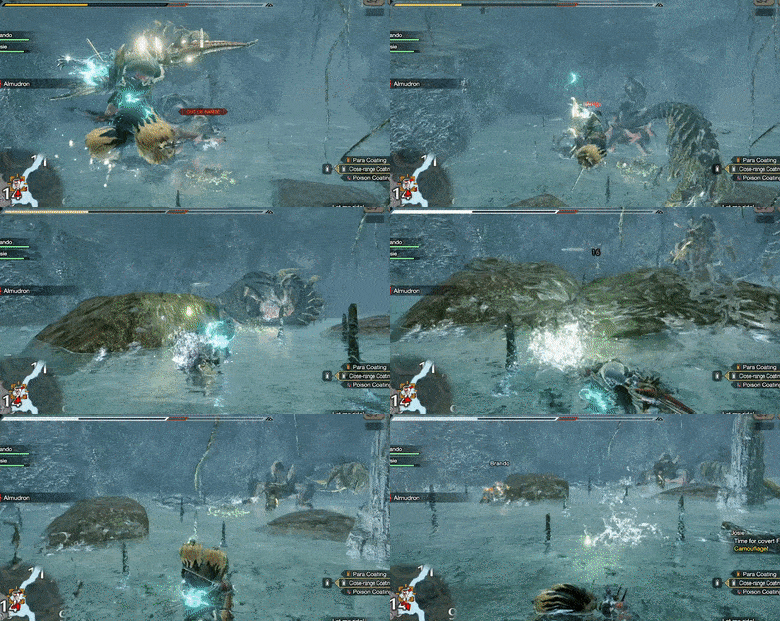 Mud Wave: Almudron repositions away from the target before performing a quick version of its Tail Slam. It will then posture its tail horizontally before unleashing a large wave of mud toward the target as it swipes with its tail. Like the first two variations, this attack can form Mud Traps or Golden Mud Traps as the wave travels toward the target. |
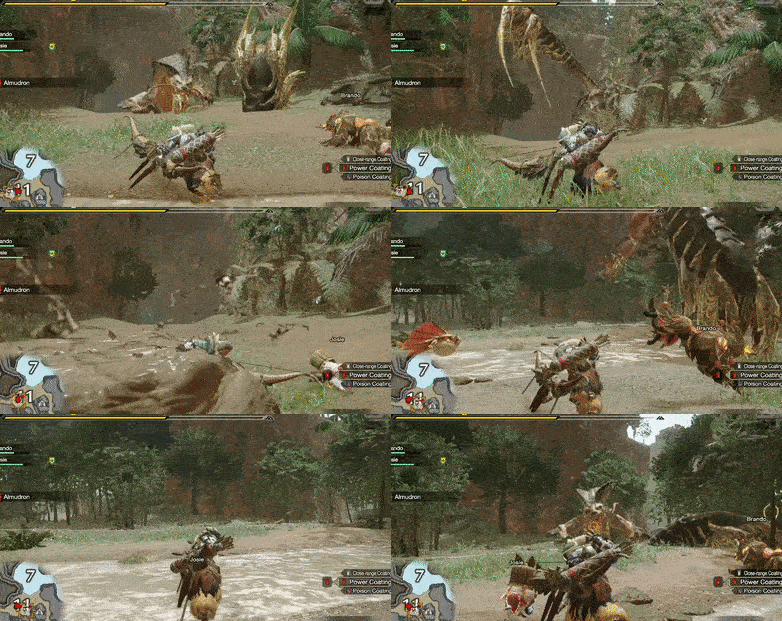 Burrowing Mud Rush: Almudron submerges underwater or underneath soft ground before burrowing toward its target, similar to Diablos' burrow attacks. Almudron can also fling mud all over the place as it burrows through and breaches the ground. Almudron can repeat this attack two to three times before settling down. |
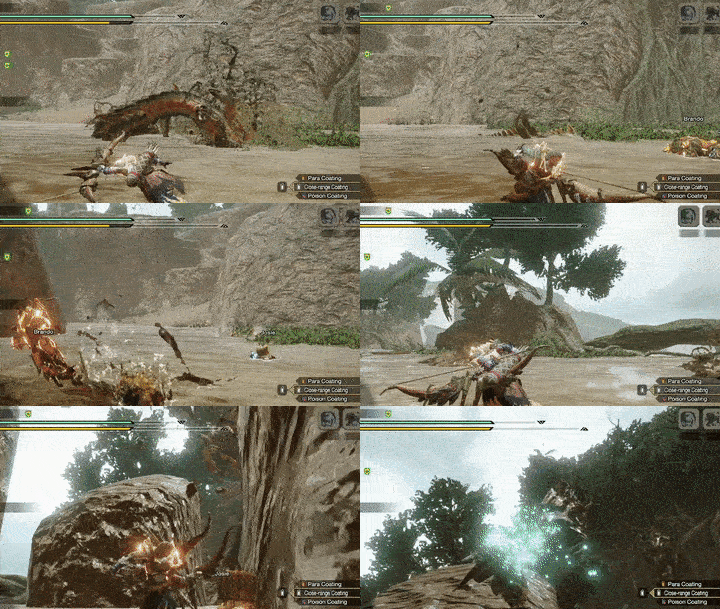 Mud Pillar Assault: Almudron summons four large mud pillars to trap the hunter before sending out waves of mud or causing localized mud eruptions. Hunters should avoid standing still and Wirebug their way around the pillars to strike at Almudron. |
Tail Attacks
Almudron can use its massive tail to hit hunters from a distance or knock them away when they get too close. These tail attacks have huge, sweeping wind-up motions, so it is easy to tell when an attack is coming. Guard up or evade accordingly! See all of the tail attack variations below:
| Tail Attack Variations |
|---|
 Tail Uppercut: Almudron hops forward and positions its tail on one side before flicking it upward to hit the hunter and reposition, sending a wave of mud outward as it moves. This attack is usually a follow-up to Almudron's Quick Bite. |
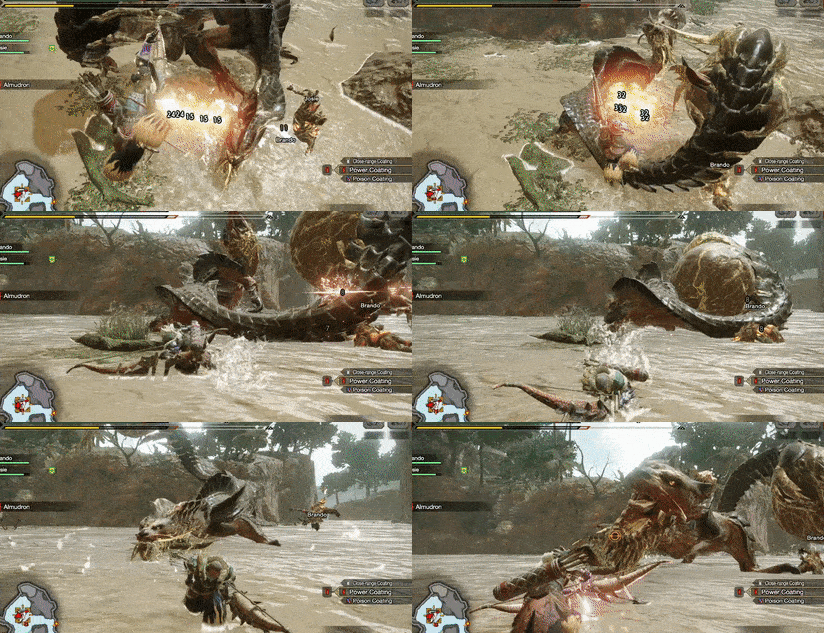 Tail Swipe: Almudron coils around itself, building up tension before swiping its tail towards the hunter, hitting a large conic area, and dealing moderate damage on impact. |
 Heavy Tail Slam: Almudron slams its tail across a long distance towards the hunter. This attack deals massive damage and should be evaded or blocked at all costs! |
 Transitional Tail Slam: This variation of Almudron's Tail Slam covers less distance and allows Almudron to transition into its Half-Submerged Stance. |
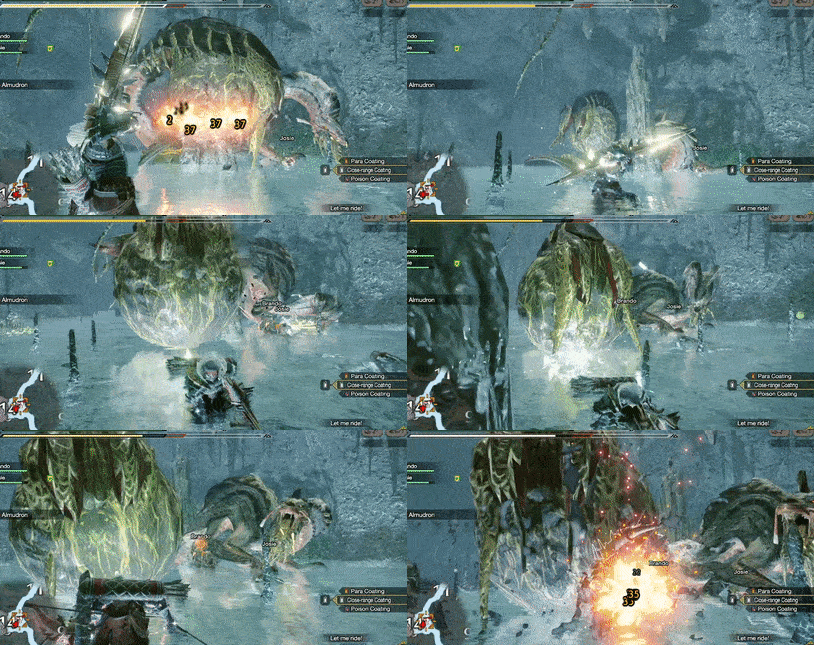 Tail Jab: Almudron postures its tail near one side of its body before quickly slamming it towards the target. This attack comes out relatively quickly, so be prepared to dodge or block at all times! |
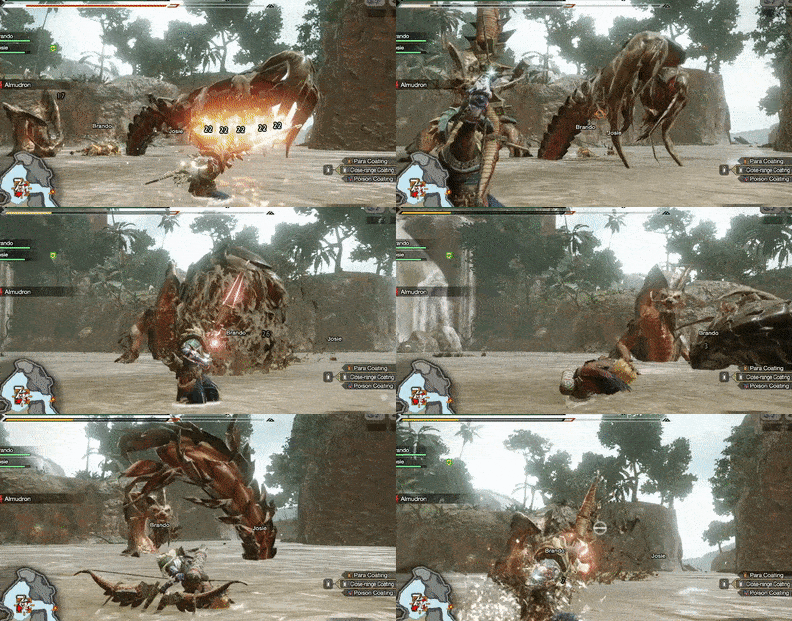 Tail Slap: Almudron can slap unsuspecting hunters with its tail whenever it enters its Half-Submerged Stance. This is another quick tail attack, so always be mindful of your position. |
Whirlpool
| Whirlpool Attack Information |
|---|
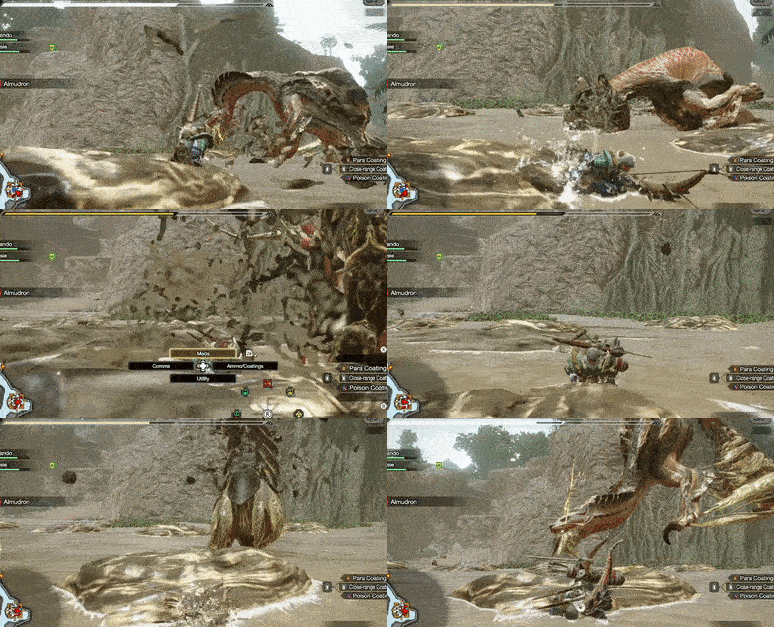 Whirlpool: Almudron transitions out of its Half-Submerged Stance by creating a whirlpool, dragging hunter caught towards the center before launching out of the water. Almudron deals massive damage and knocks players upward as it breaches the ground, so prepare to Wiredash or dive-evade to avoid getting hit. |
Mud Ball
| Mud Ball Attack Information |
|---|
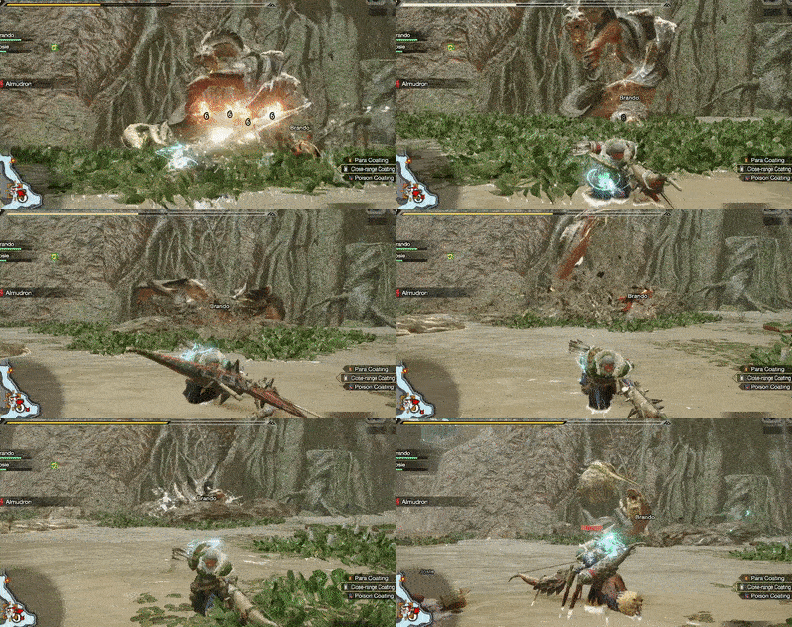 Mud Ball: Almudron assumes a unique coiled stance before rapidly spinning in place, unleashing a barrage of mud around the immediate area. After the initial mud salvo, Almudron gathers mud at the tip of its tail to form a large ball. This mud ball increases the damage of all of its Tail Attacks and allows Almudron to perform its dangerous Mud Ball Hammer. |
Mud Ball Hammer
| Mud Ball Hammer Attack Information |
|---|
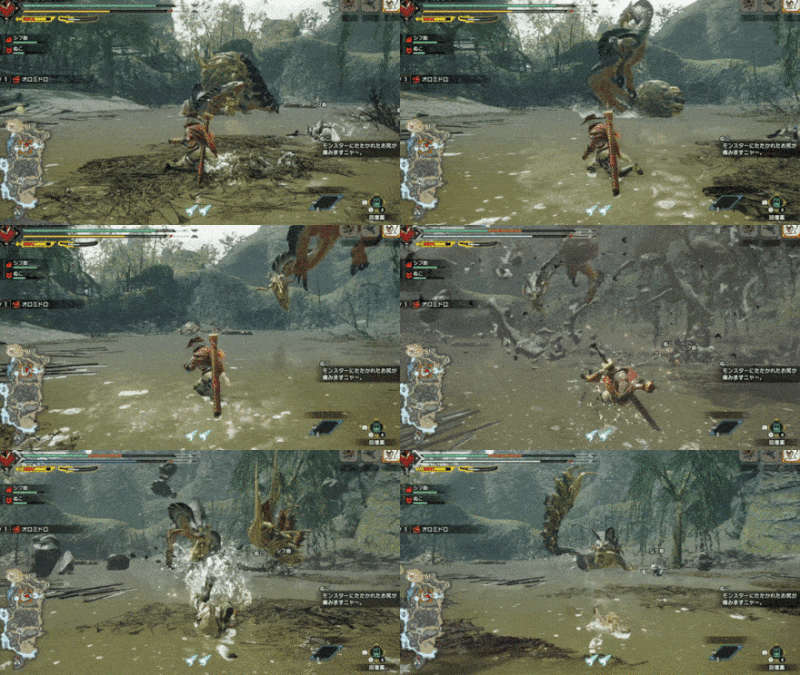 Mud Ball Hammer: With the camera panning out, Almudron jumps up before slamming its mud ball on top of the hunter, dealing massive damage in a wide area and inflicting Waterblight on any hunter caught in the attack. This attack usually occurs whenever Almudron is about to move to a new area with a mud ball attached to its tail. Prioritize breaking the mud ball whenever it is active to prevent Almudron from performing this devastating attack. |
Almudron Materials and Drops
Master Rank Almudron Materials
High Rank Almudron Materials
Low Rank Almudron Materials
Almudron Dropped Materials
Monster Hunter Rise Related Guides
All Almudron Guides
| All Almudron Related Articles | ||
|---|---|---|
 Almudron Guide Almudron Guide
|
 Almudron Weapons Almudron Weapons
|
 Almudron Armor Almudron Armor
|
Sunbreak Monsters
| Sunbreak Monster Lists | ||
|---|---|---|
| Sunbreak Monsters List | Monster Subspecies List | Sunbreak Small Monsters List |
Large Monsters
MR6+ Large Monsters
| MR6+ Monsters | |||||
|---|---|---|---|---|---|
 Gaismagorm Gaismagorm(MR6) |
 Furious Rajang Furious Rajang(MR50) |
 Scorned Magnamalo Scorned Magnamalo(MR100) |
|||
Title Update 1 Monsters
| Sunbreak Title Update 1 Monsters | |||
|---|---|---|---|
 Seething Bazelgeuse Seething Bazelgeuse |
 Silver Rathalos Silver Rathalos |
 Gold Rathian Gold Rathian |
 Lucent Nargacuga Lucent Nargacuga |
Title Update 2 Monsters
| Sunbreak Title Update 2 Monsters | ||
|---|---|---|
 Flaming Espinas Flaming Espinas |
 Risen Chameleos Risen Chameleos |
 Violet Mizutsune Violet Mizutsune |
Title Update 3 Monsters
| Sunbreak Title Update 3 Monsters | ||
|---|---|---|
 Chaotic Gore Magala Chaotic Gore Magala |
 Risen Kushala Daora Risen Kushala Daora |
 Risen Teostra Risen Teostra |
Title Update 4 Monsters
| Sunbreak Title Update 4 Monsters | |
|---|---|
 Velkhana Velkhana |
 Risen Crimson Glow Valstrax Risen Crimson Glow Valstrax |
Title Update 5 Monsters
| Sunbreak Title Update 5 Monsters | |
|---|---|
 Amatsu Amatsu |
 Risen Shagaru Magala Risen Shagaru Magala |
Small Monsters
| Sunbreak Small Monsters | |||||
|---|---|---|---|---|---|
 Boggi Boggi |
 Ceanataur Ceanataur |
 Gowngoat Gowngoat |
|||
 Hermitaur Hermitaur |
 Hornetaur Hornetaur |
 Pyrantula Pyrantula |
 Vespoid Vespoid |
 Velociprey Velociprey |
|
Other Large Monsters
Elder Dragons
| Elder Dragons | |||||
|---|---|---|---|---|---|
 Narwa the Allmother Narwa the Allmother |
|||||
 Wind Serpent Ibushi Wind Serpent Ibushi |
 Thunder Serpent Narwa Thunder Serpent Narwa |
 Crimson Glow Valstrax Crimson Glow Valstrax |
|||
 Chameleos Chameleos |
 Kushala Daora Kushala Daora |
 Teostra Teostra |
|||
Apex Monsters
| Apex Monsters | ||
|---|---|---|
 Apex Arzuros Apex Arzuros |
 Apex Rathian Apex Rathian |
 Apex Mizutsune Apex Mizutsune |
 Apex Rathalos Apex Rathalos |
 Apex Diablos Apex Diablos |
 Apex Zinogre Apex Zinogre |
Other Small Monsters
Author
Sunbreak Almudron: Weakness and Drops
Rankings
- We could not find the message board you were looking for.
Gaming News
Popular Games

Genshin Impact Walkthrough & Guides Wiki

Honkai: Star Rail Walkthrough & Guides Wiki

Arknights: Endfield Walkthrough & Guides Wiki

Umamusume: Pretty Derby Walkthrough & Guides Wiki

Wuthering Waves Walkthrough & Guides Wiki

Pokemon TCG Pocket (PTCGP) Strategies & Guides Wiki

Abyss Walkthrough & Guides Wiki

Zenless Zone Zero Walkthrough & Guides Wiki

Digimon Story: Time Stranger Walkthrough & Guides Wiki

Clair Obscur: Expedition 33 Walkthrough & Guides Wiki
Recommended Games

Fire Emblem Heroes (FEH) Walkthrough & Guides Wiki

Pokemon Brilliant Diamond and Shining Pearl (BDSP) Walkthrough & Guides Wiki

Diablo 4: Vessel of Hatred Walkthrough & Guides Wiki

Super Smash Bros. Ultimate Walkthrough & Guides Wiki

Yu-Gi-Oh! Master Duel Walkthrough & Guides Wiki

Elden Ring Shadow of the Erdtree Walkthrough & Guides Wiki

Monster Hunter World Walkthrough & Guides Wiki

The Legend of Zelda: Tears of the Kingdom Walkthrough & Guides Wiki

Persona 3 Reload Walkthrough & Guides Wiki

Cyberpunk 2077: Ultimate Edition Walkthrough & Guides Wiki
All rights reserved
©CAPCOM CO., LTD. ALL RIGHTS RESERVED.
The copyrights of videos of games used in our content and other intellectual property rights belong to the provider of the game.
The contents we provide on this site were created personally by members of the Game8 editorial department.
We refuse the right to reuse or repost content taken without our permission such as data or images to other sites.

 Daimyo Hermitaur
 Blood Orange Bishaten
 Garangolm
 Aurora Somnacanth
 Shogun Ceanataur
 Lunagaron
 Astalos
 Seregios
 Gore Magala
 Espinas
 Pyre Rakna-Kadaki
 Malzeno
 Shagaru Magala
 Great Izuchi
 Arzuros
 Great Baggi
 Lagombi
 Aknosom
 Tetranadon
 Kulu-Ya-Ku
 Barroth
 Great Wroggi
 Royal Ludroth
 Khezu
Khezu Bishaten
 Somnacanth
 Barioth
 Rathian
 Tobi-Kadachi
 Volvidon
 Basarios
 Pukei-Pukei
 Magnamalo
 Nargacuga
 Zinogre
 Anjanath
 Mizutsune
 Rathalos
 Goss Harag
 Tigrex
 Diablos
 Jyuratodus
 Rajang
 Rakna-Kadaki
 Bazelgeuse
 Altaroth
 Anteka
 Baggi
Baggi Bnahabra
 Bombadgy
 Bullfango
 Delex
Delex Felyne
 Gajau
Gajau Gargwa
 Izuchi
 Jaggi
Jaggi Jaggia
 Jagras
 Kelbi
Kelbi Kestodon
 Ludroth
 Melynx
 Popo
Popo Rachnoid
 Remobra
 Rhenoplos
 Slagtoth
 Uroktor
 Wroggi
 Zamite


