Sunbreak Seething Bazelgeuse: Weakness and Drops
★ All Title Updates now available for ALL PLATFORMS!
┗ Title Update 4 | Title Update 5 | Bonus Update
┗ Check out all our Best Builds For Every Weapon!
┗ TU4 Monsters: Velkhana | Risen C.G. Valstrax
┗ TU5 Monsters: Amatsu | Risen Shagaru Magala
┗ Bonus Update Monster: Primordial Malzeno
This is a hunting guide for Seething Bazelgeuse, a Large Monster in Monster Hunter Rise (MH Rise) and the Sunbreak DLC. Read on to learn Seething Bazelgeuse's weaknesses, forgeable weapons, forgeable armor, drops, and attack patterns for Master Rank!
 Seething Bazelgeuse Guide Seething Bazelgeuse Guide
|
 Bazelgeuse Guide Bazelgeuse Guide
|
 Seething Bazelgeuse Weapons Seething Bazelgeuse Weapons
|
 Seething Bazelgeuse Armor Seething Bazelgeuse Armor
|
List of Contents
Seething Bazelgeuse Weakness and Notes
| Seething Bazelgeuse |
|||
|---|---|---|---|
 |
|||
| Type | Flying Wyvern | Previous Games | MHW |
| Threat Level | 9/10 | Rampage Type | ー |
| Major Weakness | Other Weakness | ||
| Blight / Elemental Damage | Abnormal Status | ー | |
| Characteristics | |||
| A Bazelgeuse variant whose body seems to smolder, like it could go critical at any moment. The heat of their explosive scales have grown, their pale blue glow worthy of the "Seething" moniker. Their scales are blisteringly hot in this state, capable of scorching the very earth with their volatile force. | |||
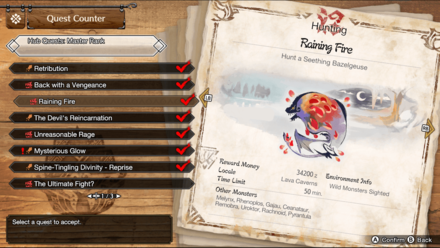
How to Unlock Seething Bazelgeuse
Reach MR 10
| Quest Name | Monster/Unlock |
|---|---|
| Raining Fire |
|
| Unlock Conditions: Reach MR10 |
To hunt Seething Bazelgeuse after downloading Sunbreak's Title Update 1, you need to raise your MR to 10.
Speak to Arena Master Arlow and Chichae the Quest Damsel to unlock Seething Bazelgeuse's Urgent Quest Raining Fire.
MR Grinding Guide:
How to Get from MR 6 to MR 100 Fast
Seething Bazelgeuse Weakness and Resistance
Seething Bazelgeuse Weapon Damage Breakdown
| Part | |||
|---|---|---|---|
| Head | 64 | 80 | 45 |
| Abdomen | 45 | 45 | 25 |
| Back | 30 | 30 | 15 |
| Wing | 44 | 44 | 35 |
| Leg | 36 | 34 | 25 |
| Tail | 70 | 65 | 55 |
| Overall | 49 | 50 | 34 |
Seething Bazelgeuse Elemental Weakness Breakdown
| Part | |||||
|---|---|---|---|---|---|
| Head | 0 | 10 | 20 | 25 | 15 |
| Abdomen | 0 | 5 | 10 | 15 | 5 |
| Back | 0 | 0 | 5 | 10 | 5 |
| Wing | 0 | 5 | 10 | 15 | 5 |
| Leg | 0 | 5 | 10 | 15 | 5 |
| Tail | 0 | 5 | 15 | 25 | 5 |
| Overall | 0 | 5 | 12 | 18 | 7 |
Higher numbers indicate higher potential damage to the monster.
Seething Bazelgeuse Hunting Tips
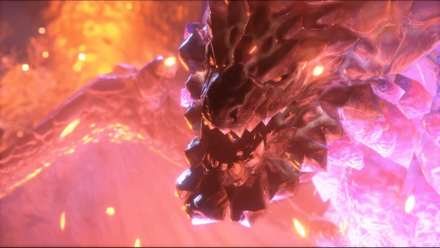
Keep an eye on their head and tail scales when they start glowing a phosphorescent white. These scales have a wide blast radius and are extremely dangerous. If left in this state for too long, Bazelgeuse will unleash a devastating blast attack that covers the entire area. To avoid this punishing attack, be aggressive and focus on the head and tail!
Status Effect Vulnerabilities
| Poison | Stun | Paralysis | Sleep |
|---|---|---|---|
| ★ | ★ | ★ | ★★★ |
| Blast | Exhaust | Fireblight | Waterblight |
| -- | ★ | ★ | ★ |
| Thunderblight | Iceblight | ||
| ★ | ★★ | ||
If an ailment has more stars it means that it has better effectiveness.
Item Vulnerabilities
| Pitfall Trap | Shock Trap | Flash Bomb |
|---|---|---|
| ◯ | ◯ | ◯ |
| Sonic Bomb | Meat Effects | Dung Bomb |
| ✕ | ✕ | ◯ |
◯ = Vulnerable; ✕ = Fully Resistant; ▲ = Situational
Kinsect Extracts
| Monster Part | Extract |
|---|---|
| Head |
|
| Abdomen |
|
| Back |
|
| Wing |
|
| Leg |
|
| Tail |
|
| Overall | — |
Red = Attack Increase, White = Movement Boost, Orange = Anti-knockback When Attacking
Seething Bazelgeuse Locations and Quests
Seething Bazelgeuse Locations
| Map | Starting Area | Visited Areas | Rest Area |
|---|---|---|---|
 Lava Caverns Lava Caverns
|
3 / 14 | 1 / 2 / 3 / 4 / 5 / 6 / 8 / 11 / 12 / 14 | 12 |
 Frost Islands Frost Islands
|
10 | 3 / 5 / 6 / 7 / 9 / 10 | 9 |
 Sandy Plains Sandy Plains
|
3 / 6 / 9 | 5 / 10 | 2 |
 Flooded Forest Flooded Forest
|
3 | 6 / 8 / 9 / 11 | 3 |
Seething Bazelgeuse Quest Appearances
| Quest Type | Lvl | Quest Name |
|---|---|---|
| Anomaly Quest | A★7 | Anomaly Research: Seething Bazelgeuse |
| Event Quest | M★6 | Dual Threat: Go Out with a Bang! |
| Event Quest | M★6 | Starting with a Bang |
| Event Quest | M★6 | Dual Threat: Seething Chaos |
| Hub Quest | M★6 | Advanced: Unflinching Walk |
| Support Survey | M★6 | Operation Seething Bazelgeuse |
| Urgent Hub Quest | M★6 | Raining Fire |
| No Quest in This Rank |
| No Quest in This Rank |
How to Beat Seething Bazelgeuse
| Bazelgeuse Tips |
|---|
|
|
Stay Away From Scales
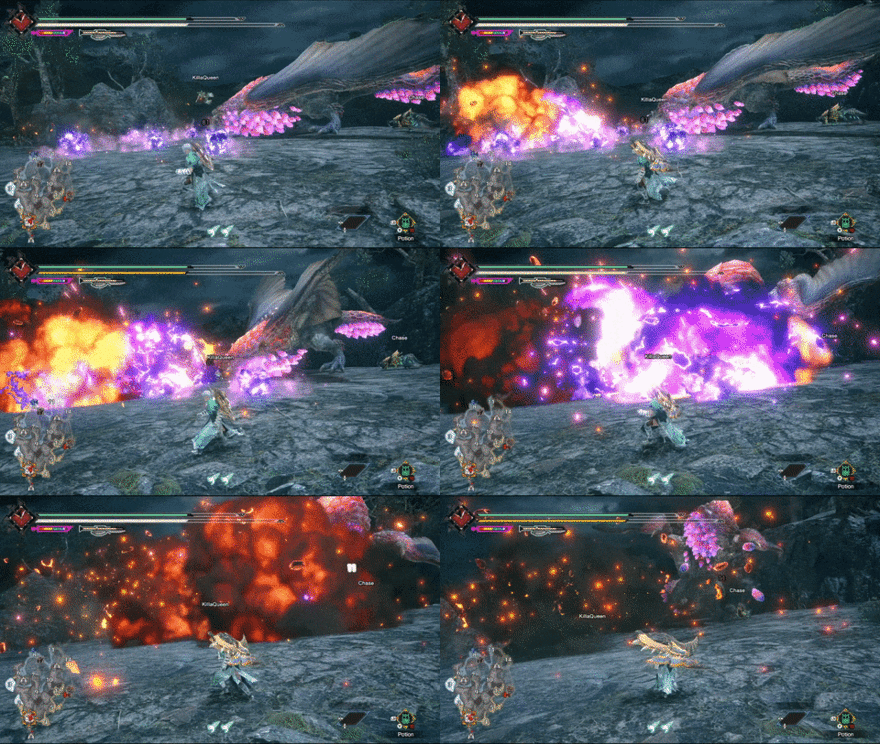
Seething Bazelgeuse's scales, which it can easily spread all around the field, can ignite and explode after a few seconds. Run away from the scales when it glows white or bright purple as it will explode soon!
Emergency Evade During Close Attacks
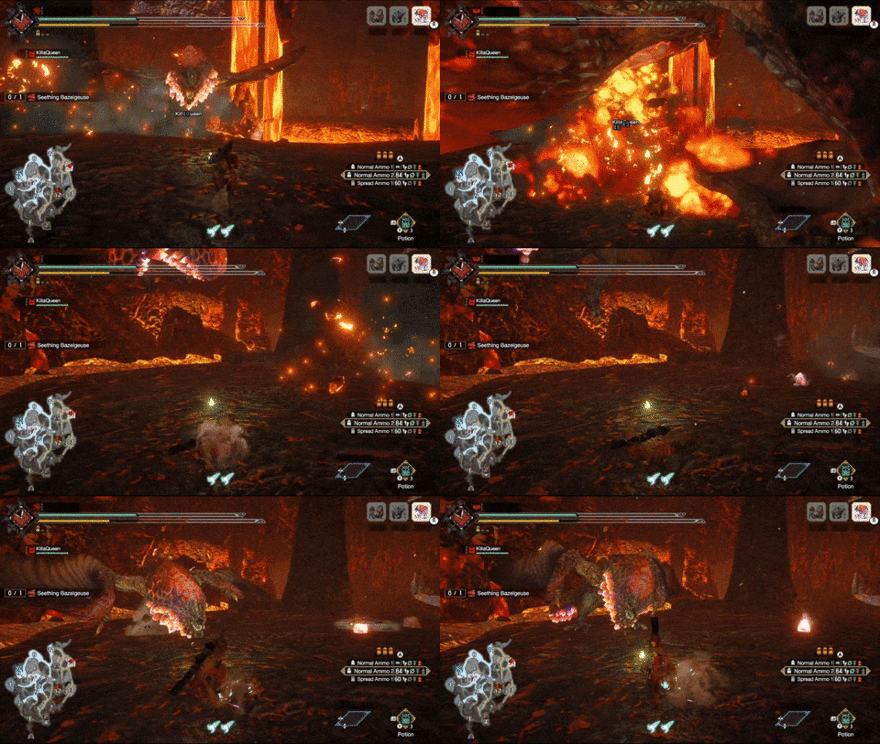
Aside from its bomb attacks, most of Seething Bazelgeuse's physical moves require it to approach hunters. If you are getting chased by Bazelgeuse and it's about to use its chin or tail attacks or its divebomb moves, Wiredash away from it or your emergency evade dive as a last resort.
Attack Glowing Parts to Remove Seething State
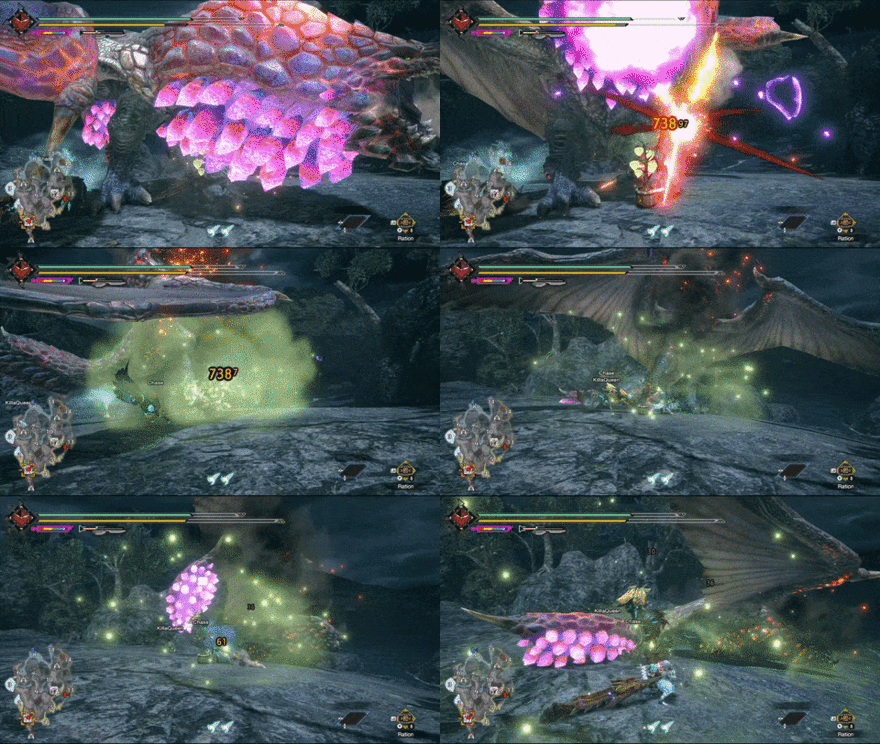
Bazelgeuse will be powered-up once its scales glow bright. meaning that it has entered its Seething state. During this state its attacks are more powerful, its scales will cause bigger explosions, and it has access to more deadly attacks.
Try your best to take it out of its Seething state as soon as you can by attacking its glowing chin and tail. Doing so will also knock it out, giving you more chances to attack while it is vulnerable.
Consider Using Ranged Weapons
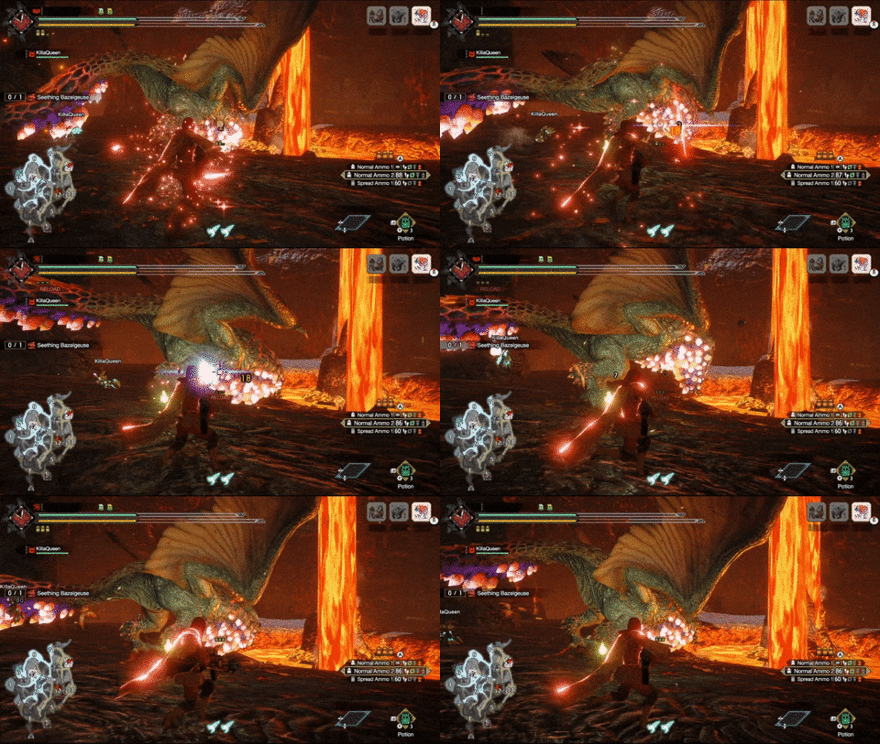
When using melee weapons against Seething Bazelgeuse you are always at the risk of being near its exploding scales that are scattered near its body.
Consider using a Bow, Light Bowgun, or Heavy Bowgun when fighting against Seething Bazelgeuse to create some distance away from it.
Seething Bazelgeuse Attacks and Moves
| Name | Description |
|---|---|
| Bomb Scatter | Seething Bazelgeuse uses its scales as bombs. |
| Chin Attacks | Seething Bazelgeuse utilizes its deadly chin to launch a variety of moves. |
| Fireball | A standard fireball attack from its mouth. |
| Hip Check | A sideways tackle that knocks off any hunters in the way. |
| Tail Slam | Slams its tail to the ground. |
| Explosive Tail Drag DANGER |
Seething Bazelgeuse drags its tail along the ground, leaving explosions as it passes. |
| Seething Carpet Bomb DANGER |
Seething Bazelgeuse will glide across the sky and drop bombs on the ground. |
| Grand Dive Bomb DANGER |
Fills the area with bombs and slams its body to the ground, resulting in a huge explosion. |
Bomb Scatter
Seething Bazelgeuse uses its scales like bombs which can explode after a short period of time. It may follow up with other moves after scattering its scales, so watch closely.
Take note that the bombs will cause bigger explosions if Seething Bazelgeuse's scales are glowing.
| Bomb Scatter Variations |
|---|
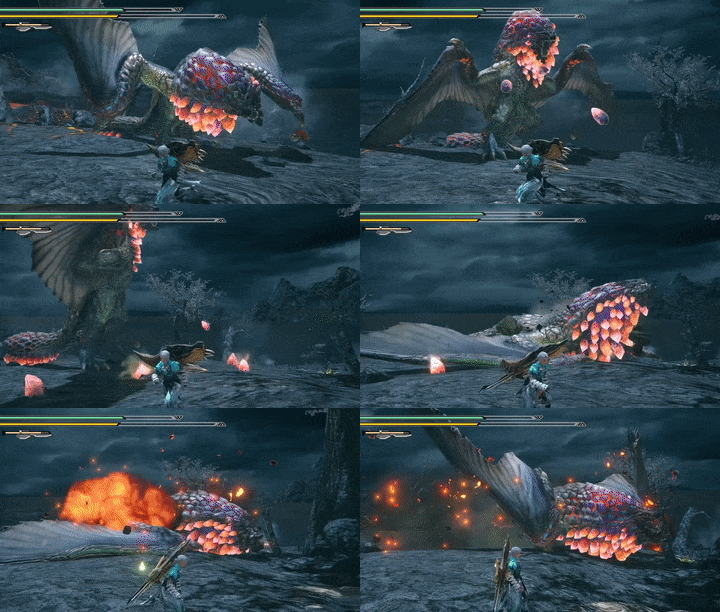 Arc Bomb Scatter: Bombs will fly off from Seething Bazelgeuse, forming an arc pattern. It has a tendency to use its Chin Drag move after this pattern, so stay clear of it! |
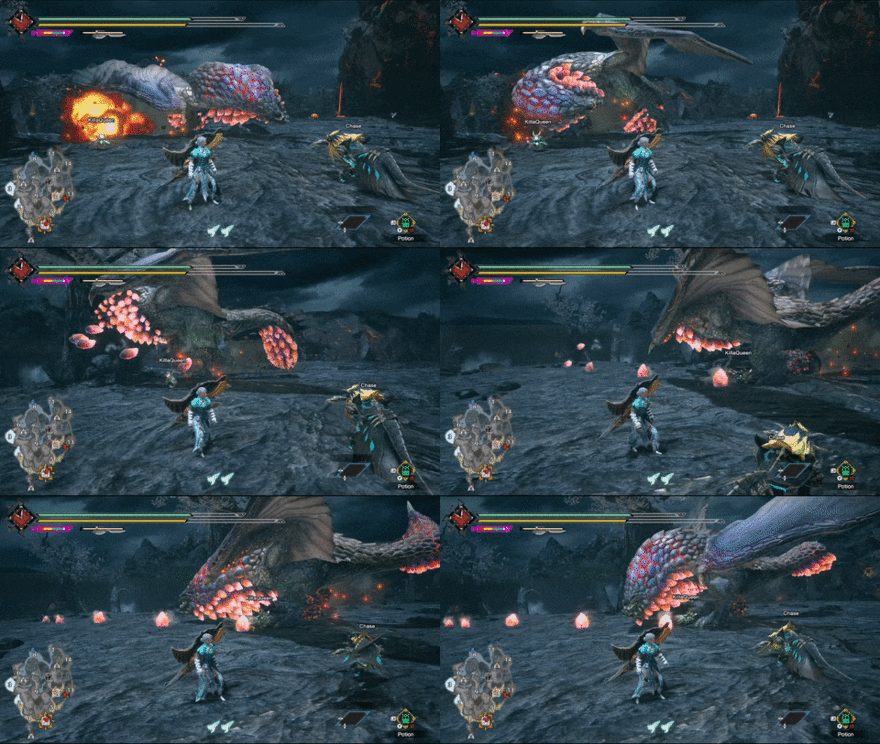 Linear Bomb Scatter: Seething Bazelgeuse sends its bombs in a straight line. Try to roll away from the line of bombs to avoid getting hit. |
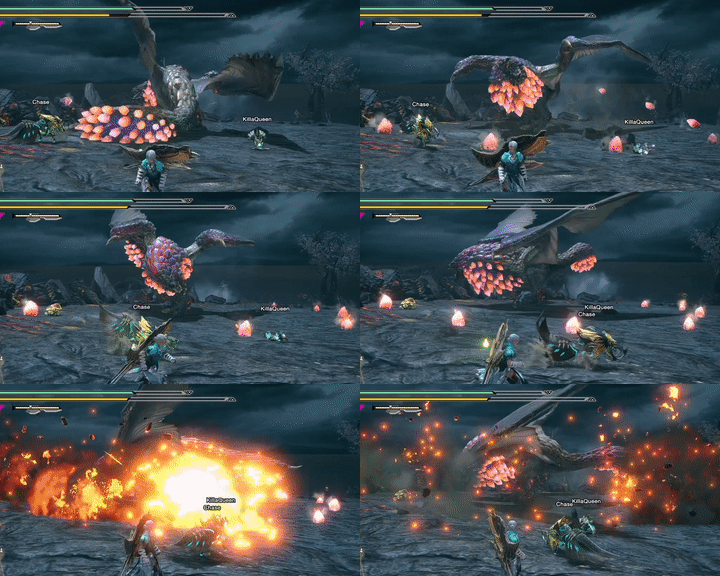 180° Bomb Scatter: Seething Bazelgeuse sets up its bombs in a half circle around it. Dodge towards the other half of the circle to avoid getting blown up! |
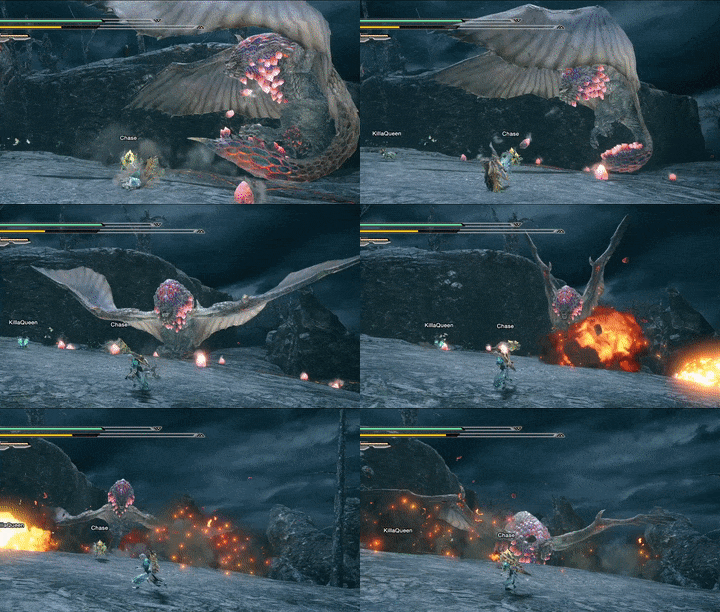 Full Bomb Scatter: A full circle of bombs is laid around Seething Bazelgeuse. Roll away from the circle before it blows up. |
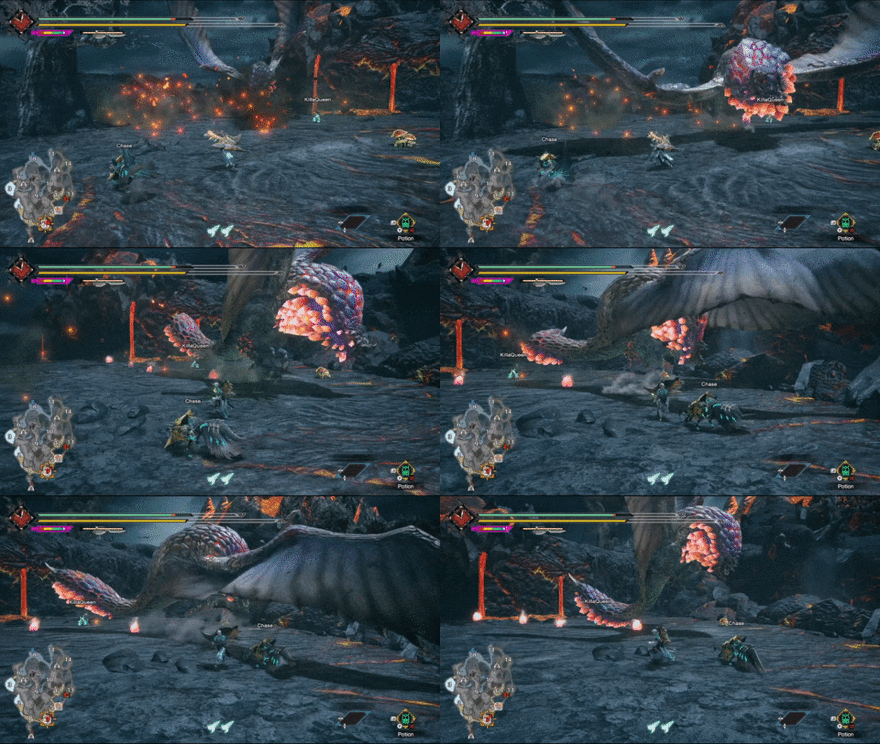 Aerial Bomb Scatter: Seething Bazelgeuse flies across the field and sends its bombs in either a straight line or all across the ground. |
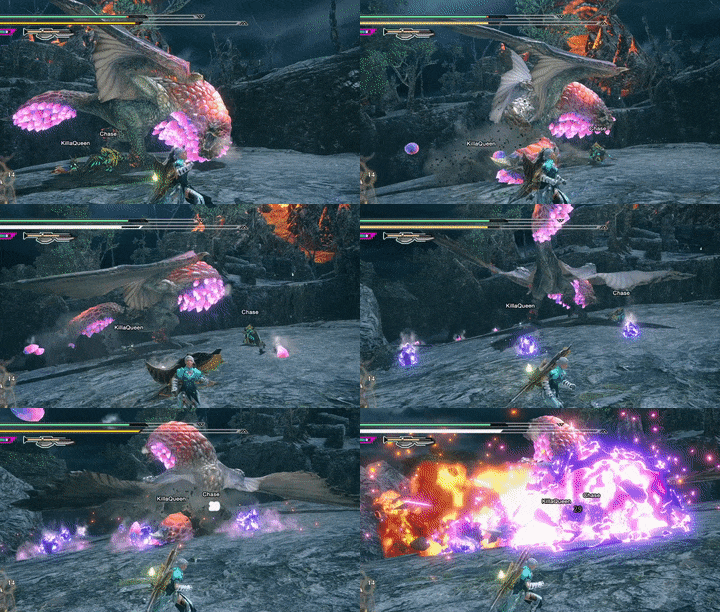 Seething Bomb Scatter: Seething Bazelgeuse's glowing scales will cause bigger explosions and deal more damage. Try to avoid these at all costs! |
Chin Attacks
Seething Bazelgeuse's chin is filled with explosive scales. It then uses this body part pummel and grind any hunters near it.
| Chin Attack Variations |
|---|
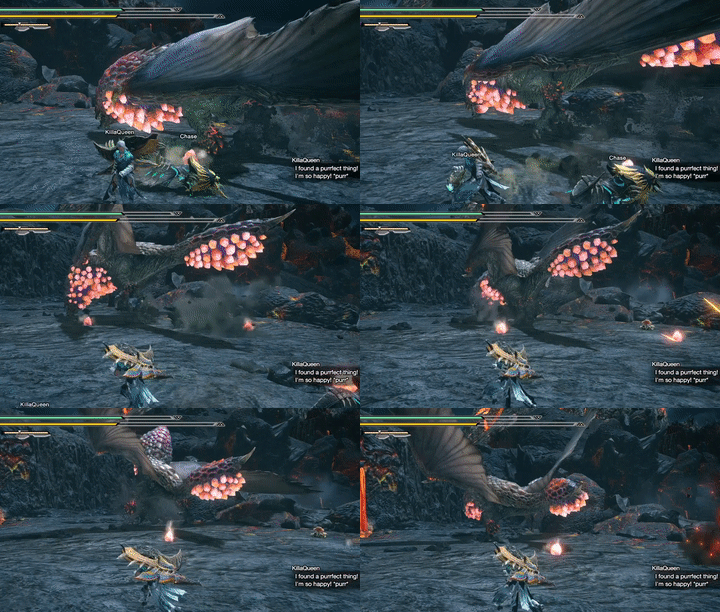 Chin Fling: Seething Bazelgeuse swings its chin upwards while charging forward. Try to roll away from it by dodging sideways. |
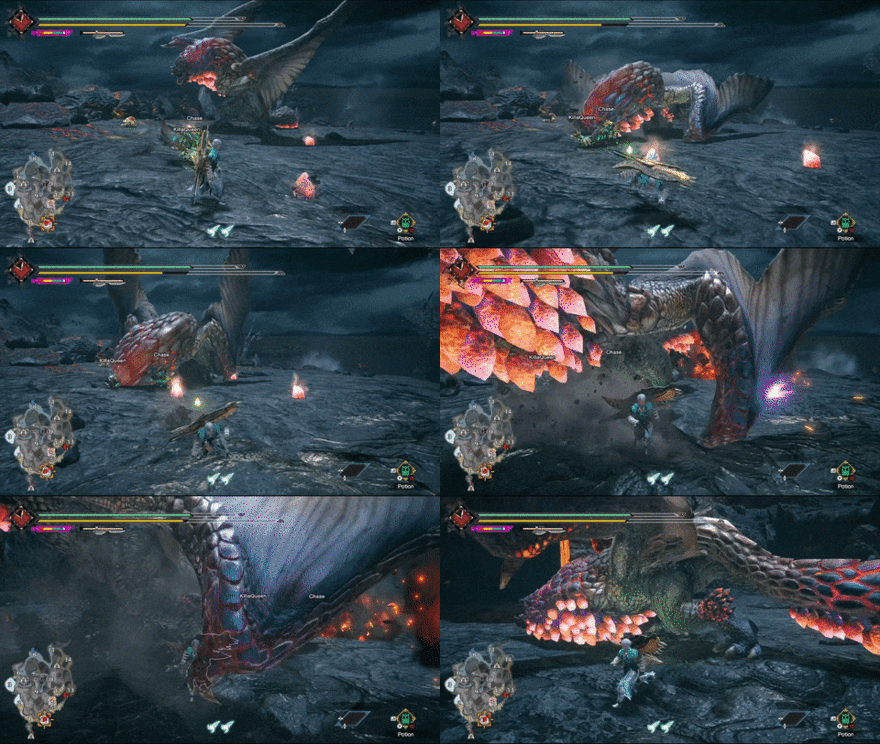 Regular Chin Drag: Bazelgeuse's standard chin drag attack. Evade sideways to avoid getting ran over! |
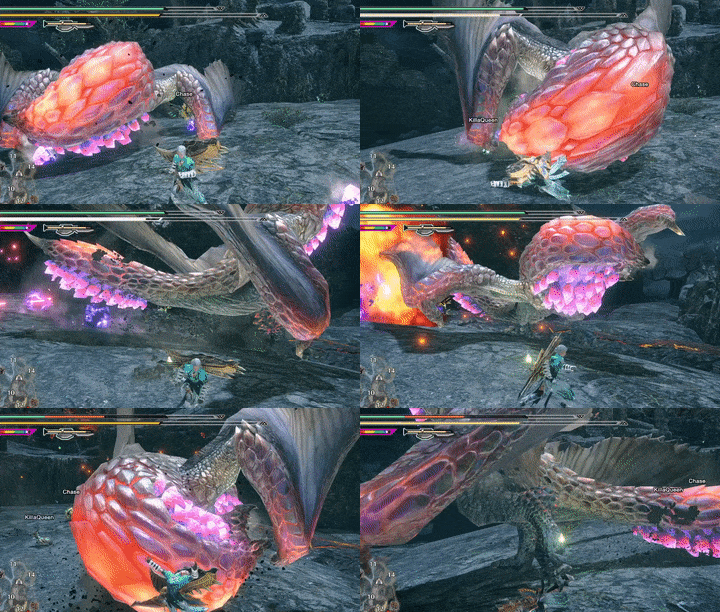 Seething Dual Chin Drag: When in its Seething state, Bazelgeuse will perform its chin drag attack twice while spewing its scales around the field. Avoid rolling towards the bombs! |
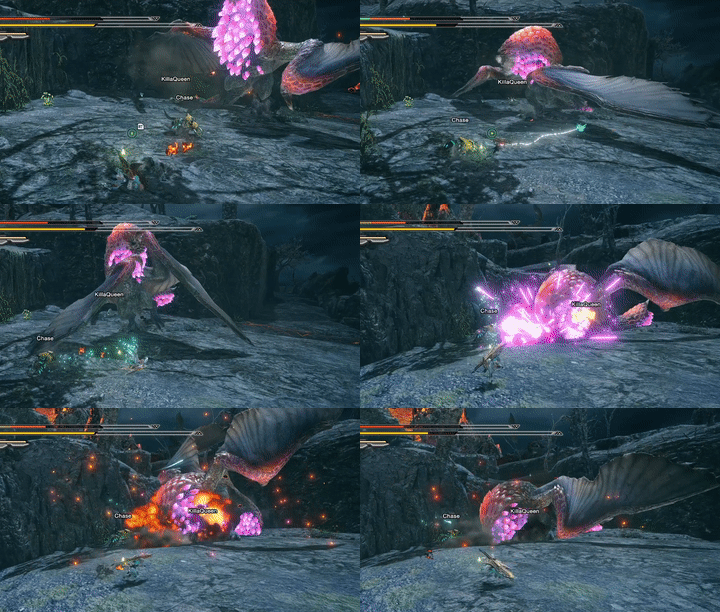 Seething Chin Slam: While in its Seething state, Bazelgeuse will slam its explosive chin towards the ground, resulting in an explosion upon impact. |
Fireball
| Fireball Attack Information |
|---|
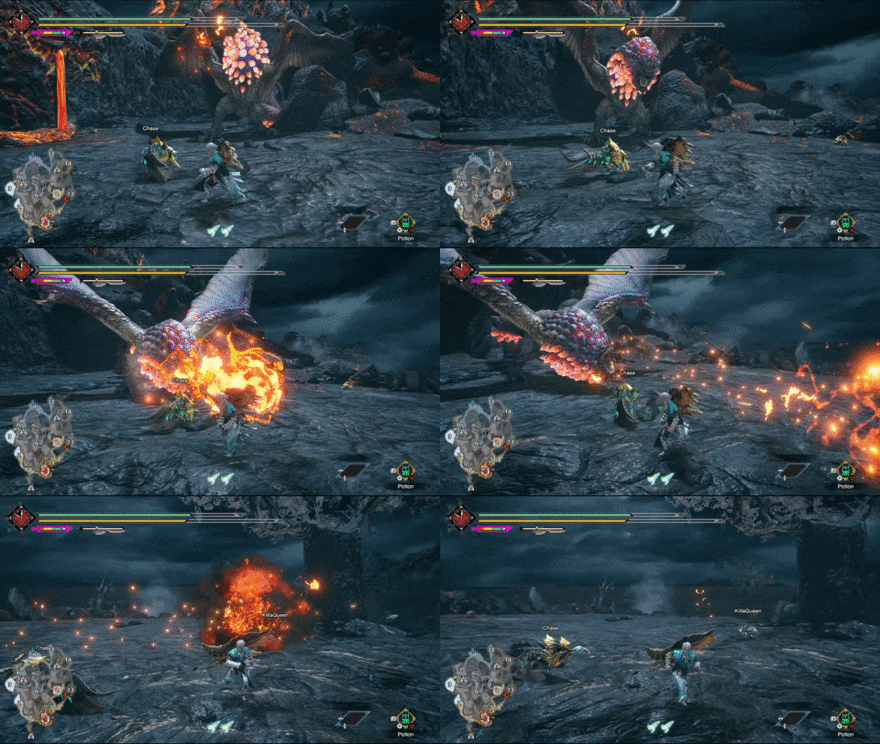 Fireball: A quick fireball attack that can deal fireblight. Only travels at a straight line so just evade sideways! |
Hip Check
| Hip Check Attack Information |
|---|
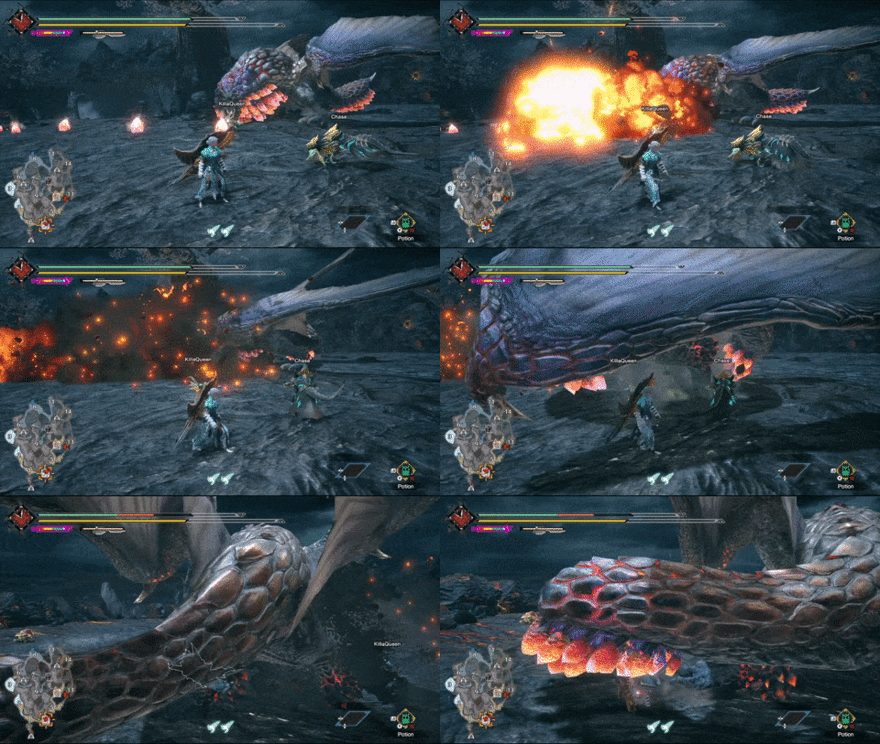 Hip Check: Seething Bazelgeuse leaps and tackles its target sideways. If you see it getting in its pre-leap stance, try to roll away from Bazelgeuse to avoid this move. |
Tail Slam
| Tail Slam Attack Information |
|---|
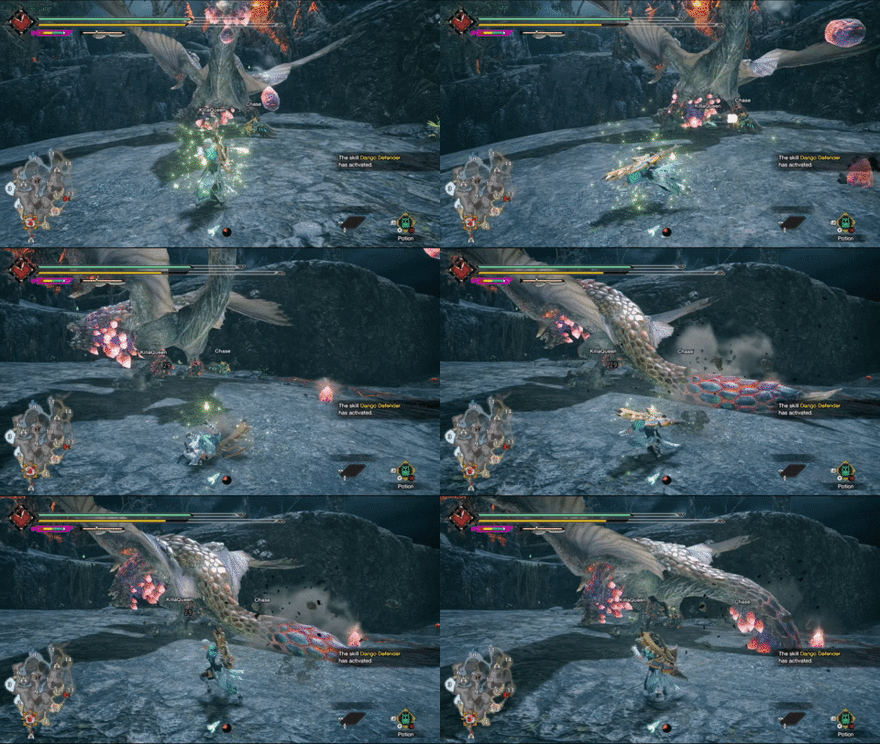 Tail Slam: Seething Bazelgeuse uses its tail like a club and slams it to the ground. Simply avoid standing near the tail to not get hit by this move, but watch out for any bombs on the ground. |
Explosive Tail Drag
Seething Bazelgeuse can use its tail filled to the brim with explosive scales to cause explosions as it drags it across the field.
| Explosive Tail Drag Variations |
|---|
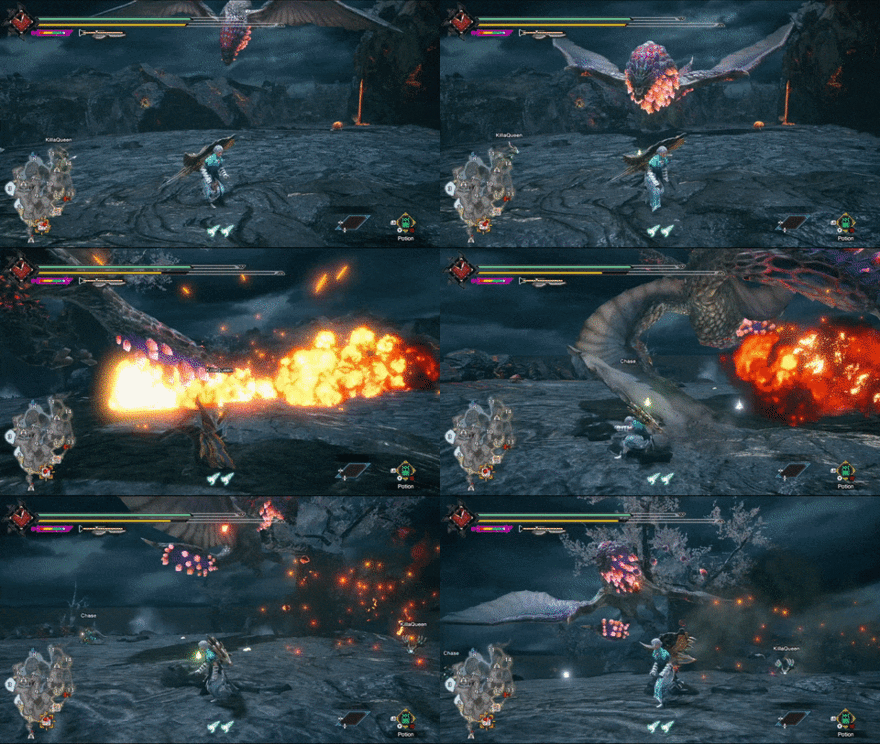 Regular Tail Drag: Seething Bazelgeuse soars through the air and drags its scale-filled tail on the ground which causes explosions. If you see Bazelgeuse flying in the air and charging towards you in a straight line, try to roll away from its path to avoid this move. |
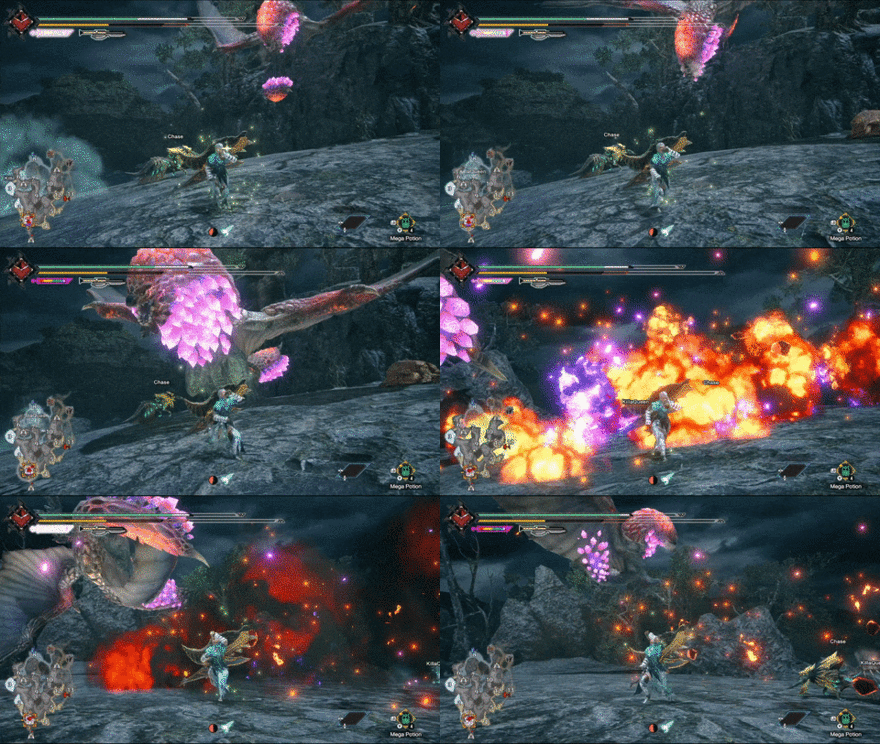 Seething Tail Drag: A variant of the tail drag move when it is in its Seething state. The explosions are bigger and will deal more damage. |
Seething Carpet Bomb
| Seething Carpet Bomb Attack Information |
|---|
 Seething Carpet Bomb: While in its Seething state, Bazelgeuse will fly above hunters in a straight line while spreading its scales across the ground. It will fly by three times before ending it with an explosive divebomb that can one-hit KO hunters in the area. Use a Flash Bomb while it is flying by to stop Bazelgeuse from divebombing or perform an emergency evade when it's too late. |
Grand Dive Bomb
| Grand Dive Bomb Attack Information |
|---|
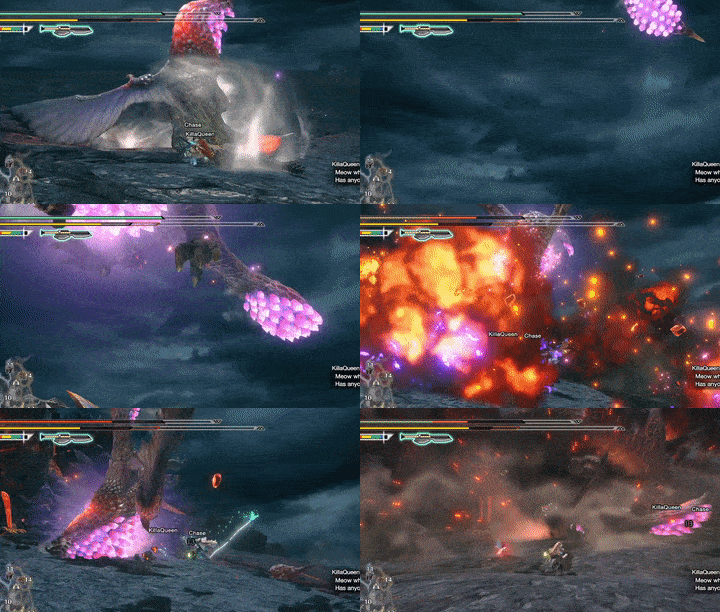 Grand Dive Bomb: Seething Bazelgeuse spreads its scales all around the area while hovering above the ground. Be careful not to dodge towards the center as Bazelgeuse will dive towards the ground and create a giant explosion which can one-hit you. This attack will occur if Bazelgeuse's Seething state is not stopped while it is active. |
Seething Bazelgeuse Materials and Drops
Master Rank Seething Bazelgeuse Materials
Seething Bazelgeuse Dropped Materials
Master Rank
|
|
Monster Hunter Rise Related Links
All Seething Bazelgeuse Guides
| All Seething Bazelgeuse Related Articles | ||
|---|---|---|
 Seething Bazelgeuse Guide Seething Bazelgeuse Guide
|
 Seething Bazelgeuse Weapons Seething Bazelgeuse Weapons
|
 Seething Bazelgeuse Armor Seething Bazelgeuse Armor
|
Sunbreak Monsters
| Sunbreak Monster Lists | ||
|---|---|---|
| Sunbreak Monsters List | Monster Subspecies List | Sunbreak Small Monsters List |
Large Monsters
MR6+ Large Monsters
| MR6+ Monsters | |||||
|---|---|---|---|---|---|
 Gaismagorm Gaismagorm(MR6) |
 Furious Rajang Furious Rajang(MR50) |
 Scorned Magnamalo Scorned Magnamalo(MR100) |
|||
Title Update 1 Monsters
| Sunbreak Title Update 1 Monsters | |||
|---|---|---|---|
 Seething Bazelgeuse Seething Bazelgeuse |
 Silver Rathalos Silver Rathalos |
 Gold Rathian Gold Rathian |
 Lucent Nargacuga Lucent Nargacuga |
Title Update 2 Monsters
| Sunbreak Title Update 2 Monsters | ||
|---|---|---|
 Flaming Espinas Flaming Espinas |
 Risen Chameleos Risen Chameleos |
 Violet Mizutsune Violet Mizutsune |
Title Update 3 Monsters
| Sunbreak Title Update 3 Monsters | ||
|---|---|---|
 Chaotic Gore Magala Chaotic Gore Magala |
 Risen Kushala Daora Risen Kushala Daora |
 Risen Teostra Risen Teostra |
Title Update 4 Monsters
| Sunbreak Title Update 4 Monsters | |
|---|---|
 Velkhana Velkhana |
 Risen Crimson Glow Valstrax Risen Crimson Glow Valstrax |
Title Update 5 Monsters
| Sunbreak Title Update 5 Monsters | |
|---|---|
 Amatsu Amatsu |
 Risen Shagaru Magala Risen Shagaru Magala |
Small Monsters
| Sunbreak Small Monsters | |||||
|---|---|---|---|---|---|
 Boggi Boggi |
 Ceanataur Ceanataur |
 Gowngoat Gowngoat |
|||
 Hermitaur Hermitaur |
 Hornetaur Hornetaur |
 Pyrantula Pyrantula |
 Vespoid Vespoid |
 Velociprey Velociprey |
|
Other Large Monsters
Elder Dragons
| Elder Dragons | |||||
|---|---|---|---|---|---|
 Narwa the Allmother Narwa the Allmother |
|||||
 Wind Serpent Ibushi Wind Serpent Ibushi |
 Thunder Serpent Narwa Thunder Serpent Narwa |
 Crimson Glow Valstrax Crimson Glow Valstrax |
|||
 Chameleos Chameleos |
 Kushala Daora Kushala Daora |
 Teostra Teostra |
|||
Apex Monsters
| Apex Monsters | ||
|---|---|---|
 Apex Arzuros Apex Arzuros |
 Apex Rathian Apex Rathian |
 Apex Mizutsune Apex Mizutsune |
 Apex Rathalos Apex Rathalos |
 Apex Diablos Apex Diablos |
 Apex Zinogre Apex Zinogre |
Other Small Monsters
Author
Sunbreak Seething Bazelgeuse: Weakness and Drops
improvement survey
03/2026
improving Game8's site?

Your answers will help us to improve our website.
Note: Please be sure not to enter any kind of personal information into your response.

We hope you continue to make use of Game8.
Rankings
Gaming News
Popular Games

Genshin Impact Walkthrough & Guides Wiki

Honkai: Star Rail Walkthrough & Guides Wiki

Umamusume: Pretty Derby Walkthrough & Guides Wiki

Pokemon Pokopia Walkthrough & Guides Wiki

Resident Evil Requiem (RE9) Walkthrough & Guides Wiki

Monster Hunter Wilds Walkthrough & Guides Wiki

Wuthering Waves Walkthrough & Guides Wiki

Arknights: Endfield Walkthrough & Guides Wiki

Pokemon FireRed and LeafGreen (FRLG) Walkthrough & Guides Wiki

Pokemon TCG Pocket (PTCGP) Strategies & Guides Wiki
Recommended Games

Diablo 4: Vessel of Hatred Walkthrough & Guides Wiki

Cyberpunk 2077: Ultimate Edition Walkthrough & Guides Wiki

Fire Emblem Heroes (FEH) Walkthrough & Guides Wiki

Yu-Gi-Oh! Master Duel Walkthrough & Guides Wiki

Super Smash Bros. Ultimate Walkthrough & Guides Wiki

Pokemon Brilliant Diamond and Shining Pearl (BDSP) Walkthrough & Guides Wiki

Elden Ring Shadow of the Erdtree Walkthrough & Guides Wiki

Monster Hunter World Walkthrough & Guides Wiki

The Legend of Zelda: Tears of the Kingdom Walkthrough & Guides Wiki

Persona 3 Reload Walkthrough & Guides Wiki
All rights reserved
©CAPCOM CO., LTD. ALL RIGHTS RESERVED.
The copyrights of videos of games used in our content and other intellectual property rights belong to the provider of the game.
The contents we provide on this site were created personally by members of the Game8 editorial department.
We refuse the right to reuse or repost content taken without our permission such as data or images to other sites.

 Daimyo Hermitaur
 Blood Orange Bishaten
 Garangolm
 Aurora Somnacanth
 Shogun Ceanataur
 Lunagaron
 Astalos
 Seregios
 Magma Almudron
 Gore Magala
 Espinas
 Pyre Rakna-Kadaki
 Malzeno
 Shagaru Magala
 Great Izuchi
 Arzuros
 Great Baggi
 Lagombi
 Aknosom
 Tetranadon
 Kulu-Ya-Ku
 Barroth
 Great Wroggi
 Royal Ludroth
 Khezu
Khezu Bishaten
 Somnacanth
 Barioth
 Rathian
 Tobi-Kadachi
 Volvidon
 Basarios
 Pukei-Pukei
 Magnamalo
 Nargacuga
 Zinogre
 Anjanath
 Mizutsune
 Rathalos
 Almudron
 Goss Harag
 Tigrex
 Diablos
 Jyuratodus
 Rajang
 Rakna-Kadaki
 Altaroth
 Anteka
 Baggi
Baggi Bnahabra
 Bombadgy
 Bullfango
 Delex
Delex Felyne
 Gajau
Gajau Gargwa
 Izuchi
 Jaggi
Jaggi Jaggia
 Jagras
 Kelbi
Kelbi Kestodon
 Ludroth
 Melynx
 Popo
Popo Rachnoid
 Remobra
 Rhenoplos
 Slagtoth
 Uroktor
 Wroggi
 Zamite


![Monster Hunter Stories 3 Review [First Impressions] | Simply Rejuvenating](https://img.game8.co/4438641/2a31b7702bd70e78ec8efd24661dacda.jpeg/thumb)


Wrong information. Major weakness is Ice, 2ndary is thunder.