High Rank Hammer Builds | Monster Hunter Rise
★ All Title Updates now available for ALL PLATFORMS!
┗ Title Update 4 | Title Update 5 | Bonus Update
┗ Check out all our Best Builds For Every Weapon!
┗ TU4 Monsters: Velkhana | Risen C.G. Valstrax
┗ TU5 Monsters: Amatsu | Risen Shagaru Magala
┗ Bonus Update Monster: Primordial Malzeno

This is a guide to the best high rank builds Hammers in Monster Hunter Rise (MH Rise). Learn about the best Hammers from Update 3.0, and the best Skills and Armor pieces to use with the Hammers for High Rank, and Endgame.
List of Contents
Endgame Build (Update 3.0): HR 100+
Tigrex Raw
| Weapon | Slots | ATK | DEF |
|---|---|---|---|
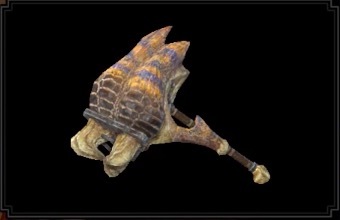 Tigrex Hammer Tigrex Hammer
 |
ーーー | 220 | - |
| Affinity | Element/Status | ||
| -20% |
-
|
||
| Armor | Slots | Skills |
|---|---|---|
|
|
①ーー |
Critical Eye Lv. 3
Critical Boost Lv. 1
|
|
|
③②① | No Skills |
|
|
②ーー |
Weakness Exploit Lv. 2
Dragonheart Lv. 1
|
|
|
②①① |
Attack Boost Lv. 2
|
|
|
①ーー |
Attack Boost Lv. 2
Critical Eye Lv. 2
|
| Talisman Skill | Weakness Exploit Lv. 1 with ②①① slot |
|
| Decorations | ||
| Skills | |
|---|---|
|
Critical Eye Lv. 7
| Attack Boost Lv. 5 Weakness Exploit Lv. 3 | Critical Boost Lv. 3 Stamina Thief Lv. 3 | Speed Sharpening Lv. 3 Dragonheart Lv. 1 |
| Build Merits | This build focuses on mitigating the -20% Affiinity on the Tigrex Hammer and taking full advantage of its massive 220 base damage. On weakpoints the Tigrex Hammer will hit with 70% Affinity thanks to Weakness Exploit Lv.3 and Critical Eye Lv.7. This is enough to consistantly deal massive damage to monster heads using Impact Crater. |
|---|
High Rank Build (Update 2.0): HR 40 to 99
Narga Critical
| Weapon | Slots | ATK | DEF |
|---|---|---|---|
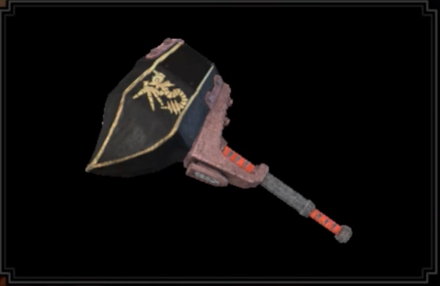
 Night Eternal Night Eternal
 |
②ーー | 180 | - |
| Affinity | Element/Status | ||
| 45% |
-
|
||
| Armor | Slots | Skills |
|---|---|---|
|
|
①ーー |
Latent Power Lv. 1
Weakness Exploit Lv. 1
|
|
|
③②① | No Skills |
|
|
①ーー |
Attack Boost Lv. 2
Slugger Lv. 2
|
|
|
②①① |
Attack Boost Lv. 2
|
|
|
①①ー |
Latent Power Lv. 1
Critical Boost Lv. 2
|
| Talisman Skill | Weakness Exploit Lv. 2 with one additional ② slot or more |
|
| Decorations | ||
| Skills | |
|---|---|
| Attack Boost Lv. 7
| Weakness Exploit Lv. 3 Critical Boost Lv. 3 | Stamina Thief Lv. 3 Speed Sharpening Lv. 3 | Slugger Lv. 3 Latent Power Lv. 2 | Flinch Free Lv. 1 |
| Build Merits | The build we recommended during the climb towards HR 40+ still holds strong at this stage of the game! Expect to easily control monsters via exhaustion and knockouts with this build. |
|---|
High Rank Build (Update 2.0): HR 8 to 40
Narga Critical
| Weapon | Slots | ATK | DEF |
|---|---|---|---|
|
Night Eternal
|
②ーー | 180 | - |
| Affinity | Element/Status | ||
| 45% |
-
|
||
| Armor | Slots | Skills |
|---|---|---|
|
|
①ーー |
Latent Power Lv. 1
Weakness Exploit Lv. 1
|
|
|
③②① | No Skills |
|
|
①ーー |
Attack Boost Lv. 2
Slugger Lv. 2
|
|
|
②①① |
Attack Boost Lv. 2
|
|
|
①①ー |
Latent Power Lv. 1
Critical Boost Lv. 2
|
| Talisman Skill | Weakness Exploit Lv. 2 with one additional ② slot or more |
|
| Decorations | ||
| Skills | |
|---|---|
| Attack Boost Lv. 7
| Weakness Exploit Lv. 3 Critical Boost Lv. 3 | Stamina Thief Lv. 3 Speed Sharpening Lv. 3 | Slugger Lv. 3 Latent Power Lv. 2 | Flinch Free Lv. 1 |
| Build Merits | This build maximizes Hammer DPS with Attack and Critical Boost. Maxed out Stamina Thief and Slugger are added to improve monster exhaustion and knockouts respectively. This build is best used with Night Eternal due to its high affinity and ② slot. |
|---|
High Rank Build: Hub HR 7+
Night Eternal Critical
| Weapon | Slots | ATK | DEF |
|---|---|---|---|
|
Night Eternal
|
②ーー | 180 | - |
| Affinity | Element/Status | ||
| 45% |
-
|
||
| Armor | Defense | Skills |
|---|---|---|
|
|
②ーー | |
|
|
①ーー |
Latent Power Lv. 1
Weakness Exploit Lv. 1
|
|
|
①ーー |
Attack Boost Lv. 2
Slugger Lv. 2
|
|
|
ーーー |
Weakness Exploit Lv. 2
|
|
|
①①ー |
Latent Power Lv. 1
Critical Boost Lv. 2
|
| Skills | |
|---|---|
Weakness Exploit Lv. 3
| Slugger Lv. 3
Attack Boost Lv. 2 | Critical Boost Lv. 2 Latent Power Lv. 2 | Focus Lv. 1 |
Best Talisman Skills
| Recommended Talisman Skills | |||
|---|---|---|---|
| Critical Eye | Slugger | Evade Extender | Razor Sharp |
| Build Merits | A hammer setup that aims for max affinity with the Nargacuga's Night Eternal hammer and max Weakness Exploit for 95% affinity when hitting the monster's head. Affinity is over 100% with Latent Power which guarantees max damage against monster weakspots. Lastly, Slugger is included to further improve on the Hammer's KO potential. |
|---|
High Rank Build: Hub HR 4 to 6
High Rank Starter
War Basher Build
| Weapon | Slots | ATK | DEF |
|---|---|---|---|
 War Basher War Basher
 |
①ーー | 180 | - |
| Affinity | Element/Status | ||
| 0% |
-
|
||
| Armor | Defense | Skills |
|---|---|---|
|
|
①①ー |
Critical Eye Lv. 1
|
|
|
①ーー |
Critical Eye Lv. 2
Recovery Speed Lv. 1
|
|
|
②ーー |
Critical Eye Lv. 2
Heroics Lv. 1
|
|
|
ーーー |
Weakness Exploit Lv. 2
|
|
|
ーーー |
Attack Boost Lv. 1
Critical Eye Lv. 1
|
| Skills | |
|---|---|
|
Critical Eye Lv. 7
| Attack Boost Lv. 2 Weakness Exploit Lv. 2 | Recovery Speed Lv. 1 Heroics Lv. 1 |
| Build Merits | A simple high-rank affinity starter set for Hammers. What it lacks in QoL skills, it makes up for with high affinity and raw damage to end hunts faster. |
|---|
Best Hammer Skills
| Best Hammer Skills | |
|---|---|
| Weakness Exploit ★★★ |
Increased affinity when hitting enemy weakspots. A vital skill for hammers who needs to stay on monster heads. |
| Attack Boost ★★★ |
Higher base attack equates to higher base damage. Simple math for a simple weapon! |
| Critical Eye ★★★ |
Flat increase to affinity. Always aim for 80-100% affinity levels! |
| Critical Boost ★★★ |
More damage from critical strikes. With Critical Eye and Weakness Exploit, this skill's value rises more. |
| Slugger ★★ |
Improves stun rate. Useful for solo due to the lower enemy ailment resistance but also works well in Multiplayer. |
| Stamina Thief ★★ |
Some Hammer attacks can exhaust monsters. Increase their effectiveness by investing in Stamina Thief! |
| Speed Sharpening ★ |
Maintaining a Hammer's sharpness bar is a good way to optimize DPS. |
| Flinch Free ★ |
Prevents allies from flinching you and even interrrupting your charge attacks. |
Monster Hunter Rise Related Links

|
• Weapons marked withNEW have been updated. • Weapons withUP have been reviewed and does not warrant an updated build from the Bonus Update. |
| All Weapon Build Guides | |
|---|---|
NEW Low Rank | High Rank Master Rank |
NEW Low Rank | High Rank Master Rank |
NEW Low Rank | High Rank Master Rank |
NEW Low Rank | High Rank Master Rank |
NEW Low Rank | High Rank Master Rank |
NEW Low Rank | High Rank Master Rank |
NEW Low Rank | High Rank Master Rank |
NEW Low Rank | High Rank Master Rank |
NEW Low Rank | High Rank Master Rank |
NEW Low Rank | High Rank Master Rank |
NEW Low Rank | High Rank Master Rank |
NEW Low Rank | High Rank Master Rank |
NEW Low Rank | High Rank Master Rank |
UP Low Rank | High Rank Master Rank |
Other Builds
| Other Build Guides | |
|---|---|
| General High Rank Builds and Best Equipment | Buddy Equipment Builds Palico | Palamute |
Comment
The war basher feels like a horrible pick for a starter high rank build. you could easily get to the narcuga hammer before you even find a wyvern gem.
Author

High Rank Hammer Builds | Monster Hunter Rise
Rankings
- We could not find the message board you were looking for.
Gaming News
![Animal Crossing: New Horizons Review [Switch 2] | Needlessly Crossing Over to a New Generation](https://img.game8.co/4391759/47d0408b0b8a892e453a0b90f54beb8a.png/show)


Popular Games

Genshin Impact Walkthrough & Guides Wiki
Honkai: Star Rail Walkthrough & Guides Wiki
Arknights: Endfield Walkthrough & Guides Wiki
Umamusume: Pretty Derby Walkthrough & Guides Wiki
Wuthering Waves Walkthrough & Guides Wiki
Pokemon TCG Pocket (PTCGP) Strategies & Guides Wiki
Abyss Walkthrough & Guides Wiki
Zenless Zone Zero Walkthrough & Guides Wiki
Digimon Story: Time Stranger Walkthrough & Guides Wiki
Clair Obscur: Expedition 33 Walkthrough & Guides Wiki


Recommended Games
Fire Emblem Heroes (FEH) Walkthrough & Guides Wiki
Pokemon Brilliant Diamond and Shining Pearl (BDSP) Walkthrough & Guides Wiki
Diablo 4: Vessel of Hatred Walkthrough & Guides Wiki
Super Smash Bros. Ultimate Walkthrough & Guides Wiki
Yu-Gi-Oh! Master Duel Walkthrough & Guides Wiki
Elden Ring Shadow of the Erdtree Walkthrough & Guides Wiki
Monster Hunter World Walkthrough & Guides Wiki
The Legend of Zelda: Tears of the Kingdom Walkthrough & Guides Wiki
Persona 3 Reload Walkthrough & Guides Wiki
Cyberpunk 2077: Ultimate Edition Walkthrough & Guides Wiki


All rights reserved
©CAPCOM CO., LTD. ALL RIGHTS RESERVED.
The copyrights of videos of games used in our content and other intellectual property rights belong to the provider of the game.
The contents we provide on this site were created personally by members of the Game8 editorial department.
We refuse the right to reuse or repost content taken without our permission such as data or images to other sites.
I agree but I preferred the teddy bear hammer