
 Daimyo Hermitaur
 Blood Orange Bishaten
 Garangolm
 Aurora Somnacanth
 Shogun Ceanataur
 Lunagaron
 Astalos
 Seregios
 Magma Almudron
 Gore Magala
 Espinas
 Pyre Rakna-Kadaki
 Malzeno
 Shagaru Magala
 Great Izuchi
 Arzuros
 Great Baggi
 Lagombi
 Aknosom
 Tetranadon
 Kulu-Ya-Ku
 Barroth
 Great Wroggi
 Royal Ludroth
 Khezu
Khezu Bishaten
 Somnacanth
 Barioth
 Rathian
 Tobi-Kadachi
 Volvidon
 Basarios
 Pukei-Pukei
 Magnamalo
 Nargacuga
 Zinogre
 Anjanath
 Mizutsune
 Rathalos
 Almudron
 Goss Harag
 Tigrex
 Jyuratodus
 Rajang
 Rakna-Kadaki
 Bazelgeuse
 Altaroth
 Anteka
 Baggi
Baggi Bnahabra
 Bombadgy
 Bullfango
 Delex
Delex Felyne
 Gajau
Gajau Gargwa
 Izuchi
 Jaggi
Jaggi Jaggia
 Jagras
 Kelbi
Kelbi Kestodon
 Ludroth
 Melynx
 Popo
Popo Rachnoid
 Remobra
 Rhenoplos
 Slagtoth
 Uroktor
 Wroggi
 Zamite
This survey will take about 1 minute.
Your answers will help us to improve our website.
Monster Hunter Rise: Sunbreak
Sunbreak Diablos: Weakness and Drops
★ All Title Updates now available for ALL PLATFORMS!
┗ Title Update 4 | Title Update 5 | Bonus Update
┗ Check out all our Best Builds For Every Weapon!
┗ TU4 Monsters: Velkhana | Risen C.G. Valstrax
┗ TU5 Monsters: Amatsu | Risen Shagaru Magala
┗ Bonus Update Monster: Primordial Malzeno
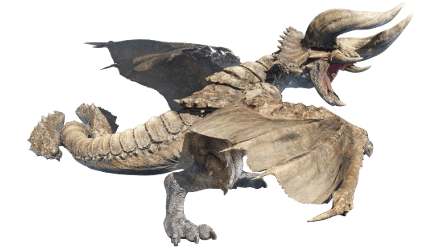
This is a hunting guide for Diablos, a Large Monster in Monster Hunter Rise (MH Rise) and the Sunbreak DLC. Read on to learn Diablos's weaknesses, forgeable weapons and armor, drops, and attack patterns for Master Rank!
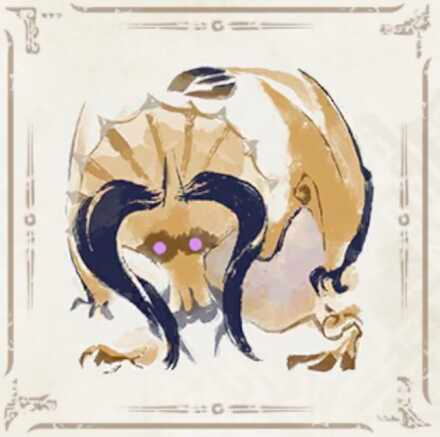 Diablos Guide Diablos Guide
|
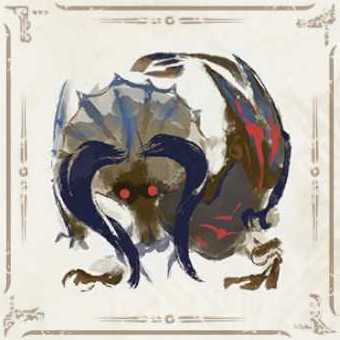 Apex Diablos Guide Apex Diablos Guide
|
 Diablos Weapons Diablos Weapons
|
 Diablos Armor Diablos Armor
|
List of Contents
Diablos Weakness and Notes
| Diablos ディアブロス |
|||
|---|---|---|---|
 |
|||
| Type | Flying Wyvern | Previous Games | MHF2, MH3, MH4U, MHW |
| Threat Level | 7/10 | Rampage Type |
|
| Major Weakness | Other Weakness | ||
| Blight / Elemental Damage | ー | Abnormal Status | ー |
| Characteristics | |||
| Known as the "Tyrant of the Desert." The Diablos is extremely territorial and will use its massive horns to charge at invaders. Diablos have the ability to borrow underground and use this ability to strike from below, however, their sensitive ears make them susceptible to Sonic Bombs. Despite their predatory appearance, they are herbivorous and mostly feed on cactus. | |||
How to Unlock Diablos
Complete Ice Wolf, Red Moon in Master Rank
| Quest Name | Monster/Unlock |
|---|---|
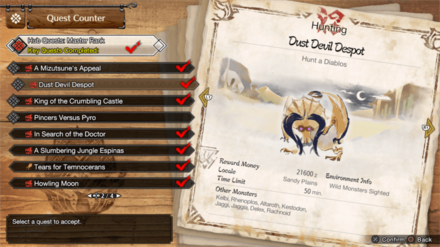
| Dust Devil Despot (Key Quest) |
|
| Unlock Conditions: Finish the Quest "Ice Wolf, Red Moon" |
MR Diablos is unlocked by completing the Urgent Quest Ice Wolf, Red Moon and reaching M★4 in the Sunbreak expansion.
MR Grinding Guide:
How to Get from MR 6 to MR 100 Fast
Complete Can't Kill It with Fire in High Rank
| Quest Name | Monster/Unlock |
|---|---|
|
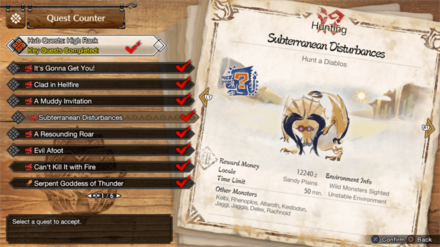
Subterranean Disturbances
(Key Quest) |
|
| Unlock Conditions: Finish the Quest "Can't Kill It with Fire" |
High Rank Diablos is unlocked by completing the Urgent Quest Can't Kill It with Fire and reaching HR 7.
Hunter Rank Farm Guide:
How to Get from HR 7 to HR 100 Fast
Reach HR 3 in Low Rank

| Quest Name | Monster/Unlock |
|---|---|
|
A Few Bumps Along the Way
(Key Quest) |
|
| Unlock Conditions: Clear ★5 Village Special License Test 2 |
Low Rank Diablos is unlocked by completing the ★5 Village Special License Test 2 and reaching HR 3.
Diablos Weakness and Resistance
| 38 | 41 | 34 | 0 |
| 19 | 9 | 23 | 19 |
Bold are the recommended Weapon Type and Elemental Damage.
Diablos Weapon Damage Breakdown
| Part | |||
|---|---|---|---|
| Head | 45 | 60 | 40 |
| Horn | 21 | 42 | 20 |
| Neck | 40 | 40 | 25 |
| Abdomen | 65 | 70 | 40 |
| Back | 25 | 42 | 35 |
| Wing | 40 | 30 | 60 |
| Leg | 35 | 35 | 35 |
| Tail | 50 | 24 | 45 |
| Tail Tip | 23 | 26 | 10 |
| Overall | 38 | 41 | 34 |
Diablos Elemental Weakness Breakdown
| Part | |||||
|---|---|---|---|---|---|
| Head | 0 | 15 | 10 | 25 | 15 |
| Horn | 0 | 20 | 10 | 25 | 20 |
| Neck | 0 | 15 | 5 | 20 | 15 |
| Abdomen | 0 | 25 | 10 | 30 | 25 |
| Back | 0 | 20 | 10 | 25 | 20 |
| Wing | 0 | 25 | 10 | 30 | 25 |
| Leg | 0 | 10 | 5 | 15 | 10 |
| Tail | 0 | 20 | 10 | 15 | 20 |
| Tail Tip | 0 | 20 | 10 | 25 | 20 |
| Overall | 0 | 19 | 9 | 23 | 19 |
Higher numbers indicate higher potential damage to the monster.
Diablos Hunting Tips

Diablos can be forcibly brought to the surface by using loud sounds. And its charging attack, while devastatingly powerful, can be baited into colliding with anthills, momentarily getting the Diablos stuck.
Status Effect Vulnerabilities
| Poison | Stun | Paralysis | Sleep |
|---|---|---|---|
| ★ | -- | ★★★ | ★ |
| Blast | Exhaust | Fireblight | Waterblight |
| ★★ | ★ | ★ | ★ |
| Thunderblight | Iceblight | ||
| ★ | ★★ | ||
If an ailment has more stars it means that it has better effectiveness.
Item Vulnerabilities
| Pitfall Trap | Shock Trap | Flash Bomb |
|---|---|---|
| ◯ | ◯ | ◯ |
| Sonic Bomb | Meat Effects | Dung Bomb |
| △ | ✕ | ◯ |
◯ = Vulnerable; ✕ = Fully Resistant; ▲ = Situational
Kinsect Extracts
| Monster Part | Extract |
|---|---|
| Head |
|
| Horn |
|
| Neck |
|
| Abdomen |
|
| Back |
|
| Wing |
|
| Leg |
|
| Tail |
|
| Tail Tip |
|
Red = Attack Increase, White = Movement Boost, Orange = Anti-knockback When Attacking
Diablos Locations and Quests
Diablos Known Habitat
| Map | Starting Area | Visited Areas | Rest Area |
|---|---|---|---|
 Sandy Plains Sandy Plains
|
9 / 12 | 5 / 6 / 8 / 9 / 10 / 11 / 12 | 12 |
 Infernal Springs Infernal Springs
|
- | - | - |
Diablos Quest Appearances
Master Rank
High Rank
Low Rank
| Quest Type | Lvl | Quest Name |
|---|---|---|
| Anomaly Quest | A★5 | Anomaly Research: Diablos |
| Event Quest | M★4 | Running Out of Ideas |
| Event Quest | M★4 | Wild Growth |
| Hub Quest | M★4 | Dust Devil Despot (Key Quest) |
| Hub Quest | M★4 | Monju Mashup! |
| Hub Quest | M★4 | Wicked Wyvern Trilogy |
| Follower Quest | M★5 | Front Row Seat |
| Hub Quest | M★5 | Life is Full of Ups and Downs |
| Support Survey | M★5 | Dangers in the Dark Desert |
| Quest Type | Lvl | Quest Name |
|---|---|---|
| Event Quest | ★7 | Heart of a Hero |
| Event Quest | ★7 | Kunai Ask You a Favor? |
| Hub Quest | ★7 | Fought, Failed, Fired Up |
| Hub Quest | ★7 | A Quartet of Horns |
| Hub Quest | ★7 | Subterranean Disturbances (Key Quest) |
| Hub Quest | ★7 | Advanced: Proof of Power |
| Quest Type | Lvl | Quest Name |
|---|---|---|
| Hub Quest | ★3 | A Few Bumps Along the Way (Key Quest) |
| Village Quest | ★6 | Twisted Desire |
How to Beat Diablos
| Diablos Tips | ||
|---|---|---|
|
|
Break Diablos' Horns

While staying near Diablos' head is risky, breaking its horns makes the fight easier as it reduces the range of its Charge Attacks. However, it is important to note that Diablos' horns are tough enough to deflect most weapons below blue sharpness.
When aiming to break Diablos' horns, consider using Hammers and Gunlances, as their charged swings and shelling damage can bypass the horns' durable nature. Alternatively, consider using Mind's Eye against Diablos so you can strike its horns without fear of bouncing attacks off of them.
Stay Close to Diablos' Rear
Some melee weapons may have a difficult time hitting Diablos' head due to the monster's tall height. Staying close to Diablos' rear and focusing attacks on its legs and chest is a safer strategy that can still result in knockdowns, allowing you to target the head afterwards.
Use Environmental Traps

Hunters can use walls and pillars in the environment to their advantage by baiting Diablos into charging at them, causing the monster to get stuck. Using environmental traps such as these can create large openings that hunters can use to deal massive damage to Diablos.
Use Quicksand in the Sandy Plains

When destroyed, the pillars in the Sandy Plains uncover quicksand pits. These quicksand pits act like Pitfall Traps, making them great environmental traps to take advantage of when Diablos performs its charging attacks.
Sonic Bombs Can Disable Diablos
Hunters can use Sonic Bombs to force Diablos out of the ground. In particular, if Diablos is burrowing towards a target, throwing a Sonic Bomb towards the crumbling earth will cause it to end its attack prematurely. Doing this leaves it vulnerable for a few seconds, giving hunters a window of opportunity to easily deal damage to the monster.
Diablos Master Rank Attack Patterns
In addition to its attacks in Low and High Rank quests, Diablos uses the following attacks in Master Rank.
| Name | Description |
|---|---|
| Delayed Horn Slam | Diablos rears its head far back before slamming its horns down on the hunter. |
| Diving Horn Slam DANGER |
Diablos rears backward before quickly diving forward to slam its horns on top of the hunter. |
| Charging Gore Feint DANGER |
Diablos performs a Charging Gore before stopping short to suddenly slam its horns on top of the hunter. |
Delayed Horn Slam
| Delayed Horn Slam Attack Information |
|---|
 Delayed Horn Slam: Diablos rears its head far back before slamming its horns down on the hunter, dealing heavy damage on contact. Diablos takes a significant amount of time to wind this move up, so prepare to guard, parry, or move out of the way when this attack begins to avoid getting hit. |
Diving Horn Slam
| Diving Horn Slam Attack Information |
|---|
 Diving Horn Slam: Diablos rears backward before quickly diving forward to slam its horns on top of the hunter, dealing massive damage. This move covers a surprising amount of distance and also tracks the hunter, so prepare to dodge at the last moment or dive-evade to avoid getting hit. |
Charging Gore Feint
| Charging Gore Feint Attack Information |
|---|
 Charging Gore Feint: Diablos performs a Charging Gore before stopping short in its tracks to suddenly slam its horns on top of the hunter, dealing massive damage on hit. The follow-up horn slam covers a surprising amount of distance and also tracks the hunter, so don't hesitate to perform a dive-evade to avoid getting hit by this attack when it occurs. |
Diablos General Attack Patterns
Diablos uses the following attacks in Low and High Rank quests.
| Name | Description |
|---|---|
| Double Gore | Diablos swings its horns from side to side. |
| Quick Bite | Diablos performs a quick bite towards hunters in front of it. |
| Hip Check | Diablos uses its hips to tackle sideways. |
| Tail Attacks | Diablos uses its tail to assault the hunter. This attack has several variations. |
| Charging Attacks DANGER |
Diablos charges at the hunter, horns first. This attack has several variations. |
| Burrowing Attacks DANGER |
Diablos burrows underground to ambush the hunter. This attack has several variations. |
Double Gore
| Double Gore Attack Information |
|---|
 Double Gore: Diablos rears back before performing two frontal horn swings, sweeping its head from one side to another. This attack covers a massive area in front of Diablos so prepare to dodge or block twice if caught in its path. |
Quick Bite
| Quick Bite Attack Information |
|---|
 Quick Bite: Diablos performs a quick bite towards hunters in front of it. This attack deals minor damage but can potentially knock you back, leaving you open for deadlier attacks. |
Hip Check
| Hip Check Attack Information |
|---|
 Hip Check: Diablos rams its hips sideways similar to other Wyverns like Barioth, dealing massive damage and knocking anyone down in its path. Its best to dodge towards Diablos' tail when it begins to posture for a Hip Check. |
Tail Attacks
Diablos can use its massive tail to inflict high damage towards unsuspecting hunters.
| Tail Attack Variations |
|---|
 Tail Spin: Diablos spins in place two times, flinging its massive tail towards anyone positioned around it. Each spin covers 180 degrees. |
 Tail Slam: Diablos quickly slams its tail towards anyone who stays directly behind it for too long! Getting hit with this attack knocks you down and leaves you open to devastating follow-up attacks. |
 Diagonal Tail Whips: Diablos whips its tail two times in a diagonal fashion, dealing high damage and launching anyone caught in the attacks. |
 Boulder Fling: Diablos spins around and slaps its tail at the earth in front of it. This results in a boulder flying towards the target. |
Charging Attacks
One of Diablos' signature sets of moves is its Charging Attacks. Diablos lowers its horns before locking on a target and running towards them at full speed, dealing massive damage on contact.
Each variation of Diablos' Charging Attacks can easily knock out careless hunters.
| Charging Attack Variations |
|---|
 Charging Gore: Diablos assumes a low stance before charging towards its target, ending its stampede by thrusting its horns upward in an attempt to gore them. Dodging this attack is fairly easy as long as you are a considerable amount of distance away from Diablos prior to the charge. Walk towards one side as Diablos readies itself, then start evading or sprinting in the same direction when it begins charging towards you. |
 Horn-Dragging Charge: Diablos slowly tilts its head down before quickly charging towards the hunter, dragging its horns through the ground as it moves. The key to dodging this attack is to run away in a straight line perpendicular to Diablos as it positions for the charge. This makes it easier to determine and avoid the path of Diablos' attack. |
 Sudden Charge: Diablos assumes a low stance similar to its Charging Gore, but performs a rapid charge forward instead of its usual long stampede. This attack usually occurs whenever a hunter is too close to Diablos, or after it sprints towards a target. This is the fastest Charging Attack variation out of the three, so always be prepared to dodge or block whenever Diablos lowers its head. |
Burrowing Attacks
Another one of Diablos' signature sets of moves is its Burrowing Attacks. In these attacks, Diablos burrows underground and prepares to ambush its target from the air or from underneath them.
| Burrowing Attack Variations |
|---|
 Burrowing Assault: Diablos picks a target as it burrows underground. After it completely burrows itself, it will travel towards the target and emerge underneath them, launching them upward and dealing an incredibly high amount of damage. Sheathe your weapon and begin sprinting as soon it starts burrowing if you cannot block the attack! |
 Aerial Ambush: Diablos burrows underground and begins traveling away from the hunter. After making enough distance, it breaches the ground and leaps towards its target, dealing massive damage on impact. This move is particularly dangerous as Diablos' entire body turns into a hitbox during the attack. Don't hesitate to perform a dive-evade when caught in the path of this attack! |
Diablos Materials and Drops
Master Rank Diablos Materials
Target
Capture
Broken Parts
Carves
High Rank Diablos Materials
Target
Capture
Broken Parts
Carves
Low Rank Diablos Materials
Target
Capture
Broken Parts
Carves
Diablos Dropped Materials
Master Rank
High Rank
Low Rank
Monster Hunter Rise Related Guides
All Diablos Guides
| All Diablos Related Articles | ||
|---|---|---|
|
Diablos Guide
|
Diablos Weapons
|
Diablos Armor
|
Sunbreak Monsters
| Sunbreak Monster Lists | ||
|---|---|---|
| Sunbreak Monsters List | Monster Subspecies List | Sunbreak Small Monsters List |
Large Monsters
MR6+ Large Monsters
| MR6+ Monsters | |||||
|---|---|---|---|---|---|
 Gaismagorm Gaismagorm(MR6) |
 Furious Rajang Furious Rajang(MR50) |
 Scorned Magnamalo Scorned Magnamalo(MR100) |
|||
Title Update 1 Monsters
| Sunbreak Title Update 1 Monsters | |||
|---|---|---|---|
 Seething Bazelgeuse Seething Bazelgeuse |
 Silver Rathalos Silver Rathalos |
 Gold Rathian Gold Rathian |
 Lucent Nargacuga Lucent Nargacuga |
Title Update 2 Monsters
| Sunbreak Title Update 2 Monsters | ||
|---|---|---|
 Flaming Espinas Flaming Espinas |
 Risen Chameleos Risen Chameleos |
 Violet Mizutsune Violet Mizutsune |
Title Update 3 Monsters
| Sunbreak Title Update 3 Monsters | ||
|---|---|---|
 Chaotic Gore Magala Chaotic Gore Magala |
 Risen Kushala Daora Risen Kushala Daora |
 Risen Teostra Risen Teostra |
Title Update 4 Monsters
| Sunbreak Title Update 4 Monsters | |
|---|---|
 Velkhana Velkhana |
 Risen Crimson Glow Valstrax Risen Crimson Glow Valstrax |
Title Update 5 Monsters
| Sunbreak Title Update 5 Monsters | |
|---|---|
 Amatsu Amatsu |
 Risen Shagaru Magala Risen Shagaru Magala |
Small Monsters
| Sunbreak Small Monsters | |||||
|---|---|---|---|---|---|
 Boggi Boggi |
 Ceanataur Ceanataur |
 Gowngoat Gowngoat |
|||
 Hermitaur Hermitaur |
 Hornetaur Hornetaur |
 Pyrantula Pyrantula |
 Vespoid Vespoid |
 Velociprey Velociprey |
|
Other Large Monsters
Elder Dragons
| Elder Dragons | |||||
|---|---|---|---|---|---|
 Narwa the Allmother Narwa the Allmother |
|||||
 Wind Serpent Ibushi Wind Serpent Ibushi |
 Thunder Serpent Narwa Thunder Serpent Narwa |
 Crimson Glow Valstrax Crimson Glow Valstrax |
|||
 Chameleos Chameleos |
 Kushala Daora Kushala Daora |
 Teostra Teostra |
|||
Apex Monsters
| Apex Monsters | ||
|---|---|---|
 Apex Arzuros Apex Arzuros |
 Apex Rathian Apex Rathian |
 Apex Mizutsune Apex Mizutsune |
 Apex Rathalos Apex Rathalos |
Apex Diablos |
 Apex Zinogre Apex Zinogre |
Other Small Monsters
Author

Sunbreak Diablos: Weakness and Drops
Please participate in our site
improvement survey
03/2026
improvement survey
03/2026
Would you assist in
improving Game8's site?
improving Game8's site?

×
We are listening to our users' valuable opinions and discussing how to act on them.
The information collected through this survey will be used for the purpose of improving our services. In addition, the information will only be disclosed a part of a statistic in a format that will not allow identification of personal information.
Begin Survey
Not Now
×
Please rate each item regarding Game8.co's Advertisements.
Amount of Ads
Very Dissatisfied
Somewhat Dissatisfied
Fine
Somewhat Satisfied
Highly Satisfied
Placement of Ads
Timing of Ad Display
Ad Loading Speed
Safeness of Ads
Content of Ads
×
Please rate each item regarding Game8.co's Quality of Articles.
Amount of information
Very Dissatisfied
Somewhat Dissatisfied
Fine
Somewhat Satisfied
Highly Satisfied
Frequency of updates
Speed of new information
Accuracy of articles
Understandibility of articles
Readability of sentences
×
Please rate each item regarding Game8.co's Usability of the Site.
Ease of finding information
Very Dissatisfied
Somewhat Dissatisfied
Fine
Somewhat Satisfied
Highly Satisfied
Loading Speed
Use of Color
Font Size
Visibility of Images
Easy to Understand Layout
×
Please rate each item regarding Game8.co's Message Boards, Comments.
Ease of Writing
Very Dissatisfied
Somewhat Dissatisfied
Fine
Somewhat Satisfied
Highly Satisfied
Readability
Ease in Finding Information
Comment Quality
Comment Quantity
Admin Response
×
Please rate each item regarding Game8.co's Site's new design.
Please rate our site's new design
Very Dissatisfied
Somewhat Dissatisfied
Fine
Somewhat Satisfied
Highly Satisfied
Do you think that the website's design change makes the site easier to use?
Has the new design made it easier for you to find information on the site?
Has the new design improved the overall visual appeal of the site?
How would you rate your overall satisfaction with the new design of the site?
×
How likely are you to recommend Game8 to someone you know?
Very Unlikely
0
1
2
3
4
5
6
7
8
9
10
Very Likely
If you have other opinions regarding potential improvement to the website, please share them with us. We would appreciate your honest opinion.
Note: This is a free response section, so you can proceed without entering anything.
Note: Please be sure not to enter any kind of personal information into your response.
Note: Please be sure not to enter any kind of personal information into your response.
×
Thank You
×
Thank you for participating in our survey! Your answers will help us to improve the quality of our website and services.
We hope you continue to make use of Game8.
We hope you continue to make use of Game8.
Close
Rankings
- We could not find the message board you were looking for.
Gaming News


![Monster Hunter Stories 3 Review [First Impressions] | Simply Rejuvenating](https://img.game8.co/4438641/2a31b7702bd70e78ec8efd24661dacda.jpeg/thumb)
Popular Games

Genshin Impact Walkthrough & Guides Wiki
Honkai: Star Rail Walkthrough & Guides Wiki
Umamusume: Pretty Derby Walkthrough & Guides Wiki
Pokemon Pokopia Walkthrough & Guides Wiki
Resident Evil Requiem (RE9) Walkthrough & Guides Wiki
Monster Hunter Wilds Walkthrough & Guides Wiki
Wuthering Waves Walkthrough & Guides Wiki
Arknights: Endfield Walkthrough & Guides Wiki
Pokemon FireRed and LeafGreen (FRLG) Walkthrough & Guides Wiki
Pokemon TCG Pocket (PTCGP) Strategies & Guides Wiki


Recommended Games
Diablo 4: Vessel of Hatred Walkthrough & Guides Wiki
Cyberpunk 2077: Ultimate Edition Walkthrough & Guides Wiki
Fire Emblem Heroes (FEH) Walkthrough & Guides Wiki
Yu-Gi-Oh! Master Duel Walkthrough & Guides Wiki
Super Smash Bros. Ultimate Walkthrough & Guides Wiki
Pokemon Brilliant Diamond and Shining Pearl (BDSP) Walkthrough & Guides Wiki
Elden Ring Shadow of the Erdtree Walkthrough & Guides Wiki
Monster Hunter World Walkthrough & Guides Wiki
The Legend of Zelda: Tears of the Kingdom Walkthrough & Guides Wiki
Persona 3 Reload Walkthrough & Guides Wiki


All rights reserved
©CAPCOM CO., LTD. ALL RIGHTS RESERVED.
The copyrights of videos of games used in our content and other intellectual property rights belong to the provider of the game.
The contents we provide on this site were created personally by members of the Game8 editorial department.
We refuse the right to reuse or repost content taken without our permission such as data or images to other sites.