This survey will take about 1 minute.
Your answers will help us to improve our website.
Monster Hunter Rise: Sunbreak
Sunbreak Hunting Horn Builds (Master Rank)
★ All Title Updates now available for ALL PLATFORMS!
┗ Title Update 4 | Title Update 5 | Bonus Update
┗ Check out all our Best Builds For Every Weapon!
┗ TU4 Monsters: Velkhana | Risen C.G. Valstrax
┗ TU5 Monsters: Amatsu | Risen Shagaru Magala
┗ Bonus Update Monster: Primordial Malzeno

This is a guide to the best builds and equipment for Hunting Horn in Monster Hunter Rise (MH Rise): Sunbreak. Learn about the best Hunting Horn for Master Rank, and the best Skills and Armor pieces to use with the Hunting Horn for Master Rank from the early game until the end game!
| All Hunting Horn Guides | ||
|---|---|---|
 Trees & Full List Trees & Full List |
 How to Use How to Use |
 Best Builds Best Builds |
| Songs and Effects | ||
List of Contents
Hunting Horn Builds List & Progression
This is a quick section summarizing all the Hunting Horn builds in this page. It is arranged from newest to oldest, and MR build progression is from bottom to top.
Click on the build name to see the build!
| Master Rank | Title Update | Build Name |
|---|---|---|
| MR160+ | Bonus Update | Blood Awakening Elemental Horns |
| MR180+ | TU5 | Dragon Conversion Elemental Horns |
| MR160+ | TU4 | Elemental Hunting Horns |
| MR140+ | TU3 | Poison Buildup Boost |
| MR140+ | TU3 | Rooksearer Dereliction Raw |
| MR10+ | TU3 | Dereliction Elemental Healing Horns |
| MR10+ | TU3 | Sharpness Regeneration Elemental Horns |
| MR6+ | Base | Fine Kamura Flute Raw Climber |
| MR3-6 | Base | Frostmoon Sharpness Regeneration |
| MR3-6 | Base | Teostra Agitator Raw |
| MR1-2 | Base | Fortissimo+ Raw Slugger |
Ultra Endgame MR Build: MR 100+
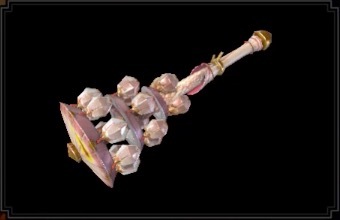
Blood Awakening Elemental Horns
| Weapon | ATK | DEF | Affinity | |
|---|---|---|---|---|
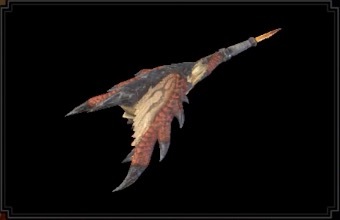 Ophelia's Grace Ophelia's Grace
 |
310 | 0 | 0% | |
| Element / Status |
Slots | Rampage Slots | ||
| ①ーー | ③ | |||
Elemental Attack Boost |
||||
Sonic Wave |
||||
Stamina Recovery Up |
||||
| Weapon | ATK | DEF | Affinity | |
|---|---|---|---|---|
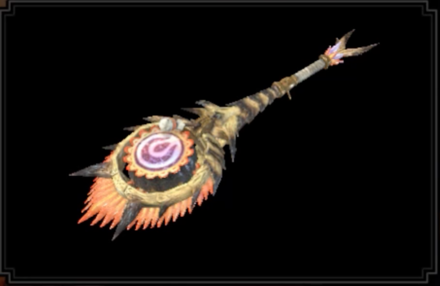
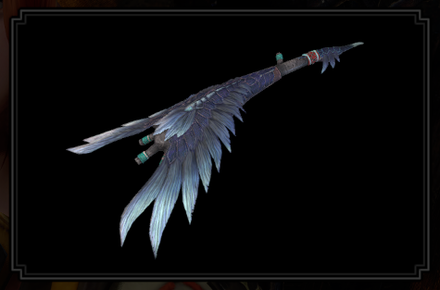
 Autumn Lute Autumn Lute
 |
350 | 0 | -25% | |
| Element / Status |
Slots | Rampage Slots | ||
| ーーー | ③ | |||
Elemental Attack Boost |
||||
Health Regeneration |
||||
Blight Negated |
||||
| Weapon | ATK | DEF | Affinity | |
|---|---|---|---|---|
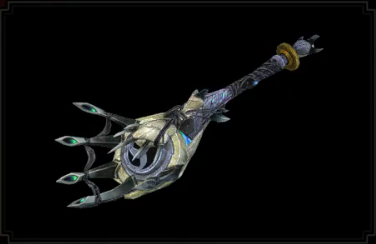
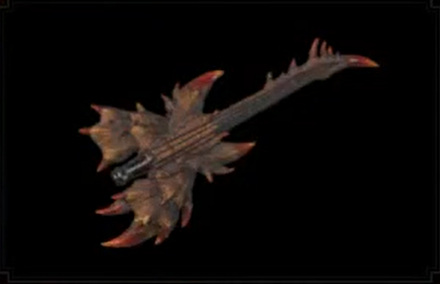
 Skytremor Rumble Skytremor Rumble
 |
320 | 0 | 0% | |
| Element / Status |
Slots | Rampage Slots | ||
| ーーー | ② | |||
Stun Negated |
||||
Health Recovery (L) |
||||
Health Regeneration |
||||
| Weapon | ATK | DEF | Affinity | |
|---|---|---|---|---|
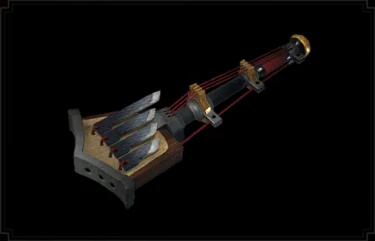
 Flicker Blizzard Flute Flicker Blizzard Flute
 |
320 | 0 | 0% | |
| Element / Status |
Slots | Rampage Slots | ||
| ②②ー | ② | |||
Stamina Use Reduced |
||||
Health Regeneration |
||||
Stun Negated |
||||
| Weapon | ATK | DEF | Affinity | |
|---|---|---|---|---|
 Silver Smasher Silver Smasher
 |
300 | 0 | 0% | |
| Element / Status |
Slots | Rampage Slots | ||
| ④④④ | ③ | |||
Blight Negated |
||||
Attack and Defense Up |
||||
Sharpness Loss Reduced |
||||
| Armor | Slots | Skills | |
|---|---|---|---|
|
|
④②ー | ||
|
|
④④ー | ||
|
|
④④② |
Critical Boost Lv. 1
Blood Awakening Lv. 1
|
|
|
|
④①① | ||
|
|
④④ー | ||
| Talisman | Furious Lv. 2 with a ②② slot or better | ||
| Rampage Decoration |
|
||
| Decorations |
Hard Element Jewel+ 4 x1
Element Jewel 1 x1 Fire only: Ice only: Dragon only: |
||
| Skills | |
|---|---|
| Rampage Skill | Swap between Wyvern Exploit, Anti-Aerial Species, Anti-Aquatic Species, or Fanged Exploit depending on the monster. Use Element Exploit if monster has a 25 Element Hitzone (may require Rampage Slot Upgrade). |
|
Element Attack Lv.5
| Attack Boost Lv.5
Critical Boost Lv.3 | Weakness Exploit Lv.3 Stamina Surge Lv.3 | Dragon Resistance Lv.3 Partbreaker Lv.3 | Dragon Conversion Lv.3 Latent Power Lv.2 | Protective Polish Lv.2 Blood Rite Lv.2 | Furious Lv.2 Element Exploit Lv.2 | Burst Lv.2 Blood Awakening Lv.2 | Horn Maestro Lv.1 Inspiration Lv.1 | Bloodlust Lv.1 Fire Only: Teostra Blessing Lv.1 Ice Only: Handicraft Lv.2 | Element Exploit Lv.1 Kushala Blessing Lv.1 Dragon Only: Attack Boost Lv.7 | Critical Element Lv.2 Coalescence Lv.2 |
|
Build Merits and Augments
| Weapon Augments | |
|---|---|
| Armor Augments |
Armor Augments for this build are not necessary. However, feel free to add as you please once you get comfortable with your build! Generally, you'd want to get better skills and more slots for your armor.
Replaceable skills already on the armor: ● Latent Power ● Stamina Surge For damage, aim for any of the following: ● Furious ● Powder Mantle ● Coalescence ● Kushala Blessing Lv.2 (for Water and Ice builds, may replace Inspiration) ● Teostra Blessing Lv.2 (for Fire builds, may replace Inspiration) For comfort, aim for any of the following: ● Speed Sharpening (can also use Whetfish) ● Blood Rite ● Recovery Up ● Intrepid Heart ● Shockproof (add as decoration, multiplayer only) |
| Build Merits and Notes |
|---|
| This build offers a safer way to play the Hunting Horn without having to rely on Dereliction and healing songs. This build can achieve comparable power with the new Blood Awakening skill which boosts both raw and element when healing with Blood Rite or Bloodblight. Also new to the Bonus Update is the Inspiration skill, which boosts attack anytime you play a melody that buffs the party. It even works when hunting solo!
For the Fire, Water, and Ice builds, consider replacing Inspiration for Teostra Blessing or Kushala Blessing if you want an extra boost to elemental damage. The decoration may be added again once you gain a slot or the Blessing skills through armor augments. Like our other elemental builds, most of the elemental damage will come from Silkbind Shockwave. Element can be boosted really high with Dragon Conversion while taking advantage of the resistance boosts from the Blue Scroll, Furious, and Elemental Resistance Dango. The Furious talisman can only be rolled with Qurious Melding - Vigor, and while Lv.1 is usable, higher levels are ideal. |
TU5 Dragon Conversion Elemental Hunting Horns
Fire Elemental Hunting Horn
| Weapon | ATK | DEF | Affinity | |
|---|---|---|---|---|
 Horn of the Indomitable+ Horn of the Indomitable+
 |
320 | 0 | -15% | |
| Element / Status |
Slots | Rampage Slots | ||
| ②①ー | ② | |||
Stamina Recovery Up |
||||
Health Recovery (S) |
||||
Attack Up |
||||
| Decoration | ||
|---|---|---|
Water Elemental Hunting Horn
| Weapon | ATK | DEF | Affinity | |
|---|---|---|---|---|
|
Autumn Lute
|
350 | 0 | -25% | |
| Element / Status |
Slots | Rampage Slots | ||
| ーーー | ③ | |||
Elemental Attack Boost |
||||
Health Regeneration |
||||
Blight Negated |
||||
| Decoration | ||
|---|---|---|
Ice Elemental Hunting Horn
| Weapon | ATK | DEF | Affinity | |
|---|---|---|---|---|
|
Flicker Blizzard Flute
|
320 | 0 | 0% | |
| Element / Status |
Slots | Rampage Slots | ||
| ②②ー | ② | |||
Stamina Use Reduced |
||||
Health Regeneration |
||||
Stun Negated |
||||
| Decoration | ||
|---|---|---|
Thunder Elemental Hunting Horn
| Weapon | ATK | DEF | Affinity | |
|---|---|---|---|---|
|
Skytremor Rumble
|
320 | 0 | 0% | |
| Element / Status |
Slots | Rampage Slots | ||
| ーーー | ② | |||
Stun Negated |
||||
Health Recovery (L) |
||||
Health Regeneration |
||||
| Decoration | ||
|---|---|---|
Recommended Armor Loadout
| Armor | Slots | Skills | |
|---|---|---|---|
|
|
④②ー | ||
|
|
④④ー | ||
|
|
④ーー |
Critical Eye Lv. 2
Furious Lv. 1
|
|
|
|
④①① | ||
|
|
③②② |
Resentment Lv. 1
Dereliction Lv. 1
|
|
| Talisman | Furious Lv.2; with ②② slot or better | ||
| Rampage Decoration | |||
| Skills | |
|---|---|
| Rampage Skill | Swap between Wyvern Exploit, Anti-Aerial Species, Anti-Aquatic Species, or Fanged Exploit depending on the monster. Alternatively, use Elembane Jewel 3 to acquire Elemental Exploit for monsters with body parts of 25 or higher elemental weakness. |
Elemental Attack Lv.5
| Attack Boost Lv.4 Weakness Exploit Lv.3 | Stamina Surge Lv.3 Dragon Resistance Lv.3 | Dragon Conversion Lv.3 Furious Lv.3 | Maximum Might Lv.2 Critical Eye Lv.2 | Latent Power Lv.2 Protective Polish Lv.2 | Resentment Lv.1 Horn Maestro Lv.1 | Dereliction Lv.1 Bloodlust Lv.1 Speed Sharpening Lv.3 (can replace with Whetfish) Fire Build: Stun Resistance Lv.3 | Teostra Blessing Lv.2 Burst Lv.1 Water Build: Stun Resistance Lv.3 | Kushala Blessing Lv.1 Thunder Build: Handicraft Lv.2 | Intrepid Heart Lv.1 Ice Build: Protective Polish Lv.3 | Handicraft Lv.2 Burst Lv.1 | Kushala Blessing Lv. 1 |
|
Build Merits and Augments
| Weapon Augments | |
|---|---|
| Armor Augments |
Armor Augments for this build are not necessary. However, feel free to add as you please once you get comfortable with your build! Generally, you'd want to get better skills and more slots for your armor.
Replaceable skills already on the armor: ● Latent Power ● Stamina Surge For damage, aim for any of the following: ● Furious ● Dragon Conversion ● Strife ● Critical Boost ● Element Exploit For comfort, aim for any of the following: ● Intrepid Heart ● Blood Rite ● Protective Polish |
| Build Merits and Notes |
|---|
| This version of our Elemental Hunting Horns take advantage of the strong combination between Dragon Conversion and Furious. Vigor melding now makes it possible to get a talisman with one (1) or higher level of Furious, opening up options for armor pieces. Similar to TU4, these sets will still make use of healing horns due to the presence of Dereliction and Bloodlust in the build.
The main skills of the build are Dragon Conversion, Furious, and Dereliction which will require using the Red Scroll to boost elemental damage. Initially you would like to use the Blue Scroll to activate the Elemental Resistance Buildup (
The use of Silkbind Shockwave Switch Skill is crucial for this build. Upon activation, your attacks will produce follow-up shockwaves for the next 45 seconds. These shockwaves can't crit but scale well with elemental damage! This skill also has super armor, so it's great for mitigating damage from monsters. Make sure to slot in Stun Resistance (except for horns with Stun Negated song) since super amor does not prevent stun. For the other slots, feel free to use any skills you're comfortable; however, we do recommend using Bead of Resonance to double the healing with Health Recovery songs get Attack Up buff for horns without Attack Up song. For this build, take advantage of Super Recovery Dango Lvl 4 from Hide-and-Seek Dango to lessen the health drain of Dereliction and Bloodlust. Also, you can get Dango Thunder Res (Hi) Lv 3 and Dango Fire Res (Hi) Lv 1 from Spicejolt and Lava-hot Egg, respectively, to further increase the elemental attack gained from Dragon Conversion. Armor augments are not necessary for this build. However, by aiming to get Furious and Dragon Conversion, you will be able to swap out certain armor pieces for better ones, notably the Chaotic/Nephilim Helm, Valstrax Braces - Epoch, and Virtue/Prudence Coil. These are slot efficient armors which will allow you to add more skills. |
Dragon Elemental Hunting Horn
| Weapon | ATK | DEF | Affinity | |
|---|---|---|---|---|
 Grimm/Joie Grimm/Joie
 |
310 | 0 | -30% / 15% | |
| Element / Status |
Slots | Rampage Slots | ||
| ③①ー | ② | |||
Health Recovery (S) |
||||
Attack Up |
||||
Earplugs (L) |
||||
| Armor | Slots | Skills | |
|---|---|---|---|
|
|
④②ー | ||
|
|
④④ー | ||
|
|
④ーー |
Weakness Exploit Lv. 2
Dragonheart Lv. 1
|
|
|
|
④①① | ||
|
|
③②② |
Resentment Lv. 1
Dereliction Lv. 1
|
|
| Talisman | Dragonheart Lv.4; with ② slot or better | ||
| Rampage Decoration | |||
| Decoration | |||
| Skills | |
|---|---|
| Rampage Skill | The build goes perfectly with the Valstrax Soul. When Dragonheart is active, you will be inflicted with the Dragonblight status increasing your dragon element attack by 20%. |
Dragon Attack Lv.5
| Dragonheart Lv.5 Attack Boost Lv.4 | Weakness Exploit Lv.3 Handicraft Lv.3 | Stamina Surge Lv.3 Dragon Resistance Lv.3 | Stun Resistance Lv.3 Dragon Conversion Lv.3 | Latent Power Lv.2 Protective Polish Lv.2 | Resentment Lv.1 Horn Maestro Lv.1 | Dereliction Lv.1 Bloodlust Lv.1 | Burst Lv.1 Intrepid Heart Lv.2 Speed Sharpening Lv.3 (can replace with Whetfish) |
|
| Build Merits and Notes |
|---|
| This build highlights the destructive power of Dragon Conversion and Dragonheart. During the previous update, Dragonheart was a very difficult skill to fit into armor pieces. However, with the Vigor melding, it is now possible to get a talisman with four (4) levels of Dragonheart, making the skill more accessible than ever.
Since Dragon Conversion and Dereliction are included in the build, you will be required to utilize the Red Scroll to boost elemental damage. This set also assumes that you will have Dragonheart active at all times which means you will have to maintain your HP at 80% or less.
The Switch Skills to be used in this set are similar to the other Elemental Hunting Horn Builds above, mainly Silkbind Shockwave. You can still take advantage of Super Recovery Dango Lvl 4 from Hide-and-Seek Dango to lessen the health drain of Dereliction and Bloodlust but take this into consideration when managing your HP. With only the inclusion of Dragonheart, refer to the other Elemental Hunting Horn Builds to know what other Armor augments to aim for. Note that this build will require you to be extremely good in HP management. Although Dragonheart gives higher stats compared to Furious, you will need to keep your HP under 80% at all times or you will lose a significant amount of damage. If you have trouble with the Dragonheart uptime, just use a build that utilizes Furious, similar to the other elemental hunting horn builds. |
TU4 Elemental Hunting Horns
Fire Elemental Hunting Horn
| Weapon | ATK | DEF | Affinity | |
|---|---|---|---|---|
|
Horn of the Indomitable+
|
320 | 0 | -15% | |
| Element / Status |
Slots | Rampage Slots | ||
| ②①ー | ② | |||
Stamina Recovery Up |
||||
Health Recovery (S) |
||||
Attack Up |
||||
| Decorations |
|
|---|
Water Elemental Hunting Horn
| Weapon | ATK | DEF | Affinity | |
|---|---|---|---|---|
 Sublime Bell+ Sublime Bell+
 |
310 | 0 | 15% | |
| Element / Status |
Slots | Rampage Slots | ||
| ②ーー | ③ | |||
Health Recovery (L) |
||||
Blight Negated |
||||
Stamina Use Reduced |
||||
| Decorations |
|
|---|
Ice Elemental Hunting Horn
| Weapon | ATK | DEF | Affinity | |
|---|---|---|---|---|
|
Flicker Blizzard Flute
|
320 | 0 | 0% | |
| Element / Status |
Slots | Rampage Slots | ||
| ②②ー | ② | |||
Stamina Use Reduced |
||||
Health Regeneration |
||||
Stun Negated |
||||
| Decorations |
|
|---|
Thunder Elemental Hunting Horn
| Weapon | ATK | DEF | Affinity | |
|---|---|---|---|---|
|
Skytremor Rumble
|
320 | 0 | 0% | |
| Element / Status |
Slots | Rampage Slots | ||
| ーーー | ② | |||
Stun Negated |
||||
Health Recovery (L) |
||||
Health Regeneration |
||||
| Decorations |
|
|---|
Dragon Elemental Hunting Horns
| Weapon | ATK | DEF | Affinity | |
|---|---|---|---|---|
|
Grimm/Joie
|
310 | 0 | -30% / 15% | |
| Element / Status |
Slots | Rampage Slots | ||
| ③①ー | ② | |||
Health Recovery (S) |
||||
Attack Up |
||||
Earplugs (L) |
||||
| Weapon | ATK | DEF | Affinity | |
|---|---|---|---|---|
 Vicello Kvar Black Vicello Kvar Black
 |
320 | 0 | 0% | |
| Element / Status |
Slots | Rampage Slots | ||
| ③①① | ③ | |||
Health Recovery (L) |
||||
Stamina Use Reduced |
||||
Earplugs (L) |
||||
| Decorations |
|
|---|
TU4 Elemental Hunting Horns Armor Setup
| Armor | Slots | Skills | |
|---|---|---|---|
|
|
④②ー |
Resentment Lv. 2
Weakness Exploit Lv. 1
|
|
|
|
③②ー | ||
|
|
④①① | ||
|
|
③①① | ||
|
|
③②② |
Resentment Lv. 1
Dereliction Lv. 1
|
|
| Talisman | Attack Boost 3 with ②① slots or better | ||
| Rampage Decoration |
|
||
| Skills | |
|---|---|
| Rampage Skill | Swap between Wyvern Exploit, Anti-Aerial Species, Anti-Aquatic Species, or Fanged Exploit depending on the monster. |
Attack Boost Lv.7
| Element Attack Lv.5
Resentment Lv.5 | Weakness Exploit Lv.3 Critical Boost Lv.3 | Speed Sharpening Lv.3 Protective Polish Lv.3 | Latent Power Lv.2 Critical Eye Lv.2 | Evade Extender Lv.2 Burst Lv.1 | Strife Lv.1 Dereliction Lv.1 | Horn Maestro Lv.1 Handicraft Lv.2 (Ice and Dragon only) Kushala Blessing Lv.1/2 (Ice and Water only) Teostra Blessing Lv.2 (Fire only) |
|
Build Merits and Augments
| Weapon Augments | |
|---|---|
| Armor Augments |
Armor Augments for this build are not necessary. However, feel free to add as you please once you get comfortable with your build! Generally, you'd want to get better skills and more slots for your armor.
Replaceable skills already on the armor: ● Latent Power For damage, aim for any of the following: ● Bloodlust ● Strife ● Element Exploit ● Powder Mantle For comfort, aim for any of the following: ● Stun Resistance ● Intrepid Heart ● Defiance |
| Build Merits and Notes |
|---|
| This build offers an alternative to our elemental build by increasing DPS against monsters without very high elemental hitzones. Element is still included, as the additional damage remains useful with the right matchups.
When using this build, Silkbind Shockwave is mandatory for the extra elemental damage it can provide. Hunters should also stick to the Blue Scroll for this build to maximize raw damage and KO potential. Hunting Horns with healing songs remain our picks to manage Dereliction's health drain. This build doesn't include armor augments. However, Bloodlust should be rolled on one piece if using the Grimm/Joie. Otherwise, the Vicello Kvar Black works as an alternative. |
TU3 Poison Buildup Boost Build
| Weapon | ATK | DEF | Affinity | |
|---|---|---|---|---|
 Namalsadirah's Asterism Namalsadirah's Asterism
 |
310 | 0 | 0% | |
| Element / Status |
Slots | Rampage Slots | ||
| ④②ー | ① | |||
Sonic Wave |
||||
Attack Up |
||||
Stamina Recovery Up |
||||
| Armor | Slots | Skills | |
|---|---|---|---|
|
|
③②ー | ||
|
|
③①ー | ||
|
|
④②① | ||
|
|
②ーー | ||
|
|
④①① | ||
| Talisman | Attack Boost Lv.3, with ②① slots | ||
| Rampage Decoration |
|
||
| Decorations |
|
||
| Skills | |
|---|---|
| Rampage Skill | Swap between Wyvern Exploit, Anti-Aerial Species, Anti-Aquatic Species, or Fanged Exploit depending on the monster. |
|
Attack Boost Lv.7
| Critical Eye Lv.4
Weakness Exploit Lv.3 | Critical Boost Lv.3 Chameleos Blessing Lv.3 | Windproof Lv.3 Speed Sharpening Lv.3 | Maximum Might Lv.3 Grinder (S) Lv.3 | Buildup Boost Lv.2 Evade Window Lv.2 | Protective Polish Lv.2 Powder Mantle Lv.1 | Strife Lv.1 Foray Lv.1 | Burst Lv.1 Horn Maestro Lv.1 |
|
Build Merits and Augments
| Weapon Augments | |
|---|---|
| Armor Augments |
Armor Augments for this build are not necessary. However, feel free to add as you please once you get comfortable with your build! Generally, you'd want to get better skills and more slots for your armor.
Replaceable skills already on the armor: ● Windproof ● Strife For damage, aim for any of the following: ● Buildup Boost ● Poison Attack ● Status Trigger For comfort, aim for any of the following: ● Stun Resistance ● Defiance |
| Build Merits and Notes |
|---|
|
This Hunting Horn build utilizes the synergy between poison and Buildup Boost to dish out more raw damage when building up poison without the need for Dereliction.
To maximize the build's damage output, Critical Eye, Critical Boost, and Weakness Exploit are used in conjunction with the additional affinity from Maximum Might. Damage is further bolstered with Attack Boost and Foray, which benefits from the extended poison duration from Chameleos Blessing. Protective Polish extends the weapon's purple sharpness, while Grinder (S) makes the most of the short white and purple sharpness of the weapon. While the build primarily focuses on dealing powerful crits on weakpoints, Powder Mantle is also included with the Risen Kaiser Horns, providing extra damage after dealing enough hits. |
Rooksearer Dereliction Raw
| Weapon | ATK | DEF | Affinity | |
|---|---|---|---|---|
 Bazel Valdi Rooksearer Bazel Valdi Rooksearer
 |
320 | 0 | -10% | |
| Element / Status |
Slots | Rampage Slots | ||
| ーーー | ② | |||
Earplugs (S) |
||||
Attack Up |
||||
Health Recovery (L) |
||||
| Armor | Slots | Skills | |
|---|---|---|---|
|
|
③②ー | ||
|
|
②②ー | ||
|
|
④ーー |
Resentment Lv. 1
Dereliction Lv. 2
|
|
|
|
③①① | ||
|
|
③②② |
Resentment Lv. 1
Dereliction Lv. 1
|
|
| Talisman | Attack Boost 3 with ②① slots or better | ||
| Rampage Decoration |
|
||
| Decorations |
|
||
| Skills | |
|---|---|
| Rampage Skill | Swap between Wyvern Exploit, Anti-Aerial Species, Anti-Aquatic Species, or Fanged Exploit depending on the monster. |
Critical Eye Lv.7
| Attack Boost Lv.4
Resentment Lv.4 | Weakness Exploit Lv.3 Dereliction Lv.3 | Critical Boost Lv.3 Speed Sharpening Lv.3 | Powder Mantle Lv.2 Handicraft Lv.2 | Maximum Might Lv.2 Strife Lv.1 | Protective Polish Lv.1 Horn Maestro Lv.1 |
|
Build Merits and Augments
| Weapon Augments | |
|---|---|
| Armor Augments |
Armor Augments for this build are not necessary. However, feel free to add as you please once you get comfortable with your build! Generally, you'd want to get better skills and more slots for your armor.
Replaceable skills already on the armor: ● Strife For damage, aim for any of the following: ● Buildup Boost ● Attack Boost ● Status Trigger For comfort, aim for any of the following: ● Stun Resistance ● Defiance ● Protective Polish |
| Build Merits and Notes |
|---|
| This build uses Bazel Valdi Rooksearer to deal high raw and Blast damage with the help of Dereliction, which remains powerful and manageable with healing songs. Aside from Dereliction, the build uses Attack Boost, Critical Boost, and Resentment to increase the weapon's damage output. In addition, maxed Critical Eye, Weakness Exploit, and two points in Maximum Might allow the weapon to always land critical hits on weak spots. To round out the build, it also features Speed Sharpening, Handicraft and a point in Protective Polish to help maintain purple sharpness during the hunt.
When using this build, always swap to your Blue Scroll when the hunt begins as Dereliction will only provide increased attack and stun potency when on the Blue Scroll. In addition, to further help mitigate the health drain from Dereliction, we recommend eating Gourmet Fish and the Hide-and-Seek Dango as they both provide health regeneration over time. |
Endgame MR Build: MR 6+
Dereliction Elemental Healing Horns
Fire Elemental Hunting Horn
| Weapon | ATK | DEF | Affinity | |
|---|---|---|---|---|
|
Horn of the Indomitable+
|
320 | 0 | -15% | |
| Element / Status |
Slots | Rampage Slots | ||
| ②①ー | ② | |||
Stamina Recovery Up |
||||
Health Recovery (S) |
||||
Attack Up |
||||
| Weapon Augments | ||
|---|---|---|
| Decorations |
|
|
Water Elemental Hunting Horn
| Weapon | ATK | DEF | Affinity | |
|---|---|---|---|---|
|
Sublime Bell+
|
310 | 0 | 15% | |
| Element / Status |
Slots | Rampage Slots | ||
| ②ーー | ③ | |||
Health Recovery (L) |
||||
Blight Negated |
||||
Stamina Use Reduced |
||||
| Weapon Augments | ||
|---|---|---|
| Decorations |
|
|
Ice Elemental Hunting Horn
| Weapon | ATK | DEF | Affinity | |
|---|---|---|---|---|
|
Flicker Blizzard Flute
|
320 | 0 | 0% | |
| Element / Status |
Slots | Rampage Slots | ||
| ②②ー | ② | |||
Stamina Use Reduced |
||||
Health Regeneration |
||||
Stun Negated |
||||
| Weapon Augments | ||
|---|---|---|
| Decorations |
|
|
Thunder Elemental Hunting Horn
| Weapon | ATK | DEF | Affinity | |
|---|---|---|---|---|
|
Skytremor Rumble
|
320 | 0 | 0% | |
| Element / Status |
Slots | Rampage Slots | ||
| ーーー | ② | |||
Stun Negated |
||||
Health Recovery (L) |
||||
Health Regeneration |
||||
| Weapon Augments | ||
|---|---|---|
| Decorations |
|
|
Dragon Elemental Hunting Horn
| Weapon | ATK | DEF | Affinity | |
|---|---|---|---|---|
|
Grimm/Joie
|
310 | 0 | -30% / 15% | |
| Element / Status |
Slots | Rampage Slots | ||
| ③①ー | ② | |||
Health Recovery (S) |
||||
Attack Up |
||||
Earplugs (L) |
||||
| Weapon Augments | ||
|---|---|---|
| Decorations |
|
|
Dereliction Elemental Healing Horns Armor Setup
| Armor | Slots | Skills | |
|---|---|---|---|
|
|
④②ー | ||
|
|
②ーー | ||
|
|
④ーー |
Resentment Lv. 1
Dereliction Lv. 2
|
|
|
|
③①① | ||
|
|
③②② |
Resentment Lv. 1
Dereliction Lv. 1
|
|
| Talisman | Attack Boost Lv.3 with ②① slots or better | ||
| Rampage Decoration |
|
||
| Skills | |
|---|---|
| Rampage Skill | Swap between Wyvern Exploit, Anti-Aerial Species, Anti-Aquatic Species, or Fanged Exploit depending on the monster. |
Attack Boost Lv.6/Lv.7
| Element Attack Lv.5
Critical Eye Lv.4 | Resentment Lv.4 Dereliction Lv.3 | Burst Lv.3 Speed Sharpening Lv.3 | Strife Lv.2 Resuscitate Lv.2 | Evade Extender Lv.2 Element Exploit Lv.1 | Bloodlust Lv.1 Critical Element Lv.1 | Horn Maestro Lv.1 Teostra Blessing Lv.2 (Fire only) Kushala Blessing Lv. 2 (Water/Ice only) Spiribird's Call Lv.1 (Dragon Only) |
|
| Build Merits and Notes |
|---|
| Silkbind Shockwave works very well with elemental Hunting Horns as it effectively deals extra elemental damage on every hit. Our picks for Hunting Horns have healing songs to easily manage Dereliction's HP drain.
When using this build, use the Blue Scroll to boost raw attack and stun potential as most monsters don't have very high elemental hitzone values. Swap to the Red Scroll against monsters very weak to elements as Dereliction will provide more elemental damage. Teostra Blessing and Kushala Blessing can help boost elemental damage further once these become available later. In the meantime, other decorations may be slotted. In addition to playing healing melodies often, the health drain from Dereliction can be mitigated by eating Gourmet Fish and the Hide-and-Seek Dango as they both provide health regeneration over time. |
Sharpness Regeneration Elemental Horns
Fire Elemental Hunting Horn
| Weapon | ATK | DEF | Affinity | |
|---|---|---|---|---|
 Kaktus Seele Kaktus Seele
 |
280 | 0 | 20% | |
| Element / Status |
Slots | Rampage Slots | ||
| ④①① | ③ | |||
Attack Up |
||||
Sharpness Regeneration |
||||
Wind Pressure Negated |
||||
| Weapon Augments | ||
|---|---|---|
| Decorations |
|
|
Ice Elemental Hunting Horn
| Weapon | ATK | DEF | Affinity | |
|---|---|---|---|---|
 Harmonic Resonance Harmonic Resonance
 |
320 | 0 | 0% | |
| Element / Status |
Slots | Rampage Slots | ||
| ①①ー | ② | |||
Elemental Attack Boost |
||||
Stamina Recovery Up |
||||
Sharpness Regeneration |
||||
| Weapon Augments | ||
|---|---|---|
| Decorations |
|
|
Dragon Elemental Hunting Horn
| Weapon | ATK | DEF | Affinity | |
|---|---|---|---|---|
 Magician's Allure Magician's Allure
 |
320 | 0 | 0% | |
| Element / Status |
Slots | Rampage Slots | ||
| ④ーー | ① | |||
Sharpness Regeneration |
||||
Earplugs (L) |
||||
Sharpness Loss Reduced |
||||
| Weapon Augments | ||
|---|---|---|
| Decorations |
|
|
Sharpness Regeneration Elemental Horns Armor Setup
| Armor | Slots | Skills | |
|---|---|---|---|
|
|
④②ー | ||
|
|
③①ー | ||
|
|
④②① | ||
|
|
③①① | ||
|
|
③②② |
Resentment Lv. 1
Dereliction Lv. 1
|
|
| Talisman | Attack Boost Lv.3 with ②① slot or better | ||
| Rampage Decoration |
|
||
| Skills | |
|---|---|
| Rampage Skill | Swap between Wyvern Exploit, Anti-Aerial Species, Anti-Aquatic Species, or Fanged Exploit depending on the monster. |
Attack Boost Lv.7
| Critical Eye Lv.6/Lv.7
Element Attack Lv.5 | Resentment Lv.3/Lv.5 Weakness Exploit Lv.3 | Stun Resistance Lv.3 Strife Lv.3 | Critical Boost Lv.3 Evade Extender Lv.2 | Horn Maestro Lv.1 Flinch Free Lv.1 | Burst Lv.1 Element Exploit Lv.1 | Peak Performance Lv.1 Dereliction Lv.1 Slugger Lv.2 (Fire only) |
|
| Build Merits and Notes |
|---|
| This build uses Hunting Horns with the Sharpness Regeneration melody to support allies and reduce reliance on sharpness skills. Unfortunately, not all elements have this song, so the only options are the horns above. The Allysyl Muse may be used as a raw alternative using a modified Fire set, but it's not as optimal due to the build's focus on elemental damage. The Fire set can also have its Resentment level lowered if Velkhana or the Furor Jewel+ 4 are not available yet.
As this is an elemental set, Silkbind Shockwave is mandatory for the extra damage. It's also recommended to mostly use the Blue Scroll for added raw attack and stun potential and only switching to the Red Scroll if a monster is very weak to the chosen element. To help mitigate the health drain from Dereliction, we recommend eating Gourmet Fish and the Hide-and-Seek Dango as they both provide health regeneration over time. If you want to avoid using Dereliction, the legs can be swapped for the Malzeno Greaves, but you'll have to adjust the decorations accordingly and give up Flinch Free. |
Fine Kamura Flute Raw Climber
| Weapon | ATK | DEF | Affinity | |
|---|---|---|---|---|
 Fine Kamura Flute Fine Kamura Flute
 |
310 | 0 | 0% | |
| Element / Status |
Slots | Rampage Slots | ||
-
|
④②ー | ② | ||
Defense Up |
||||
Attack Up |
||||
Health Recovery (S) + Antidote |
||||
| Armor | Slots | Skills | |
|---|---|---|---|
|
|
①①① |
Critical Eye Lv. 3
Critical Boost Lv. 1
|
|
|
|
③②ー | ||
|
|
③ーー | ||
|
|
②ーー | ||
|
|
①①ー |
Attack Boost Lv. 2
Critical Eye Lv. 2
|
|
| Talisman | Attack Boost Lv.3 with ② slot or better | ||
| Rampage Decoration |
|
||
| Decorations |
|
||
| Skills | |
|---|---|
| Rampage Skill | Swap between Wyvern Exploit, Anti-Aerial Species, Anti-Aquatic Species, or Fanged Exploit depending on the monster. |
Attack Boost Lv.7 | Critical Eye Lv.7
Critical Boost Lv.3 | Weakness Exploit Lv.3 Windproof Lv.3 | Stun Resistance Lv.3 Speed Sharpening Lv.3 | Wirebug Whisperer Lv.3 Resentment Lv.1 | Horn Maestro Lv.1 Flinch Free Lv.1 | Teostra Blessing Lv.1 Burst Lv.1 |
|
| Build Merits and Notes |
|---|
| This all-rounder build using the Fine Kamura Flute mixes damage and utility, making it a great set to go climbing with in Master Rank. For raw damage, it features maxed Attack Boost, Critical Eye, Critical Boost, Weakness Exploit, and a point in Burst. For utility, it also includes maxed Stun Resistance, Speed Sharpening, and Wirebug Whisperer. |
Master Rank Build (Mid Game): MR 3-6
Frostmoon Sharpness Regeneration
| Weapon | ATK | DEF | Affinity | |
|---|---|---|---|---|
Frostmoon Wailer+
 |
300 | 0 | 0% | |
| Element / Status |
Slots | Rampage Slots | ||
| ①①ー | ② | |||
Elemental Attack Boost |
||||
Stamina Recovery Up |
||||
Sharpness Regeneration |
||||
| Armor | Slots | Skills | |
|---|---|---|---|
|
|
②②ー |
Weakness Exploit Lv. 1
Wirebug Whisperer Lv. 2
|
|
|
|
③①ー | ||
|
|
④ーー | ||
|
|
③ーー | ||
|
|
①①ー |
Attack Boost Lv. 2
Critical Eye Lv. 2
|
|
| Talisman | Attack Boost 3 with ② slot or better | ||
| Rampage Decoration |
|
||
| Decorations |
|
||
| Skills | |
|---|---|
| Rampage Skill | For damage, swap between Wyvern Exploit, Anti-Aerial Species, Anti-Aquatic Species, or Fanged Exploit depending on the monster. When supporting a multiplayer party, use Maximum Volume. |
Attack Boost Lv.7 | Ice Attack Lv.5
Critical Eye Lv.4 | Defense Boost Lv.4 Critical Boost Lv.3 | Weakness Exploit Lv.3 Stun Resistance Lv.3 | Wirebug Whisperer Lv.3 Offensive Guard Lv.1 | Horn Maestro Lv.1 Evade Window Lv.1 | Blight Resistance Lv.1 Flinch Free Lv.1 |
|
| Build Merits and Notes |
|---|
| This Hunting Horn build focuses on delivering high raw and Ice damage with the help of maxed Attack Boost, Ice Attack, Weakness Exploit, and Critical Boost. It also highlights the new Sharpness Regeneration Melody, which provides you and your allies' weapons with rapid sharpness restoration over time and allows you to stay on the offensive. To round the build out, it also includes Stun Resistance, Wirebug Whisperer, and Flinch Free for added utility. |
Teostra Agitator Raw
| Weapon | ATK | DEF | Affinity | |
|---|---|---|---|---|
 Teostra's Orphee+ Teostra's Orphee+
 |
300 | 0 | 0% | |
| Element / Status |
Slots | Rampage Slots | ||
| ーーー | ② | |||
Health Regeneration |
||||
Health Recovery (S) + Antidote |
||||
Attack and Defense Up |
||||
| Armor | Slots | Skills | |
|---|---|---|---|
|
|
②②ー |
Weakness Exploit Lv. 1
Wirebug Whisperer Lv. 2
|
|
|
|
①①① | ||
|
|
②①ー |
Agitator Lv. 3
Wirebug Whisperer Lv. 1
|
|
|
|
③①ー |
Agitator Lv. 2
Protective Polish Lv. 1
|
|
|
|
①①① | ||
| Talisman | Attack Boost 3 with ② slot or better | ||
| Rampage Decoration |
|
||
| Decorations |
|
||
| Skills | |
|---|---|
| Rampage Skill | For damage, swap between Wyvern Exploit, Anti-Aerial Species, Anti-Aquatic Species, or Fanged Exploit depending on the monster. When supporting a multiplayer party, use Maximum Volume. |
Agitator Lv.5 | Attack Boost Lv.5
Critical Boost Lv.3 | Weakness Exploit Lv.3 Protective Polish Lv.3 | Stun Resistance Lv.3 Speed Sharpening Lv.3 | Wirebug Whisperer Lv.3 Thunder Attack Lv.2 | Latent Power Lv.1 Horn Maestro Lv.1 | Evade Window Lv.1 Flinch Free Lv.1 |
|
| Build Merits and Notes |
|---|
| This build makes use of Teostra's Orphée+'s potential for high raw damage with its Attack and Defense Melody alongside Agitator, Attack Boost, Critical Boost, and Weakness Exploit. To help keep its sharpness up, Protective Polish and Speed Sharpening are also included in the build. To round the build out, maxed Wirebug Whisperer is added to help keep the Hunting Horn's powerful Silkbind skills available. |
Master Rank Build (Early Game): MR 1-2
Fortissimo+ Raw Slugger
| Weapon | ATK | DEF | Affinity | |
|---|---|---|---|---|
 Fortissimo+ Fortissimo+
 |
230 | 20 | 0% | |
| Element / Status |
Slots | Rampage Slots | ||
-
|
①ーー | ③ | ||
Sonic Wave |
||||
Stamina Recovery Up |
||||
Attack Up |
||||
| Armor | Slots | Skills | |
|---|---|---|---|
|
|
③ーー | ||
|
|
③①ー |
Critical Eye Lv. 2
Windproof Lv. 2
|
|
|
|
①ーー | ||
|
|
④①① |
Attack Boost Lv. 2
|
|
|
|
①①ー |
Attack Boost Lv. 2
Critical Eye Lv. 2
|
|
| Talisman | Weakness Exploit 2 with ② slot or better | ||
| Rampage Decoration |
|
||
| Decorations |
|
||
| Skills | |
|---|---|
| Rampage Skill | Swap between Wyvern Exploit, Anti-Aerial Species, Anti-Aquatic Species, or Fanged Exploit depending on the monster. |
Attack Boost Lv. 7 | Critical Eye Lv.4 Critical Boost Lv. 3 | Weakness Exploit Lv.3 Slugger Lv. 3 | Stun Resistance Lv.3 Defense Boost Lv.2 | Windproof Lv.2 Agitator Lv.1 | Focus Lv.1 Horn Maestro Lv.1 | Flinch Free Lv.1 |
|
| Build Merits and Notes |
|---|
| A well-rounded Hunting Horn build great for starting out in Sunbreak's Master Rank. This build focuses on dealing high stun and raw damage with Hunting Horn using Attack Boost, Slugger, Critical Boost, and Weakness Exploit. This build also offers some additional survivability with Stun Resistance and Defense Boost. |
Best Skills for Hunting Horn
Best Damage Skills
These skills make it possible to deal extra damage! Aim for these skills for maximum DPS to defeat those monsters easier and finish those quests faster!
| Best Skills | Explanation |
|---|---|
| Attack Boost ★★★ |
Increasing the Hunting Horn's base attack is one of the most efficient ways to increase DPS. |
| Weakness Exploit ★★★ |
Increased affinity when hitting enemy weakspots. This is perfect for Hunting Horns because they should always prioritize the head. |
| Element Attack ★★★ |
Sunbreak featured buffs for elemental damage, making elemental builds viable. Be sure to max out this skill to get the most out of its potential. Fire | Water | Ice | Thunder | Dragon |
| Critical Boost ★★ |
Amplifies critical damage by 30%/35%/40% per level, working well with Weakness Exploit. |
| Burst ★★ |
Power up with this skill, which can activate with the Hunting Horn's continuous combos. Max it out as much as possible but a single point is enough to deal impactful damage. |
| Dereliction ★★ |
Using the Red Scroll will increase element values while using the Blue Scroll increases attack values, improving overall damage. This skill is basically a free buff for the weapon since you can manage the health drain by using Hunting Horns with healing songs! For additional elemental damage, pair this skill with Strife from the Chaotic Gore Magala Armor Set. Available in Sunbreak Base Game |
| Element Exploit ★★ |
This skill is ideal to have on elemental builds because of the Hunting Horn's effectiveness in targeting weakspots, making sure you pull off significant damage every time you hit them! Available in Sunbreak Free Title Update 1 |
| Powder Mantle ★★ |
This skill from the Risen Teostra Armor provides the Hunting Horn with additional blast damage every time it activates, contributing greatly to DPS. Available in Sunbreak Free Title Update 3 |
| Bloodlust ★★ |
Overcome the Frenzy Virus to power up with this skill; best paired with Coalescence. Available in Sunbreak Base Game |
| Blood Awakening ★★ |
At Lv.2 of this skill, its maximum boost is comparable to Lv.1 Dereliction, making it a safer alternative without the health drain. Best paired with Blood Rite to heal outside of afflicted monster hunts. Available in Sunbreak Bonus Update |
| Inspiration ★★ |
Boosts 10 raw attack for 20 seconds whenever most melodies are played. Easy to slot in and also boosts allied hunters. Available in Sunbreak Bonus Update |
| Slugger ★ |
Increased stun rate is a valuable skill for Hunting Horn in both solo and multiplayer. Slot this skill only when you can! |
Best Comfort Skills
These are skills that make managing weapon mechanics a lot easier. Damage is only part of the equation - taking time to slot in comfort skills that increase consistency & comfort will also increase overall DPS!
| Best Skills | Explanation |
|---|---|
| Horn Maestro ★★★ |
This skill improves the Hunting Horn's performance speed and shockwave damage using just 1 skill slot. |
| Protective Polish ★★★ |
An amazing skill that synergizes with Speed Sharpening. Make the most of your re-sharpens by negating sharpness loss for a significant amount of time with this skill. |
| Speed Sharpening ★★★ |
With Hunting Horn chewing through sharpness, having increased sharpening speed means you can return to the fray faster! |
| Evade Extender ★★ |
Improves the Hunting Horn's ability to dodge out of harm's way and reposition. |
| Defiance ★★ |
Three levels of this skill prevent most roars, tremors, and winds from interrupting attacks. The Cornerstone Jewel is a level 1 decoration, so slot it in whenever possible! Available in Sunbreak Free Title Update 1 |
| Wirebug Whisperer ★ |
This skill will allow you to access more of your silkbind attacks. Consider this skill if your playstyle involves using Bead of Resonance. |
| Wind Mantle ★ |
This skill from the Risen Kushala Armor will recharge your Wirebugs faster, allowing you to do more silkbind attacks with the Hunting Horn. As with Wirebug Whisperer, consider this skill if your playstyle involves using Bead of Resonance. Available in Sunbreak Free Title Update 3 |
| Flinch Free ★ |
No singer or musician likes interruptions. Don't let allies cancel those melodies! |
| Intrepid Heart ★ |
Whenever the gauge above your health bar is full, this skill can be useful in preventing monster attacks from interrupting your combos. Available in Sunbreak Free Title Update 2 |
Monster Hunter Rise Related Guides

|
• Weapons marked withNEW have been updated. • Weapons withUP have been reviewed and does not warrant an updated build from the Bonus Update. |
| All Weapon Build Guides | |
|---|---|
NEW Low Rank | High Rank Master Rank |
NEW Low Rank | High Rank Master Rank |
NEW Low Rank | High Rank Master Rank |
NEW Low Rank | High Rank Master Rank |
NEW Low Rank | High Rank Master Rank |
NEW Low Rank | High Rank Master Rank |
NEW Low Rank | High Rank Master Rank |
NEW Low Rank | High Rank Master Rank |
NEW Low Rank | High Rank Master Rank |
NEW Low Rank | High Rank Master Rank |
NEW Low Rank | High Rank Master Rank |
NEW Low Rank | High Rank Master Rank |
NEW Low Rank | High Rank Master Rank |
UP Low Rank | High Rank Master Rank |
Other Builds
| Other Build Guides | |
|---|---|
| General High Rank Builds and Best Equipment | Buddy Equipment Builds Palico | Palamute |
Comment
20  Sunbreak Walkthrough Team@Game8 almost 3 years
Hi, Anon! We've already updated the build with more appropriate decorations.
Author

Sunbreak Hunting Horn Builds (Master Rank)
Please participate in our site
improvement survey
03/2026
improvement survey
03/2026
Would you assist in
improving Game8's site?
improving Game8's site?

×
We are listening to our users' valuable opinions and discussing how to act on them.
The information collected through this survey will be used for the purpose of improving our services. In addition, the information will only be disclosed a part of a statistic in a format that will not allow identification of personal information.
Begin Survey
Not Now
×
Please rate each item regarding Game8.co's Advertisements.
Amount of Ads
Very Dissatisfied
Somewhat Dissatisfied
Fine
Somewhat Satisfied
Highly Satisfied
Placement of Ads
Timing of Ad Display
Ad Loading Speed
Safeness of Ads
Content of Ads
×
Please rate each item regarding Game8.co's Quality of Articles.
Amount of information
Very Dissatisfied
Somewhat Dissatisfied
Fine
Somewhat Satisfied
Highly Satisfied
Frequency of updates
Speed of new information
Accuracy of articles
Understandibility of articles
Readability of sentences
×
Please rate each item regarding Game8.co's Usability of the Site.
Ease of finding information
Very Dissatisfied
Somewhat Dissatisfied
Fine
Somewhat Satisfied
Highly Satisfied
Loading Speed
Use of Color
Font Size
Visibility of Images
Easy to Understand Layout
×
Please rate each item regarding Game8.co's Message Boards, Comments.
Ease of Writing
Very Dissatisfied
Somewhat Dissatisfied
Fine
Somewhat Satisfied
Highly Satisfied
Readability
Ease in Finding Information
Comment Quality
Comment Quantity
Admin Response
×
Please rate each item regarding Game8.co's Site's new design.
Please rate our site's new design
Very Dissatisfied
Somewhat Dissatisfied
Fine
Somewhat Satisfied
Highly Satisfied
Do you think that the website's design change makes the site easier to use?
Has the new design made it easier for you to find information on the site?
Has the new design improved the overall visual appeal of the site?
How would you rate your overall satisfaction with the new design of the site?
×
How likely are you to recommend Game8 to someone you know?
Very Unlikely
0
1
2
3
4
5
6
7
8
9
10
Very Likely
If you have other opinions regarding potential improvement to the website, please share them with us. We would appreciate your honest opinion.
Note: This is a free response section, so you can proceed without entering anything.
Note: Please be sure not to enter any kind of personal information into your response.
Note: Please be sure not to enter any kind of personal information into your response.
×
Thank You
×
Thank you for participating in our survey! Your answers will help us to improve the quality of our website and services.
We hope you continue to make use of Game8.
We hope you continue to make use of Game8.
Close
Rankings
Gaming News


![Monster Hunter Stories 3 Review [First Impressions] | Simply Rejuvenating](https://img.game8.co/4438641/2a31b7702bd70e78ec8efd24661dacda.jpeg/thumb)

Popular Games

Genshin Impact Walkthrough & Guides Wiki
Honkai: Star Rail Walkthrough & Guides Wiki
Umamusume: Pretty Derby Walkthrough & Guides Wiki
Pokemon Pokopia Walkthrough & Guides Wiki
Resident Evil Requiem (RE9) Walkthrough & Guides Wiki
Monster Hunter Wilds Walkthrough & Guides Wiki
Wuthering Waves Walkthrough & Guides Wiki
Arknights: Endfield Walkthrough & Guides Wiki
Pokemon FireRed and LeafGreen (FRLG) Walkthrough & Guides Wiki
Pokemon TCG Pocket (PTCGP) Strategies & Guides Wiki


Recommended Games
Diablo 4: Vessel of Hatred Walkthrough & Guides Wiki
Fire Emblem Heroes (FEH) Walkthrough & Guides Wiki
Yu-Gi-Oh! Master Duel Walkthrough & Guides Wiki
Super Smash Bros. Ultimate Walkthrough & Guides Wiki
Pokemon Brilliant Diamond and Shining Pearl (BDSP) Walkthrough & Guides Wiki
Elden Ring Shadow of the Erdtree Walkthrough & Guides Wiki
Monster Hunter World Walkthrough & Guides Wiki
The Legend of Zelda: Tears of the Kingdom Walkthrough & Guides Wiki
Persona 3 Reload Walkthrough & Guides Wiki
Cyberpunk 2077: Ultimate Edition Walkthrough & Guides Wiki


All rights reserved
©CAPCOM CO., LTD. ALL RIGHTS RESERVED.
The copyrights of videos of games used in our content and other intellectual property rights belong to the provider of the game.
The contents we provide on this site were created personally by members of the Game8 editorial department.
We refuse the right to reuse or repost content taken without our permission such as data or images to other sites.
Hi, regarding Ice, is there a decoration missing from the list for Blood Awakening Elemental Horns? It says [except Ice] for Element Exploit+ 4, and under Ice Only skills, it says Handicraft Lv2. Is it safe to assume the Ice build swaps Element Exploit+ 4 for Handicraft+ 4?