Sunbreak Bazelgeuse: Weakness and Drops
★ All Title Updates now available for ALL PLATFORMS!
┗ Title Update 4 | Title Update 5 | Bonus Update
┗ Check out all our Best Builds For Every Weapon!
┗ TU4 Monsters: Velkhana | Risen C.G. Valstrax
┗ TU5 Monsters: Amatsu | Risen Shagaru Magala
┗ Bonus Update Monster: Primordial Malzeno
This is a hunting guide for Bazelgeuse, a Large Monster in Monster Hunter Rise (MH Rise) and the Sunbreak DLC. Read on to learn Bazelgeuse's weaknesses, forgeable weapons and armor, drops, and attack patterns for Master Rank!
| All Bazelgeuse Related Articles | ||
|---|---|---|
 Bazelgeuse Guide Bazelgeuse Guide
|
 Bazelgeuse Weapons Bazelgeuse Weapons
|
 Bazelgeuse Armor Bazelgeuse Armor
|
List of Contents
Bazelgeuse Weakness and Notes
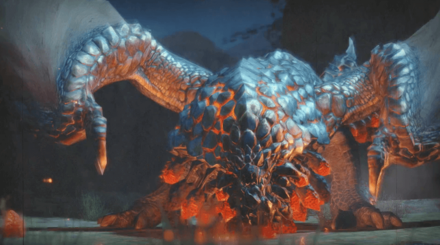
| Bazelgeuse バゼルギウス |
|||
|---|---|---|---|
 |
|||
| Type | Flying Wyvern | Previous Games | MHW |
| Threat Level | 8/10 | Rampage Type | ー |
| Major Weakness | Other Weakness | ||
| Blight / Elemental Damage | Abnormal Status | ー | |
| Characteristics | |||
| A nefarious flying wyvern that travels the world in search for prey. It scatters its own explosive scales over a wide area to prey on whatever gets caught in the blast. In some places, this has earned it the nickname, Bomber Wyvern. | |||
How to Unlock Bazelgeuse
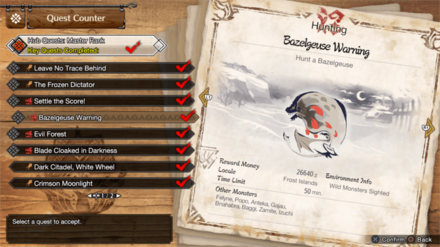
Complete Witness by Moonlight in Master Rank
| Quest Name | Monster/Unlock |
|---|---|
| Bazelgeuse Warning (Key Quest) |
|
| Unlock Conditions: Finish the Quest "Witness by Moonlight" |
MR Bazelgeuse is unlocked by completing the Urgent Quest Witness by Moonlight and reaching M★5 in the Sunbreak expansion.
MR Grinding Guide:
How to Get from MR 6 to MR 100 Fast
Reach HR 8 in High Rank
| Quest Name | Monster/Unlock |
|---|---|
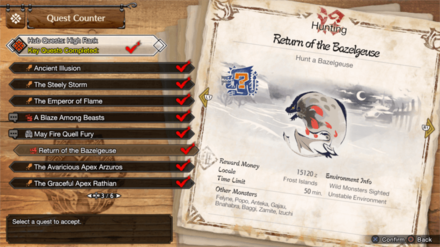
| Death From Above |
|
| Unlock Conditions: Reach HR 8 |
|
| Return of the Bazelgeuse |
|
| Unlock Conditions: Finish the Quest "Death From Above" |
Bazelgeuse is unlocked by reaching HR 8 after defeating Thunder Serpent Narwa in the ★7 Urgent Hub Quest Serpent Goddess of Thunder.
Hunter Rank Farm Guide:
How to Get from HR 7 to HR 100 Fast
Bazelgeuse Weakness and Resistance
| 42 | 42 | 26 | 0 |
| 4 | 12 | 9 | 9 |
Bold are the recommended Weapon Type and Elemental Damage.
Bazelgeuse Weapon Damage Breakdown
| Part | |||
|---|---|---|---|
| Head | 60 | 65 | 25 |
| Abdomen | 45 | 45 | 25 |
| Back | 30 | 30 | 10 |
| Wing | 25 | 25 | 42 |
| Leg | 30 | 30 | 20 |
| Tail | 60 | 55 | 35 |
| Overall | 42 | 42 | 26 |
Bazelgeuse Elemental Weakness Breakdown
| Part | |||||
|---|---|---|---|---|---|
| Head | 0 | 5 | 15 | 10 | 10 |
| Abdomen | 0 | 5 | 10 | 10 | 10 |
| Back | 0 | 0 | 5 | 5 | 5 |
| Wing | 0 | 5 | 10 | 10 | 10 |
| Leg | 0 | 5 | 15 | 10 | 10 |
| Tail | 0 | 5 | 15 | 10 | 10 |
| Overall | 0 | 4 | 12 | 9 | 9 |
Higher numbers indicate higher potential damage to the monster.
Bazelgeuse Hunting Tips

Bazelgeuse flies overhead and scatters pinecone-like droppings from its beard and tail that explodes at Bazelgeuse's will. When enraged, Bazelgeuse will glow red and become aggresive but will have a softer hide. Use this opportunity to fight back!
Status Effect Vulnerabilities
| Poison | Stun | Paralysis | Sleep |
|---|---|---|---|
| ★ | -- | ★ | ★ |
| Blast | Exhaust | Fireblight | Waterblight |
| -- | ★ | ★ | ★ |
| Thunderblight | Iceblight | ||
| ★★ | ★ | ||
If an ailment has more stars it means that it has better effectiveness.
Item Vulnerabilities
| Pitfall Trap | Shock Trap | Flash Bomb |
|---|---|---|
| ◯ | ◯ | ◯ |
| Sonic Bomb | Meat Effects | Dung Bomb |
| ✕ | ✕ | ◯ |
◯ = Vulnerable; ✕ = Fully Resistant; ▲ = Situational
Kinsect Extracts
| Monster Part | Extract |
|---|---|
| Head |
|
| Abdomen |
|
| Back |
|
| Wing |
|
| Leg |
|
| Tail |
|
Red = Attack Increase, White = Movement Boost, Orange = Anti-knockback When Attacking
Bazelgeuse Locations and Quests
Bazelgeuse Known Habitat
| Map | Starting Area | Visited Areas | Rest Area |
|---|---|---|---|
 Shrine Ruins Shrine Ruins
|
7 | 1 / 2 / 3 / 4 / 8 / 9 / 10 / 13 / 11 | 3 / 11 |
 Sandy Plains Sandy Plains
|
10 / 5 / 7 | 9 / 6 / 3 / 7 | 2 |
 Lava Caverns Lava Caverns
|
12 | 2 / 3 / 4 / 5 / 7 / 9 / 12 | 12 |
 Frost Islands Frost Islands
|
6 | 2 / 3 / 6 / 7 / 8 / 9 | 9 |
 Flooded Forest Flooded Forest
|
9 / 10 | 1 / 2 / 3 / 6 / 8 / 9 / 10 / 11 / 13 | 3 |
 Jungle Jungle
|
2 / 4 / 9 | 1 / 2 / 3 / 4 / 5 / 9 / 11 | 10 |
Bazelgeuse Quest Appearances
| Quest Type | Lvl | Quest Name |
|---|---|---|
| Anomaly Quest | A★6 | Anomaly Research: Bazelgeuse |
| Event Quest | M★5 | Fear in the Flooded Forest |
| Follower Quest | M★5 | Fire Vs. Fire |
| Hub Quest | M★5 | Bazelgeuse Warning (Key Quest) |
| Hub Quest | M★5 | Bombs and Beams |
| Hub Quest | M★5 | Life is Full of Ups and Downs |
| Support Survey | M★5 | Operation Bazelgeuse |
| Hub Quest | M★6 | Trials of Passion and Composure |
| Hub Quest | M★6 | Bested by Bazelgeuse |
| Support Survey | M★6 | Operation Explosive Anger |
| Quest Type | Lvl | Quest Name |
|---|---|---|
| Village Quest | ★6 | Advanced: The Veterans' Gala |
| Arena Quest | ★7 | Arena 06 |
| Event Quest | ★7 | Boomy Dango |
| Hub Quest | ★7 | Death From Above |
| Hub Quest | ★7 | Advanced: Dual Calamities |
| Hub Quest | ★7 | Return of the Bazelgeuse |
| No Quest in This Rank |
How to Beat Bazelgeuse
Remember to Upgrade Your Armor

Since Bazelgeuse arrived with the game's Update 2.0, which also introduced additional armor upgrades, don't forget to upgrade your existing armors to increase their defense before taking this monster on!
Stay Away from Scales

When Bazelgeuse scatters its explosive scales on the battlefield, it will detonate after a few moments. When it turns red, stay away because that is the indicator that it is about to explode! Always be aware of your surroundings when fighting Bazelgeuse.
Ranged Weapons are Recommended

Bazelgeuse is a very big monster and it is quite hard to fight it toe to toe while minding all the explosive shells it scatters on the battlefield. Hence, we suggest using ranged weapons to better position yourself!
For this fight, we recommend using Pierce Ammo for Heavy Bowgun and Light Bowgun, and Piercing-type arrows for Bow!
Emergency Evade During Divebombs

Whenever Bazelgeuse does the Fly By attack, it will most likely follow it up with a divebomb. Wiredash away from it or emergency evade to save yourself!
How to Avoid Attacks: Frame Dodge Guide
Use Flash Bombs During Fly By to Cancel the Divebomb
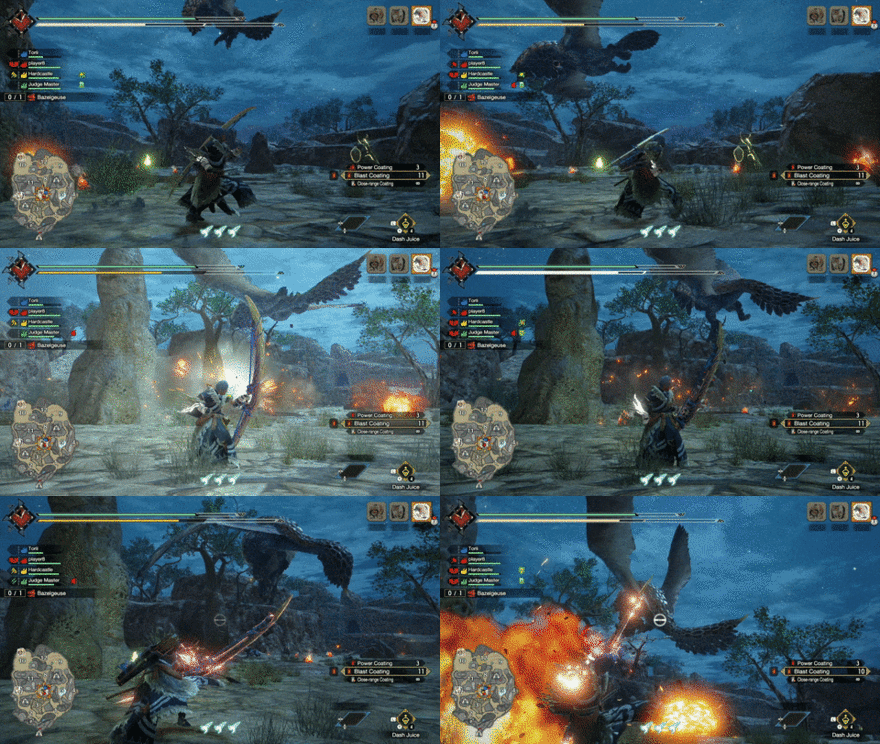
Bazelgeuse will hover and fly away - a tell to know that it's going to turn back and execute a Fly By. Get ready and try flash bombing Bazelgeuse to stop it in its tracks! This will not ground Bazelgeuse but will save you from the divebomb!
Flash Bomb: How to Get and Uses
Play Aggressive When Bazelgeuse Turns Red

Bazelgeuse will turn red and be more aggressive when enraged, but this also softens its hide. We suggest going aggressive whenever this happens to deal significantly more damage against the monster.
We also suggest using the skill Agitator against Bazelgeuse because it gives you bonus attack and affinity when the monster is enraged! Go toe-to-toe to win!
Everything Explodes When Bazelgeuse is Red

When Bazelgeuse turns red, that's when everything turns explosive. It will try to scatter more red volatile scales around the battlefield or drag its underside that triggers explosions.
Take Note of Changing Weak Spots
| Not Enraged | Enraged |
|---|---|
 |
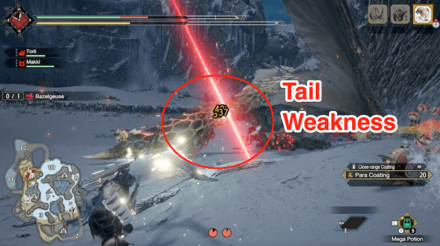 |
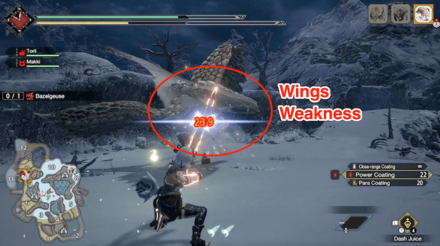
When Bazelgeuse is not enraged, the weak spots for ammo damage (Bowguns and Bows) are its wings and tail. When enraged, its weak spots become the red parts on its chin and tail. We suggest aiming for Bazelgeuse's tail because it is a larger and safer weak point to take advantage of.
If you're a Gunner, make sure to take note of Bazelgeuse's changing weak spots and adjust your aim accordingly!
Bring Dung Bombs To Make Bazelgeuse Leave

Bazelgeuse can appear in all locales and invade your hunt for other monsters. Whenever it arrives, throw a Dung Bomb to make it leave the area!
Dung Bomb Location: How to Get and Uses
Bazelgeuse Master Rank Attack Patterns
In addition to its attacks in High Rank quests, Bazelgeuse uses the following attacks in Master Rank.
| Name | Description |
|---|---|
| Double Tail Slam | Bazelgeuse performs two quick tail slams that scatter explosive scales on impact. |
| Spinning Scale Scatter [DANGER] |
Bazelgeuse rises upwards and scatters explosive scales in a wide circular area before crashing back down to the ground. |
Double Tail Slam
| Double Tail Slam Attack Information |
|---|
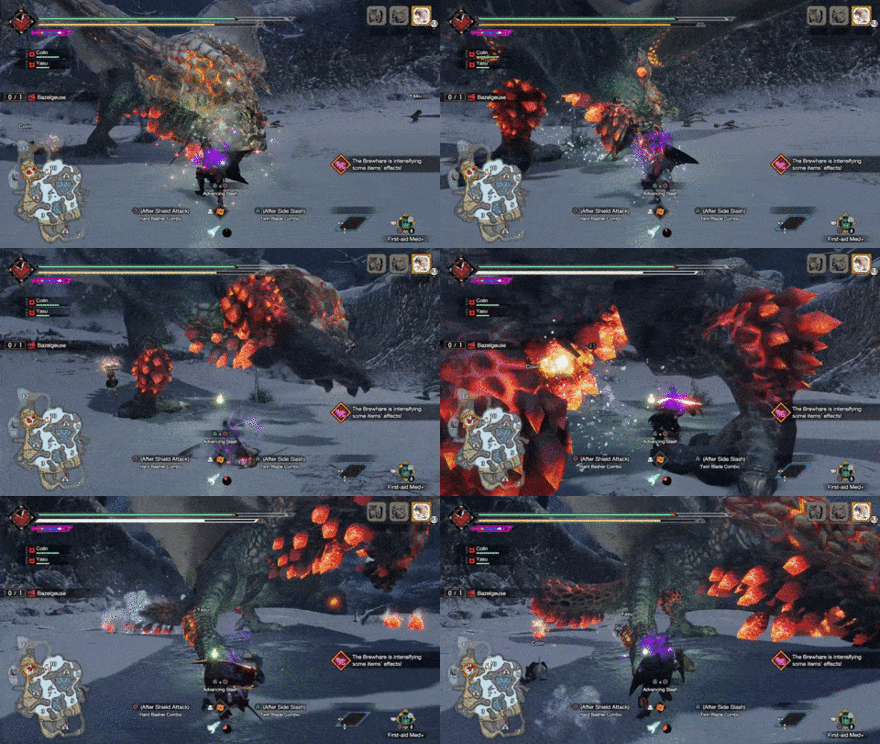 Double Tail Slam: Bazelgeuse winds up its tail before slamming it down twice in a row, scattering explosive scales on impact. To avoid this move, dodge perpendicular to the tail's path or towards Bazelgeuse to dodge the attack and the accompanying explosive scales. |
Spinning Scale Scatter
| Spinning Scale Scatter Attack Information |
|---|
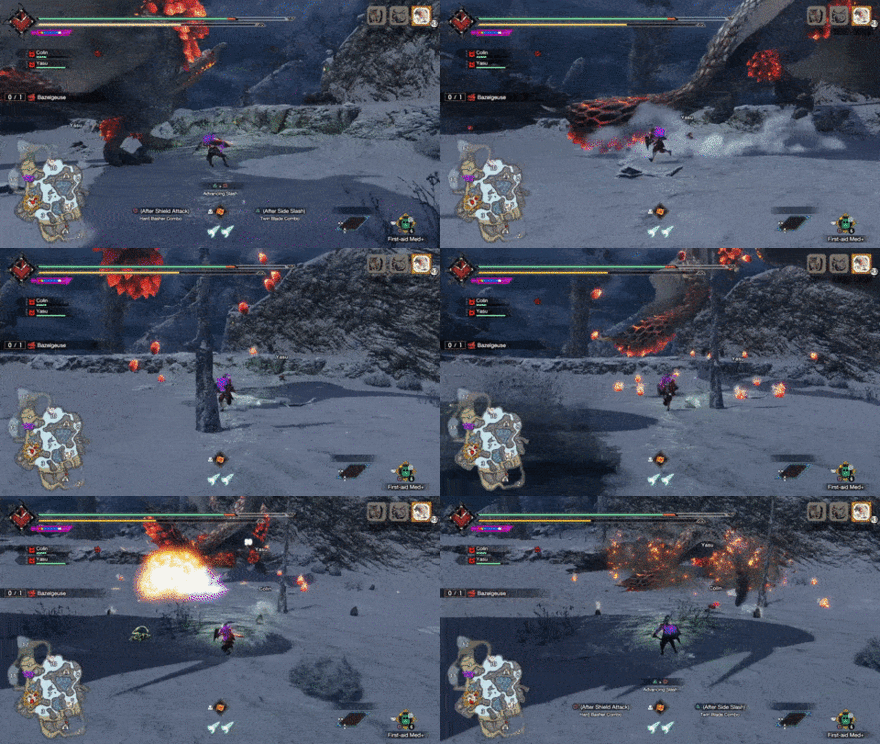 Spinning Scale Scatter: With the camera zooming out, Bazelgeuse rises upwards and scatters explosive scales in a wide circular area. After a short delay, it crashes down, dealing heavy damage on impact. React to the camera zooming out and run away as far as possible from Bazelgeuse and the explosive scales to avoid getting hit by this move. |
Bazelgeuse General Attack Patterns
Bazelgeuse uses the following attacks in High Rank quests.
| Name | Description |
|---|---|
| Big Chomp | A quick bite attack that can flinch hunters. Can hold hunters above explosive scales. |
| Big Stomp | A forceful stomp attack from the air. Follows an aerial glide. |
| Fire Ball | A quick fireball attack that travels in a straight line. Doesn't happen very often but can be executed by Bazelgeuse from time to time. |
| Bomb Scatters | Scatters explosive scales in multiple patterns. Can mess with hunter positions so be careful! |
| Chin Drag [DANGER] |
Scatters scales in a straight line then drags the chin on them for explosive damage! |
| Bombing Fly By [DANGER] |
Bazelgeuse will glide in the sky and drop bombs on the ground. It usually follows this up with a divebomb so be careful! |
| Divebomb Attack [DANGER] |
After a fly by, Bazelgeuse will aim for the explosive scales and ignite them as it divebombs! |
Big Chomp
| Big Chomp Attack Information |
|---|
 Big Chomp: A very quick bite attack that can flinch an unaware hunter. Bazelgeuse can use this as a way to keep the hunter stationary, especially above a volatile scale. |
Big Stomp
| Big Stomp Attack Information |
|---|
 Big Stomp: Bazelgeuse will fly and glide over the hunter and will forcefully slam its huge underside. Evade sideways or wiredash away! |
Fire Ball
| Fire Ball Attack Information |
|---|
 Fire Ball: A really quick fireball attack that can deal fireblight. Only travels at a straight line so just evade sideways! |
Bomb Scatters
Bazelgeuse's main mechanic revolves around scattering scales around the battlefield then igniting them to mess with the hunter's movement and repositioning. This also causes Fireblight and deal massive damage.
When Bazelgeuse is angry, instead of the usual dark-colored scales, it scatters red scales that explode faster. Mind your positioning and the environment whenever it's mad!
Bazelgeuse can also scatter volatile scales in different patterns which can originate from either the chin or the tail.
| Bomb Scatter Variations |
|---|
 Arc Bomb Scatter: Bazelgeuse can scatter volatile bombs in a 180° arc. For this pattern, you should evade either forward or backward away from Bazelgeuse. If scattered from the tail, Bazelgeuse can follow this one up with a Linear Bomb Scatter - using the previous explosion as a mask to disorient the hunter. Keep this in mind to reposition effectively! |
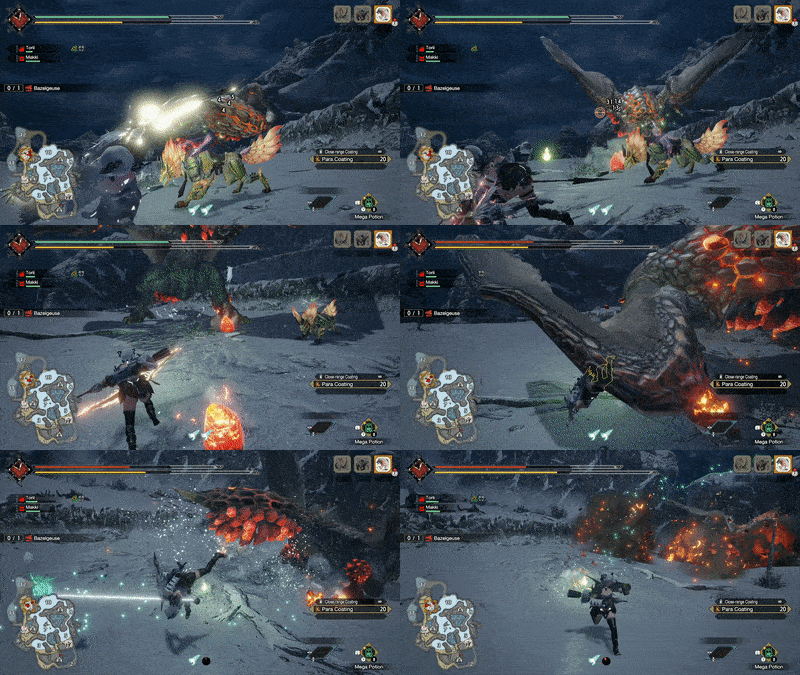 Linear Bomb Scatter: Bazelgeuse throws volatile scales in a line, in front or behind, depending on if it originated from the chin or the tail. We suggest evading sideways if it's not too late, else perform an emergency evade. If scattered from the chin, Bazelgeuse can follow it up with a Chin Drag that can deal massive damage from the explosion and Bazelgeuse itself! |
Chin Drag
| Chin Drag Attack Information |
|---|
 Chin Drag: Bazelgeuse will scatter two rows of scales in front of it then proceeds on dragging its chin in the middle of the two rows, igniting them in a fiery line. Evade sideways when you see Bazelgeuse scatter two rows of scales in front of it! |
Bombing Fly By
| Bombing Fly By Attack Information |
|---|
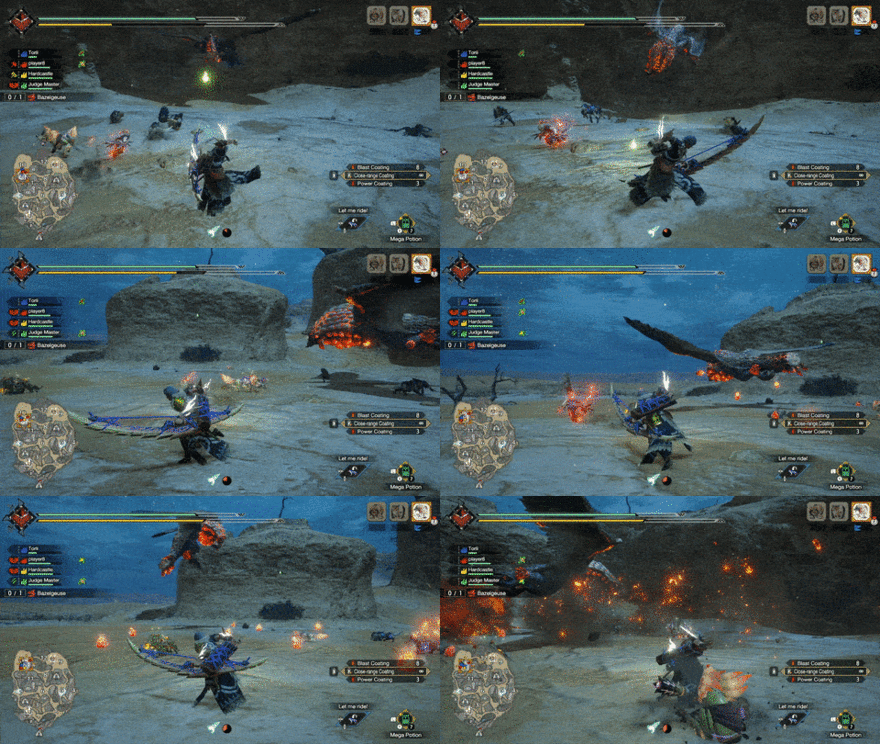 Bombing Fly By: Bazelgeuse flies above hunters in a straight line then turning back to glide again - all while scattering scales all over the battlefield in a wide area. It will do this three times before ending it with a Divebomb that can one-hit KO hunters. Use a Flash Bomb while it is flying by to stop Bazelgeuse from divebombing or perform an emergency evade when it's too late. |
Divebomb Attack
| Divebomb Attack Information |
|---|
 Divebomb Attack: After the Bombing Fly By, Bazelgeuse will execute a Divebomb that can one-hit KO hunters. Since hunters are focused on evading all the scales scattered during the Bombing Fly By, it is very easy to ignore Bazelgeuse and only notice it when it's falling on you. To stop Bazelgeuse from executing the Divebomb, use a Flash Bomb while it is Flying By which can instantly disorient it and abort the Divebomb. If you don't have a Flash Bomb or you're already too late, perform an Emergency Evade to save yourself! |
Bazelgeuse Materials and Drops
Master Rank Bazelgeuse Materials
High Rank Bazelgeuse Materials
Bazelgeuse Dropped Materials
Monster Hunter Rise Related Links
All Bazelgeuse Guides
| All Bazelgeuse Related Articles | ||
|---|---|---|
 Bazelgeuse Guide Bazelgeuse Guide
|
 Bazelgeuse Weapons Bazelgeuse Weapons
|
 Bazelgeuse Armor Bazelgeuse Armor
|
Sunbreak Monsters
| Sunbreak Monster Lists | ||
|---|---|---|
| Sunbreak Monsters List | Monster Subspecies List | Sunbreak Small Monsters List |
Large Monsters
MR6+ Large Monsters
| MR6+ Monsters | |||||
|---|---|---|---|---|---|
 Gaismagorm Gaismagorm(MR6) |
 Furious Rajang Furious Rajang(MR50) |
 Scorned Magnamalo Scorned Magnamalo(MR100) |
|||
Title Update 1 Monsters
| Sunbreak Title Update 1 Monsters | |||
|---|---|---|---|
 Seething Bazelgeuse Seething Bazelgeuse |
 Silver Rathalos Silver Rathalos |
 Gold Rathian Gold Rathian |
 Lucent Nargacuga Lucent Nargacuga |
Title Update 2 Monsters
| Sunbreak Title Update 2 Monsters | ||
|---|---|---|
 Flaming Espinas Flaming Espinas |
 Risen Chameleos Risen Chameleos |
 Violet Mizutsune Violet Mizutsune |
Title Update 3 Monsters
| Sunbreak Title Update 3 Monsters | ||
|---|---|---|
 Chaotic Gore Magala Chaotic Gore Magala |
 Risen Kushala Daora Risen Kushala Daora |
 Risen Teostra Risen Teostra |
Title Update 4 Monsters
| Sunbreak Title Update 4 Monsters | |
|---|---|
 Velkhana Velkhana |
 Risen Crimson Glow Valstrax Risen Crimson Glow Valstrax |
Title Update 5 Monsters
| Sunbreak Title Update 5 Monsters | |
|---|---|
 Amatsu Amatsu |
 Risen Shagaru Magala Risen Shagaru Magala |
Small Monsters
| Sunbreak Small Monsters | |||||
|---|---|---|---|---|---|
 Boggi Boggi |
 Ceanataur Ceanataur |
 Gowngoat Gowngoat |
|||
 Hermitaur Hermitaur |
 Hornetaur Hornetaur |
 Pyrantula Pyrantula |
 Vespoid Vespoid |
 Velociprey Velociprey |
|
Other Large Monsters
Elder Dragons
| Elder Dragons | |||||
|---|---|---|---|---|---|
 Narwa the Allmother Narwa the Allmother |
|||||
 Wind Serpent Ibushi Wind Serpent Ibushi |
 Thunder Serpent Narwa Thunder Serpent Narwa |
 Crimson Glow Valstrax Crimson Glow Valstrax |
|||
 Chameleos Chameleos |
 Kushala Daora Kushala Daora |
 Teostra Teostra |
|||
Apex Monsters
| Apex Monsters | ||
|---|---|---|
 Apex Arzuros Apex Arzuros |
 Apex Rathian Apex Rathian |
 Apex Mizutsune Apex Mizutsune |
 Apex Rathalos Apex Rathalos |
 Apex Diablos Apex Diablos |
 Apex Zinogre Apex Zinogre |
Other Small Monsters
Author
Sunbreak Bazelgeuse: Weakness and Drops
improvement survey
03/2026
improving Game8's site?

Your answers will help us to improve our website.
Note: Please be sure not to enter any kind of personal information into your response.

We hope you continue to make use of Game8.
Rankings
- We could not find the message board you were looking for.
Gaming News
Popular Games

Genshin Impact Walkthrough & Guides Wiki

Honkai: Star Rail Walkthrough & Guides Wiki

Umamusume: Pretty Derby Walkthrough & Guides Wiki

Pokemon Pokopia Walkthrough & Guides Wiki

Resident Evil Requiem (RE9) Walkthrough & Guides Wiki

Monster Hunter Wilds Walkthrough & Guides Wiki

Wuthering Waves Walkthrough & Guides Wiki

Arknights: Endfield Walkthrough & Guides Wiki

Pokemon FireRed and LeafGreen (FRLG) Walkthrough & Guides Wiki

Pokemon TCG Pocket (PTCGP) Strategies & Guides Wiki
Recommended Games

Diablo 4: Vessel of Hatred Walkthrough & Guides Wiki

Cyberpunk 2077: Ultimate Edition Walkthrough & Guides Wiki

Fire Emblem Heroes (FEH) Walkthrough & Guides Wiki

Yu-Gi-Oh! Master Duel Walkthrough & Guides Wiki

Super Smash Bros. Ultimate Walkthrough & Guides Wiki

Pokemon Brilliant Diamond and Shining Pearl (BDSP) Walkthrough & Guides Wiki

Elden Ring Shadow of the Erdtree Walkthrough & Guides Wiki

Monster Hunter World Walkthrough & Guides Wiki

The Legend of Zelda: Tears of the Kingdom Walkthrough & Guides Wiki

Persona 3 Reload Walkthrough & Guides Wiki
All rights reserved
©CAPCOM CO., LTD. ALL RIGHTS RESERVED.
The copyrights of videos of games used in our content and other intellectual property rights belong to the provider of the game.
The contents we provide on this site were created personally by members of the Game8 editorial department.
We refuse the right to reuse or repost content taken without our permission such as data or images to other sites.

 Daimyo Hermitaur
 Blood Orange Bishaten
 Garangolm
 Aurora Somnacanth
 Shogun Ceanataur
 Lunagaron
 Astalos
 Seregios
 Magma Almudron
 Gore Magala
 Espinas
 Pyre Rakna-Kadaki
 Malzeno
 Shagaru Magala
 Great Izuchi
 Arzuros
 Great Baggi
 Lagombi
 Aknosom
 Tetranadon
 Kulu-Ya-Ku
 Barroth
 Great Wroggi
 Royal Ludroth
 Khezu
Khezu Bishaten
 Somnacanth
 Barioth
 Rathian
 Tobi-Kadachi
 Volvidon
 Basarios
 Pukei-Pukei
 Magnamalo
 Nargacuga
 Zinogre
 Anjanath
 Mizutsune
 Rathalos
 Almudron
 Goss Harag
 Tigrex
 Diablos
 Jyuratodus
 Rajang
 Rakna-Kadaki
 Altaroth
 Anteka
 Baggi
Baggi Bnahabra
 Bombadgy
 Bullfango
 Delex
Delex Felyne
 Gajau
Gajau Gargwa
 Izuchi
 Jaggi
Jaggi Jaggia
 Jagras
 Kelbi
Kelbi Kestodon
 Ludroth
 Melynx
 Popo
Popo Rachnoid
 Remobra
 Rhenoplos
 Slagtoth
 Uroktor
 Wroggi
 Zamite


![Monster Hunter Stories 3 Review [First Impressions] | Simply Rejuvenating](https://img.game8.co/4438641/2a31b7702bd70e78ec8efd24661dacda.jpeg/thumb)


