Challenge Quest 01 - Tetranadon: How to Get S Rank | Monster Hunter Rise
★ All Title Updates now available for ALL PLATFORMS!
┗ Title Update 4 | Title Update 5 | Bonus Update
┗ Check out all our Best Builds For Every Weapon!
┗ TU4 Monsters: Velkhana | Risen C.G. Valstrax
┗ TU5 Monsters: Amatsu | Risen Shagaru Magala
┗ Bonus Update Monster: Primordial Malzeno

This is a comprehensive guide on Challenge Quest 01 found in Monster Hunter Rise (MH Rise). Read on for a guide on how to beat Tetranadon in the Arena, how to get S Rank, armor and weapon loadouts, and more!
List of Contents
Challenge Quest 01 Basic Information
| Slay a Tetranadon | |
|---|---|
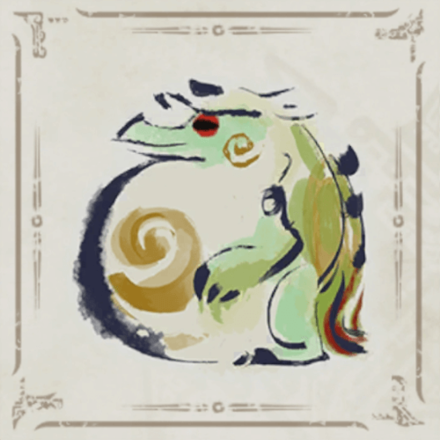
|
|
| Locale | Arena |
| Time Limit | 50 min. |
| Available Weapons | |
Rank Clear Times
| S Rank | 3 min 30 sec |
|---|---|
| A Rank | 7 min |
| B Rank | 50 min |
Challenge Quest 01 Rewards
| Tetranadon (Low Rank) | |
|---|---|
| Item Name | Drop Rate (#) |
| Tetranadon Beak | 8% |
| Tetra Carapace | 32% |
| Jumbo Bone | 12% |
| Aqua Sac | 24% |
| Tetranadon Hide | 24% |
| Rewards | Drop Rate |
|---|---|
| Steel Egg | - |
| Well-done Steak | - |
| Lifepowder | - |
Weapon and Armor Sets
Dual Blades Loadout

| Weapon | Armor | Items | |
|---|---|---|---|
| Twin Chainsaws I |
・Kadachi Helm
・Tobi-Kadachi Mail ・Tobi-Kadachi Braces ・Tobi-Kadachi Coil ・Kadachi Greaves |
・Potion x10
・Ration x10 ・Whetstone ・Throwing Kunai ・BBQ Spit |
|
| Switch Skills | |||
| Demon Flurry Rush | Demon Mode | Piercing Bind | |
Lance Loadout

| Weapon | Armor | Items | |
|---|---|---|---|
| Red Tail I |
・Aknosom Helm
・Aknosom Mail ・Aknosom Braces ・Aknosom Coil ・Aknosom Greaves |
・Potion x10
・Ration x10 ・EZ Shock Trap x1 ・Sleep Kunai x3 ・Large Barrel Bomb x3 ・Whetstone ・Throwing Kunai ・BBQ Spit |
|
| Switch Skills | |||
| Anchor Rage | Shield Charge | Guard | |
Hammer Loadout

| Weapon | Armor | Items | |
|---|---|---|---|
| War Hammer I |
・Rathian Helm
・Rathian Mail ・Rathian Braces ・Rathian Coil ・Rathian Greaves |
・Potion x10
・Ration x10 ・Whetstone ・Throwing Kunai ・BBQ Spit |
|
| Switch Skills | |||
| Water Strike | Silkbind Spinning Bludgeon | Charge Switch: Strength | |
Insect Glaive

| Weapon | Armor | Items | |
|---|---|---|---|
| Kadachi Glaive I |
・Remobra Headgear
・Remobra Suit ・Remobra Gloves ・Remobra Belt ・Remobra Feet |
・Potion x10
・Ration x10 ・EZ Pitfall Trap ・Whetstone ・Throwing Kunai ・BBQ Spit |
|
| Switch Skills | |||
| Leaping Slash | Tetraseal Slash | Recall Kinsect | |
Heavy Bowgun

| Weapon | Armor | Items | |
|---|---|---|---|
| Arzuros Gun I |
・Rhenoplos Helm
・Rhenoplos Mail ・Rhenoplos Braces ・Rhenoplos Coil ・Rhenoplos Greaves |
・Potion x10
・Ration x10 ・Normal Ammo 1 ・Throwing Kunai ・BBQ Spit |
|
| Switch Skills | |||
| Tackle | Counter Shot | Mech-Wyvernsnipe | |
| Heavy Bowgun Ammo | ||
|---|---|---|
| Normal Ammo 2 x99 | Spread Ammo 1 x60 | Spread Ammo 2 x60 |
| Cluster Bomb 1 x3 | Poison Ammo 1 x12 | Sticky Ammo 1 x12 |
| Sleep Ammo 1 x12 | Exhaust Ammo 1 x12 | Recover Ammo 1 x12 |
| Flaming Ammo x60 | Wyvern Ammo x2 | |
S Rank Guide: Dual Blades
| Dual Blades Tips |
|---|
Utilize Binding Pierce
Binding Pierce is vital for S Rank clears with Dual Blades. Make sure you land the kunai on the head for maximum damage!
Target the Head
Tetranadon's head has the best hit zone value for our Dual Blades and must always be prioritized for quick and easy S Rank clears. The arms and the bloated belly can also be targetted for solid damage if the head is unreachable.
Fill and Maintain Your Demon Gauge
Dual Blades, regardless of the hunt, must always have their Demon Gauge filled to improve non-demon mode attacks and increase overall damage.
S Rank Guide: Lance
| Lance Tips |
|---|
Start the Fight With Sleep Kunai and Large Barrel Bombs
Utilize your Sleep Kunai and Large Barrel Bombs to deal solid damage at the start of the fight. You can even use the bombs to your advantage by striking it with the lance and immediately activating Anchor Rage just before it explodes.
Refer to the table below a breakdown of our recommended start to this fight:
| How to Maximize Sleep Kunai & Large Barrel Bombs | |
|---|---|
| 1 | Throw all of your sleep kunais at Tetranadon to force it to sleep. It doesn't matter where the kunais land, as long as they connect. Also make sure you are close enough to perform the next step |
| 2 | Plant a Large Barrel Bomb in front of Tetranadon as it falls down and quickly blow it up with a Running Lance Thrust + Anchor Rage combo.
IMPORTANT: You need to be quick and pull this off before Tetranadon goes to sleep. |
| 3 | Plant the remaining two Large Barrel Bombs beside Tetranadon's head while it is asleep. |
| 4 | Ignite the Large Barrel Bombs with a Throwing Kunai. The damage should be high enough to instantly break Tetranadon's head, giving you a nice start into the fight. |
Focus on the Head
As with any other weapon in this Challenge Quest, Tetranadon's head is a priority target and must always be aimed at for maximum damage. Forearms and a bloated Belly are good alternatives in cases where the head is unreachable.
Utilize Anchor Rage
Anchor Rage grants you a damage buffs throughout the fight and must be used as much as possible to achieve S Rank clears. This particular switch skill lets you block all of Tetranadon's moves with ease except its double palm lunge.
S Rank Guide: Hammer
| Hammer Tips |
|---|
Use Strength Charge
Strength Charge must be used to achieve S Rank clears with a Hammer. This particular mode allows us to dish out high damage efficiently.
Aim for the Head
Do what the Hammer does best and strike at Tetranadon's head whenever possible. Not only does this ensure maximum damage, but accumulating enough damage results in knockouts as well!
Use Your Silkbind Attacks
Impact Crater and Silkbind Spinning Bludgeon are key skills against Tetranadon and must be used with proper timing and positioning for maximized effect.
Impact Craters' descending attacks must land on the head as much as possible. The attack animation is fairly long so we recommend that you perform this move whenever Tetranadon is knocked out or when you're absolutely sure that the descending attacks will connect.
Silkbind Spinning Bludgeon is great for closing the distance between you and Tetranadon whenever he charges or hops away. This move is especially effective at striking the head whenever Tetranadon is bloated as well. Make sure you charge to at least level two first for solid damage.
S Rank Guide: Insect Glaive
| Hammer Tips |
|---|
Start the Fight With Your Pitfall Trap
Position in a few steps along Tetranadon's path and set your Pitfall Trap to start the fight. This allows you to land free strikes to the head and gather kinsect extracts with ease.
Maintain Your Triple Up Buff
Insect Glaives, regardless of the hunt, must always maintain their Triple Up Buff. This grants you better attack combinations and immunity to roars.
Paralyze Tetranadon
Challenge Quest 01's Insect Glaive Loadout comes with Rigiprayne, a powder-type Kinsect that produces Paralysis Clouds. This synergizes perfectly with our Tetraseal Slash and allows us to Paralyze Tetranadon throughout the fight. Make sure you combust the clouds near Tetranadon for Paralysis buildup!
Aim for the Head and Forelegs
As with any weapon in this Challenge Quest, the head lets us deal the most damage against Tetranadon as must always be prioritized throughout the fight — with forelegs being the best alternative.
Use Tetraseal Slash
Tetraseal Slash is a heavy-hitting combination that allows us to mark monster parts for powder-type kinsects as well. This combination is the key to achievent S Rank clears against Tetranadon.
S Rank Guide: Heavy Bowgun
| Hammer Tips |
|---|
Aim for the Head
Always aim for Tetranadon's head for maximum damage. This is extremely important for Heavy Bowgun S Rank clear as hitting other parts too much will lead to failure.
Start the Fight With Sleep and Wyvern Ammo
Position close to Tetranadon at the start of the fight and put it to sleep with Sleep Ammo. The timing of Wyvern Ammo shots afterward is very important to achieve an optimal start.
- Both Wyvern Ammo shots must be fully charged and aimed towards the head for maximum damage.
- The first shot must be performed before Tetranadon completely falls asleep.
- The second shot will be amplified by wake-up damage, allowing us to completely break Tetranadon's head at the start of the fight.
Use Counter Shots on the Head
Counter Shots are extremely important for S Rank clears against Tetranadon. Make sure you use these shots as much as possible and on the head for maximum damage.
Use Poison and Flaming Ammo
Use Poison and Flaming Ammo to finish Tetranadon off after your explosive opening.
Tetranadon gets poisoned after four Poison Ammo shots. Flaming Ammo must always be fully charged and aimed at the head for maximum damage.
Related Monster Hunter Rise Guides

Quest Types and List of Quests
All Quest Guides by Type
| Quest Types | |
|---|---|
 Village Quests Village Quests |
 Urgent Quests Urgent Quests
|
 Gathering Hub Quests Gathering Hub QuestsBase Game | Sunbreak |
 Arena Quests Arena Quests |
 Side Quests Side Quests |
 Requests Requests |
 Event Quests Event Quests(Rewards) |
 Collaboration Quests Collaboration Quests |
 Challenge Quests Challenge Quests |
 Anomaly Quests Anomaly Quests |
 Follower Quests Follower Quests |
 Support Surveys Support Surveys |
Author
Challenge Quest 01 - Tetranadon: How to Get S Rank | Monster Hunter Rise
improvement survey
03/2026
improving Game8's site?

Your answers will help us to improve our website.
Note: Please be sure not to enter any kind of personal information into your response.

We hope you continue to make use of Game8.
Rankings
- We could not find the message board you were looking for.
Gaming News
Popular Games

Genshin Impact Walkthrough & Guides Wiki

Honkai: Star Rail Walkthrough & Guides Wiki

Umamusume: Pretty Derby Walkthrough & Guides Wiki

Pokemon Pokopia Walkthrough & Guides Wiki

Resident Evil Requiem (RE9) Walkthrough & Guides Wiki

Monster Hunter Wilds Walkthrough & Guides Wiki

Wuthering Waves Walkthrough & Guides Wiki

Arknights: Endfield Walkthrough & Guides Wiki

Pokemon FireRed and LeafGreen (FRLG) Walkthrough & Guides Wiki

Pokemon TCG Pocket (PTCGP) Strategies & Guides Wiki
Recommended Games

Diablo 4: Vessel of Hatred Walkthrough & Guides Wiki

Cyberpunk 2077: Ultimate Edition Walkthrough & Guides Wiki

Fire Emblem Heroes (FEH) Walkthrough & Guides Wiki

Yu-Gi-Oh! Master Duel Walkthrough & Guides Wiki

Super Smash Bros. Ultimate Walkthrough & Guides Wiki

Pokemon Brilliant Diamond and Shining Pearl (BDSP) Walkthrough & Guides Wiki

Elden Ring Shadow of the Erdtree Walkthrough & Guides Wiki

Monster Hunter World Walkthrough & Guides Wiki

The Legend of Zelda: Tears of the Kingdom Walkthrough & Guides Wiki

Persona 3 Reload Walkthrough & Guides Wiki
All rights reserved
©CAPCOM CO., LTD. ALL RIGHTS RESERVED.
The copyrights of videos of games used in our content and other intellectual property rights belong to the provider of the game.
The contents we provide on this site were created personally by members of the Game8 editorial department.
We refuse the right to reuse or repost content taken without our permission such as data or images to other sites.


![Monster Hunter Stories 3 Review [First Impressions] | Simply Rejuvenating](https://img.game8.co/4438641/2a31b7702bd70e78ec8efd24661dacda.jpeg/thumb)


