This survey will take about 1 minute.
Your answers will help us to improve our website.
Monster Hunter Rise: Sunbreak
Dual Blade Builds and Best Armor
★ All Title Updates now available for ALL PLATFORMS!
┗ Title Update 4 | Title Update 5 | Bonus Update
┗ Check out all our Best Builds For Every Weapon!
┗ TU4 Monsters: Velkhana | Risen C.G. Valstrax
┗ TU5 Monsters: Amatsu | Risen Shagaru Magala
┗ Bonus Update Monster: Primordial Malzeno
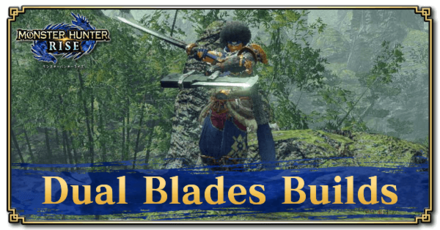
This is a guide to the best builds and equipment for Dual Blades in Monster Hunter Rise (MH Rise): Sunbreak. Learn about the best Dual Blades for Sunbreak and the best builds and Armor pieces to use with the Dual Blade for Low, High, and Master Rank.
| All Dual Blades Guides | ||
|---|---|---|
 Trees & Full List Trees & Full List |
 How to Use How to Use |
 Best Builds Best Builds |
List of Contents
Latest Sunbreak MR Build
Blood Awakening Dragon DB Comfort Build (BU)
Recommended Dual Blades
| Weapon | ATK | DEF | Affinity |
|---|---|---|---|
 Silver Slicers Silver Slicers
 |
310 | 0 | 0% |
| Element / Status |
Slots | Rampage Slots | |
| ④④④ | ③ |
| Decorations |
|
|
|---|---|---|
* = check Build Merits below.
Recommended Armor Loadout
| Armor | Slots | Skills | |
|---|---|---|---|
|
|
③②① |
Wirebug Whisperer Lv. 3
Wind Mantle Lv. 1
|
|
|
|
④④② |
Burst Lv. 1
Blood Awakening Lv. 1
|
|
|
|
④④② |
Critical Boost Lv. 1
Blood Awakening Lv. 1
|
|
|
|
③①ー | ||
|
|
④④ー | ||
| Talisman | Attack Boost 3 with a ②②① slot | ||
| Rampage Decoration |
Alternative: |
||
| Skills | Rampage Skill | Element Exploit to increase elemental damage. If target is immune to Dragon, consider Wyvern Exploit, Anti-Aerial Species, Anti-Aquatic Species, or Fanged Exploit depending on the monster. |
|---|---|
|
Attack Boost Lv. 5 | Critical Eye Lv. 5
Dragon Attack Lv. 5 | Constitution Lv. 3 Weakness Exploit Lv. 3 | Recovery Up Lv. 3 Parbreaker Lv. 3 | Wirebug Whisperer Lv. 3 Blood Rite Lv. 3 | Element Exploit Lv. 3 Blood Awakening Lv. 3 | Critical Boost Lv. 2 Critical Element Lv. 2 | Razor Sharp Lv. 2 Evade Extender Lv. 2 | Kushala Blessing Lv. 2 Burst Lv. 1 | Intrepid Heart Lv. 1 Wind Mantle Lv. 1 | Shock Absorber Lv. 1 |
Build Merits & Augments
| Weapon Augments | |
|---|---|
| Armor Augments |
Armor Augments for this build are not necessary. However, feel free to add as you please once you get comfortable with your build! Generally, you'd want to get better skills and more slots for your armor.
Replaceable skills already on the armor: ● Kushala Blessing For damage, aim for any of the following: ● Powder Mantle ● Critical Element ● Burst For comfort, aim for the following: ● Stamina Surge ● Wind Mantle ● Frenzied Bloodlust |
| Build Merits and Notes |
The Bonus Update introduces a new aggressive comfort skill: Blood Awakening. While seeming like a gimmick, this skill shines in Anomaly hunts when dealing with Bloodblight.
This build uses three pieces of Primordial Malzeno armor and two pieces of Risen Kushala Daora. In these armor pieces are comfort skills such as Wirebug Whisperer and Wind Mantle, which help greatly in bringing out the Shrouded Vault switch skill when countering or I-framing monster attacks, and Constitution for stamina management. You can use Dash Juice to help reduce stamina drain when using Demon Mode. All three levels of Blood Rite and Partbreaker are present to hasten the activation of Blood Awakening. Further damage skills are provided as listed above to strengthen your overall damage. The Silver Slicers Dragon Dual Blades boost the health you gain from Blood Rite and Bloodblight, which makes it a good pair with the build's core skill Blood Awakening. This build is a late bloomer in a hunt due to it requiring breaking parts and Bloodblight to be fully effective. The Dragon Conversion build is still the best for dealing elemental damage, since the element here relies heavily on the element increase of Blood Awakening. You can at least safely recieve some Bloodblight by making use of Intrepid Heart, which significantly reduces damage and nullifies knockback when filled. Either augment your armor to gain it or augment for an extra slot to fit in another jewel! |
|---|
Master Rank Dual Blades Builds
High Rank Builds
Gathering Hub HR 4 - HR 100+
Whether you're just breaking in the High Rank at HR 4 or are just looking for some new strategies at HR 100, we've got the best High Rank Dual Blades builds to spice up your hunts.
►High Rank Dual Blades Builds
| Latest Builds | Rank |
|---|---|
| Raw Damage | HR 100+ |
Low Rank Builds
Village Quests - Low Rank Hub
Check out the best Dual Blades builds for Monster Hunter beginners or for speeding through Village Quests or Low Rank Gathering hub.
►Low Rank Dual Blades Builds
| Latest Builds | Rank |
|---|---|
| Affinity Latent Power | ★4 to ★6 |
Best Skills for Dual Blades
Best Damage Skills
These skills make it possible to deal extra damage! Aim for these skills for maximum DPS to defeat those monsters easier and finish those quests faster!
| Best Skills | Explanation |
|---|---|
| Weakness Exploit ★★★ |
A staple skill for any meta build. Increases your affinity when hitting weak spots by 50% at max rank, increasing your DPS significantly. |
| Element Attack ★★★ |
Sunbreak featured buffs for elemental damage, most notably on Dual Blades. Max out this skill to increase damage against monsters weak to a specific element and watch your numbers go up! Fire | Water | Ice | Thunder | Dragon |
| Critical Eye ★★★ |
More damage and Critical Element is also reliant on affinity so make sure to raise this stat when playing Dual Blades. |
| Critical Boost ★★★ |
Amplifies critical strike damage, increasing your DPS on high-affinity Dual Blades builds. |
| Critical Element ★★★ |
Amplifying elemental damage is the next step to increasing your damage output as an elemental Dual Blades player. Critical Element is similar to Critical Boost for elemental attacks and having it is near critical especially for the end game monsters and quests! |
| Burst ★★★ |
Fast, continuous hits let this skill shine to its full potential, something the Dual Blades often do! Max this skill out or put in at least a level to feel a jump in your DPS. Available in Sunbreak Base Game |
| Element Exploit ★★ |
Amplify your damage against monsters weak to a specific element with this skill. A single point of it is enough to deal significant damage. Available in Sunbreak Free Title Update 1 |
| Attack Boost ★★ |
Increases attack power. This skill is a lesser priority as most of the Dual Blades' damage come from elemental attacks. If you must, aim for at least 4 levels. |
| Status Trigger ★★ |
Make Status Builds even better with this skill, which allows you to deal status buildup on every hit after evading successfully! For best results, we suggest pairing this with Evade Window. Take note that Demon Flight does not activate this skill. Available in Sunbreak Free Title Update 1 |
| Buildup Boost ★★ |
Boosts raw damage every time a status buildup attack hits, which allows you to deal significant damage, especially with Status Trigger active. Available in Sunbreak Free Title Update 2 |
| Powder Mantle ★★ |
This skill from the Risen Teostra Armor provides your Dual Blades combos with additional blast damage every time it activates, contributing greatly to DPS. Available in Sunbreak Free Title Update 3 |
| Dragon Conversion ★★ |
When activated, this skill from the Risen Crimson Glow Valstrax Armor will benefit elemental builds, increasing DPS even further! Available in Sunbreak Free Title Update 4 |
| Dereliction ★★ |
Using the Red Scroll increases the Dual Blades' elemental and status effect values, improving overall damage. Just be wary of your health! Best paired with the Strife skill from the Chaotic Gore Magala Armor Set. Available in Sunbreak Base Game |
| Bloodlust ★★ |
Overcome the Frenzy Virus to power up with this skill; best paired with Coalescence. Available in Sunbreak Base Game |
| Foray ★ |
Increases attack power whenever a monster is poisoned, paralyzed, or blighted. Best paired with Status Trigger or Status Attack skills. |
| Status Attack ★ |
Only consider this skill when you want more status attack on your Status Builds. Blast | Paralysis | Poison |
Best Comfort Skills
These are skills that make managing weapon mechanics a lot easier. Damage is only part of the equation - taking time to slot in comfort skills that increase consistency & comfort will also increase overall DPS!
| Best Skills | Explanation |
|---|---|
| Heaven-Sent ★★★ |
From the heavenly armor of Amatsu, maxing this skill out will negate sharpness loss and grant you infinite stamina. Having this will give you more uptime on your attacks, increasing overall DPS in a fight! Available in Sunbreak Free Title Update 5 |
| Protective Polish or Master's Touch ★★★ |
Ideal sharpness-managing skills to have due to the Dual Blades' fast-paced attacks. Equip one or the other, depending on what's more suitable to your playstyle! |
| Constitution ★★ |
A great skill to have as it allows you to manage stamina better, especially during Demon Mode. |
| Stamina Surge ★★ |
Quickly replenish your stamina after using Demon Mode, which can help you get back into the fight faster! |
| Marathon Runner ★★ |
Longer demon mode duration is always great for DPS! |
| Wirebug Whisperer ★★ |
Maxing this skill out makes your Wirebugs more readily available, which will allow you to do more Spiral Slashes in a fight. |
| Frenzied Bloodlust ★★ |
The Risen Shagaru Magala Armor introduced this new skill. After overcoming the Frenzy Virus, it grants you an extra Wirebug on your arsenal. If you have 3 Wirebugs equipped, activating this skill will allow you to access 4. For the Dual Blades, this means more silkbind attacks, like the Spiral Slash. Synergizes well with Wirebug Whisperer and/or Wind Mantle. Available in Sunbreak Free Title Update 5 |
| Furious ★★ |
Activate this skill for a temporary infinite stamina boost, which lets you stay in Demon Mode longer. Available in Sunbreak Base Game |
| Defiance ★★ |
Three levels of this skill prevent most roars, tremors, and winds from interrupting attacks. The Cornerstone Jewel is a level 1 decoration, so slot it in whenever possible! Available in Sunbreak Free Title Update 1 |
| Speed Sharpening ★★ |
Reduces a cycle for sharpening with each level. It is an ideal skill to partner with Protective Polish. |
| Shock Absorber Flinch Free ★★ |
Useful especially in multiplayer so no minor attacks can interrupt you or your team's combos! |
| Intrepid Heart ★ |
Whenever the gauge above your health bar is full, this skill can be useful in preventing monster attacks from interrupting your combos, making it possible to pull off an extra charged attack before you can regroup. Available in Sunbreak Free Title Update 2 |
| Wind Mantle ★ |
This skill from the Risen Kushala Armor will recharge your Wirebugs faster, allowing you to do more silkbind attacks with the Dual Blades. Consider this skill only when it's possible to build around it! Available in Sunbreak Free Title Update 3 |
| Embolden ★ |
Aside from the defensive boost, this skill also provides longer dodging invincibility. Slot this skill in only when possible! Available in Sunbreak Free Title Update 2 |
| Evade Window ★ |
Allows you to dodge enemy attacks more easily. Slot this skill in only when possible! |
Monster Hunter Related Links

|
• Weapons marked withNEW have been updated. • Weapons withUP have been reviewed and does not warrant an updated build from the Bonus Update. |
| All Weapon Build Guides | |
|---|---|
NEW Low Rank | High Rank Master Rank |
NEW Low Rank | High Rank Master Rank |
NEW Low Rank | High Rank Master Rank |
NEW Low Rank | High Rank Master Rank |
NEW Low Rank | High Rank Master Rank |
NEW Low Rank | High Rank Master Rank |
NEW Low Rank | High Rank Master Rank |
NEW Low Rank | High Rank Master Rank |
NEW Low Rank | High Rank Master Rank |
NEW Low Rank | High Rank Master Rank |
NEW Low Rank | High Rank Master Rank |
NEW Low Rank | High Rank Master Rank |
NEW Low Rank | High Rank Master Rank |
UP Low Rank | High Rank Master Rank |
Other Builds
| Other Build Guides | |
|---|---|
| General High Rank Builds and Best Equipment | Buddy Equipment Builds Palico | Palamute |
Comment
15  Anonymous almost 5 years
Your 3.0 Crit Raw DB Build has a few errors. 1. The Skills at the bottom should say Crit Eye Lv.6 (3 Helm, 2 Legs, 1 Jewel) and not Lv.5, and the Talisman can be... anything else than WEx 1, personally I'm using an EE2 with the same deco slots. At 70% base, WEx 3 giving you 50% is meaningless when WEx 2 gives you the 30% you need. A stamina conservation skill like MR or Con would be best I imagine
Author

Dual Blade Builds and Best Armor
Please participate in our site
improvement survey
03/2026
improvement survey
03/2026
Would you assist in
improving Game8's site?
improving Game8's site?

×
We are listening to our users' valuable opinions and discussing how to act on them.
The information collected through this survey will be used for the purpose of improving our services. In addition, the information will only be disclosed a part of a statistic in a format that will not allow identification of personal information.
Begin Survey
Not Now
×
Please rate each item regarding Game8.co's Advertisements.
Amount of Ads
Very Dissatisfied
Somewhat Dissatisfied
Fine
Somewhat Satisfied
Highly Satisfied
Placement of Ads
Timing of Ad Display
Ad Loading Speed
Safeness of Ads
Content of Ads
×
Please rate each item regarding Game8.co's Quality of Articles.
Amount of information
Very Dissatisfied
Somewhat Dissatisfied
Fine
Somewhat Satisfied
Highly Satisfied
Frequency of updates
Speed of new information
Accuracy of articles
Understandibility of articles
Readability of sentences
×
Please rate each item regarding Game8.co's Usability of the Site.
Ease of finding information
Very Dissatisfied
Somewhat Dissatisfied
Fine
Somewhat Satisfied
Highly Satisfied
Loading Speed
Use of Color
Font Size
Visibility of Images
Easy to Understand Layout
×
Please rate each item regarding Game8.co's Message Boards, Comments.
Ease of Writing
Very Dissatisfied
Somewhat Dissatisfied
Fine
Somewhat Satisfied
Highly Satisfied
Readability
Ease in Finding Information
Comment Quality
Comment Quantity
Admin Response
×
Please rate each item regarding Game8.co's Site's new design.
Please rate our site's new design
Very Dissatisfied
Somewhat Dissatisfied
Fine
Somewhat Satisfied
Highly Satisfied
Do you think that the website's design change makes the site easier to use?
Has the new design made it easier for you to find information on the site?
Has the new design improved the overall visual appeal of the site?
How would you rate your overall satisfaction with the new design of the site?
×
How likely are you to recommend Game8 to someone you know?
Very Unlikely
0
1
2
3
4
5
6
7
8
9
10
Very Likely
If you have other opinions regarding potential improvement to the website, please share them with us. We would appreciate your honest opinion.
Note: This is a free response section, so you can proceed without entering anything.
Note: Please be sure not to enter any kind of personal information into your response.
Note: Please be sure not to enter any kind of personal information into your response.
×
Thank You
×
Thank you for participating in our survey! Your answers will help us to improve the quality of our website and services.
We hope you continue to make use of Game8.
We hope you continue to make use of Game8.
Close
Rankings
Gaming News


![Monster Hunter Stories 3 Review [First Impressions] | Simply Rejuvenating](https://img.game8.co/4438641/2a31b7702bd70e78ec8efd24661dacda.jpeg/thumb)
Popular Games

Genshin Impact Walkthrough & Guides Wiki
Honkai: Star Rail Walkthrough & Guides Wiki
Umamusume: Pretty Derby Walkthrough & Guides Wiki
Pokemon Pokopia Walkthrough & Guides Wiki
Resident Evil Requiem (RE9) Walkthrough & Guides Wiki
Monster Hunter Wilds Walkthrough & Guides Wiki
Wuthering Waves Walkthrough & Guides Wiki
Arknights: Endfield Walkthrough & Guides Wiki
Pokemon FireRed and LeafGreen (FRLG) Walkthrough & Guides Wiki
Pokemon TCG Pocket (PTCGP) Strategies & Guides Wiki


Recommended Games
Diablo 4: Vessel of Hatred Walkthrough & Guides Wiki
Cyberpunk 2077: Ultimate Edition Walkthrough & Guides Wiki
Fire Emblem Heroes (FEH) Walkthrough & Guides Wiki
Yu-Gi-Oh! Master Duel Walkthrough & Guides Wiki
Super Smash Bros. Ultimate Walkthrough & Guides Wiki
Pokemon Brilliant Diamond and Shining Pearl (BDSP) Walkthrough & Guides Wiki
Elden Ring Shadow of the Erdtree Walkthrough & Guides Wiki
Monster Hunter World Walkthrough & Guides Wiki
The Legend of Zelda: Tears of the Kingdom Walkthrough & Guides Wiki
Persona 3 Reload Walkthrough & Guides Wiki


All rights reserved
©CAPCOM CO., LTD. ALL RIGHTS RESERVED.
The copyrights of videos of games used in our content and other intellectual property rights belong to the provider of the game.
The contents we provide on this site were created personally by members of the Game8 editorial department.
We refuse the right to reuse or repost content taken without our permission such as data or images to other sites.
I know this is way late but on the 3.0 build for dbs would the azure age haori be better. Allowing for more con and freedom in your talisman. I don't have a con 3 talisman but an attack 3 talisman swapped good.