Apex Diablos Guide: Weakness, Armor, Drops, and Weapons | Monster Hunter Rise
★ All Title Updates now available for ALL PLATFORMS!
┗ Title Update 4 | Title Update 5 | Bonus Update
┗ Check out all our Best Builds For Every Weapon!
┗ TU4 Monsters: Velkhana | Risen C.G. Valstrax
┗ TU5 Monsters: Amatsu | Risen Shagaru Magala
┗ Bonus Update Monster: Primordial Malzeno
This is a hunting guide for Apex Diablos, a Large Monster in Monster Hunter Rise (MH Rise). Read on to learn Apex Diablos's weaknesses, forgeable weapons, forgeable armor, drops, and more!
 Apex Diablos Guide Apex Diablos Guide
|
 Diablos Guide Diablos Guide
|
List of Contents
Apex Diablos Weakness and Notes
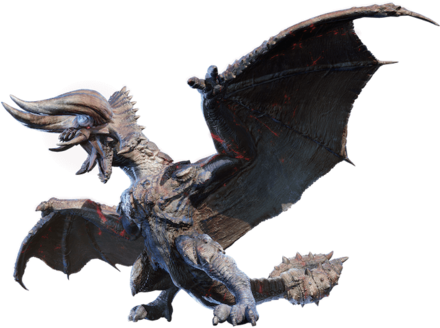
| Apex Diablos ヌシ・ディアブロス |
|||
|---|---|---|---|
 |
|||
| Type | Flying Wyvern | ||
| Threat Level | 10/10 | Rampage Type |
|
| Major Weakness | Other Weakness | ||
| Blight / Elemental Damage | ー | Abnormal Status | ー |
| Characteristics | |||
| A Diablos so mighty, it was crowned an Apex. It is eternally possessed by wrath and terror, possibly due to the myriad wounds that cover its body. Its supremely developed horns add to the lethality of its charge. The call of an Apex unleashes its tortured anger on nearby beasts, driving them into a frenzy. | |||
How to Unlock Apex Diablos
Reach Anomaly Investigation Lv 201 in Master Rank
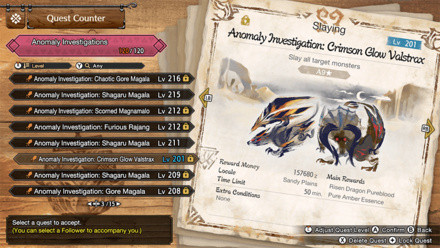
Apex Diablos can only be encountered as an additional target monster in Anomaly Investigations starting at Level 201 in Version 15 or later. Defeating it rewards a base of 310 Anomaly Research Points. Unlike most monsters in Master Rank, Apex Diablos doesn't gain any new moves.
Anomaly Research Level:
How to Get Max Level Fast
Update 3.0: Solo Quest Unlocked after HR100

| Quest Name | Monster/Unlock |
|---|---|
| The Devastating Apex Diablos |
|
| Unlock Conditions: Complete an Apex Diablos Rampage Quest, Reach HR 100 and Finish the Urgent Quest "The Crimson Glow" |
Once you update to Version 3.0, reach HR 100, finish the Urgent Quest The Crimson Glow
, and have fought Apex Diablos in a Rampage at least once, you can take on Apex Diablos in its own slay quest!
Unlocked in Rampage Quests When You Reach HR 8

Apex Diablos will start to appear in High Rank Rampages when you reach HR 8 after the 2.0 Update. Like all Rampage Quests, you can run Apex Diablos rampage quests an unlimited number of times. Do note, however, that monsters appearing in Rampages are completely random so check the Quest Counter regularly!
Rampage Guide and Tips: How to Get S-Rank
Apex Diablos Weakness and Resistance
| 37 | 34 | 19 | 0 |
| 11 | 7 | 17 | 11 |
Bold are the recommended Weapon Type and Elemental Damage.
Apex Diablos Weapon Damage Breakdown
| Part | |||
|---|---|---|---|
| Head | 45 | 45 | 45 |
| Horn | 35 | 45 | 10 |
| Neck | 40 | 45 | 20 |
| Abdomen | 38 | 38 | 15 |
| Back | 25 | 25 | 10 |
| Wing | 30 | 30 | 20 |
| Leg | 28 | 28 | 25 |
| Tail | 50 | 24 | 20 |
| Tail Tip | 45 | 24 | 10 |
| Overall | 37 | 34 | 19 |
Apex Diablos Elemental Weakness Breakdown
| Part | |||||
|---|---|---|---|---|---|
| Head | 0 | 15 | 10 | 25 | 15 |
| Horn | 0 | 15 | 10 | 25 | 15 |
| Neck | 0 | 8 | 5 | 10 | 5 |
| Abdomen | 0 | 10 | 5 | 10 | 10 |
| Back | 0 | 5 | 5 | 10 | 5 |
| Wing | 0 | 5 | 5 | 10 | 5 |
| Leg | 0 | 10 | 5 | 15 | 10 |
| Tail | 0 | 10 | 10 | 15 | 10 |
| Tail Tip | 0 | 25 | 10 | 30 | 20 |
| Overall | 0 | 11 | 7 | 17 | 11 |
Higher numbers indicate higher potential damage to the monster.
Apex Diablos Hunting Tips

An angry Apex Diablos will trigger a devastating move, launching into an unstoppable charge, bringing down everything that stands in its pat. Push on against an enraged Apex to quickly rid it of its rage and steady its temper.
Status Effect Vulnerabilities
| Poison | Stun | Paralysis | Sleep |
|---|---|---|---|
| ★ | ★ | -- | -- |
| Blast | Exhaust | Fireblight | Waterblight |
| ★★ | -- | ★ | ★ |
| Thunderblight | Iceblight | ||
| ★ | ★★ | ||
If an ailment has more stars it means that it has better effectiveness.
Item Vulnerabilities
| Pitfall Trap | Shock Trap | Flash Bomb |
|---|---|---|
| ✕ | ✕ | ◯ |
| Sonic Bomb | Meat Effects | Dung Bomb |
| ✕ | ✕ | ◯ |
◯ = Vulnerable; ✕ = Fully Resistant; ▲ = Situational
Great Way to Farm Defender Ticket 8

Defender Ticket 8's are useful as Talisman Melding materials and an Apex Diablos Rampage Quest is a great way to farm for them!
Defender Ticket 8 is also needed for late-game weapon Ramp-Up for normal and Rampage weapons so take time to acquire these!
Apex Diablos Locations
Apex Diablos Known Habitat
| Map | Starting Area | Visited Areas | Rest Area |
|---|---|---|---|
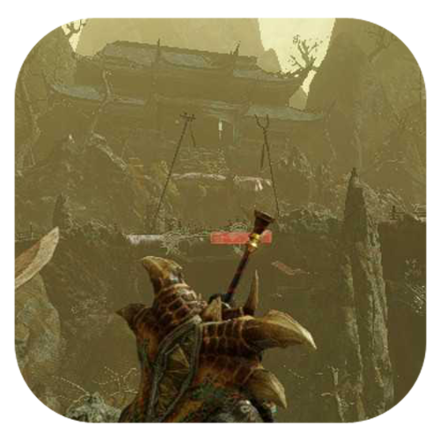
 Sandy Plains Sandy Plains
|
9 / 10 / 11 | 5 / 6 / 8 / 9 / 10 / 11 / 12 | 2 / 12 |
 Infernal Springs Infernal Springs
|
- | - | - |
Apex Diablos Quest Appearances
| Quest Type | Lvl | Quest Name |
|---|---|---|
| Challenge Quest | ★7 | Challenge Quest 07 |
| Event Quest | ★7 | Diablos Deception |
| Event Quest | ★7 | Heart of an Apex |
| Event Quest | ★7 | Apex Diablos Emergency |
| Hub Quest | ★7 | The Devastating Apex Diablos |
| No Quest in This Rank |
How to Beat Apex Diablos
|
|
Increase Your Hunter's Defenses

Apex Diablos dishes out pure, raw damage so we suggest increasing your defense stat. Eat Dangos with Defender (Hi) effects, upgrade your armor in the Smithy, or invest in armors with the Defense Boost skill if Apex Diablos is giving you a hard time.
Aim for the Head!

Apex Diablos has a major weakness on the head. We suggest focusing all your damage on this part not only to deal huge damage but also to break the horns, which could increase the likelihood of Apex Curlhorns dropping.
Use Ice Weapons

Apex Diablos is extremely weak against the Ice Element. We bringing a good Ice Element weapon whenever you fight Apex Diablos!
You can also increase the Ice Element of your weapon even further by investing on the Ice Attack Armor skill!
Use Sonic Bombs While It Is Underground

Using Sonic Bombs while Apex Diablos is underground will confuse him, making it unborrow itself halfway! This is a very long opening that you can use to deal massive damage!
Watch Out for Black Smoke On Its Mouth

When Apex Diablos has black smoke around its mouth, it is more aggressive and more likely to execute its Bloodbath Charge Ultimate Move. Stay on the defensive when Apex Diablos enters this mode and be mindful with your positioning!
Use the Environment Against Apex Diablos
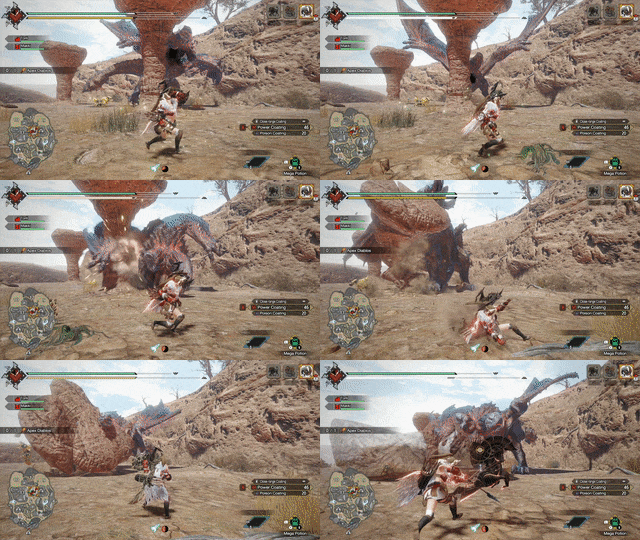
Apex Diablos will carelessly charge towards hunters because of its blinding rage. Whenever you see it charging, go behind any environmental obstacles to catch Apex Diablos off guard!
Apex Diablos General Attack Patterns
Apex Diablos has the all the moves of a regular Diablos with added moves that are harder to telegraph and destroys Rampage gates. Here are some of the notable ones you have to watch out for:
| Name | Description |
|---|---|
| Battle Cry Charge | A scream plus charge combo that can catch hunters without Earplugs near Apex Diablos. |
| Burrowing Corkscrew Attack | Apex Diablos will burrow itself underground then unborrows while spinning. This move targets hunters so keep an eye out! |
| Ground Horn Impalement | Apex Diablos stabs its horns on the ground with extreme force. Hunters caught at the epicenter will receive significant damage. |
| Charging Horn Impalement | Apex Diablos charges towards a hunter then immediately follows it up with a double Ground Horn Impalement. |
| Horn Charge Combo | Apex Diablos will charge towards a hunter then immediately turns around for a horn attack! |
| Bloodbath Charge [DANGER] |
Apex Diablos' ultimate move where it zips around the area three (3) times then finishing the move with a spinning attack. This can one-shot any hunter caught along Apex Diablos' path! |
| Apex Arena Rush [RAMPAGE ONLY] [DANGER] |
Rampage-only variation to Bloodbath Charge, this is Apex Diablos' multi-stage charge to the gate. Apex Diablos will zigzag through the battlefield first then finally target the gate! |
Battle Cry Charge
| Battle Cry Charge Attack Information |
|---|
 Battle Cry Charge: Apex Diablos will shout at the top of its lungs which immobilizes hunters without Earplugs. It will then follow the cry up with a charge attack that can damage any hunter near it! |
Burrowing Corkscrew Attack
| Burrowing Corkscrew Attack Information |
|---|
 Burrowing Corkscrew Attack: Apex Diablos will jump up and burrow itself on the ground. After some time, it will dig itself up while propelling itself in the air! The attack will target nearby hunters so be careful! You can avoid this move by using Sonic Bombs as it burrows underground to stun Diablos back aboveground! |
Ground Horn Impalement
| Ground Horn Impalement Attack Information |
|---|
 Ground Horn Impalement: A very quick impalement attack that can catch an unaware hunter. Apex Diablos will usually raise its horns before it smashes them to the ground. This has a fairly big hitbox so try using Emergency Evade when you see the attack coming! |
Charging Horn Impalement
| Charging Horn Impalement Attack Information |
|---|
 Charging Horn Impalement: A variation to the Ground Horn Impalement where Apex Diablos will first charge towards a hunter then slam its sharp horns towards the ground twice! Keep your distance or use Emergency Evade to save yourself. |
Horn Charge Combo
| Horn Charge Combo Attack Information |
|---|
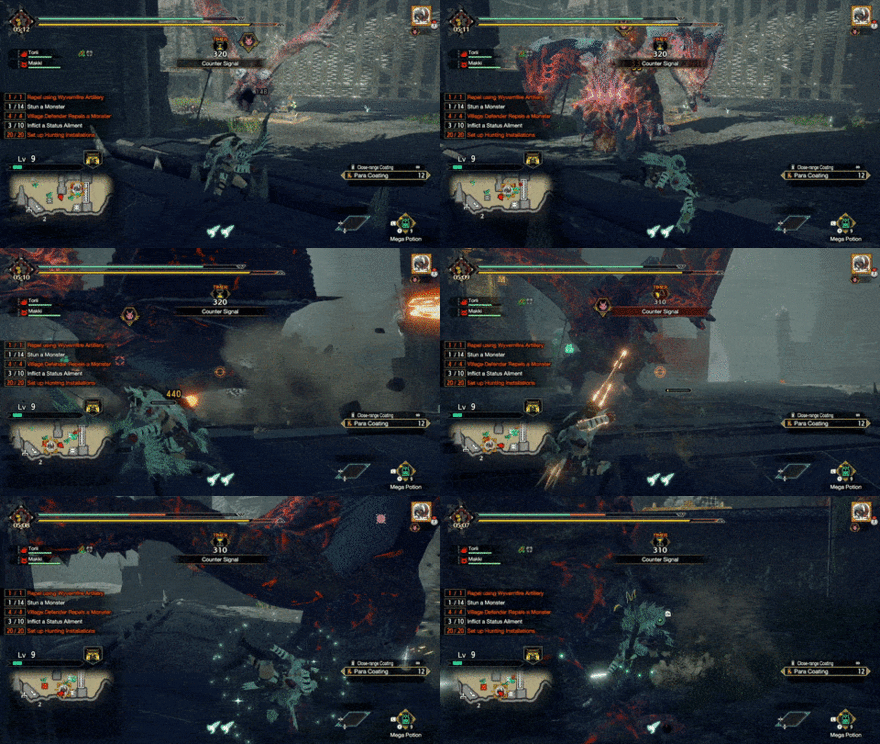 Horn Charge Combo: Apex Diablos will charge towards a hunter then immediately turns around for a follow-up horn attack. This can easily catch hunters who have evaded the first horn charge. Be aware of this combo to save your life! |
Bloodbath Charge
| Bloodbath Charge Attack Information |
|---|
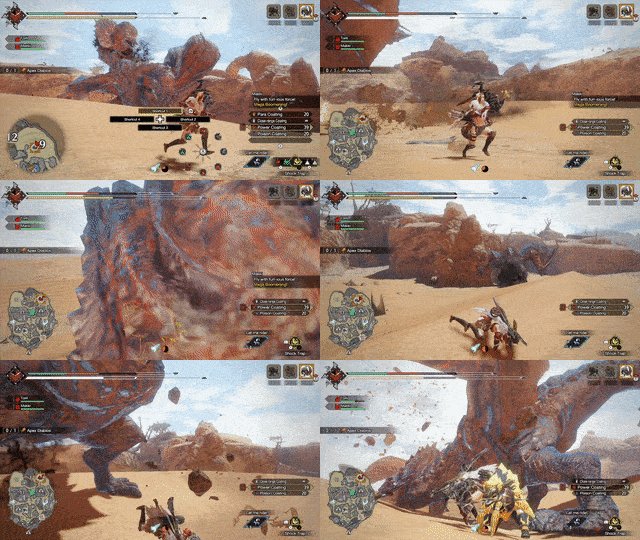 Bloodbath Charge: Considered as Apex Diablos ultimate move, Apex Diablos will quickly charge three (3) times then finish the move off with a spinning attack. This can one-shot any hunter caught along its path so Emergency Evade when you can! |
Apex Arena Rush
| Apex Arena Rush Attack Information |
|---|
 Apex Arena Rush: A rampage-only variation of Bloodbath Charge, Apex Arena Rush is a four-step attack that sees Apex Diablos deal damage to the gate and installations all over the battlefield! This can be countered by interrupting it by dealing huge damage via deploying the Splitting Wyvernshot or Elder Fugen. |
Here are steps to Apex Diablos' Apex Arena Rush:
| 1 |  Apex Diablos Charges Far Away from the Gate Apex Diablos will charge far away from the gate. You can either attack it directly using weapons, use Splitting Wyvernshot, or deploy Elder Fugen to try and cancel the Rush. |
|---|---|
| 2 | 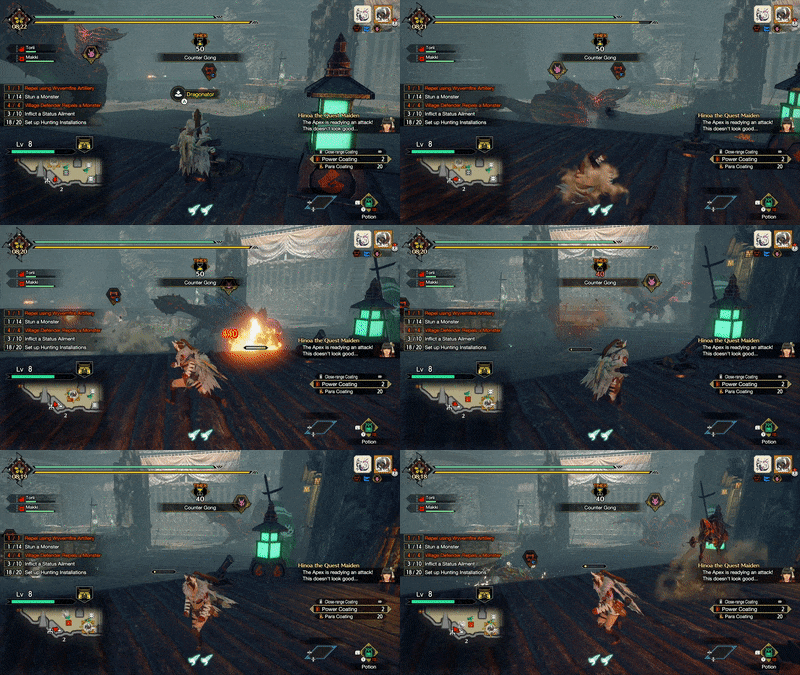 It Charges Towards Nearby Installations When the charge pushes through, Apex Diablos will charge towards nearby installations - damaging them. |
| 3 |  Charges Towards Another Installation Then Burrows Underground It then turns back and attacks another installation. Afterward, it burrows underground to prepare for the gate charge. |
| 4 |  Moves Near the Center, Unburrows, then Charges to the Gate! While burrowed, Apex Diablos will move near the center of the arena and unburrows to charge the gate! This deals significant damage to the gate which can result in a quest failure! |
Apex Diablos Rampage Tips
How to Beat Apex Diablos in Rampages
|
|
Interrupt Apex Arena Rush with the Splitting Wyvernshot

Apex Diablos' Apex Arena Rush can be interrupted using the Splitting Wyvernshot. You can do this while it is charging or after!
Lure Apex Diablos towards Wyvernfire Artilleries
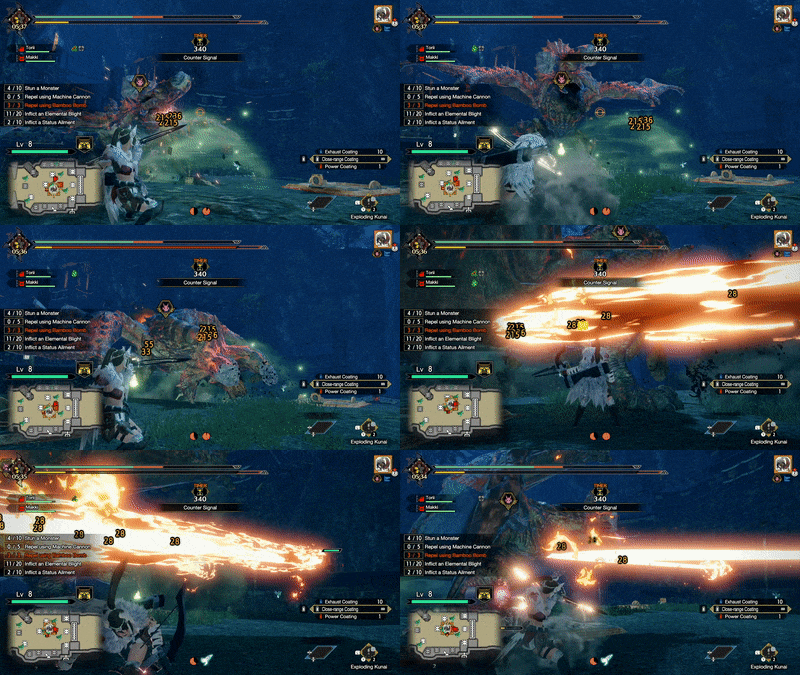
Apex Diablos will always go for you, the Hunter, in a straight line. Whenever you get its aggro, we suggest luring it to a nearby Wyvernfire Artillery just so you can give it Fireblight and deal consistent damage!
Use the Warriors of Kamura

The actual fight against Apex Diablos is the perfect time to use specific Warriors of Kamura in your arsenal. It is important to note that this does not mean that you should use all of them at once though!
Each of these special installations have their own benefits and mechanics when activated. Refer to the list below to determine when is the best time to use each one:
| When to Deploy the Warriors of Kamura | |
|---|---|
| Elder Fugen | Elder Fugen unleashes a very strong AoE attack in its deployed area. Use this to deal massive damage against Apex Diablos whenever it charges up for a big attack or while bashing on the gate. |
| Master Utsushi | Master Utsushi performs a large AoE attack in its deployed area that makes regular monster caught in the attack rideable. Remember, Apex Monsters are not mountable so he is best deployed whenever Apex Diablos summons a horde of monsters! |
| Yomogi the Chef | Yomogi bombards monsters with her Machine Cannon and increases the damage of all hunters in the area, similar to the Counter Signal. It is recommended that you deploy her whenever Apex Diablos charges up for a big attack on the gate as well. |
General Rampage Tips

There are also general guidelines applicable to every Rampage quest. Check out our Rampage Guide for the best way to get S-Rank in every Rampage!
Rampage Guide and Tips: How to Get S-Rank
Apex Diablos Materials and Drops
Master Rank Apex Diablos Materials
| You cannot capture this monster! |
High Rank Apex Diablos Materials
| You cannot capture this monster! |
Apex Diablos Dropped Materials
Monster Hunter Rise Related Guides
Monster Guides by Rank
Village Rank ★2
| 2-Star Large Monsters | |||
|---|---|---|---|
 Great Izuchi Great Izuchi |
 Arzuros Arzuros |
 Great Baggi Great Baggi |
 Lagombi Lagombi |
Village Rank ★3
| 3-Star Large Monsters | |||
|---|---|---|---|
 Aknosom Aknosom |
 Tetranadon Tetranadon |
 Kulu-Ya-Ku Kulu-Ya-Ku |
 Barroth Barroth |
 Great Wroggi Great Wroggi |
 Royal Ludroth Royal Ludroth |
 Khezu Khezu |
|
Village Rank ★4
| 4-Star Large Monsters | |||
|---|---|---|---|
 Bishaten Bishaten |
 Somnacanth Somnacanth |
 Barioth Barioth |
 Rathian Rathian |
 Tobi-Kadachi Tobi-Kadachi |
 Volvidon Volvidon |
 Basarios Basarios |
 Pukei-Pukei Pukei-Pukei |
Village Rank ★5
| 5-Star Large Monsters | |||
|---|---|---|---|
 Magnamalo Magnamalo |
 Nargacuga Nargacuga |
 Zinogre Zinogre |
 Anjanath Anjanath |
 Mizutsune Mizutsune |
 Rathalos Rathalos |
||
Village Rank ★6
| 6-Star Large Monsters | |||
|---|---|---|---|
 Almudron Almudron |
 Goss Harag Goss Harag |
 Tigrex Tigrex |
 Diablos Diablos |
High Rank Hub Quests
| High Rank Large Monsters | |||
|---|---|---|---|
 Jyuratodus Jyuratodus |
 Rajang Rajang |
 Rakna-Kadaki Rakna-Kadaki |
 Bazelgeuse Bazelgeuse |
Elder Dragons
| Elder Dragons | |||||
|---|---|---|---|---|---|
 Narwa the Allmother Narwa the Allmother |
|||||
 Wind Serpent Ibushi Wind Serpent Ibushi |
 Thunder Serpent Narwa Thunder Serpent Narwa |
 Crimson Glow Valstrax Crimson Glow Valstrax |
|||
 Chameleos Chameleos |
 Kushala Daora Kushala Daora |
 Teostra Teostra |
|||
Apex Monsters
| Apex Monsters | ||
|---|---|---|
 Apex Arzuros Apex Arzuros |
 Apex Rathian Apex Rathian |
 Apex Mizutsune Apex Mizutsune |
 Apex Rathalos Apex Rathalos |
 Apex Diablos Apex Diablos |
 Apex Zinogre Apex Zinogre |
Small Monsters
Author
Apex Diablos Guide: Weakness, Armor, Drops, and Weapons | Monster Hunter Rise
improvement survey
03/2026
improving Game8's site?

Your answers will help us to improve our website.
Note: Please be sure not to enter any kind of personal information into your response.

We hope you continue to make use of Game8.
Rankings
- We could not find the message board you were looking for.
Gaming News
Popular Games

Genshin Impact Walkthrough & Guides Wiki

Honkai: Star Rail Walkthrough & Guides Wiki

Umamusume: Pretty Derby Walkthrough & Guides Wiki

Pokemon Pokopia Walkthrough & Guides Wiki

Resident Evil Requiem (RE9) Walkthrough & Guides Wiki

Monster Hunter Wilds Walkthrough & Guides Wiki

Wuthering Waves Walkthrough & Guides Wiki

Arknights: Endfield Walkthrough & Guides Wiki

Pokemon FireRed and LeafGreen (FRLG) Walkthrough & Guides Wiki

Pokemon TCG Pocket (PTCGP) Strategies & Guides Wiki
Recommended Games

Diablo 4: Vessel of Hatred Walkthrough & Guides Wiki

Cyberpunk 2077: Ultimate Edition Walkthrough & Guides Wiki

Fire Emblem Heroes (FEH) Walkthrough & Guides Wiki

Yu-Gi-Oh! Master Duel Walkthrough & Guides Wiki

Super Smash Bros. Ultimate Walkthrough & Guides Wiki

Pokemon Brilliant Diamond and Shining Pearl (BDSP) Walkthrough & Guides Wiki

Elden Ring Shadow of the Erdtree Walkthrough & Guides Wiki

Monster Hunter World Walkthrough & Guides Wiki

The Legend of Zelda: Tears of the Kingdom Walkthrough & Guides Wiki

Persona 3 Reload Walkthrough & Guides Wiki
All rights reserved
©CAPCOM CO., LTD. ALL RIGHTS RESERVED.
The copyrights of videos of games used in our content and other intellectual property rights belong to the provider of the game.
The contents we provide on this site were created personally by members of the Game8 editorial department.
We refuse the right to reuse or repost content taken without our permission such as data or images to other sites.

 Altaroth
 Anteka
 Baggi
Baggi Bnahabra
 Bombadgy
 Bullfango
 Delex
Delex Felyne
 Gajau
Gajau Gargwa
 Izuchi
 Jaggi
Jaggi Jaggia
 Jagras
 Kelbi
Kelbi Kestodon
 Ludroth
 Melynx
 Popo
Popo Rachnoid
 Remobra
 Rhenoplos
 Slagtoth
 Uroktor
 Wroggi
 Zamite


![Monster Hunter Stories 3 Review [First Impressions] | Simply Rejuvenating](https://img.game8.co/4438641/2a31b7702bd70e78ec8efd24661dacda.jpeg/thumb)


