Charge Blade Builds and Best Armor
★ All Title Updates now available for ALL PLATFORMS!
┗ Title Update 4 | Title Update 5 | Bonus Update
┗ Check out all our Best Builds For Every Weapon!
┗ TU4 Monsters: Velkhana | Risen C.G. Valstrax
┗ TU5 Monsters: Amatsu | Risen Shagaru Magala
┗ Bonus Update Monster: Primordial Malzeno

This is a guide to the best builds and equipment for Charge Blades in Monster Hunter Rise (MH Rise): Sunbreak. Learn about the best Charge Blades for the Sunbreak expansion, and the best Skills and Armor pieces to use with the Charge Blades for Low Rank, High Rank, and Master Rank.
| All Charge Blade Guides | ||
|---|---|---|
 Trees & Full List Trees & Full List |
 How to Use How to Use |
 Best Builds Best Builds |
List of Contents
| If you have any suggestions or additional information, please comment them below! |
|---|
Latest Sunbreak MR Build
Blood Awakening Elemental Savage Axe (BU Build)
Recommended Charge Blades
| Weapon | ATK | DEF | Affinity | |
|---|---|---|---|---|
 Flamlion Blade Flamlion Blade
 |
320 | 0 | 0% | |
| Element / Status |
Slots | Rampage Slots | ||
| ②ーー | ③ | |||
| Phial Type | Impact Phial | |||
| Decorations |
|
|
|---|---|---|
| Weapon | ATK | DEF | Affinity | |
|---|---|---|---|---|
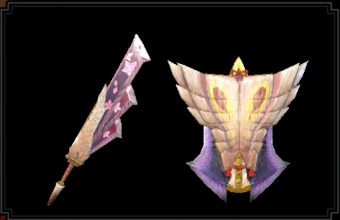 Divine Fieldblade+ Divine Fieldblade+
 |
310 | 0 | 20% | |
| Element / Status |
Slots | Rampage Slots | ||
| ①ーー | ② | |||
| Phial Type | Impact Phial | |||
| Decorations | ||
|---|---|---|
| Weapon | ATK | DEF | Affinity | |
|---|---|---|---|---|
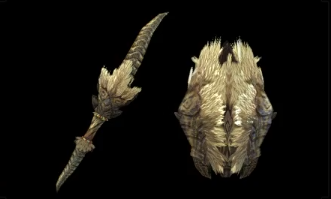 Demonlord Blade Demonlord Blade
 |
330 | 0 | 0% | |
| Element / Status |
Slots | Rampage Slots | ||
| ②②ー | ① | |||
| Phial Type | Impact Phial | |||
| Decorations |
|
|
|---|---|---|
| Weapon | ATK | DEF | Affinity | |
|---|---|---|---|---|
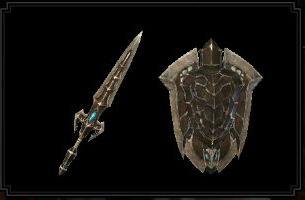 Daora's Worldbearer Daora's Worldbearer
 |
320 | 0 | 10% | |
| Element / Status |
Slots | Rampage Slots | ||
| ①ーー | ③ | |||
| Phial Type | Impact Phial | |||
| Decorations | ||
|---|---|---|
| Weapon | ATK | DEF | Affinity | |
|---|---|---|---|---|
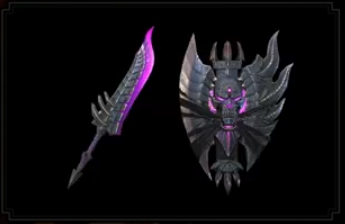 Unheilskraft Unheilskraft
 |
320 | 0 | 20% | |
| Element / Status |
Slots | Rampage Slots | ||
| ②ーー | ② | |||
| Phial Type | Impact Phial | |||
| Decorations |
|
|
|---|---|---|
Recommended Armor Loadout
| Armor | Slots | Skills | |
|---|---|---|---|
|
|
③②① |
Wirebug Whisperer Lv. 3
Wind Mantle Lv. 1
|
|
|
|
④④② |
Burst Lv. 1
Blood Awakening Lv. 1
|
|
|
|
④④② |
Critical Boost Lv. 1
Blood Awakening Lv. 1
|
|
|
|
④③ー | ||
|
|
④④ー | ||
| Talisman | Weakness Exploit 2 with a ②②① slot or better | ||
| Rampage Decoration |
Alternative: |
||
| Skills | |
|---|---|
| Rampage Skill | Element Exploit to increase elemental damage against monsters weak to each element Alternative: Swap between Wyvern Exploit, Anti-Aerial Species, Anti-Aquatic Species, or Fanged Exploit depending on the monster. |
|
Critical Eye Lv. 5 | Element Attack Lv.5
Attack Boost Lv. 4 | Blood Awakening Lv. 3 Blood Rite Lv. 3 | Weakness Exploit Lv. 3 Wirebug Whisperer Lv. 3 | Partbreaker Lv. 3 Master's Touch Lv. 3 | Critical Boost Lv. 2 Guard Lv. 2 | Element Exploit Lv. 2 Critical Element Lv. 2 | Ballistics Lv. 2 Burst Lv. 1 | Powder Mantle Lv. 1 Wind Mantle Lv. 1 | Intrepid Heart Lv. 1 For the Fire and Dragon: Element Exploit Lv. 3 For the Water and Ice Build: Kushala Blessing Lv.1 For the Thunder Build: Element Exploit Lv. 3 | Critical Element Lv. 3 |
|
Build Merits and Augments
| Weapon Augments |
For Water/Thunder/Dragon Weapon: |
|---|---|
| Armor Augments |
Armor Augments for this build are not necessary. However, feel free to add as you please once you get comfortable with your build! Generally, you'd want to get better skills and more slots for your armor.
Replaceable skills already on the armor: ● Ballistics For damage, aim for any of the following: ● Powder Mantle ● Element Exploit ● Critical Boost ● Burst For comfort, aim for any of the following: ● Recovery Up ● Wind Mantle ● Frenzied Bloodlust ● Guard |
| Build Merits and Notes |
|---|
| Blood Awakening is a new aggressive comfort skill introduced in the Bonus Update. Paired with Blood Rite, this skill becomes formidable late in a hunt or when dealing with large monsters that inflict Bloodblight.
This build leans toward comfort. If seeking for more elemental damage and a consistently higher overall DPS, we recommend the Dragon Conversion build. For the Charge Blade play style, this focuses on the use of Condensed Spinning Slash. The switch skill Ready Stance is helpful in bringing out damage faster, since they can cancel Elemental Discharge axe swings. For sharpness maintenance, we included Risen Teostra's waist piece and maxed out Master's Touch. High affinity weapons and affinity-boosting skills are used to ensure that you get the most out of sharpness preservation. One level of Blood Rite can be exchanged for two more levels of Guard if needed since they share the same jewel slot requirement. However, recovering health and activating Blood Awakening will take longer, requiring more hits. Intrepid Heart comes handy in receiving Bloodblight since it significantly reduces damage and negates knockback when filled. If armor is to be augmented, you can put in Recovery Up which synergizes with Blood Rite. |
Master Rank Charge Blade Builds
High Rank Builds

Gathering Hub HR 4 - HR 100+
Whether you're just breaking in the High Rank at HR 4 or are just looking for some new strategies at HR 100, we've got the best High Rank Charge Blade builds to spice up your hunts.
►High Rank Charge Blade Builds
| Latest Builds | Rank |
|---|---|
| Ultra Element Discharger Build | HR 100+ |
| Balanced Charge Blade Build | HR 100+ |
Low Rank Builds

Village Quests - Low Rank Hub
Check out the best Charge Blade builds for Monster Hunter beginners or for speeding through Village Quests or Low Rank Gathering hub.
| Latest Builds | Rank |
|---|---|
| Mid Game Morpher Build | Village Quest ★4 to ★6 |
Best Charge Blade Skills
Best Damage Skills
These skills make it possible to deal extra damage! Aim for these skills for maximum DPS to defeat those monsters easier and finish those quests faster!
Main Damage Skills
| Best Skills | Explanation |
|---|---|
| Weakness Exploit ★★★ |
A staple skill for any meta builds. Use this skill to increase your DPS with your sword attacks, especially in between AEDs. |
| Element Attack ★★★ |
Sunbreak featured buffs for elemental damage, making elemental builds viable. Max out this skill to increase damage for Charge Blades with Element Phials! Fire | Water | Ice | Thunder | Dragon |
| Burst ★★★ |
Activate this skill with ease with both the Charge Blades AED and Savage Axe attacks, improving overall DPS. Available in Sunbreak Base Game |
| Element Exploit ★★ |
Amplify your elemental AED and Savage Axe hits with this skill. A single point of it is enough to deal significant damage. Available in Sunbreak Free Title Update 1 |
| Dragon Conversion ★★ |
When activated, this skill from the Risen Crimson Glow Valstrax Armor will benefit elemental builds, increasing DPS even further! Available in Sunbreak Free Title Update 4 |
| Powder Mantle ★★ |
This skill from the Risen Teostra Armor provides the Charge Blade with additional blast damage every time it activates, contributing greatly to DPS. Available in Sunbreak Free Title Update 3 |
| Dereliction ★★ |
Using the Red Scroll increases the Charge Blade's elemental values while using the Blue Scroll increases both attack and stun potency, improving overall damage. Just be wary of your health! Available in Sunbreak Base Game |
AED Charge Blade Playstyle
| Best Skills | Explanation |
|---|---|
| Attack Boost ★★★ |
Focus on maxing out this skill when using an Impact AED build. |
| Offensive Guard ★★★ |
Doing moves such as the Guard Point or Counter Peak Performance activates this skill, increasing your damage values. Be sure to max it out! |
| Artillery ★★ |
Improves phial hits for Impact Phial builds. |
| Slugger ★ |
Improves stun rate. Useful for solo play due to the lower enemy ailment resistance. Also useful for multiplayer to give the team openings to deal damage. Only viable with Impact AED Builds. |
| Partbreaker ★ |
Easily break monster parts with the AED's reach. |
Savage Axe Charge Blade Playstyle
| Best Skills | Explanation |
|---|---|
| Critical Eye ★★★ |
With the Savage Axe playstyle, this skill will provide more DPS the higher its level. Always aim for 80-100% affinity to amplify base damage efficiently! |
| Critical Boost ★★★ |
Further amplifies critical hit damage. Make sure to have high affinity first before equipping! |
| Attack Boost ★★ |
For the Savage Axe playstyle, 4 levels of this skill is more than enough. |
| Offensive Guard ★★ |
Get a boost in your DPS after blocking with Ready Stance. Only slot this if you can. |
| Critical Element ★★ |
Increases elemental attacks whenever you land critical hits. |
| Maximum Might ★ |
Doing Savage Axe combos won't consume stamina; with this skill, you can get up to 30% affinity whenever it's activated. |
| Bloodlust ★ |
Overcome the Frenzy Virus to power up with this skill; best paired with Coalescence. Available in Sunbreak Base Game |
Best Comfort Skills
These are skills that make managing weapon mechanics a lot easier. Damage is only part of the equation - taking time to slot in comfort skills that increase consistency & comfort will also increase overall DPS!
| Best Skills | Explanation |
|---|---|
| Rapid Morph ★★★ |
A Charge Blade's best friend. Rapid Morph is still an amazing skill for Charge Blade builds as it makes the transitions between its two forms as seamless as possible. The damage increase for its morphing attacks further improves its value. |
| Load Shells ★★★ |
Get your Charge Blade into full potential as soon as possible with this skill, decreasing the time it takes to fill all your bottles! |
| Guard ★★★ |
This skill decreases the impact and stamina consumption upon guarding a strong attack with Guard Point or Ready Stance, making it easier to get back into your combos! |
| Protective Polish or Master's Touch ★★★ |
Be sure to consider these skills for the Savage Axe Playstyle, which can eat up sharpness fast! |
| Guard Up ★★ |
Lets you guard normally unguardable attacks. A single point of this skill is enough for most fights. |
| Defiance ★★ |
Three levels of this skill prevent most roars, tremors, and winds from interrupting your charged attacks. The Cornerstone Jewel is a level 1 decoration, so slot it in whenever possible! Available in Sunbreak Free Title Update 1 |
| Wind Mantle ★★ |
This skill from the Risen Kushala Armor will recharge your Wirebugs faster after a Counter Peak Performance or Ready Stance. Available in Sunbreak Free Title Update 3 |
| Flinch Free ★★ |
Useful especially in multiplayer where minor attacks can interrupt your attacks, especially when trying to fill your bottles! |
| Speed Sharpening ★ |
Reduces a cycle for sharpening with each level. Useful for getting your sharpness level up mid-fight. |
| Handicraft ★ |
Increases sharpness. Be sure to consider this skill for the Savage Axe Playstyle |
| Intrepid Heart ★ |
Whenever the gauge above your health bar is full, this skill can be useful in preventing monster attacks from interrupting your combos, making it possible to pull off an extra charged attack before you can regroup. Available in Sunbreak Free Title Update 2 |
Monster Hunter Rise Related Links

|
• Weapons marked withNEW have been updated. • Weapons withUP have been reviewed and does not warrant an updated build from the Bonus Update. |
| All Weapon Build Guides | |
|---|---|
NEW Low Rank | High Rank Master Rank |
NEW Low Rank | High Rank Master Rank |
NEW Low Rank | High Rank Master Rank |
NEW Low Rank | High Rank Master Rank |
NEW Low Rank | High Rank Master Rank |
NEW Low Rank | High Rank Master Rank |
NEW Low Rank | High Rank Master Rank |
NEW Low Rank | High Rank Master Rank |
NEW Low Rank | High Rank Master Rank |
NEW Low Rank | High Rank Master Rank |
NEW Low Rank | High Rank Master Rank |
NEW Low Rank | High Rank Master Rank |
NEW Low Rank | High Rank Master Rank |
UP Low Rank | High Rank Master Rank |
Other Builds
| Other Build Guides | |
|---|---|
| General High Rank Builds and Best Equipment | Buddy Equipment Builds Palico | Palamute |
Author
Charge Blade Builds and Best Armor
Rankings
- We could not find the message board you were looking for.
Gaming News
Popular Games

Genshin Impact Walkthrough & Guides Wiki

Honkai: Star Rail Walkthrough & Guides Wiki

Arknights: Endfield Walkthrough & Guides Wiki

Umamusume: Pretty Derby Walkthrough & Guides Wiki

Wuthering Waves Walkthrough & Guides Wiki

Pokemon TCG Pocket (PTCGP) Strategies & Guides Wiki

Abyss Walkthrough & Guides Wiki

Zenless Zone Zero Walkthrough & Guides Wiki

Digimon Story: Time Stranger Walkthrough & Guides Wiki

Clair Obscur: Expedition 33 Walkthrough & Guides Wiki
Recommended Games

Fire Emblem Heroes (FEH) Walkthrough & Guides Wiki

Pokemon Brilliant Diamond and Shining Pearl (BDSP) Walkthrough & Guides Wiki

Diablo 4: Vessel of Hatred Walkthrough & Guides Wiki

Super Smash Bros. Ultimate Walkthrough & Guides Wiki

Yu-Gi-Oh! Master Duel Walkthrough & Guides Wiki

Elden Ring Shadow of the Erdtree Walkthrough & Guides Wiki

Monster Hunter World Walkthrough & Guides Wiki

The Legend of Zelda: Tears of the Kingdom Walkthrough & Guides Wiki

Persona 3 Reload Walkthrough & Guides Wiki

Cyberpunk 2077: Ultimate Edition Walkthrough & Guides Wiki
All rights reserved
©CAPCOM CO., LTD. ALL RIGHTS RESERVED.
The copyrights of videos of games used in our content and other intellectual property rights belong to the provider of the game.
The contents we provide on this site were created personally by members of the Game8 editorial department.
We refuse the right to reuse or repost content taken without our permission such as data or images to other sites.


![Neverness to Everness (NTE) Review [Beta Co-Ex Test] | Rolling the Dice on Something Special](https://img.game8.co/4414628/dd3192c8f1f074ea788451a11eb862a7.jpeg/show)


Apparently there're no better elemental builds than the ones you can make since TU4, except that you can get better charms now. However, the TU5 savage axe sets, despite having less damage than the TU4 ones, are a relief since they have not business with deriliction anymore while still having a very high DPS 🙃🙌