This survey will take about 1 minute.
Your answers will help us to improve our website.
Monster Hunter Rise: Sunbreak
Sword and Shield Builds and Best Armor (SNS)
★ All Title Updates now available for ALL PLATFORMS!
┗ Title Update 4 | Title Update 5 | Bonus Update
┗ Check out all our Best Builds For Every Weapon!
┗ TU4 Monsters: Velkhana | Risen C.G. Valstrax
┗ TU5 Monsters: Amatsu | Risen Shagaru Magala
┗ Bonus Update Monster: Primordial Malzeno
This is a guide to the best builds and equipment for Sword and Shields in Monster Hunter Rise (MH Rise): Sunbreak. Learn about the best Sword and Shields for Sunbreak and the best builds and Armor pieces to use with the Sword and Shield for Low, High, and Master Rank.
| All Sword and Shield Guides | ||
|---|---|---|
 Trees & Full List Trees & Full List |
 How to Use How to Use |
 Best Builds Best Builds |
List of Contents
| If you have any suggestions or additional information, please comment them below! |
|---|
Latest Sunbreak MR Build
Heaven-Sent Embolden Poison Build
| Weapon | ATK | DEF | Affinity |
|---|---|---|---|
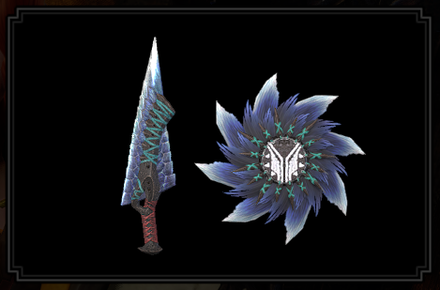 Phecda's Asterism Phecda's Asterism
 |
340 | 0 | 0% |
| Element / Status |
Slots | Rampage Slots | |
| ④②ー | ① |
| Armor | Slots | Skills | |
|---|---|---|---|
|
|
③②ー | ||
|
|
④④① |
Critical Boost Lv. 1
Heaven-Sent Lv. 1
|
|
|
|
④②① | ||
|
|
④②ー | ||
|
|
④③ー | ||
| Talisman | Attack Boost Lv. 3 with a ③② slot or better | ||
| Rampage Decoration |
|
||
| Decorations | |||
| Skills | |
|---|---|
| Rampage Skill | Swap between Wyvern Exploit, Anti-Aerial Species, Anti-Aquatic Species, or Fanged Exploit depending on the monster. |
|
Attack Boost Lv.7
| Guard Lv.5
Critical Eye Lv.4 | Critical Boost Lv.3 Weakness Exploit Lv.3 | Offensive Guard Lv.3 Stun Resistance Lv.3 | Grinder (S) Lv.3 Chameleos Blessing Lv.3 | Embolden Lv.2 Wirebug Whisperer Lv.1 | Coalescence Lv.1 Bloodlust Lv.1 | Foray Lv.1 Burst Lv.1 | Buildup Boost Lv.1 Powder Mantle Lv.1 | Heaven-Sent Lv.1 Frenzied Bloodlust Lv.1 |
|
Build Merits and Augments
| Weapon Augments | |
|---|---|
| Armor Augments |
Armor Augments for this build are not necessary. However, feel free to add as you please once you get comfortable with your build! Generally, you'd want to get better skills and more slots for your armor.
For damage, aim for any of the following: ● Buildup Boost ● Critical Eye ● Poison Attack ● Status Trigger For comfort, aim for any of the following: ● Intrepid Heart ● Wind Mantle ● Embolden ● Shockproof (add as decoration, multiplayer only) |
| Build Merits and Notes |
|---|
| The Phecda's Asterism remains a powerful option for raw damage in Sunbreak's endgame, even after having its sharpness extended with additional anomaly slots. By dropping Protective Polish, it's still possible to burn through sharpness to reach blue before Grinder (S) runs out of time. Heaven-Sent also gives the option to sharpen back to purple with a Switch Skill Swap, eliminating the need for other sharpness skills as long as you don't get knocked back often. Adding Intrepid Heart through a skill or slot augment is highly recommended to maintain this buff more easily.
Also new to this build is the addition of Embolden, which reduces knockback more when paired with max-level Guard. This allows us to activate Offensive Guard consistently with either Metsu Shoryugeki or a Guard Slash. Guard Slash is notable as it can be chained to a Perfect Rush, scoring big damage when used properly. Due to the nature of Embolden, this is best used when playing solo or with followers that don't draw aggro. While it can also be used in multiplayer hunts, it's far from ideal since the monster will not constantly target you. |
Master Rank Sword and Shield Builds
High Rank Builds
Gathering Hub HR 4 - HR 100+
Whether you're just breaking in the High Rank at HR 4 or are just looking for some new strategies at HR 100, we've got the best High Rank Sword and Shield builds to spice up your hunts.
►High Rank Sword and Shield Builds
| Latest Builds | Rank |
|---|---|
| Raw Damage Build | HR 100+ |
| Dragon Slayer Build | HR 100+ |
Low Rank Builds

Village Quests - Low Rank Hub
Check out the best Sword and Shield builds for Monster Hunter beginners or for speeding through Village Quests or Low Rank Gathering hub.
►Low Rank Sword and Shield Builds
| Latest Builds | Rank |
|---|---|
| Maximum KO Build | Village Quest ★4 to ★6 |
Recommended Skills for Sword and Shield
Best Damage Skills
These skills make it possible to deal extra damage! Aim for these skills for maximum DPS to defeat those monsters easier and finish those quests faster!
| Best Skills | Explanation |
|---|---|
| Weakness Exploit ★★★ |
A staple skill for any meta build. Increases affinity when hitting enemy weakspots, which the Sword and Shield does very often. Synergizes with Critical Eye and Critical Boost. |
| Critical Boost ★★★ |
Amplifies critical damage by 5% per level, synergizing with Critical Eye and Weakness Exploit for critical-focused Sword and Shield builds. |
| Critical Eye ★★★ |
Critical Eye increases Affinity, working hand-in-hand with Sword and Shield builds being mostly critical-focused. |
| Attack Boost ★★★ |
More damage is always welcome for the Sword and Shield. Max this skill out whenever possible or aim for 4 levels. |
| Element Attack ★★★ |
Sunbreak featured buffs for elemental damage, making elemental builds viable. Max out this skill to increase damage against monsters. Fire | Water | Ice | Thunder | Dragon |
| Offensive Guard ★★★ |
This skill further amps your damage whenever you pull off a successful Metsu Shoryugeki. |
| Burst ★★★ |
The Sword and Shield's fast-paced attacks allow this skill to shine to its full potential. Max it out whenever possible, but a single point is enough for most fights. Available in Sunbreak Base Game |
| Element Exploit ★★ |
Amplify your elemental damage against monsters weak to a specific element with this skill. A single point of it is enough to deal significant damage. Available in Sunbreak Free Title Update 1 |
| Critical Element ★★ |
Improve your overall DPS with more elemental damage during critical hits! |
| Slugger ★★ |
Makes it easier to stun monsters, working hand-in-hand with the weapon's various shield bash moves. |
| Dragon Conversion ★★ |
When activated, this skill from the Risen Crimson Glow Valstrax Armor will benefit elemental builds, increasing DPS even further! Available in Sunbreak Free Title Update 4 |
| Powder Mantle ★★ |
This skill from the Risen Teostra Armor provides the Sword and Shield with additional blast damage every time it activates, contributing greatly to DPS. Available in Sunbreak Free Title Update 3 |
| Dereliction ★ |
Using the Red Scroll increases the Sword and Shield's elemental values while using the Blue Scroll increases both attack and stun potency, improving overall damage. Just be wary of your health! Available in Sunbreak Base Game |
| Bloodlust ★ |
Overcome the Frenzy Virus to power up with this skill; best paired with Coalescence. Available in Sunbreak Base Game |
Best Comfort Skills
These are skills that make managing weapon mechanics a lot easier. Damage is only part of the equation - taking time to slot in comfort skills that increase consistency & comfort will also increase overall DPS!
| Best Skills | Explanation |
|---|---|
| Protective Polish ★★★ |
Due to the Sword and Shield's fast-attacking nature, it will deplete sharpness fast. Always consider maxing this skill out to keep your sharpness high, up to a maximum of 90 seconds! |
| Master's Touch ★★ |
Every time a critical strike hits, this skill prevents your weapon from losing sharpness. This is an ideal skill for most high affinity builds and for weapons with manageable sharpness (e.g., Gates of Heaven) |
| Razor Sharp ★★ |
Another sharpness managing skill to consider with the Sword and Shield. |
| Speed Sharpening ★★ |
Reduces a cycle for sharpening with each level. Synergizes well with the Protective Polish skill. |
| Wirebug Whisperer ★★ |
Using Metsu Shoryugeki during your combos costs 2 Wirebugs and recharges slowly. Focusing on this skill will make the Wirebugs more readily available. Best paired with Wind Mantle. |
| Wind Mantle ★★ |
This skill from the Risen Kushala Armor will recharge your Wirebugs faster, giving you more utility with your Sword and Shield. Available in Sunbreak Free Title Update 3 |
| Defiance ★★ |
Three levels of this skill prevent most roars, tremors, and winds from interrupting your charged attacks. The Cornerstone Jewel is a level 1 decoration, so slot it in whenever possible! Available in Sunbreak Free Title Update 1 |
| Flinch Free ★★ |
Useful especially in multiplayer where minor attacks can interrupt your attacks, especially when trying to charge your weapon! |
| Guard ★ |
When paired with Embolden, this skill is useful in guarding strong attacks, which can make transitioning into the Perfect Rush combo easier. |
| Handicraft ★ |
Some endgame Sword and Shields tend to have a lot of room for improvement regarding their sharpness. Slot this skill in only when necessary! |
| Intrepid Heart ★ |
Whenever the gauge above your health bar is full, this skill can be useful in preventing monster attacks from interrupting your combos, making it possible to pull off an extra charged attack before you can regroup. Available in Sunbreak Free Title Update 2 |
Monster Hunter Rise Related Guides

|
• Weapons marked withNEW have been updated. • Weapons withUP have been reviewed and does not warrant an updated build from the Bonus Update. |
| All Weapon Build Guides | |
|---|---|
NEW Low Rank | High Rank Master Rank |
NEW Low Rank | High Rank Master Rank |
NEW Low Rank | High Rank Master Rank |
NEW Low Rank | High Rank Master Rank |
NEW Low Rank | High Rank Master Rank |
NEW Low Rank | High Rank Master Rank |
NEW Low Rank | High Rank Master Rank |
NEW Low Rank | High Rank Master Rank |
NEW Low Rank | High Rank Master Rank |
NEW Low Rank | High Rank Master Rank |
NEW Low Rank | High Rank Master Rank |
NEW Low Rank | High Rank Master Rank |
NEW Low Rank | High Rank Master Rank |
UP Low Rank | High Rank Master Rank |
Other Builds
| Other Build Guides | |
|---|---|
| General High Rank Builds and Best Equipment | Buddy Equipment Builds Palico | Palamute |
Comment
7  Anonymous@Game8 about 4 years
Hey Anon, thanks for pointing this out. We've rewritten this section now.
Author

Sword and Shield Builds and Best Armor (SNS)
Please participate in our site
improvement survey
03/2026
improvement survey
03/2026
Would you assist in
improving Game8's site?
improving Game8's site?

×
We are listening to our users' valuable opinions and discussing how to act on them.
The information collected through this survey will be used for the purpose of improving our services. In addition, the information will only be disclosed a part of a statistic in a format that will not allow identification of personal information.
Begin Survey
Not Now
×
Please rate each item regarding Game8.co's Advertisements.
Amount of Ads
Very Dissatisfied
Somewhat Dissatisfied
Fine
Somewhat Satisfied
Highly Satisfied
Placement of Ads
Timing of Ad Display
Ad Loading Speed
Safeness of Ads
Content of Ads
×
Please rate each item regarding Game8.co's Quality of Articles.
Amount of information
Very Dissatisfied
Somewhat Dissatisfied
Fine
Somewhat Satisfied
Highly Satisfied
Frequency of updates
Speed of new information
Accuracy of articles
Understandibility of articles
Readability of sentences
×
Please rate each item regarding Game8.co's Usability of the Site.
Ease of finding information
Very Dissatisfied
Somewhat Dissatisfied
Fine
Somewhat Satisfied
Highly Satisfied
Loading Speed
Use of Color
Font Size
Visibility of Images
Easy to Understand Layout
×
Please rate each item regarding Game8.co's Message Boards, Comments.
Ease of Writing
Very Dissatisfied
Somewhat Dissatisfied
Fine
Somewhat Satisfied
Highly Satisfied
Readability
Ease in Finding Information
Comment Quality
Comment Quantity
Admin Response
×
Please rate each item regarding Game8.co's Site's new design.
Please rate our site's new design
Very Dissatisfied
Somewhat Dissatisfied
Fine
Somewhat Satisfied
Highly Satisfied
Do you think that the website's design change makes the site easier to use?
Has the new design made it easier for you to find information on the site?
Has the new design improved the overall visual appeal of the site?
How would you rate your overall satisfaction with the new design of the site?
×
How likely are you to recommend Game8 to someone you know?
Very Unlikely
0
1
2
3
4
5
6
7
8
9
10
Very Likely
If you have other opinions regarding potential improvement to the website, please share them with us. We would appreciate your honest opinion.
Note: This is a free response section, so you can proceed without entering anything.
Note: Please be sure not to enter any kind of personal information into your response.
Note: Please be sure not to enter any kind of personal information into your response.
×
Thank You
×
Thank you for participating in our survey! Your answers will help us to improve the quality of our website and services.
We hope you continue to make use of Game8.
We hope you continue to make use of Game8.
Close
Rankings
- We could not find the message board you were looking for.
Gaming News


![Monster Hunter Stories 3 Review [First Impressions] | Simply Rejuvenating](https://img.game8.co/4438641/2a31b7702bd70e78ec8efd24661dacda.jpeg/thumb)
Popular Games

Genshin Impact Walkthrough & Guides Wiki
Honkai: Star Rail Walkthrough & Guides Wiki
Umamusume: Pretty Derby Walkthrough & Guides Wiki
Pokemon Pokopia Walkthrough & Guides Wiki
Resident Evil Requiem (RE9) Walkthrough & Guides Wiki
Monster Hunter Wilds Walkthrough & Guides Wiki
Wuthering Waves Walkthrough & Guides Wiki
Arknights: Endfield Walkthrough & Guides Wiki
Pokemon FireRed and LeafGreen (FRLG) Walkthrough & Guides Wiki
Pokemon TCG Pocket (PTCGP) Strategies & Guides Wiki


Recommended Games
Diablo 4: Vessel of Hatred Walkthrough & Guides Wiki
Cyberpunk 2077: Ultimate Edition Walkthrough & Guides Wiki
Fire Emblem Heroes (FEH) Walkthrough & Guides Wiki
Yu-Gi-Oh! Master Duel Walkthrough & Guides Wiki
Super Smash Bros. Ultimate Walkthrough & Guides Wiki
Pokemon Brilliant Diamond and Shining Pearl (BDSP) Walkthrough & Guides Wiki
Elden Ring Shadow of the Erdtree Walkthrough & Guides Wiki
Monster Hunter World Walkthrough & Guides Wiki
The Legend of Zelda: Tears of the Kingdom Walkthrough & Guides Wiki
Persona 3 Reload Walkthrough & Guides Wiki


All rights reserved
©CAPCOM CO., LTD. ALL RIGHTS RESERVED.
The copyrights of videos of games used in our content and other intellectual property rights belong to the provider of the game.
The contents we provide on this site were created personally by members of the Game8 editorial department.
We refuse the right to reuse or repost content taken without our permission such as data or images to other sites.
Didn’t know where to post this but you guys are so awesome you should really make an app please.