Sunbreak Long Sword Builds (Master Rank)
★ All Title Updates now available for ALL PLATFORMS!
┗ Title Update 4 | Title Update 5 | Bonus Update
┗ Check out all our Best Builds For Every Weapon!
┗ TU4 Monsters: Velkhana | Risen C.G. Valstrax
┗ TU5 Monsters: Amatsu | Risen Shagaru Magala
┗ Bonus Update Monster: Primordial Malzeno

This is a guide to the best builds and equipment for Long Swords in Monster Hunter Rise (MH Rise): Sunbreak. Learn about the best Long Swords for Sunbreak and the best builds and Armor pieces to use with the Long Swords for Low, High, and Master Rank.
| All Long Sword Guides | ||
|---|---|---|
 Trees & Full List Trees & Full List |
 How to Use How to Use |
 Best Builds Best Builds |
List of Contents
Long Sword Builds List & Progression
This is a quick section summarizing all the Long Sword builds in this page. It is arranged from newest to oldest, and MR build progression is from bottom to top.
Click on the build name to see the build!
| Master Rank | Anomaly Rank | Title Update | Build Name |
|---|---|---|---|
| MR140+ | AR241+ | TU5 | Blood Awakening Master's Touch Long LS |
| MR180+ | AR31+ | TU5 | Silkbind Spammer Amatsu LS |
| MR140+ | - | TU4 | Powder Frost Lucent Narga LS |
| MR140+ | - | TU3 | Max DPS Lucent Narga Long Sword |
| MR6+ | - | TU1 | Lucent Raw Monster |
| MR6+ | - | Base | Archfiend All-Rounder |
| MR3-6 | - | Base | Mid-Game Raw Long Sword |
| MR1-2 | - | Base | Long Sword Raw Starter |
Ultra Endgame MR Build: MR 100+
Blood Awakening Master's Touch Long Sword Build
Recommended Long Sword
| Weapon | ATK | DEF | Affinity |
|---|---|---|---|
 Silver Severer Silver Severer
 |
310 | 0 | 0% |
| Element / Status |
Slots | Rampage Slots | |
| ④④④ | ③ |
| Decorations | ||
|---|---|---|
Recommended Armor Loadout
| Armor | Slots | Skills | |
|---|---|---|---|
|
|
③②① |
Wirebug Whisperer Lv. 3
Wind Mantle Lv. 1
|
|
|
|
④④② |
Burst Lv. 1
Blood Awakening Lv. 1
|
|
|
|
④④② |
Critical Boost Lv. 1
Blood Awakening Lv. 1
|
|
|
|
④③ー | ||
|
|
④④ー | ||
| Talisman | Frenzied Bloodlust 2 with a ②②① slot or better. | ||
| Rampage Decoration |
|
||
| Skills | Rampage Skill | Wyvern Exploit, Anti-Aerial Species, Anti-Aquatic Species, or Fanged Exploit depending on the monster. |
|---|---|
|
Critical Eye Lv. 6 | Attack Boost Lv. 6
Weakness Exploit Lv. 3 | Critical Boost Lv. 3 Blood Rite Lv. 3 | Blood Awakening Lv. 3 Speed Sharpening Lv. 3 | Partbreaker Lv. 3 Quick Sheathe Lv. 3 | Wirebug Whisperer Lv. 3 Master's Touch Lv. 3 | Frenzied Bloodlust Lv. 2 Ballistics Lv. 2 | Intrepid Heart Lv. 1 Bloodlust Lv. 1 | Powder Mantle Lv. 1 Wind Mantle Lv. 1 | Shock Absorber Lv. 1 |
Build Merits & Augments
| Weapon Augments | |
|---|---|
| Armor Augments |
Armor Augments for this build are not necessary. However, feel free to add as you please once you get comfortable with your build! Generally, you'd want to get better skills and more slots for your armor.
Replaceable skills already on the armor: ● Ballistics For damage, aim for any of the following: ● Coalescence ● Frostcraft For comfort, aim for the following: ● Defiance ● Wind Mantle ● Frenzied Bloodlust |
| Build Merits and Notes |
The Bonus Update introduces a new aggressive comfort skill: Blood Awakening. Paired with Blood Rite, this skill is valuable when fighting against monsters with broken parts or Bloodblight.
Silver Severer is the choice weapon for this build due to its available 3 ④ slots and boosted health gain from Blood Rite and Bloodblight. Desperate Roar+ is alternative for going all-out Raw at the expense of weapon slots. To make up for the weapon's Raw damage, additional damage skills like Attack Boost and Attack Boost Augments are recommended. Affinity skills are maxed out to ensure that you can get the most out of Master's Touch in sharpness management. A Frenzied Bloodlust talisman, along with Wind Mantle, is included to boost your usage of any powerful Silkbind attacks like Serene Pose or Sakura Silkbind Slash. You can aim for augmenting your armor Frostcraft to deal more overall damage, but if you already have a Frostcraft Lv. 3 talisman, you can augment for Frenzied Bloodlust instead. Intrepid Heart is included and can help you recieve Bloodblight much safer since it significantly reduces damage and negates knockback when filled. |
|---|
Silkbind Spammer Amatsu Long Sword
| Weapon | ATK | DEF | Affinity |
|---|---|---|---|
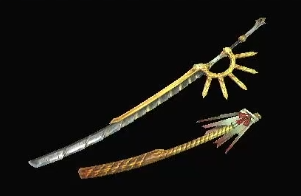 Ominous Spring Ominous Spring
 |
350 | 0 | -25% |
| Element / Status |
Slots | Rampage Slots | |
| ーーー | ③ |
| Armor | Slots | Skills | |
|---|---|---|---|
|
|
③②① |
Wirebug Whisperer Lv. 3
Wind Mantle Lv. 1
|
|
|
|
④②① |
Quick Sheathe Lv. 3
Frostcraft Lv. 1
|
|
|
|
③①ー | ||
|
|
④②ー | ||
|
|
④③① | ||
| Talisman | Frostcraft 2 with ②②- slot or better | ||
| Rampage Decoration | |||
| Decorations | |||
| Skills | |
|---|---|
| Rampage Skill | Kushala Daora Soul for the bonus affinity. Works well with Silkbind Sakura Slash and Harvest Moon. |
|
Attack Boost Lv.5 |
Critical Boost Lv.3
Weakness Exploit Lv.3 | Quick Sheathe Lv.3 Speed Sharpening Lv.3 | Wirebug Whisperer Lv.3 Bloodlust Lv.3 | Frostcraft Lv.3 Frenzied Bloodlust Lv.3 | Critical Eye Lv.2 Handicraft Lv.2 | Critical Draw Lv.2 Evade Extender Lv.2 | Wind Mantle Lv.1 Strife Lv.1 | Shock Absorber Lv.1 |
|
Build Merits and Augments
| Weapon Augments |
|
|---|---|
| Armor Augments |
Armor Augments for this build are not necessary. However, feel free to add as you please once you get comfortable with your build! Generally, you'd want to get better skills and more slots for your armor.
Replaceable skills already on the armor: ● Strife For damage, aim for any of the following: ● Mail of Hellfire ● Powder Mantle ● Burst ● Frostcraft For comfort, aim for any of the following: ● Wind Mantle |
| Build Merits and Notes |
|---|
| While slightly behind TU4's Powder Frost build in terms of DPS, TU5's Silkbind Spammer allows hunters to double-down on Silkbind counters such as Harvest Moon and Tempered Spirit Blade. By utilizing Frenzied Bloodlust and combining it with Wirebug Whisperer and Wind Mantle, hunters can have a total of 4 active Wirebugs that recharge quickly. Also included in this build are the staple Long Sword skills such as Quick Sheathe and Frostcraft.
We chose the Amatsu LS for this build for the high raw damage and the silkbind damage boosting effect. Considering Bloodlust, Critical Draw, Critical Eye, and the Affinity Boosting augment, we can disregard the weapon's negative affinity. The intended playstyle for this set is to utilize Special Sheathe and Sacred Sheathe to charge Frostcraft without cancelling Wind Mantle, while spamming Silkbind moves. The total amount of Wirebugs allows you to comfortably set up Harvest Moon, while still having 2 Wirebugs for either Tempered Spirit Blade counters or Silkbind Sakura Slash spamming. Evade Extender Lv.2 is present as our preferred comfort skill. The extra distance it provides carries over to the dashes performed while charging your Sacred Sheathe, allowing you to cover longer distances. If your playstyle revolves around Harvest Moon, consider replacing the Jumping Jewel+ 4 with another Handicraft+ 4, or a Razor Jewel+ 4 to allow you to fight within the circle for a longer period of time. |
Powder Frost Lucent Narga LS
| Weapon | ATK | DEF | Affinity |
|---|---|---|---|
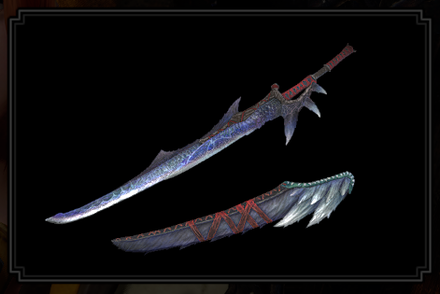 Megrez's Asterism Megrez's Asterism
 |
330 | 0 | 0% |
| Element / Status |
Slots | Rampage Slots | |
| ④②ー | ① |
| Armor | Slots | Skills | |
|---|---|---|---|
|
|
③②ー | ||
|
|
④②① |
Quick Sheathe Lv. 3
Frostcraft Lv. 1
|
|
|
|
④②① | ||
|
|
③③② |
Focus Lv. 3
Frostcraft Lv. 1
|
|
|
|
①①ー |
Attack Boost Lv. 2
Critical Eye Lv. 2
|
|
| Talisman | Attack Boost 3 with ②①ー slot or better | ||
| Rampage Decoration |
Upgrade the weapon's rampage slot via Qurio Augment. |
||
| Decorations |
|
||
| Skills | |
|---|---|
| Rampage Skill | Swap between Wyvern Exploit, Anti-Aerial Species, Anti-Aquatic Species, or Fanged Exploit depending on the monster. |
|
Critical Eye Lv.7 |
Attack Boost Lv.7
Critical Boost Lv.3 | Weakness Exploit Lv.3 Focus Lv.3 | Quick Sheathe Lv.3 Speed Sharpening Lv.2 Chameleos Blessing Lv.3 Protective Polish Lv.2 | Evade Extender Lv.2 Frostcraft Lv.2 | Flinch Free Lv. 1 Foray Lv. 1 | Buildup Boost Lv. 1 Powder Mantle Lv. 1 |
|
Build Merits and Augments
| Weapon Augments | |
|---|---|
| Armor Augments |
Armor Augments for this build are not necessary. However, feel free to add as you please once you get comfortable with your build! Generally, you'd want to get better skills and more slots for your armor.
For damage, aim for any of the following: ● Powder Mantle ● Burst ● Frostcraft For comfort, aim for any of the following: ● Wind Mantle |
| Build Merits and Notes |
|---|
| An upgrade to TU3's Max DPS Status Build for the Longsword! We retain most of the strongpoints from our previous TU3 Max DPS build by keeping skills such as Buildup Boost to further increase our damage. Effectively, we replaced Ballistics with TU4's Frostcraft to boost our Special Sheathe and Sacred Sheathe attacks! Also included in this build are max points in meta damage skills such as Attack Boost, Critical Eye, Weakness Exploit, and Critical Boost. While Powder Mantle may activate less often, effective and timely use of Sheathe-based attacks is a guaranteed DPS increase as opposed to a timed mechanic. We highly recommend using weapon Augment to increase the Megrez's Asterism's rampage slot to 2 to gain access to the species exploit rampage decoration. |
Max DPS Lucent Narga Long Sword
| Weapon | ATK | DEF | Affinity |
|---|---|---|---|
 Megrez's Asterism Megrez's Asterism
 |
330 | 0 | 0% |
| Element / Status |
Slots | Rampage Slots | |
| ④②ー | ① |
| Armor | Slots | Skills | |
|---|---|---|---|
|
|
③②ー | ||
|
|
②②ー | ||
|
|
④②① | ||
|
|
④③ー | ||
|
|
①①ー |
Attack Boost Lv. 2
Critical Eye Lv. 2
|
|
| Talisman | Attack Boost 3 with ② slot or better | ||
| Rampage Decoration |
Upgrade the weapon's rampage slot via Qurio Augment. |
||
| Decorations |
|
||
| Skills | |
|---|---|
| Rampage Skill | Swap between Wyvern Exploit, Anti-Aerial Species, Anti-Aquatic Species, or Fanged Exploit depending on the monster. |
|
Critical Eye Lv.7 |
Attack Boost Lv.7
Powder Mantle Lv.3 | Weakness Exploit Lv.3 Master's Touch Lv.3 | Critical Boost Lv.3 Quick Sheathe Lv.3 | Wirebug Whisperer Lv.3 Chameleos Blessing Lv.3 | Ballistics Lv.2 Buildup Boost Lv.1 | Foray Lv.1 Flinch Free Lv. 1 |
|
| Build Merits and Notes |
|---|
| A max DPS Status Build for the Longsword in TU3! We retain the strong point of the ailment build from TU2's Buildup Boost to effectiveley increase our raw damage everytime we apply poison to a monster. We then slot in the standard DPS skills such as Critical Eye, Attack Boost, Weakness Exploit, and Critical Boost. We also slot in a Master's Touch to retain our weapon's Purple and eventually, White Sharpness for a lengthy duration of the fight. However, it's not only retainment of TU2's build that we have, with the new Kaiser armor set, we now gain the ability to maximize the DPS skills with AB easily reaching 7 and being able to slot in the new Powder Mantle skill to level 3. This allows us to gain an additional burst of damage whenever we hit a monster with the blue powder. We highly recommend using weapon Augment to increase the Megrez's Asterism's rampage slot to 2 to gain access to the species exploit rampage decoration. |
Endgame MR Build: MR 6+
Lucent Raw Monster
| Weapon | ATK | DEF | Affinity |
|---|---|---|---|
 Megrez's Asterism Megrez's Asterism
 |
330 | 0 | 0% |
| Element / Status |
Slots | Rampage Slots | |
| ④②ー | ① |
| Armor | Slots | Skills | |
|---|---|---|---|
|
|
①①① |
Critical Eye Lv. 3
Critical Boost Lv. 1
|
|
|
|
②①ー | ||
|
|
④②① | ||
|
|
④ーー |
Weakness Exploit Lv. 1
Burst Lv. 2
|
|
|
|
③②② |
Resentment Lv. 1
Dereliction Lv. 1
|
|
| Talisman | Critical Eye Lv.3 | ||
| Rampage Decoration | |||
| Decoration |
|
||
| Skills | |
|---|---|
| Rampage Skill | Spiribird Doubled |
Critical Eye Lv.7
| Critical Boost Lv.3 Weakness Exploit Lv.3 | Protective Polish Lv.3 Quick Sheath Lv.3 | Speed Sharpening Lv.3 Chain Crit Lv.3 | Wirebug Whisperer Lv.3 Peak Performance Lv.1 | Resentment Lv.1 Partbreaker Lv.1 | Flinch Free Lv.1 Hunger Resistance Lv.1 | Blood Rite Lv.1 Dereliction Lv. 1 |
|
| Build Merits and Notes |
|---|
| Free Title Update 1 gave us the tools to create a raw damage monster for Long Swords! Damage is maximized through a mix of classic and new meta skills, while enhancing the Long Sword's QoL through Quick Sheathe, Speed Sharpening, and Protective Polish. Blood Rite is added to provide an extra layer of sustainability.
Megrez's Asterism may not have as much atk as Abyssal Flicker and Desperate Roar+, its superior slots and neutral affinity make it easier to build around. We recommend augmenting the weapon's rampage slot so gain access to rampage skills such as Wyvern and Fanged Exploit — resulting in even more damage. Remember: You can restore your HP through Dereliction's scroll swapping effect whenever you have more than one Qurio active. Always swap back to the Blue Scroll after. In addition, to help mitigate the health drain from Dereliction, we recommend eating Gourmet Fish and the Hide-and-Seek Dango as they both provide health regeneration over time. |
Archfiend All-Rounder
Best Long Sword: Abyssal Flicker
| Weapon | ATK | DEF | Affinity |
|---|---|---|---|
 Abyssal Flicker Abyssal Flicker
 |
340 | 0 | -25% |
| Element / Status |
Slots | Rampage Slots | |
| ーーー | ③ |
Alternative Long Sword: Desperate Roar+
| Weapon | ATK | DEF | Affinity |
|---|---|---|---|
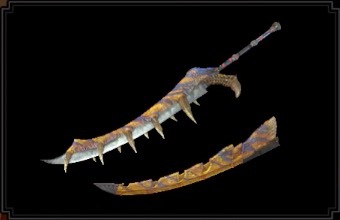 Desperate Roar+ Desperate Roar+
 |
350 | 0 | -15% |
| Element / Status |
Slots | Rampage Slots | |
-
|
ーーー | ② |
| Armor | Slots | Skills | |
|---|---|---|---|
|
|
①①① |
Critical Eye Lv. 3
Critical Boost Lv. 1
|
|
|
|
③②ー | ||
|
|
②ーー | ||
|
|
④ーー |
Weakness Exploit Lv. 1
Burst Lv. 2
|
|
|
|
③②② |
Resentment Lv. 1
Dereliction Lv. 1
|
|
| Talisman | Critical Eye Lv.3; one ① slot recommended, but not required | ||
| Rampage Decoration | |||
| Decoration |
|
||
| Skills | |
|---|---|
| Rampage Skill | Swap between Wyvern Exploit, Fanged Exploit, or Spiribird Doubled depending on the monster |
Critical Eye Lv.7
| Critical Boost Lv.3 Weakness Exploit Lv.3 | Protective Polish Lv.3 Quick Sheath Lv.3 | Speed Sharpening Lv.2/3 Chain Crit Lv.3 | Resentment Lv.2 Speed Eating Lv.1 | Flinch Free Lv.1 Dereliction Lv.1 |
|
| Build Merits and Notes |
|---|
| An endgame raw damage build that takes advantage of key pieces from Gaismagorm's set. Abyssal Flicker's negative affinity is tamed through Critical Eye and Weakness Exploit, while its sharpness is maintained via Protective Polish and Quick Sheath. Damage is maximized through Critical Boost, Chain Crit, Resentment, and Dereliction's blue scroll effect.
Remember: You can restore your HP through Dereliction's scroll swapping effect whenever you have more than one Qurio active. Always swap back to the Blue Scroll after. Those who prefer slightly more raw damage and more affinity may go for Tigrex's Desperate Roar+ instead. Take note that this Long Sword has significantly less purple sharpness as well, making you stop to sharpen more often. |
Master Rank Build (Mid Game): MR 3-6
Mid Game Raw Long Sword Build
| Weapon | ATK | DEF | Affinity |
|---|---|---|---|
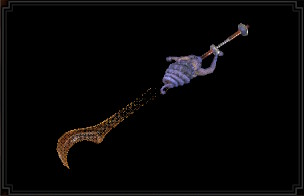 Phantom Mirage+ Phantom Mirage+
 |
290 | 15 | 15% |
| Element / Status |
Slots | Rampage Slots | |
-
|
②②① | ② |
| Armor | Slots | Skills | |
|---|---|---|---|
|
|
②②ー |
Critical Eye Lv. 2
Wirebug Whisperer Lv. 1
|
|
|
|
②②① |
Maximum Might Lv. 1
Wirebug Whisperer Lv. 2
|
|
|
|
ーーー |
Handicraft Lv. 3
|
|
|
|
②ーー | ||
|
|
①①ー |
Attack Boost Lv. 2
Critical Eye Lv. 2
|
|
| Talisman | Quick Sheath Lv. 2 With ② slot. | ||
| Rampage Decoration |
|
||
| Decorations |
|
||
| Skills | |
|---|---|
| Rampage Skills | Anti-Species Skill (change according to enemy target). |
|
Wirebug Whisperer Lv.3
| Critical Boost Lv.3 Weakness Exploit Lv.3 | Quick Sheath Lv.3 Speed Sharpening Lv.3 | Critical Eye Lv.6 Attack Boost Lv.4 | Handicraft Lv. 3 Windproof Lv.3 | Flinch Free Lv.1 Maximum Might Lv. 1 |
|
| Build Merits and Notes |
|---|
| A full on raw Long Sword build for Master Rank's Mid Game! It features all the necessary offensive skills while coupling it with other supportive skills for the Long Sword such as Quick Sheath for faster move transitions and a maxed out Wirebug Whisperer to utilize more counters! We reduced Critical Eye from 7 to 6 to make room for other quality of life skills such as Handicraft which also increases our DPS thanks to sharpness damage multipliers. |
Master Rank Build (Early Game): MR 1-2
Long Sword Raw Starter Build
| Weapon | ATK | DEF | Affinity |
|---|---|---|---|
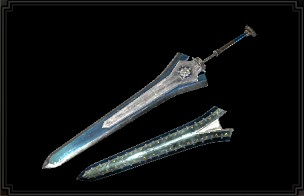 Imperial Sword II Imperial Sword II
 |
250 | 0 | 10% |
| Element / Status |
Slots | Rampage Slots | |
-
|
②②① | ① |
| Armor | Slots | Skills | |
|---|---|---|---|
|
|
④①ー |
Attack Boost Lv. 2
Windproof Lv. 1
|
|
|
|
①ーー | ||
|
|
②①ー |
Latent Power Lv. 3
Quick Sheathe Lv. 1
|
|
|
|
①①ー |
Constitution Lv. 1
Critical Eye Lv. 2
|
|
|
|
②ーー | ||
| Talisman | Weakness Exploit Lv. 2 with ② slot. | ||
| Rampage Decoration | |||
| Decorations |
|
||
| Skills | |
|---|---|
Weakness Exploit Lv.3
| Critical Boost Lv.3
Quick Sheath Lv.3 | Defense Boost Lv.5 Attack Boost Lv.4 | Critical Eye Lv.4 Latent Power Lv.3 | Windproof Lv.1 Evade Window Lv.1 | Recovery Speed Lv.2 Constitution Lv.1 | Stun Resistance Lv.1 Flinch Free Lv.1 | Punishing Draw Lv.1 |
| Build Merits and Notes |
|---|
| This is a starter MR build for the Long Sword! It features standard offensive skills such as Attack Boost (lv.4 for the bonus damage percentage), Critical Eye and Critical Boost as well as Weakness Exploit. We further add other Long Sword essential skills such as Quick Sheath and even Punishing Draw for extra ease of use and bonus effects for the Long Sword's kit. |
Best Skills and Explanations
Best Damage Skills
These skills make it possible to deal extra damage! Aim for these skills for maximum DPS to defeat those monsters easier and finish those quests faster!
| Best Skills | Explanation |
|---|---|
| Weakness Exploit ★★★ |
A staple skill for any meta build. Increases your affinity when hitting weak spots by 50% at max rank, increasing your DPS significantly. |
| Critical Boost ★★★ |
Amplifies critical damage by 5% per level, ideal for Long Swords since you want to focus on getting your weapon to the highest affinity possible. |
| Critical Eye ★★★ |
Critical Eye increases affinity, working hand-in-hand with Long Sword builds being mostly critical-focused. |
| Attack Boost ★★★ |
Increases damage values for the Long Sword. Max this skill out whenever possible or aim for 4 levels. |
| Burst ★★★ |
The Long Sword's continuous combos activates this skill with ease, buffing you up throughout a fight. Max it out whenever possible, but a single point is enough for most fights. Available in Sunbreak Base Game |
| Status Trigger ★★ |
With the Long Sword's continuous combos, this skill makes Status Builds viable. Best paired with Evade Window. Take note that Iai Spirit Slash and Foresight Slash do not activate Status Trigger. Available in Sunbreak Free Title Update 1 |
| Buildup Boost ★★ |
Increases your attack by 20%. Along with Status Trigger, this is an ideal skill to consider with Status Builds. Available in Sunbreak Free Title Update 2 |
| Element Attack ★★ |
Sunbreak featured buffs for elemental damage, making elemental builds viable. Max out this skill to increase damage against monsters. Fire | Water | Ice | Thunder | Dragon |
| Powder Mantle ★★ |
This skill from the Risen Teostra Armor provides the Long Sword with additional blast damage every time it activates, contributing greatly to DPS. Available in Sunbreak Free Title Update 3 |
| Dereliction ★★ |
Using the Red Scroll increases the Long Sword's elemental and status values while using the Blue Scroll increases both attack and stun potency, improving overall damage. Just be wary of your health! Available in Sunbreak Base Game |
| Bloodlust ★★ |
Overcome the Frenzy Virus to power up with this skill; best paired with Coalescence. Available in Sunbreak Base Game |
| Dragon Conversion ★ |
When activated, this skill from the Risen Crimson Glow Valstrax Armor will benefit elemental builds, increasing DPS even further! Available in Sunbreak Free Title Update 4 |
| Element Exploit ★ |
Amplify your elemental damage against monsters weak to a specific element with this skill. A single point of it is enough to deal significant damage. Available in Sunbreak Free Title Update 1 |
Best Comfort Skills
These are skills that makes managing weapon mechanics a lot easier. Damage is only part of the equation - taking time to slot in comfort skills that increase consistency & comfort will also increase overall DPS!
| Best Skills | Explanation |
|---|---|
| Quick Sheathe ★★★ |
As the name implies, this skill speeds up weapon sheathing, including your Special Sheathe. This means that transitioning into an Iai Slash or Spirit Slash gets way quicker and, in turn, improves overall DPS. |
| Wirebug Whisperer ★★★ |
Greatly increases the Longsword's safety by granting it more counters which also indirectly increases your damage output by having your silkbind skills up faster. |
| Master's Touch ★★ |
Every time a critical strike hits, this skill prevents your weapon from losing sharpness. This is an ideal skill for most high affinity builds and for weapons with manageable sharpness. |
| Protective Polish ★★ |
Due to the Long Sword's continuous combo hits, it will deplete sharpness fast. Always consider maxing this skill out to keep your sharpness high, up to a maximum of 90 seconds! |
| Speed Sharpening ★★ |
Reduces a cycle for sharpening with each level. Synergizes well with the Protective Polish skill. |
| Defiance ★★ |
Three levels of this skill prevent most roars, tremors, and winds from interrupting your charged attacks. The Cornerstone Jewel is a level 1 decoration, so slot it in whenever possible! Available in Sunbreak Free Title Update 1 |
| Flinch Free ★★ |
Useful especially in multiplayer where minor attacks can interrupt your attacks! |
| Intrepid Heart ★ |
Whenever the gauge above your health bar is full, this skill can be useful in preventing monster attacks from interrupting your combos, making it possible to pull off an extra charged attack before you can regroup. Available in Sunbreak Free Title Update 2 |
| Wind Mantle ★ |
This skill from the Risen Kushala Armor will recharge your Wirebugs faster, giving you more utility with your Long Sword. Available in Sunbreak Free Title Update 3 |
| Handicraft ★ |
Increases weapon sharpness and it can also unlock new sharpness levels for some weapons. Amazing for the Long Sword but only slot this skill in if you can. |
Monster Hunter Rise Related Links

|
• Weapons marked withNEW have been updated. • Weapons withUP have been reviewed and does not warrant an updated build from the Bonus Update. |
| All Weapon Build Guides | |
|---|---|
NEW Low Rank | High Rank Master Rank |
NEW Low Rank | High Rank Master Rank |
NEW Low Rank | High Rank Master Rank |
NEW Low Rank | High Rank Master Rank |
NEW Low Rank | High Rank Master Rank |
NEW Low Rank | High Rank Master Rank |
NEW Low Rank | High Rank Master Rank |
NEW Low Rank | High Rank Master Rank |
NEW Low Rank | High Rank Master Rank |
NEW Low Rank | High Rank Master Rank |
NEW Low Rank | High Rank Master Rank |
NEW Low Rank | High Rank Master Rank |
NEW Low Rank | High Rank Master Rank |
UP Low Rank | High Rank Master Rank |
Other Builds
| Other Build Guides | |
|---|---|
| General High Rank Builds and Best Equipment | Buddy Equipment Builds Palico | Palamute |
Comment
Same here, I guess we need 3 Expert Jewel+ 4 instead of 1. Meaning the stuff need a total of 10 slots for Deco+4, which it possess. Therefore we can remove the Expert Jewel 2. It works this way as it remains Bloodening Jewel 3 x1 in one of the slot +3 (Kushala helm for exemple) and the last 6 decos are slot 2 which can goes into slots 2 and 3 remaining. Plus both 1 slot deco for intrepid and shockproof into helm and talisman.
Author
Sunbreak Long Sword Builds (Master Rank)
improvement survey
03/2026
improving Game8's site?

Your answers will help us to improve our website.
Note: Please be sure not to enter any kind of personal information into your response.

We hope you continue to make use of Game8.
Rankings
Gaming News
Popular Games

Genshin Impact Walkthrough & Guides Wiki

Honkai: Star Rail Walkthrough & Guides Wiki

Umamusume: Pretty Derby Walkthrough & Guides Wiki

Pokemon Pokopia Walkthrough & Guides Wiki

Resident Evil Requiem (RE9) Walkthrough & Guides Wiki

Monster Hunter Wilds Walkthrough & Guides Wiki

Wuthering Waves Walkthrough & Guides Wiki

Arknights: Endfield Walkthrough & Guides Wiki

Pokemon FireRed and LeafGreen (FRLG) Walkthrough & Guides Wiki

Pokemon TCG Pocket (PTCGP) Strategies & Guides Wiki
Recommended Games

Diablo 4: Vessel of Hatred Walkthrough & Guides Wiki

Cyberpunk 2077: Ultimate Edition Walkthrough & Guides Wiki

Fire Emblem Heroes (FEH) Walkthrough & Guides Wiki

Yu-Gi-Oh! Master Duel Walkthrough & Guides Wiki

Super Smash Bros. Ultimate Walkthrough & Guides Wiki

Pokemon Brilliant Diamond and Shining Pearl (BDSP) Walkthrough & Guides Wiki

Elden Ring Shadow of the Erdtree Walkthrough & Guides Wiki

Monster Hunter World Walkthrough & Guides Wiki

The Legend of Zelda: Tears of the Kingdom Walkthrough & Guides Wiki

Persona 3 Reload Walkthrough & Guides Wiki
All rights reserved
©CAPCOM CO., LTD. ALL RIGHTS RESERVED.
The copyrights of videos of games used in our content and other intellectual property rights belong to the provider of the game.
The contents we provide on this site were created personally by members of the Game8 editorial department.
We refuse the right to reuse or repost content taken without our permission such as data or images to other sites.


![Monster Hunter Stories 3 Review [First Impressions] | Simply Rejuvenating](https://img.game8.co/4438641/2a31b7702bd70e78ec8efd24661dacda.jpeg/thumb)


mr 100+ and then they include risen stuff that you start getting at mr 140 and there are 0 builds to actually challenge those risen monsters (no one doing risen with mr 6 gear) cinema im supposed to just spawn the risen sht out of thin air i guess every content creator and sites seem to know something no one else does appearently since all their mr 70 builds contain risen gear magic