Sunbreak Bow Builds (Master Rank)
★ All Title Updates now available for ALL PLATFORMS!
┗ Title Update 4 | Title Update 5 | Bonus Update
┗ Check out all our Best Builds For Every Weapon!
┗ TU4 Monsters: Velkhana | Risen C.G. Valstrax
┗ TU5 Monsters: Amatsu | Risen Shagaru Magala
┗ Bonus Update Monster: Primordial Malzeno
This is a guide to the best builds and equipment for Bows in Monster Hunter Rise (MH Rise): Sunbreak. Learn about the best Bows for Master Rank, and the best Skills and Armor pieces to use with the Bows for Master Rank from the early game until the end game!
| All Bow Guides | ||
|---|---|---|
 Trees & Full List Trees & Full List |
 How to Use How to Use |
 Best Builds Best Builds |
List of Contents
Bow Builds List & Progression
This is a quick section summarizing all the Bow builds in this page. It is arranged from newest to oldest, and MR build progression is from bottom to top.
Click on the build name to see the build!
| Master Rank | Title Update | Build Name |
|---|---|---|
| MR180+ | Bonus Update | Bonus Update Berserk Strife Bows |
| MR180+ | TU5 | Heaven-Sent, Dragon Conversion Elemental Spread Bows |
| MR160+ | TU4 | Dragon Conversion Elemental Spread Bows |
| MR140+ | TU3 | Meta DPS Bow Build |
| MR120+ | TU3 | Infinite Stamina Berserk Build |
| MR10+ | TU2 | Bloodlust Elem. Spread Bows (Dereliction or Non-Dereliction) |
| MR10+ | TU2 | Critical Element Bow |
| MR3-6 | Base | Mid Game Elemental Bow Build |
| MR1-2 | Base | Starter Raw Bow Build |
Ultra Endgame MR Build: MR 100+
Bonus Update Berserk Strife Bows
Recommended Spread Bows
| Weapon | Slots | ATK | DEF |
|---|---|---|---|
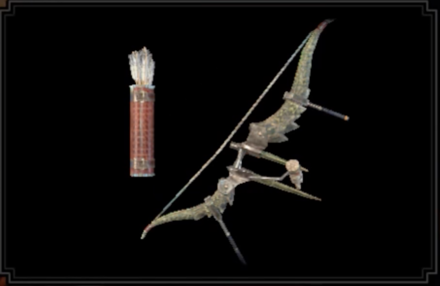 Queen's Rhapsody+ Queen's Rhapsody+
|
④①ー | 330 | 0 |
| Affinity | Element | ||
| 0% | |||
| Rampage Slots | ③ | ||
| Weapon | Slots | ATK | DEF |
|---|---|---|---|
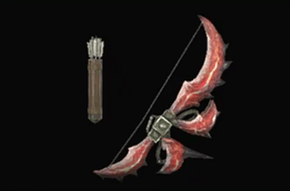 Chelae Warbow Chelae Warbow
|
④②① | 340 | 30 |
| Affinity | Element | ||
| 0% | |||
| Rampage Slots | ③ | ||
| Weapon | Slots | ATK | DEF |
|---|---|---|---|
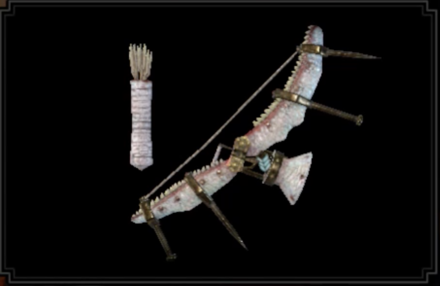 Khezu Que C'est+ Khezu Que C'est+
|
③ーー | 330 | 0 |
| Affinity | Element | ||
| 0% | |||
| Rampage Slots | ③ | ||
| Weapon | Slots | ATK | DEF |
|---|---|---|---|
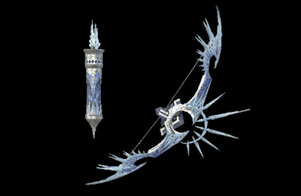 Alluring Evelia Alluring Evelia
|
④ーー | 340 | 0 |
| Affinity | Element | ||
| 0% | |||
| Rampage Slots | ③ | ||
| Weapon | Slots | ATK | DEF |
|---|---|---|---|
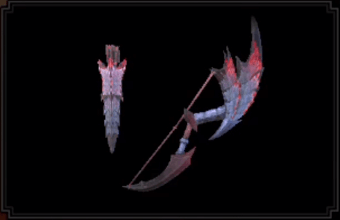 Crimson Plume Crimson Plume
|
②ーー | 310 | 0 |
| Affinity | Element | ||
| 0% | |||
| Rampage Slots | ② | ||
Recommended Pierce and Rapid Bows
| Element | Rapid Bows | Pierce Bows |
|---|---|---|
| Lohenbogen+ or Hyperion | Creeping Darkness | |
| Elysian Manna+ | Drothdymion+ | |
| Thundering Strikebow+ | Oppressor's Answer | |
| Heaven's Breath | Daora's Toxotes | |
| Auftauchen/Disparition or Untergang | Silver Striker |
| Armor | Slots | Skills | |
|---|---|---|---|
|
|
④②ー | ||
|
|
③①① | ||
|
|
④④② |
Critical Boost Lv. 1
Blood Awakening Lv. 1
|
|
|
|
④④② |
Critical Boost Lv. 1
Burst Lv. 2
|
|
|
|
④③ー | ||
| Talisman | Berserk Lv. 1 with a ②②① slot or better | ||
| Rampage Decoration |
|
||
| Decorations |
Hard Element Jewel 3
Element Jewel+ 2 |
||
| Skills | |
|---|---|
| Rampage Skill | Swap between Wyvern Exploit, Anti-Aerial Species, Anti-Aquatic Species, or Fanged Exploit depending on the monster. Use Element Exploit if monster has a 25 Element Hitzone (may require Rampage Slot Upgrade). |
|
Element Attack Lv.5
| Attack Boost Lv.4
Shot Type Up Lv.3 | Critical Boost Lv.3 Weakness Exploit Lv.3 | Critical Element Lv.3 Ammo Up Lv.3 | Stun Resistance Lv.3 Charge Master Lv.3 | Strife Lv.3 Handicraft Lv.3 | Kushala Blessing Lv.3 Critical Eye Lv.2 | Burst Lv.2 Blood Rite Lv.2 | Bow Charge Plus Lv.1 Berserk Lv.1 | Element Exploit Lv.1 Blood Awakening Lv.1 Spread Fire Only: Teostra Blessing Lv.1 Spread Water Only: Maximum Might Lv.2 | Reload Speed Lv.1 |
|
Build Merits and Augments
| Weapon Augments | |
|---|---|
| Armor Augments |
Armor Augments for this build are not necessary. However, feel free to add as you please once you get comfortable with your build! Generally, you'd want to get better skills and more slots for your armor.
Replaceable skills already on the armor: ● Handicraft ● Ammo Up ● Critical Eye For damage, aim for any of the following: ● Powder Mantle ● Bloodlust + Coalescence ● Adrenaline Rush ● Teostra Blessing Lv.2 (for Fire builds) For comfort, aim for any of the following: ● Reload Speed Lv.2 ● Blood Rite ● Recovery Up ● Partbreaker ● Constitution (when using Red Scroll) ● Stamina Surge (when using Red Scroll) |
| Build Merits and Notes |
|---|
| Being able to roll for Berserk as a talisman with Vigor melding opens more options for an infinite stamina build. Rolling for Lv.2 Berserk is possible and recommended, but the build can work with just a single level of the skill. While Berserk can let you survive several attacks that would've otherwise been a cart, it's still best to avoid getting hit to not have to swap to the Red Scroll to heal up and slow the drain.
Berserk is key to this build since the Blue Scroll easily activates Strife's maximum boosts and infinite stamina. However, maintaining at least 60% red health is necessary to keep these buffs. This can be accomplished with Kushala Blessing Lv.3 to mitigate the drain, either an Immunizer or Gourmet Fish to boost recovery, and Lv.4 Super Recovery Dango. Blood Rite is also included to heal up when attacking broken parts and to activate Blood Awakening. Palicoes with the Healing Clover Bat are also great to have for additional recovery. Spread bows are our main recommendation for this build, as these have a higher damage output and synergy with Dodgebolt. However, this also works as a Rapid or Pierce build by swapping the appropriate decorations. For Bows with less than a single Lv2 slot, they'll have to give up a level of Critical Element. Those with additional slots should aim to get Reload Speed or Maximum Might. |
Heaven-Sent, Dragon Conversion Elemental Spread Bow Builds (TU5)
Recommended Elemental Spread Bows
| Weapon | Slots | ATK | DEF |
|---|---|---|---|
 Queen's Rhapsody+ Queen's Rhapsody+
|
④①ー | 330 | 0 |
| Affinity | Element | ||
| 0% | |||
| Rampage Slots | ③ | ||
| Decorations |
*Depending on Talisman: or |
|
|---|---|---|
| Weapon | Slots | ATK | DEF |
|---|---|---|---|
 Chelae Warbow Chelae Warbow
|
④②① | 340 | 30 |
| Affinity | Element | ||
| 0% | |||
| Rampage Slots | ③ | ||
| Decorations |
*Depending on Talisman: or |
|
|---|---|---|
| Weapon | Slots | ATK | DEF |
|---|---|---|---|
 Khezu Que C'est+ Khezu Que C'est+
|
③ーー | 330 | 0 |
| Affinity | Element | ||
| 0% | |||
| Rampage Slots | ③ | ||
| Decorations |
*Depending on Talisman: or |
|
|---|---|---|
| Weapon | Slots | ATK | DEF |
|---|---|---|---|
 Alluring Evelia Alluring Evelia
|
④ーー | 340 | 0 |
| Affinity | Element | ||
| 0% | |||
| Rampage Slots | ③ | ||
| Decorations |
*Depending on Talisman: or |
|
|---|---|---|
| Weapon | Slots | ATK | DEF |
|---|---|---|---|
 Crimson Plume Crimson Plume
|
②ーー | 310 | 0 |
| Affinity | Element | ||
| 0% | |||
| Rampage Slots | ② | ||
| Decorations |
*Depending on Talisman: or |
|
|---|---|---|
* = check Build Merits below.
Recommended Armor Loadout
| Armor | Slots | Skills | |
|---|---|---|---|
|
|
④②ー | ||
|
|
④④① |
Critical Boost Lv. 1
Heaven-Sent Lv. 1
|
|
|
|
④④① |
Latent Power Lv. 1
Heaven-Sent Lv. 1
|
|
|
|
④①① | ||
|
|
④④ー |
Critical Boost Lv. 2
Heaven-Sent Lv. 1
|
|
| Talisman |
Weakness Exploit 2 with at least a ②① slot Secondary Skill Recommendations: Constitution Lv.2 |
||
| Rampage Decoration |
For Dragon Bow: |
||
| Skills | |
|---|---|
| Rampage Skill | Element Exploit to increase elemental damage against each element or Kushala Daora Soul to increase affinity during combos For the Dragon Build: Swap between Wyvern Exploit, Anti-Aerial Species, Anti-Aquatic Species, or Fanged Exploit depending on the monster. |
|
Element Attack Lv.5
Attack Boost Lv.4 | Critical Boost Lv.3 Weakness Exploit Lv.3 | Latent Power Lv.3 Stamina Surge Lv.3 | Spread Up Lv.3 Heaven-Sent Lv.3 | Reload Speed Lv.2 Coalescence Lv.2 | Burst Lv. 2-3 Dragon Conversion Lv.2 | Bow Charge Plus Lv.1 Bloodlust Lv.1 Constitution Lv.2-3 or Critical Element Lv. 2-3 | Constitution Lv.2 see Build Merits For the Fire Build: Teostra Blessing Lv.2 For the Water and Ice Build: Kushala Blessing Lv.2 For the Thunder and Dragon Build: Defiance Lv.1 |
|
Build Merits and Augments
| Weapon Augments | |
|---|---|
| Armor Augments |
Armor Augments for this build are not necessary. However, feel free to add as you please once you get comfortable with your build! Generally, you'd want to get better skills and more slots for your armor.
Replaceable skills already on the armor: ● Stamina Surge (only a single point) For damage, aim for any of the following: ● Dragon Conversion (to max it out) ● Critical Element ● Charge Master ● Burst For comfort, aim for any of the following: ● Constitution ● Evade Extender (with Dodgebolt) ● Augment for a Level 1 Decoration Slot on the Ice Build in the Augment: Stability method to make it possible to slot in Shock Absorber |
| Build Merits and Notes |
|---|
| *Note: If you've acquired Constitution as the secondary skill for your talisman via Qurious Melding - Vigor, you can swap out the Physique Jewels for Crit Element Jewels.
In Free Title Update 5, the heavenly armor of Amatsu descended from the skies. Three pieces of this armor introduced a new skill; Heaven-Sent. This skill bestows its users powers when they manage to not get caught in any attacks. At level 3, it negates stamina depletion. This is perfect for Bow users who, with their kit, excels in making sure the monster has a hard time getting their colossal hits in! Be sure to utilize Dodgebolt as much as you can with this playstyle. Risen Crimson Glow Valstrax's armor skill, Dragon Conversion, converts elemental resistances you get from attacking with the Blue Swap Scroll to elemental damage when you switch to the Red Swap Scroll. This is a powerful skill to use with elemental builds and for weapons that are able to land hits continuously. Be sure to start fights with the Blue Swap Scroll first and switch to Red only when the elemental resistance logo appears at the top of your health bar. Also take extra care when fighting with the Red Swap Scroll as your elemental resistances will all be 0. For affinity, we optimized skills like Latent Power, Weakness Exploit, and, thanks to TU5 introducing it as a decoration, Bloodlust. With all of this activated, it is possible to deal 100% affinity on weakspots. To further increase this damage, we also slotted Attack Boost and Coalescence. We slotted in the Bow Charge Plus skill to increase the weapon's charge shot to level 4. With this in mind, we chose the best Bows in their respective elements with a Spread Level 5 on their Level 4 Charge Shot to make sure significant damage is dealt. |
Dragon Conversion Elemental Spread Bow Builds (MR160+)
Recommended Elemental Spread Bows
| Weapon | Slots | ATK | DEF |
|---|---|---|---|
 Queen's Rhapsody+ Queen's Rhapsody+
|
④①ー | 330 | 0 |
| Affinity | Element | ||
| 0% | |||
| Rampage Slots | ③ | ||
| Weapon | Slots | ATK | DEF |
|---|---|---|---|
 Chelae Warbow Chelae Warbow
|
④②① | 340 | 30 |
| Affinity | Element | ||
| 0% | |||
| Rampage Slots | ③ | ||
| Weapon | Slots | ATK | DEF |
|---|---|---|---|
 Khezu Que C'est+ Khezu Que C'est+
|
③ーー | 330 | 0 |
| Affinity | Element | ||
| 0% | |||
| Rampage Slots | ③ | ||
| Weapon | Slots | ATK | DEF |
|---|---|---|---|
 Alluring Evelia Alluring Evelia
|
④ーー | 340 | 0 |
| Affinity | Element | ||
| 0% | |||
| Rampage Slots | ③ | ||
| Weapon | Slots | ATK | DEF |
|---|---|---|---|
 Crimson Plume Crimson Plume
|
②ーー | 310 | 0 |
| Affinity | Element | ||
| 0% | |||
| Rampage Slots | ② | ||
| Armor | Slots | Skills | |
|---|---|---|---|
|
|
④②ー | ||
|
|
④④ー | ||
|
|
④①① | ||
|
|
④①① | ||
|
|
④③ー | ||
| Talisman | Critical Eye 2 with a ②① slot | ||
| Rampage Decoration | |||
| Decorations |
Main Decorations: (except for the Ice Bow Build) Fire, Water, Ice and Dragon Build:
Hard Element Jewel+ 4 x1
Water Build:Element Jewel 1 x1 For Thunder Build: For Dragon Build: For Fire Build: For Water and Ice Build: |
||
| Skills | |
|---|---|
| Rampage Skill | Element Exploit to increase elemental damage against each element or Kushala Daora Soul to increase affinity during combos |
|
Element Attack Lv.5
Attack Boost Lv.6 | Latent Power Lv.4 Critical Boost Lv.3 | Weakness Exploit Lv.3 Constitution Lv.3 | Stamina Surge Lv.3 Spread Up Lv.3 | Dragon Resistance Lv.3 Stun Resistance Lv.3 | Dragon Conversion Lv.3 Critical Eye Lv.2 | Reload Speed Lv.2 Bow Charge Plus Lv.1 For Fire Bow Build: Teostra Blessing Lv.2 For Water and Ice Bow Build: Kushala Blessing Lv.2 For Dragon Bow Build: Intrepid Heart Lv.1 |
|
Build Merits and Augments
| Weapon Augments | Fire, Water, Ice, and Thunder Bows: Dragon Bows: |
|---|---|
| Armor Augments |
Armor Augments for this build are not necessary. However, feel free to add as you please once you get comfortable with your build! Generally, you'd want to get better skills and more slots for your armor.
For damage, aim for any of the following: ● Element Exploit ● Charge Master ● Furious (preferably Lv.3) For comfort, aim for any of the following: ● Defiance ● Evade Extender (with Dodgebolt) ● Intrepid Heart ● Blood Rite |
| Build Merits and Notes |
|---|
| Risen Crimson Glow Valstrax's armor skill, Dragon Conversion, converts elemental resistances you get from attacking with the Blue Swap Scroll to elemental damage when you switch to the Red Swap Scroll. This is a powerful skill to use with elemental builds and for weapons that are able to land hits continuously. Be sure to start fights with the Blue Swap Scroll first and switch to Red only when the elemental resistance logo appears at the top of your health bar. Also take extra care when fighting with the Red Swap Scroll as your elemental resistances will all be 0.
We slotted in the Bow Charge Plus skill to increase the weapon's charge shot to level 4. With this in mind, we chose the best Bows in their respective elements with a Spread Level 5 on their Level 4 Charge Shot to make sure significant damage is dealt. A talisman with at least 2 levels of Critical Eye is ideal. When Latent Power activates during hunts, this will make your shots deal 100% affinity to monsters' weakspots, further increasing your DPS! |
Meta DPS Bow Build
Fire Element Bow
| Weapon | Slots | ATK | DEF |
|---|---|---|---|
 Hyperion Hyperion
|
ーーー | 300 | 0 |
| Affinity | Element | ||
| 35% | |||
| Rampage Slots | ② | ||
A good rapid bow with a high amount of Affinity which can push our affinity to a hundred (albeit with some excess). However, Hyperion does not have any decoration slots so our build's current skills will remain as is but make sure to change your rampage slots depending on the current monster you're hunting to get a steady additional 5% DPS.
Water Element Bow
| Weapon | Slots | ATK | DEF |
|---|---|---|---|
 Chelae Warbow Chelae Warbow
|
④②① | 340 | 30 |
| Affinity | Element | ||
| 0% | |||
| Rampage Slots | ③ | ||
A strong water elemental spread bow. With this bow, you gain a ④②① which can allows us to complete the build's DPS skills. We can slot in an Element Jewel 2 in the ② slot then replace the previously used deco slots with two Ironshell Jewel 1. The level 4 slot can be slotted in with a Trueshot Jewel+ 4 to gain some damage boost to Dragon Piercer or an Evasion/Jump Jewel 4 for increased evasion capabilities.
Ice Element Bow
| Weapon | Slots | ATK | DEF |
|---|---|---|---|
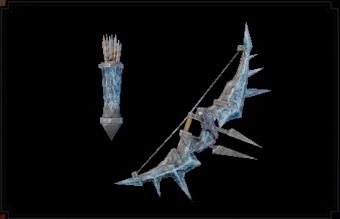 Heaven's Breath Heaven's Breath
|
③ーー | 300 | 0 |
| Affinity | Element | ||
| 0% | |||
| Rampage Slots | ③ | ||
Similar to the Chelae Warbow but as a rapid bow. We have an extra Lv. 3 slot so slotting in an Frost Jewel+ 2 here then replacing the previous two level 1 slots two Ironshell Jewel 1 will maximize our Ice elemental damage.
Thunder Element Bow
| Weapon | Slots | ATK | DEF |
|---|---|---|---|
 Khezu Que C'est+ Khezu Que C'est+
|
③ーー | 330 | 0 |
| Affinity | Element | ||
| 0% | |||
| Rampage Slots | ③ | ||
A spread bow with a lv. 3 slot. Slot in a Hard Bolt Jewel 3 in this slot then replace the three level 1 slots with three Hungerless Jewel 1 or three Steadfast jewels against anomaly monsters.
Dragon Element Bow
| Weapon | Slots | ATK | DEF |
|---|---|---|---|
 Crimson Plume Crimson Plume
|
②ーー | 310 | 0 |
| Affinity | Element | ||
| 0% | |||
| Rampage Slots | ② | ||
Same as the rest of the non fire bows. Use the Two slot to equip a Dragon Jewel+ 2 then replace the two now unslotted jewels with other comfort skills. With only two slots available, we recommend two Cornerstone Jewels for additional safety against enraged monsters.
| Armor | Slots | Skills | |
|---|---|---|---|
|
|
②②ー | ||
|
|
③②① | ||
|
|
④①① | ||
|
|
④①① | ||
|
|
④①① | ||
| Talisman | Attack Boost Lv.3 With a ② slot. | ||
| Rampage Decoration |
|
||
| Decorations |
Element Jewel 1 x5 Quickload is a great jewel but if you don't swap out coatings too much, this can be replaced by two Ironshell Jewels if you're using Ice/Water bows. If bows are not using these two elements, keep the Quickload Jewel into your kit. Bow Ammo Type Up 3x1 Bow Ammo Type Up+ 4x1 Change depending on your chosen bow's ammo type. |
||
| Skills | |
|---|---|
|
Element Attack Lv.5 |
Attack Boost Lv.4
Burst Lv.3 | Weakness Exploit Lv.3 Stamina Surge Lv.3 | Critical Element Lv.3 Charge Master Lv.3 | Marathon Runner Lv.3 Bow Ammo Up Lv.3 | Status Trigger Lv.2 Constitution Lv.2 | Teostra Blessing Lv.2 Fire Attack Lv.2 | Reload Speed Lv.2* Foray Lv.1 | Embolden Lv.1 Element Exploit Lv.1 | Bow Charge Plus Lv.1 As mentioned above in the decoration section, Reload Speed can be removed in favor of two Ironshell decoration 1 to hit Kushala's blessings if the player does not swap coatings but we still highly recommend retaining the Reload Speed. |
Build Merits and Augments
| Weapon Augments | Fire, Water, Ice, and Thunder Bows: Dragon Bows: |
|---|---|
| Armor Augments |
Armor Augments for this build are not necessary. However, feel free to add as you please once you get comfortable with your build! Generally, you'd want to get better skills and more slots for your armor.
Replaceable skills already on the armor: ● Foray ● Fire Attack (except Fire) For damage, aim for any of the following: ● Adrenaline Rush ● Bladescale Hone ● Kushala Blessing Lv.2 (Water and Ice bows) For comfort, aim for any of the following: ● Defiance ● Evade Extender (with Dodgebolt) ● Constitution ● Reload Speed Lv.2 (to free up slots) |
| Build Merits and Notes |
|---|
| A DPS meta bow for Sunbreak's Title Update 3. We slot in the necessary stamina skills and elemental DPS skills to ramp up the bow's elemental damage through the roof while minimizing down time due to stamina management. Thanks to Title Update 3, we now gain access to Teostra Blessing and Kushala Daora Blessing through level 1 decorations but the build will need to sacrifice Reload Speed to slot in the Ironshell decoration that is needed to further increase the DPS of Ice and Water elemental bows. Thankfully, the Risen Teostra legs innately have Teostra Blessing Lv. 2, so this is not the case for fire elemental bows. |
Infinite Stamina Berserk Bow Build
| Armor | Slots | Skills | |
|---|---|---|---|
|
|
④②ー | ||
|
|
③①ー | ||
|
|
③ーー | ||
|
|
③①① | ||
|
|
③ーー | ||
| Talisman | Critical Element Lv.2 With a ②① slot. | ||
| Rampage Decoration |
|
||
| Decorations |
Hard Element Jewel 3 x1 Element Jewel 1 x2 |
||
| Skills | |
|---|---|
|
Critical Eye Lv.6 |
Resentment Lv.5
Elemental Attack Lv.5 | Strife Lv.3 Critical Boost Lv.3 | Critical Element Lv.2 Coalescence Lv.3 | Kushala Blessing Lv.3 Recovery Up Lv.3 | Berserk Lv.2 Bloodlust Lv.2 | Element Exploit Lv.1 Bow Charge Plus Lv.1 |
| Build Merits and Notes |
|---|
|
This is a new non-meta infinite stamina build for the Bow! It utilizes the Chaotic Gore Magala set and the new Kushala Daora's Blessing skil + Recovery Up to maximize the uptime of Berserk which effectively grants us an almost infinite amount of stamina if no damage is taken during the hunt. While having no damage taken may sound intimidating, this build does feature an infinite amount of dodge from Charging Sidestep which allows us to play around the field easily while outputting high amounts of DPS. With this build, we also reach an almost hundred percent affinity without any weakness exploit which allows us to output a high amount of DPS regardless of the monster's hitbox we are hitting. Make sure to always watch your HP bar as having less than 60% red gauge will cause your stamina consumption to start! Once hit, make sure to cancel your Berserk state then recover your HP before jumping into the fray once again! Take note that the bow's decoration slots are not considered into our current build and can be supplemented with more decorations such as Burst or Foray to increase the build's DPS even further. |
Below are the recommended elemental bows to use with this build.
Recommended Fire Element Bow
| Weapon | Slots | ATK | DEF |
|---|---|---|---|
 Hyperion Hyperion
|
ーーー | 300 | 0 |
| Affinity | Element | ||
| 35% | |||
| Rampage Slots | ② | ||
A good rapid bow with a high amount of Affinity which can push our affinity to a hundred (albeit with some excess). However, Hyperion does not have any decoration slots so our build's current skills will remain as is but make sure to change your rampage slots depending on the current monster you're hunting to get a steady additional 5% DPS.
Recommended Water Element Bow
| Weapon | Slots | ATK | DEF |
|---|---|---|---|
 Chelae Warbow Chelae Warbow
|
④②① | 340 | 30 |
| Affinity | Element | ||
| 0% | |||
| Rampage Slots | ③ | ||
A strong water elemental spread bow. With this bow, you gain a ④②① which can allow us to slot in some more DPS skills like Critical Element 3. For the rest of the decoration choices, we recommend a Jumping Jewel to gain some more distance on your Charge steps and a Flinch Free for that ease of experience when playing multiplayer.
Recommended Ice Element Bow
| Weapon | Slots | ATK | DEF |
|---|---|---|---|
 Heaven's Breath Heaven's Breath
|
③ーー | 300 | 0 |
| Affinity | Element | ||
| 0% | |||
| Rampage Slots | ③ | ||
Similar to the Chelae Warbow but as a rapid bow. We have an extra Lv. 3 slot to use so we can slot in some Critical Element to fully level the skill and gain some wanted DPS.
Recommended Thunder Element Bow
| Weapon | Slots | ATK | DEF |
|---|---|---|---|
 Khezu Que C'est+ Khezu Que C'est+
|
③ーー | 330 | 0 |
| Affinity | Element | ||
| 0% | |||
| Rampage Slots | ③ | ||
A spread bow with a lv. 3 slot. Slot in an extra Critical Element similar to the Chelae Warbow and Heaven's Breath.
Recommended Dragon Element Bow
| Weapon | Slots | ATK | DEF |
|---|---|---|---|
 Crimson Plume Crimson Plume
|
②ーー | 310 | 0 |
| Affinity | Element | ||
| 0% | |||
| Rampage Slots | ② | ||
The last selection for our bow choices gose to Crimson Plume with a lv. 2 slot. It is also a spread bow so make sure to place your self close to the enemy to maximize your DPS.
Endgame MR Build: MR 6+
Bloodlust Elemental Spread Bow Builds (MR6-100)
Dereliction and Non-Dereliction
| Weapon | Slots | ATK | DEF |
|---|---|---|---|
 Queen's Rhapsody+ Queen's Rhapsody+
|
④①ー | 330 | 0 |
| Affinity | Element | ||
| 0% | |||
| Rampage Slots | ③ | ||
| Weapon | Slots | ATK | DEF |
|---|---|---|---|
 Chelae Warbow Chelae Warbow
|
④②① | 340 | 30 |
| Affinity | Element | ||
| 0% | |||
| Rampage Slots | ③ | ||
| Weapon | Slots | ATK | DEF |
|---|---|---|---|
 Khezu Que C'est+ Khezu Que C'est+
|
③ーー | 330 | 0 |
| Affinity | Element | ||
| 0% | |||
| Rampage Slots | ③ | ||
| Weapon | Slots | ATK | DEF |
|---|---|---|---|
 Alluring Evelia Alluring Evelia
|
④ーー | 340 | 0 |
| Affinity | Element | ||
| 0% | |||
| Rampage Slots | ③ | ||
| Weapon Augments | ||
|---|---|---|
| Rampage Decoration |
|
|
Dragon Bow Selections
| Weapon | Slots | ATK | DEF |
|---|---|---|---|
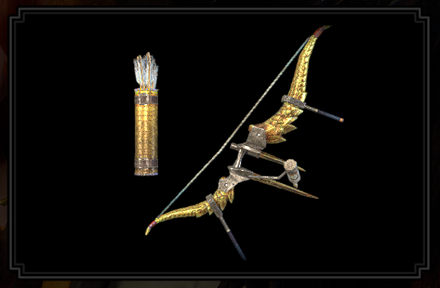 Selene Moonbroken Selene Moonbroken
|
④ーー | 350 | 0 |
| Affinity | Element | ||
| 0% | |||
| Rampage Slots | ② | ||
| Weapon | Slots | ATK | DEF |
|---|---|---|---|
 Crimson Plume Crimson Plume
|
②ーー | 310 | 0 |
| Affinity | Element | ||
| 0% | |||
| Rampage Slots | ② | ||
Crimson Plume is only available at MR 70+ after defeating Master Rank Crimson Glow Valstrax.
| Weapon Augments | ||
|---|---|---|
| Rampage Decoration |
|
|
'Risky' Dereliction Build
| Armor | Slots | Skills | |
|---|---|---|---|
|
|
③ーー |
Coalescence Lv. 2
Bloodlust Lv. 1
|
|
|
|
③②① | ||
|
|
④②ー | ||
|
|
②①① | ||
|
|
③②② |
Resentment Lv. 1
Dereliction Lv. 1
|
|
| Talisman | Attack Boost 3 with a ②① slot | ||
| Decorations |
Hard Element Jewel 3 x1
Element Jewel+ 2 x1 For the Crimson Plume Dragon Bow: For the Water Bow: Fire and Water Bow: x2 Ice, Thunder, and G.Rathian Bow: x1 Crimson Glow Valstrax Bow: none |
||
| Skills | |
|---|---|
| Rampage Skill | Element Exploit to increase elemental damage against each element or For the Dragon Bow Build: Swap between Wyvern Exploit, Anti-Aerial Species, Anti-Aquatic Species, or Fanged Exploit depending on the monster. |
|
Element Attack Lv.5
Attack Boost Lv.4| Critical Boost Lv.3 Weakness Exploit Lv.3 | Constitution Lv.3 Coalescence Lv.2 (Lv.3 on Water Bow) Spread Up Lv.3 | Stamina Surge Lv.2 Razor Sharp Lv.2 | Spare Shot Lv.2 Reload Speed Lv.2 | Resentment Lv.1 Bow Charge Plus Lv.1 | Flinch Free Lv.1 Dereliction Lv.1 | Bloodlust Lv.1 Embolden Lv.1 | Redirection Lv.1 Element Exploit Lv.1 | Intrepid Heart Lv.1 Recovery Speed Lv.1-2 (except for the Crimson Plume Bow) |
|
'Safe' Non-Dereliction Build
| Armor | Slots | Skills | |
|---|---|---|---|
|
|
④①① | ||
|
|
③②① | ||
|
|
②②ー |
Evade Window Lv. 3
Adrenaline Rush Lv. 2
|
|
|
|
②①① | ||
|
|
③②ー | ||
| Talisman | Attack Boost 3 with a ②① slot | ||
| Decorations |
Hard Element Jewel 3 x1
Element Jewel 1 x2 For the Crimson Plume Dragon Bow: For the Water Bow: x2 Fire and Water Bow: x2 Ice, Thunder, and G.Rathian Bow: x1 Crimson Glow Valstrax Bow: none |
||
| Skills | |
|---|---|
| Rampage Skill | Element Exploit to increase elemental damage against each element or For the Dragon Bow Build: Swap between Wyvern Exploit, Anti-Aerial Species, Anti-Aquatic Species, or Fanged Exploit depending on the monster. |
|
Element Attack Lv.5
Attack Boost Lv.4| Critical Boost Lv.3 Weakness Exploit Lv.3 | Constitution Lv.3 Stamina Surge Lv.3 | Spread Up Lv.3 Windproof Lv.3 | Evade Window Lv.3 Reload Speed Lv.2 | Adrenaline Rush Lv.2 Coalescence Lv.1 (Lv.2 for the Water Bow) Critical Element Lv.1 | Bow Charge Plus Lv.1 Razor Sharp Lv.1 | Spare Shot Lv.1 Flinch Free Lv.1 | Bloodlust Lv.1 Embolden Lv.1 | Element Exploit Lv.1 Recovery Speed Lv.1-2 (except for the Crimson Plume Bow) |
|
| Build Merits and Notes |
|---|
| Two variations of this build are presented; the 'Risky' Dereliction Build and the 'Safe' Non-Dereliction Build.
The 'Risky' Dereliction Build boasts significant firepower with damage boosts from Dereliction and at least two levels of Coalescence. The trade-off is that with Dereliction and Bloodlust active, your health degenerates faster at the early stages of the fight. This will require you to safely position since you need to be close to the monster to get the most out of your spread shots. We recommend the Dodgebolt switch skill for this playstyle. The 'Safe' Non-Dereliction Build has a slightly lower dps compared to the first one. However, this is replaced with comfortability of not worrying about the qurios eating your health bar. This build also makes use of Lucent Nargacuga's vambraces, the Lambent Wristrays. This armor piece has an inherent 3 levels of Evade Window and 2 levels of Adrenaline Rush. With this armor piece, it's easier to get extra damage boosts while evading. With this in mind, we also recommend the Dodgebolt switch skill for this build. These builds assume that no Armor Augmentations have been made. |
TU2 Critical Element Bow Build
| Armor | Slots | Skills |
|---|---|---|
|
|
①①① |
Critical Eye Lv. 3
Critical Boost Lv. 1
|
|
|
③②ー | |
|
|
④①① | |
|
|
③①① | |
|
|
④①ー | |
Fire Elemental Bow
| Weapon | Slots | ATK | DEF |
|---|---|---|---|
 Creeping Darkness Creeping Darkness
|
②①① | 300 | 0 |
| Affinity | Element | ||
| 30% | |||
| Rampage Slots | ② | ||
| Talisman | Pierce Up Lv. 2 with a ②② slot | ||
|---|---|---|---|
| Rampage Decoration |
|
||
| Decorations | |||
| Skills | |
|---|---|
|
Critical Eye Lv.5
| Fire Attack Lv. 5
Critical Boost Lv.3 | Weakness Exploit Lv.3 Critical Element Lv.3 | Hunger Resistance Lv.3 Burst Lv.3 | Handicraft Lv. 2 Constitution Lv.2 | Pierce Up Lv.2 Spread Up Lv.2 | Attack Boost Lv.1 Resentment Lv.1 | Bow Charge Plus Lv.1 Defense Boost Lv.1 | Flinch Free Lv.1 Sneak Attack Lv.1 | Element Exploit Lv.1 Intrepid Heart Lv.1 |
| Build Merits and Notes |
|---|
| This is a Fire Elemental bow build that utilizes a monster's elemental weakness to your advantage. By having Fire Attack at Lv.5 paired with Critical Element at Lv.3, it increases your elemental damage a significant amount. Having Critical Eye at Lv.5 gives you a chance to deal more damage, on top of its 30% affinity. With a Lv.3 Burst, it should increase your attack and elemental damage. For added stamina management, consume Invigorating Dango for the Dango Fighter effect. We recommend using Power Coating or Close-Range Coating for this build. You can swap out Flaming Espinas Heel with Rakna Greaves X for both its Lv.2 Stamina Surge and Lv.3 Constitution if you need the added Constitution. We also recommend upgrading your weapon to have the Attack Boost, Affinity Boost, and Elemental Boost augmentations. |
Water Elemental Bow
| Weapon | Slots | ATK | DEF |
|---|---|---|---|
 Chelae Warbow Chelae Warbow
|
④②① | 340 | 30 |
| Affinity | Element | ||
| 0% | |||
| Rampage Slots | ③ | ||
| Talisman | Constitution Lv 3, Critical Element Lv 1, with a ②② slot | ||
|---|---|---|---|
| Rampage Decoration |
|
||
| Decorations | |||
| Skills | |
|---|---|
|
Water Attack Lv.5
| Constitution Lv.5
Critical Eye Lv.5 | Critical Element Lv.3 Spread Up Lv.3 | Critical Boost Lv.3 Weakness Exploit Lv.3 | Hunger Resistance Lv. 3 Burst Lv.3 | Handicraft Lv.2 Attack Boost Lv.1 | Resentment Lv.1 Bow Charge Plus Lv.1 | Sneak Attack Lv.1 Element Exploit Lv.1 | Intrepid Heart Lv.1 Flinch Free Lv.1 |
| Build Merits and Notes |
|---|
| This is a Water Elemental bow build that utilizes a monster's elemental weakness to your advantage. By having Water Attack at Lv.5 paired with Critical Element at Lv.3, it increases your elemental damage a significant amount. Having Critical Eye at Lv.4 gives you a chance to deal more damage since Chelae Bow has 0% affinity. With a Lv.3 Burst, it should increase your attack and elemental damage. For added stamina management, consume Invigorating Dango for the Dango Fighter effect. We recommend using Close-Range Coating for this build. You can swap out Flaming Espinas Heel with Rakna Greaves X for both its Lv.2 Stamina Surge and Lv.3 Constitution if you don't have a talisman with decent Constitution stats. We also recommend upgrading your weapon to have the Affinity Boost and Elemental Boost augmentations. |
Thunder Elemental Bow
| Weapon | Slots | ATK | DEF |
|---|---|---|---|
 Khezu Que C'est+ Khezu Que C'est+
|
③ーー | 330 | 0 |
| Affinity | Element | ||
| 0% | |||
| Rampage Slots | ③ | ||
| Talisman | Pierce Up Lv. 2, with a ②② slot | ||
|---|---|---|---|
| Rampage Decoration |
|
||
| Decorations | |||
| Skills | |
|---|---|
|
Thunder Attack Lv.5
| Critical Eye Lv.4
Critical Boost Lv.3 | Weakness Exploit Lv.3 Critical Element Lv.3 | Spread Up Lv.3 Hunger Resistance Lv.3 | Burst Lv.3 Handicraft Lv.2 | Constitution Lv.2 Pierce Up Lv.2 | Attack Boost Lv.1 Resentment Lv.1 | Bow Charge Plus Lv.1 Sneak Attack Lv.1 | Element Exploit Lv.1 Intrepid Heart Lv.1 |
| Build Merits and Notes |
|---|
| This is a Thunder Elemental bow build that utilizes a monster's elemental weakness to your advantage. By having Thunder Attack at Lv.5 paired with Critical Element at Lv.3, it increases your elemental damage a significant amount. Having Critical Eye at Lv.4 gives you a chance to deal more damage since Khezu Que C'est+ Bow has 0% affinity. With a Lv.3 Burst, it should increase your attack and elemental damage. For added stamina management, consume Invigorating Dango for the Dango Fighter effect. We recommend using Close-Range Coating for this build. You can swap out Flaming Espinas Heel with Rakna Greaves X for both its Lv.2 Stamina Surge and Lv.3 Constitution if you don't have a talisman with decent Constitution stats. We also recommend upgrading your weapon to have the Affinity Boost and Elemental Boost augmentations. |
Ice Elemental Bow
| Weapon | Slots | ATK | DEF |
|---|---|---|---|
 Heaven's Breath Heaven's Breath
|
③ーー | 300 | 0 |
| Affinity | Element | ||
| 0% | |||
| Rampage Slots | ③ | ||
| Talisman | Weakness Exploit Lv. 2 with a ②① slot | ||
|---|---|---|---|
| Rampage Decoration |
|
||
| Decorations | |||
| Skills | |
|---|---|
|
Ice Attack Lv.5
| Critical Eye Lv.3
Critical Boost Lv.3 | Weakness Exploit Lv.3 Critical Element Lv.3 | Normal/Rapid Up Lv.3 Hunger Resistance Lv.3 | Burst Lv.3 Handicraft Lv.2 | Constitution Lv.2 Spread Up Lv.2 | Attack Boost Lv.1 Resentment Lv.1 | Bow Charge Plus Lv.1 Flinch Free Lv.1 | Sneak Attack Lv.1 Element Exploit Lv.1 | Intrepid Heart Lv.1 |
| Build Merits and Notes |
|---|
| This is an Ice Elemental bow build that utilizes a monster's elemental weakness to your advantage. By having Ice Attack at Lv.5 paired with Critical Element at Lv.3, it increases your elemental damage a significant amount. Other offensive skills are also incorporated to bolster attack. For added stamina management, consume Invigorating Dango for the Dango Fighter effect. We recommend using Power Coating or Close-Range Coating for this build. Additionally, remember to replace Anti-Species Jewel on the weapon's Rampage Decoration slot depending on the monster you will hunt! You can swap out Flaming Espinas Heel with Rakna Greaves X for both its Lv.2 Stamina Surge and Lv.3 Constitution if you need the added Constitution. We also recommend upgrading your weapon to have the Attack Boost, Affinity Boost, and Elemental Boost augmentations. |
Dragon Elemental Bow
| Weapon | Slots | ATK | DEF |
|---|---|---|---|
 Crimson Plume Crimson Plume
|
②ーー | 310 | 0 |
| Affinity | Element | ||
| 0% | |||
| Rampage Slots | ② | ||
| Talisman | Spread Up Lv. 1, with a ②② slot. If you don't have | ||
|---|---|---|---|
| Rampage Decoration |
|
||
| Decorations | |||
| Skills | |
|---|---|
|
Critical Eye Lv.5
| Dragon Attack Lv.5
Critical Boost Lv.3 | Weakness Exploit Lv.3 Critical Element Lv.3 | Spread Up Lv.3 Hunger Resistance Lv.3 | Burst Lv.3 Handicraft Lv.2 | Constitution Lv.2 Attack Boost Lv.1 | Resentment Lv.1 Bow Charge Plus Lv.1 | Sneak Attack Lv.1 Element Exploit Lv.1 | Intrepid Heart Lv.1 |
| Build Merits and Notes |
|---|
| This is a Dragon Elemental bow build that utilizes a monster's elemental weakness to your advantage. By having Dragon Attack at Lv.5 paired with Critical Element at Lv.3, it increases your elemental damage a significant amount. Having Critical Eye at Lv.4 gives you a chance to deal more damage since the Crimson Plume Bow has 0% affinity. With a Lv.3 Burst, it should increase your attack and elemental damage. For added stamina management, consume Invigorating Dango for the Dango Fighter effect. We recommend using Close-Range Coating and Power Coating for this build. You can swap out Flaming Espinas Heel with Rakna Greaves X for both its Lv.2 Stamina Surge and Lv.3 Constitution if you don't have a talisman with decent Constitution stats. We also recommend upgrading your weapon to have the Affinity Boost and Elemental Boost augmentations. |
Master Rank Build (Mid Game): MR 3-6
Mid Game Elemental Bow Build
| Armor | Slots | Skills | |
|---|---|---|---|
|
|
ーーー |
Bow Charge Plus Lv. 1
|
|
|
|
①①① | ||
|
|
②ーー | ||
|
|
②②ー |
Critical Element Lv. 2
Poison Resistance Lv. 1
|
|
|
|
①①① | ||
| Talisman | Constitution Lv. 2 with ② slot. | ||
| Rampage Decoration | |||
| Decorations |
Elemental Jewel 1 x 5 |
||
| Skills | |
|---|---|
Elemental Attack Lv. 5 | Constitution Lv.4 Latent Power Lv.4 | Critical Boost Lv. 3 Critical Element Lv.3 | Weakness Exploit Lv.3 Flinch Free Lv. 2 | Thunder Attack Lv.2 Bow Charge Plus Lv.1 | Poison Resistance Lv.1 Hunger Resistance Lv.1 |
| Build Merits and Notes |
|---|
| A full elemental bow armor set featuring several affinity skills to bump up Critical Element's damage! We also get lv.4 Constitution levels to maximize our powershots, charging sidesteps, etc. We do not easily get high affinity levels in this build with 50% coming from weakspots so make sure to maximize this by focusing monster weakspots or Critical Element and the whole build's damage output will suffer! |
Fire Elemental Bow
| Weapon | Slots | ATK | DEF |
|---|---|---|---|
 Rosenbogen+ Rosenbogen+
|
①ーー | 320 | 0 |
| Affinity | Element | ||
| 20% | |||
| Rampage Slots | ① | ||
Water Elemental Bow
| Weapon | Slots | ATK | DEF |
|---|---|---|---|
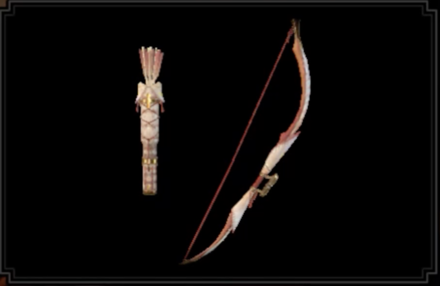 Elysian Manna Elysian Manna
|
①ーー | 310 | 0 |
| Affinity | Element | ||
| 10% | |||
| Rampage Slots | ② | ||
Thunder Elemental Bow
| Weapon | Slots | ATK | DEF |
|---|---|---|---|
 Beastking Thunderbow+ Beastking Thunderbow+
|
③ーー | 350 | 0 |
| Affinity | Element | ||
| 0% | |||
| Rampage Slots | ① | ||
Ice Elemental Bow
| Weapon | Slots | ATK | DEF |
|---|---|---|---|
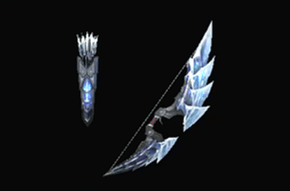 Frostmoon Crescentbow+ Frostmoon Crescentbow+
|
①①ー | 330 | 0 |
| Affinity | Element | ||
| 0% | |||
| Rampage Slots | ② | ||
Dragon Elemental Bow
| Weapon | Slots | ATK | DEF |
|---|---|---|---|
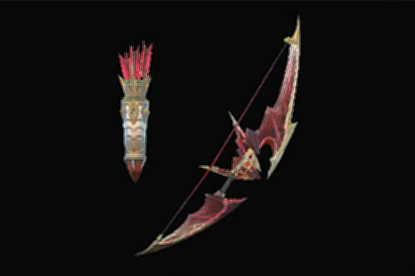 Duke's Bloodwings Duke's Bloodwings
|
④ーー | 330 | 0 |
| Affinity | Element | ||
| 0% | |||
| Rampage Slots | ① | ||
Master Rank Build (Early Game): MR 1-2
Starter Raw Bow Build
| Weapon | Slots | ATK | DEF |
|---|---|---|---|
 Grand Glowing Oath Grand Glowing Oath
|
③ーー | 300 | 10 |
| Affinity | Element | ||
| 0% |
- |
||
| Rampage Slots | ② | ||
| Armor | Slots | Skills | |
|---|---|---|---|
|
|
①①ー | ||
|
|
④ーー | ||
|
|
③ーー |
Constitution Lv. 3
Fortify Lv. 1
|
|
|
|
④①① |
Attack Boost Lv. 2
|
|
|
|
①①ー |
Attack Boost Lv. 2
Critical Eye Lv. 2
|
|
| Talisman | Weakness Exploit Lv. 2 with ② slot. | ||
| Rampage Decoration | |||
| Decorations |
|
||
| Skills | |
|---|---|
Attack Boost Lv.7
| Critical Eye Lv.5 Constitution Lv. 4 | Critical Boost Lv.3 Weakness Exploit Lv.3 | Hunger Resistance Lv.3 Defense Boost Lv. 2 | Flinch Free Lv. 1 Muck Resistance Lv.1 | Fortify Lv.1 Jump Master Lv. 1 |
| Build Merits and Notes |
|---|
| A stamina centered build with the necessary offensive stats for an easy to use starter build for bows in Master Rank!We use the Grand Glowing Oath as our raw bow for its raw damage and rapid shots at charge shot levels 2 and 3. Aside from Rapid shots, it also has a natural level 4 charge shot allowing us to remove the Master Bow Feather for a better head piece! |
Best Skills and Explanation
Best Damage Skills
These skills make it possible to deal extra damage! Aim for these skills for maximum DPS to defeat those monsters easier and finish those quests faster!
| Best Skills | Explanation |
|---|---|
| Bow Charge Plus ★★★ |
Increases maximum charge level, making it possible for your Bow to reach its maximum potential. This is a must-have skill for any endgame Bow Build, and a skill you should start considering when making one! |
| Charge Shot Type Up ★★★ |
Increase your Charge Shot damage even more with this skill, which greatly contributes to your DPS! We recommend maxing this skill out before anything else. Normal/Rapid Up | Spread Up | Pierce Up |
| Weakness Exploit ★★★ |
A staple skill for any meta build. Increases your affinity when hitting weak spots by 50% at max rank, increasing your DPS significantly. |
| Element Attack ★★★ |
Sunbreak featured buffs for elemental damage, making elemental builds viable. Max out this skill to increase damage against monsters weak to a specific element and watch your numbers go up! Best used with Spread Bows. Fire | Water | Ice | Thunder | Dragon |
| Critical Eye ★★★ |
Bows can do continuous attacks, so make sure to raise your affinity to get the most of out the weapon's DPS. Aim for 80-100% affinity! |
| Critical Boost ★★★ |
Amplifies critical strike damage, increasing your DPS on high-affinity Bow builds. |
| Burst ★★★ |
Fast, continuous hits let this skill shine to its full potential, something the Bow can often do! Max this skill out or put in at least a level to feel a jump in your DPS. Available in Sunbreak Base Game |
| Element Exploit ★★ |
Amplify your damage against monsters weak to a specific element with this skill. A single point of it is enough to deal significant damage. Available in Sunbreak Free Title Update 1 |
| Dereliction ★★ |
Using the Red Scroll increases the Bow's elemental values, improving overall damage. Just be wary of your health! Best paired with the Strife skill from the Chaotic Gore Magala Armor Set and/or Resentment. Available in Sunbreak Base Game |
| Bloodlust ★★ |
Overcome the Frenzy Virus to power up with this skill; best paired with Coalescence. Available in Sunbreak Base Game |
| Adrenaline Rush ★★ |
Using the Dodgebolt playstyle on Bows will activate this constantly. Consider this skill for more DPS. Synergizes well with Evade Window or 2 levels of Embolden. Available in Sunbreak Free Title Update 1 |
| Dragon Conversion ★★ |
When activated, this skill from the Risen Crimson Glow Valstrax Armor will benefit elemental builds, increasing DPS even further! Available in Sunbreak Free Title Update 4 |
| Attack Boost ★★ |
Increases attack power. This skill is a lesser priority since it's much more ideal to focus on affinity with Bows. If you must, aim for at least 4 levels. |
| Strife + Berserk ★★ |
This skill combination from the Chaotic Gore Magala Armor Set will not only contribute to your damage, but will also ensure infinite stamina and immortality, just be wary of the health drain! You can mitigate this by slotting in skills such as 3 levels of Kushala Blessing and/or Blood Rite. Available in Sunbreak Free Title Update 3 |
| Charge Master ★★ |
With the buffs to elemental damage, Charge Master becomes a useful skill when you can maintain max charge for most of the hunt. Available in Sunbreak Base Game |
| Powder Mantle ★ |
This skill from the Risen Teostra Armor provides your Bow combos with additional blast damage every time it activates, contributing greatly to DPS. Only consider this skill whenever it's possible to build around it! Available in Sunbreak Free Title Update 3 |
| Bladescale Hone ★ |
Perfect for the Dodgebolt playstyle and for bows that don't support Power Coatings. Only consider this skill whenever it's possible to build around it! Available in Sunbreak Base Game |
| Critical Element ★ |
Amplifying elemental damage is the next step to increasing your damage output as a Spread Elemental Bow player. Only slot this skill in if possible! |
Best Comfort Skills
These are skills that make managing weapon mechanics a lot easier. Damage is only part of the equation - taking time to slot in comfort skills that increase consistency & comfort will also increase overall DPS!
| Best Skills | Explanation |
|---|---|
| Heaven-Sent ★★★ |
From the heavenly armor of Amatsu, maxing this skill out will grant you infinite stamina. This will make fights with the Bow much easier. Equipping this skill on its max level will allow you to forgo any stamina-managing skills, which makes it possible for you to focus more on the ones that contribute greatly to your DPS! Available in Sunbreak Free Title Update 5 |
| Constitution ★★★ |
No Bow Build is complete without this skill! Pulling off combos will eat your stamina bar fairly quick, so having this stamina-managing skill can let you output more, increasing overall DPS! |
| Stamina Surge ★★★ |
Along with Constitution, this is a staple skill for any Bow Build. Getting your stamina back up quickly will allow you to pull off more combos, which can help you finish a monster faster! 2 levels of this skill is enough for most builds. |
| Reload Speed ★★★ |
This will allow you to switch coatings faster, from Power Coatings to Status Coatings, making a fight much more simple to manage. For Bows, 2 levels of this skill is enough. |
| Marathon Runner ★★ |
Another stamina-managing skill that can help you out while you're running around, charging your Bow! |
| Defiance ★★ |
Three levels of this skill prevent most roars, tremors, and winds from interrupting attacks. The Cornerstone Jewel is a level 1 decoration, so slot it in whenever possible! Available in Sunbreak Free Title Update 1 |
| Shock Absorber Flinch Free ★★ |
Useful especially in multiplayer so no minor attacks can interrupt you or your team's combos! |
| Intrepid Heart ★ |
Whenever the gauge above your health bar is full, this skill can be useful in preventing monster attacks from interrupting your combos. Available in Sunbreak Free Title Update 2 |
| Furious ★ |
Activate this skill for a temporary infinite stamina boost. Consider this skill only when you can build around it! Available in Sunbreak Base Game |
| Embolden or Evade Window ★ |
These skills help out in extending dodging invincibility. Slot this skill in only when you're having trouble timing Dodgebolt! Available in Sunbreak Free Title Update 2 |
| Evade Extender ★ |
Evade Extender can help mitigate the very short dodge of Dodgebolt. Even Lv. 1 of this skill should be enough. Avoid adding this skill with Charging Sidestep as it could cause problems with positioning. |
Monster Hunter Rise Related Guides

|
• Weapons marked withNEW have been updated. • Weapons withUP have been reviewed and does not warrant an updated build from the Bonus Update. |
| All Weapon Build Guides | |
|---|---|
NEW Low Rank | High Rank Master Rank |
NEW Low Rank | High Rank Master Rank |
NEW Low Rank | High Rank Master Rank |
NEW Low Rank | High Rank Master Rank |
NEW Low Rank | High Rank Master Rank |
NEW Low Rank | High Rank Master Rank |
NEW Low Rank | High Rank Master Rank |
NEW Low Rank | High Rank Master Rank |
NEW Low Rank | High Rank Master Rank |
NEW Low Rank | High Rank Master Rank |
NEW Low Rank | High Rank Master Rank |
NEW Low Rank | High Rank Master Rank |
NEW Low Rank | High Rank Master Rank |
UP Low Rank | High Rank Master Rank |
Other Builds
| Other Build Guides | |
|---|---|
| General High Rank Builds and Best Equipment | Buddy Equipment Builds Palico | Palamute |
Comment
why would you put a build enabling jewel (kushala blessing) that is only obtainable for players WELL over MR10 in an MR10 build?? wtf is wrong with you guys
Author
Sunbreak Bow Builds (Master Rank)
improvement survey
03/2026
improving Game8's site?

Your answers will help us to improve our website.
Note: Please be sure not to enter any kind of personal information into your response.

We hope you continue to make use of Game8.
Rankings
- We could not find the message board you were looking for.
Gaming News
Popular Games

Genshin Impact Walkthrough & Guides Wiki

Honkai: Star Rail Walkthrough & Guides Wiki

Umamusume: Pretty Derby Walkthrough & Guides Wiki

Pokemon Pokopia Walkthrough & Guides Wiki

Resident Evil Requiem (RE9) Walkthrough & Guides Wiki

Monster Hunter Wilds Walkthrough & Guides Wiki

Wuthering Waves Walkthrough & Guides Wiki

Arknights: Endfield Walkthrough & Guides Wiki

Pokemon FireRed and LeafGreen (FRLG) Walkthrough & Guides Wiki

Pokemon TCG Pocket (PTCGP) Strategies & Guides Wiki
Recommended Games

Diablo 4: Vessel of Hatred Walkthrough & Guides Wiki

Cyberpunk 2077: Ultimate Edition Walkthrough & Guides Wiki

Fire Emblem Heroes (FEH) Walkthrough & Guides Wiki

Yu-Gi-Oh! Master Duel Walkthrough & Guides Wiki

Super Smash Bros. Ultimate Walkthrough & Guides Wiki

Pokemon Brilliant Diamond and Shining Pearl (BDSP) Walkthrough & Guides Wiki

Elden Ring Shadow of the Erdtree Walkthrough & Guides Wiki

Monster Hunter World Walkthrough & Guides Wiki

The Legend of Zelda: Tears of the Kingdom Walkthrough & Guides Wiki

Persona 3 Reload Walkthrough & Guides Wiki
All rights reserved
©CAPCOM CO., LTD. ALL RIGHTS RESERVED.
The copyrights of videos of games used in our content and other intellectual property rights belong to the provider of the game.
The contents we provide on this site were created personally by members of the Game8 editorial department.
We refuse the right to reuse or repost content taken without our permission such as data or images to other sites.


![Monster Hunter Stories 3 Review [First Impressions] | Simply Rejuvenating](https://img.game8.co/4438641/2a31b7702bd70e78ec8efd24661dacda.jpeg/thumb)


there's too many 3 slot decorations for the available slots in the MR 6+ non dereliction build, you need 4 slots for one hard element jewel and three spread jewels but you only have 3 slots available as one of the slots is also taken up by the mighty bow jewel