This survey will take about 1 minute.
Your answers will help us to improve our website.
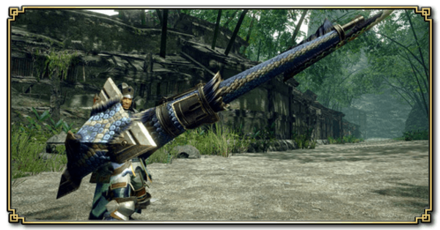
Monster Hunter Rise: Sunbreak
Sunbreak Gunlance Guide: Combos, Controls and Moveset
★ All Title Updates now available for ALL PLATFORMS!
┗ Title Update 4 | Title Update 5 | Bonus Update
┗ Check out all our Best Builds For Every Weapon!
┗ TU4 Monsters: Velkhana | Risen C.G. Valstrax
┗ TU5 Monsters: Amatsu | Risen Shagaru Magala
┗ Bonus Update Monster: Primordial Malzeno

This is a guide to the Gunlance, a weapon in Monster Hunter Rise: Sunbreak (MH Rise). Read on to learn about new Gunlance controls and combos, how to use Gunlance shelling, Gunlance's Blast Dash as well as details on Gunlance Switch Skills.
| All Gunlance Guides | ||
|---|---|---|
 Trees & Full List Trees & Full List |
 How to Use How to Use |
 Best Builds Best Builds |
List of Contents
Gunlance Balance Changes
Update 15.0
| Gunlance Balance Changes and Fixes (Update 15.0) |
|---|
| ・Increased the power of the the Gunlance's Wyrmstake Cannon (Normal, Long, Wide). ・Increased the power of the Gunlance's shelling (Wide only). |
Update 13.0
| Gunlance Balance Changes and Fixes (Update 13.0) |
|---|
| ・Fixed an issue where the forward movement of Bullet Barrage would cause Large Barrel Bombs and Mega Barrel Bombs to explode at unintended times. ・Fixed an issue with the timing of chaining a Lunging Upthrust into a Quick Reload and finally an Overhead Smash, where using the button assigned for an Overhead Smash would mistakenly chain into a Shelling instead. ・Ground Splitter: Effect duration increased, Wirebug Gauge recovery speed increased. ・Hail Cutter: Wirebug Gauge cost changed to 1; Wirebug recovery speed changed to Medium. ・Ground Splitter: Fixed an inconsistency between the player animation and the duration of the blowback negation and damage reduction effectys would occur after successfully hitting a monster with Ground Splitter. |
Ground Splitter effect duration and wirebug gauge recovered speed have been buffed.
Hail Cutter has also become more efficient with its Wirebug Gauge cost changed to 1. With these changes in mind, we are expecting to see more optimal plays for the gunlance.
Update 10.0
| Gunlance Balance Changes and Fixes (Update 10.0) |
|---|
| ・Hail Cutter: Wirebug Gauge recovers more quickly, and Wyvern's Fire cooldown reduction has been increased. ・Shelling levels 4 and 5 have been adjusted. ・[Normal Type (Levels 4 and 5)] ・ Shelling (Level 4): Attack power slightly increased ・ Shelling (Level 5): Attack power slightly increased ・ Charged Shelling (Level 4): Attack power slightly increased ・ Charged Shelling (Level 4): Attack power slightly increased ・ Wyvern's Fire (Level 4): Attack power increased; Elemental scaling slightly increased ・ Wyvern's Fire (Level 5): Attack power increased; Elemental scaling increased ・ Burst Fire (Level 4): Attack power slightly increased ・ Burst Fire (Level 5): Attack power slightly increased ・[Long Type (Levels 4 and 5)] ・ Shelling (Level 4): Attack power slightly increased ・ Shelling (Level 5): Attack power slightly increased ・ Wyvern's Fire (Level 4): Attack power slightly increased; Elemental scaling slightly increased ・ Wyvern's Fire (Level 5): Attack power increased; Elemental scaling increased ・ Burst Fire (Level 4): Attack power slightly increased ・ Burst Fire (Level 5): Attack power slightly increased ・[Wide Type (Levels 4 and 5)] ・ Shelling (Level 4): Attack power slightly increased ・ Shelling (Level 5): Attack power slightly increased ・ Charged Shelling (Level 5): Attack power slightly increased ・ Strong Charged Shelling (Level 4): Attack power slightly increased ・ Strong Charged Shelling (Level 5): Attack power slightly increased ・ Wyvern's Fire (Level 4): Attack power increased; Elemental scaling slightly increased ・ Wyvern's Fire (Level 5): Attack power increased; Elemental scaling increased ・ Burst Fire (Level 4): Attack power slightly increased ・ Burst Fire (Level 5): Attack power slightly increased ・Fixed a bug where the delay was set too short between performing a sidestep after a large backstep. ・Guard Edge: Fixed a bug where sometimes you could not perform a Guard Edge immediately after stopping moving while guarding. ・Wyvern's Fire: Fixed a bug where the aftereffects of Wyvern's Fire would appear displaced on certain types of Gunlances. ・Wyvern's Fire: Fixed a bug where the explosion from Wyvern's Fire would sometimes not properly register a sloped surface when using Wyvern's Fire on a slope. ・Wyvern's Fire: Fixed a bug where you could not combo into Wyvern's Fire after chaining an Overhead Smash into a sidestep. |
Gunlance was fun to use in MHRise so it's great that it got really great buffs across the board, mostly to keep up with the damage needed to dispose of MR monsters! What more, the cooldown for the Wyvern Fire and Wirebug cooldown after using Hail Cutter were shortened - making these already staple moves an even greater pick.
Gunlance is very comfortable to use in Sunbreak!
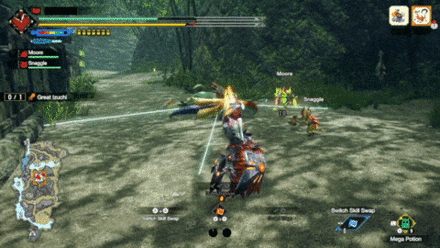
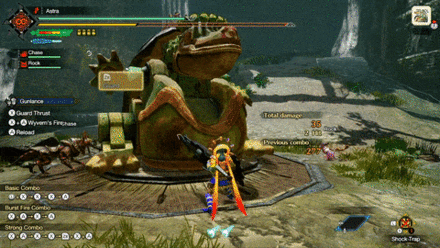
Gunlance New Sunbreak Attacks and Moves
Official Gunlance Preview Video
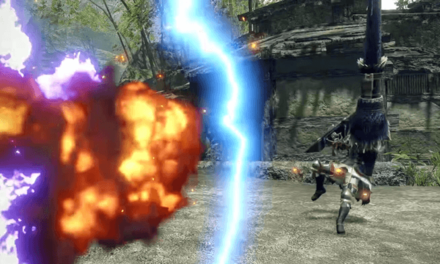
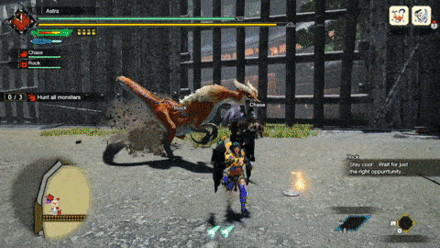
Silkbind Attack: Bullet Barrage

The hunter uses a Wirebug to close in on the monster, then it unleashes everything loaded in the Gunlance! Note that a full reload will be done first if any of the ammunition (including Wyvern's Fire cooldown) is not ready before performing the attack, so time it properly!
The reload and blast dash also cannot be stopped by roars or enemy attacks.
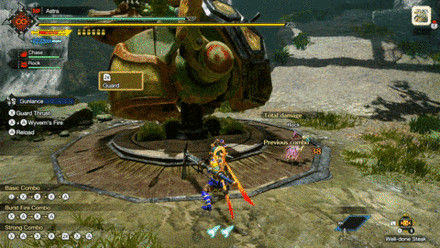
Switch Skill: Erupting Cannon

This Switch Skill fires an exploding stake at the target. The Gunlance heats up after the explosion, indicated by a blue flame, and enhances all slashing attacks for a limited time. This will likely switch with the Wyrmstake Cannon.
Silkbind Attack: Reverse Blast
Not introduced in any trailer, Reverse Blast is an additional Silkbind Attack added to the Sunbreak Expansion. The reverse of Blast Dash, you use the thrust from your Gunlance to increase the gap between you and the monster. Use this when you're in a pinch and need to retreat.
Monster Hunter Rise: Sunbreak
Release Date and New Monsters
How Good is the Gunlance?
Tier List Ranking
| MHRise Ranking | → | Sunbreak Ranking |
|---|---|---|
(S - A - B) 3 Level Tier |
(SS - S - A) 3 Level Tier |
The Gunlance received really great weapon improvements in the Sunbreak expansion. Bullet Barrage gave it a big burst damage option that unloads all its ammo in one, single attack.
However, this over-reliance on Switch Skills and Wirebugs stunded this weapon's effectiveness. It also do not benefit from the elemental burst meta we have today.
Gunlance Strengths
Shelling Neglects Monster Armor
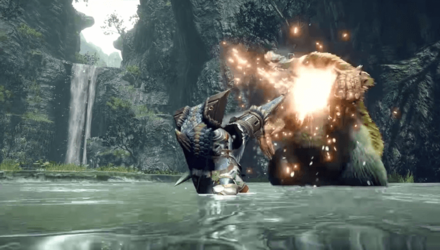
Shelling attacks ignore monster armor so Gunlance players revolve their playstyle around it. This is mostly where the Gunlance shows its full potential!
Physical Attacks Are Equally Strong!
Though shelling is where the power lies, Gunlance's physical attacks are not too shabby either! Depending on the situation, you can build your Gunlance for poking only!
Long Reach and High Aim
Like the Lance, the Gunlance also has a long reach and can aim high. This enables the hunter to reach the high heads of Anjanath or hit flying enemies like Rathalos!
Gunlances Can Guard!
The Gunlance is also top tier when it comes to guarding! It is possible to bombard enemies with shelling while guarding to keep this in mind!
Gunlance Weaknesses

Shelling Consumes Sharpness
Unfortunately, shelling rapidly consumes sharpness. Remember to use Guard Edge or sharpen during the fight! We suggest putting in the skills Razor Sharp or Protective Polish to slow down sharpness degradation. If not, just opt with Speed Sharpening so you can sharpen in less time.
Very Poor Mobility
When unsheathed, the Gunlance reduces the hunter to a crawl. Sheath your weapon or build your Gunlance for Evade Extend to reposition effectively! Blast Dash can be used to mitigate this but you will not have access to Charged Shelling anymore.
Wyvern's Fire and Shell Ammo Needs Proper Management
In addition to managing sharpness, Gunlance users must also manage the Gunlance's Wyvern's Fire and Shelling ammo. This requires a steady presence of mind whenever you play!
Gunlance Controls
| Controls | Action | |
|---|---|---|
| PC |
PS |
Lateral Thrust |
| Switch |
Xbox |
|
| PC |
PS |
Shelling |
| Switch |
Xbox |
|
| PC Hold |
PS Hold |
Charged Shelling |
| Switch Hold |
Xbox Hold |
|
| PC Left Click + Right Click |
PS Triangle + Circle |
Rising Slash |
| Switch X + A |
Xbox Y + B |
|
| PC After Rising Slash, |
PS After Rising Slash, |
Overhead Smash |
| Switch After Rising Slash, |
Xbox After Rising Slash, |
|
| PC After Overhead Smash, |
PS After Overhead Smash, |
Wide Sweep |
| Switch After Overhead Smash, |
Xbox After Overhead Smash, |
|
| PC |
PS |
Guard |
| Switch |
Xbox |
|
| PC MB4 + Left Click |
PS R2 + Triangle |
Guard Thrust |
| Switch zR + X |
Xbox RT + Y |
|
| PC MB4 + Right Click |
PS R2 + Circle |
Reload |
| Switch zR + A |
Xbox RT + B |
|
| PC MB4 + Right Click |
PS R2 + Circle |
Quick Reload |
| Switch zR + A |
Xbox RT + B |
|
| PC |
PS |
Backstep |
| Switch |
Xbox |
|
| PC After Overhead Smash, After Hail Cutter, |
PS After Overhead Smash, After Hail Cutter, |
Burst Fire |
| Switch After Overhead Smash, After Hail Cutter, |
Xbox After Overhead Smash, After Hail Cutter, |
|
| PC After Wide Sweep, Left Click or Right Click
After 2 Shelling, After Burst Fire, After Guard Edge, |
PS After Wide Sweep, Triangle or Circle
After 2 Shelling, After Burst Fire, After Guard Edge, |
Wyrmstake Cannon |
| Switch After Wide Sweep, X or A
After 2 Shelling, After Burst Fire, After Guard Edge, |
Xbox After Wide Sweep, Y or B
After 2 Shelling, After Burst Fire, After Guard Edge, |
|
| PC MB4 + Left Click + Right Click |
PS Triangle + Circle |
Wyvern's Fire |
| Switch zR + X + A |
Xbox RT + Y + B |
|
| PC Middle Click + Left Click |
PS L2 + Triangle |
Hail Cutter |
| Switch zL + X |
Xbox LT + Y |
|
| PC Middle Click + Right Click |
PS L2 + Circle |
Guard Edge |
| Switch zL + A |
Xbox LT + B |
|
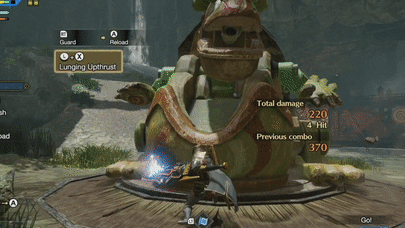
Useful Combos
| Basic Combo | |||
|---|---|---|---|
| Lunging Upthrust | Mid Thrust I | Mid Thrust II | Shelling |
| Burst Fire Combo | |||
|---|---|---|---|
| Rising Slash | Overhead Smash | Burst Fire | |
| Strong Combo | |||
|---|---|---|---|
| Rising Slash | Overhead Smash | Wide Sweep | Wyvern's Fire |
Gunlance Silkbind Attacks
Bullet Barrage
| Switch Controls | zL + X |
|---|---|
| PC Controls | Middle Click + Left Click |
| PS Controls | L2 + Triangle |
| Xbox Controls | LT + Y |
The hunter uses a Wirebug and the Gunlance to launch themselves forward and sets off an explosion that unloads everything the Gunlance has loaded. The reload and blast dash also cannot be stopped by roars or enemy attacks.
A fully loaded Gunlance will perform the action quickly. Note that shells, Wyrmstake Cannon, and Wyvern's Fire will be reloaded first before the move is executed if any of them are not fully loaded or ready. When using Bullet Barrage, make sure that you are in a safe position before using it as it has a relatively long windup time.
This move costs two Wirebug charges and has a medium recovery speed.
Hail Cutter
| Switch Controls | zL + X |
|---|---|
| PC Controls | Middle Click + Left Click |
| PS Controls | L2 + Triangle |
| Xbox Controls | LT + Y |
Hail Cutter is a Silkbind Attack that launches the hunter airborne while reloading the Gunlance. The move finishes with a downward slam where you may opt to use Burst Fire or Wyvern Fire with a shortened charge time!
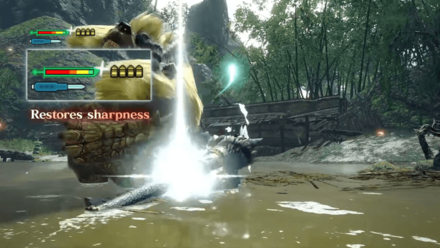
Guard Edge
| Switch Controls | zL + A |
|---|---|
| PC Controls | Middle Click + Right Click |
| PS Controls | L2 + Circle |
| Xbox Controls | LT + B |
Guard Edge is a Silkbind Attack that acts like a counter-guard but restores sharpness. Considering how Gunlance shelling eats up sharpness at a rapid rate, this is a great addition to Gunlance's arsenal!
Ground Splitter

| Switch Controls | zL + X |
|---|---|
| PC Controls | Middle Click + Left Click |
| PS Controls | L2 + Triangle |
| Xbox Controls | LT + Y |
Ground Splitter is a Switch Skill switchable with Hail Cutter. The hunter will drag the Gunlance on the ground while moving forward and strike with an upward slash. It also temporarily boosts the damage for shells, Wyrmstake Shots, and Wyvern's Fire.
Reverse Blast
| Switch Controls | zL + B |
|---|---|
| PC Controls | Middle Click + Space |
| PS Controls | L2 + X |
| Xbox Controls | LT + A |
The reverse of Blast Dash where you use the thrust from your Gunlance to increase the gap between you and the monster. Use this when you're in a pinch and need to retreat.
Gunlance Switch Skills
Switch Skills are unlocked with different conditions as you progress in the game. Base game MHRise provides Hunters with three (3) slots of Switch Skills, with the Sunbreak expansion adding two (2) more.
Note: Skills in red are exclusive to the Sunbreak expansion.
| Skill Slot | Switch Skill Choices |
|---|---|
| 1 | ・ Charged Shelling ・ Blast Dash |
| 2 | ・ Quick Reload ・ Guard Reload |
| 3 | ・ Wyrmstake Cannon ・ Erupting Cannon |
| 4 | ・ Hail Cutter ・ Ground Splitter ・ Bullet Barrage |
| 5 | ・ Guard Edge ・ Reverse Blast |
Switch Skills Guide: How to Unlock Switch Skills
Blast Dash
| Switched With | |
|---|---|
| Charged Shelling | |
| Description | |
| Uses recoil to travel far. Aims the Gunlance backwards then launches forward to close in the target. It is possible to use Blast Dash again while hurtling! | |
| Controls | |
Hold Can be performed in midair usingHold Can be performed in midair usingHold Can be performed in midair using Hold Can be performed in midair using |
|
Blast Dash propels your hunter using the force of the Gunlance artillery. It does not have any damaging potential but is useful for closing out the distance between you and the monster. Blast Dash can be used up to three times.
Ground Splitter
| Switched With | |
|---|---|
| Hail Cutter | |
| Description | |
| Scrapes the ground while slashing upwards. Increases shell, Wyrmstake Shot, and Wyvern Fire damage temporarily. Wirebug Gauge Recovery Speed: Slow Wirebug Cost: 1 |
Controls |
Ground Splitter drags your Gunlance on the ground, heating the tip while increasing the damage of shelling and Wyvern's Fire for a short time. Change into this Switch Skill as soon as you unlock it!
Guard Reload
| Switched With | |
|---|---|
| Quick Reload | |
| Description | |
| Has a Guard at the start of the reload. Reloads both the shells and the Wyrmstake Cannon but only reloads less shells than normal Reload. | |
| Controls | |
In Guard Reload, your artillery rounds are reduced to 3 but reloading is now guarded. This will also reload your Wyrmstake Cannon.
Erupting Cannon
| Switched With | |
|---|---|
| Wyrmstake Cannon | |
| Description | |
| The Gunlance fires an exploding stake onto your target. When using this, the tip of the Gunlance heats up and slashing attacks are enhances for a certain period. | |
| Controls | |
| Switch ↓
PC PlayStation ↓
Xbox ↓ |
|
Replaces the consistent tick damage of Wyrmstake Cannon with a huge, single burst damage attack. Useful for breaking parts of the monster since it's a big, single point damage.
Bullet Barrage
| Switched With | |
|---|---|
| Hail Cutter | |
| Description | |
| Uses a Wirebug to Blast dash toward your target, and unleashing all your ammo in one go. Shells, Wyrmstake Cannon, and Wyvern're will automatically be reloaded first before performing the attack so a windup animation is needed. Can also be used after firing in midair. Wirebug Gauge Recovery Speed: Medium Wirebug Cost: 2 |
|
| Controls | |
| Switch PC PlayStation Xbox |
|
A quick burst damage move that Hunters can use to drop a big boom on monsters! It even has a small blast dash at the start to close the gap with the monster! Use this whenever you see an opening!
Reverse Blast
| Switched With | |
|---|---|
| Guard Edge | |
| Description | |
| A rapid, backward evasive maneuver using a Wirebug to stop. If no shells are loaded, a quick reload will happen so be careful. Can be followed up with a Burst Fire. Wirebug Gauge Recovery Speed: Fast Wirebug Cost: 1 |
|
| Controls | |
| Switch PC PlayStation Xbox |
|
The reverse of Blast Dash where you use the thrust from your Gunlance to increase the gap between you and the monster. Use this when you're in a pinch and need to retreat.
Gunlance Attacks and Moves
Charged Shelling
| Switch Controls | Hold, |
|---|---|
| PC Controls | Hold, |
| PS Controls | Hold, |
| Xbox Controls | Hold, |
Charged Selling is an old Gunlance attack that allows you to increase a shell's damage by charging your shots. It's extremely effective for long-type Gunlance ammo due to its inherently high damage output.
Unlike the Unload Burst, charged shelling only consumes 1 ammo at the cost of dealing less damage.
Change Direction of Attack
While charging, the direction of the Gunlance's shot can be changed by moving the joystick up or down or with W or S. Charged Shelling can be shot forward, at a 45° angle, or directly above the user.
Wyrmstake Cannon

| Controls |
|---|
| After 2 Shelling, After a Shelling, ↓ + Down + A, Right Click, Circle, or B
After a Burst Fire, After a Guard Edge, After a Wide Sweep, |
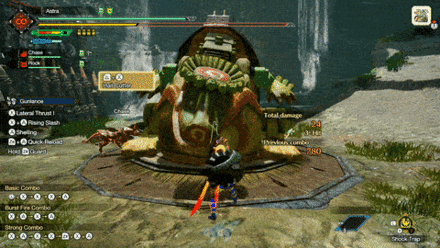
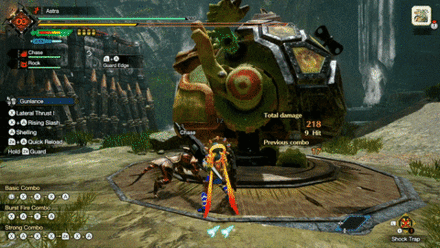
The Wyrmstake Cannon uses a large metallic stake or harpoon-like ammo which deals a massive amount of damage when fired. Accompanied by this cannon are two attacks which in turn makes the combo a devastating blow to any enemy monster.
There are multiple ways to achieve this combo so practice what feels comfortable the most to you.
Remember to Reload your Wrymstake Cannon Using Normal / Guard Reloading
 |
 |
| Switch Controls | |
|---|---|
| PC Controls | |
| PS Controls | |
| Xbox Controls |
Reloading your Wrymstake Cannon is different from reloading the ammo in your Gunlance. Always keep in mind that you cannot successfully perform a Wyrmstake Cannon combo if your Gunlance is empty.
Reload them using Normal Reload or Guard Reload, Quick Reload will not reload the Wyrmstake Cannon.
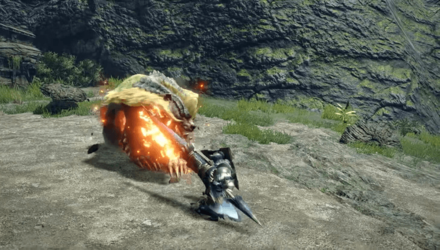
Wyvern Fire
| Switch Controls | |
|---|---|
| PC Controls | |
| PS Controls | |
| Xbox Controls |
The Gunlance is charged and unleashes an explosive shot after a few seconds. You can adjust the Gunlance's aim while winding up the attack.
Wyvern Fire will force you to stay in place until the weapon is fired and also has a long cooldown, so it is better to use this move when the monster is down.
Block Attacks When Using Wyvern Fire
While the Wyvern Fire isn't a new move to the Gunlance, it has received a new feature wherein it can guard the user against attacks while the Gunlance is charging the move.
Burst Fire

| Switch Controls | After Using Overhead Smash, A |
|---|---|
| PC Controls | After Using Overhead Smash, Right Click |
| PS Controls | After Using Overhead Smash, A |
| Xbox Controls | After Using Overhead Smash, B |
The Burst Fire is a returning move in Monster Hunter Rise! Burst Fire is a move that quickly fires all the current shells you have and is a great move to use for Gunlances with normal ammo types due to its massive amount of ammunition.
Recommended Combos for the Gunlance
Full Firepower Combo

| Switch Controls | X + A → X → A → X → A |
|---|---|
| PC Controls | Left Click + Right Click → Left Click → Righ Clickt → Left Click → Right Click |
| PS Controls | Triangle + Circle → Triangle → Circle → Triangle → Circle |
| Xbox Controls | Y + B → Y → B → Y → B |
This combo utilizes all of the high damage moves of the Gunlance but leaves you open to counterattacks. Only use this combo when the monster is down.
Wyrmstake Cannon + Guard Edge Combo
| Switch Controls | |
|---|---|
| PC Controls | |
| PS Controls | |
| Xbox Controls |
With this combo, you can start prepping the Wyrmstake Cannon when the monster roars as that is your opening. Quickly transferring into guard edge can help block against the attack after the roar which then leaves the monster open for you to blast them with your readied Wyrmstake Cannon.
Guard Edge Burst Fire Combo
| Switch Controls | zL + A → X → A |
|---|---|
| PC Controls | Middle Click + Right Click → Left Click → Right Click |
| PS Controls | L2 + Circle → Triangle → Circle |
| Xbox Controls | LT + B → Y → B |
This combo allows you to enter into a Guard Edge and then transfer into a Burst Fire. You can also integrate movements for repositioning yourself while slamming down attacks.
Infinite Burst Fire Combo

| Switch Controls | X + A → X → A → X → zL + A → ... |
|---|---|
| PC Controls | Left Click + Right Click → Left Click → Right Click → Left Click → Middle Click + Right Click → ... |
| PS Controls | Triangle + Circle → Triangle → Circle → Triangle → L2 + Circle → ... |
| Xbox Controls | Y + B → Y → B → Y → L2 + B → ... |
A full combo that bombards the target with endless Burst Fires using Ammo Up and Reload Speed and goes well with Normal Shelling Gunlances.
Fast Wyrmstake Cannon Combo from Charged Shelling

| Switch Controls | Hold Hold A → Down + A |
|---|---|
| PC Controls | Hold
Hold Right Click → S + Right Click |
| PS Controls | Hold Hold Circle → Down + Circle |
| Xbox Controls | Hold Hold B → Down + B |
This combo enables your Wyrmstake Cannon to execute faster if shot from Charged Shelling. Combine this with the Switch Skill Guard Reload and you will have an infinite combo.
Tips on How to Use the Gunlance
|
|
Deal a Lot of Damage With Wyvern Fire!
Wyvern Fire is the most powerful attack the Gunlance can deliver. Make sure it hits the monster so it would not be wasted!
Shelling Bypasses Monster Armor
Shelling bypasses monster armor so you may bombard any part of the body regardless of the toughness!
Use Guard Edge to Recover Sharpness
Guard Edge is a great addition to Gunlance's arsenal. This is very useful considering that shelling rapidly decreases Gunlance sharpness! You may also use armor skills like Handicraft or Speed Sharpening to mitigate the rapid sharpness decrease.
Always Lodge a Wyrmstake Cannon Into Monsters
The Wyrmstake Cannon is Gunlance's main DPS improving skill. It almost doubles your damage so always make sure that the monster has a Wyrmstake cannon in it and keep firing on it with shells!
Don't Hesitate To Use Traps
Traps are a valuable item in Monster Hunter games. It allows you to ensnare a monster and potentially capture it when its HP is low. With Gunlance's bursty nature, a single opening can prove fatal to monsters, and using traps is a surefire way to get that opening.
List of All Traps and Bombs | Monster Hunter Rise
Know Your Shelling Types
The Gunlance's playstyle, while fixed into the DPS tank role, will vary greatly depending on their weapon's shelling type.
| Ammo | Best Movesets and Playstyles |
|---|---|
| Normal | Most Ammo capacity, gets high damage from Burst Fire due to ammo quantity. |
| Spread | Least ammo capacity, benefits greatly from a poke, fire, quick reload style of play. |
| Long | Medium ammo capacity, has the highest shelling damage and can benefit the most from Wyrmstake Cannon and Shelling only playstlyle. |
Master the Three Types of Reload
| Reload | Slow Reload Speed Bullets and Wyrmstake are both reloaded |
|---|---|
| Quick Reload | Fast Reload Speed Only the bullets are reloaded |
| Guard Reload Switch Skill |
Can Guard while reloading Fast Reload Speed that includes the Wyrmstake but reloads only 3 bullets |
It is important to know when to use these types of reloading. Wyrmstake Cannon is very powerful but it is cumbersome to reload. A great Gunlance player knows if the situation calls for Reload or Quick Reload.
The Switch Skill Guard Reload is the middle ground but you don't unlock it until the Hub ★6 so it's a long way to go. By that time, you should have mastered both Reload and Quick Reload.
Switch Skills Guide: How to Unlock Switch Skills
Wyvern Fire Can Flinch Allies
Be careful when using the Wyvern Fire if your teammates are nearby. The explosion can flinch them and will disrupt their combo. Maintain proper decorum and use Wyvern Fire only when there isn't an ally nearby or let them know if you will use it so they can back off.
Gunlance Known Bugs and Fixes
Update 3.5 Bug Fixes

There are a couple of bugs related to the Gunlance that Update 3.5 that are now fixed!
|
Update 3.5: Ghosts 'n Goblins Resurrection Collaboration, DLC, and Patch Notes
Changes from MHW: Iceborne
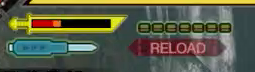
Wyvern Fire Cooldown is Shown Under the Wyrmstake Cannon Icon

The cooldown for the Wyvern Fire is now displayed with an orange meter below the Wyrmstake Cannon icon. You can now see (at a glance) if Wyvern Fire is ready!
Monster Hunter Rise (MH Rise) Related Guides

| Weapon Type Guides | ||
|---|---|---|
 Weapons and Weapon Types Weapons and Weapon Types |
 Weapon Type Tier List Weapon Type Tier List |
 Builds for Each Weapon Type Builds for Each Weapon Type |
Melee Weapon Guides
| Melee Weapons | ||
|---|---|---|
Guide | Weapon Tree |
Guide | Weapon Tree |
Guide | Weapon Tree |
Guide | Weapon Tree |
Guide | Weapon Tree |
Guide | Weapon Tree |
Guide | Weapon Tree |
Guide | Weapon Tree | Melodies |
Guide | Weapon Tree |
Guide | Weapon Tree |
Guide | Weapon Tree | Kinsects |
|
Ranged Weapon Guides
| Ranged Weapons | ||
|---|---|---|
Guide | Weapon Tree |
Guide | Weapon Tree |
Guide | Weapon Tree |
Comment
3  Anonymous@Game8 almost 4 years
Hi Anon! You're correct, this was an oversight on our end. We've edited the article according to your suggestion. Thank you!
Author

Sunbreak Gunlance Guide: Combos, Controls and Moveset
Please participate in our site
improvement survey
03/2026
improvement survey
03/2026
Would you assist in
improving Game8's site?
improving Game8's site?

×
We are listening to our users' valuable opinions and discussing how to act on them.
The information collected through this survey will be used for the purpose of improving our services. In addition, the information will only be disclosed a part of a statistic in a format that will not allow identification of personal information.
Begin Survey
Not Now
×
Please rate each item regarding Game8.co's Advertisements.
Amount of Ads
Very Dissatisfied
Somewhat Dissatisfied
Fine
Somewhat Satisfied
Highly Satisfied
Placement of Ads
Timing of Ad Display
Ad Loading Speed
Safeness of Ads
Content of Ads
×
Please rate each item regarding Game8.co's Quality of Articles.
Amount of information
Very Dissatisfied
Somewhat Dissatisfied
Fine
Somewhat Satisfied
Highly Satisfied
Frequency of updates
Speed of new information
Accuracy of articles
Understandibility of articles
Readability of sentences
×
Please rate each item regarding Game8.co's Usability of the Site.
Ease of finding information
Very Dissatisfied
Somewhat Dissatisfied
Fine
Somewhat Satisfied
Highly Satisfied
Loading Speed
Use of Color
Font Size
Visibility of Images
Easy to Understand Layout
×
Please rate each item regarding Game8.co's Message Boards, Comments.
Ease of Writing
Very Dissatisfied
Somewhat Dissatisfied
Fine
Somewhat Satisfied
Highly Satisfied
Readability
Ease in Finding Information
Comment Quality
Comment Quantity
Admin Response
×
Please rate each item regarding Game8.co's Site's new design.
Please rate our site's new design
Very Dissatisfied
Somewhat Dissatisfied
Fine
Somewhat Satisfied
Highly Satisfied
Do you think that the website's design change makes the site easier to use?
Has the new design made it easier for you to find information on the site?
Has the new design improved the overall visual appeal of the site?
How would you rate your overall satisfaction with the new design of the site?
×
How likely are you to recommend Game8 to someone you know?
Very Unlikely
0
1
2
3
4
5
6
7
8
9
10
Very Likely
If you have other opinions regarding potential improvement to the website, please share them with us. We would appreciate your honest opinion.
Note: This is a free response section, so you can proceed without entering anything.
Note: Please be sure not to enter any kind of personal information into your response.
Note: Please be sure not to enter any kind of personal information into your response.
×
Thank You
×
Thank you for participating in our survey! Your answers will help us to improve the quality of our website and services.
We hope you continue to make use of Game8.
We hope you continue to make use of Game8.
Close
Rankings
- We could not find the message board you were looking for.
Gaming News


![Monster Hunter Stories 3 Review [First Impressions] | Simply Rejuvenating](https://img.game8.co/4438641/2a31b7702bd70e78ec8efd24661dacda.jpeg/thumb)
Popular Games

Genshin Impact Walkthrough & Guides Wiki
Honkai: Star Rail Walkthrough & Guides Wiki
Umamusume: Pretty Derby Walkthrough & Guides Wiki
Pokemon Pokopia Walkthrough & Guides Wiki
Resident Evil Requiem (RE9) Walkthrough & Guides Wiki
Monster Hunter Wilds Walkthrough & Guides Wiki
Wuthering Waves Walkthrough & Guides Wiki
Arknights: Endfield Walkthrough & Guides Wiki
Pokemon FireRed and LeafGreen (FRLG) Walkthrough & Guides Wiki
Pokemon TCG Pocket (PTCGP) Strategies & Guides Wiki


Recommended Games
Diablo 4: Vessel of Hatred Walkthrough & Guides Wiki
Cyberpunk 2077: Ultimate Edition Walkthrough & Guides Wiki
Fire Emblem Heroes (FEH) Walkthrough & Guides Wiki
Yu-Gi-Oh! Master Duel Walkthrough & Guides Wiki
Super Smash Bros. Ultimate Walkthrough & Guides Wiki
Pokemon Brilliant Diamond and Shining Pearl (BDSP) Walkthrough & Guides Wiki
Elden Ring Shadow of the Erdtree Walkthrough & Guides Wiki
Monster Hunter World Walkthrough & Guides Wiki
The Legend of Zelda: Tears of the Kingdom Walkthrough & Guides Wiki
Persona 3 Reload Walkthrough & Guides Wiki


All rights reserved
©CAPCOM CO., LTD. ALL RIGHTS RESERVED.
The copyrights of videos of games used in our content and other intellectual property rights belong to the provider of the game.
The contents we provide on this site were created personally by members of the Game8 editorial department.
We refuse the right to reuse or repost content taken without our permission such as data or images to other sites.
Is the stuff in the "Always Lodge a Wyrmstake Cannon Into Monsters" section really up to date for Rise? Isn't that just describing a mechanic from World that didn't make it into Rise?