This survey will take about 1 minute.
Your answers will help us to improve our website.
Monster Hunter Rise: Sunbreak
Sunbreak Bow Guide: Combos, Controls and Moveset
★ All Title Updates now available for ALL PLATFORMS!
┗ Title Update 4 | Title Update 5 | Bonus Update
┗ Check out all our Best Builds For Every Weapon!
┗ TU4 Monsters: Velkhana | Risen C.G. Valstrax
┗ TU5 Monsters: Amatsu | Risen Shagaru Magala
┗ Bonus Update Monster: Primordial Malzeno
This is a guide to the Bow, a weapon in Monster Hunter Rise: Sunbreak (MH Rise). Read on to learn about new Bow controls and combos, how to use Bow Power Shots, Bow Coating and Shot Types, how to aim properly using the Bow, Bow Silkbind Attacks, the Power Shot Animation Cancel as well as details on Bow Switch Skills.
| All Bow Guides | ||
|---|---|---|
 Trees & Full List Trees & Full List |
 How to Use How to Use |
 Best Builds Best Builds |
List of Contents
Bow Balance Changes
Update 10.0
| Bow Balance Changes and Fixes (Update 10.0) |
|---|
| ・ Adjusted all of the following weapon actions: ・ Jumping Melee Attack (Arrow Slice): Attack power increased ・ Lunging Melee Attack: Attack power increased ・ Melee Attack (Arrow Slice - 1st Hit): Attack power increased ・ Melee Attack (Arrow Slice - 2nd Hit): Attack power increased ・ Adjustments have been made per level to Charged Shots with the Bow. ・ Charge Level 1: Attack power increased; Elemental scaling slightly increased ・ Charge Level 2: Elemental scaling slightly increased ・ Charge Level 3: Attack power decreased; Elemental scaling slightly increased ・ Charge Level 4: Attack power decreased; Elemental scaling slightly increased ・ Coating effects have been increased when melee attacks (arrow slices) hit while coatings are applied. ・ Poison Coating: Status effect buildup increased ・ Para Coating: Status effect buildup increased ・ Sleep Coating: Status effect buildup increased ・ Blast Coating: Status effect buildup increased ・ Exhaust Coating: Stun value increased; Exhaust value increased ・ Power Coating: Attack power slightly increased ・ Close-range Coating: Attack power slightly increased ・ Focus Shot: Stamina recovery speed after landing on the ground has been increased. ・ Changed the calculation order for Close-range Coating and the Ballistics skill. ・ Arc Shot: Fixed a bug where aiming an Arc Shot would sometimes mistakenly register a level 1 Charge and show Charge graphical effects, despite Charge levels not existing for Arc Shot. ・ Fixed an issue where it was possible to combo into an Arc Shot with fewer-than-intended command inputs while drawing your bow. ・ Fixed a bug where the effects for Draw skills would not activate when performing a Charge action right after unsheathing in a stationary position. |
Bow received significant nerfs especially on damage for Charge Lv 3 and 4. This would definitely hurt the Bow's overall firepower in Sunbreak.
On another note though, the introduction of Stake Thrust gave Bow users a more concentrated damage dealing capabilities. You need to get close to the monster and stick the stake first though, so timing is still a very important thing.
Overall, the changes introduced balanced the bow - as like the Long Sword it has been steamrolling base Rise since release.
Bow New Sunbreak Attacks and Moves
Official Bow Preview Video
Silkbind Attack: Butcher's Bind
The Butcher's Bind is a Silkbind Attack that uses the Ironsilk to latch on a monster. A follow-up arrow hitting the same spot where the Ironsilk is latched on will cause severing damage. This attack can slice off a monster's tail.
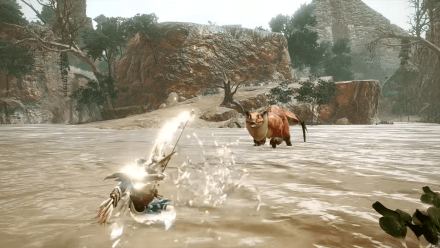
Switch Skill: Stake Thrust
This Switch Skill lets you thrust a stake to any part of your target. This stake can explode and deal damage to a monster. Attacking the part where the stake is embedded will deal extra damage to the monster. This move can be switched with the Melee Attack.
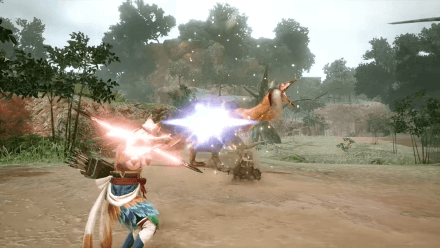
Silkbind Attack: Bolt Boost

Not introduced in any trailer, Bolt Boost is an additional Silkbind Attack added to the Sunbreak Expansion. This silkbind attack gives Bow users the power to shoot at Super Critical Range for a short time to deal increased damage. This silkbind is very good to pair with Dodgebolt as you're usually near the monster when you're running it!
Monster Hunter Rise: Sunbreak
Release Date and New Monsters
How Good is the Bow?
Tier List Ranking
| MHRise Ranking | → | Sunbreak Ranking |
|---|---|---|
(S - A - B) 3 Level Tier |
(SS - S - A) 3 Level Tier |
The nerf on Charge Levels 3 and 4 have affected the overall damage output of the Bow, hence the drop in the tier list. The new Swich Skills felt lacking as well with one only providing a way to sever weapon while the other requires you to go near a monster and risk yourself.
The introduction of the Bow Charge Plus decoration is good as builds can now be more flexible than ever. Some bows even have inherent Charge Level 4, so they don't need the decoration. This opens up possibilities for crazier builds in the mid to endgame!
Bow Strengths
Charged Shots
You can make any of the Bow's attacks more powerful by charging it from level 1 up to level 3 (level 4 if you have the Bow Charge Plus skill).
High Mobility
Bow users can quickly evade with Charging Sidestep or Dodgebolt. Charging Sidestep charges your Bow by one level while Dodgebolt offers a parry-like move when you evade (and successful evasion charges your Bow!).
Capability To Use Various Coatings
Bow users can also use different types of coatings to either empower the user (Power or Close Range) or apply Status Ailments to the monster (Blast, Sleep, Paralysis, or Poison).
Bow Weaknesses
High Stamina Consumption
The Bow is a very stamina-heavy weapon. When making builds for the Bow, try including Constitution and Stamina Surge. If it's still not enough, try using Dash Juice. Sunbreak also introduces options for infinite stamina with Strife and Furious, which are great for highly aggressive play.
Precision Needed
Bow users have to aim precisely at a monster's weak points to completely optimize their damage. This can put off some players because some take time to get used to the controls. If ever, you can opt to use the gyroscope of the Nintendo Switch! You can turn it on in the settings.
List of Settings: Best Settings to Choose
Low Defense
The Bow, as a ranged weapon, takes more physical damage, making dodging and proper positioning important skills to learn for any Bow user.
Bow Controls and Combos
| Controls | Action | |
|---|---|---|
| PC |
PS |
Aim |
| Switch |
Xbox |
|
| PC |
PS |
Shoot |
| Switch |
Xbox |
|
| PC |
PS |
Melee Attack |
| Switch |
Xbox |
|
| PC |
PS |
Dragon Piercer |
| Switch |
Xbox |
|
| PC Hold, |
PS Hold, |
Select Coating |
| Switch Hold, |
Xbox Hold, |
|
| PC |
PS |
Load/Unload Coating |
| Switch |
Xbox |
|
| PC Hold, |
PS Hold, |
Herculean Draw |
| Switch Hold, |
Xbox Hold, |
|
| PC Hold, |
PS Hold, |
Focus Shot |
| Switch Hold, |
Xbox Hold, |
|
Useful Combos
| Arc Shot | |||
|---|---|---|---|
| Draw | Arc Shot | ||
| Hold, zR |
|||
| Hold, Left Click |
|||
| Hold |
|||
| Hold |
|||
| Power Shot | |||
|---|---|---|---|
| Draw | Shoot | Power Shot (Press Quickly) |
|
| Hold, |
Let go of |
||
| Hold, |
Let go of |
||
| Hold |
Let go of |
||
| Hold |
Let go of |
||
| Charging Sidestep Combo | |||
|---|---|---|---|
| Shoot | Charging Sidestep | Power Shot | Power Volley |
Bow Silkbind Attacks
Butcher's Bind
| Controls | |
|---|---|
| Switch | R + X |
| PC | Shift + MB5 |
| PlayStation | R1 + Triangle |
| Xbox | RB + Y |
The new Butcher's Bind Silkbind Attack can be used in the Sunbreak demo and replaces either Focus Shot or Aerial Aim.
The user fires an Ironsilk-loaded arrows and creates a tether to the monster. If a follow-up shot lands on the same body part where the first shot is lodged, both arrows are bound together and inflict severing damage. If the follow-up shot does not land near the first shot, the lodged arrow disappears.
This move is very useful in cutting tails as long as both the initial and follow-up shot land the target.
This move costs one Wirebug charge and has a medium recovery speed.
Herculean Draw
| Controls | |
|---|---|
| Switch | R + A |
| PC | Shift + MB4 |
| PlayStation | R1 + Circle |
| Xbox | RB + B |
Herculean Draw is a Silkbind Attack that makes the Bow user do a short evade and then temporarily buffs their attack power.
Focus Shot
| Controls | |
|---|---|
| Switch | R + X |
| PC | Shift + MB5 |
| PlayStation | R1 + Triangle |
| Xbox | RB + Y |
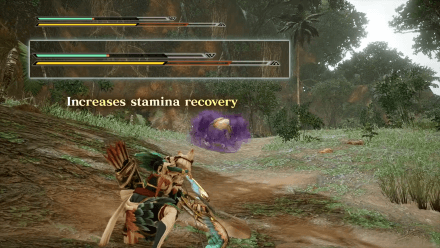
Focus Shot is a Silkbind Attack that pulls the user towards a direction with the help of the Wirebug and then lands at a crouching position. While crouching, you rapidly recover stamina! By default, it will pull you back, but you can use the left analog stick to choose the direction (left or right).
This also has plenty of invincibility frames so you can dodge away from dangerous situations!
Aerial Aim

| Controls | |
|---|---|
| Switch | R + X |
| PC | Shift + MB5 |
| PlayStation | R1 + Triangle |
| Xbox | RB + Y |
This attack launches the hunter into the air, and while in midair, shots deal more damage than normal. The user can also use a close-range stabbing attack with an arrow on an unlucky monster below.
Bolt Boost
| Controls | |
|---|---|
| Switch | R + A |
| PC | Shift + MB4 |
| PlayStation | R1 + Circle |
| Xbox | RB + B |
This Silkbind attack gives Bow users the power to shoot at Super Critical Range for a short time to deal increased damage. This can be paired with Dodgebolt as you're usually near the monster when you're running it!
Bow Switch Skills
Switch Skills are unlocked with different conditions as you progress in the game. Base game MHRise provides Hunters with three (3) slots of Switch Skills, with the Sunbreak expansion adding two (2) more.
Note: Skills in red are exclusive to the Sunbreak expansion.
| Skill Slot | Switch Skill Choices |
|---|---|
| 1 | ・ Charging Sidestep ・ Dodgebolt |
| 2 | ・ Power Shot ・ Absolute Power Shot |
| 3 | ・ Melee Attack ・ Stake Thrust |
| 4 | ・ Focus Shot ・ Aerial Aim ・ Butcher's Bind |
| 5 | ・ Herculean Draw ・ Bolt Boost |
Switch Skills Guide: How to Use Switch Skills
Absolute Power Shot

| Switched With | |
|---|---|
| Power Shot | |
| Description | |
| Fires a powerful shot after charging. Shots are fired with a higher level than usual (but never over the charge level limit). Power Shots will cost more stamina but can stun the target. | |
| Controls | |
| After firing an arrow, press: After firing an arrow, press: A, MB4, Circle, or B |
|
Though the ability to stun monsters without Exhaust Coating is a good addition to the bow, the stun values of Absolute Power Shot are too small to be worth the extra stamina cost. You can only stun at most once or twice per hunt, which is a bad trade-off in our book.
We recommend sticking to the normal Power Shots unless you have enough stamina management skills or infinite stamina.
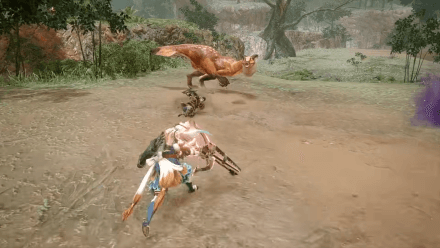
Dodgebolt

| Switched With | |
|---|---|
| Charging Sidestep | |
| Description | |
| Spinning evade that doubles as an attack. Making it a near-miss can fill up the charge level considerably. Allows you to move forward, backwards, left, or right. | |
| Controls | |
Left Stick + B Directional Button + Space Left Stick + X Left Stick + A while aming. B, Space, X, or A during a combo |
|
This has no bad tradeoffs besides a short dodge distance and not being able to charge while sidestepping, so we recommend getting this one, especially if you like using Close-Range Coating.
In addition, it deals a melee attack on the dodge while consuming less stamina than a Charging Sidestep. Putting at least Lv. 1 Evade Extender in your builds can mitigate the short dodge distance of Dodgebolt.
Aerial Aim
| Switched With | |
|---|---|
| Focus Shot | |
| Description | |
| An action for firing arrows by jumping straight up with a Wirebug. Particularly damaging shots can be fired from midair. A close-range attack using an arrow can also be aimed directly underneath you. Aerial Aim also retains you current bow charge level so use this at max level (3 or 4) Wirebug Gauge Recovery Speed: Medium Wirebug Cost: 1 |
|
| Controls | |
Press A, MB4, Circle, or B to continue firing arrows midair. Press X, MB5, Triangle, or Y to follow-up with an Aerial Diving Melee Attack. R + X Shift + MB5 R1 + Triangle RB + Y |
|
When you get this, slot it in immediately. The main difference between this and Focus Shot is that Aerial Aim exchanges stamina recovery for the ability to aim from above. It's a good trade-off considering you can use Dash Juice to mitigate the stamina problems of the bow.
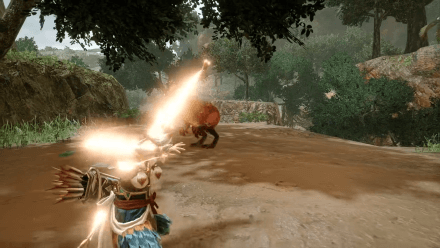
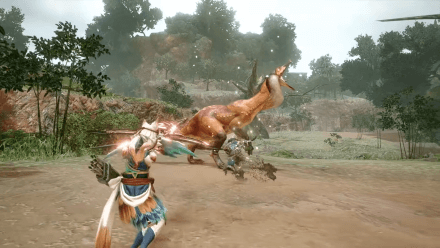
Stake Thrust
| Switched With | |
|---|---|
| Melee Attack | |
| Description | |
| Thrusts an explosive stake on your target. The stake reacts to follow-up attacks, dealing extra damage. The amount of damage dealt is determined by the type of arrow used. | |
| Controls | |
| Switch PC PlayStation Xbox |
|
This is a must-use for all Bow users and the stake that you drive on a monster will deal extra free damage whenever you target the part! It gets really easy to break parts this way!
Bolt Boost
| Switched With | |
|---|---|
| Herculean Draw | |
| Description | |
| Activates Super Critical Range for a short time. All arrows fired at Super Critical Range will deal increased damage. The activation lasts for around 105s. Wirebug Gauge Recovery Speed: Medium Wirebug Cost: 1 |
|
| Controls | |
| Switch PC PlayStation Xbox |
|
This Silkbind attack gives Bow users the power to shoot at Super Critical Range for a short time to deal increased damage. This Silkbind can be paired with Dodgebolt as you're usually near the monster when you're running it!
Butcher's Bind
| Switched With | |
|---|---|
| Focus Shot | |
| Description | |
| Fires an arrow loaded with Ironsilk. Shooting the tether spot will deal sever damage. Missing any arrow would cancel the skill. Wirebug Gauge Recovery Speed: Medium Wirebug Cost: 1 |
|
| Controls | |
| Switch Press A, MB4, Circle, or B to continue firing arrows midair. Press X, MB5, Triangle, or Y to follow-up with an Aerial Diving Melee Attack. R + X Shift + MB5 R1 + Triangle RB + Y |
|
This Silkbind attack allows Bow users to deal sever damage and cut tails! It's pretty handy especially if you're a solo Bow user that aims to cut tails without resorting to the melee arrow attack.
List of Bow Coatings
Equipping Coatings
| Input | |
|---|---|
| Choose Coating | Hold |
| Hold, |
|
| Hold, |
|
| Hold, |
|
| Apply / Remove Coating | |
| Reload Speed Lv. 2 automatically applies the coating while you are choosing! | |
Different Bows Have Different Compatible Coatings

Each Bow has a set of compatible coatings that they can use while on hunts. Compatible coatings are in white text, while incompatible ones are in gray text.
Some Bows have support for a lot of coatings like the Kelbi Stingshot or the Kamura Bow - these Bows are great for support! Do check each Bow for its supported coatings before every hunt!
Coatings and Effects
Bow coatings are items you craft using materials or bought from Kagero the Merchant in the Steelworks or the Guild Store in the Gathering Hub. You can only carry a certain number of coatings in your Item Pouch except for Close-range Coating. Be sure to bring crafting materials or restock your coatings by fast-traveling to camps in-between hunts!
| Coating | Max Qty. in Pouch | Effect |
|---|---|---|
| ∞ | Arrows designed to deal more damage to nearby targets, at the cost of a reduced maximum range. Close range is now considered critical distance. Damage is boosted by Bladescale Hone. |
|
|
|
50 | An arrow coating that increases the attack power of arrows. |
|
|
20 | An arrow coating that applies paralysis effects to arrows. |
|
|
20 | An arrow coating that applies poison effects to arrows. |
|
|
20 | An arrow coating that induces sleep. |
|
|
20 | An arrow coating that applies explosive powder to arrows. |
|
|
20 | Drains the monster's stamina so it tires more easily. Shots to the head can stun the monster. |
Enhanced Coatings
There are Bows with innate enhanced power for certain coatings denoted by a + sign next to the coating icon. This just means that the effects of such coatings are amplified.
This effect can also be achieved by adding Rampage Skills that increase coating efficacy on a Bow that is already compatible with that coating.
Bow Shot Types
Shot Type is Unique Per Bow
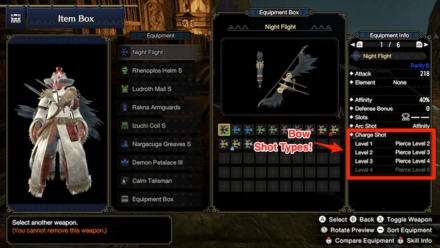
Shot types are unique per Bow, so you might want to check before crafting or equipping one. Each shot type has its unique strengths and weaknesses against certain monsters.
Shot types can also change depending on the Charge Level of the Bows. For example, Kelbi Stingshot has Spread type arrows for Level 1 and 2 charge levels while a Pierce for Level 3. We suggest checking the details of your Bow!
Spread Shot Type
| Spread Shot |
|---|
| Spreads the arrow in a fan in front of you. Spreads arrows in a horizontal line so it's hard to focus on a weak spot unless up close. Quite easy to aim at weak spots because of the spread nature of the arrows. Spread Lvl 1: 3 Arrows Spread Lvl 2: 3 Arrows Spread Lvl 3: 5 Arrows Spread Lvl 4: 5 Arrows Spread Lvl 5: 5 Arrows Range: Short |
Rapid Shot Type
| Rapid Shot |
|---|
| Focuses all arrow hits on one area. Great for targeting weak spots. Quite hard to aim at weak spots. Rapid Lvl 1: 1 Arrow Rapid Lvl 2: 2 Arrows Rapid Lvl 3: 3 Arrows Rapid Lvl 4: 4 Arrows Rapid Lvl 5: 4 Arrows Range: Medium |
Pierce Shot Type
| Pierce Shot |
|---|
| Great against Leviathans and huge Elder Dragons. The arrow pierces through a focused spot and then continues through the monster, dealing 5 continuous hits. Quite hard to aim at weak spots. The number of arrow hits depends on the travel through the monster. Maximum of 6 hits. Range: Long |
Bow Attacks and Moves
Shoot Arrows

| Switch Controls | zR or Hold zR |
|---|---|
| PC Controls | Left Click or hold Left Click |
| PlayStation Controls | R2 or hold R2 |
| Xbox Controls | RT or hold RT |
Shooting is your main attacking method when using the Bow. Every shot will increase your Bow charge level by 1 until you reach the maximum charge level. You can also charge the shot by holding zR in exchange for continuous stamina drain.
Shooting your bow thrice will increase your Charge Level to Level 3. If you are wearing a Mighty Bow Feather or equipping the Mighty Bow Jewel 4, you can increase it further to Level 4.
Overcharging Returns you to Charge Level 1
If you shoot a shot after reaching the maximum, you will return to Charge Level 1. However, dodging or doing a Switch Skill Swap will retain the charge level right after the last shot. Firing a Power Shot also increases charge or retains it if already at max charge. Be mindful of these to maximize damage potential!
Power Shots

| Switch Controls | After Charged Attack, After Charged Attack, A |
|---|---|
| PC Controls | After Charged Attack, After Charged Attack, MB4 |
| PlayStation Controls | After Charged Attack, After Charged Attack, Circle |
| Xbox Controls | After Charged Attack, After Charged Attack, B |
After firing a shot, you can follow it up with up to two more extra Power Shots if you have enough stamina. This increases (or retains when at maximum charge level) your Bow charge level per Power Shot!
Just like regular shots, dodging will retain the last charge level, allowing you to fire an extra normal shot followed by up to two more Power Shots. Remember this to maximize the uptime of the highest charge level!
Charging Sidestep
| Switch Controls | Left Stick + B |
|---|---|
| PC Controls | Directional Button + Space |
| PlayStation Controls | Left Stick + Cross |
| Xbox Controls | Left Stick + A |
The Charging Sidestep returns in Monster Hunter Rise! It's an evasive maneuver that also allows you to charge your shots per sidestep. Once you have reached the maximum charge level (Level 3 or 4), subsequent sidesteps maintain the max Charge Level!
Switched with the Switch Skill Dodgebolt
Charging Sidestep can be switched with the Switch Skill Dodgebolt. Dodgebolt adds a melee attack for every evade in exchange for shortened evade distance and lack of charging your shots. It can charge your shot but only when you parry just before an enemy attack hits you!
Switch Skills Guide: How to Unlock Switch Skills
Arc Shots and Types
| Switch Controls | zR + A |
|---|---|
| PC Controls | Left Click+MB4 |
| PlayStation Controls | R2 + Circle |
| Xbox Controls |
Arc Shots in Monster Hunter Rise (MH Rise) differ so much from Arc Shots in Monster Hunter World (MHW). In this game, these shots now scatter powder that can buff the stats of everyone under it. You can control where the Arc Shot lands by holding the command while aiming (zL, Right Click, L2, LT).
There are three types of Arc Shots:
| Arc Shot Type | Effect |
|---|---|
| Affinity | Increases affinity by 15% for a short period of time. |
| Brace | Negates knockback for a short period of time. |
| Recovery | Gradually restores health for a short period of time. |
Dragon Piercer
| Switch Controls | X + A |
|---|---|
| PC Controls | MB4 + MB5 |
| PlayStation Controls | Triangle + Circle |
| Xbox Controls | Y + B |
Dragon Piercer is a returning move from Monster Hunter World (MHW) that scrapes an arrow on the ground and then unleashes a powerful Pierce shot after a long wind-up. This deals a ton of damage but requires a large opening.
Dragon Piercer's damage increases depending on your current charge level, so make sure to use this when your charge level is at maximum. Also, don't worry about critical distance - Dragon Piercer is always treated as being shot within critical distance no matter how near you are to the monster!
Recommended Combos For the Bow
Charged Shot to Power Shot
| Switch Controls | Hold Hold zL to aim → zR (x4) → A (x2) |
|---|---|
| PC Controls | Hold R.Click to Aim → L.Click (x4) → MB4(x2) |
| PlayStation Controls | Hold Hold L2 to Aim → R2 (x4) → Circle (x2) |
| Xbox Controls | Hold Hold LT to Aim → RT (x4) → B (x2) |
With this combo, you can shoot Power Shots after a chain of shots! The Power Shots increase (or retain if at maximum charge level) the charge level of your Bow, so mind your charge level! If you cap out at Level 3 Charge, fire only thrice to avoid overcharging.
Power Shot Dance Combo
| Switch Controls | Hold →
Charging Sidestep → Charged Shots (x3) → Power Shots (x2) → Charging Sidestep → Charged Shot → Power Shots (x2) → Charging Sidestep → ... |
|---|---|
| PC Controls | Hold → |
| PlayStation Controls | Hold → |
| Xbox Controls | Hold → |
The Dance loop is the bread-and-butter DPS combo for Bow as it is an effective way to fire as many fully charged shots as possible. It begins with a variation of the Power Shot combo from earlier, skipping the first charge by dodging.
After reaching max charge, the Dance loop begins by using a Charging Sidestep to maintain the charge level for a normal Charged Shot followed by up to two Power Shots. The three maxed shots can be repeated after another Charging Sidestep while you have stamina!
Dodgebolt Variation
| Switch Controls | Hold →
Charged Shot to Power Shot Combo → Dodgebolt → Charged Shot → Power Shots (x2) → Dodgebolt → ... |
|---|---|
| PC Controls | Hold → |
| PlayStation Controls | Hold → |
| Xbox Controls | Hold → |
Due to lacking the ability to charge while dodging, getting to the Dance combo loop requires performing the full Power Shot combo first.
However, if you can successfully counter with Dodgebolt, you'll only need to fire one or two Charged Shots, followed by up to two Power Shots, then Dodgebolt again to continue to the Dance loop!
Power Shot Animation Cancel
| Switch Controls | |
|---|---|
| PC Controls | Right Click + Space → Left Click then immediately press MB4 |
| PlayStation Controls | |
| Xbox Controls |
While doing the Power Shot Dance Combo, fire a Charged Shot after a Charging Sidestep or Dodgebolt, then immediately fire a Power Shot. This effectively cancels the remaining shooting animation (from the Charged Shot) and gives you two full arrow shots in a very short time. This is extremely good DPS-wise, so practice this until it's muscle memory!
You can do this cancel either from Charging Sidestep or Dodgebolt although the former has a more forgiving Power Shot input window.
High Firepower Combo + Dragon Piercer
| Switch Controls | zL + B → zR (x2) → A (x2) → X + A |
|---|---|
| PC Controls | Right Click + Space → Left Click (x2) → MB4 (x2) → MB5 + MB4 |
| PlayStation Controls | L2 + Cross → R2(x2) → Circle (x2) → Triangle+Circle |
| Xbox Controls | LT + A → RT(x2) → B (x2) → Y + B |
This is a powerful combo that starts with the Charging Sidestep, charges up through rapid-fire attacks, fires Power Shots, and then ends with a Dragon Piercer. This is all performed while holding down zL to aim.
This combo is good to know but is outclassed by the Power Shot Dance Combo when it comes to DPS. You can opt to use this to wake up monsters from sleep, but that's about it.
High Firepower Combo + Aerial Aim
| Switch Controls | zL + B → zR(x2) → A (x2) → R + X |
|---|---|
| PC Controls | Right Click + Space → Left Click (x2) → MB4 (x2) → Shift + MB5 |
| PlayStation Controls | L2 + Cross → R2(x2) → Circle (x2) → R1 + Triangle |
| Xbox Controls | LT + A → RT(x2) → B (x2) → RB + Y |
This very powerful combo replaces the Dragon Piercer of the previous combo with the Switch Skill Aerial Aim. Aerial Aim effectively boosts your damage without the long wind-up animation of the Dragon Piercer.
You can do this combo even while the monster is moving around because Aerial Aim is an effective evasion tool that shoots you upwards!
Tips on How to Use the Bow
|
|
Change Your Settings To Be More Bow-Friendly
| Settings | Recommended |
|---|---|
| Camera Shake | None |
| Gunner Reticle Controls | Fast |
| Camera Controls | Type 2 |
| Camera Style | Focus Camera |
| Camera Distance | 100 |
If you want to master the Bow, we recommend looking into your settings and switching a few things up. While this is what we recommend, you may always prefer another setting. That's no problem, it's all up to what makes you more comfortable in the end!
How to Aim with the Bow: Manual Aim Vs. Gyroscrope
Know the Proper Aim Distance
| Move | Arrow Trajectory | Critical Distance |
|---|---|---|
| Shoot / Charged Shot | Straight | Medium range |
| Power Shot | Straight | Medium range |
| Arc Shot | From above | None |
| Dragon Piercer | Straight, piercing | Short to long range |
At different ranges, the Bow can deal either no damage (out of range), some damage (middle of out of range and critical distance), or a lot of damage (critical distance). Your reticle will change to show how much damage you can deal.
Different Aim Distances
| Critical Distance |  |
|---|---|
| Medium | 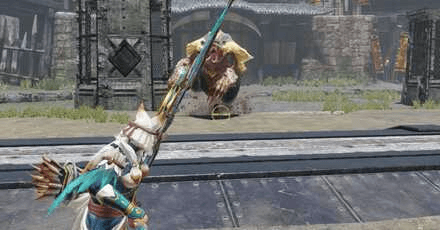 |
| Out of Range | 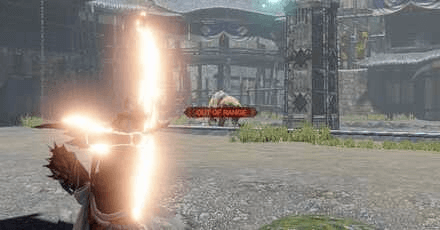 |
Gyro Aiming is Available but We Do Not Recommend Using It
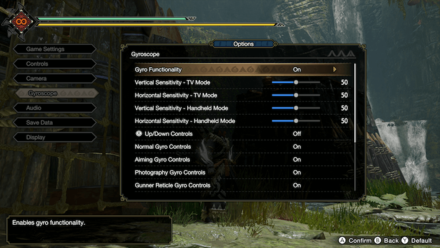
The aiming mechanic for ranged weapons can utilize the built-in Gyroscope sensor of the Nintendo Switch / Pro Controller. This can ease the aiming process, especially for those that are having a hard time aiming using analog sticks. To enable Gyro Aiming, go to Options → Gyroscope → Guro Functionality (ON / OFF).
Though present, we do not recommend using the Gyroscopic functionality. The system is too unreliable, especially for high-pressure and precision-dependent games like Monster Hunter Rise (MH Rise). If you managed to make it work and got used to it, you may continue to do so.
How to Aim with the Bow: Manual Aim Vs. Gyroscrope
Manage Stamina Usage
One of the biggest weaknesses of the Bow is that it consumes a lot of stamina. Luckily, there are several ways to work around this such as using the Focus Shot Silkbind, taking in Dash Juice, or equipping certain skills. Constitution and Stamina Surge are must-haves for any Bow build while Strife can give infinite stamina consistently when paired with Berserk.
Charge Your Shots and Keep Them At Max
Charging the Bow's attacks increases its damage by a lot. You can charge shots simply by firing arrows one after the other or by using Charging Sidestep. Fully charged shots are also key to maximizing damage with Power Shots, so it's best to understand how to maintain max charge with the Dance combo loop.
You may also charge your bow up to Level 4 if you have the Bow Charge Plus skill!
Aim for Charge Level 4!
Using Bow Charge Plus is mandatory for the Bow as Charge Level 4 increases damage from Charge Level 3 by 20%! This damage increase is no joke, so always go for that Charge Level 4!
Utilize the Charging Sidestep
The Charging Sidestep is both useful for evading and empowering your shots by one level. It is highly recommended that you weave this move into your combos, especially since it's needed to maintain shots at max charge.
When Using Dodgebolt, Consider Using Evade Extender
Dodgebolt has a very short dodge animation compared to Charging Sidestep mostly because it's a counterattack dodge, not an evasion dodge. While not necessary, putting Lv. 1 Evade Extender in your build can help mitigate the short dodge animation and give you ample evade distance to dodge out in dangerous situations.
If you're using Charging Sidestep, however, remove Evade Extender from your build. Charging Sidestep covers enough distance, and adding more will do you more harm than good because it will mess up your critical distance!
Master the Power Shot Animation Cancel
| Switch Controls | |
|---|---|
| PC Controls | Right Click + Space → Left Click then immediately press MB4 |
| PlayStation Controls | |
| Xbox Controls |
Power Shot Animation Cancel effectively increases your DPS by shooting two full arrow shots very quickly. If you want to dish out great damage, we suggest practicing doing this until it's second nature!
Use Power Shots Wisely
While firing both Power Shots is ideal for DPS, it's also important to know when to fire Power Shots as firing recklessly can get you carted easily. Sometimes, firing just one Power Shot or none at all is fine if it means avoiding attacks. Power Shots also consume lots of stamina, so proper management is necessary to maintain full charge.
Support Allies with Arc Shots
Instead of doing damage, Arc Shots in Monster Hunter Rise (MH Rise) now apply buffs to whoever is in the targeted area. The duration of Arc Shot effects can also be extended with the Lasting Arc Shot rampage skill. Provide support to your allies with Arc Shots whenever it is needed!
Use Coatings When Necessary
Bow users should look to use coatings as much as possible not only to do more damage, but to provide support to their teammates by paralyzing, poisoning, or knocking out the monster. Take note, however, that some bows only support certain types of coatings, so check out your Bow's details before going on hunts!
For Bows that have compatibility with a lot of coatings, we suggest putting Lv. 2 Reload Speed into your builds. Having Lv. 2 Reload Speed automatically loads coatings as you cycle through them—perfect for Bows that support a wide range of coatings!
Types of Coatings and Effects
| Coating | Max Qty. in Pouch | Effect |
|---|---|---|
| ∞ | Arrows designed to deal more damage to nearby targets, at the cost of a reduced maximum range. Close range is now considered critical distance. Damage is boosted by Bladescale Hone. |
|
|
|
50 | An arrow coating that increases the attack power of arrows. |
|
|
20 | An arrow coating that applies paralysis effects to arrows. |
|
|
20 | An arrow coating that applies poison effects to arrows. |
|
|
20 | An arrow coating that induces sleep. |
|
|
20 | An arrow coating that applies explosive powder to arrows. |
|
|
20 | Drains the monster's stamina so it tires more easily. Shots to the head can stun the monster. |
Know the Different Behaviors of Each Shot Type
The different shot types have varying behaviors depending on several factors like distance and monster size. For example, Pierce Type Bows are great against large enemies with long bodies and are effective from afar. Knowing the behavior of each Bow can improve your overall performance!
Spread Shot Type
| Spread Shot |
|---|
| Spreads the arrow in a fan in front of you. Spreads arrows in a horizontal line so it's hard to focus on a weak spot unless up close. Quite easy to aim at weak spots because of the spread nature of the arrows. Spread Lvl 1: 3 Arrows Spread Lvl 2: 3 Arrows Spread Lvl 3: 5 Arrows Spread Lvl 4: 5 Arrows Spread Lvl 5: 5 Arrows Range: Short |
Rapid Shot Type
| Rapid Shot |
|---|
| Focuses all arrow hits on one area. Great for targeting weak spots. Quite hard to aim at weak spots. Rapid Lvl 1: 1 Arrow Rapid Lvl 2: 2 Arrows Rapid Lvl 3: 3 Arrows Rapid Lvl 4: 4 Arrows Rapid Lvl 5: 4 Arrows Range: Medium |
Pierce Shot Type
| Pierce Shot |
|---|
| Great against Leviathans and huge Elder Dragons. The arrow pierces through a focused spot and then continues through the monster, dealing 5 continuous hits. Quite hard to aim at weak spots. The number of arrow hits depends on the travel through the monster. Maximum of 6 hits. Range: Long |
Changes from MHW: Iceborne
Arc Shots are Now Used for Support
Arc Shots in MH Rise have changed to providing support in the battlefield by scattering stat-improving dust in a portion of the battlefield. These Arc Shots have the following effects:
| Arc Shot Type | Effect |
|---|---|
| Affinity | Increases affinity by 15% for a short period of time |
| Brace | Negates knockback for a short period of time |
| Recovery | Gradually restores health for a short period of time. |
Monster Hunter Rise (MH Rise) Related Guides

| Weapon Type Guides | ||
|---|---|---|
 Weapons and Weapon Types Weapons and Weapon Types |
 Weapon Type Tier List Weapon Type Tier List |
 Builds for Each Weapon Type Builds for Each Weapon Type |
Melee Weapon Guides
| Melee Weapons | ||
|---|---|---|
Guide | Weapon Tree |
Guide | Weapon Tree |
Guide | Weapon Tree |
Guide | Weapon Tree |
Guide | Weapon Tree |
Guide | Weapon Tree |
Guide | Weapon Tree |
Guide | Weapon Tree | Melodies |
Guide | Weapon Tree |
Guide | Weapon Tree |
Guide | Weapon Tree | Kinsects |
|
Ranged Weapon Guides
| Ranged Weapons | ||
|---|---|---|
Guide | Weapon Tree |
Guide | Weapon Tree |
Guide | Weapon Tree |
Comment
1  Anonymous almost 5 years
Gunner reticle controls doesn't have option fast.
Author

Sunbreak Bow Guide: Combos, Controls and Moveset
Please participate in our site
improvement survey
03/2026
improvement survey
03/2026
Would you assist in
improving Game8's site?
improving Game8's site?

×
We are listening to our users' valuable opinions and discussing how to act on them.
The information collected through this survey will be used for the purpose of improving our services. In addition, the information will only be disclosed a part of a statistic in a format that will not allow identification of personal information.
Begin Survey
Not Now
×
Please rate each item regarding Game8.co's Advertisements.
Amount of Ads
Very Dissatisfied
Somewhat Dissatisfied
Fine
Somewhat Satisfied
Highly Satisfied
Placement of Ads
Timing of Ad Display
Ad Loading Speed
Safeness of Ads
Content of Ads
×
Please rate each item regarding Game8.co's Quality of Articles.
Amount of information
Very Dissatisfied
Somewhat Dissatisfied
Fine
Somewhat Satisfied
Highly Satisfied
Frequency of updates
Speed of new information
Accuracy of articles
Understandibility of articles
Readability of sentences
×
Please rate each item regarding Game8.co's Usability of the Site.
Ease of finding information
Very Dissatisfied
Somewhat Dissatisfied
Fine
Somewhat Satisfied
Highly Satisfied
Loading Speed
Use of Color
Font Size
Visibility of Images
Easy to Understand Layout
×
Please rate each item regarding Game8.co's Message Boards, Comments.
Ease of Writing
Very Dissatisfied
Somewhat Dissatisfied
Fine
Somewhat Satisfied
Highly Satisfied
Readability
Ease in Finding Information
Comment Quality
Comment Quantity
Admin Response
×
Please rate each item regarding Game8.co's Site's new design.
Please rate our site's new design
Very Dissatisfied
Somewhat Dissatisfied
Fine
Somewhat Satisfied
Highly Satisfied
Do you think that the website's design change makes the site easier to use?
Has the new design made it easier for you to find information on the site?
Has the new design improved the overall visual appeal of the site?
How would you rate your overall satisfaction with the new design of the site?
×
How likely are you to recommend Game8 to someone you know?
Very Unlikely
0
1
2
3
4
5
6
7
8
9
10
Very Likely
If you have other opinions regarding potential improvement to the website, please share them with us. We would appreciate your honest opinion.
Note: This is a free response section, so you can proceed without entering anything.
Note: Please be sure not to enter any kind of personal information into your response.
Note: Please be sure not to enter any kind of personal information into your response.
×
Thank You
×
Thank you for participating in our survey! Your answers will help us to improve the quality of our website and services.
We hope you continue to make use of Game8.
We hope you continue to make use of Game8.
Close
Rankings
- We could not find the message board you were looking for.
Gaming News


![Monster Hunter Stories 3 Review [First Impressions] | Simply Rejuvenating](https://img.game8.co/4438641/2a31b7702bd70e78ec8efd24661dacda.jpeg/thumb)
Popular Games

Genshin Impact Walkthrough & Guides Wiki
Honkai: Star Rail Walkthrough & Guides Wiki
Umamusume: Pretty Derby Walkthrough & Guides Wiki
Pokemon Pokopia Walkthrough & Guides Wiki
Resident Evil Requiem (RE9) Walkthrough & Guides Wiki
Monster Hunter Wilds Walkthrough & Guides Wiki
Wuthering Waves Walkthrough & Guides Wiki
Arknights: Endfield Walkthrough & Guides Wiki
Pokemon FireRed and LeafGreen (FRLG) Walkthrough & Guides Wiki
Pokemon TCG Pocket (PTCGP) Strategies & Guides Wiki


Recommended Games
Diablo 4: Vessel of Hatred Walkthrough & Guides Wiki
Cyberpunk 2077: Ultimate Edition Walkthrough & Guides Wiki
Fire Emblem Heroes (FEH) Walkthrough & Guides Wiki
Yu-Gi-Oh! Master Duel Walkthrough & Guides Wiki
Super Smash Bros. Ultimate Walkthrough & Guides Wiki
Pokemon Brilliant Diamond and Shining Pearl (BDSP) Walkthrough & Guides Wiki
Elden Ring Shadow of the Erdtree Walkthrough & Guides Wiki
Monster Hunter World Walkthrough & Guides Wiki
The Legend of Zelda: Tears of the Kingdom Walkthrough & Guides Wiki
Persona 3 Reload Walkthrough & Guides Wiki


All rights reserved
©CAPCOM CO., LTD. ALL RIGHTS RESERVED.
The copyrights of videos of games used in our content and other intellectual property rights belong to the provider of the game.
The contents we provide on this site were created personally by members of the Game8 editorial department.
We refuse the right to reuse or repost content taken without our permission such as data or images to other sites.
What happened to the recommended switch skills before the sunbreak expansion.