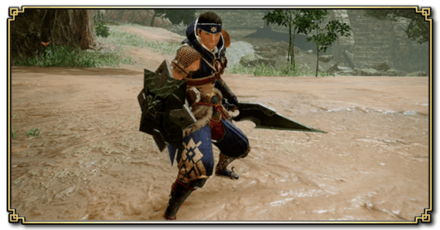
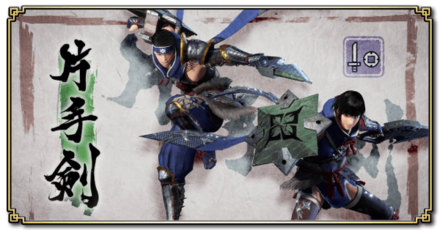
Sunbreak Sword and Shield Guide: Combos, Controls and Moveset
★ All Title Updates now available for ALL PLATFORMS!
┗ Title Update 4 | Title Update 5 | Bonus Update
┗ Check out all our Best Builds For Every Weapon!
┗ TU4 Monsters: Velkhana | Risen C.G. Valstrax
┗ TU5 Monsters: Amatsu | Risen Shagaru Magala
┗ Bonus Update Monster: Primordial Malzeno

This is a guide to the Sword and Shield (SNS), a weapon in Monster Hunter Rise: Sunbreak (MH Rise). Read on to learn about new Sword and Shield controls and combos, how to use Sword and Shield Perfect Rush, the Sword and Shield's new Guard Point move, Sword and Shield Oils, as well as details on Sword and Shield Switch Skills.
| All Sword and Shield Guides | ||
|---|---|---|
 Trees & Full List Trees & Full List |
 How to Use How to Use |
 Best Builds Best Builds |
List of Contents
Sword and Shield Balance Changes
| Sword and Shield Balance Changes and Fixes (Update 15.0) |
|---|
| ・Fixed a bug causing the Sword & Shield's Jumping Slash to combo into a Rising Slash instead of a Roundslash if performed right after landing. |
This update is mostly aimed at fixing a bug with Jumping Slash. No major changes for the Sword and Shield this time.
Update 13.0
| Sword and Shield Balance Changes and Fixes (Update 13.0) |
|---|
| ・Applying Destroyer Oil now also restores some sharpness (in addition to its current effect). ・Fixed an issue with the timing of chaining a Rising Slash into a Roundslash, where using the button assigned for a Roundslash would mistakenly chain into a Lateral Slash or Shield Attack instead. ・Followers: attack power for follower using the weapon type Sword & Shield has been increased. |
With the buff to Destroyer Oil, we'll be seeing more potential in its damage output thanks to it now being able to restore some sharpness.
A bug has been fixed regarding the chaining of Rising Slash into a Roundslash mistakingly leading into a Lateral Slash or Shield Attack instead. With this fix, we'll be able to see more proper Sword & Shield combos for better damage output and survivability.
Update 10.0
| Sword and Shield Balance Changes and Fixes (Update 10.0) |
|---|
| ・ Adjusted all of the following weapon actions: ・ Advancing Slash: Attack power slightly increased ・ Rising Slash: Attack power slightly increased ・ Chop: Attack power slightly increased ・ Side Slash: Attack power slightly increased ・ Lateral Slash: Attack power slightly increased ・ Return Stroke: Attack power slightly increased ・ Spinning Rising Slash: Attack power slightly increased ・ Roundslash: Attack power slightly increased ・ Spinning Reaper: Attack power increased ・ Shield Attack: Attack power slightly increased ・ Shield Bash: Attack power increased ・ Sword/Shield Combo (Shield): Attack power slightly increased ・ Sword/Shield Combo (Sword): Attack power increased ・ Sliding Slash: Attack power increased ・ Falling Shadow (Chop): Attack power increased ・ Falling Bash (Heavy): Attack power increased ・ Falling Bash (Heavy, landing): Attack power increased ・ Drill Slash: Elemental scaling increased ・ Windmill: Attack power slightly increased; Elemental scaling increased; Sharpness consumption reduced ・ Perfect Rush 1: Attack power increased ・ Perfect Rush 2 (1st Hit - Strong): Attack power increased ・ Perfect Rush 2 (2nd Hit - Strong): Attack power increased; Elemental scaling increased ・ Perfect Rush 2 (3rd Hit - Strong): Attack power increased ・ Perfect Rush 3 (Strong): Attack power increased ・ Perfect Rush 4 (Strong): Attack power increased; Elemental scaling increased ・ Perfect Rush 2 (2nd Hit - Weak): Attack power increased ・ Perfect Rush 2 (3rd Hit - Weak): Attack power increased ・ Perfect Rush 4 (Weak): Attack power increased; Elemental scaling increased ・ Perfect Rush 4 (Thrust): Slightly enlarged the hit detection. ・ Fixed a bug where you couldn't cancel your blocking stance after performing a Guard Slash immediately after entering a blocking stance after a Rising Slash. |
The buff on Perfect Rush and Windmill makes the Sword and Shield a powerful weapon after the update. This opens up other possibilities for the Sword and Shield that maybe people would use Windmill more than Metsu Shoryugeki.
They're pushing for more elemental damage too, with increased Elemental Scaling for Perfect Rush introduced in the patch.
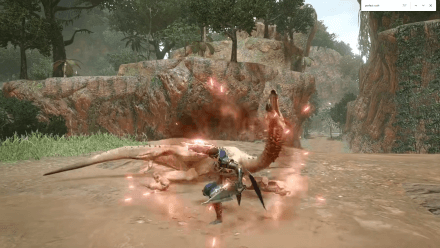
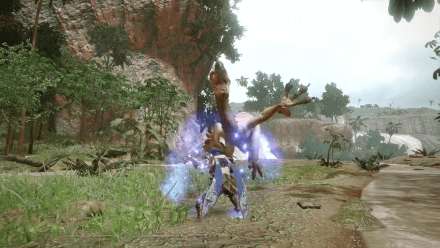
Sword and Shield New Sunbreak Attacks and Moves
Official Sword and Shield Preview Video
Silkbind Attack: Destroyer Oil

Destroyer Oil makes its return from MHGU as a Silkbind Attack for the Sword and Shield in Sunbreak! While active, the oil makes it easier to stagger monsters. Use this opportunity to deal more damage!
Switch Skill: Twin Blade Combo
This Switch Skill replaces the end of the basic Sword/Shield Combo with a circular slash followed by a thrust. The additional hits make this useful for applying more elemental and status damage.
Silkbind Attack: Shield Bash
Not introduced in any trailer, Shield Bash is an additional Silkbind Attack added to the Sunbreak Expansion. A great gap closer tool for all Sword and Shield users, it also deals stun damage after making contact with the monster! If your Guard skill is high enough, you might be able to take on hits when timed right!
Monster Hunter Rise: Sunbreak
Release Date and New Monsters
How Good is the Sword and Shield?
Tier List Ranking
| MHRise Ranking | → | Sunbreak Ranking |
|---|---|---|
(S - A - B) 3 Level Tier |
(SS - S - A) 3 Level Tier |
The Sword and Shield continues to be the well-rounded weapon we know and love in the Sunbreak expansion. The buff on Perfect Rush gives it the power it needed to go toe-to-toe with monsters. The additions for it is kind of mediocre though, with Destroyer Oil not delivering as much as we expected and many more. Still, it remains to be a viable choice for Hunters that loves to balance offense and defense effectively.
Sword and Shield Strengths
High Elemental Damage and Number of Hits

Sword and Shield's weapons often have high Elemental damage. Sword and Shield attacks also hit multiple times, allowing them to deal elemental damage and apply status ailments faster.
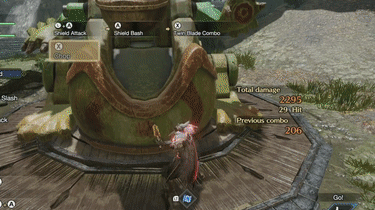
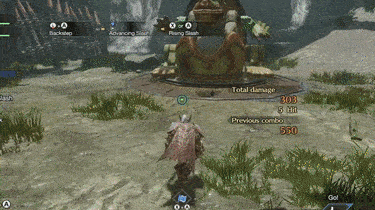
Perfect Rush is Powerful
Perfect Rush, while difficult to execute, has one of the highest DPS rates of any move in the game. Players must execute it with proper timing, and it can take a long time to get used to. In Monster Hunter Rise, players can now perform a Perfect Rush from a Guard Slash, increasing the potential to combo into a Perfect Rush.
Stun with Shield
Attacks with the Shield, including Charged Slash, count as stun damage and can be used to knock out a monster.
No Need to Sheathe to Use Items
The Sword and Shield is the only weapon that can use items without having to sheathe the weapons. This gives it incredible utility when setting up traps or healing during emergencies.
Guarding with Shield
While it is far from being the best shield in the game, being able to guard against attacks on the fly is incredibly valuable. Not to mention the existence of a Guard Point whenever you Guard Slash.
Sword and Shield Weaknesses
Easily Flinched
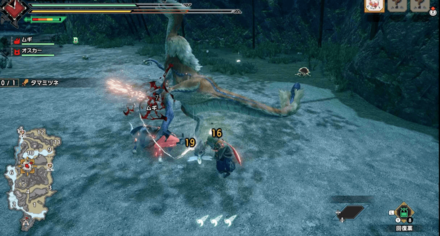
If you get hit by an ally's attack, you can easily get flinched out of your combos. In Monster Hunter Rise (MH Rise), there is a skill called Flinch Free that a lot of hunters utilize as a countermeasure to this problem.
Short Reach
The Sword and Shield has a shorter reach than most weapons, making it difficult to attack parts that are high up (often the head or the tail). Hunters can mitigate this with jumping moves like Metsu Shoryugeki or the Sliding Slash Switch Skill.
Sword and Shield Controls
| Controls | Action | |
|---|---|---|
| PC |
PS |
Chop |
| Switch |
Xbox |
|
| PC |
PS |
Lateral Slash |
| Switch |
Xbox |
|
| PC Directional Button + Right Click |
PS Left Stick + Circle |
Shield Attack |
| Switch Left Stick + A |
Xbox Left Stick + B |
|
| PC Left Click + Right Click |
PS Triangle + Circle |
Advancing Slash |
| Switch X + A |
Xbox Y + B |
|
| PC MB4 + Left Click |
PS R2 + Triangle |
Rising Slash |
| Switch zR + X |
Xbox RT + Y |
|
| PC |
PS |
Guard |
| Switch |
Xbox |
|
| PC MB4 + Right Click |
PS R2 + Circle |
Guard Slash |
| Switch zR + A |
Xbox RT + B |
|
| PC During a combo, hold Down Direction + Right Click |
PS During a combo, hold Down Left Stick + Circle |
Backstep |
| Switch During a combo, hold Down Left Stick + A |
Xbox During a combo, hold Down Left Stick + B |
|
| PC During a backstep, hold Right Click |
PS During a backstep, hold Circle |
Charged Slash |
| Switch During a backstep, hold A |
Xbox During a backstep, hold B |
|
| PC After a backstep, Left Click |
PS After a backstep, Triangle |
Leaping Slash |
| Switch After a backstep, X |
Xbox After a backstep, Y |
|
| PC After a Leaping Slash or Guard Slash, Left Click |
PS After a Leaping Slash or Guard Slash, Triangle |
Perfect Rush |
| Switch After a Leaping Slash or Guard Slash, X |
Xbox After a Leaping Slash or Guard Slash, Y |
|
| PC MB4 or Middle Click + E |
PS R2 + Square |
Use Item |
| Switch |
Xbox |
|
| PC Middle Click + Left Click |
PS L2 + Triangle |
Falling Shadow |
| Switch zL + X |
Xbox LT + Y |
|
| PC Middle Click + Right Click |
PS L2 + Circle |
Windmill |
| Switch zL + A |
Xbox LT + B |
|
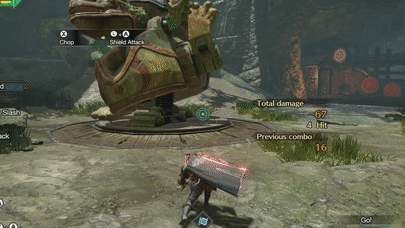
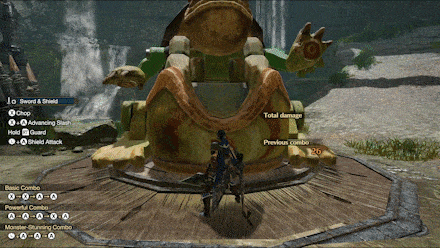
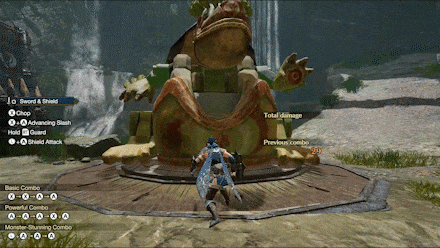
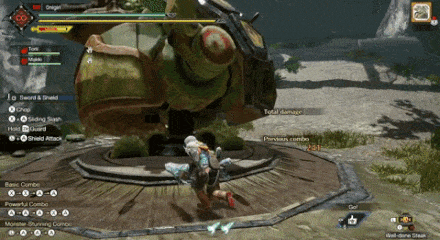
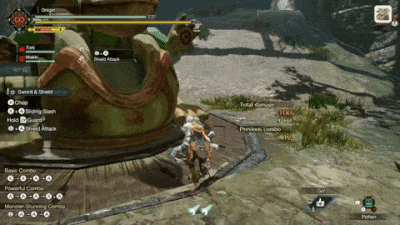
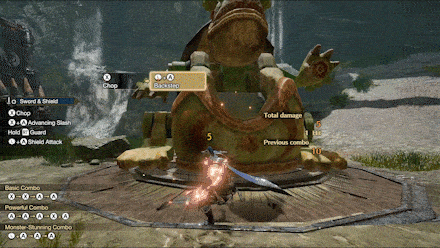
Useful Combos
| Basic Combo | |||
|---|---|---|---|
| Chop | Side Slash | Lateral Slash | Return Stroke |
| Powerful Combo | |||
|---|---|---|---|
| Chop | Side Slash | Lateral Slash | Return Stroke |
| Monster-Stunning Combo | |||
|---|---|---|---|
| Chop | Side Slash | Lateral Slash | |
| Charged Slash Combo | ||||
|---|---|---|---|---|
| Chop | Charged Slash | Hit Monster | Jump Slash | Falling Bash |
| Any attack, then lead to either a Jump Slash or a Falling Bash | ||||
Sword and Shield Silkbind Attacks
Falling Shadow
| Switch Controls | zL + X |
|---|---|
| PC Controls | Middle Click + Left Click |
| PS Controls | L2 + Triangle |
| Xbox Controls | LT + Y |
Falling Shadow is a Silkbind Attack that makes you jump up into the air. When you land the attack, you can combo it to fly into the air again and land another hit with an attack like Falling Bash (A, Right Click, Circle, or B) to stun or Plunging Thrust (X + A, Left Click + Right Click, Triangle + Circle, or Y + B) to deal big damage. It uses one Wirebug has fast Wirebug recovery.
Windmill
| Switch Controls | zL + A |
|---|---|
| PC Controls | Middle Click + Right Click |
| PS Controls | L2 + Circle |
| Xbox Controls | LT + B |
Windmill is a Silkbind Attack that attaches your sword to the end of the Ironsilk and whips it around. This attack grants invincibility frames, so using it with good timing will allow you to avoid Monsters' fierce attacks. This uses two Wirebugs and has fast Wirebug recovery. It can also be swapped with Metsu Shoryugeki or Destroyer Oil.
Metsu Shoryugeki
| Switch Controls | zL + A |
|---|---|
| PC Controls | Middle Click + Right Click |
| PS Controls | L2 + Circle |
| Xbox Controls | LT + B |
Back from MHGU, this nod to the famous Shoryuken attack from Street Fighter returns as a newly announced Silkbind Attack which can be switched out with the Windmill or Destroyer Oil.
Like its namesake, this attack causes the hunter to jump up and uppercut the target with the Shield. You can also follow it up with a Falling Bash (A, Right Click, Circle, or B) to stun or Plunging Thrust (X + A, Left Click + Right Click, Triangle + Circle, or Y + B) to deal big damage.
The user has a short timeframe to Guard against an attack at the beginning of this attack A successful counter here will cause the damage from Metsu Shoryugeki to increase further. This move uses two Wirebugs and has medium recovery speed.
Destroyer Oil

| Switch Controls | zL + A |
|---|---|
| PC Controls | Middle Click + Right Click |
| PS Controls | L2 + Circle |
| Xbox Controls | LT + B |
Destroyer Oil makes its return from MHGU as a Silkbind Attack for the Sword and Shield in Sunbreak! However, it is no longer an item and is now an attack that powers up your ability to stagger monsters. The first part of the attack is a sword thrust that can deal damage, while the second part is quickly applying the oil to the sword.
This Silkbind Attack uses one Wirebug, has medium recovery speed, and can be swapped with Metsu Shoryugeki or Windmill. You'll know the effect is active when your arm glows blue. It lasts for 45 seconds, and you can keep using Destroyer Oil again to extend the duration. As of Version 13, Destroyer Oil also restores 20 sharpness when used.
Shield Bash
| Switch Controls | zL + X |
|---|---|
| PC Controls | Middle Click + Left Click |
| PS Controls | L2 + Triangle |
| Xbox Controls | LT + Y |
A great gap closer tool for all Sword and Shield users. This also deals stun damage after making contact with the monster so use this whenever you can! If your Guard skill is high enough, you might be able to take on hits when timed right!
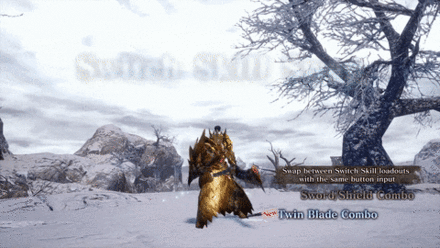
Sword and Shield Switch Skills
Switch Skills are unlocked with different conditions as you progress in the game. Base game MHRise provides Hunters with three (3) slots of Switch Skills, with the Sunbreak expansion adding two (2) more.
Note: Skills in red are exclusive to the Sunbreak expansion.
| Skill Slot | Switch Skill Choices |
|---|---|
| 1 | ・Advancing Slash ・Sliding Slash |
| 2 | ・Hard Basher Combo ・Drill Slash Combo |
| 3 | ・Sword/Shield Combo ・Twin Blade Combo |
| 4 | ・Windmill ・Metsu Shoryugeki ・Destroyer Oil |
| 5 | ・Falling Shadow ・Shield Bash |
Switch Skills Guide: How to Unlock Switch Skills
Drill Slash Combo
| Switched With | |
|---|---|
| Hard Basher Combo | |
| Description | |
| This is a derivative of the Shield Slam that converts Thrust to a Drill Slash. Basically, it is a multi-hit attack with great potential when combined with an elemental weapon. | |
| Controls | |
| After a Shield Bash,
After a Shield Bash, press A, Right Click, Triangle, or B |
|
This Switch Skill has a different finisher for the Sword and Shield's Shield Bash. The hunter sticks the sword through a monster and then pulls it out to deal lingering damage. Useful for element and status Sword and Shield builds.
Sliding Slash

| Switched With | |
|---|---|
| Advancing Slash | |
| Description | |
| A sliding attack that slashes the target twice. High reach but no ability to turn. Allows for a follow-up jumping attack. | |
| Controls | |
| Draw Attack when sheathed,
Draw Attack when sheathed, Draw Attack when sheathed, Draw Attack when sheathed, X + A, Left Click + Right Click, Triangle + Cricle, or Y + B when unsheathed. Pressing A, Right Click, Circle, or B while sliding changes attack to Jumping Rising Slash |
|
A draw attack (or advancing move) that slides the hunter forward and slashes the target twice. You can also follow it up with a jumping slash.
Metsu Shoryugeki
| Switched With | |
|---|---|
| Windmill | |
| Description | |
| A jumping Wirebug attack that uses the shield to uppercut the target. Can perform a Guard at the start and finish off with a Falling Bash. Wirebug Gauge Recovery Speed: Medium Wirebug Cost: 2 |
|
| Controls | |
A Silkbind Attack Switch Skill for Windmill, Metsu Shoryugeki pushes the hunter upward while uppercutting the monster with the shield for blunt damage. Like Windmill, the start of the move also has invincibility frames. Use this to deal insane amount of stun damage to monsters!
Twin Blade Combo
| Switched With | |
|---|---|
| Sword/Shield Combo | |
| Description | |
| Opens the combo with a circular attack then follows up with a blade thrust - both using the sword. Effective for dealing status and elemental damage. | Controls |
Press Use
Press Use
Press Use
Press Use |
|
A more elemental/status inclined combo that replaces the shield bash in the middle of the combo into another sword attack, applying status/element procs more than stun. Pretty good choice if you're fighting a monster that is hard to KO.
Destroyer Oil
| Switched With | |
|---|---|
| Windmill | |
| Description | |
| Uses a Wirebug to cover your blade with a special ointment whose effects triggered by the friction with the shield. Also restores 20 Sharpness when used. While active, monsters flinch easily, creating more opening for attack. Wirebug Gauge Recovery Speed: Medium Wirebug Cost: 1 |
|
| Controls | |
An boost-type Silkbind attack that increases the likelihood of flinching monsters that can create openings for attack. Pretty simple and can be used at any time with no timings needed.
Shield Bash
| Switched With | |
|---|---|
| Falling Shadow | |
| Description | |
| A mix of offense and defense, allows the Hunter to use a Wirebug to dash forward with the shield raised. If the attack connects with a monster, the Hunter can follow up with more attacks. Can also parry an incoming attack - if timed right. Wirebug Gauge Recovery Speed: Fast Wirebug Cost: 1 |
Controls |
A great gap closer tool for all Sword and Shield users. This also deals stun damage after making contact with the monster so use this whenever you can! If your Guard skill is high enough, you might be able to take on hits when timed right!
Sword and Shield Attacks and Moves
Guard Point Counter Added to the Sword and Shield

| Switch Controls | |
|---|---|
| PC Controls | |
| PS Controls | |
| Xbox Controls |
A Guard Point counter has been added to the Guard Slash move of the Sword and Shield! Whenever you successfully trigger the Guard Point, you can counter with Perfect Rush!
Perfect Rush
| Switch Controls | After a Backstep, Down Left Stick + A → X |
|---|---|
| PC Controls | After a Backstep, S + Right Click → Left Click |
| PS Controls | After a Backstep, Down Left Stick + Cricle → Triangle |
| Xbox Controls | After a Backstep, Down Left Stick + B → Y |
The strongest potential combo for the Sword and Shield is the Perfect Rush. It's a specific move that can only be combined from a Backstep → Leaping Slash or a Guard Slash, making it tricky to pull off but worth your while.
If you time your inputs correctly, you'll be able to deal significantly more damage with this attack. The timing is usually denoted by a red glow on the weapon so hit either X or A (Switch), Left Click or Right Click (PC), Triangle or Circle (PS), or Y or B (Xbox) to execute Perfect Rush perfectly.
End Airborne or with Spinning Reaper
When you choose X (Switch), Left Click (PC), Triangle (PS), or Y (Xbox) as the final input for the Perfect Rush combo, your hunter will jump up then you may end the combo with a Falling Bash (A, Right Click, Circle, or B) to stun or Plunging Thrust (X + A, Left Click + Right Click, Triangle + Circle, or Y + B) to deal big damage.
If you choose to input A, Right Click, Circle, or B, your hunter will just execute a smaller roundslash move called Spinning Reaper. It is mostly used when you don't want to go airborne because of poor positioning.
Charged Slash
| Switch Controls | Execute Backstep (↓ + A) while holding Down + A while holding A then release |
|---|---|
| PC Controls | Execute Backstep (Hold S + Right Click) while holding Hold S + Right Click while holding Right Click then release |
| PS Controls | Execute Backstep (↓ + Circle) while holding Down + Circle while holding Circle then release |
| Xbox Controls | Execute Backstep (↓ + B) while holding Down + B while holding B then release |
The Charged Slash also makes a triumphant return together with the Perfect Rush move. After a backstep, the hunter can charge the Sword and Shield to leap high and unleash combos. You can end with a Falling Bash (A or Right Click) to stun or Jumping Slash (X or Left Click) to deal more damage.
Can Use Items While Unsheathed

| Switch Controls | |
|---|---|
| PC Controls | |
| PS Controls | |
| Xbox Controls |
The Sword and Shield is the only weapon that allows for Items to be used without sheathing. This makes it easy to lay traps or handle emergencies quickly, and makes it suitable for support players in a multiplayer setting.
Recommended Combos for the Sword and Shield
Elemental-Centric Combo
| Switch Controls | |
|---|---|
| PC Controls | |
| PS Controls | |
| Xbox Controls |
This combo makes use of the new Switch Skill Twin Blade Combo. This replaces the mid-combo shield bash with another sword attack. It promotes more elemental and status attacks since those procs more easily using the blade, not the shield.
Shield Bash to Perfect Rush
| Switch Controls | |
|---|---|
| PC Controls | |
| PS Controls | |
| Xbox Controls | |
| Sequence | Shield Bash → Sword Combos → Perfect Rush |
This combo uses Shield Bash as a way to close the gap between you and the enemy. After a few hits, you gan follow it up with your powerful Perfect Rush Combo!
Bread-and-Butter Combo

| Switch Controls | X → Left Stick + A → A (x2) → X + A |
|---|---|
| PC Controls | Left Click → Directional Button + Right Click → Right Click (x2) → Left Click + Right Click |
| PS Controls | Triangle → Left Stick + Circle → Circle (x2) → Triangle + Circle |
| Xbox Controls | Y → Left Stick + B → B (x2) → Y + B |
This is the bread-and-butter combo for Sword and Shield. Use this when there is not enough of an opening for a Perfect Rush. It is not as powerful, but it is better than waiting. You can also turn the Left Stick (or WASD) to any direction and hit X + A, Left Click + Right Click, Triangle + Circle, or Y + B to change the direction your hunter is facing! You can also execute a back hop to follow-up with Perfect Rush.
High Damage Perfect Rush - Metsu Shoryugeki Combo

| Switch Controls | ↓
Down + A → X (x3) → A → zL + A |
|---|---|
| PC Controls | S + Right Click → Left Click (x3) → Right Click → Middle Click + Right Click |
| PS Controls | ↓
Down + Circle → Triangle (x3) → Circle → L2 + Circle |
| Xbox Controls | ↓
Down + B → Y (x3) → B → LT + B |
This combo utilizes the power of both Perfect Rush and Metsu Shoryugeki. Use this whenever you have a huge opening like when a monster is down or trapped! What's more, Metsu Shoryugeki can stun a monster when used repeatedly!
High Damage Perfect Rush Combo
| Switch Controls | zR → Down + A → X (x4) → X + A |
|---|---|
| PC Controls | MB4 → S + Right Click → Left Click (x4) → Left Click + Right Click |
| PS Controls | R2 → Left Stick + Circle → Triangle (x4) → Triangle + Circle |
| Xbox Controls | LT → Left Stick + B → Y (x4) → Y + B |
This combo utilizes the Sword and Shield's most powerful move—the Perfect Rush and combines it with the new Plunging Thrust finisher while airborne. Always remember to time the Perfect Rush hits properly for maximum damage (Clue: When red, hit X, Left Click, Trangle, or Y). This combo is great whenever there is an opening to attack the monster so you can time a Perfect Rush properly!
Falling Shadow Combo

| Switch Controls | →
→
zL + X → A (Shield Bash) or X + A (Plunging Thrust) |
|---|---|
| PC Controls | → →
Middle Click + Left Click → Right Click or Left Click + Right Click |
| PS Controls | →
→
L2 + Triangle → Circle (Shield Bash) or Triangle + Circle (Plunging Thrust) |
| Xbox Controls | →
→
LT + Y → B (Shield Bash) or Y + B (Plunging Thrust) |
This combo utilizes the Silkbind Attack Falling Shadow. After the Shield Bash or Plunging Thrust, you can backstep and then proceed to a Perfect Rush!
Tips on How to Use the Sword and Shield
|
|
Stun to Create Opportunities for Perfect Rush
We recommend using shield attacks like Shield Bash and Metsu Shoryugeki on the head of the monster to accumulate stun. This will give you a big opening to execute a Perfect Rush.
Utilize Windmill or Metsu Shoryugeki
Windmill and Metsu Shoryugeki both have invincibility frames at the start of their animations. This can be used as an emergency button when you need to nullify an attack.
Maximize Wirebug Usage

Wirebugs can easily close the gap between you and a monster, making up for the Sword and Shield's short reach.
Execute Perfect Rush... perfectly

As mentioned earlier, the Perfect Rush can dish out a ton of damage when done correctly. So when an opening presents itself, always try to execute it perfectly.
Only Use the Guard Slash Guard Point During Emergencies
Sword and Shield's guarding ability is not the best, so do not be overly reliant on guarding. However, Sword and Shield now has a Guard Point whenever you execute a Guard Slash. We recommend using this over the default Guard during emergencies. You can even increase the performance of Guarding by investing in Guard or Guard Up armor skills.
Sword and Shield Known Bugs and Fixes
Update 3.5 Bug Fix

Update 3.5 fixed a gameplay bug related to Sword and Shield! Whenever Sword and Shield players perform the Falling Bash attack and then move back while pressing X and A (Left Click and Right Click), they will now correctly perform a Roundslash instead of a Backstep.
Update 3.5: Ghosts 'n Goblins Resurrection Collaboration, DLC, and Patch Notes
Changes from the Past Games
Turning Slash is Gone
In Iceborne, you could execute a turning slash to change the direction your hunter is facing. This is now gone in Monster Hunter Rise.
Perfect Rush Finisher has Changed
The Perfect Rush finisher in Monster Hunter Rise can end with a jumping slash or a simple roundslash. You can follow up the jump attack with Falling Bash (A or Right Click) to stun or Plunging Thrust (X + A or Left Click + Right Click) to deal big damage.
Guard Slash has a Guard Point
The Guard Slash receives a Guard Point in Monster Hunter Rise that can be useful for emergencies. It can even be used to follow up with a Perfect Rush.
Sword and Shield Oils are Gone
One of the best items to use for the Sword and Shield in Monster Hunter Generations Ultimate (MHGU) were Sword and Shield oils. All oils are sadly not present in the base Monster Hunter Rise (MH Rise), but Destroyer Oil is making a return in Sunbreak.
Monster Hunter Rise (MH Rise) Related Guides

| Weapon Type Guides | ||
|---|---|---|
 Weapons and Weapon Types Weapons and Weapon Types |
 Weapon Type Tier List Weapon Type Tier List |
 Builds for Each Weapon Type Builds for Each Weapon Type |
Melee Weapon Guides
| Melee Weapons | ||
|---|---|---|
Guide | Weapon Tree |
Guide | Weapon Tree |
Guide | Weapon Tree |
Guide | Weapon Tree |
Guide | Weapon Tree |
Guide | Weapon Tree |
Guide | Weapon Tree |
Guide | Weapon Tree | Melodies |
Guide | Weapon Tree |
Guide | Weapon Tree |
Guide | Weapon Tree | Kinsects |
|
Ranged Weapon Guides
| Ranged Weapons | ||
|---|---|---|
Guide | Weapon Tree |
Guide | Weapon Tree |
Guide | Weapon Tree |
Comment
Press X + A in mid air to do a downward trust
Author

Sunbreak Sword and Shield Guide: Combos, Controls and Moveset
Rankings
- We could not find the message board you were looking for.
Gaming News


![Monster Hunter Stories 3 Review [First Impressions] | Simply Rejuvenating](https://img.game8.co/4438641/2a31b7702bd70e78ec8efd24661dacda.jpeg/thumb)
Popular Games

Genshin Impact Walkthrough & Guides Wiki
Honkai: Star Rail Walkthrough & Guides Wiki
Umamusume: Pretty Derby Walkthrough & Guides Wiki
Pokemon Pokopia Walkthrough & Guides Wiki
Resident Evil Requiem (RE9) Walkthrough & Guides Wiki
Monster Hunter Wilds Walkthrough & Guides Wiki
Wuthering Waves Walkthrough & Guides Wiki
Arknights: Endfield Walkthrough & Guides Wiki
Pokemon FireRed and LeafGreen (FRLG) Walkthrough & Guides Wiki
Pokemon TCG Pocket (PTCGP) Strategies & Guides Wiki


Recommended Games
Diablo 4: Vessel of Hatred Walkthrough & Guides Wiki
Cyberpunk 2077: Ultimate Edition Walkthrough & Guides Wiki
Fire Emblem Heroes (FEH) Walkthrough & Guides Wiki
Yu-Gi-Oh! Master Duel Walkthrough & Guides Wiki
Super Smash Bros. Ultimate Walkthrough & Guides Wiki
Pokemon Brilliant Diamond and Shining Pearl (BDSP) Walkthrough & Guides Wiki
Elden Ring Shadow of the Erdtree Walkthrough & Guides Wiki
Monster Hunter World Walkthrough & Guides Wiki
The Legend of Zelda: Tears of the Kingdom Walkthrough & Guides Wiki
Persona 3 Reload Walkthrough & Guides Wiki


All rights reserved
©CAPCOM CO., LTD. ALL RIGHTS RESERVED.
The copyrights of videos of games used in our content and other intellectual property rights belong to the provider of the game.
The contents we provide on this site were created personally by members of the Game8 editorial department.
We refuse the right to reuse or repost content taken without our permission such as data or images to other sites.
XA mid combo is turning slash...