Apex Arzuros Guide: Weakness, Armor, Drops, and Weapons | Monster Hunter Rise
★ All Title Updates now available for ALL PLATFORMS!
┗ Title Update 4 | Title Update 5 | Bonus Update
┗ Check out all our Best Builds For Every Weapon!
┗ TU4 Monsters: Velkhana | Risen C.G. Valstrax
┗ TU5 Monsters: Amatsu | Risen Shagaru Magala
┗ Bonus Update Monster: Primordial Malzeno

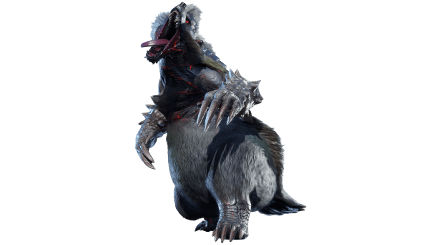
This is a hunting guide for Apex Arzuros, a Large Monster in Monster Hunter Rise (MH Rise). Read on to learn Apex Arzuros's weaknesses, forgeable weapons, forgeable armor, drops, and more!
 Apex Arzuros Guide Apex Arzuros Guide
|
 Arzuros Guide Arzuros Guide
|
List of Contents
Apex Arzuros Weakness and Notes
| Apex Arzuros ヌシ・アオアシラ |
|||
|---|---|---|---|
 |
|||
| Type | Fanged Beast | ||
| Threat Level | 8/10 | Rampage Type |
|
| Major Weakness | Other Weakness | ||
| Blight / Elemental Damage | ー | Abnormal Status | ー |
| Characteristics | |||
| An Arzuros so mighty, it was crowned an Apex. It is eternally possessed by wrath and terror, possibly due to the myriad wounds that cover its body. Its forelegs are massive, deft removers of any who'd stand in their way. The call of an Apex unleashes its tortured anger on nearby beasts, driving them into a frenzy. | |||
How to Unlock Apex Arzuros
Reach Anomaly Investigation Lv 21 in Master Rank
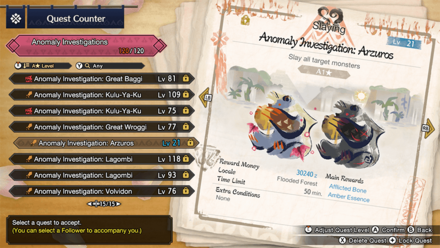
Apex Arzuros can only be encountered as an additional target monster in Anomaly Investigations starting as low as Level 21. Defeating it rewards a base of 190 Anomaly Research Points. Unlike most monsters in Master Rank, Apex Arzuros doesn't gain any new moves.
Solo Quest Unlocked at HR 8
| Quest Name | Monster/Unlock |
|---|---|
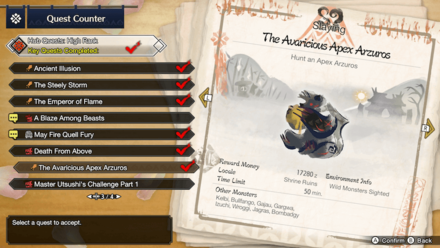
| The Avaricious Apex Arzuros |
|
| Unlock Conditions: Reach HR 8 after hunting Apex Arzuros in a Rampage Quest |
Once you update to Version 2.0, reach HR 8, and defeat an Apex Arzuros in a Rampage at least once, you can take on Apex Arzuros in its own slaying quest!
Update 2.0 Guide: Patch Notes and New Monsters
Apex Arzuros Weakness and Resistance
| 40 | 36 | 30 | 10 |
| 0 | 8 | 12 | 0 |
Bold are the recommended Weapon Type and Elemental Damage.
Apex Arzuros Weapon Damage Breakdown
| Part | |||
|---|---|---|---|
| Head | 50 | 45 | 35 |
| Upper Half | 38 | 38 | 35 |
| Foreleg | 45 | 45 | 30 |
| Abdomen | 38 | 24 | 26 |
| Hind Leg | 38 | 24 | 26 |
| Rear | 30 | 40 | 30 |
| Overall | 40 | 36 | 30 |
Apex Arzuros Elemental Weakness Breakdown
| Part | |||||
|---|---|---|---|---|---|
| Head | 5 | 0 | 5 | 5 | 0 |
| Upper Half | 15 | 0 | 10 | 5 | 0 |
| Foreleg | 20 | 0 | 15 | 10 | 0 |
| Abdomen | 5 | 0 | 5 | 16 | 0 |
| Hind Leg | 5 | 0 | 5 | 16 | 0 |
| Rear | 12 | 0 | 5 | 20 | 0 |
| Overall | 10 | 0 | 8 | 12 | 0 |
Higher numbers indicate higher potential damage to the monster.
Apex Arzuros Hunting Tips

An angry Apex Arzuros will trigger a devastating move, closing in while thrashing the ground, hitting obstacles with a colossal strike. Push on against an enraged Apex to quickly rid of its rage and steady its temper.
Status Effect Vulnerabilities
| Poison | Stun | Paralysis | Sleep |
|---|---|---|---|
| ★ | ★ | -- | -- |
| Blast | Exhaust | Fireblight | Waterblight |
| ★★ | -- | ★★ | ★ |
| Thunderblight | Iceblight | ||
| ★ | ★ | ||
If an ailment has more stars it means that it has better effectiveness.
Item Vulnerabilities
| Pitfall Trap | Shock Trap | Flash Bomb |
|---|---|---|
| ✕ | ✕ | ◯ |
| Sonic Bomb | Meat Effects | Dung Bomb |
| ✕ | ✕ | ◯ |
◯ = Vulnerable; ✕ = Fully Resistant; ▲ = Situational
Apex Arzuros Locations
Apex Arzuros Known Habitat
| Map | Starting Area | Visited Areas | Rest Area |
|---|---|---|---|
 Shrine Ruins Shrine Ruins
|
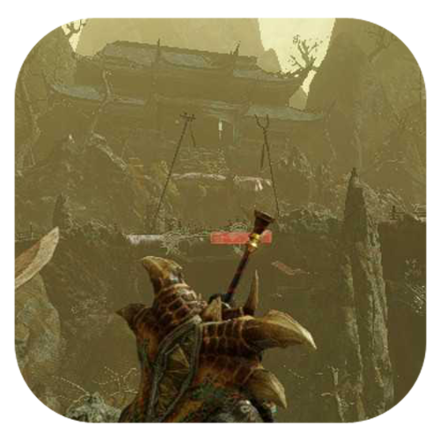
6 | 3 / 4 / 6 / 7 / 8 / 13 | 3 |
 Flooded Forest Flooded Forest
|
13 | 11 / 12 / 13 | 11 / 13 |
 Infernal Springs Infernal Springs
|
- | - | - |
Apex Arzuros Quest Appearances
| Quest Type | Lvl | Quest Name |
|---|---|---|
| Urgent Hub Quest | ★4 | The Blue Apex |
| Event Quest | ★7 | Haste Makes Waste |
| Event Quest | ★7 | Apex Arzuros Emergency |
| Event Quest | ★7 | Heart of an Apex |
| Event Quest | ★7 | USJ - Arzuros Onslaught! |
| Hub Quest | ★7 | The Avaricious Apex Arzuros |
| No Quest in This Rank |
How to Beat Apex Arzuros
|
|
Aim for the Head and Arms

Apex Arzuros has weakness on its heads and arms. For the Normal Arzuros, the weakness is at the rear but Apex Arzuros' rear is extremely hard. We suggest going for the head and the arms!
Beware of Apex Arzuros' Roar!

Apex Arzuros, unlike the normal Arzuros, has a loud roar! Take note whenever it raises both its arms!
Apex Arzuros Cannot be Mounted
Apex Monsters like Apex Arzuros cannot be mounted. Take note of this whenever you try to launch monsters towards it - just go for Mounted Punishers.
Traps Do Not Work
Apex monsters know all your tricks from all the hunters it has faced (and survived) before. Both Shock and Pitfall Traps wouldn't work against Apex Arzuros so don't bother carrying and setting one! Flash Bombs work against them though so just invest in those for crowd control!
Apex Monsters Can't Be Captured
Subsequently, Apex monsters can't be captured as well. Take note of this when on Apex hunts to not waste resources!
Keep one Wirebug for the Apex Bear Swipes
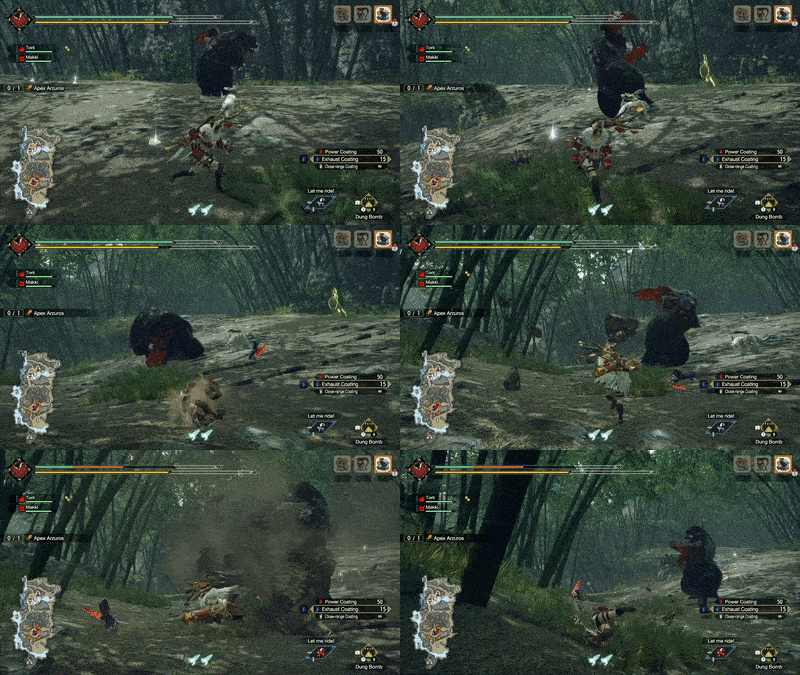
Apex Bear Swipes can one-shot hunters when not mitigated properly. When you see yourself taking one swipe and flying upward, Wirefall (zL + B) away before the follow-up attack!
Apex Arzuros General Attack Patterns
| Name | Description |
|---|---|
| Jump Smash | Apex Arzuros will jump high in an arc then land on an unsuspecting hunter. This also deals Tremor in an area after it lands! |
| Rock Throw | Apex Arzuros will throw rocks at hunters because of its rage. When angry, it will perform this move twice in a row. |
| Apex Bear Swipes [DANGER] |
Apex Arzuros' ultimate move where it swipe with extreme force. A hunter caught in the attack will be thrown up and followed up with a punch - basically a death combo. |
| All of Apex Arzuros' moves in the Rampage are also present when hunting it in the Hub Quest! |
|---|
Jump Smash
| Jump Smash Attack Information |
|---|
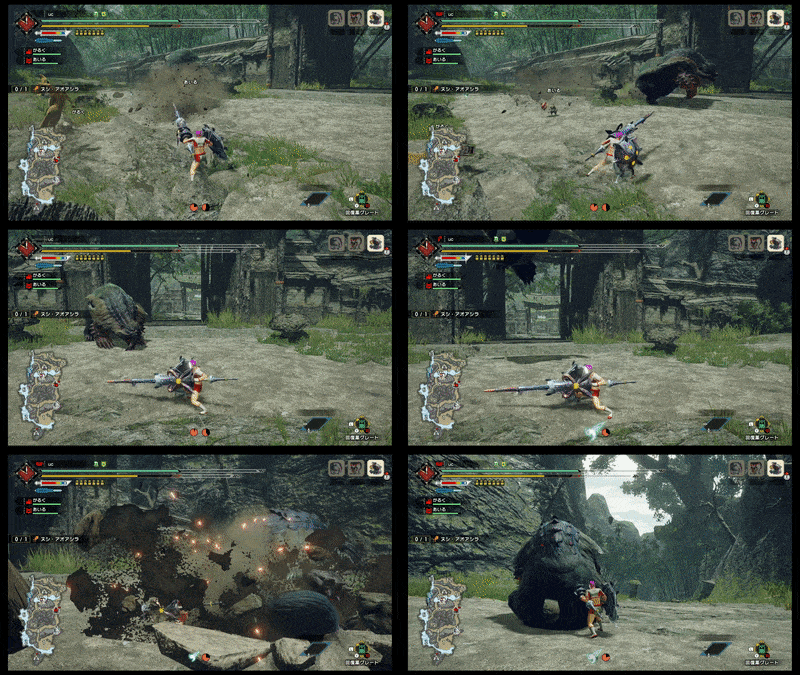 Jump Smash: Apex Arzuros will jump high in an arc then lands on hunters. Any hunters in the center will receive massive damage and those in the landing zone will be stunned due to Tremor. You can easily telegraph this by checking if Apex Arzuros goes down on all fours and while shaking its behind. This move also has a very large opening when it misses allowing you to attack so try to telegraph this as much as possible. |
Rock Throw
| Rock Throw Attack Information |
|---|
 Rock Throw: Apex Arzuros can hurl rocks towards hunters. When Apex Arzuros is angry, it will execute this move twice! This has a pretty large hitbox so guard if you're using a shield, counterattack with moves, or use Emergency Evade! |
Apex Bear Swipes
| Apex Bear Swipes Attack Information |
|---|
 Apex Bear Swipes: Apex Arzuros will use its very powerful arms to swipe hunters to the air, up to five (5) times when angry. Anyone caught will be thrown into the air where Apex Arzuros can follow up with a very powerful punch. This can reduce your health to zero so be careful! If you're caught with one of the swipes, use a Wirefall before the follow-up attack! |
Apex Arzuros Rampage Tips
How to Beat Apex Arzuros on Rampages
| Apex Arzuros Key Notes |
|---|
Use Master Utsushi to Mount a Monster

Master Utsushi's effect allows you to instantly ride a monster. However, Apex Arzuros himself cannot be mounted. When Apex Arzuros appears, wait for it to summon a horde before using Master Utsushi to get a free ride on a monster!
Elder Fugen Deals Around 4000 Damage to Apex Arzuros
Summoning Elder Fugen only when Apex Arzuros appears is highly recommended. He can deal a massive amount of damage to Apex Arzuros and more damage is always welcome when fighting Apex monsters.
Yomogi Triggers a long Counter Signal

When Yomogi is summoned, she'll grant hunters a buff that increases hunting capabilities. This has the same effects as a Counter Gong so go all out when Yomogi is used!
If Available, Use the Splitting Wyvern Shot
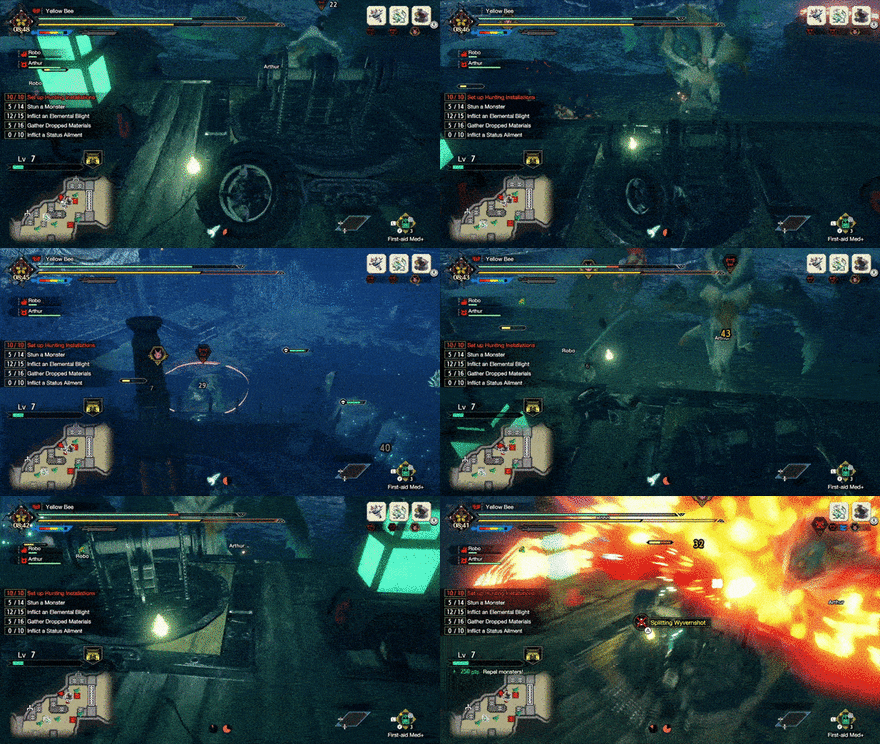
The Splitting Wyvernshot is one of the strongest facilities you should be using against Apex Monsters. With one use, you can deal around 7000 damage and if used together with Elder Fugen, you can deal more than 10,000 damage with just two installations.
General Rampage Tips

There are also general guidelines applicable to every Rampage quest. Check out our Rampage Guide for the best way to get S-Rank in every Rampage!
Rampage Guide and Tips: How to Get S-Rank
Apex Arzuros Materials and Drops
Master Rank Apex Arzuros Materials
| You cannot capture this monster! |
High Rank Apex Arzuros Materials
| You cannot capture this monster! |
Apex Arzuros Dropped Materials
Monster Hunter Rise Related Guides
Monster Guides by Rank
Village Rank ★2
| 2-Star Large Monsters | |||
|---|---|---|---|
 Great Izuchi Great Izuchi |
 Arzuros Arzuros |
 Great Baggi Great Baggi |
 Lagombi Lagombi |
Village Rank ★3
| 3-Star Large Monsters | |||
|---|---|---|---|
 Aknosom Aknosom |
 Tetranadon Tetranadon |
 Kulu-Ya-Ku Kulu-Ya-Ku |
 Barroth Barroth |
 Great Wroggi Great Wroggi |
 Royal Ludroth Royal Ludroth |
 Khezu Khezu |
|
Village Rank ★4
| 4-Star Large Monsters | |||
|---|---|---|---|
 Bishaten Bishaten |
 Somnacanth Somnacanth |
 Barioth Barioth |
 Rathian Rathian |
 Tobi-Kadachi Tobi-Kadachi |
 Volvidon Volvidon |
 Basarios Basarios |
 Pukei-Pukei Pukei-Pukei |
Village Rank ★5
| 5-Star Large Monsters | |||
|---|---|---|---|
 Magnamalo Magnamalo |
 Nargacuga Nargacuga |
 Zinogre Zinogre |
 Anjanath Anjanath |
 Mizutsune Mizutsune |
 Rathalos Rathalos |
||
Village Rank ★6
| 6-Star Large Monsters | |||
|---|---|---|---|
 Almudron Almudron |
 Goss Harag Goss Harag |
 Tigrex Tigrex |
 Diablos Diablos |
High Rank Hub Quests
| High Rank Large Monsters | |||
|---|---|---|---|
 Jyuratodus Jyuratodus |
 Rajang Rajang |
 Rakna-Kadaki Rakna-Kadaki |
 Bazelgeuse Bazelgeuse |
Elder Dragons
| Elder Dragons | |||||
|---|---|---|---|---|---|
 Narwa the Allmother Narwa the Allmother |
|||||
 Wind Serpent Ibushi Wind Serpent Ibushi |
 Thunder Serpent Narwa Thunder Serpent Narwa |
 Crimson Glow Valstrax Crimson Glow Valstrax |
|||
 Chameleos Chameleos |
 Kushala Daora Kushala Daora |
 Teostra Teostra |
|||
Apex Monsters
| Apex Monsters | ||
|---|---|---|
 Apex Arzuros Apex Arzuros |
 Apex Rathian Apex Rathian |
 Apex Mizutsune Apex Mizutsune |
 Apex Rathalos Apex Rathalos |
 Apex Diablos Apex Diablos |
 Apex Zinogre Apex Zinogre |
Small Monsters
Author
Apex Arzuros Guide: Weakness, Armor, Drops, and Weapons | Monster Hunter Rise
improvement survey
03/2026
improving Game8's site?

Your answers will help us to improve our website.
Note: Please be sure not to enter any kind of personal information into your response.

We hope you continue to make use of Game8.
Rankings
- We could not find the message board you were looking for.
Gaming News
Popular Games

Genshin Impact Walkthrough & Guides Wiki

Honkai: Star Rail Walkthrough & Guides Wiki

Umamusume: Pretty Derby Walkthrough & Guides Wiki

Pokemon Pokopia Walkthrough & Guides Wiki

Resident Evil Requiem (RE9) Walkthrough & Guides Wiki

Monster Hunter Wilds Walkthrough & Guides Wiki

Wuthering Waves Walkthrough & Guides Wiki

Arknights: Endfield Walkthrough & Guides Wiki

Pokemon FireRed and LeafGreen (FRLG) Walkthrough & Guides Wiki

Pokemon TCG Pocket (PTCGP) Strategies & Guides Wiki
Recommended Games

Diablo 4: Vessel of Hatred Walkthrough & Guides Wiki

Cyberpunk 2077: Ultimate Edition Walkthrough & Guides Wiki

Fire Emblem Heroes (FEH) Walkthrough & Guides Wiki

Yu-Gi-Oh! Master Duel Walkthrough & Guides Wiki

Super Smash Bros. Ultimate Walkthrough & Guides Wiki

Pokemon Brilliant Diamond and Shining Pearl (BDSP) Walkthrough & Guides Wiki

Elden Ring Shadow of the Erdtree Walkthrough & Guides Wiki

Monster Hunter World Walkthrough & Guides Wiki

The Legend of Zelda: Tears of the Kingdom Walkthrough & Guides Wiki

Persona 3 Reload Walkthrough & Guides Wiki
All rights reserved
©CAPCOM CO., LTD. ALL RIGHTS RESERVED.
The copyrights of videos of games used in our content and other intellectual property rights belong to the provider of the game.
The contents we provide on this site were created personally by members of the Game8 editorial department.
We refuse the right to reuse or repost content taken without our permission such as data or images to other sites.

 Altaroth
 Anteka
 Baggi
Baggi Bnahabra
 Bombadgy
 Bullfango
 Delex
Delex Felyne
 Gajau
Gajau Gargwa
 Izuchi
 Jaggi
Jaggi Jaggia
 Jagras
 Kelbi
Kelbi Kestodon
 Ludroth
 Melynx
 Popo
Popo Rachnoid
 Remobra
 Rhenoplos
 Slagtoth
 Uroktor
 Wroggi
 Zamite


![Monster Hunter Stories 3 Review [First Impressions] | Simply Rejuvenating](https://img.game8.co/4438641/2a31b7702bd70e78ec8efd24661dacda.jpeg/thumb)


