Sunbreak Dual Blades Builds (Master Rank)
★ All Title Updates now available for ALL PLATFORMS!
┗ Title Update 4 | Title Update 5 | Bonus Update
┗ Check out all our Best Builds For Every Weapon!
┗ TU4 Monsters: Velkhana | Risen C.G. Valstrax
┗ TU5 Monsters: Amatsu | Risen Shagaru Magala
┗ Bonus Update Monster: Primordial Malzeno

This is a guide to the best builds and equipment for Dual Blades in Monster Hunter Rise (MH Rise): Sunbreak. Learn about the best Dual Blades for Master Rank, and the best Skills and Armor pieces to use with the Dual Blades for Master Rank from the early game until the end game!
| All Dual Blades Guides | ||
|---|---|---|
 Trees & Full List Trees & Full List |
 How to Use How to Use |
 Best Builds Best Builds |
List of Contents
Dual Blades Builds List & Progression
This is a quick section summarizing all the Dual Blades builds in this page. It is arranged from newest to oldest, and MR build progression is from bottom to top.
Click on the build name to see the build!
| Master Rank | Title Update | Build Name |
|---|---|---|
| MR120+ | BU | Blood Awakening Dragon DB Comfort Build |
| MR160+ | TU5 | Heaven-Sent, Dragon Conversion Elemental DB |
| MR180+ | TU5 | Heaven-Sent, Frenzied Bloodlust Elemental DB |
| MR160+ | TU4 | Furious Rimeguard, Dragon Conversion DB |
| MR140+ | TU4 | Buildup Status DB |
| MR140+ | TU3 | Meta Elemental DPS Build |
| MR10+ | TU3 | Berserk Thunder Elemental DB |
| MR10+ | TU3 | General Berserk Elemental DB |
| MR10+ | TU1 | Elemental DB Climber |
| MR10+ | TU1 | Poison Dual Blades |
| MR10+ | TU1 | Raw Master's Touch DB |
| MR3-6 | Base | Mid Game Elemental |
| MR3-6 | Base | Mid Game Raw Max Affinity |
| MR3-6 | Base | Mid Game DB Blast |
| MR1-2 | Base | Cyclone+ Raw Affinity |
Ultra Endgame MR Build: MR 100+
Blood Awakening Dragon DB Comfort Build (BU)
Recommended Dual Blades
| Weapon | ATK | DEF | Affinity |
|---|---|---|---|
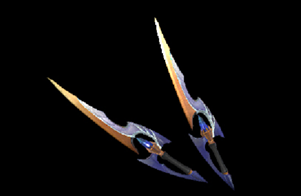 Silver Slicers Silver Slicers
 |
310 | 0 | 0% |
| Element / Status |
Slots | Rampage Slots | |
| ④④④ | ③ |
| Decorations |
|
|
|---|---|---|
* = check Build Merits below.
Recommended Armor Loadout
| Armor | Slots | Skills | |
|---|---|---|---|
|
|
③②① |
Wirebug Whisperer Lv. 3
Wind Mantle Lv. 1
|
|
|
|
④④② |
Burst Lv. 1
Blood Awakening Lv. 1
|
|
|
|
④④② |
Critical Boost Lv. 1
Blood Awakening Lv. 1
|
|
|
|
③①ー | ||
|
|
④④ー | ||
| Talisman | Attack Boost 3 with a ②②① slot | ||
| Rampage Decoration |
Alternative: |
||
| Skills | Rampage Skill | Element Exploit to increase elemental damage. If target is immune to Dragon, consider Wyvern Exploit, Anti-Aerial Species, Anti-Aquatic Species, or Fanged Exploit depending on the monster. |
|---|---|
|
Attack Boost Lv. 5 | Critical Eye Lv. 5
Dragon Attack Lv. 5 | Constitution Lv. 3 Weakness Exploit Lv. 3 | Recovery Up Lv. 3 Parbreaker Lv. 3 | Wirebug Whisperer Lv. 3 Blood Rite Lv. 3 | Element Exploit Lv. 3 Blood Awakening Lv. 3 | Critical Boost Lv. 2 Critical Element Lv. 2 | Razor Sharp Lv. 2 Evade Extender Lv. 2 | Kushala Blessing Lv. 2 Burst Lv. 1 | Intrepid Heart Lv. 1 Wind Mantle Lv. 1 | Shock Absorber Lv. 1 |
Build Merits & Augments
| Weapon Augments | |
|---|---|
| Armor Augments |
Armor Augments for this build are not necessary. However, feel free to add as you please once you get comfortable with your build! Generally, you'd want to get better skills and more slots for your armor.
Replaceable skills already on the armor: ● Kushala Blessing For damage, aim for any of the following: ● Powder Mantle ● Critical Element ● Burst For comfort, aim for the following: ● Stamina Surge ● Wind Mantle ● Frenzied Bloodlust |
| Build Merits and Notes |
The Bonus Update introduces a new aggressive comfort skill: Blood Awakening. While seeming like a gimmick, this skill shines in Anomaly hunts when dealing with Bloodblight.
This build uses three pieces of Primordial Malzeno armor and two pieces of Risen Kushala Daora. In these armor pieces are comfort skills such as Wirebug Whisperer and Wind Mantle, which help greatly in bringing out the Shrouded Vault switch skill when countering or I-framing monster attacks, and Constitution for stamina management. You can use Dash Juice to help reduce stamina drain when using Demon Mode. All three levels of Blood Rite and Partbreaker are present to hasten the activation of Blood Awakening. Further damage skills are provided as listed above to strengthen your overall damage. The Silver Slicers Dragon Dual Blades boost the health you gain from Blood Rite and Bloodblight, which makes it a good pair with the build's core skill Blood Awakening. This build is a late bloomer in a hunt due to it requiring breaking parts and Bloodblight to be fully effective. The Dragon Conversion build is still the best for dealing elemental damage, since the element here relies heavily on the element increase of Blood Awakening. You can at least safely recieve some Bloodblight by making use of Intrepid Heart, which significantly reduces damage and nullifies knockback when filled. Either augment your armor to gain it or augment for an extra slot to fit in another jewel! |
|---|
Heaven-Sent, Dragon Conversion Elemental Dual Blades Build (TU5)
Recommended Elemental Dual Blades
| Weapon | ATK | DEF | Affinity |
|---|---|---|---|
 Magma Shredders Magma Shredders
 |
300 | 0 | 0% |
| Element / Status |
Slots | Rampage Slots | |
| ③ーー | ③ |
| Decorations |
*Depending on Talisman: or |
|
|---|---|---|
| Weapon | ATK | DEF | Affinity |
|---|---|---|---|
 Mud Shredders Mud Shredders
 |
300 | 0 | 0% |
| Element / Status |
Slots | Rampage Slots | |
| ②①ー | ③ |
| Decorations |
*Depending on Talisman: or |
|
|---|---|---|
| Weapon | ATK | DEF | Affinity |
|---|---|---|---|
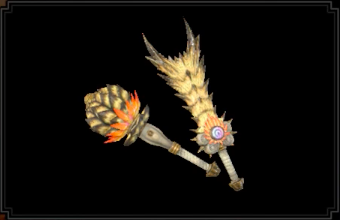 Double Discharge Double Discharge
 |
300 | 0 | 0% |
| Element / Status |
Slots | Rampage Slots | |
| ーーー | ② |
| Decorations |
*Depending on Talisman: or |
|
|---|---|---|
| Weapon | ATK | DEF | Affinity |
|---|---|---|---|
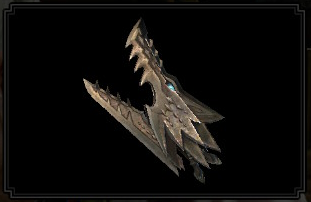 Daora's Ventus Daora's Ventus
 |
310 | 0 | 0% |
| Element / Status |
Slots | Rampage Slots | |
| ②ーー | ③ |
| Decorations |
*Depending on Talisman: or |
|
|---|---|---|
| Weapon | ATK | DEF | Affinity |
|---|---|---|---|
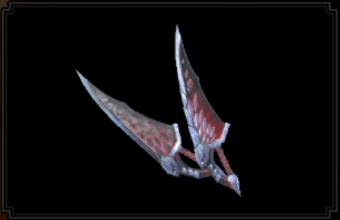 Crimson Twinwing Crimson Twinwing
 |
330 | 0 | 0% |
| Element / Status |
Slots | Rampage Slots | |
| ②ーー | ② |
| Decorations |
*Depending on Talisman: or |
|
|---|---|---|
* = check Build Merits below.
Recommended Armor Loadout
| Armor | Slots | Skills | |
|---|---|---|---|
|
|
④②ー | ||
|
|
④④① |
Critical Boost Lv. 1
Heaven-Sent Lv. 1
|
|
|
|
④④① |
Latent Power Lv. 1
Heaven-Sent Lv. 1
|
|
|
|
④①① | ||
|
|
④④ー |
Critical Boost Lv. 2
Heaven-Sent Lv. 1
|
|
| Talisman |
Weakness Exploit 2 with a ②① slot Secondary Skill Recommendations: Constitution Lv.2 |
||
| Rampage Decoration |
For Thunder and Dragon Build: |
||
| Skills | |
|---|---|
| Rampage Skill | Element Exploit to increase elemental damage against each element For the Thunder and Dragon Build: Swap between Wyvern Exploit, Anti-Aerial Species, Anti-Aquatic Species, or Fanged Exploit depending on the monster. |
|
Element Attack Lv.5
Intrepid Heart Lv.1Critical Eye Lv.6 | Attack Boost Lv.4 Critical Boost Lv.3 | Weakness Exploit Lv.3 Latent Power Lv.3 | Stamina Surge Lv.3 Heaven-Sent Lv.3 | Coalescence Lv.2 Burst Lv. 2 | Dragon Conversion Lv.2 Bloodlust Lv.1 | Shock Absorber Lv.1 Constitution Lv.2-3 or Critical Element Lv. 2-3 | Constitution Lv.2 see Build Merits for the Thunder and Dragon Build only For the Fire Build: Teostra Blessing Lv.2 For the Water and Ice Build: Kushala Blessing Lv.2 |
|
Build Merits & Augments
| Weapon Augments | |
|---|---|
| Armor Augments |
Armor Augments for this build are not necessary. However, feel free to add as you please once you get comfortable with your build! Generally, you'd want to get better skills and more slots for your armor.
Replaceable skills already on the armor: ● Stamina Surge (only a single point) For damage, aim for any of the following: ● Dragon Conversion (to max it out) ● Powder Mantle ● Critical Element ● Burst For comfort, aim for the following: ● Wind Mantle |
| Build Merits and Notes |
|---|
| *Note: If you've acquired Constitution as the secondary skill for your talisman via Qurious Melding -Vigor, you can swap out the Physique Jewels for Crit Element Jewels.
In Free Title Update 5, the heavenly armor of Amatsu descended from the skies. Three pieces of this armor introduced a new skill; Heaven-Sent. This skill bestows its users powers when they manage to not get caught in any attacks. At level 3, it negates stamina depletion and sharpness loss. This is perfect for Dual Blades users, making it possible to stay in Demon or Feral Demon Mode the whole time you're fighting while keeping your sharpness up! Risen Crimson Glow Valstrax's armor skill, Dragon Conversion, converts elemental resistances you get from attacking with the Blue Swap Scroll to elemental damage when you switch to the Red Swap Scroll. This is a powerful skill to use with elemental builds and for weapons that are able to land hits continuosly. Be sure to start fights with this build with the Blue Swap Scroll first and switch to Red only when the elemental resistance logo appears at the top of your health bar. Also take extra care when fighting with the Red Swap Scroll as your elemental resistances will all be 0. For affinity, we optimized skills like Latent Power, Weakness Exploit, and, thanks to TU5 introducing it as a decoration, Bloodlust. With all of this activated, it is possible to deal 100% affinity on weakspots. To further increase this damage, we also slotted Attack Boost and Coalescence. |
Heaven-Sent, Frenzied Bloodlust Elemental Dual Blades Build (TU5)
Recommended Elemental Dual Blades
| Weapon | ATK | DEF | Affinity |
|---|---|---|---|
 Magma Shredders Magma Shredders
 |
300 | 0 | 0% |
| Element / Status |
Slots | Rampage Slots | |
| ③ーー | ③ |
| Decorations |
*Depending on Talisman: or |
|
|---|---|---|
| Weapon | ATK | DEF | Affinity |
|---|---|---|---|
 Mud Shredders Mud Shredders
 |
300 | 0 | 0% |
| Element / Status |
Slots | Rampage Slots | |
| ②①ー | ③ |
| Decorations |
*Depending on Talisman: or |
|
|---|---|---|
| Weapon | ATK | DEF | Affinity |
|---|---|---|---|
 Double Discharge Double Discharge
 |
300 | 0 | 0% |
| Element / Status |
Slots | Rampage Slots | |
| ーーー | ② |
| Decorations |
*Depending on Talisman: or |
|
|---|---|---|
| Weapon | ATK | DEF | Affinity |
|---|---|---|---|
 Daora's Ventus Daora's Ventus
 |
310 | 0 | 0% |
| Element / Status |
Slots | Rampage Slots | |
| ②ーー | ③ |
| Decorations |
*Depending on Talisman: or |
|
|---|---|---|
| Weapon | ATK | DEF | Affinity |
|---|---|---|---|
 Crimson Twinwing Crimson Twinwing
 |
330 | 0 | 0% |
| Element / Status |
Slots | Rampage Slots | |
| ②ーー | ② |
| Decorations |
*Depending on Talisman: or |
|
|---|---|---|
* = check Build Merits below.
Recommended Armor Loadout
| Armor | Slots | Skills | |
|---|---|---|---|
|
|
③②① |
Wirebug Whisperer Lv. 3
Wind Mantle Lv. 1
|
|
|
|
④④① |
Critical Boost Lv. 1
Heaven-Sent Lv. 1
|
|
|
|
④④① |
Latent Power Lv. 1
Heaven-Sent Lv. 1
|
|
|
|
④②ー | ||
|
|
④④ー |
Critical Boost Lv. 2
Heaven-Sent Lv. 1
|
|
| Talisman |
Attack Boost 3 with a ②① slot or better Secondary Skill Recommendations: Agitator Lv.3 |
||
| Rampage Decoration |
For Thunder and Dragon Build: |
||
| Skills | |
|---|---|
| Rampage Skill | Element Exploit to increase elemental damage against each element For the Dragon Build: Swap between Wyvern Exploit, Anti-Aerial Species, Anti-Aquatic Species, or Fanged Exploit depending on the monster. |
|
Element Attack Lv.5
Intrepid Heart Lv.1-2Attack Boost Lv.7 | Critical Boost Lv.3 Weakness Exploit Lv.3 | Critical Element Lv.3 Wirebug Whisperer Lv.3 | Heaven-Sent Lv.3 Latent Power Lv.1 | Coalescence Lv.1 Bloodlust Lv.1 | Wind Mantle Lv.1 Frenzied Bloodlust Lv.1 | Shock Absorber Lv.1 Normal Talisman: Constitution Lv.3 | Maximum Might Lv.2-3 Burst Lv. 2 Talisman with Recommended Secondary Skill: Agitator Lv.4 | Burst Lv. 3 Maximum Might Lv.2 | Constitution Lv.2 see Build Merits except Fire and Ice Build For the Fire Build: Teostra Blessing Lv.2 For the Water and Ice Build: Kushala Blessing Lv.2 |
|
Build Merits and Augments
| Weapon Augments | |
|---|---|
| Armor Augments |
Armor Augments for this build are not necessary. However, feel free to add as you please once you get comfortable with your build! Generally, you'd want to get better skills and more slots for your armor.
Replaceable skills already on the armor: ● Latent Power For damage, aim for any of the following: ● Dragon Conversion ● Powder Mantle ● Burst |
| Build Merits and Notes |
|---|
| *Note: Depending on the talisman you have, you will have skill variations in this build, as shown in the previous section above. For a Normal Talisman, equip a Mighty Jewel and a Physique Jewel. If you've acquired the recommended talisman with Agitator as its secondary skill via Qurious Melding -Vigor, equip a Challenger Jewel and a Chain Jewel to further boost this build's damage values. In Free Title Update 5, the heavenly armor of Amatsu descended from the skies. Three pieces of this armor introduced a new skill; Heaven-Sent. This skill bestows its users powers when they manage to not get caught in any attacks. At level 3, it negates stamina depletion and sharpness loss. This is perfect for Dual Blades users, making it possible to stay in Demon or Feral Demon Mode the whole time you're fighting while keeping your sharpness up! With the infinite stamina provided by this skill, we slotted in Maximum Might to contribute more to DPS. TU5 also introduced the armor of Risen Shagaru Magala, with the unique skill, Frenzied Bloodlust. This skill allows you to have one extra wirebug after overcoming the Frenzy Virus. The build is also equipped with the Wind Mantle skill and a level 3 Wirebug Whisperer from the Risen Kushala Daora Armor. Combining this all of this will grant you access to a lot of wirebugs, making Spiral Slash or any Dual Blades silkbind attacks more readily available. Unleash the Dual Blades full potential! With Maximum Might, Weakness Exploit, and Bloodlust, the build is equipped with lots of affinity! For this reason, we focused on adding more to raw and element values. This build maxes out Attack Boost and Critical Element, has 2 levels of Burst (maxed out with the right talisman), and a single point in Coalescence. All in all, every Dual Blades combo will surely be 'heaven sent'. |
TU4 Furious Rimeguard Dragon Conversion Build
| Armor | Slots | Skills | |
|---|---|---|---|
|
|
④②ー | ||
|
|
④④ー | ||
|
|
④ーー |
Critical Eye Lv. 2
Furious Lv. 1
|
|
|
|
④①① | ||
|
|
④①ー | ||
| Talisman | Critical Eye 3 with a ②① slot or better. | ||
| Rampage Decoration | |||
| Decorations |
Hard Element Jewel+ 4 x1
(except Element Jewel+ 1 x1 (except |
||
| Skills | |
|---|---|
| Rampage Skill | Kushala Daora Soul for increased affinity or Elembane for increased elemental attack. |
|
Element Attack Lv. 5 | Critical Eye Lv. 5
Ice Attack Lv. 5 | Attack Boost Lv. 4 Weakness Exploit Lv. 3 | Critical Element Lv. 3 Stamina Surge Lv. 3 | Dragon Resistance Lv. 3 Speed Sharpening Lv. 3 | Element Exploit Lv. 3 Dragon Conversion Lv 3 | Latent Power Lv. 2 Evade Extender Lv. 2 | Critical Boost Lv. 1 Burst Lv. 1 | Furious Lv. 1 |
|
Build Merits and Augments
| Weapon Augments |
|
|---|---|
| Armor Augments |
Armor Augments for this build are not necessary. However, feel free to add as you please once you get comfortable with your build! Generally, you'd want to get better skills and more slots for your armor.
Replaceable skills already on the armor: ● Latent Power For damage, aim for any of the following: ● Powder Mantle ● Burst For comfort, aim for the following: ● Stamina Surge |
| Build Merits and Notes |
|---|
| Title Update 4's new Dragon Conversion skill finds its potential in fast-striking weapons that can dish out tons of elemental damage. This build encourages an offensive playstyle with viable defensive options.
Any high-damage elemental weapon with at least an affinity of 0% is fit for this build provided it has at least a ② slot and a ③ rampage slot (if it is only a ② rampage slot, augmenting it with a Rampage Slot Upgrade is recommended.) If you take an Ice weapon, Rimeguard Greaves provides Ice Attack Lv. 5 as a bonus. Raising your elemental attack through Dragon Conversion is this build's main feature. With Furious, +5 resistance to all elements is added when using the red swap scroll. More elemental attack can be gained out of this setup through jewels for Element Attack Lv. 5, giving a 20% and +4 increase to elemental attack. Defense Boost Lvl. 5 or Elemental Resistance Lv. 3 can be used instead if you are using an Ice weapon since Ice Attack already exists. Adjust per monster weakness accordingly! For utility, Stamina Surge takes care of stamina management while Evade Extender has been added for better movement options. This makes dashes more fluid, which helps greatly in evading large AoE attacks by monsters such as Risen Teosta and chasing with attacks for Dragon Conversion against fast moving foes like Furious Rajang. This works well with the Slide Slash Combo switch skill. For added counter options, Demon Flight and Shrouded Vault switch skills are recommended. Eat elemental resistance dangos for more elemental attack conversion (as they each give +10 resistance without a Hopping Skewer). Mind the resistance cap when you do so! With 25% affinity from Critical Eye, 50% from Weakness Exploit, 5% from Affinity Boost augment, and the initial 15% from Daora Soul, you should have at least 95% affinity on weak spots (80% if you have Elembane instead.) With Latent Power's 20% affinity active, affinity goes over 100%. |
Below are the recommended dual blades to pair with this Dragon Conversion build as of TU4!
Fire Elemental Dual Blades
| Weapon | ATK | DEF | Affinity |
|---|---|---|---|
 Flaming Wyvern Lovers Flaming Wyvern Lovers
 |
310 | 0 | 0% |
| Element / Status |
Slots | Rampage Slots | |
| ②ーー | ③ |
Generally a good pair of blades with enough slots for this build. This can be switched with Wyvern Strife if you want 57 element at the expense of only white sharpness, or Kaktus Ehrgeiz for more slots and 15% affinity but with only 41 element.
Water Elemental Dual Blades
| Weapon | ATK | DEF | Affinity |
|---|---|---|---|
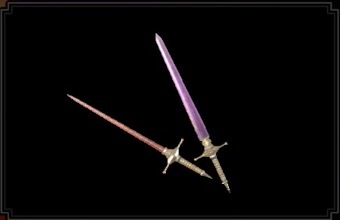 Sacred Espadas Sacred Espadas
 |
310 | 0 | 0% |
| Element / Status |
Slots | Rampage Slots | |
| ②ーー | ② |
If looking for water dual blades, then this is good one to go for. This can be switched with Double Droth Flood+ for a decent amount of slots and ③ rampage slot but for only 45 element and white sharpness, or Mud Shredders for 62 element, ③ rampage slot, but 10 less attack and white sharpness.
Thunder Elemental Dual Blades
| Weapon | ATK | DEF | Affinity |
|---|---|---|---|
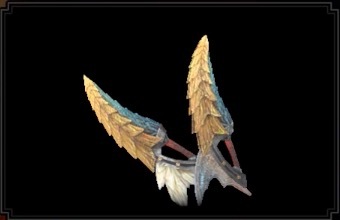 Oppressor's Miracle Oppressor's Miracle
 |
310 | 0 | 0% |
| Element / Status |
Slots | Rampage Slots | |
| ②ーー | ② |
Zinogre's dual blades is the go-to for this build. However, you can switch this out for Double Discharge from Narwa for 69 element but 10 less attack and no slots (you would have to give up a ② slot jewel.)
Ice Elemental Dual Blades
| Weapon | ATK | DEF | Affinity |
|---|---|---|---|
 Daora's Ventus Daora's Ventus
 |
310 | 0 | 0% |
| Element / Status |
Slots | Rampage Slots | |
| ②ーー | ③ |
Daora's Ventus remains to be one of the best for ice elemental dual blades. An alternative is Velkhana's Untouched Hel which boasts a ④ and ① slot, and 20 more attack but only 22 element.
Dragon Elemental Dual Blades
| Weapon | ATK | DEF | Affinity |
|---|---|---|---|
 Crimson Twinwing Crimson Twinwing
 |
330 | 0 | 0% |
| Element / Status |
Slots | Rampage Slots | |
| ②ーー | ② |
The dragon dual blades from Crimson Glow Valstrax is a good all-around for dragon elemental builds. But another good pair to look at is Gila Ro Waga, which gives 3 ② slots and a ③ rampage slot but only 44 element.
TU4 Buildup Status Dual Blades Build
| Weapon | ATK | DEF | Affinity |
|---|---|---|---|
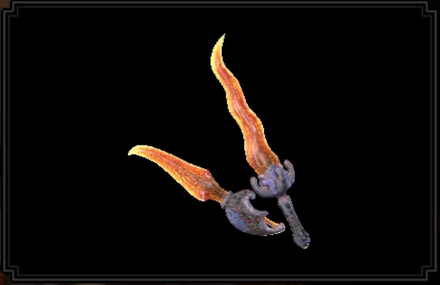 Chameleos Blades Chameleos Blades
 |
310 | 0 | 0% |
| Element / Status |
Slots | Rampage Slots | |
| ③②① | ② |
| Weapon | ATK | DEF | Affinity |
|---|---|---|---|
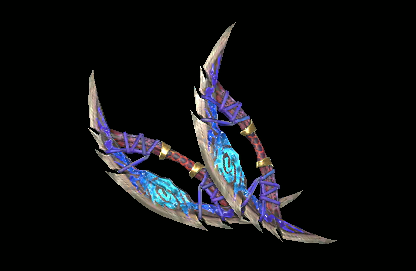 Blue Blaze Blades Blue Blaze Blades
 |
320 | 0 | 0% |
| Element / Status |
Slots | Rampage Slots | |
| ③②ー | ② |
| Armor | Slots | Skills | |
|---|---|---|---|
|
|
③②ー | ||
|
|
②②ー | ||
|
|
④②① | ||
|
|
④③ー | ||
|
|
④①① | ||
| Talisman | Attack Boost Lv. 2 with a ②① slot or better. | ||
| Rampage Decoration | |||
| Decorations |
or or |
||
| Skills | |
|---|---|
| Rampage Skill | Teostra Soul or any Anti-Species Exploit |
|
Critical Eye Lv. 7 |
Attack Boost Lv. 4
Critical Boost Lv. 3 | Weakness Exploit Lv. 3 Master's Touch Lv. 3 | Blast Attack Lv. 3 or Poison Attack Lv. 3 | Powder Mantle Lv. 3 Ballistics Lv. 2 | Evade Window Lv. 2 Evade Extender Lv. 2 | Chameleos Blessing Lv. 2-3 Teostra Blessing Lv. 2 | Buildup Boost Lv. 2 Speed Sharpening Lv. 1-2 | Flinch Free Lv. 1 Foray Lv. 1 |
|
Build Merits and Augments
| Weapon Augments | |
|---|---|
| Armor Augments |
Armor Augments for this build are not necessary. However, feel free to add as you please once you get comfortable with your build! Generally, you'd want to get better skills and more slots for your armor.
Replaceable skills already on the armor: ● Ballistics For damage, aim for any of the following: ● Buildup Boost ● Burst For comfort, aim for the following: ● Stamina Surge |
| Build Merits and Notes |
|---|
| This is a dual blades build that focuses on status effects and uses both Risen Teostra and Risen Chameleos parts. At most, you will have 95% affinity against weakspots. You can easily fit in either a Blast or Poison weapon in this build!
Weapon sharpness is easily maintained thanks to Master's Touch Lv. 3. Damage and weapon status effect is maximized through the combination of Attack Boost, Buildup Boost and other damage-boosting skills. When using poison dual blades, you can swap out 1 Critical Boost for 1 more Foray to get extra 10% affinity on a monster is poisoned. For comfort skills, you can slot in Evade Extender for better movement (this can be swapped out for other skills like Constitution, Stamina Surge, and Marathon Runner). Speed Sharpening has been included shorter sharpen times and Flinch Free whenever you need to reduce monster knockbacks or weapon knockbacks in multiplayer. |
TU3 Meta Elemental DPS Build
| Armor | Slots | Skills | |
|---|---|---|---|
|
|
④②ー | ||
|
|
②②ー | ||
|
|
④②① | ||
|
|
③①① | ||
|
|
④①ー | ||
| Talisman | Attack Boost Lv.3; with one ② slot or better | ||
| Rampage Decoration | |||
| Decoration |
Element Jewel 1 x1 Hard Element Jewel +4 x1 Elder Dragon Blessing Jewel 1 x2 |
||
| Skills | |
|---|---|
| Rampage Skill | Swap between Wyvern Exploit, Anti-Aerial Species, Anti-Aquatic Species, or Fanged Exploit depending on the monster. |
Critical Eye Lv.7 |
Element Attack Lv.5 Attack Boost Lv.4 | Weakness Exploit Lv.3 Critical Boost Lv.3 | Burst Lv.3 Critical Element Lv.3 | Master's Touch Lv.3 Strife Lv.2 | Resentment Lv.2 Elder Dragon Blessing Lv.2 | Element Exploit Lv.1 Powder Mantle Lv.1 | Peak Performance Lv.1 Intrepid Heart Lv.1 | Defiance Lv. 1 |
|
| Build Merits and Notes |
|---|
| Our Meta DPS build for the Dual Blades in Sunbreak's Title Update 3! We slot in the new Strife skill from the Chaotic Gore which allows us to hit 100% affinity with any weapon provided that it does not have any negative affinity due to Strife's 10% affinity bonus from having any red gauge in your HP. Note that we do not need to hit Strife's maximum effect to get the 100% affinity from this build. 95% of the time, you will take damage during the hunt. With our defensive skills in the form of Powder Mantle and Intrepid Heart, you are incentivized to hold off on healing to maximize the uptime of your red gauge without the risk of fainting. The build also features a healthy mix of DPS and sharpness skill such as Attack Boost Lv. 4, Critical Eye Lv. 7, Weakness Exploit Lv. 3, Critical Element Lv. 3, Critical Boost Lv. 3, Element Exploit Lv. 1 (for high elemental weakness monsters) and Master's Touch Lv. 3. This allows us to hit hard continuously without pause. Lastly, with TU3, not only do we gain Powder Mantle for extra safety/DPS, we also gain the new Elder Dragon blessings as level 1 decorations! We add these decorations into the build to further increase our elemental damage with the exception of the Thunder DBs having no Elder Dragon blessing. In the case of Thunder DBs, we can slot in some comfort skills such as speed sharpening or Defiance to offset the emptied level 1 decoration slots. |
Powder Mantle is both an offensive and defensive skill that allows you to deal burst damage to enemies or take explosion damage instead of the monster's hit.
Below are our recommended elemental DBs as of TU3!
Thunder Elemental Dual Blades
| Weapon | ATK | DEF | Affinity |
|---|---|---|---|
 Double Discharge Double Discharge
 |
300 | 0 | 0% |
| Element / Status |
Slots | Rampage Slots | |
| ーーー | ② |
King of the thunder dual blades. Despite not having an Elder Dragon blessing to accompany the thunder element, Double Discharge's DPS levels can still compete with the rest of the elemental dual blades on this list.
Fire Elemental Dual Blades
| Weapon | ATK | DEF | Affinity |
|---|---|---|---|
 Magma Shredders Magma Shredders
 |
300 | 0 | 0% |
| Element / Status |
Slots | Rampage Slots | |
| ③ーー | ③ |
The Magma Shredders is one of the king of fire elemental dual blades together with Wyvern Strife. It sports a 3 slot rampage skill and a high 64 fire elemental damage which allows us to deal high amounts of damage to monsters with high weakness to fire element. For the decoration slot, you can go with a Jumping Jewel to ease the weakness of Demon Flight or just outright add more Attack jewel 2 for more damage.
Water Elemental Dual Blades
| Weapon | ATK | DEF | Affinity |
|---|---|---|---|
 Mud Shredders Mud Shredders
 |
300 | 0 | 0% |
| Element / Status |
Slots | Rampage Slots | |
| ②①ー | ③ |
For Water Dual Blades, the Mud Shredders is the best general water elemental dual blades. It synergizes well with the Element Exploit and Elemental Bane rampage decoration to deal high amounts of damage to monsters with high water elemental weakpoints. For the decoration slot, we recommend getting an additional attack jewel for more DPS and a Flinch Free to avoid tripping when not in Demon Mode.
Ice Elemental Dual Blades
| Weapon | ATK | DEF | Affinity |
|---|---|---|---|
 Daora's Ventus Daora's Ventus
 |
310 | 0 | 0% |
| Element / Status |
Slots | Rampage Slots | |
| ②ーー | ③ |
Daora's Ventus is easily the best Dual Blades among all the existing Ice elemental DBs. It sports a high raw damage of 310 and an above average ice elemental value allowing it to take the best of both worlds. It works universally for all monsters weak to the Ice element. For decoration slot, an Attack Jewel 2 will bump up the build's DPS slightly.
Dragon Elemental Dual Blades
| Weapon | ATK | DEF | Affinity |
|---|---|---|---|
 Crimson Twinwing Crimson Twinwing
 |
330 | 0 | 0% |
| Element / Status |
Slots | Rampage Slots | |
| ②ーー | ② |
Crimson Twinwing is still our dragon elemental DB choice. Shangri-La/Hades DB is great when you're running a bloodlust build but with this set, we completely forego Bloodlust so going for Crimson Twinwing is the best choice moving forward. We can also add in an Attack Jewel 2 to bump our Attack Boost from 4 to 5 to gain some more DPS for the build.
Berserk Thunder Elemental Dual Blade Build
| Weapon | ATK | DEF | Affinity |
|---|---|---|---|
 Double Discharge Double Discharge
 |
300 | 0 | 0% |
| Element / Status |
Slots | Rampage Slots | |
| ーーー | ② |
| Armor | Slots | Skills | |
|---|---|---|---|
|
|
④②ー | ||
|
|
③①ー | ||
|
|
③ーー | ||
|
|
③①① | ||
|
|
③ーー | ||
| Talisman | Critical Element Lv.2, with a ② slot | ||
| Rampage Decoration |
|
||
| Decorations | |||
| Skills | |
|---|---|
|
Critical Eye Lv7 |
Resentment Lv5
Thunder Attack Lv5 | Strife Lv3 Critical Boost Lv3 | Coalescence Lv3 Critical Element Lv3 | Master's Touch Lv3 Berserk Lv2 | Bloodlust Lv2 Element Exploit Lv1 | Flinch Free Lv1 Handicraft Lv1 |
| Build Merits and Notes |
|---|
|
This is the thunder elemental build for TU3 that features the new Chaotic Gore Magala armor set. However, it is separated from our general elemental build as this build features a different setup utilizing Handicraft to make use of the weapon's innate purple sharpness and push it further. With the Berserk skill, we can entirely focus on aggressive plays by going for Blue Scroll or Berserk state where our HP slowly depletes but we can never faint as long as we have a red gauge. We support this mechanic by utilizing the aforementioned Handicraft skill then supporting it with Master's Touch to maintain our Purple and eventually, white sharpness to avoid DPS loss for the entirety or majority of the hunt. Just make sure to watch your HP and fall back to recover if your red gauge is about to deplete. |
General Berserk Elemental Build
| Armor | Slots | Skills | |
|---|---|---|---|
|
|
④②ー | ||
|
|
③①ー | ||
|
|
③ーー | ||
|
|
③①① | ||
|
|
③ーー | ||
| Talisman | Critical Element Lv.2, with a ②① slot | ||
| Rampage Decoration |
|
||
| Decorations |
Hard Elemental Jewel 3x1 Elder Dragon Blessing Jewel 1x2 Elemental Jewel 1 x2 For Water, Fire, and Ice Dual Blades, slot in a Hard Elemental Jewel then two level 1 Elemental Jewels and Elder Dragon Blessing Jewels of the necessary element (Teostra for Fire and Kushala for Ice and Water). For Dragon Dual Blades, equip 5 Elemental Jewels and Equip a Handicraft Jewel for bonus sharpness. Alternatively, we can also replace the Chain Jewel to remove Burst and replace it fully with three more Handicraft skills for a full Level 3/4 Handicraft. However, only the Daora's Ventus and Shangri-La/Hades DB (Frost and Dragon respectively) benefit hugely from this deco choice by extending their purple sharpness unlike the two . |
||
| Skills | |
|---|---|
|
Critical Eye Lv6 |
Resentment Lv5
Elemental Attack Lv5 | Strife Lv3 Critical Boost Lv3 | Coalescence Lv3 Critical Element Lv3 | Burst Lv3 Master's Touch Lv3 | Berserk Lv2 Bloodlust Lv2 | Elder Dragon Blessing Lv2 Element Exploit Lv1 |
| Build Merits and Notes |
|---|
|
Another Berserk set but unlike our thunder set, we utilize the new level 1 Elder Dragon blessing Gems and replace Handicraft with Foray due to the sharpness levels of our chosen weapons with both shredders (Magma and Mud) only reaching white sharpness or thin purple sharpness by investing Handicraft so we forego those skills and focus on adding more DPS via Burst into our kit. Take note that the Daora/Frost build is also a great weapon for the handicraft set and its build setup can also follow our first build depending on the player's preference. |
Below are our recommended elemental for our berserk build!
Fire Elemental Dual Blades
| Weapon | ATK | DEF | Affinity |
|---|---|---|---|
 Magma Shredders Magma Shredders
 |
300 | 0 | 0% |
| Element / Status |
Slots | Rampage Slots | |
| ③ーー | ③ |
The Magma Shredders is the king of fire elemental dual blades. It sports a 3 slot rampage skill and a high 64 fire elemental damage. It also has a decent amount of white sharpness that won't deplete easily together with the Master's Touch skill that we incorporate into our Berserk build.
Water Elemental Dual Blades
| Weapon | ATK | DEF | Affinity |
|---|---|---|---|
 Mud Shredders Mud Shredders
 |
300 | 0 | 0% |
| Element / Status |
Slots | Rampage Slots | |
| ②①ー | ③ |
For Water Dual Blades, the Mud Shredders is the best general water elemental dual blades. It synergizes well with the Element Exploit and Elemental Bane rampage decoration to deal high amounts of damage to monsters with high water elemental weakpoints.
Ice Elemental Dual Blades
| Weapon | ATK | DEF | Affinity |
|---|---|---|---|
 Daora's Ventus Daora's Ventus
 |
310 | 0 | 0% |
| Element / Status |
Slots | Rampage Slots | |
| ②ーー | ③ |
Daora's Ventus is easily the best Dual Blades among all the existing Ice elemental DBs. It sports a high raw damage of 310 and an above average ice elemental value allowing it to take the best of both worlds. It works universally for all monsters weak to the Ice element.
Dragon Elemental Dual Blades
| Weapon | ATK | DEF | Affinity |
|---|---|---|---|
 Shangri-La/Hades Shangri-La/Hades
 |
330 | 0 | -25% / 20% |
| Element / Status |
Slots | Rampage Slots | |
| ③①ー | ② |
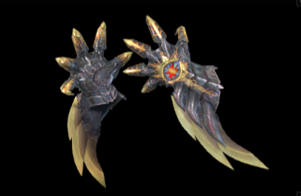
The new king of the Dragon Elemental Dual Blades. Previously, there were no decent Dragon elemental dual blades at all with Crimson Valstrax Dual Blades being the best with its high raw and white sharpness but Shangri-La/Hades changes the meta with its Chaos Affinity mechanic. With the current berserk setup, the build can easily reach 100% affinity which allows for a non-stop assault. This build is an elemental build but it is specially tailored for this dual blade to rip all monsters weak to dragon elements.
Chaotic Gore Weapons Explained
Endgame MR Build: MR 6+
MR10+ Elemental Dual Blades Build
| Armor | Slots | Skills | |
|---|---|---|---|
|
|
④②ー | ||
|
|
④③① | ||
|
|
④①① | ||
|
|
②ーー | ||
|
|
②①ー | ||
| Talisman | Critical Eye 3 with a ②① slot or better. | ||
| Rampage Decoration |
Anti-Species Jewel 2 x 1 or
|
||
| Decorations |
Element Jewel+ 2 x2
Element Jewel 1 x1 Weapons with ② or ③ deco slots: or Weapons with ① deco slot: |
||
| Skills | |
|---|---|
| Rampage Skill | Elembane for increased elemental attack or any Anti-Species Jewel 2. |
|
Critical Eye Lv. 7 | Element Attack Lv. 5
Attack Boost Lv. 4 | Constitution Lv. 3 Weakness Exploit Lv. 3 | Windproof Lv. 3 Critical Element Lv. 3 | Speed Sharpening Lv. 3 Element Exploit Lv. 3 | Evade Extender Lv. 2 | Critical Boost Lv. 1 | Burst Lv. 1 Flinch-Free Lv. 1 | Stun Resistance Lv. 1 (optional) |
|
Build Merits and Augments
| Weapon Augments |
|
|---|---|
| Armor Augments |
Armor Augments for this build are not necessary. However, feel free to add as you please once you get comfortable with your build! Generally, you'd want to get better skills and more slots for your armor.
For damage, aim for any of the following: ● Burst For comfort, aim for any of the following: ● Stamina Surge |
| Build Merits and Notes |
|---|
| This build is focused on having a stable starting MR10 build viable up to MR100. Afflicted Materials for certain weapons and decorations here can be obtained from A1 Anomaly Quests.
Per elemental weapon, there should be at least a ③ or ② rampage slot to accomodate for Elembane or Anti-Species Jewels. Should there be an extra ② decoration slot in the weapon, Burst would be a good skill to put in since it adds to elemental damage during consecutive attacks. For getting Elemental Attack Lv. 5, 2 ④ decoration slots and 1 ① decoration slot are made available to fit in Element Jewels+ 2 (or Hard Element Jewel 3) and Element Jewel 1. Make sure to change your jewels to match your weapon element! Critical Eye Lv. 7 gives 40% affinity and Weakness Exploit gives 50%, making your affinity on weak spots at 90%. Critical Eye Lv. 5 should still be fine if you don't have Lv. 3 for your talisman yet (making the lowest with a 0% affinity weapon 75% affinity.) There should be enough affinity to cover the effectiveness of Element Exploit Lv. 3 and Critical Element Lv. 3, both which are essential for elemental builds. For utility, both the Constitution and Evade Extender skills are great at improving the overall movement experience (Evade Extender can be adjusted to your preference). Windproof Lv. 3 is already present in the Rathalos waist and will help in mitigating wind pressure. The Speed Sharpening skill helps minimize downtimes during sharpening. Flinch-Free helps lessen knockbacks from monsters and other hunters' weapons in multiplayer. There are no limitations in what switch skill to use with this build. For suggested switch skills, Spiral Slash, Shrouded Vault, and Demon Flight are great picks to set to your scrolls. |
Below are the suggested elemental weapons for this build as of TU 4. Recommended below are rarity 10 weapons, but their rarity 9 versions should be fine in the meantime while you're still gettting afflicted materials!
Fire Elemental Dual Blades
| Weapon | ATK | DEF | Affinity |
|---|---|---|---|
 Magma Shredders Magma Shredders
 |
300 | 0 | 0% |
| Element / Status |
Slots | Rampage Slots | |
| ③ーー | ③ |
Magma Shreders is a good set to go with this build. Great against monsters weak to fire like Lunagaron and Chaotic Gore Magala.
Water Elemental Dual Blades
| Weapon | ATK | DEF | Affinity |
|---|---|---|---|
 Mud Shredders Mud Shredders
 |
300 | 0 | 0% |
| Element / Status |
Slots | Rampage Slots | |
| ②①ー | ③ |
A pair of viable water elemental blades! Effective againt monsters weak to water like Magma Almudron and Scorned Magnamalo.
Thunder Elemental Dual Blades
| Weapon | ATK | DEF | Affinity |
|---|---|---|---|
 Twin Wyvern Bolts Twin Wyvern Bolts
 |
310 | 0 | 20% |
| Element / Status |
Slots | Rampage Slots | |
| ①ーー | ② |
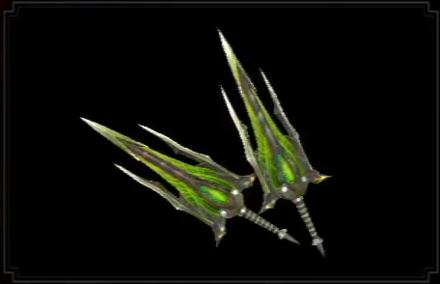
These blades are made from Astalos materials. Effective against monsters weak to Thunder such as Gold Rathian.
Ice Elemental Dual Blades
| Weapon | ATK | DEF | Affinity |
|---|---|---|---|
 Daora's Ventus Daora's Ventus
 |
310 | 0 | 0% |
| Element / Status |
Slots | Rampage Slots | |
| ②ーー | ③ |
This is recommended Ice element dual blades from Kushala Daora. Works well against monstesr weak to Ice like Furious Rajang and Seething Bazelgeuse.
Dragon Elemental Dual Blades
| Weapon | ATK | DEF | Affinity |
|---|---|---|---|
 Aasklauen Aasklauen
 |
310 | 0 | 20% |
| Element / Status |
Slots | Rampage Slots | |
| ①ーー | ② |
The suggested dragon dual blades from Gore Magala! Works well against monsters weak to Dragon element like Gaismagorm and Malzeno.
MR10+ Poison Dual Blades Build
| Weapon | ATK | DEF | Affinity |
|---|---|---|---|
 Chameleos Blades Chameleos Blades
 |
310 | 0 | 0% |
| Element / Status |
Slots | Rampage Slots | |
| ③②① | ② |
| Armor | Slots | Skills | |
|---|---|---|---|
|
|
②②ー | ||
|
|
①①ー | ||
|
|
④ーー | ||
|
|
②ーー | ||
|
|
④①ー | ||
| Talisman | Critical Eye 3 with a ②① slot or better. | ||
| Rampage Decoration |
Anti-Species Jewel 2 x1
or |
||
| Decorations |
|
||
| Skills | |
|---|---|
| Rampage Skill | Species Exploit for more damage against specific monsters or Kushala Daora Soul for more affinity. |
|
Attack Boost Lv. 5 |
Critical Eye Lv. 5
Burst Lv. 3 | Speed Sharpening Lv. 3 Weakness Exploit Lv. 3 | Master's Touch Lv. 3 Poison Attack Lv. 3 | Windproof Lv. 3 Foray Lv. 3 | Flinch Free Lv. 2 Protective Polish Lv. 2 | Ballistics Lv. 2 Evade Extender Lv. 2 | Status Trigger Lv. 2 Critical Boost Lv. 1 | Defiance Lv. 1-2 Rapid Fire Up Lv. 1 |
|
Build Merits and Augments
| Weapon Augments | |
|---|---|
| Armor Augments |
Armor Augments for this build are not necessary. However, feel free to add as you please once you get comfortable with your build! Generally, you'd want to get better skills and more slots for your armor.
Replaceable skills already on the armor: ● Ballistics ● Rapid Fire Up For damage, aim for any of the following: ● Burst |
| Build Merits and Notes |
|---|
| This MR10+ build that makes use of poison status and high affinity. With the combined pieces and decorations, this build sits at 80% affinity against weakspots and reaches a maximum of 100% affinity with Foray active.
To maintain high sharpness, Master's Touch is maxed out. Speed Sharpening is included for quickly recovering sharpness in the heat of battle. The 60 seconds of non-degrading sharpness from Protective Polish Lv. 2 is already an added bonus thanks to the Espinas Vambraces. Poison status and attack is boosted by Poison Attack and Status Trigger. By applying poison status quickly, we can also get Foray to give an additional attack boost to your weapon. For comfort, Evade Extender has been included. This can be swapped out for Constitution, Stamina Surge, or Marathon Runner at a moment's notice. You are free to use any switch skill, but we recommend having Spiral Slash, Demon Flight, and Slide Slash Combo for damage options, and Shrouded Vault for a good counter option. This build does not require qurious armor crafting and can be used as a climber starting MR10! Should qurious crafting be desired, you can trade in Ballistics and Rapid Fire Up for better skills since these only work with ranged weapons. |
MR10+ Raw Master's Touch Dual Blades Build
| Weapon | ATK | DEF | Affinity |
|---|---|---|---|
 Avidya Blades Avidya Blades
 |
300 | 0 | 40% |
| Element / Status |
Slots | Rampage Slots | |
-
|
②ーー | ① |
| Armor | Slots | Skills | |
|---|---|---|---|
|
|
③②ー | ||
|
|
①①ー | ||
|
|
②①ー | ||
|
|
②ーー | ||
|
|
④①① | ||
| Talisman | Critical Eye 3 with a ②① slot or better. | ||
| Rampage Decoration | |||
| Decorations |
|
||
| Skills | |
|---|---|
| Rampage Skill | Spiribird Doubled or Buddy Rally. If with a ②+ rampage slot: Species Exploit for more damage against specific monsters. |
|
Attack Boost Lv. 7 |
Critical Eye Lv. 7
Defiance Lv. 5 | Critical Boost Lv. 3 Master's Touch Lv. 3 | Windproof Lv. 3 Ballistics Lv. 2 | Evade Extender Lv. 2 Blight Resistance Lv. 2 | Weakness Exploit Lv. 1 Maximum Might Lv. 1 | Razor Sharp Lv. 1 Spare Shot Lv. 1 | Quick Sheathe Lv. 1 Speed Sharpening Lv. 1 | Burst Lv. 1 |
|
Build Merits and Augments
| Weapon Augments | |
|---|---|
| Armor Augments |
Armor Augments for this build are not necessary. However, feel free to add as you please once you get comfortable with your build! Generally, you'd want to get better skills and more slots for your armor.
Replaceable skills already on the armor: ● Razor Sharp ● Spare Shot ● Quick Sheathe For damage, aim for any of the following: ● Burst |
| Build Merits and Notes |
|---|
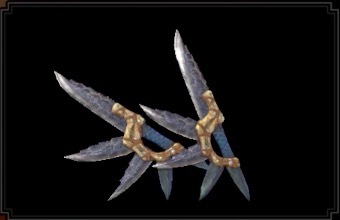
| This is an economic build that focuses on an aggressive playstyle without ever needing to sharpen during an encounter. The combination of Avidya Blades's 40% affinity, the 40% of Critical Eye, and the 5% of Affinity Boost Augment Lv. 1 (summing up to a total 85% affinity), has the weapon almost always staying at purple sharpness due Master's Touch Lv. 3 applying at almost every strike. This is improved further with 100% affinity on weakspots thanks to Weakness Exploit.
To maintain high damage, we have Attack Boost Lv. 7 and Critical Boost Lv. 3. Since you will find yourself sharpening only after a fight, Speed Sharpening Lv. 1 will suffice. You can fit Defiance Lv. 5 to ensure that you are neither disturbed by roars, tremors, and even wind pressure when fighting enraged monsters. For comfort, Evade Extender is present in this build. This, however, can be swapped out for either Constitution, Stamina Surge, or Marathon Runner. You are free to use any switch skill, but we recommend having Spiral Slash, Demon Flight, and Slide Slash Combo for damage options, and Shrouded Vault for a good counter option. Feel free to adjust this build as needed since it requires no qurious armor crafting! When making an attempt at qurious armor crafting, you can trade in Razor Sharp, Spare Shot, and Quick Sheathe for better skills since there are already enough comfort skills in place. |
Master Rank Build (Mid Game): MR 3-6
Mid Game Elemental Build
Fire Elemental Dual Blades
| Weapon | ATK | DEF | Affinity |
|---|---|---|---|
 Magma Slicers+ Magma Slicers+
 |
290 | 0 | 0% |
| Element / Status |
Slots | Rampage Slots | |
| ③ーー | ③ |
Water Elemental Dual Blades
| Weapon | ATK | DEF | Affinity |
|---|---|---|---|
 Mud Slicers+ Mud Slicers+
 |
290 | 0 | 0% |
| Element / Status |
Slots | Rampage Slots | |
| ②①ー | ③ |
Thunder Elemental Dual Blades
| Weapon | ATK | DEF | Affinity |
|---|---|---|---|
 Despot's Blitz+ Despot's Blitz+
 |
300 | 0 | 0% |
| Element / Status |
Slots | Rampage Slots | |
| ②ーー | ② |
Ice Elemental Dual Blades
| Weapon | ATK | DEF | Affinity |
|---|---|---|---|
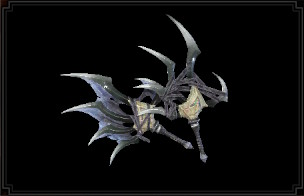 Bloom Snow Claws+ Bloom Snow Claws+
 |
290 | 0 | 0% |
| Element / Status |
Slots | Rampage Slots | |
| ①①ー | ② |
Dragon Elemental Dual Blades
| Weapon | ATK | DEF | Affinity |
|---|---|---|---|
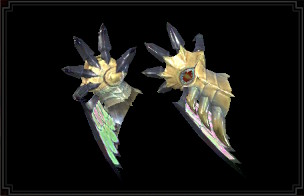 Les Apotres Les Apotres
 |
280 | 0 | 35% |
| Element / Status |
Slots | Rampage Slots | |
| ーーー | ① |
| Armor | Slots | Skills | |
|---|---|---|---|
|
|
②②ー |
Critical Eye Lv. 2
Wirebug Whisperer Lv. 1
|
|
|
|
①①ー | ||
|
|
②ーー | ||
|
|
②ーー | ||
|
|
①①ー |
Attack Boost Lv. 2
Critical Eye Lv. 2
|
|
| Talisman | Weakness Exploit 2 with a ②① slot. | ||
| Rampage Decoration |
|
||
| Decorations |
Elemental Jewel Lv. 1 (Blaze, Stream, Bolt, Frost, Dragon)x 5
|
||
| Skills | |
|---|---|
| Rampage Skill | Element Exploit for Level 3 Rampage Slots Spiribird Doubled for lvl 2 decoration slots and lower or a counter ramp-up skill to your current target. |
Critical Eye Lv. 7
| Critical Element Lv. 3
Critical Boost Lv. 3 | Weakness Exploit Lv. 3 Elemental Attack Lv. 5 | Windproof Lv. 3 Attack Boost Lv. 6 | Wirebug Whisperer Lv. 2 Evade Window Lv. 1 |
|
| Build Merits and Notes |
|---|
|
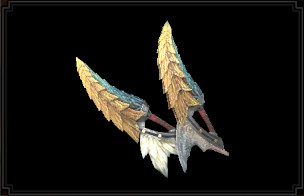
A general elemental build for mid-rank Dual Blades! We slot in all high priority offensive skills for elemental builds such as Weakness Exploit and Critical Eye for high affinity levels, Critical Element and Elemental Attack to bolster our elemental damage, and a lv. 6 Attack Boost to be able to still do raw damage. All level 1 elemental gems can be replaced with ease to change the build's elemental damage focus making it adaptable for multiple types of hunt provided that the necessary elemental weapons are equipped. |
Mid Game Raw Max Affinity Build
| Weapon | ATK | DEF | Affinity |
|---|---|---|---|
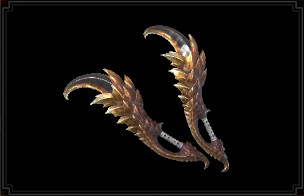 Zakun Twins+ Zakun Twins+
 |
310 | 0 | 10% |
| Element / Status |
Slots | Rampage Slots | |
-
|
①ーー | ② |
| Armor | Slots | Skills | |
|---|---|---|---|
|
|
①①① |
Critical Eye Lv. 3
Critical Boost Lv. 1
|
|
|
|
①①① | ||
|
|
③ーー | ||
|
|
②ーー | ||
|
|
①①ー |
Attack Boost Lv. 2
Critical Eye Lv. 2
|
|
| Talisman | Attack Boost Lv. 2 with ② slot. | ||
| Rampage Decoration |
|
||
| Decorations |
|
||
| Skills | |
|---|---|
| Rampage Skills | Anti Species/Chameleos Soul |
Attack Boost Lv.7
| Critical Eye Lv.7 Critical Boost Lv.3 | Weakness Exploit Lv.3 Earplugs Lv.3 | Free Meal Lv.3 Speed Sharpening Lv.3 | Stun Resistance Lv.3 Thunder Attack Lv.2 | Latent Power Lv.1 Teostra Blessing Lv.1 | Flinch Free Lv.1 |
|
| Build Merits and Notes |
|---|
| A full offensive raw dual blades build! We utilize the Seregios Dual Blade Zakun Twins+ for a high raw damage dual blade with high sharpness and a positive affinity stat (10%). We support this build with full offensive skills and minor defensive ones for ease of use and thanks to maximum affinity skills, this build can hit 100% affinity when striking enemy weak spots! |
Mid Game Dual Blades Blast Build
| Weapon | ATK | DEF | Affinity |
|---|---|---|---|
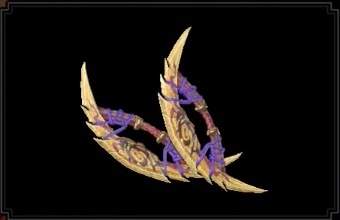 Mighty Soulchoker Mighty Soulchoker
 |
310 | 0 | 0% |
| Element / Status |
Slots | Rampage Slots | |
| ②①ー | ② |
| Armor | Slots | Skills | |
|---|---|---|---|
|
|
②②ー |
Critical Eye Lv. 2
Wirebug Whisperer Lv. 1
|
|
|
|
②②ー | ||
|
|
②ーー | ||
|
|
③ーー |
Critical Eye Lv. 1
Teostra Blessing Lv. 2
|
|
|
|
①①ー |
Attack Boost Lv. 2
Critical Eye Lv. 2
|
|
| Talisman | Weakness Exploit Lv. 2 With ② Slot. | ||
| Rampage Decoration | |||
| Decorations |
|
||
| Skills | |
|---|---|
| Rampage Skills | Teostra Soul |
|
Wirebug Whisperer Lv.3
| Critical Boost Lv.3 Weakness Exploit Lv.3 Speed Sharpening Lv.3 Critical Eye Lv.7 | Attack Boost Lv.4 Blast Attack Lv. 3 | Focus Lv.1 Slugger Lv. 1 | Evade Window Lv.1 |
|
| Build Merits and Notes |
|---|
| A pure blast build for the mid-stages of Master Rank! We utilize the full blast weapon from the Magnamalo weapon tree and support it by slotting in more damage-boosting effect to avoid losing too much DPS from monster blast resistance. The build is also supported by Teostra Soul to increase our blast damage proc making the blast ailment more valuable. |
Master Rank Build (Early Game): MR 1-2
Cyclone+ Raw Affinity Build
| Weapon | ATK | DEF | Affinity |
|---|---|---|---|
 Cyclone+ Cyclone+
 |
250 | 0 | 0% |
| Element / Status |
Slots | Rampage Slots | |
-
|
②ーー | ② |
| Armor | Slots | Skills | |
|---|---|---|---|
|
|
②ーー |
Attack Boost Lv. 2
Item Prolonger Lv. 1
|
|
|
|
①ーー | ||
|
|
②①ー |
Latent Power Lv. 3
Quick Sheathe Lv. 1
|
|
|
|
④①① |
Attack Boost Lv. 2
|
|
|
|
①①ー |
Attack Boost Lv. 2
Critical Eye Lv. 2
|
|
| Talisman | Weakness Exploit Lv. 2 with a ② slot. | ||
| Rampage Decoration | |||
| Decorations | |||
| Skills | |
|---|---|
| Rampage Skill | Spiribird Doubled |
Attack Boost Lv.7
| Weakness Exploit Lv.3
Critical Boost Lv.3 | Critical Eye Lv.4 Latent Power Lv.3 | Recovery Speed Lv.2 Evade Window Lv.1 | Item Prolonger Lv.1 Quick Sheath Lv.1 |
|
| Build Merits and Notes |
|---|
| A safe Dual Blades build to get you started in Sunbreak's Master Rank. It features several utility skills and defensive skills to avoid getting killed by the new MR monster's damage while also not neglecting damage skills for dispatching monsters and their higher HP pool. Defense Jewels and Critical Jewels can be swapped for elemental jewels for switching to elemental builds. |
Best Skills and Explanations
Best Damage Skills
These skills make it possible to deal extra damage! Aim for these skills for maximum DPS to defeat those monsters easier and finish those quests faster!
| Best Skills | Explanation |
|---|---|
| Weakness Exploit ★★★ |
A staple skill for any meta build. Increases your affinity when hitting weak spots by 50% at max rank, increasing your DPS significantly. |
| Element Attack ★★★ |
Sunbreak featured buffs for elemental damage, most notably on Dual Blades. Max out this skill to increase damage against monsters weak to a specific element and watch your numbers go up! Fire | Water | Ice | Thunder | Dragon |
| Critical Eye ★★★ |
More damage and Critical Element is also reliant on affinity so make sure to raise this stat when playing Dual Blades. |
| Critical Boost ★★★ |
Amplifies critical strike damage, increasing your DPS on high-affinity Dual Blades builds. |
| Critical Element ★★★ |
Amplifying elemental damage is the next step to increasing your damage output as an elemental Dual Blades player. Critical Element is similar to Critical Boost for elemental attacks and having it is near critical especially for the end game monsters and quests! |
| Burst ★★★ |
Fast, continuous hits let this skill shine to its full potential, something the Dual Blades often do! Max this skill out or put in at least a level to feel a jump in your DPS. Available in Sunbreak Base Game |
| Element Exploit ★★ |
Amplify your damage against monsters weak to a specific element with this skill. A single point of it is enough to deal significant damage. Available in Sunbreak Free Title Update 1 |
| Attack Boost ★★ |
Increases attack power. This skill is a lesser priority as most of the Dual Blades' damage come from elemental attacks. If you must, aim for at least 4 levels. |
| Status Trigger ★★ |
Make Status Builds even better with this skill, which allows you to deal status buildup on every hit after evading successfully! For best results, we suggest pairing this with Evade Window. Take note that Demon Flight does not activate this skill. Available in Sunbreak Free Title Update 1 |
| Buildup Boost ★★ |
Boosts raw damage every time a status buildup attack hits, which allows you to deal significant damage, especially with Status Trigger active. Available in Sunbreak Free Title Update 2 |
| Powder Mantle ★★ |
This skill from the Risen Teostra Armor provides your Dual Blades combos with additional blast damage every time it activates, contributing greatly to DPS. Available in Sunbreak Free Title Update 3 |
| Dragon Conversion ★★ |
When activated, this skill from the Risen Crimson Glow Valstrax Armor will benefit elemental builds, increasing DPS even further! Available in Sunbreak Free Title Update 4 |
| Dereliction ★★ |
Using the Red Scroll increases the Dual Blades' elemental and status effect values, improving overall damage. Just be wary of your health! Best paired with the Strife skill from the Chaotic Gore Magala Armor Set. Available in Sunbreak Base Game |
| Bloodlust ★★ |
Overcome the Frenzy Virus to power up with this skill; best paired with Coalescence. Available in Sunbreak Base Game |
| Foray ★ |
Increases attack power whenever a monster is poisoned, paralyzed, or blighted. Best paired with Status Trigger or Status Attack skills. |
| Status Attack ★ |
Only consider this skill when you want more status attack on your Status Builds. Blast | Paralysis | Poison |
Best Comfort Skills
These are skills that make managing weapon mechanics a lot easier. Damage is only part of the equation - taking time to slot in comfort skills that increase consistency & comfort will also increase overall DPS!
| Best Skills | Explanation |
|---|---|
| Heaven-Sent ★★★ |
From the heavenly armor of Amatsu, maxing this skill out will negate sharpness loss and grant you infinite stamina. Having this will give you more uptime on your attacks, increasing overall DPS in a fight! Available in Sunbreak Free Title Update 5 |
| Protective Polish or Master's Touch ★★★ |
Ideal sharpness-managing skills to have due to the Dual Blades' fast-paced attacks. Equip one or the other, depending on what's more suitable to your playstyle! |
| Constitution ★★ |
A great skill to have as it allows you to manage stamina better, especially during Demon Mode. |
| Stamina Surge ★★ |
Quickly replenish your stamina after using Demon Mode, which can help you get back into the fight faster! |
| Marathon Runner ★★ |
Longer demon mode duration is always great for DPS! |
| Wirebug Whisperer ★★ |
Maxing this skill out makes your Wirebugs more readily available, which will allow you to do more Spiral Slashes in a fight. |
| Frenzied Bloodlust ★★ |
The Risen Shagaru Magala Armor introduced this new skill. After overcoming the Frenzy Virus, it grants you an extra Wirebug on your arsenal. If you have 3 Wirebugs equipped, activating this skill will allow you to access 4. For the Dual Blades, this means more silkbind attacks, like the Spiral Slash. Synergizes well with Wirebug Whisperer and/or Wind Mantle. Available in Sunbreak Free Title Update 5 |
| Furious ★★ |
Activate this skill for a temporary infinite stamina boost, which lets you stay in Demon Mode longer. Available in Sunbreak Base Game |
| Defiance ★★ |
Three levels of this skill prevent most roars, tremors, and winds from interrupting attacks. The Cornerstone Jewel is a level 1 decoration, so slot it in whenever possible! Available in Sunbreak Free Title Update 1 |
| Speed Sharpening ★★ |
Reduces a cycle for sharpening with each level. It is an ideal skill to partner with Protective Polish. |
| Shock Absorber Flinch Free ★★ |
Useful especially in multiplayer so no minor attacks can interrupt you or your team's combos! |
| Intrepid Heart ★ |
Whenever the gauge above your health bar is full, this skill can be useful in preventing monster attacks from interrupting your combos, making it possible to pull off an extra charged attack before you can regroup. Available in Sunbreak Free Title Update 2 |
| Wind Mantle ★ |
This skill from the Risen Kushala Armor will recharge your Wirebugs faster, allowing you to do more silkbind attacks with the Dual Blades. Consider this skill only when it's possible to build around it! Available in Sunbreak Free Title Update 3 |
| Embolden ★ |
Aside from the defensive boost, this skill also provides longer dodging invincibility. Slot this skill in only when possible! Available in Sunbreak Free Title Update 2 |
| Evade Window ★ |
Allows you to dodge enemy attacks more easily. Slot this skill in only when possible! |
Monster Hunter Rise: Sunbreak Related Guides

|
• Weapons marked withNEW have been updated. • Weapons withUP have been reviewed and does not warrant an updated build from the Bonus Update. |
| All Weapon Build Guides | |
|---|---|
NEW Low Rank | High Rank Master Rank |
NEW Low Rank | High Rank Master Rank |
NEW Low Rank | High Rank Master Rank |
NEW Low Rank | High Rank Master Rank |
NEW Low Rank | High Rank Master Rank |
NEW Low Rank | High Rank Master Rank |
NEW Low Rank | High Rank Master Rank |
NEW Low Rank | High Rank Master Rank |
NEW Low Rank | High Rank Master Rank |
NEW Low Rank | High Rank Master Rank |
NEW Low Rank | High Rank Master Rank |
NEW Low Rank | High Rank Master Rank |
NEW Low Rank | High Rank Master Rank |
UP Low Rank | High Rank Master Rank |
Other Builds
| Other Build Guides | |
|---|---|
| General High Rank Builds and Best Equipment | Buddy Equipment Builds Palico | Palamute |
Comment
Really important thing for the berserk builds, they should aim to have kushalas blessing at level 4 to reduce the health drain and i feel like there isn't enough detail for the berserk skill like things that should go with it, examples are super recovery dango and immunizers to help reduce the heakth drain. all of these are really important things that are missing
Author
Sunbreak Dual Blades Builds (Master Rank)
improvement survey
03/2026
improving Game8's site?

Your answers will help us to improve our website.
Note: Please be sure not to enter any kind of personal information into your response.

We hope you continue to make use of Game8.
Rankings
Gaming News
Popular Games

Genshin Impact Walkthrough & Guides Wiki

Honkai: Star Rail Walkthrough & Guides Wiki

Umamusume: Pretty Derby Walkthrough & Guides Wiki

Pokemon Pokopia Walkthrough & Guides Wiki

Resident Evil Requiem (RE9) Walkthrough & Guides Wiki

Monster Hunter Wilds Walkthrough & Guides Wiki

Wuthering Waves Walkthrough & Guides Wiki

Arknights: Endfield Walkthrough & Guides Wiki

Pokemon FireRed and LeafGreen (FRLG) Walkthrough & Guides Wiki

Pokemon TCG Pocket (PTCGP) Strategies & Guides Wiki
Recommended Games

Diablo 4: Vessel of Hatred Walkthrough & Guides Wiki

Fire Emblem Heroes (FEH) Walkthrough & Guides Wiki

Yu-Gi-Oh! Master Duel Walkthrough & Guides Wiki

Super Smash Bros. Ultimate Walkthrough & Guides Wiki

Pokemon Brilliant Diamond and Shining Pearl (BDSP) Walkthrough & Guides Wiki

Elden Ring Shadow of the Erdtree Walkthrough & Guides Wiki

Monster Hunter World Walkthrough & Guides Wiki

The Legend of Zelda: Tears of the Kingdom Walkthrough & Guides Wiki

Persona 3 Reload Walkthrough & Guides Wiki

Cyberpunk 2077: Ultimate Edition Walkthrough & Guides Wiki
All rights reserved
©CAPCOM CO., LTD. ALL RIGHTS RESERVED.
The copyrights of videos of games used in our content and other intellectual property rights belong to the provider of the game.
The contents we provide on this site were created personally by members of the Game8 editorial department.
We refuse the right to reuse or repost content taken without our permission such as data or images to other sites.


![Everwind Review [Early Access] | The Shaky First Step to A Very Long Journey](https://img.game8.co/4440226/ab079b1153298a042633dd1ef51e878e.png/thumb)

![Monster Hunter Stories 3 Review [First Impressions] | Simply Rejuvenating](https://img.game8.co/4438641/2a31b7702bd70e78ec8efd24661dacda.jpeg/thumb)


for a mid/late game biuld using gore hands and legs, malzeno coil and shagaru head and chest i reach 4 wirebugs a lotta sustain and an infinite loop of dps