Sunbreak Wind Serpent Ibushi: Weakness and Drops
★ All Title Updates now available for ALL PLATFORMS!
┗ Title Update 4 | Title Update 5 | Bonus Update
┗ Check out all our Best Builds For Every Weapon!
┗ TU4 Monsters: Velkhana | Risen C.G. Valstrax
┗ TU5 Monsters: Amatsu | Risen Shagaru Magala
┗ Bonus Update Monster: Primordial Malzeno

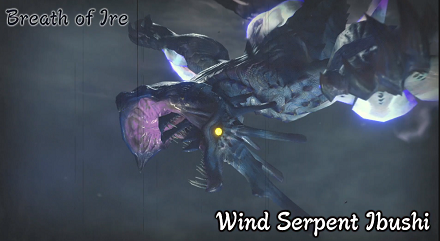
This is a hunting guide for Wind Serpent Ibushi, a Large Monster in Monster Hunter Rise (MH Rise) and the Sunbreak DLC. Read on to learn Wind Serpent Ibushi's weaknesses, forgeable weapons, forgeable armor, drops, and attack patterns for Master Rank!
 Wind Serpent Ibushi Guide Wind Serpent Ibushi Guide
|
 Wind Serpent Ibushi Weapons Wind Serpent Ibushi Weapons
|
 Wind Serpent Ibushi Armor Wind Serpent Ibushi Armor
|
List of Contents
Wind Serpent Ibushi Weakness and Notes
| Wind Serpent Ibushi イブシマキヒコ |
|||
|---|---|---|---|
 |
|||
| Type | Elder Dragon | ||
| Threat Level | 9/10 | Rampage Type |
|
| Major Weakness | Other Weakness | ||
| Blight / Elemental Damage | Abnormal Status | ー | |
| Characteristics | |||
| A male elder dragon that exhibits inexplicable behaviors such as floating upside down midair. Research indicates that the emission of a special gas from all over its body, and the modulation of this gas, is what allows it to move freely. It shoots air from gills on its arms and tail to fly, creating its own turbulence and soaring to great heights. | |||
How to Unlock Wind Serpent Ibushi
Reach MR 20 in Master Rank
| Quest Name | Monster/Unlock |
|---|---|
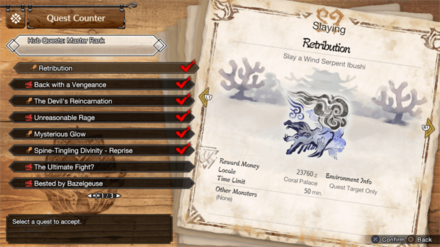
| Retribution |
|
| Unlock Conditions: Reach MR 20 |
MR Wind Serpent Ibushi is unlocked by reaching MR 20 after defeating Gaismagorm in the Sunbreak expansion. Doing both of these unlocks the Urgent Quest Retribution, which allows you to fight it at the Coral Palace.
After completing its Urgent Quest, it will appear as a regular quest in the M★6 Quest Pool.
MR Grinding Guide:
How to Get from MR 6 to MR 100 Fast
Clear Three ★6 Key Hub Quests
| Quest Name | Monster/Unlock |
|---|---|
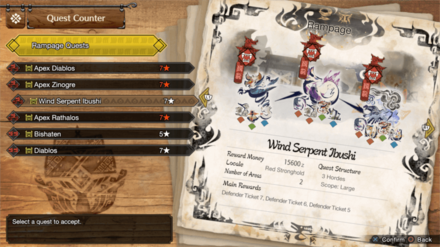
| Serpent God of Wind |
|
| Unlock Conditions: Clear 3 ★6 Key Hub Quests |
Wind Serpent Ibushi is unlocked after clearing three ★6 Key Hub Quests and completing the Urgent Quest Serpent God of Wind.
Note that this Urgent Quest is a Rampage Quest and not a regular hunt, so prepare to face multiple waves of Large Monsters before fighting Ibushi.
After completing its Urgent Quest, Wind Serpent Ibushi will appear in High Rank 7★ Rampage Quests.
Wind Serpent Ibushi Weakness and Resistance
| 48 | 45 | 36 | 15 |
| 9 | 5 | 8 | 19 |
Bold are the recommended Weapon Type and Elemental Damage.
Wind Serpent Ibushi Weapon Damage Breakdown
| Part | |||
|---|---|---|---|
| Head | 65 | 70 | 45 |
| Neck | 35 | 30 | 25 |
| Torso | 30 | 30 | 25 |
| Chest (Windsac) | 80 | 80 | 75 |
| Wingarm | 35 | 30 | 35 |
| Wingarm (Windsac) | 65 | 60 | 40 |
| Back (Windsac) | 60 | 55 | 45 |
| Leg Fin | 25 | 25 | 15 |
| Tail | 30 | 25 | 10 |
| Tail Tip (Windsac) | 50 | 45 | 40 |
| Overall | 48 | 45 | 36 |
Wind Serpent Ibushi Elemental Weakness Breakdown
| Part | |||||
|---|---|---|---|---|---|
| Head | 20 | 10 | 5 | 10 | 25 |
| Neck | 15 | 5 | 5 | 5 | 20 |
| Torso | 10 | 5 | 5 | 5 | 10 |
| Chest (Windsac) | 15 | 15 | 5 | 15 | 25 |
| Wingarm | 5 | 5 | 0 | 5 | 5 |
| Wingarm (Windsac) | 25 | 10 | 5 | 5 | 25 |
| Back (Windsac) | 20 | 10 | 5 | 5 | 25 |
| Leg Fin | 10 | 5 | 5 | 5 | 10 |
| Tail | 5 | 5 | 5 | 5 | 10 |
| Tail Tip (Windsac) | 25 | 15 | 5 | 15 | 35 |
| Overall | 15 | 9 | 5 | 8 | 19 |
Higher numbers indicate higher potential damage to the monster.
Wind Serpent Ibushi Hunting Tips

It possesses special organs called windsacs
that store the gas it uses to float, and can be seen on its back, and tail. They are very delicate, and injuring them could open up a prime opportunity to attack.
Status Effect Vulnerabilities
| Poison | Stun | Paralysis | Sleep |
|---|---|---|---|
| ★ | ★ | ★ | ★ |
| Blast | Exhaust | Fireblight | Waterblight |
| ★★ | -- | ★★ | ★ |
| Thunderblight | Iceblight | ||
| ★ | ★ | ||
If an ailment has more stars it means that it has better effectiveness.
Item Vulnerabilities
| Pitfall Trap | Shock Trap | Flash Bomb |
|---|---|---|
| ✕ | ✕ | ◯ |
| Sonic Bomb | Meat Effects | Dung Bomb |
| ✕ | ✕ | ✕ |
◯ = Vulnerable; ✕ = Fully Resistant; ▲ = Situational
Kinsect Extracts
| Monster Part | Extract |
|---|---|
| Head |
|
| Neck |
|
| Torso |
|
| Chest (Windsac) |
|
| Wingarm |
|
| Wingarm (Windsac) |
|
| Back (Windsac) |
|
| Leg Fin |
|
| Tail |
|
| Tail Tip (Windsac) |
|
Red = Attack Increase, White = Movement Boost, Orange = Anti-knockback When Attacking
Wind Serpent Ibushi Locations and Quests
Wind Serpent Ibushi Known Habitat
| Map | Starting Area | Visited Areas | Rest Area |
|---|---|---|---|
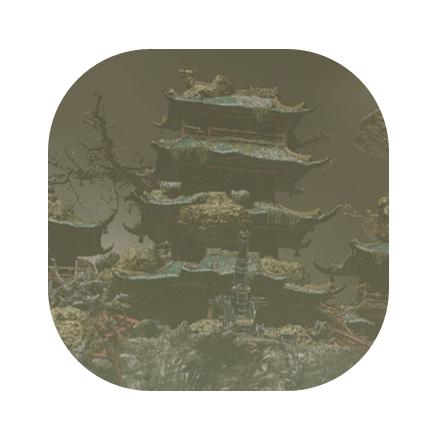 Coral Palace Coral Palace
|
- | - | - |
Wind Serpent Ibushi Quest Appearances
| Quest Type | Lvl | Quest Name |
|---|---|---|
| Urgent Hub Quest | M★6 | Retribution |
| Quest Type | Lvl | Quest Name |
|---|---|---|
| Urgent Hub Quest | ★6 | Serpent God of Wind |
| Event Quest | ★7 | Gales of Ibushi Blow Again |
| Event Quest | ★7 | Rampage: Kamura Night Hunt |
| Event Quest | ★7 | Advanced: Born of Paradise |
| Urgent Hub Quest | ★7 | The Allmother |
| No Quest in This Rank |
How to Beat Wind Serpent Ibushi
Take Advantage of the Counter Signal
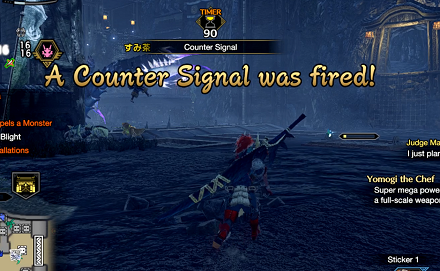
Ibushi isn't as directly aggressive compared to Apex Arzuros or Apex Rathian and due to its size its weak points are easily hit. This makes dealing tons of damage with the Counter Signal boost quite easy and should be taken advantage of as much as possible.
Use the Splitting Wyvernshot and Dragonator
| Dragonator | Spliting Wyvernshot |
|---|---|
 |
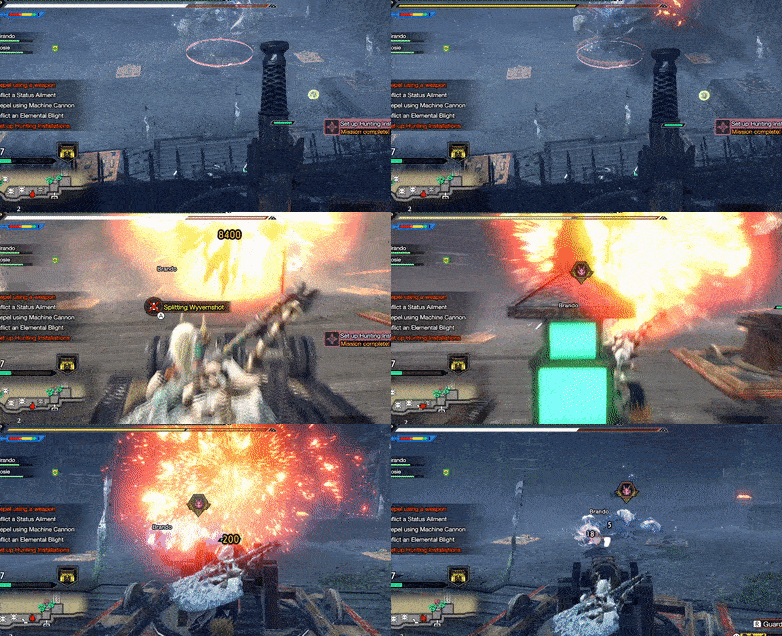 |
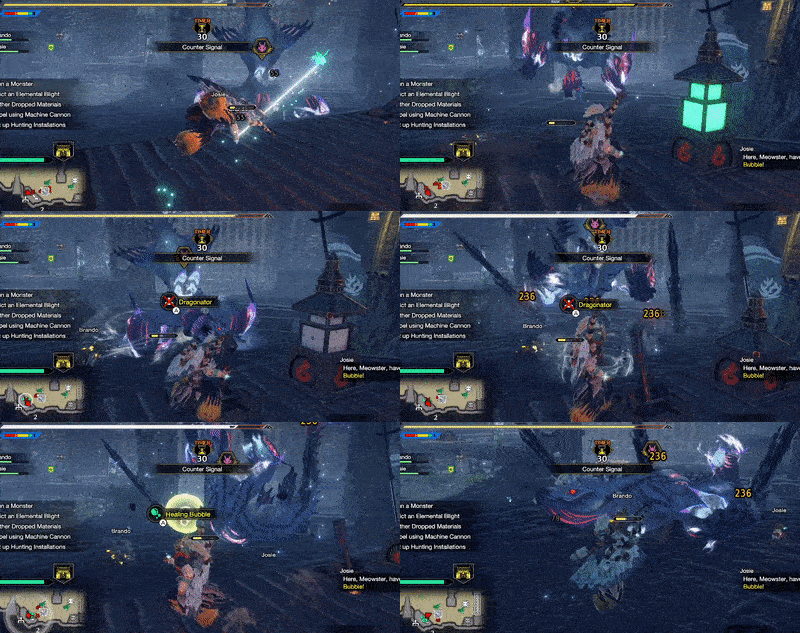
As with all Rampage Quests, using the Dragonators and Splitting Wyvernshot will deal massive damage to all monsters caught in their range. Always use them to your advantage!
Use Artillery During Boulder Smash
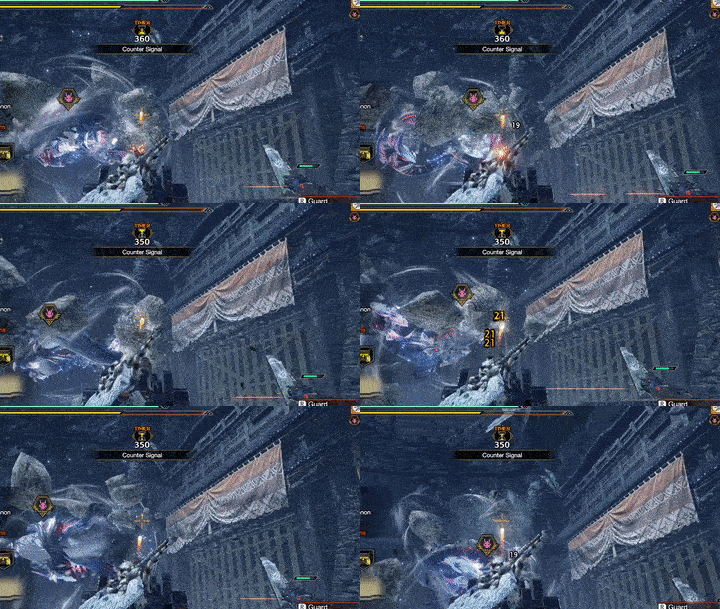
Ibushi's Boulder Smash is a devastating attack towards the gate that can cause your hunt to fail if left unchecked. Hop on a machine cannon, ballista, or cannon and blast the boulders away to mitigate its damage.
Alternatively, it is possible to knock Ibushi down to the ground by straight-up shooting it with the installations — This mostly works with a full squad though.
The Splitting Wyvernshot (and Dragonator depending on the area layout) can be used during this time in solo play to knock Ibushi down as well, but only if enough damage was dealt prior to the start of the attack.
Take Advantage of Ibushi's Updrafts
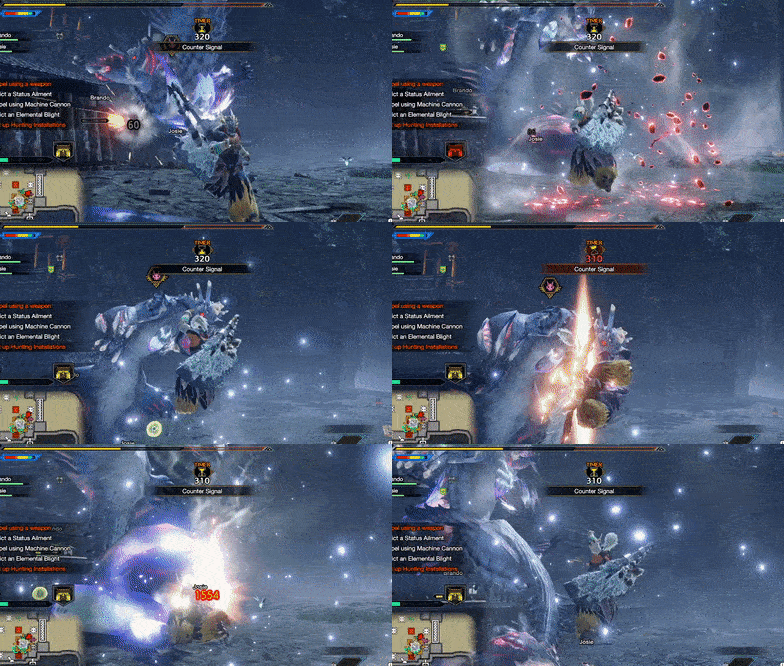
Ibushi's Updrafts offer much needed mobility during the hunt when used correctly. Use them to land your heavy-hitting aerial attacks or when you need to get to somewhere else quicker!
Use the Power Kiln to Reduce Installation Cooldowns

It’s easy to get two multiple uses of the Splitting Wyvernshot and Dragonator, especially in multiplayer.
Be sure to use the Power Kilns at the second area to start reducing the cooldown while your other teammates keep Ibushi busy.
Wind Serpent Ibushi Master Rank Attack Patterns
In addition to its attacks in High Rank quests, Wind Serpent Ibushi uses the following attacks in Master Rank.
| Name | Description |
|---|---|
| Biting Wind Burst Combo [DANGER] |
Ibushi bites upwards with its maw before slamming into the ground to discharge large bursts of wind, dealing heavy damage. |
| Twin Bite Dragon Burst Combo [DANGER] |
Ibushi performs two quick bites before repositioning and letting out a powerful Dragon Burst, with each part of the combo dealing massive damage. |
Biting Wind Burst Combo
| Biting Wind Burst Combo Attack Information |
|---|
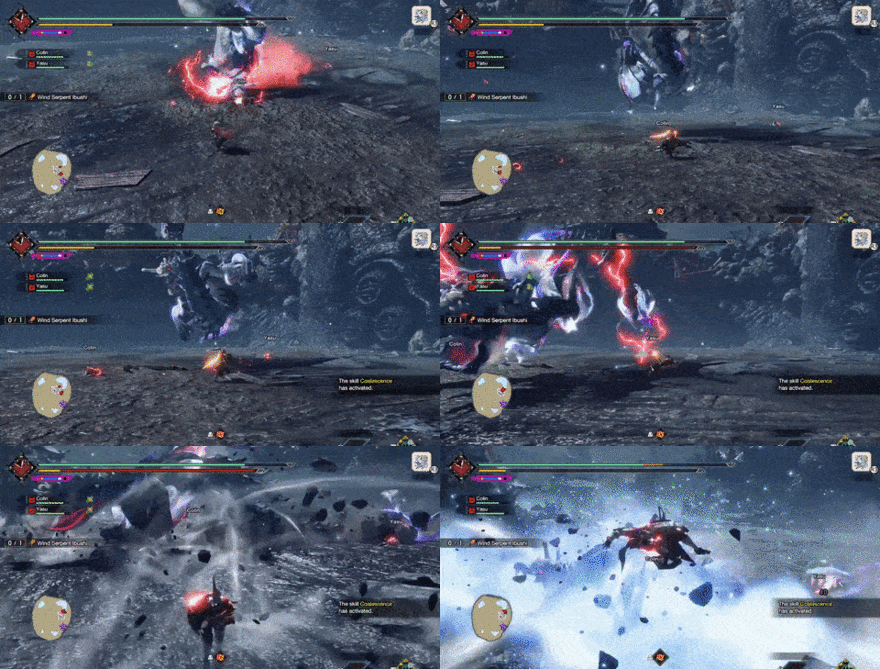 Biting Wind Burst Combo: Ibushi bites upwards with its maw before slamming into the ground to discharge large bursts of wind, knocking hunters upward and dealing heavy damage. Move away from Ibushi's mouth to dodge the biting attack, and quickly reposition away from the body slam's impact zone and wind bursts to avoid getting hit. |
Twin Bite Dragon Burst Combo
| Twin Bite Dragon Burst Combo Attack Information |
|---|
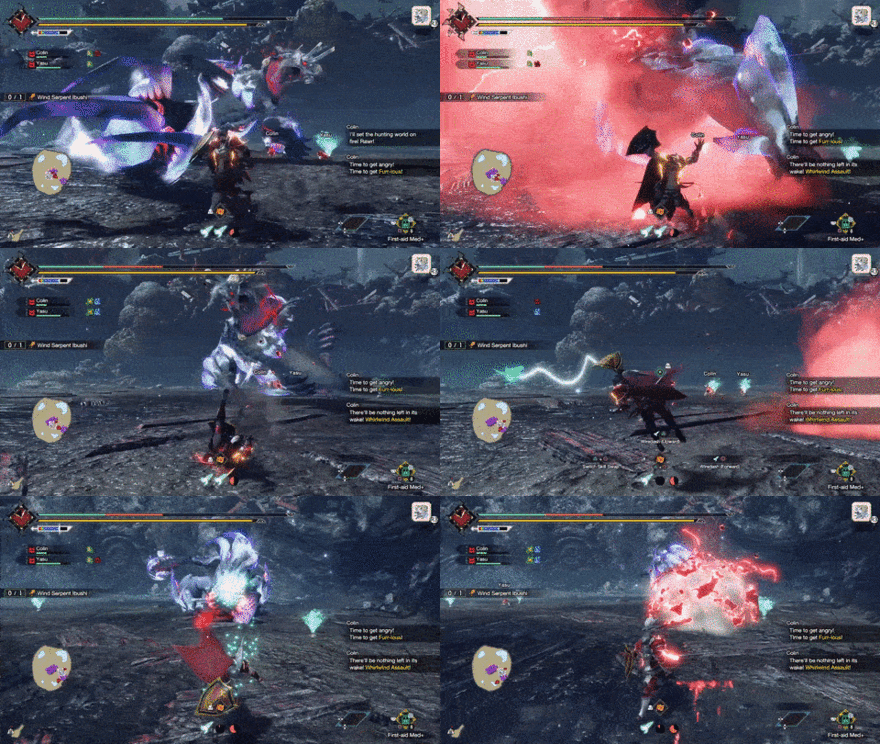 Twin Bite Dragon Burst Combo: Ibushi performs two quick bites before repositioning and letting out a powerful Dragon Burst. Each attack in this combo has the potential to easily KO any careless hunter, so stay cautious when Ibushi is enraged. To avoid this attack, evade to the left or right twice to dodge each bite and run perpendicular to the path of the Dragon Burst. |
Wind Serpent Ibushi General Attack Patterns
Wind Serpent Ibushi uses the following attacks in High Rank quests.
| Name | Description |
|---|---|
| Tail Attacks | Ibushi takes advantage of its tail's long reach to attack the hunter in different ways. |
| Dragon's Maw | A quick bite attack that can catch hunters comfortably positioned near Ibushi's face. |
| Updraft | Ibushi uses dragon energy to create updrafts that can fling hunters upward. Use this to your advantage by executing an aerial attack! |
| Dragon's Corkscrew | Ibushi performs a corkscrew, damaging and launching anyone caught in the attack! |
| Charged Dragon Cannon [DANGER] |
Ibushi will fire a beam of dragon energy from its maw that can knockdown hunters caught in the crossfire! |
| Dragon Burst [DANGER] |
A quickfire dragon breath attack that can fling hunters upward. This inflicts dragonblight so ready your Nulberries! |
| Wind Burst Wave [DANGER] |
A strong, multi-hit attack in a wide area that can KO an unaware hunter! |
| Boulder Smash [DANGER] |
Ibushi curls up into a ball, gathering large boulders before flinging it onto its target! In Rampages, this deals massive damage to the gate! |
Tail Attacks
Ibushi can use its long tail to attack hunters in a variety of ways.
| Tail Attack Variations |
|---|
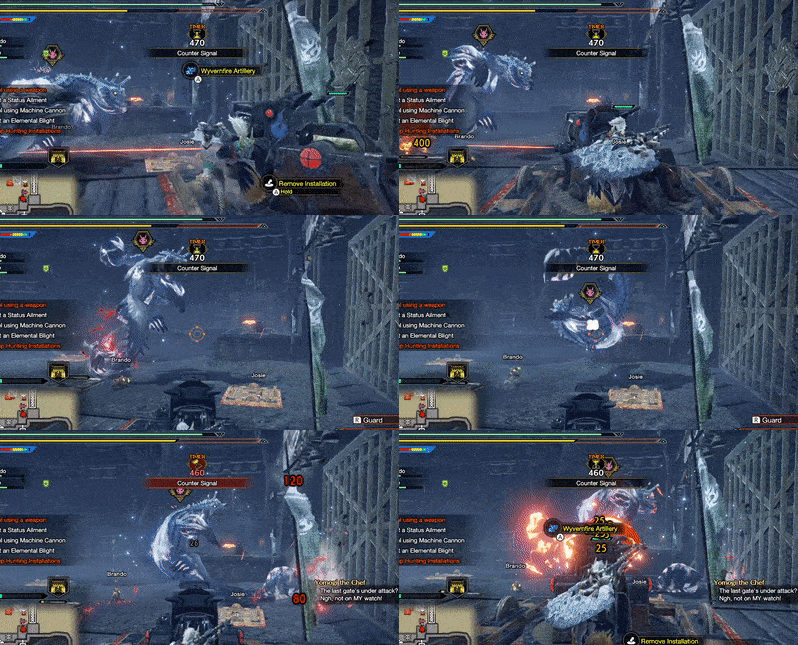 Spinning Tail Slam: Ibushi spins and quickly slams its tail towards the front. This particular pattern can target both the hunter and the gate and may produce an Updraft or Dragon Burst. |
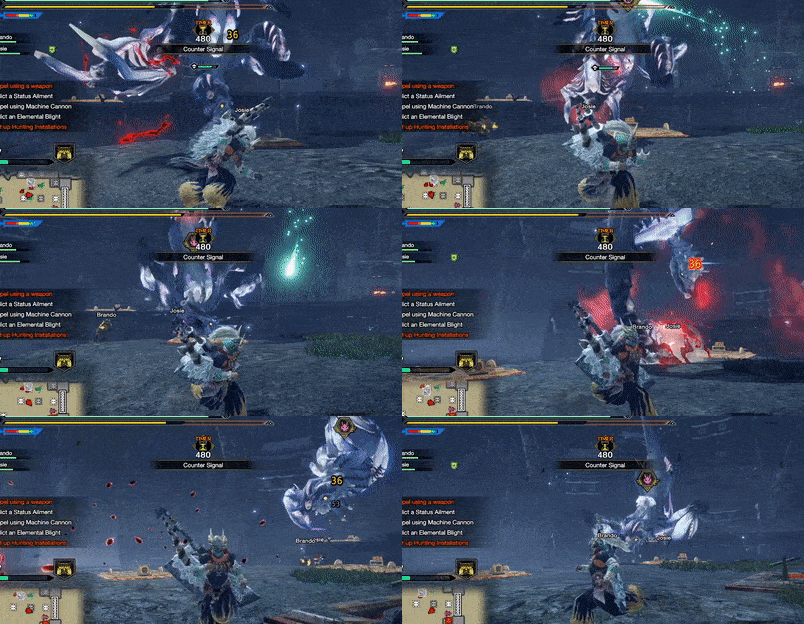 Tail Uppercut: Ibushi performs a sommersault in the air, flinging its tail straight-up in the process. This pattern can send a Dragon Burst flying towards the target. |
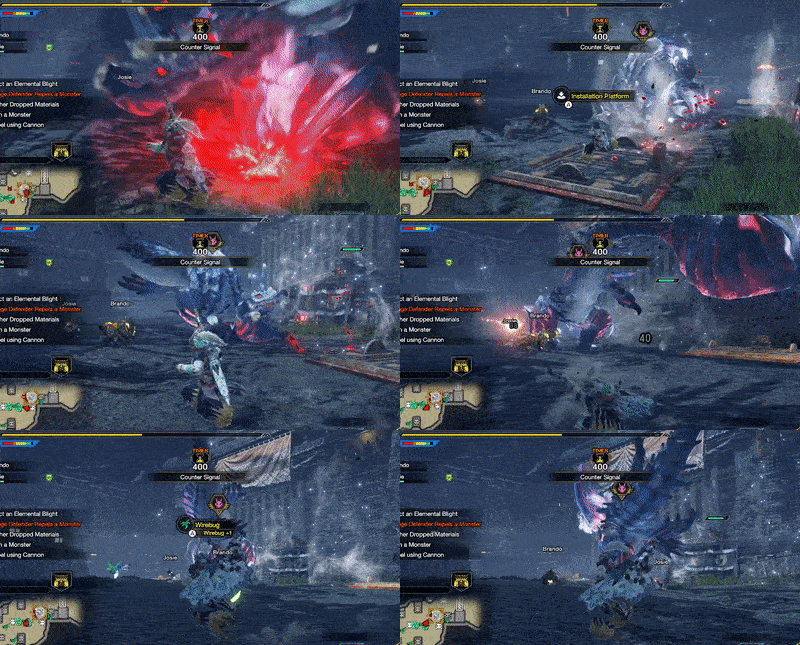 Diagonal Tail Flip: Ibushi diagonally sweeps its tail on one of its sides, launching anyone caught in the attack. This pattern is usually a follow-up whenever it creates multiple Updrafts at once. |
Dragon's Maw
Ibushi uses its massive maw to bite hunters within range. See the possible patterns below:
| Dragon's Maw Variations |
|---|
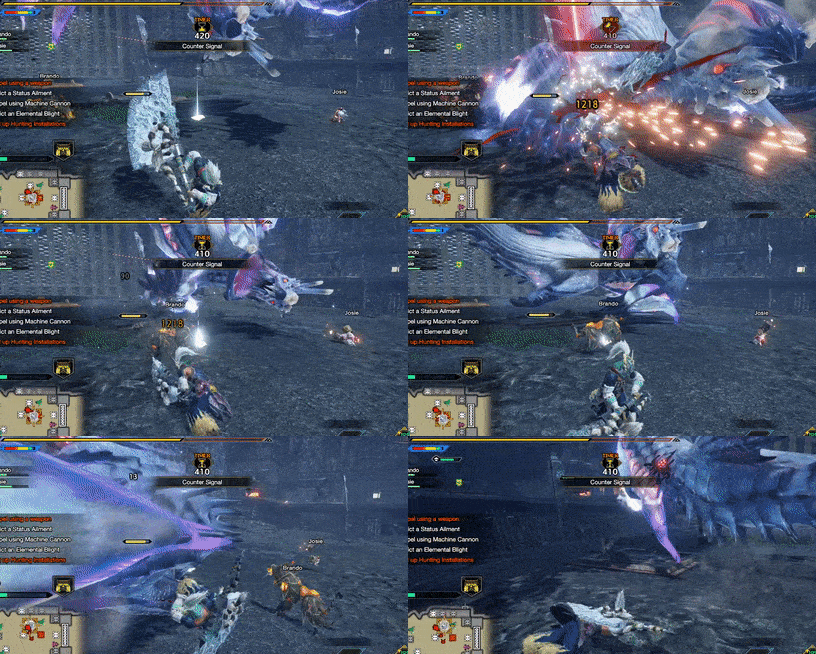 Single Bite: Ibushi floats back before quickly lunging forward to do a quickly bite its target. Always be mindful of this pattern whenever Ibushi suddenly repositions in the air. |
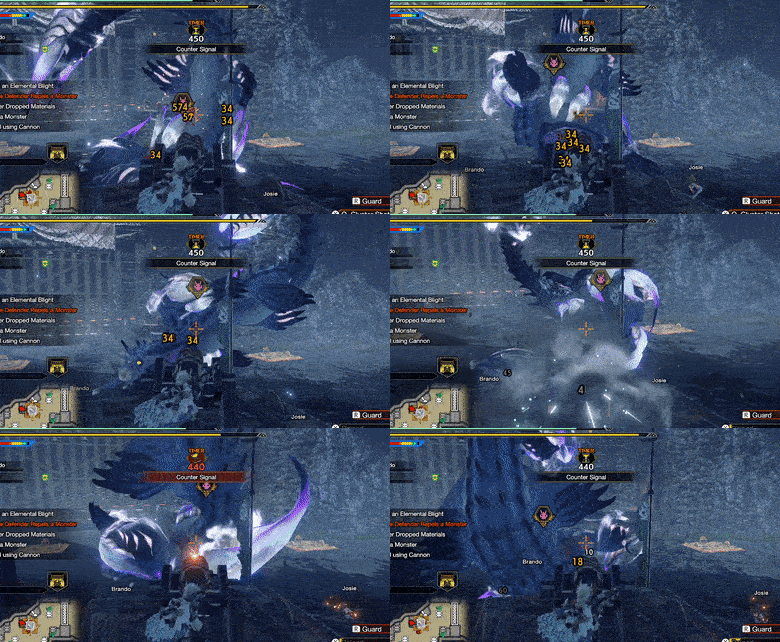 Double Bite: Ibushi does two quick bites towards the target. This pattern is usually performed whenever you are on an installation platform. |
Updraft
| Updraft Attack Information |
|---|
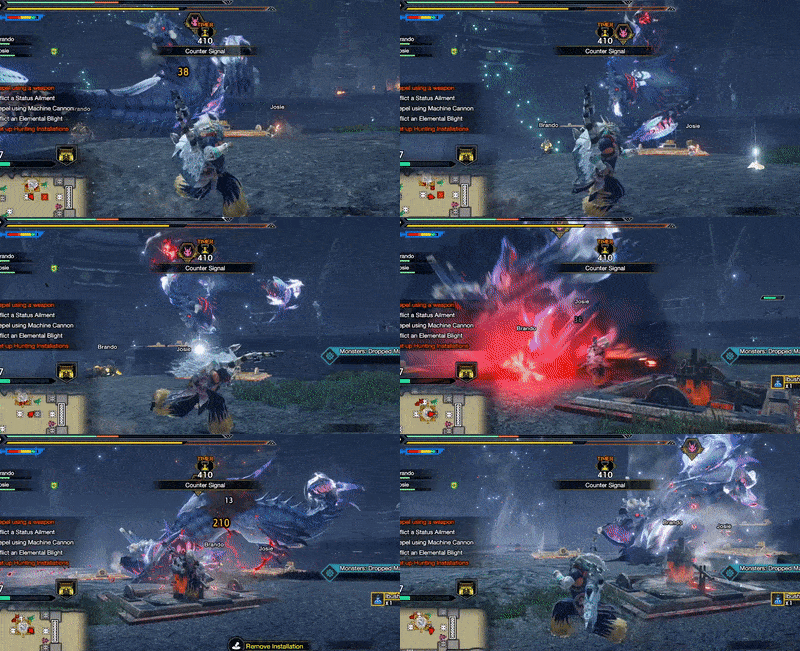 Updraft: Ibushi sends its energy into the ground itself, unleashing multiple Updrafts that fling hunters up high as soon as they set foot in them. Keep in mind that this particular attack is usually followed by a Diagonal Tail Flip. |
Dragon's Corkscrew
| Dragon's Corkscrew Attack Information |
|---|
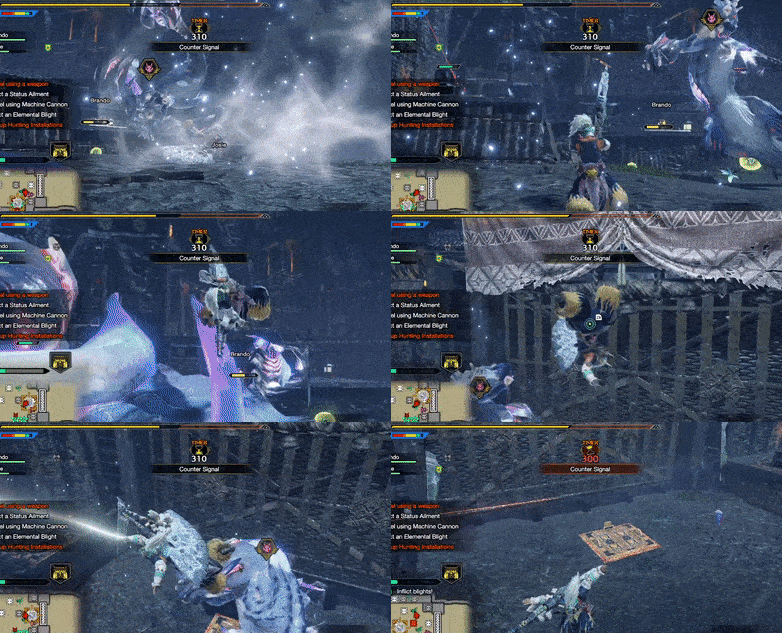 Dragon's Corkscrew: Ibushi corkscrews through the air, damaging and launching anyone caught in the attack. It is important to note that those hit while manning an installation can get knocked off of them as well. |
Charged Dragon Cannon
| Charged Dragon Cannon Attack Information |
|---|
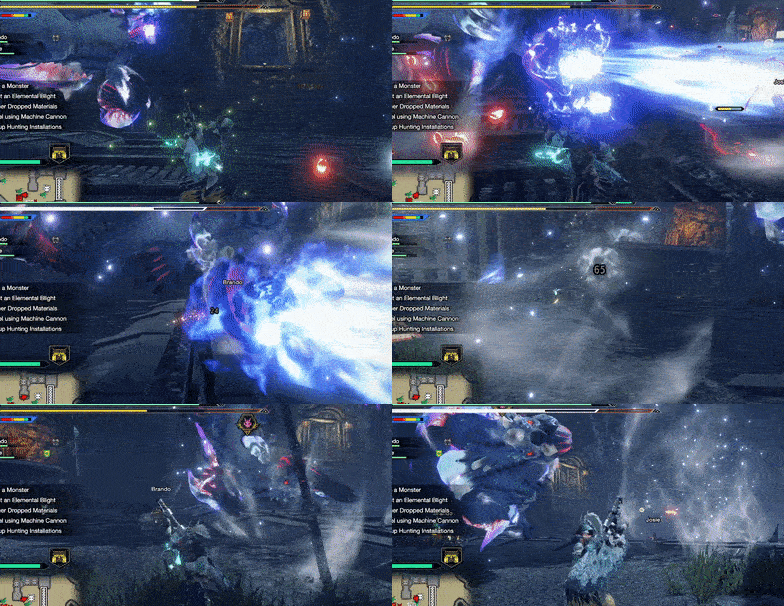 Charged Dragon Cannon: Ibushi will fire a beam of energy from its maw and rotate in a circle pattern. If you're are on a platform and are not using artillery it will knock you off. |
Dragon Burst
| Dragon Burst Attack Information |
|---|
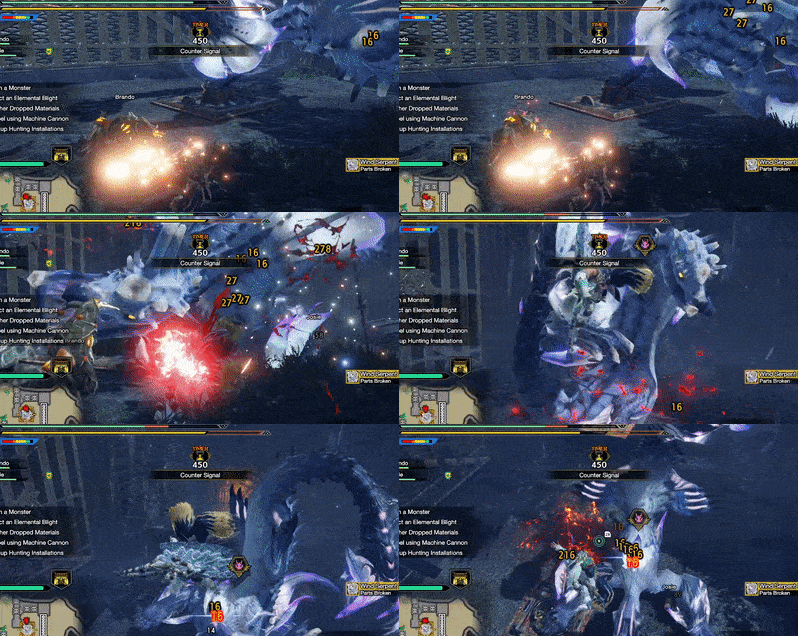 Dragon Burst: Ibushi gathers a portion of its energy in one of its arms before unleashing them towards the target in a quick and sudden burst. It is possible to get afflicted with Dragonblight from this attack. Keep your Nulberries on hand whenever you use elemental weapons against Ibushi! |
Wind Burst Wave
| Wind Burst Wave Attack Information |
|---|
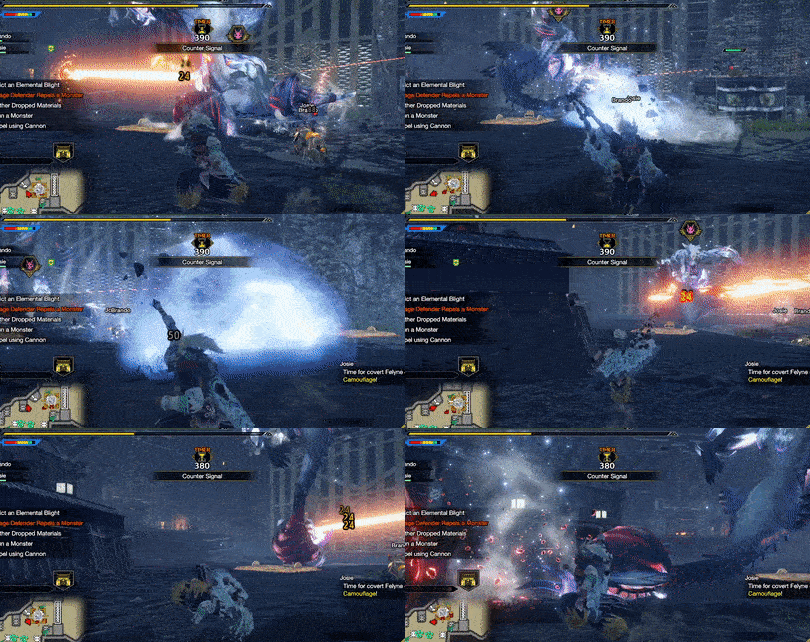 Wind Burst Wave: Ibushi plants both arms into the ground and fires a cascade of wind that deals high damage and knocks anyone caught in the attack. This attack can easily KO an unaware hunter as it has a long range and will destroy any installations. Keep in mind that this attack is usually followed by a Spinning Tail Slam. |
Boulder Smash
| Boulder Smash Attack Information |
|---|
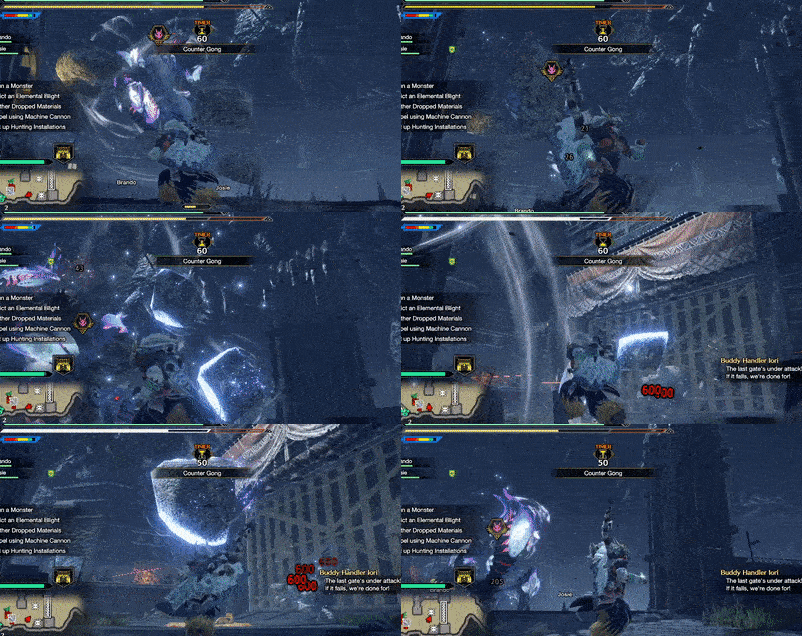 Boulder Smash: Ibushi curls up into a ball, gathering large boulders around it before flinging them towards the gate. This deals massive damage to the gate so knock Ibushi down or break the boulders at all costs! |
Wind Serpent Ibushi Materials and Drops
Master Rank Wind Serpent Ibushi Materials
| You cannot capture this monster! |
High Rank Wind Serpent Ibushi Materials
| You cannot capture this monster! |
Wind Serpent Ibushi Dropped Materials
Monster Hunter Rise Related Links
All Wind Serpent Ibushi Guides
| All Wind Serpent Ibushi Related Articles | ||
|---|---|---|
 Wind Serpent Ibushi Guide Wind Serpent Ibushi Guide
|
 Wind Serpent Ibushi Weapons Wind Serpent Ibushi Weapons
|
 Wind Serpent Ibushi Armor Wind Serpent Ibushi Armor
|
Sunbreak Monsters
| Sunbreak Monster Lists | ||
|---|---|---|
| Sunbreak Monsters List | Monster Subspecies List | Sunbreak Small Monsters List |
Large Monsters
MR6+ Large Monsters
| MR6+ Monsters | |||||
|---|---|---|---|---|---|
 Gaismagorm Gaismagorm(MR6) |
 Furious Rajang Furious Rajang(MR50) |
 Scorned Magnamalo Scorned Magnamalo(MR100) |
|||
Title Update 1 Monsters
| Sunbreak Title Update 1 Monsters | |||
|---|---|---|---|
 Seething Bazelgeuse Seething Bazelgeuse |
 Silver Rathalos Silver Rathalos |
 Gold Rathian Gold Rathian |
 Lucent Nargacuga Lucent Nargacuga |
Title Update 2 Monsters
| Sunbreak Title Update 2 Monsters | ||
|---|---|---|
 Flaming Espinas Flaming Espinas |
 Risen Chameleos Risen Chameleos |
 Violet Mizutsune Violet Mizutsune |
Title Update 3 Monsters
| Sunbreak Title Update 3 Monsters | ||
|---|---|---|
 Chaotic Gore Magala Chaotic Gore Magala |
 Risen Kushala Daora Risen Kushala Daora |
 Risen Teostra Risen Teostra |
Title Update 4 Monsters
| Sunbreak Title Update 4 Monsters | |
|---|---|
 Velkhana Velkhana |
 Risen Crimson Glow Valstrax Risen Crimson Glow Valstrax |
Title Update 5 Monsters
| Sunbreak Title Update 5 Monsters | |
|---|---|
 Amatsu Amatsu |
 Risen Shagaru Magala Risen Shagaru Magala |
Small Monsters
| Sunbreak Small Monsters | |||||
|---|---|---|---|---|---|
 Boggi Boggi |
 Ceanataur Ceanataur |
 Gowngoat Gowngoat |
|||
 Hermitaur Hermitaur |
 Hornetaur Hornetaur |
 Pyrantula Pyrantula |
 Vespoid Vespoid |
 Velociprey Velociprey |
|
Other Large Monsters
Elder Dragons
| Elder Dragons | |||||
|---|---|---|---|---|---|
 Narwa the Allmother Narwa the Allmother |
|||||
 Wind Serpent Ibushi Wind Serpent Ibushi |
 Thunder Serpent Narwa Thunder Serpent Narwa |
 Crimson Glow Valstrax Crimson Glow Valstrax |
|||
 Chameleos Chameleos |
 Kushala Daora Kushala Daora |
 Teostra Teostra |
|||
Apex Monsters
| Apex Monsters | ||
|---|---|---|
 Apex Arzuros Apex Arzuros |
 Apex Rathian Apex Rathian |
 Apex Mizutsune Apex Mizutsune |
 Apex Rathalos Apex Rathalos |
 Apex Diablos Apex Diablos |
 Apex Zinogre Apex Zinogre |
Other Small Monsters
Author
Sunbreak Wind Serpent Ibushi: Weakness and Drops
improvement survey
03/2026
improving Game8's site?

Your answers will help us to improve our website.
Note: Please be sure not to enter any kind of personal information into your response.

We hope you continue to make use of Game8.
Rankings
Gaming News
Popular Games

Genshin Impact Walkthrough & Guides Wiki

Honkai: Star Rail Walkthrough & Guides Wiki

Umamusume: Pretty Derby Walkthrough & Guides Wiki

Pokemon Pokopia Walkthrough & Guides Wiki

Resident Evil Requiem (RE9) Walkthrough & Guides Wiki

Monster Hunter Wilds Walkthrough & Guides Wiki

Wuthering Waves Walkthrough & Guides Wiki

Arknights: Endfield Walkthrough & Guides Wiki

Pokemon FireRed and LeafGreen (FRLG) Walkthrough & Guides Wiki

Pokemon TCG Pocket (PTCGP) Strategies & Guides Wiki
Recommended Games

Diablo 4: Vessel of Hatred Walkthrough & Guides Wiki

Cyberpunk 2077: Ultimate Edition Walkthrough & Guides Wiki

Fire Emblem Heroes (FEH) Walkthrough & Guides Wiki

Yu-Gi-Oh! Master Duel Walkthrough & Guides Wiki

Super Smash Bros. Ultimate Walkthrough & Guides Wiki

Pokemon Brilliant Diamond and Shining Pearl (BDSP) Walkthrough & Guides Wiki

Elden Ring Shadow of the Erdtree Walkthrough & Guides Wiki

Monster Hunter World Walkthrough & Guides Wiki

The Legend of Zelda: Tears of the Kingdom Walkthrough & Guides Wiki

Persona 3 Reload Walkthrough & Guides Wiki
All rights reserved
©CAPCOM CO., LTD. ALL RIGHTS RESERVED.
The copyrights of videos of games used in our content and other intellectual property rights belong to the provider of the game.
The contents we provide on this site were created personally by members of the Game8 editorial department.
We refuse the right to reuse or repost content taken without our permission such as data or images to other sites.

 Daimyo Hermitaur
 Blood Orange Bishaten
 Garangolm
 Aurora Somnacanth
 Shogun Ceanataur
 Lunagaron
 Astalos
 Seregios
 Magma Almudron
 Gore Magala
 Espinas
 Pyre Rakna-Kadaki
 Malzeno
 Shagaru Magala
 Great Izuchi
 Arzuros
 Great Baggi
 Lagombi
 Aknosom
 Tetranadon
 Kulu-Ya-Ku
 Barroth
 Great Wroggi
 Royal Ludroth
 Khezu
Khezu Bishaten
 Somnacanth
 Barioth
 Rathian
 Tobi-Kadachi
 Volvidon
 Basarios
 Pukei-Pukei
 Magnamalo
 Nargacuga
 Zinogre
 Anjanath
 Mizutsune
 Rathalos
 Almudron
 Goss Harag
 Tigrex
 Diablos
 Jyuratodus
 Rajang
 Rakna-Kadaki
 Bazelgeuse
 Altaroth
 Anteka
 Baggi
Baggi Bnahabra
 Bombadgy
 Bullfango
 Delex
Delex Felyne
 Gajau
Gajau Gargwa
 Izuchi
 Jaggi
Jaggi Jaggia
 Jagras
 Kelbi
Kelbi Kestodon
 Ludroth
 Melynx
 Popo
Popo Rachnoid
 Remobra
 Rhenoplos
 Slagtoth
 Uroktor
 Wroggi
 Zamite


![Monster Hunter Stories 3 Review [First Impressions] | Simply Rejuvenating](https://img.game8.co/4438641/2a31b7702bd70e78ec8efd24661dacda.jpeg/thumb)


