Sunbreak Nargacuga: Weakness and Drops
★ All Title Updates now available for ALL PLATFORMS!
┗ Title Update 4 | Title Update 5 | Bonus Update
┗ Check out all our Best Builds For Every Weapon!
┗ TU4 Monsters: Velkhana | Risen C.G. Valstrax
┗ TU5 Monsters: Amatsu | Risen Shagaru Magala
┗ Bonus Update Monster: Primordial Malzeno
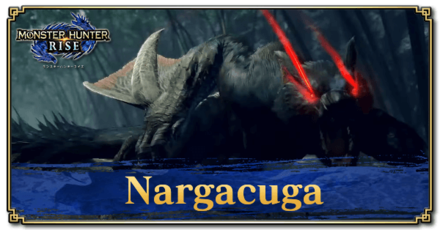
This is a hunting guide for Nargacuga, a Large Monster in Monster Hunter Rise (MH Rise) and the Sunbreak DLC. Read on to learn Nargacuga's weaknesses, weaknesses, forgeable weapons and armor, drops, and attack patterns for Master Rank!
 Nargacuga Guide Nargacuga Guide
|
 Lucent Nargacuga Guide Lucent Nargacuga Guide
|
 Nargacuga Weapons Nargacuga Weapons
|
 Nargacuga Armor Nargacuga Armor
|
List of Contents
Nargacuga Weakness and Notes
| Nargacuga ナルガクルガ |
|||
|---|---|---|---|
 |
|||
| Type | Flying Wyvern | Previous Games | MHF2, MHFU, MH3, MH3, MH3U, MH4U, MHG, MHGU, MHWI |
| Threat Level | 6/10 | Rampage Type |
|
| Major Weakness | Other Weakness | ||
| Blight / Elemental Damage | ー | Abnormal Status | ー |
| Characteristics | |||
| Flying wyverns that have evolved to live in thickly wooded areas. Covered in jet black fur, these cunning predators stalk their prey from the shadows and attack with ferocious speed. Their massive tails are as dexterous as they are deadly, and powerful enough to slay smaller monsters with one strike. | |||
How to Unlock Nargacuga
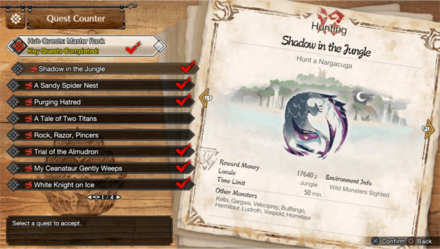
Complete Keep it Busy in Master Rank
| Quest Name | Monster/Unlock |
|---|---|
| Shadow in the Jungle (Key Quest) |
|
| Unlock Conditions: Finish the Quest "Keep it Busy" |
MR Nargacuga is unlocked by reaching M★3 and completing the Urgent Quest Keep it Busy and in the Sunbreak expansion.
MR Grinding Guide:
How to Get from MR 6 to MR 100 Fast
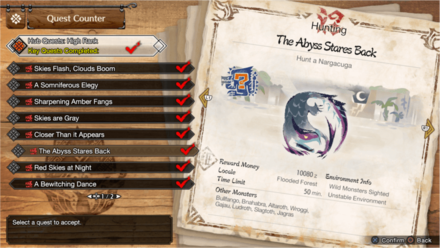
Complete A Bewitching Dance in High Rank
| Quest Name | Monster/Unlock |
|---|---|
|
The Abyss Stares Back
(Key Quest) |
|
| Unlock Conditions: Finish the Quest "A Bewitching Dance" |
High Rank Nargacuga is unlocked by completing the Urgent Quest A Bewitching Dance and reaching HR 6.
Hunter Rank Farm Guide:
How to Get from HR 7 to HR 100 Fast
Reach HR 3 in Low Rank

| Quest Name | Monster/Unlock |
|---|---|
|
Twilit Twin Stars
(Key Quest) |
|
| Unlock Conditions: Clear ★5 Village Special License Test 2 |
Low Rank Nargacuga is unlocked by completing the ★5 Village Special License Test 2 and reaching HR 3.
Nargacuga Weakness and Resistance
| 39 | 39 | 34 | 13 |
| 0 | 22 | 6 | 7 |
Bold are the recommended Weapon Type and Elemental Damage.
Nargacuga Weapon Damage Breakdown
| Part | |||
|---|---|---|---|
| Head | 65 | 70 | 40 |
| Neck/Back | 30 | 30 | 35 |
| Foreleg | 43 | 43 | 35 |
| Cutwing | 21 | 24 | 21 |
| Abdomen | 40 | 40 | 30 |
| Hind Leg | 30 | 30 | 25 |
| Tail | 46 | 40 | 45 |
| Tail Tip | 40 | 35 | 40 |
| Overall | 39 | 39 | 34 |
Nargacuga Elemental Weakness Breakdown
| Part | |||||
|---|---|---|---|---|---|
| Head | 15 | 0 | 25 | 10 | 10 |
| Neck/Back | 10 | 0 | 15 | 5 | 5 |
| Foreleg | 10 | 0 | 20 | 0 | 5 |
| Cutwing | 25 | 0 | 35 | 10 | 15 |
| Abdomen | 10 | 0 | 20 | 5 | 5 |
| Hind Leg | 10 | 0 | 15 | 5 | 5 |
| Tail | 10 | 0 | 25 | 5 | 5 |
| Tail Tip | 10 | 0 | 20 | 5 | 5 |
| Overall | 13 | 0 | 22 | 6 | 7 |
Higher numbers indicate higher potential damage to the monster.
Hunting Tips
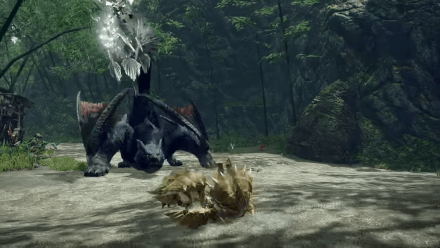
The Nargacuga is a beast of the shadows, and becomes enraged by bright light. At the risk of missing the mark and simply riling it up further, its excellent hearing can be exploited by throwing a Sonic Bomb as it pauses to focus. It can destory Pitfall Traps, so be discreet when placing them.
Status Effect Vulnerabilities
| Poison | Stun | Paralysis | Sleep |
|---|---|---|---|
| ★ | ★ | ★ | ★ |
| Blast | Exhaust | Fireblight | Waterblight |
| ★★ | ★ | ★ | ★ |
| Thunderblight | Iceblight | ||
| ★★ | ★ | ||
If an ailment has more stars it means that it has better effectiveness.
Item Vulnerabilities
| Pitfall Trap | Shock Trap | Flash Bomb |
|---|---|---|
| △ | ◯ | ◯ |
| Sonic Bomb | Meat Effects | Dung Bomb |
| ◯ | △ | ◯ |
◯ = Vulnerable; ✕ = Fully Resistant; ▲ = Situational
Kinsect Extracts
| Monster Part | Extract |
|---|---|
| Head |
|
| Neck/Back |
|
| Foreleg |
|
| Cutwing |
|
| Abdomen |
|
| Hind Leg |
|
| Tail |
|
| Tail Tip |
|
Red = Attack Increase, White = Movement Boost, Orange = Anti-knockback When Attacking
Nargacuga Locations and Quests
Nargacuga Known Habitat
| Map | Starting Area | Visited Areas | Rest Area |
|---|---|---|---|
 Shrine Ruins Shrine Ruins
|
3 | 1 / 3 / 4 / 7 / 8 / 9 / 10 / 11 | 3 |
 Flooded Forest Flooded Forest
|
10 / 13 | 1 / 8 / 9 / 10 / 11 / 12 / 13 | 11 |
 Jungle Jungle
|
2 / 5 / 8 | 1 / 2 / 3 / 5 / 7 / 8 / 9 | 7 |
 Forlorn Arena Forlorn Arena
|
- | - | - |
Nargacuga Quest Appearances
| Quest Type | Lvl | Quest Name |
|---|---|---|
| Anomaly Quest | A★4 | Anomaly Research: Nargacuga |
| Follower Quest | M★3 | Into the Jungle Deep |
| Hub Quest | M★3 | Shadow in the Jungle (Key Quest) |
| Hub Quest | M★3 | Shady Activity |
| Hub Quest | M★3 | Tempering the Fierce |
| Support Survey | M★3 | Operation Nargacuga |
| Hub Quest | M★4 | Troublemaking Trio Pt. 2 |
| Event Quest | M★6 | Cutting Through Darkness |
| Hub Quest | M★6 | Advanced: Hail to the Fierce |
| Quest Type | Lvl | Quest Name |
|---|---|---|
| Hub Quest | ★6 | Do it for the Dango! |
| Hub Quest | ★6 | The Abyss Stares Back (Key Quest) |
| Event Quest | ★7 | Beast of the Shadows |
| Event Quest | ★7 | Heart of a Ninja |
| Event Quest | ★7 | Super Shady Look-alike |
| Hub Quest | ★7 | A Whirlwind of a Stage |
| Hub Quest | ★7 | Master Utsushi's Challenge Part 3 |
| Quest Type | Lvl | Quest Name |
|---|---|---|
| Arena Quest | ★3 | Arena 03 |
| Hub Quest | ★3 | Twilit Twin Stars (Key Quest) |
| Village Quest | ★5 | Wind Speed Wyvern (Key Quest) |
How to Beat Nargacuga
| Nargacuga Tips | ||
|---|---|---|
|
|
Be Aware of Nargacuga's Enraged Mode
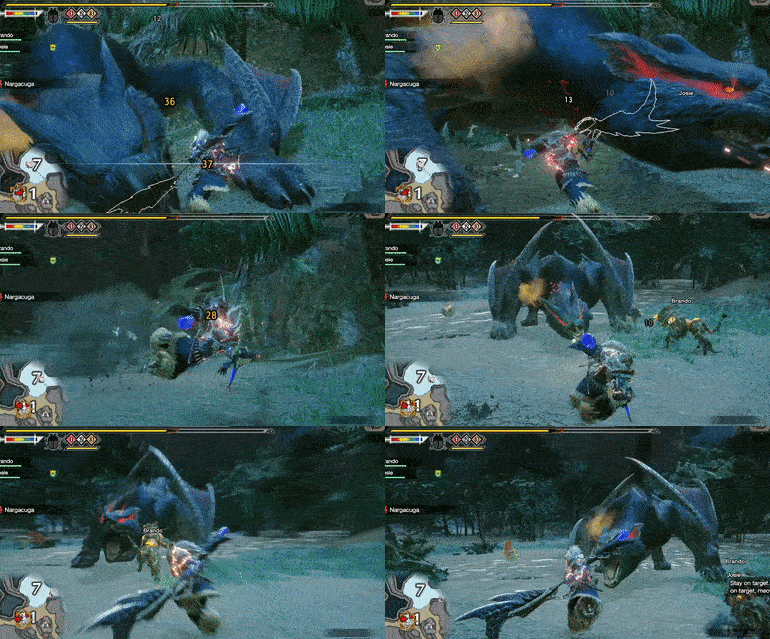
Nargacuga's enraged state occurs when its eyes start to change in color. When enraged, Nargacuga's eyes change from their standard yellow color to bright red, with the red color reaching up to its ears.
The transition to Nargacuga's enraged state is followed up by a roar, so be prepared to dodge or block it and take advantage of its vulnerable state.
This state also alters Nargacuga's behavior and specific moves. Read more below:
- Nargacuga's attacks are faster and more powerful when enraged.
- Nargacuga is more mobile and will attempt to flank you more often during this state.
- Nargacuga is susceptible to pitfall traps when enraged.
- Nargacuga makes use of more attacks in High Rank and Master Rank when enraged.
Consider Using Target Camera
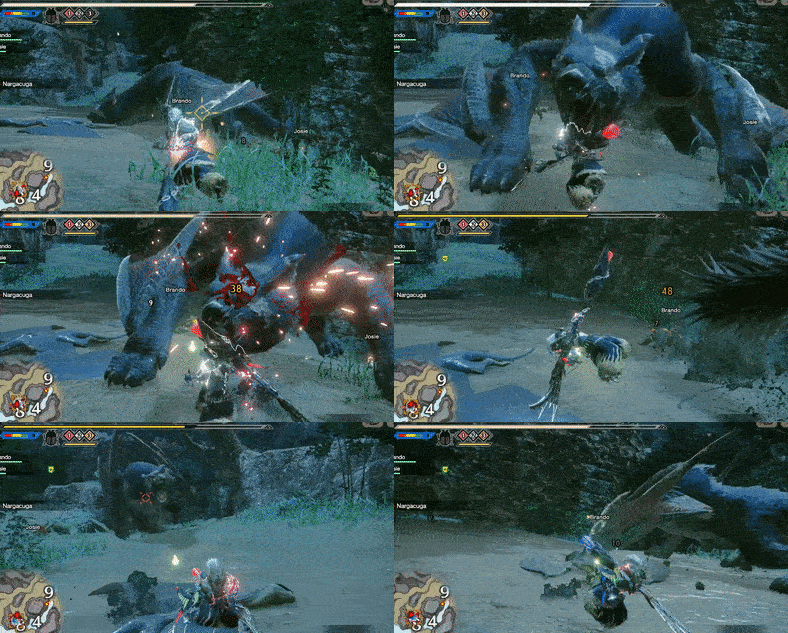
Nargacuga's signature speed and mobility make it a very dangerous monster to hunt. Given this, we recommend that you maintain vision of the monster at all times using Monster Hunter Rise's Target Camera so you can dodge or block its attacks with relative ease.
Target Lock: How to Use the Lock On Camera and Targeting Arrow
Sever Nargacuga's Tail
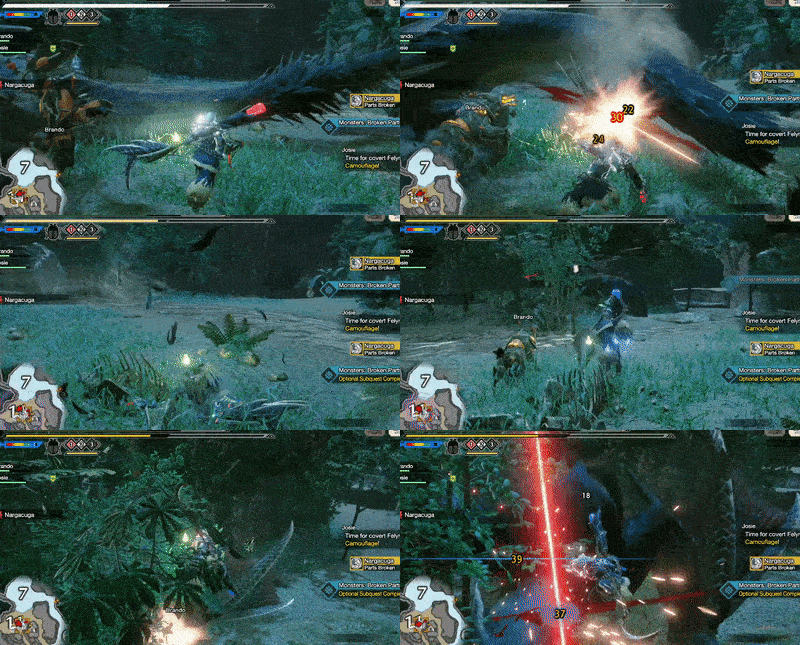
While severing Nargacuga's tail won't stop its Spike Shot attack, it will reduce the range and damage of its Spiked Tail Slam. Doing this will greatly increase your survivability in the hunt, so make it a habit to cut off Nargacuga's tail when possible.
Break Its Forelegs
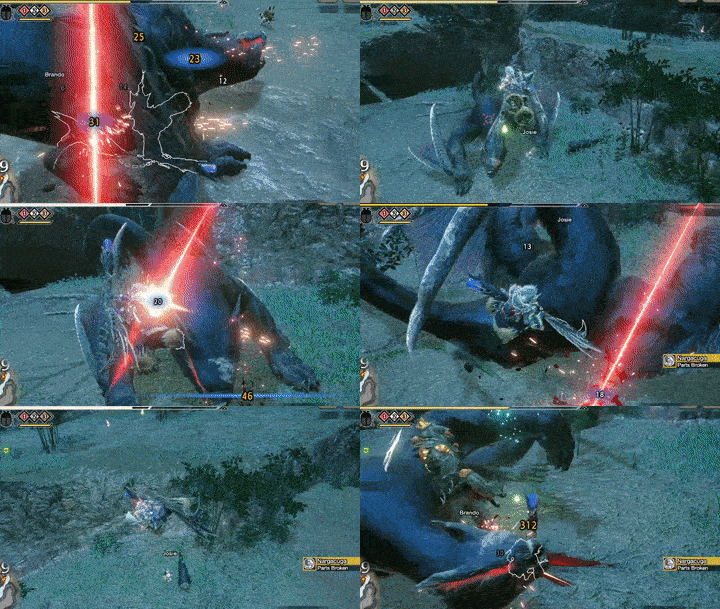
To mitigate Nargacuga's mobility, prioritize breaking its forelegs. Doing this will severely reduce its speed and adds a chance for it to trip whenever it performs certain leaping attacks.
However, note that its forelegs can deflect most weapons that only reach Green sharpness or lower, so consider using Mind's Eye if crafting Blue sharpness weapons is not yet possible.
Be Mindful With Your Pitfall Traps

Unlike Shock Traps, Nargacuga can easily break Pitfall Traps in its normal state. To avoid wasting these traps, only use them while Nargacuga is enraged!
Nargacuga Master Rank Attack Patterns
In addition to its attacks in Low and High Rank quests, Nargacuga uses the following attacks in Master Rank.
| Name | Description |
|---|---|
| Lunging Bites | Nargacuga leans back before rapidly lunging forward, biting hunters caught in its path. |
| Leaping Double Tail Slam DANGER |
Nargacuga slams its tail on top of the hunter before leaping beside them to perform another tail slam. |
Lunging Bites
| Lunging Bites Attack Information |
|---|
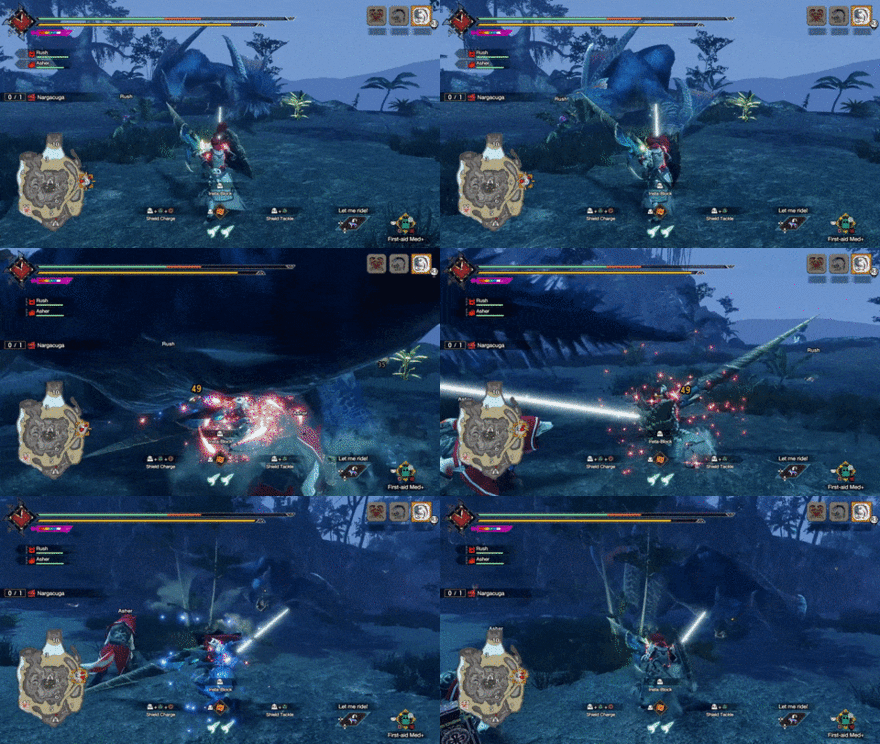 Lunging Bites: Nargacuga leans back before rapidly lunging forward, biting hunters caught in its path. At the end of its charge, it turns around to face the hunter. This attack becomes faster when Nargacuga is enraged. Evade perpendicular to Nargacuga as it charges forward to avoid this attack. In addition, note that this attack can occur at the end of Nargacuga's multiple Stalking Lunges. |
Leaping Double Tail Slam
| Leaping Double Tail Slam Attack Information |
|---|
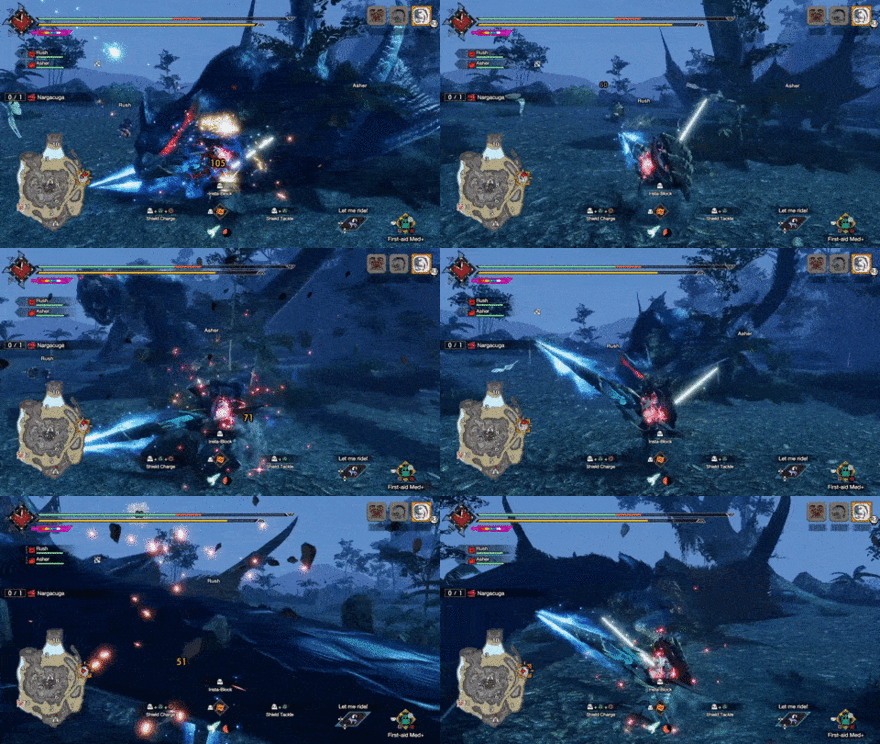 Leaping Double Tail Slam: Nargacuga slams its tail on top of the hunter before leaping beside them to perform another tail slam. This move only occurs when Nargacuga is enraged. Keep your camera aimed at Nargacuga when it performs this attack to have an easier time reacting to and avoiding its second tail slam. |
Nargacuga General Attack Patterns
Nargacuga uses the following attacks in Low and High Rank quests.
| Name | Description |
|---|---|
| Stalking Lunge | Nargacuga picks a target and lunges towards them. Has several variations. |
| Diving Pounce | Nargacuga rears back before performing a diving pounce towards its target. |
| Quick Bite | Nargacuga thrusts its head forward for a quick bite. |
| Spike Shots | Nargacuga whips its tail above its head before launching two sets of spikes from them toward the hunter. |
| Tail Whip | Nargacuga swings its tail towards the front of its head from its left or right side. |
| Tail Spin [DANGER] |
Nargacuga rapidly spins in place, sweeping its tail around and dealing heavy damage to hunters caught in its path. |
| Spiked Tail Slam [DANGER] |
Nargacuga flips around and slams its tail down on top of its target. Can be executed twice in a row. |
Stalking Lunge
Nargacuga picks a target before swiftly lunging towards them, dealing moderate damage on contact. Each variation of this attack can cover fairly long distances so hunters should be prepared.
Take note that Nargacuga can perform two to three lunges and end its combo with a Diving Pounce, Tail Whip, or Tail Spin.
Always be mindful of your positioning to dodge or block this attack! See this attack's variations below:
| Stalking Lunge Variations |
|---|
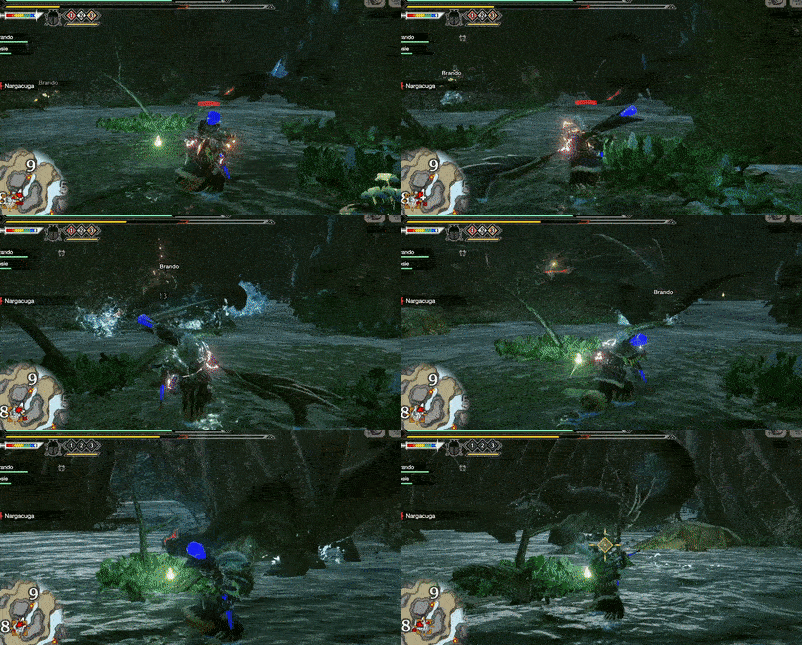 Regular Stalking Lunge: Nargacuga hops in place and assumes a very low stance before lunging towards its target and attacking with its cutwings. |
 Backstep Stalking Lunge Combo: Nargacuga performs a backward leap before lunging forward towards its target. |
Diving Pounce
| Diving Pounce Attack Information |
|---|
 Diving Pounce: Nargacuga rears back before performing a diving pounce towards its target, dealing heavy damage and knocking back hunters on contact. Make sure you always have Nargacuga within your sights to react to this attack and evade it! |
Quick Bite
| Quick Bite Attack Information |
|---|
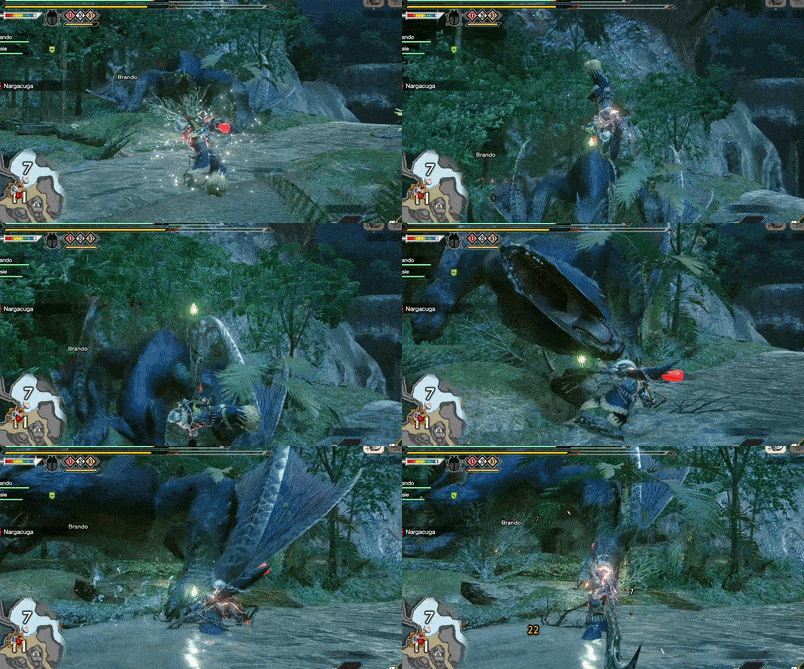 Quick Bite: Nargacuga performs a swift bite towards any hunter in front of it with its fangs. Always be mindful of this attack whenever you're directly in front of it. |
Spike Shots
| Spike Shots Attack Information |
|---|
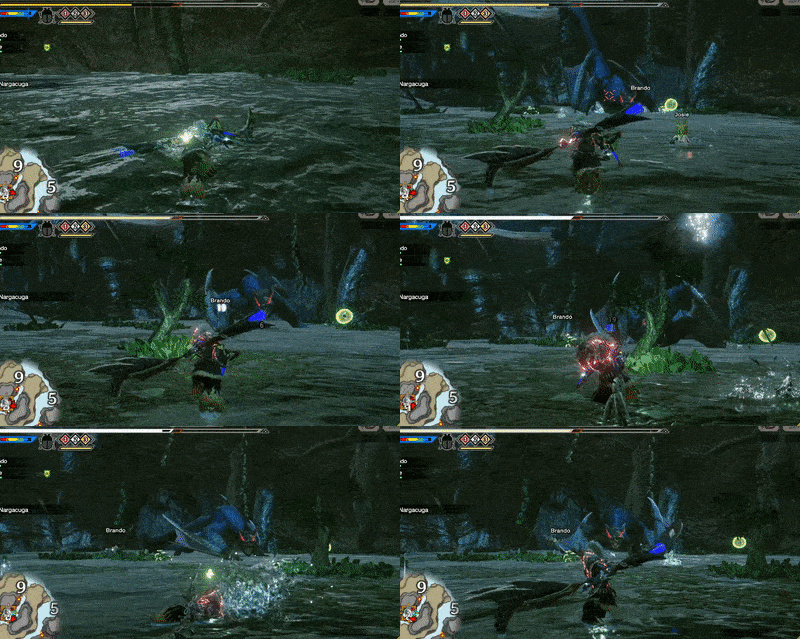 Spike Shots: Nargacuga whips its tail above its head before launching two sets of spikes toward the hunter. These spikes linger for a few seconds on the ground, and stepping on them deals damage and potentially causes a stun. Be mindful of your positioning whenever this attack occurs. |
Tail Whip
| Tail Whip Attack Information |
|---|
 Tail Whip: Following a slight backward hop, Nargacuga will swing its long tail towards the front of its head from its left or right side. This attack has a wide range and will hit hunters directly in front of Nargacuga, so hunters positioned at its head should dodge to the opposite side of the swipe or move away out of range. |
Tail Spin
| Tail Spin Attack Information |
|---|
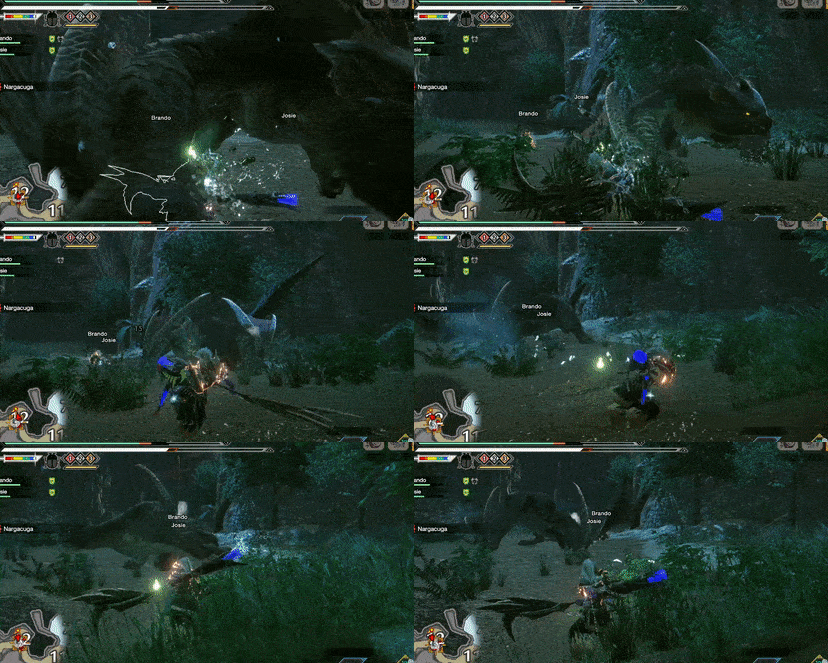 Tail Spin: Nargacuga performs a fast and powerful tail spin, covering a large area and dealing massive damage on contact. This attack becomes quicker and deals more damage when Nargacuga is enraged. In addition, this particular attack has a follow-up spin at High Rank and Master Rank. Against High Rank and Master Rank Nargacuga, any hunter hit by the first spin should stay down and let the second spin play out to avoid getting caught while Wirefalling. |
Spiked Tail Slam
Nargacuga observes its prey, stalking or staring at them for a few seconds before turning around with a quick hop to slam its tail down. This attack can easily KO careless hunters so stay alert when Nargacuga begins stalking.
This attack has variations depending on whether you're hunting a Low or High Rank Nargacuga:
| Spiked Tail Slam Variations |
|---|
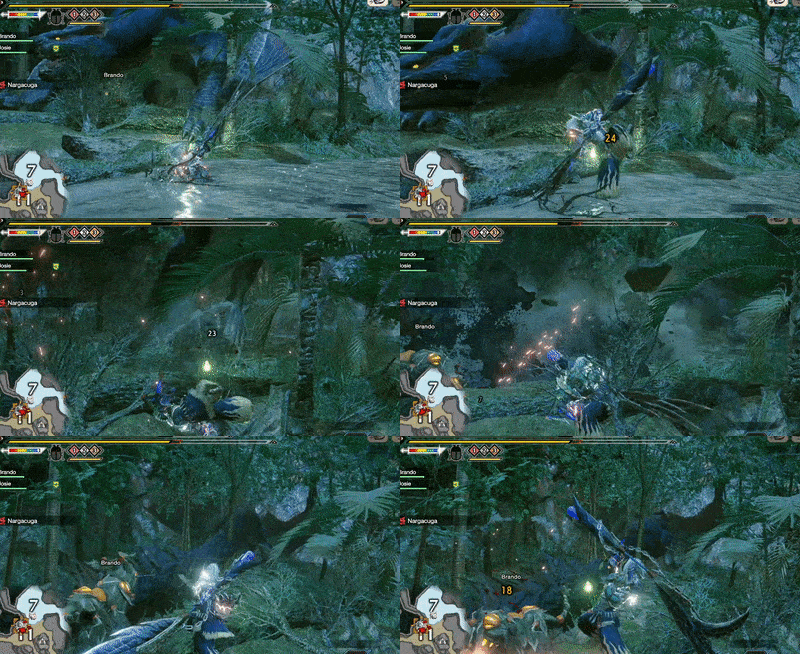 Single Spiked Tail Slam: Nargacuga flips around with a hop and slams its massive spiked tail towards its target. This attack deals massive damage and can potentially stun the hunter or knock them out in one hit. Wait for the exact moment when Nargacuga flips around before attempting to evade or block the tail slam. |
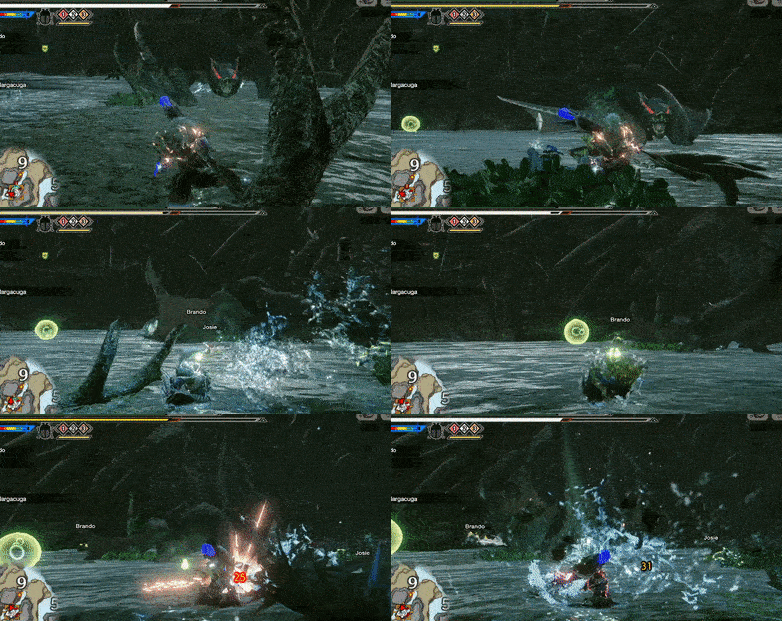 Double Spiked Tail Slam: Nargacuga slams its spiked tail on top of its target before quickly performing another tail slam after a short delay. Note that Nargacuga only performs this attack variation in High Rank quests and only when it is enraged. Like the single variation, wait for the moment when Nargacuga flips around before attempting to evade or block each tail slam. |
Nargacuga Materials and Drops
Master Rank Nargacuga Materials
High Rank Nargacuga Materials
Low Rank Nargacuga Materials
Nargacuga Dropped Materials
Monster Hunter Rise Related Links
All Nargacuga Guides
| All Nargacuga Related Articles | ||
|---|---|---|
 Nargacuga Guide Nargacuga Guide
|
 Nargacuga Weapons Nargacuga Weapons
|
 Nargacuga Armor Nargacuga Armor
|
Sunbreak Monsters
| Sunbreak Monster Lists | ||
|---|---|---|
| Sunbreak Monsters List | Monster Subspecies List | Sunbreak Small Monsters List |
Large Monsters
MR6+ Large Monsters
| MR6+ Monsters | |||||
|---|---|---|---|---|---|
 Gaismagorm Gaismagorm(MR6) |
 Furious Rajang Furious Rajang(MR50) |
 Scorned Magnamalo Scorned Magnamalo(MR100) |
|||
Title Update 1 Monsters
| Sunbreak Title Update 1 Monsters | |||
|---|---|---|---|
 Seething Bazelgeuse Seething Bazelgeuse |
 Silver Rathalos Silver Rathalos |
 Gold Rathian Gold Rathian |
 Lucent Nargacuga Lucent Nargacuga |
Title Update 2 Monsters
| Sunbreak Title Update 2 Monsters | ||
|---|---|---|
 Flaming Espinas Flaming Espinas |
 Risen Chameleos Risen Chameleos |
 Violet Mizutsune Violet Mizutsune |
Title Update 3 Monsters
| Sunbreak Title Update 3 Monsters | ||
|---|---|---|
 Chaotic Gore Magala Chaotic Gore Magala |
 Risen Kushala Daora Risen Kushala Daora |
 Risen Teostra Risen Teostra |
Title Update 4 Monsters
| Sunbreak Title Update 4 Monsters | |
|---|---|
 Velkhana Velkhana |
 Risen Crimson Glow Valstrax Risen Crimson Glow Valstrax |
Title Update 5 Monsters
| Sunbreak Title Update 5 Monsters | |
|---|---|
 Amatsu Amatsu |
 Risen Shagaru Magala Risen Shagaru Magala |
Small Monsters
| Sunbreak Small Monsters | |||||
|---|---|---|---|---|---|
 Boggi Boggi |
 Ceanataur Ceanataur |
 Gowngoat Gowngoat |
|||
 Hermitaur Hermitaur |
 Hornetaur Hornetaur |
 Pyrantula Pyrantula |
 Vespoid Vespoid |
 Velociprey Velociprey |
|
Other Large Monsters
Elder Dragons
| Elder Dragons | |||||
|---|---|---|---|---|---|
 Narwa the Allmother Narwa the Allmother |
|||||
 Wind Serpent Ibushi Wind Serpent Ibushi |
 Thunder Serpent Narwa Thunder Serpent Narwa |
 Crimson Glow Valstrax Crimson Glow Valstrax |
|||
 Chameleos Chameleos |
 Kushala Daora Kushala Daora |
 Teostra Teostra |
|||
Apex Monsters
| Apex Monsters | ||
|---|---|---|
 Apex Arzuros Apex Arzuros |
 Apex Rathian Apex Rathian |
 Apex Mizutsune Apex Mizutsune |
 Apex Rathalos Apex Rathalos |
 Apex Diablos Apex Diablos |
 Apex Zinogre Apex Zinogre |
Other Small Monsters
Author
Sunbreak Nargacuga: Weakness and Drops
Rankings
- We could not find the message board you were looking for.
Gaming News
Popular Games

Genshin Impact Walkthrough & Guides Wiki

Honkai: Star Rail Walkthrough & Guides Wiki

Arknights: Endfield Walkthrough & Guides Wiki

Umamusume: Pretty Derby Walkthrough & Guides Wiki

Wuthering Waves Walkthrough & Guides Wiki

Pokemon TCG Pocket (PTCGP) Strategies & Guides Wiki

Abyss Walkthrough & Guides Wiki

Zenless Zone Zero Walkthrough & Guides Wiki

Digimon Story: Time Stranger Walkthrough & Guides Wiki

Clair Obscur: Expedition 33 Walkthrough & Guides Wiki
Recommended Games

Fire Emblem Heroes (FEH) Walkthrough & Guides Wiki

Pokemon Brilliant Diamond and Shining Pearl (BDSP) Walkthrough & Guides Wiki

Diablo 4: Vessel of Hatred Walkthrough & Guides Wiki

Super Smash Bros. Ultimate Walkthrough & Guides Wiki

Yu-Gi-Oh! Master Duel Walkthrough & Guides Wiki

Elden Ring Shadow of the Erdtree Walkthrough & Guides Wiki

Monster Hunter World Walkthrough & Guides Wiki

The Legend of Zelda: Tears of the Kingdom Walkthrough & Guides Wiki

Persona 3 Reload Walkthrough & Guides Wiki

Cyberpunk 2077: Ultimate Edition Walkthrough & Guides Wiki
All rights reserved
©CAPCOM CO., LTD. ALL RIGHTS RESERVED.
The copyrights of videos of games used in our content and other intellectual property rights belong to the provider of the game.
The contents we provide on this site were created personally by members of the Game8 editorial department.
We refuse the right to reuse or repost content taken without our permission such as data or images to other sites.

 Daimyo Hermitaur
 Blood Orange Bishaten
 Garangolm
 Aurora Somnacanth
 Shogun Ceanataur
 Lunagaron
 Astalos
 Seregios
 Magma Almudron
 Gore Magala
 Espinas
 Pyre Rakna-Kadaki
 Malzeno
 Shagaru Magala
 Great Izuchi
 Arzuros
 Great Baggi
 Lagombi
 Aknosom
 Tetranadon
 Kulu-Ya-Ku
 Barroth
 Great Wroggi
 Royal Ludroth
 Khezu
Khezu Bishaten
 Somnacanth
 Barioth
 Rathian
 Tobi-Kadachi
 Volvidon
 Basarios
 Pukei-Pukei
 Magnamalo
 Zinogre
 Anjanath
 Mizutsune
 Rathalos
 Almudron
 Goss Harag
 Tigrex
 Diablos
 Jyuratodus
 Rajang
 Rakna-Kadaki
 Bazelgeuse
 Altaroth
 Anteka
 Baggi
Baggi Bnahabra
 Bombadgy
 Bullfango
 Delex
Delex Felyne
 Gajau
Gajau Gargwa
 Izuchi
 Jaggi
Jaggi Jaggia
 Jagras
 Kelbi
Kelbi Kestodon
 Ludroth
 Melynx
 Popo
Popo Rachnoid
 Remobra
 Rhenoplos
 Slagtoth
 Uroktor
 Wroggi
 Zamite


![Neverness to Everness (NTE) Review [Beta Co-Ex Test] | Rolling the Dice on Something Special](https://img.game8.co/4414628/dd3192c8f1f074ea788451a11eb862a7.jpeg/show)


