This survey will take about 1 minute.
Your answers will help us to improve our website.
Monster Hunter Rise: Sunbreak
Sunbreak Heavy Bowgun Builds (Master Rank HBG)
★ All Title Updates now available for ALL PLATFORMS!
┗ Title Update 4 | Title Update 5 | Bonus Update
┗ Check out all our Best Builds For Every Weapon!
┗ TU4 Monsters: Velkhana | Risen C.G. Valstrax
┗ TU5 Monsters: Amatsu | Risen Shagaru Magala
┗ Bonus Update Monster: Primordial Malzeno

This is a guide to the best builds and equipment for Heavy Bowguns (HBG) in Monster Hunter Rise (MH Rise): Sunbreak. Learn about the best Heavy Bowguns for Master Rank, and the best Skills and Armor pieces to use with the Heavy Bowguns for Master Rank from the early game until the end game!
| All Heavy Bowgun Guides | ||
|---|---|---|
 Trees & Full List Trees & Full List |
 How to Use How to Use |
 Best Builds Best Builds |
List of Contents
Heavy Bowgun Builds List & Progression
This is a quick section summarizing all the Heavy Bowgun builds in this page. It is arranged from newest to oldest, and MR build progression is from bottom to top.
Click on the build name to see the build!
| Master Rank | Title Update | Build Name |
|---|---|---|
| MR180+ | TU5 | Dragonheart Dereliction Raw |
| MR180+ | TU5 | Shield Spread HBG |
| MR160+ | TU4 | TU4 Endgame Spread Build |
| MR160+ | TU4 | TU4 Dragon Conversion Elemental Pierce Build |
| MR120+ | TU3 | TU3 Elemental Pierce Build |
| MR140+ | TU3 | TU3 Raw Pierce Build |
| MR10+ | TU3 | Elemental Pierce Climber |
| MR10+ | TU2 | Raw Pierce Climber |
| MR10+ | TU2 | Endgame Sticky Ammo Climber |
| MR3-6 | Base | Mid Game Spread Ammo |
| MR3-6 | Base | Mid Game Pierce & Slicing Ammo |
| MR1-2 | Base | Izuchi Pierce + Slicing Starter |
Ultra Endgame MR Build: MR100+
TU5 Dragonheart Dereliction Raw HBGs
Spread Heavy Bowgun
| Weapon | Slots | ATK | DEF | |
|---|---|---|---|---|
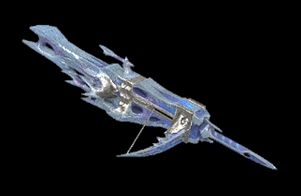 Righteous Varka Righteous Varka
|
④ーー | 370 | 0 | |
| Affinity | Element | |||
| 0% | ||||
| Rampage Slots | ③ | |||
| Special Ammo | Wyvernsnipe | |||
| Decorations |
|
|---|
Pierce Heavy Bowgun
| Weapon | Slots | ATK | DEF | |
|---|---|---|---|---|
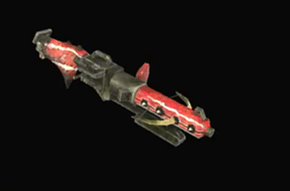
 Ursprung/Mort Ursprung/Mort
|
③①① | 360 | 0 | |
| Affinity | Element | |||
| -35% / 15% |
- |
|||
| Rampage Slots | ② | |||
| Special Ammo | Wyvernheart | |||
| Decorations |
|
|---|
Recommended Armor Loadout
| Armor | Slots | Skills | |
|---|---|---|---|
|
|
④①① |
Weakness Exploit Lv. 1
Dragonheart Lv. 1
|
|
|
|
③②① | ||
|
|
④②ー | ||
|
|
④②ー | ||
|
|
③②② |
Resentment Lv. 1
Dereliction Lv. 1
|
|
| Talisman | Dragonheart Lv.4; with ②② slot or better | ||
| Rampage Decoration | |||
| Skills | |
|---|---|
| Rampage Skill | Swap between Wyvern Exploit, Anti-Aerial Species, Anti-Aquatic Species, or Fanged Exploit depending on the monster. |
Attack Boost Lv.7
| Dragonheart Lv.5 Razor Sharp Lv.3 | Spare Shot Lv.3 Weakness Exploit Lv.3 | Critical Boost Lv.3 Tune-Up Lv.2 | Recoil Down Lv.2 Kushala Blessing Lv.2 | Intrepid Heart Lv.1 Frenzied Bloodlust Lv.1 | Bloodlust Lv.1 Dereliction Lv.1 | Resentment Lv.1 Evade Extender Lv.1 | Coalescence Lv.1 Spread only: Spread Up Lv.3 | Maximum Might Lv.3 Reload Speed Lv.1 Pierce only: Pierce Up Lv.3 | Reload Speed Lv.3 Ballistics Lv.1 | Steadiness Lv.1 |
|
Build Merits and Augments
| Weapon Augments |
|
|---|---|
| Armor Augments | Armor augments are not needed for this build. However, feel free to add as you please once you get comfortable with your build! Generally, you'd want to get better skills and more slots for your armor.
Replaceable skills already on the armor: ● Razor Sharp ● Frenzied Bloodlust For damage, aim for any of the following: ● Powder Mantle ● Resentment (aim for higher levels) ● Resuscitate ● Burst For comfort, aim for any of the following: ● Intrepid Heart ● Evade Extender ● Defiance |
| Build Merits and Notes |
|---|
| With the introduction of Vigor and Cyclus melding, Dragonheart can now be rolled in talismans. At Lv.5, this skill adds around 50 raw attack when activated, which is quite the boost! When paired with Dereliction on the Blue Scroll, the 80% HP threshold can be reached fairly easily even with the HP recovery of Bloodlust.
This build requires equipping the Power Barrel to maximize Tune-Up's attack boost. While this is certainly more powerful than our other raw builds, this is also much riskier to use as there is continuous health drain and HP must be kept below 80%. As a safety net, we've included a level of Intrepid Heart. |
TU5 Shield Spread Heavy Bowgun
| Weapon | Slots | ATK | DEF | |
|---|---|---|---|---|
|
Righteous Varka
|
④ーー | 370 | 0 | |
| Affinity | Element | |||
| 0% | ||||
| Rampage Slots | ③ | |||
| Special Ammo | Wyvernsnipe | |||
| Armor | Slots | Skills | |
|---|---|---|---|
|
|
④④ー |
Redirection Lv. 2
Defiance Lv. 2
|
|
|
|
③②① | ||
|
|
④①① | ||
|
|
②②ー | ||
|
|
②②① | ||
| Talisman | Weakness Exploit Lv.3; with ③① slot or better | ||
| Rampage Decoration | |||
| Decorations | |||
| Skills | |
|---|---|
| Rampage Skill | Swap between Wyvern Exploit, Anti-Aerial Species, Anti-Aquatic Species, or Fanged Exploit depending on the monster. Use Kushala Daora Soul if you want 100% Affinity on weakpoints. |
Attack Boost Lv.5
| Embolden Lv.3 Spare Shot Lv.3 | Critical Boost Lv.3 Spread Up Lv.3 | Maximum Might Lv.3 Weakness Exploit Lv.3 | Guard Up Lv.3 Kushala Blessing Lv.3 | Guard Lv.3 Redirection Lv.2 | Defiance Lv.2 Razor Sharp Lv.2 | Latent Power Lv.2 Recoil Down Lv.2 | Tune-Up Lv.1 Blood Rite Lv.1 | Intrepid Heart Lv.1 Evade Extender Lv.1 | Reload Speed Lv.1 |
|
Build Merits and Augments
| Weapon Augments |
|
|---|---|
| Armor Augments | Armor augments are not needed for this build. However, feel free to add as you please once you get comfortable with your build! Generally, you'd want to get better skills and more slots for your armor.
Replaceable skills already on the armor: ● Razor Sharp ● Latent Power For damage, aim for any of the following: ● Powder Mantle ● Attack Boost ● Mail of Hellfire ● Burst For comfort, aim for any of the following: ● Guard Lv.5 ● Blood Rite ● Recovery Up ● Defiance |
| Build Merits and Notes |
|---|
| Sunbreak's endgame pushes Anomaly Investigations to greater heights with powerful monsters that can easily one-shot gunners even with max armor upgrades. One way of surviving is by using the Shield to take hits and retaliate with Spread 3 shots. While this won't make you immortal, it's certainly a much safer way to play the Heavy Bowgun.
The Heavy Bowgun's shield is normally pretty weak, with most attacks causing heavy knockback even with max Guard levels. This issue can be resolved with Embolden and Tune-Up. Guard Up allows you to block through normally unblockable attacks like beams and lasers, opening opportunities to rain Spread ammo on monsters. This combination of skills can take most hits in the game with minimal knockback, getting you back in action quickly. This build also adds several defensive skills like Kushala Blessing Lv.3 and Blood Rite for healing. Intrepid Heart can act as an extra layer of safety while Evade Extender can help in cases where evading would be better than directly tanking hits. |
TU4 Endgame Spread Build
| Weapon | Slots | ATK | DEF | |
|---|---|---|---|---|
|
Righteous Varka
|
④ーー | 370 | 0 | |
| Affinity | Element | |||
| 0% | ||||
| Rampage Slots | ③ | |||
| Special Ammo | Wyvernsnipe | |||
| Armor | Slots | Skills | |
|---|---|---|---|
|
|
③②ー | ||
|
|
②②ー | ||
|
|
④①① | ||
|
|
④②① |
Mail of Hellfire Lv. 1
Coalescence Lv. 1
|
|
|
|
③②ー | ||
| Talisman | Attack Boost Lv.3; with one ② slot or better | ||
| Rampage Decoration | |||
| Decoration |
|
||
| Skills | |
|---|---|
| Rampage Skill | Swap between Wyvern Exploit, Anti-Aerial Species, Anti-Aquatic Species, or Fanged Exploit depending on the monster. |
Attack Boost Lv.6
| Critical Eye Lv. 6 Critical Boost Lv.3 | Weakness Exploit Lv.3 Spread Up Lv.3 | Spare Shot Lv.3 Latent Power Lv.2 | Recoil Down Lv.2 Evade Extender Lv.2 | Powder Mantle Lv.2 Mail of Hellfire Lv.1 | Coalescence Lv.1 Bloodlust Lv.1 | Razor Sharp Lv.1 Burst Lv.1 | Reload Speed Lv.1 |
|
Build Merits and Augments
| Weapon Augments |
|
|---|---|
| Armor Augments | Armor augments are not needed for this build. However, feel free to add as you please once you get comfortable with your build! Generally, you'd want to get better skills and more slots for your armor.
Replaceable skills already on the armor: ● Razor Sharp ● Latent Power For damage, aim for any of the following: ● Tune-Up Lv.2 (if using with Power Barrel) ● Attack Boost ● Mail of Hellfire For comfort, aim for any of the following: ● Intrepid Heart ● Ammo Up Lv.3 ● Blood Rite ● Defiance |
| Build Merits and Notes |
|---|
| The Righteous Varka has high raw and fairly manageable Recoil and Reload Speed for its Spread Ammo 3 and can use Status and Exhaust ammo. This gives it more flexibility while maintaining the power of its Spread shots when compared to other options. The chosen skills guarantee crits on weakspots after Bloodlust while providing additional damage with Powder Mantle. This build is best used with the Power Barrel to maximize attack. |
TU4 Dragon Conversion Elemental Pierce Build
Fire Elemental Heavy Bowgun
| Weapon | Slots | ATK | DEF | |
|---|---|---|---|---|
 Six Paths Crossing Six Paths Crossing
|
①①① | 350 | 0 | |
| Affinity | Element | |||
| 0% |
- |
|||
| Rampage Slots | ③ | |||
| Special Ammo | Wyvernheart | |||
| Decorations | ||
|---|---|---|
Water Elemental Heavy Bowgun
| Weapon | Slots | ATK | DEF | |
|---|---|---|---|---|
 Heavy Crab Buster Heavy Crab Buster
|
③ーー | 350 | 0 | |
| Affinity | Element | |||
| 0% |
- |
|||
| Rampage Slots | ③ | |||
| Special Ammo | Wyvernsnipe | |||
| Decorations | ||
|---|---|---|
Thunder Elemental Heavy Bowgun
| Weapon | Slots | ATK | DEF | |
|---|---|---|---|---|
 Skyshot Thunderstorm Skyshot Thunderstorm
|
④ーー | 340 | 0 | |
| Affinity | Element | |||
| 0% |
- |
|||
| Rampage Slots | ③ | |||
| Special Ammo | Wyvernsnipe | |||
| Decorations | ||
|---|---|---|
Ice Elemental Heavy Bowgun
| Weapon | Slots | ATK | DEF | |
|---|---|---|---|---|
 Egil Egil
|
②ーー | 360 | 0 | |
| Affinity | Element | |||
| 0% |
- |
|||
| Rampage Slots | ③ | |||
| Special Ammo | Wyvernsnipe | |||
| Decorations | ||
|---|---|---|
TU4 Elemental Pierce Build Armor Setup
| Armor | Slots | Skills | |
|---|---|---|---|
|
|
④②ー | ||
|
|
④④ー | ||
|
|
④ーー |
Resentment Lv. 1
Dereliction Lv. 2
|
|
|
|
④①① | ||
|
|
③②② |
Resentment Lv. 1
Dereliction Lv. 1
|
|
| Talisman | Attack Boost Lv.3; with ①① slot | ||
| Rampage Decoration | |||
| Skills | |
|---|---|
| Rampage Skill | Use Element Exploit if monster has a 25 element hitzone, otherwise use Kushala Daora Soul |
|
Attack Boost Lv.7
| Element Attack Lv.5
Dragon Conversion Lv.3 | Dragon Resistance Lv.3 Spare Shot Lv.3 | Dereliction Lv.3 Stamina Surge Lv.3 | Defiance Lv.3 Reload Speed Lv.2/Lv.3 | Element Exploit Lv.1/Lv.3 Resentment Lv.2 | Evade Extender Lv.2 Latent Power Lv.2 | Recoil Down Lv.1 Burst Lv.1 Teostra Blessing Lv.2 (Fire Only) Kushala Blessing Lv.1 (Water Only) Steadiness Lv.1 (Thunder Only) |
|
Build Merits and Augments
| Weapon Augments |
|
|---|---|
| Armor Augments | Armor augments are not needed for this build. However, feel free to add as you please once you get comfortable with your build! Generally, you'd want to get better skills and more slots for your armor.
Replaceable skills already on the armor: ● Stamina Surge ● Latent Power For damage, aim for any of the following: ● Furious Lv.3 or additional resistance ● Kushala Blessing Lv.2 (Water and Ice) ● Tune-Up Lv.2 (if using Power Barrel) ● Strife ● Mail of Hellfire For comfort, aim for any of the following: ● Intrepid Heart ● Blood Rite ● Steadiness |
| Build Merits and Notes |
|---|
|
Pierce elemental ammo continues to be a powerful option for the Heavy Bowgun thanks to Dereliction. TU4 introduces Dragon Conversion, which boosts elemental damage further, as long as elemental resistance is high enough.
Using this build requires the Crouching Shot and Setting Sun switch skills in addition to the Power Barrel mod. Start hunts with the Blue Scroll then quickly build up around 80 hits using Pierce or Spread Ammo with Crouching Shot. Once you've gained the additional resistance, swap to the Red Scroll to take advantage of the bonus elemental damage for the rest of the hunt. Due to the limited supply of elemental ammo, be sure to bring combines for every hunt as well as a Farcaster for emergency restocks. |
TU3 Elemental Pierce Build
Fire Elemental Heavy Bowgun
| Weapon | Slots | ATK | DEF | |
|---|---|---|---|---|
|
Six Paths Crossing
|
①①① | 350 | 0 | |
| Affinity | Element | |||
| 0% |
- |
|||
| Rampage Slots | ③ | |||
| Special Ammo | Wyvernheart | |||
Water Elemental Heavy Bowgun
| Weapon | Slots | ATK | DEF | |
|---|---|---|---|---|
|
Heavy Crab Buster
|
③ーー | 350 | 0 | |
| Affinity | Element | |||
| 0% |
- |
|||
| Rampage Slots | ③ | |||
| Special Ammo | Wyvernsnipe | |||
Thunder Elemental Heavy Bowgun
| Weapon | Slots | ATK | DEF | |
|---|---|---|---|---|
|
Skyshot Thunderstorm
|
④ーー | 340 | 0 | |
| Affinity | Element | |||
| 0% |
- |
|||
| Rampage Slots | ③ | |||
| Special Ammo | Wyvernsnipe | |||
Ice Elemental Heavy Bowgun
| Weapon | Slots | ATK | DEF | |
|---|---|---|---|---|
|
Egil
|
②ーー | 360 | 0 | |
| Affinity | Element | |||
| 0% |
- |
|||
| Rampage Slots | ③ | |||
| Special Ammo | Wyvernsnipe | |||
TU3 Elemental Pierce Build Armor Setup
| Armor | Slots | Skills | |
|---|---|---|---|
|
|
④②ー | ||
|
|
③②① | ||
|
|
④ーー |
Resentment Lv. 1
Dereliction Lv. 2
|
|
|
|
③①① | ||
|
|
③②② |
Resentment Lv. 1
Dereliction Lv. 1
|
|
| Talisman | Ammo Up Lv.2; with ① slot | ||
| Rampage Decoration | |||
| Decorations |
Hard Element Jewel 3 x1 Element Jewel+ 2 x1 |
||
| Skills | |
|---|---|
| Rampage Skill | Use Element Exploit if monster has a 25 element hitzone, otherwise use Kushala Daora Soul |
|
Element Attack Lv.5
| Attack Boost Lv.4
Critical Eye Lv.4 | Resentment Lv.4 Spare Shot Lv.3 | Dereliction Lv.3 Reload Speed Lv.2/Lv.3 | Strife Lv.2 Kushala Blessing Lv.2 | Razor Sharp Lv.2 Ammo Up Lv.2 | Critical Element Lv.2 Evade Extender Lv.2 | Recoil Down Lv.1 Element Exploit Lv.1 | Burst Lv.1 Steadiness Lv.1 | Weakness Exploit Lv.1 Teostra Blessing Lv.2 (Fire Only) |
|
Build Merits and Augments
| Weapon Augments |
|
|---|---|
| Armor Augments | Armor augments are not needed for this build. However, feel free to add as you please once you get comfortable with your build! Generally, you'd want to get better skills and more slots for your armor.
Replaceable skills already on the armor: ● Razor Sharp For damage, aim for any of the following: ● Bloodlust ● Tune-Up Lv.2 (if using Power Barrel) ● Weakness Exploit ● Element Exploit For comfort, aim for any of the following: ● Defiance ● Blood Rite |
| Build Merits and Notes |
|---|
|
Pierce elemental ammo continues to be a powerful option for the Heavy Bowgun thanks to easier access to Teostra and Kushala Blessings as well as the new skill Strife. We're also keeping Dereliction, as it remains a powerful elemental boosting skill especially when paired with Strife.
We're also keeping Bowgun staples like Spare Shot and Burst while adding Ammo Up to extend clip size. Depending on the Bowgun, you may reduce levels of Recoil Down and Reload Speed to free up slots and fit in other skills as needed. Due to the limited supply of elemental ammo you can carry, be sure to bring combines for every hunt as well as a Farcaster if you must restock. To maximize the number of hits each shot does, use the Setting Sun switch skill with a Power Barrel. |
TU3 Raw Pierce Build
| Weapon | Slots | ATK | DEF | |
|---|---|---|---|---|
|
Ursprung/Mort
|
③①① | 360 | 0 | |
| Affinity | Element | |||
| -35% / 15% |
- |
|||
| Rampage Slots | ② | |||
| Special Ammo | Wyvernheart | |||
| Armor | Slots | Skills | |
|---|---|---|---|
|
|
④①① | ||
|
|
③②① | ||
|
|
④②① | ||
|
|
④③ー | ||
|
|
③②ー | ||
| Talisman | Attack Boost Lv.3; with one ② slot | ||
| Rampage Decoration | |||
| Decoration |
|
||
| Skills | |
|---|---|
| Rampage Skill | Swap between Wyvern Exploit, Anti-Aerial Species, Anti-Aquatic Species, or Fanged Exploit depending on the monster. |
Attack Boost Lv.7
| Critical Boost Lv.3 Windproof Lv.3 | Razor Sharp Lv.3 Spare Shot Lv.3 | Reload Speed Lv.3 Ammo Up Lv.3 | Pierce Up Lv.3 Recoil Down Lv.2 | Kushala Blessing Lv.2 Master's Touch Lv.2 | Ballistics Lv.2 Critical Eye Lv.2 | Evade Extender Lv.2 Maximum Might Lv.2 | Critical Element Lv.1 Peak Performance Lv.1 | Burst Lv.1 Powder Mantle Lv.1 | Bloodlust Lv.1 Steadiness Lv.1 |
|
Build Merits and Augments
| Weapon Augments |
|
|---|---|
| Armor Augments | Armor augments are not needed for this build. However, feel free to add as you please once you get comfortable with your build! Generally, you'd want to get better skills and more slots for your armor.
Replaceable skills already on the armor: ● Razor Sharp ● Master's Touch ● Critical Element ● Windproof For damage, aim for any of the following: ● Tune-Up Lv.2 (if using Power Barrel) ● Coalescence For comfort, aim for any of the following: ● Defiance ● Blood Rite |
| Build Merits and Notes |
|---|
| Crouching Shot gained buffs in TU3 that let the already powerful Pierce Ammo deal raw damage much quicker than before. Pierce shots also continue to improve with the introduction of Ursprung/Mort, the Chaotic Gore HBG. Unlike our previous choice, the Devil's Conduit, the Ursprung/Mort doesn't require Weakness Exploit to reach maximum affinity, allowing us to deal crits with all the pierce hits and letting us slot in Anti-species Jewels for more damage.
For skills, Bloodlust is mandatory as we need it to change the Ursprung/Mort's negative affinity to positive. Thankfully, overcoming the Frenzy with Pierce Ammo is fairly easy. Damage skills like Critical Boost, Pierce Up, and Burst all help maximize the weapon's potential, while Ballistics and Evade Extender should make positioning easier. Wirebug Whisperer may be slotted in by replacing Ballistics and one level of Attack Boost if you rely on the Silkbind Attacks for survivability. For weapon augments, we recommend full Attack augments as the build can already hit 100% affinity after overcoming the Frenzy. Using the Power Barrel is also recommended to increase our damage per shot. We also recommend using the Setting Sun switch skill when you have the chance to maximize the number of hits per shot. |
Endgame MR Build: MR 6-100
Elemental Pierce Climber
Fire Elemental Light Bowgun
| Weapon | Slots | ATK | DEF | |
|---|---|---|---|---|
|
Six Paths Crossing
|
①①① | 350 | 0 | |
| Affinity | Element | |||
| 0% |
- |
|||
| Rampage Slots | ③ | |||
| Special Ammo | Wyvernheart | |||
| Weapon Augments | ||
|---|---|---|
| Decorations |
|
|
Water Elemental Light Bowgun
| Weapon | Slots | ATK | DEF | |
|---|---|---|---|---|
|
Heavy Crab Buster
|
③ーー | 350 | 0 | |
| Affinity | Element | |||
| 0% |
- |
|||
| Rampage Slots | ③ | |||
| Special Ammo | Wyvernsnipe | |||
| Weapon Augments | ||
|---|---|---|
| Decorations |
|
|
Thunder Elemental Light Bowgun
| Weapon | Slots | ATK | DEF | |
|---|---|---|---|---|
|
Skyshot Thunderstorm
|
④ーー | 340 | 0 | |
| Affinity | Element | |||
| 0% |
- |
|||
| Rampage Slots | ③ | |||
| Special Ammo | Wyvernsnipe | |||
| Weapon Augments | ||
|---|---|---|
| Decorations |
|
|
Ice Elemental Light Bowgun
| Weapon | Slots | ATK | DEF | |
|---|---|---|---|---|
|
Egil
|
②ーー | 360 | 0 | |
| Affinity | Element | |||
| 0% |
- |
|||
| Rampage Slots | ③ | |||
| Special Ammo | Wyvernsnipe | |||
| Weapon Augments | ||
|---|---|---|
| Decorations |
|
|
Elemental Pierce Climber Armor Setup
| Armor | Slots | Skills | |
|---|---|---|---|
|
|
④②ー | ||
|
|
②ーー | ||
|
|
④ーー |
Resentment Lv. 1
Dereliction Lv. 2
|
|
|
|
③①① | ||
|
|
③②② |
Resentment Lv. 1
Dereliction Lv. 1
|
|
| Talisman | Attack Boost Lv.3, with ①① slots | ||
| Rampage Decoration | |||
| Skills | |
|---|---|
| Rampage Skill | Use Element Exploit if monster has a 25 element hitzone, otherwise use Kushala Daora Soul |
|
Element Attack Lv.5
| Critical Eye Lv.4
Resentment Lv.4 | Attack Boost Lv.4 Dereliction Lv.3 | Spare Shot Lv.3 Reload Speed Lv.2/Lv.3 | Strife Lv.2 Resuscitate Lv.2 | Evade Extender Lv.2 Steadiness Lv.1/Lv.2 | Bloodlust Lv.1 Critical Element Lv.1 | Element Exploit Lv.1 Burst Lv.1 | Coalescence Lv.1 Recoil Down Lv.1 (Except Thunder) |
|
| Build Merits and Notes |
|---|
|
Pierce elemental ammo is a great way to quickly hunt monsters that are very weak to elemental damage. All these parts are available starting from MR 10, with the only exception being the Phoenix Jewel 2, which requires at least Anomaly Investigation Lv. 51. This can be substituted with an extra level of Burst in the meantime.
Using the Power Barrel is recommended to maximize damage, while frequently having Setting Sun up will make sure you get the most hits out of each shot. Since the build is using Dereliction, be sure to stay on the Red Scroll and watch your health. This build doesn't require any augments, but increasing the levels of skills such as Strife or Coalescence will certainly improve elemental damage. |
Raw Pierce Climber
| Weapon | Slots | ATK | DEF | |
|---|---|---|---|---|
|
Ursprung/Mort
|
③①① | 360 | 0 | |
| Affinity | Element | |||
| -35% / 15% |
- |
|||
| Rampage Slots | ② | |||
| Special Ammo | Wyvernheart | |||
| Weapon Augments |
|---|
| Armor | Slots | Skills | |
|---|---|---|---|
|
|
④①① | ||
|
|
②②ー | ||
|
|
④②ー | ||
|
|
②ーー | ||
|
|
③②ー | ||
| Talisman | Attack Boost Lv.3, with ①① slots | ||
| Rampage Decoration | |||
| Decoration |
|
||
| Skills | |
|---|---|
| Rampage Skill | Swap between Wyvern Exploit, Anti-Aerial Species, Anti-Aquatic Species, or Fanged Exploit depending on the monster. |
Attack Boost Lv.7
| Critical Boost Lv.3 Windproof Lv.3 | Recovery Speed Lv.3 Ammo Up Lv.3 | Razor Sharp Lv.3 Spare Shot Lv.3 | Pierce Up Lv.3 Reload Speed Lv.3 | Handicraft Lv.2 Recoil Down Lv.2 | Evade Extender Lv.2 Weakness Exploit Lv.2 | Critical Element Lv.1 Intrepid Heart Lv.1 | Bloodlust Lv.1 Burst Lv.1 | Coalescence Lv.1 Steadiness Lv.1 |
|
| Build Merits and Notes |
|---|
| Pierce Ammo with the Chaotic Gore HBG is a powerful endgame combination. This build can be made starting from MR 10, save for a few decorations. Pierce Jewel+ 4 can be obtained after reaching investigation level 71, but this and the other Lv. 4 decoration can be replaced with Pierce Jewel 3 to keep Pierce Up Lv.3. The Phoenix Jewel 2 requires investigation level 51, but this can be substituted with a decoration for another skill like Evade Extender or Ballistics.
The Power Barrel is the mod of choice for its boost to raw attack, while Crouching Shot should be equipped to quickly fire Pierce shots when there's an opening. Augments are optional for this build, but adding skills for more damage, such as Powder Mantle and Mail of Hellfire, can certainly help. |
Endgame Sticky Ammo Climber
| Weapon | Slots | ATK | DEF | |
|---|---|---|---|---|
 Antique Machina HB Antique Machina HB
|
ーーー | 350 | 0 | |
| Affinity | Element | |||
| 0% |
- |
|||
| Rampage Slots | ① | |||
| Special Ammo | Wyvernheart | |||
| Weapon Augments |
|---|
| Armor | Slots | Skills | |
|---|---|---|---|
|
|
③②ー | ||
|
|
②②ー | ||
|
|
④②ー | ||
|
|
④①① |
Attack Boost Lv. 2
|
|
|
|
④①ー | ||
| Talisman | Recoil Down Lv.3; with two ① slot | ||
| Rampage Decoration | |||
| Decoration |
|
||
| Skills | |
|---|---|
| Rampage Skill | Teostra Soul |
Attack Boost Lv.7
| Razor Sharp Lv.3 Spare Shot Lv.3 | Recovery Speed Lv.3 Ammo Up Lv.3 | Recoil Down Lv.3 Artillery Lv.3 | Slugger Lv.3 Reload Speed Lv.3 | Handicraft Lv.2 Intrepid Heart Lv.2 | Burst Lv.2 Evade Extender Lv.2 | Steadiness Lv.2 |
|
| Build Merits and Notes |
|---|
| Sticky Ammo, while not as overpowered as before, makes a decent comeback in Sunbreak's endgame! Damage is bolstered through Attack Boost, Artillery, and Teostra Soul. Slugger is added to enhance the Ammo's KO damage, while the usual QoL staples for Bowgun performance are present in the build.
We've updated this build to use the Antique Machina HB over the Bordeaux Candlestick+ as it can also fire Level Shot Cluster Bombs, meaning you don't have to aim them at an arc for the explosion. You'll primarily be launching Sticky Ammo and Cluster Bombs at the head to stun the monster then unleash charged Wyvern Ammo when you have an opening. Also, watch out when using this build during multiplayer hunts as the explosions can send your teammates flying! As the Antique Machina HB only has a level 1 Rampage Decoration slot, we'll need to use the Rampage Slot upgrade augment to slot in the Teostra Soul Jewel 2. The rest can be filled with Attack Boost augments. Of course, the set will also use the Power Barrel to maximize our damage. |
Master Rank Build (Mid Game): MR 3-6
Mid Game Spread Ammo
| Weapon | Slots | ATK | DEF | |
|---|---|---|---|---|
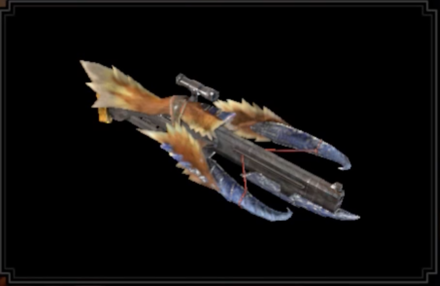
 Golm Cannon+ Golm Cannon+
|
③②① | 380 | 0 | |
| Affinity | Element | |||
| 0% |
- |
|||
| Rampage Slots | ③ | |||
| Special Ammo | Wyvernheart | |||
| Armor | Slots | Skills | |
|---|---|---|---|
|
|
②①ー | ||
|
|
③①ー | ||
|
|
④ーー | ||
|
|
②②ー | ||
|
|
①①① | ||
| Talisman | Wirebug Whisperer Lv.2; two ② slots recommended but not required | ||
| Rampage Decoration | |||
| Decoration |
|
||
| Skills | |
|---|---|
| Rampage Skill | Kushala Daora Soul |
Attack Boost Lv.2-4
| Critical Boost Lv.3 Weakness Exploit Lv.3 | Spare Shot Lv.3 Ballistics Lv.3 | Spread Up Lv.3 Reload Speed Lv.3 | Recoil Down Lv.3 Steadiness Lv.3 | Flinch Free Lv.3 Wirebug Whisperer Lv.3 | Tune-Up Lv.2 Latent Power Lv.1 | Blight Resistance Lv.1 |
|
| Build Merits and Notes |
|---|
| This build revolves around Garangolm's insanely powerful spread HBG. Damage is maximized through the usual suspects plus Tune-Up. QoL staples such as Reload Speed and Recoil Down are added to tame the HBG.
Wirebug Whisperer is once again added to significantly reduce your wirebug charges, making shield mods unnecessary for survival! Take note that Attack Jewel 2sshould only go to talisman slots if you have them. Prioritize other skills in the armor and weapon slots. Only slot in Precise Jewel 2 once you've upgraded to Golm Cannon+. |
Mid Game Pierce & Slicing Ammo
| Weapon | Slots | ATK | DEF | |
|---|---|---|---|---|
 Mighty Soulstriker Mighty Soulstriker
|
②①ー | 350 | 0 | |
| Affinity | Element | |||
| 0% |
- |
|||
| Rampage Slots | ② | |||
| Special Ammo | Wyvernsnipe | |||
| Armor | Slots | Skills | |
|---|---|---|---|
|
|
①ーー | ||
|
|
②①ー | ||
|
|
③ーー |
Spare Shot Lv. 1
Ballistics Lv. 2
|
|
|
|
③ーー | ||
|
|
①①① | ||
| Talisman | Wirebug Whisperer Lv.2; two ② slots recommended but not required | ||
| Rampage Decoration |
|
||
| Decoration |
|
||
| Skills | |
|---|---|
| Rampage Skill | Swap between Wyvern Exploit, Anti-Aerial Species, Anti-Aquatic Species, or Fanged Exploit depending on the monster. |
Attack Boost Lv.2-4
| Critical Boost Lv.3 Weakness Exploit Lv.3 | Spare Shot Lv.3 Ballistics Lv.3 | Pierce Up Lv.3 Reload Speed Lv.3 | Recoil Down Lv.3 Wirebug Whisperer Lv.3 | Handicraft Lv.2 Razor Sharp Lv.2 | Flinch Free Lv.2 Latent Power Lv.1 | Offensive Guard Lv.1 Tremor Resistance Lv.1 |
|
| Build Merits and Notes |
|---|
| Those who prefer to continue through the midgame with Pierce and Slicing Ammo may opt for this build. Main skills are mostly the same as the early game build, but with the inclusion of Wirebug Whisperer and Critical Boost.
As with most HBG builds, Wirebug Whisperer is maxed out so you can use your Silkbind moves more frequently. This cooldown reduction is significant enough to make Shield Mods unnecessary in hunts, allowing you to use Power Barrels instead. |
Master Rank Build (Early Game): MR 1-2
Izuchi Pierce + Slicing Starter
| Weapon | Slots | ATK | DEF | |
|---|---|---|---|---|
 Gale Crossbow+ Gale Crossbow+
|
②①ー | 250 | 0 | |
| Affinity | Element | |||
| 10% |
- |
|||
| Rampage Slots | ② | |||
| Special Ammo | Wyvernsnipe | |||
| Armor | Slots | Skills | |
|---|---|---|---|
|
|
②ーー | ||
|
|
①①ー | ||
|
|
②ーー | ||
|
|
④①① |
Attack Boost Lv. 2
|
|
|
|
①①ー |
Attack Boost Lv. 2
Critical Eye Lv. 2
|
|
| Talisman | Attack Boost Lv. 3 | ||
| Rampage Decoration | |||
| Decorations | |||
| Skills | |
|---|---|
| Rampage Skill | Spiribird Doubled |
Pierce Up Lv.3
| Attack Boost Lv.7 Spare Shot Lv.3 | Ballistics Lv.3 Critical Eye Lv.2 | Stun Resistance Lv.3 Recoil Down Lv.3 | Bombardier Lv.2 Handicraft Lv.1 | Normal/Rapid Up Lv.1 Divine Blessing Lv.1 | Muck Resistance Lv.1 Flinch Free Lv.1 | Tune-Up Lv.1 |
|
| Build Merits and Notes |
|---|
| A build that utilizes Pierce and Slicing Ammo to kick off the Sunbreak expansion! Damage is bolstered through Pierce Up, Attack Boost, with the addition of QoL staples such as Ballistics, Spare Shot, and Recoil Down to ensure a comfortable early game experience. |
Best Skills for Heavy Bowgun
Best Damage Skills
These skills make it possible to deal extra damage! Aim for these skills for maximum DPS to defeat those monsters easier and finish those quests faster!
| Best Skills | Explanation |
|---|---|
| Weakness Exploit ★★★ |
Increases affinity when hitting enemy weakspots, which can increase your DPS significantly. |
| Ammo Type Up ★★★ |
Get one of the three ammo type skills depending on what you're going to use! We recommend maxing this skill out before anything else. Normal/Rapid Up | Spread Up | Pierce Up |
| Element Attack ★★★ |
Sunbreak featured buffs for elemental damage, making elemental builds viable. Be sure to max out this skill to get the most out of its potential. Fire | Water | Ice | Thunder | Dragon |
| Attack Boost ★★★ |
Increases DPS for all ammo types. Aim for at least 4 levels of this skill. |
| Critical Boost ★★ |
Amplifies critical damage by 30/35/40% per level, working well with Weakness Exploit. |
| Burst ★★ |
Continuous shots from the Bowgun can power you up with this skill. Max it out whenever possible but a single point is enough to deal impactful damage. |
| Dereliction ★★ |
Using the Red Scroll will increase element values while using the Blue Scroll increases attack values, improving overall damage. Don't fear the depleting health; with how the Bowgun playstyle works, you'll never have to worry about getting hit! For additional elemental damage, pair this skill with Strife from the Chaotic Gore Magala Armor Set. Available in Sunbreak Base Game |
| Element Exploit ★★ |
This skill is ideal to have on elemental builds, making sure you pull off significant damage every time you hit elemental hit zones! Available in Sunbreak Free Title Update 1 |
| Critical Element ★★ |
Increases elemental damnage during critical hits. Slot this skill in whenever your affinity is close to or at 100%! |
| Maximum Might ★ |
Increases affinity when Stamina is at maximum. Slot in this skill if you need more affinity to reach 100% from other skills. |
| Dragon Conversion ★ |
When activated, this skill from the Risen Crimson Glow Valstrax Armor will benefit elemental builds, increasing DPS even further! Only consider this skill when you can build around it. Available in Sunbreak Free Title Update 4 |
| Bloodlust ★ |
Overcome the Frenzy Virus to boost affinity with this skill; best paired with Coalescence. Available in Sunbreak Base Game |
| Mail of Hellfire ★ |
Attack power while using the Red Scroll will increase raw power by at least 15. This is a fun skill to consider when you can build around it! Available in Sunbreak Base Game |
Best Comfort Skills
These are skills that make managing weapon mechanics a lot easier. Damage is only part of the equation - taking time to slot in comfort skills that increase consistency & comfort will also increase overall DPS!
| Best Skills | Explanation |
|---|---|
| Recoil Down ★★★ |
This skill reduces the time between shots, greatly helping with DPS and preventing you from staying in place for too long. |
| Reload Speed ★★★ |
Ideal skill to output more DPS throughout the fight! |
| Spare Shot ★★★ |
Increased DPS by giving you a chance to shoot ammo for free. |
| Steadiness ★★★ |
Reduces deviation, which will make your shots more accurate. At level 3, this skill also extends your range. Slot this skill in if you're eating for Dango Temper. |
| Ballistics ★★ |
Ballistics helps extend your critical distance, allowing you to hit optimal damage from far away. This skill helps with positioning safely throughout the fight. |
| Ammo Up ★★ |
Increases ammo clip size for bowguns, which lets you shoot more and, in turn, increases DPS. For most Bowgun builds, 2 levels of this skill is enough. |
| Evade Extender ★★ |
A great comfort skill to have. Evade Extender greatly helps with survivability, considering Bowgunners should avoid getting hit at all costs. |
| Tune-Up ★ |
Introduced in the Sunbreak Expansion, this skill increases the power of your attached mods. Tune-Up is a nice pickup for most bowgun builds, but only consider this skill when you can build around it. Available in Sunbreak Base Game |
| Intrepid Heart ★ |
Whenever the gauge above your health bar is full, this skill can be useful in clutch situations. Available in Sunbreak Free Title Update 2 |
| Embolden ★ |
Having this skill in addition to Guard and Tune-Up makes the Shield a more viable mod to use. Available in Sunbreak Free Title Update 2 |
Monster Hunter Rise Related Guides

|
• Weapons marked withNEW have been updated. • Weapons withUP have been reviewed and does not warrant an updated build from the Bonus Update. |
| All Weapon Build Guides | |
|---|---|
NEW Low Rank | High Rank Master Rank |
NEW Low Rank | High Rank Master Rank |
NEW Low Rank | High Rank Master Rank |
NEW Low Rank | High Rank Master Rank |
NEW Low Rank | High Rank Master Rank |
NEW Low Rank | High Rank Master Rank |
NEW Low Rank | High Rank Master Rank |
NEW Low Rank | High Rank Master Rank |
NEW Low Rank | High Rank Master Rank |
NEW Low Rank | High Rank Master Rank |
NEW Low Rank | High Rank Master Rank |
NEW Low Rank | High Rank Master Rank |
NEW Low Rank | High Rank Master Rank |
UP Low Rank | High Rank Master Rank |
Other Builds
| Other Build Guides | |
|---|---|
| General High Rank Builds and Best Equipment | Buddy Equipment Builds Palico | Palamute |
Comment
16  Anonymous over 2 years
for "TU5 Shield Spread Heavy Bowgun" you can't get a WEX 3 talisman. The highest weakness exploit can go is up to 2.
Author

Sunbreak Heavy Bowgun Builds (Master Rank HBG)
Please participate in our site
improvement survey
03/2026
improvement survey
03/2026
Would you assist in
improving Game8's site?
improving Game8's site?

×
We are listening to our users' valuable opinions and discussing how to act on them.
The information collected through this survey will be used for the purpose of improving our services. In addition, the information will only be disclosed a part of a statistic in a format that will not allow identification of personal information.
Begin Survey
Not Now
×
Please rate each item regarding Game8.co's Advertisements.
Amount of Ads
Very Dissatisfied
Somewhat Dissatisfied
Fine
Somewhat Satisfied
Highly Satisfied
Placement of Ads
Timing of Ad Display
Ad Loading Speed
Safeness of Ads
Content of Ads
×
Please rate each item regarding Game8.co's Quality of Articles.
Amount of information
Very Dissatisfied
Somewhat Dissatisfied
Fine
Somewhat Satisfied
Highly Satisfied
Frequency of updates
Speed of new information
Accuracy of articles
Understandibility of articles
Readability of sentences
×
Please rate each item regarding Game8.co's Usability of the Site.
Ease of finding information
Very Dissatisfied
Somewhat Dissatisfied
Fine
Somewhat Satisfied
Highly Satisfied
Loading Speed
Use of Color
Font Size
Visibility of Images
Easy to Understand Layout
×
Please rate each item regarding Game8.co's Message Boards, Comments.
Ease of Writing
Very Dissatisfied
Somewhat Dissatisfied
Fine
Somewhat Satisfied
Highly Satisfied
Readability
Ease in Finding Information
Comment Quality
Comment Quantity
Admin Response
×
Please rate each item regarding Game8.co's Site's new design.
Please rate our site's new design
Very Dissatisfied
Somewhat Dissatisfied
Fine
Somewhat Satisfied
Highly Satisfied
Do you think that the website's design change makes the site easier to use?
Has the new design made it easier for you to find information on the site?
Has the new design improved the overall visual appeal of the site?
How would you rate your overall satisfaction with the new design of the site?
×
How likely are you to recommend Game8 to someone you know?
Very Unlikely
0
1
2
3
4
5
6
7
8
9
10
Very Likely
If you have other opinions regarding potential improvement to the website, please share them with us. We would appreciate your honest opinion.
Note: This is a free response section, so you can proceed without entering anything.
Note: Please be sure not to enter any kind of personal information into your response.
Note: Please be sure not to enter any kind of personal information into your response.
×
Thank You
×
Thank you for participating in our survey! Your answers will help us to improve the quality of our website and services.
We hope you continue to make use of Game8.
We hope you continue to make use of Game8.
Close
Rankings
Gaming News


![Monster Hunter Stories 3 Review [First Impressions] | Simply Rejuvenating](https://img.game8.co/4438641/2a31b7702bd70e78ec8efd24661dacda.jpeg/thumb)
Popular Games

Genshin Impact Walkthrough & Guides Wiki
Honkai: Star Rail Walkthrough & Guides Wiki
Umamusume: Pretty Derby Walkthrough & Guides Wiki
Pokemon Pokopia Walkthrough & Guides Wiki
Resident Evil Requiem (RE9) Walkthrough & Guides Wiki
Monster Hunter Wilds Walkthrough & Guides Wiki
Wuthering Waves Walkthrough & Guides Wiki
Arknights: Endfield Walkthrough & Guides Wiki
Pokemon FireRed and LeafGreen (FRLG) Walkthrough & Guides Wiki
Pokemon TCG Pocket (PTCGP) Strategies & Guides Wiki


Recommended Games
Diablo 4: Vessel of Hatred Walkthrough & Guides Wiki
Cyberpunk 2077: Ultimate Edition Walkthrough & Guides Wiki
Fire Emblem Heroes (FEH) Walkthrough & Guides Wiki
Yu-Gi-Oh! Master Duel Walkthrough & Guides Wiki
Super Smash Bros. Ultimate Walkthrough & Guides Wiki
Pokemon Brilliant Diamond and Shining Pearl (BDSP) Walkthrough & Guides Wiki
Elden Ring Shadow of the Erdtree Walkthrough & Guides Wiki
Monster Hunter World Walkthrough & Guides Wiki
The Legend of Zelda: Tears of the Kingdom Walkthrough & Guides Wiki
Persona 3 Reload Walkthrough & Guides Wiki


All rights reserved
©CAPCOM CO., LTD. ALL RIGHTS RESERVED.
The copyrights of videos of games used in our content and other intellectual property rights belong to the provider of the game.
The contents we provide on this site were created personally by members of the Game8 editorial department.
We refuse the right to reuse or repost content taken without our permission such as data or images to other sites.
Found something when building the Endgame Sticky Climber build. It appears that only 2 levels of Recoil Down and Steadiness are needed to get max effectiveness on the Antique Machina HB. Don’t know if I’m incorrect somehow or if it’s perhaps a remnant from when the build used the Pyre-Kadaki gun. Can we confirm? Thanks.