Sunbreak Best Weapon Tier List (March 2024)
★ All Title Updates now available for ALL PLATFORMS!
┗ Title Update 4 | Title Update 5 | Bonus Update
┗ Check out all our Best Builds For Every Weapon!
┗ TU4 Monsters: Velkhana | Risen C.G. Valstrax
┗ TU5 Monsters: Amatsu | Risen Shagaru Magala
┗ Bonus Update Monster: Primordial Malzeno

This is our updated tier list rankings for all weapons in the Sunbreak expansion of Monster Hunter Rise. We've taken the changes from Title Update 5 into account, so read on to know the best weapons to use in the current version of the game, and why they're at the top and bottom of the tier list!
| Weapon Related Guides | |
|---|---|
 Weapons and Weapon Types Weapons and Weapon Types |
 Builds for Each Weapon Type Builds for Each Weapon Type |
 Weapon Type Tier List Weapon Type Tier List(Base Game) |
 Weapon Type Tier List Weapon Type Tier List(Sunbreak Expansion) |
| Tier Lists | ||
|---|---|---|
 Weapon Tier List Weapon Tier List(Base Game) |
 Weapon Tier List Weapon Tier List(Sunbreak) |
 Follower Tier List Follower Tier List(Sunbreak) |
List of Contents
Sunbreak Expansion Weapon Tier List
Let us know your thoughts and suggestions in the comments!
| Sunbreak Expansion Weapon Tier List | |
|---|---|
| ▼ Check out the Tier Changes here! ▼ | |
Tier List Reminders · Click on the weapon's icon to see its full evaluation! · The weapons in each tier are unordered. · This tier list considers all changes and mechanics introduced in the Sunbreak expansion and all subsequent Title Updates of Monster Hunter Rise. |
Builds and Best Armor for Each Weapon
Tier List Criteria
The Game8 team considers the four factors below during the creation and update of this Tier List. Take note that this tier list is extremely subjective based on our experience playing the game.
| ① Balance Between Ease of Use and Power Please do note that no weapon is weak - when given enough practice and love, all fourteen weapons can shine. However, some weapons are just very easy to get into while maintaining high damage output. For starters, the weapons in the SS Tier are quite easy to learn plus can dish out tons of damage! |
| ② Overall Kit Synergy With all Switch Skills introduced and basically the whole kit of a weapon finalized, one of the criteria for this tier list is weapon kit synergy. There are certain weapons that has great kit synergy that enables them to perform exceptionally and that affects their placement in this tier list. |
| ③ Improvements in Sunbreak & Title Updates One more criterion we considered is the weapon's improvements in the expansion and subsequent title updates. Some weapon may have received game-changing improvements either from balance patches or new armor sets & skills. |
| ④ Overall Fit in the Current Meta Lastly, we would consider how a weapon performs in the currently set meta and how it maximizes the weapon to be above all else. |
Base Game Weapon Tier List
Purchasing the Sunbreak expansion is completely optional, and playing with the base version of Monster Hunter Rise can still offer hours of fun! If you fall to this category, check out which weapon is best to use in the base game of MH Rise!
Base Game Weapon Tier List (2023)
Tier List Changes (Title Update 5)
Title Update 5 Notes
Sunbreak's Title Update 5 brought in some changes that aimed to balance the power of weapons across the board. Now, almost all weapons can be played with no disappointment.
This update highlighted the arrival of Amatsu, and with its armor came the new skill: Heaven-Sent. It's a stamina and sharpness management skill that made the Dual Blades an even more fun weapon to play with. It continues to be top tier - and playing it won't leave you with any disappointment!
On top of that, a small weapon balancing patch was dropped but it focused more on tweaking things with a certain weapon. For example, Wide-shelling Gunlance now can perform like Normal and Long-shelling Gunlances - making for more weapon choices. Harvest Moon was also buffed, making it more fun and flexible to play with.
In conclusion, all these buffs basically further solidified the current placement of weapons in this tier list.
Let us know your thoughts in the comments!
Past Title Update Changes
Title Update 4 Notes
Sunbreak's Title Update 4 brought in new armor sets that further reinforced the already dominant elemental damage meta. The new Frostcraft skill brought in indirect buffs for sheathing weapons like the Long Sword and Great Sword - and it helped them continue to be on top of their respective tier placements.
TU4 did not come with weapon balance changes & the overall update did not bring in game-changing tweaks, so there is no movement in this tier list - for now. All builds from TU3 are still viable, with Title Update 4 improving on them with additional decorations, new armor options, and more.
Title Update 3 Notes
Sunbreak's Title Update 3 has brought a few changes for the current meta. Some weapons have improved and some have basically little to no changes made.
TU3 and other recent updates have pushed for a focus on more elemental builds. Weapons that exploit a monster's elemental weaknesses are the focus right now, as opposed to the poison meta in Title Update 2.
Additionally, poison builds are still viable in the current version of the game, and we still recommend using those if it is preferrable to use them over elemental builds against certain monsters.
Weapon Tier Movements (Title Update 3)
| Weapon | Summary |
|---|---|
 Heavy Bowgun Heavy Bowgun | ・Like the Light Bowgun, the Heavy Bowgun benefits from the elemental damage meta, and can dish out attacks from a safe distance. ・Pierce elemental ammo is accessible thanks to Teostra and Kushala Blessings as well as the new skill Strife. |
 Gunlance Gunlance | ・Free Title Update 3 finally allows all Gunlances to reach Lv 8 Shelling with the Shelling Level Boost Augment, making the Gunlance even more viable than before! For this, the Gunlance's rank raises to A. ・The Gunlance, while explosive, relies too heavily on wirebugs / silkbind attacks to dish tons of damage. The introduction of Wind Mantle greatly improves Gunlance's quality of life since it hastens Wirebug Regeneration. |
 Hunting Horn Hunting Horn | ・As of TU3, the Hunting Horn finally benefits from the elemental damage meta! ・HH users need to stay on the head of the monster to dish out some damage, which can be a little tricky for some players. |
 Great Sword Great Sword | ・Great Sword can deal a lot of damage easier with Strongarm Stance. However, compared to other weapons like HBG and LBG, it is difficult to deal consistent damage. ・Dealing consistent damage is important especially in higher Anomaly Investigation levels if you want to prioritize faster clears. |
SS Tier Weapon List
| Jump to a Tier! | |||
|---|---|---|---|
| SS Tier | S Tier | A Tier | |
| ▲ Back to Full Tier List ▲ | |||
Long Sword

| MHRise Ranking | → | Sunbreak Ranking |
|---|---|---|
(S - A - B) 3 Level Tier |
(SS - S - A) 3 Level Tier |
| All Long Sword Guides | ||
|---|---|---|
 Trees & Full List Trees & Full List |
 How to Use How to Use |
 Best Builds Best Builds |
Top Notch Sunbreak Kit Synergy
The number one reason for Long Sword's high placement even with the nerf it received in Update 10.0 is its amazing kit synergy. All its Switch Skills are viable in the game and can be used to further improve its performance. With the introduction of Skill Swap, Long Sword mains can go ham with this weapon!
More Counterattack with Tempered Spirit Blade
Tempered Spirit Blade when used properly is an instant counter move that increases the Spirit Gauge level. This helps Long Sword users increase their Spirit Gauge as fast as possible for better damage scaling.
Harvest Moon Deals Increased Damage
The addition of Harvest Moon gave Long Sword users an arena that enables all counterattacks to deal extra damage. With how many counterattacks / parries this weapon has, it definitely would not disappoint.
Sacred Sheathe Combo Deals an Insane Amount of Damage
Not only does Sacred Sheathe Combo has a small counter window at the start, it also enables Long Sword users to expend all the Spirit Gauge levels and charge their Long Swords to deal insane damage. With the proper build, Long Swords can reach Great Sword levels of damage with this move!
Skill Swap is Really Effective for the Long Sword
The addition of Skill Swap enables the Long Sword users to freely switch between two Switch Skill loadouts. Usually, they're between Spirit Gauge level gain moves and level expend moves.
For example, Long Sword users have to choose between Silkbind Sakura Slash (gain move) and Soaring Kick (expend move) - but now they can easily Skill Swap between both of them to shuffle between gains and expend dealing damage more effectively.
Light Bowgun

| MHRise Ranking | → | Sunbreak Ranking |
|---|---|---|
(S - A - B) 3 Level Tier |
(SS - S - A) 3 Level Tier |
| All Light Bowgun Guides | ||
|---|---|---|
 Trees & Full List Trees & Full List |
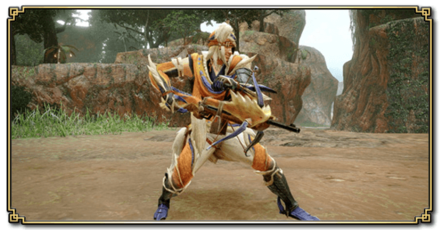 How to Use How to Use |
 Best Builds Best Builds |
Nerf with Sticky and Slicing Ammo
There is no denying it: the nerf on Sticky and Slicing ammo generally decreased the LBG's firepower in Sunbreak.
Update 10.0 brought a decrease in damage and increase in recoil for both ammo. Additionally, stun values for Sticky Ammo are also decreased. This affected LBG's top-tier status back then and caused it to drop rankings in Sunbreak.
Nerf Management with Tune Up
The nerf on Sticky/Slicing can be managed with the new Tune Up skill though. Tune Up basically improves the effectiveness of LBG modifications to mitigate and lessen the impact of the nerf.
Also, the fact that you have to invest on Tune Up to mitigate said nerf just goes to show that those ammo types are overtuned in the base game.
Critical Firepower is Awesome
The addition of Critical Firepower is a great addition to the LBG. It basically shortens your critical distance BUT increases your damage output. Always be ready with your mobility silkbind moves cause you're more susceptible to damage at this distance.
Improved Mobility with New Silkbind Changes
Various silkbind attacks were also buffed in Update 10.0 to further promote mobility.
Silkbind Glide wirebug cost was reduced to 1 but has slower wirebug regen time. The addition of Wyvern Counter also acts as a safety net for when you need to quickly create a gap between you and the monster.
Benefits From the Elemental Damage Meta
Light Bowgun is just too good as of Title Update 1, and even now on Title Update 3 with the new elemental meta shaping up, the Light Bowgun is now a top weapon! It deals an insane amount of consistent damage as well as great against afflicted monsters!
Heavy Bowgun

| MHRise Ranking | → | Sunbreak Ranking |
|---|---|---|
(S - A - B) 3 Level Tier |
(SS - S - A) 3 Level Tier |
| All Heavy Bowgun Guides | ||
|---|---|---|
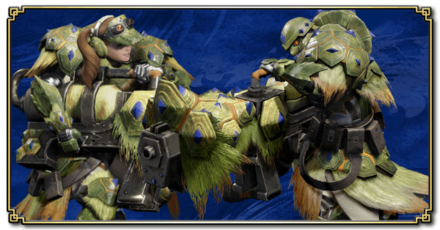 Trees & Full List Trees & Full List |
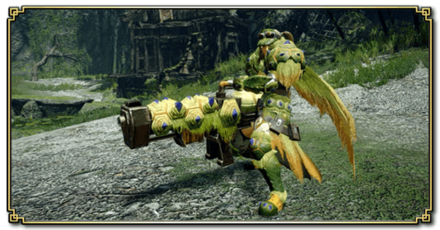 How to Use How to Use |
 Best Builds Best Builds |
Strife Skill makes Pierce Elemental Ammo accessible
Pierce elemental ammo continues to be a powerful option for the Heavy Bowgun thanks to easier access to Teostra Blessing and Kushala Blessing skills, as well as the the new skill Strife. With these skills on hand, you can effortlessly dish out more damage!
Nerf Sticky, Cluster, and Slicing Ammo
Like the Light Bowgun, the Heavy Bowgun suffered greatly with the sticky, cluster, and slicing ammo nerfs in Update 10.0.
Not only was the damage decreased, but the recoil was increased as well. It can be mitigated by certain armor skills in Sunbreak but you can feel the difference in firepower from Base Rise.
Ammo Nerfs Can Be Managed with Tune Up
On the bright side though, the ammo nerfs introduced can be managed with the new armor skill Tune Up. It increases the effectiveness of mods installed on your Heavy Bowgun so you mitigate and lessen the impact of the nerfs.
Also, the fact that you have to invest on Tune Up to mitigate said nerf just goes to show that those ammo types are overtuned in the base game.
Crouching Shot is Restrictive
The new silkbind attack Crouching Shot enables you to stay stationary and shoot a flurry of shots from your Heavy Bowgun while managing an overheat meter.
This silkbind attack is awesome and can deal a great amount of damage, but the management for the skill (not being able to move while doing it and keeping the overheat meter in check) is very restrictive. It's like the negatives of the skill overpowered the positives greatly.
New Silkbinds Did Not Promote Mobility
In addition, the new silkbind attack for the Heavy Bowgun did not provide any mobility at all.
Setting Sun and Rising Moon was great but it requires you to shoot inside the circle further limiting your aiming and positioning further. With how monsters in Sunbreak were generally more mobile, these skills are hard to manage.
Benefits From the Elemental Damage Meta
Heavy Bowgun is deals a lot of damage as of Title Update 1 and with the new elemental meta shaping up, the Heavy Bowgun can perform thru sheer damage alone! It deals an insane amount of damage as well as great against afflicted monsters!
Dual Blades

| MHRise Ranking | → | Sunbreak Ranking |
|---|---|---|
(S - A - B) 3 Level Tier |
(SS - S - A) 3 Level Tier |
| All Dual Blades Guides | ||
|---|---|---|
 Trees & Full List Trees & Full List |
 How to Use How to Use |
 Best Builds Best Builds |
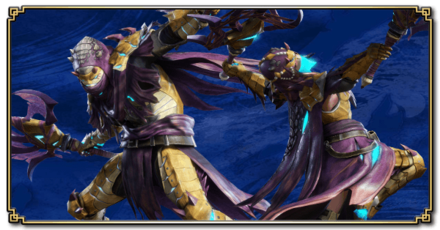
Spiral Slash is a Great Burst Option
Spiral Slash provides press-when-ready burst damage whenever there's an opening for any monster. It deals tons of damage that can break parts since it concentrates multiple hits in one location.
The only caveat with this skill is its difficulty in execution. Some monsters move a lot so you're stuck with using this on a high-area monster body part like the head. It also only sticks on weak parts so you're limited to where to use this move.
Side Slash Combo Improved Mobility and Reposition Mid-Combo
This new move provides an option for the Dual Blades user to reposition even if they're mid-combo. This helps immensely since DB users need to achieve a high combo count to deal damage efficiently.
Ironshine Silk Helps with Sharpness Management, but Hard to Use
Since Dual Blades hits a lot of times, it eats up your sharpness bar like crazy. The addition of Ironshine Silk gives Dual Blades users an option to regenerate sharpness as they execute near-miss evasions.
This is pretty hard to execute though as you need to have a high level of iframe awareness or invest on Evade Window to increase iframe. With how Evade Extender is a generally stronger skill in Sunbreak, trying to gem in Evade Window in your builds for this alone is counterproductive.
Benefits GREATLY From the Elemental Damage Meta
The Dual Blades has always been the the elemental master compared to all the weapons in the game, and with the meta shifting more to elemental damage, Dual Blades shone really bright in Title Update 1.
New Armors Are Built for Dual Blades
Almost all the new armors have parts that can greatly improve Dual Blades' performance. Want to go full elemental? Explore builds around Silver Rathalos' Silver Sol Armor. Status is the way to go? Try out Golden Lune from Gold Rathian!
S Tier Weapons List
| Jump to a Tier! | |||
|---|---|---|---|
| SS Tier | S Tier | A Tier | |
| ▲ Back to Full Tier List ▲ | |||
Great Sword

| MHRise Ranking | → | Sunbreak Ranking |
|---|---|---|
(S - A - B) 3 Level Tier |
(SS - S - A) 3 Level Tier |
| All Great Sword Guides | ||
|---|---|---|
 Trees & Full List Trees & Full List |
 How to Use How to Use |
 Best Builds Best Builds |
|
|
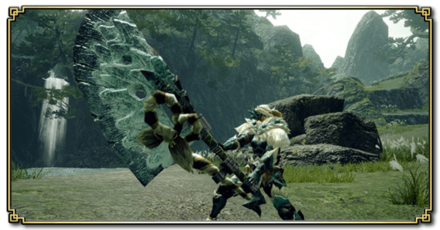
Counterattack with Strongarm Stance
One of the greatest addition to the Great Sword, Strongarm Stance enables Great Sword users to effectively counterattack an enemy move instantly with a charged attack.
Not only does it provide a window of opportunity though - when using this move while charging, it goes straight to True Charged Slash making it the fastest way to reach that powerful attack.
True Charged Slash is Easier to Achieve
With the addition of Strongarm Stance, True Charge Slash is even easier to achieve! This gives the Great Sword a significant performance upgrade from what it was in base MHRise.
True Charged Slash Was Buffed
Not only did they make reaching True Charged Slash easier to achieve, but its damage was also buffed in Update 10.0 as well! This factored into its high placement in the tier list.
Surge Slash Combo Revived Unsheathing GS Gameplay
Aside from Strongarm Stance, the addition of Surge Slash Combo enabled Great Sword users to revert to the safe, unsheathing Great Sword gameplay from the old games, albeit significantly upgraded.
Surge Slash Combo does not deal damage like the original Charged Slashes, but it makes up for its quick actions. This makes it effective in dealing with small bursts of damage while giving Hunters time to reposition. With how much damage Master Rank monsters deal, this is a highly effective playstyle.
Increased Mobility with Backslide
The addition of Backslide is a godsend for Charging Great Sword-style users. Not only does this give the Hunter a short dash for repositioning, it also retains your charge levels making it really effective for repositioning.
This increase in mobility helped with Great Sword's long-standing problem: mobility.
Inconsistent Damage and Too Much Work
Despite it being easier to use now because of Strongarm Stance and the buffs to True Charged Slash, it still takes a lot more work, positioning, knowledge, and staging to deal consistent damage compared to other weapons, and that's why the Great Sword dropped to from SS to S.
Switch Axe

| MHRise Ranking | → | Sunbreak Ranking |
|---|---|---|
(S - A - B) 3 Level Tier |
(SS - S - A) 3 Level Tier |
| All Switch Axe Guides | ||
|---|---|---|
 Trees & Full List Trees & Full List |
 How to Use How to Use |
 Best Builds Best Builds |
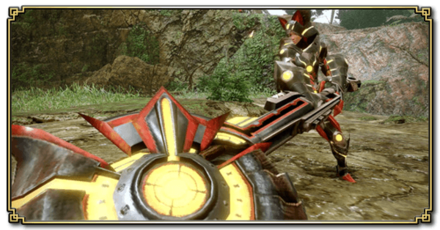
New Counterattack Move: Elemental Burst Counter
Capcom has finally added a much-needed counterattack move for the Switch Axe: the Elemental Burst Counter! Not only does this counter all incoming moves, it also fill-up your Amp Gauge immediately making it a staple for hard-filling phial Switch Axe like Power Phial Switch Axes!
It does not come with its own caveat though: it costs two Wirebugs to operate and quite hard to execute. You have to prime your Switch Axe first then time the counter with another button input like the Long Sword's Special Sheathe Combo. It's not the instant counter that you might be thinking so don't use it mid-combo unless you're confident you can pull it off.
Instantly Charge your Amp Gauge
As mentioned above, Elemental Burst Counter provides an easy way to maximize your Amp Gauge. It can even counter roars so you can have a full Amp Gauge at the start of every hunt. Partner this with Power Prolonger Lv. 3 and you'll have an almost 100% uptime for your Amp Gauge for the whole hunt.
Increased Mobility with Wire Step
Not only did Switch Axe gain a counterattack opportunity, but it also received a robust repositioning move in Wire Step that has a huge invulnerability window at the start. This saves you from overcommitting close to a monster and saves you a ton of carts.
Charge Both Gauges with 2-Staged Morph Slash Combo
2-Staged Morph Slash Combo introduced a way to gain switch and amp gauge quickly even from Axe Mode. This saves Switch Axe users a ton of time trying to maintain Switch Gauge so as not to be stuck in that reload animation consistently.
With this, hunters can have the option of not using Switch Charger as a charging tool for the Switch gauge.
Charge Blade

| MHRise Ranking | → | Sunbreak Ranking |
|---|---|---|
(S - A - B) 3 Level Tier |
(SS - S - A) 3 Level Tier |
| All Charge Blade Guides | ||
|---|---|---|
 Trees & Full List Trees & Full List |
 How to Use How to Use |
 Best Builds Best Builds |
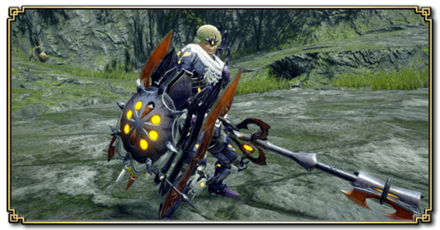
Ultra Element Discharge Hitzone is Finally Fixed
With Update 10.0, the hitzone for the Ultra Element Discharge is finally fixed.
The height of the hitbox has been boosted significantly so that it can now hit hovering monsters. It is now way easier to hit.
New Mobility Option with Air Dash
Air Dash offers a great way to execute an aerial attack on an enemy while at the same time having the option to retreat if needed. Couple this with Condensed Spinning Slash and you'll get a very mobile pizza cutter weapon that deals a lot of tick damage.
Chain Crit Scales Well with Condensed Spinning Slash
With how Condensed Spinning Slash deals multiple hits in a single swing, it works perfectly well with Chain Crit that increases both attack and elemental attack after multiple successive hits.
This makes the Charge Blade a damage machine that can topple any monster it can lay its blades on.
Ready Stance is a Great Attack Blocking Tool
Ready Stance gives charge blade users the ability to block at a moment's notice from most positions. It may not have the phial charging capabilities counter peak performance, but it's a nice alternative for those who prefer Condensed Spinning Slashes over Element Discharges.
Versatile Phial-based Switch Skills
Charge Blade also got a variety of choices when it comes to Phial-based attack Switch Skills. The introduction of Firing Pin gives users the option to accumulate energy on the monster and not on the weapon that can be later on detonated for big damage.
This gives the Charge Blade user a versatile option on what gameplay they want, which is always a welcome addition.
Insect Glaive

| MHRise Ranking | → | Sunbreak Ranking |
|---|---|---|
(S - A - B) 3 Level Tier |
(SS - S - A - B) 3 Level Tier |
| All Insect Glaive Guides | ||
|---|---|---|
 Trees & Full List Trees & Full List |
 How to Use How to Use |
 Best Builds Best Builds |
| Best Kinsects and How to Upgrade Them | ||
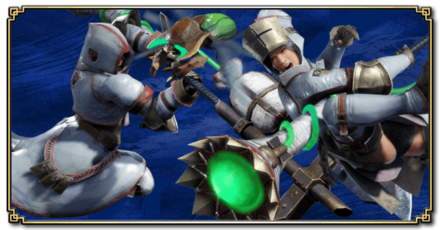
New Kinsect Bonuses are Great
Capcom opens up with new types of Kinsect Bonuses for the Insect Glaive: Powder Vortex, Boosted Powder Extract, and Kinsect Charge.
Powder Vortex for example, enables Hunters to concentrate powder particles into a single vortex and detonate them for huge damage. Kinsect Charge essentially gives your Kinsect the ability to attack autonomously even if it's not with you.
These great additions give the Insect Glaive additional choices on how they want to battle along with their trusty Kinsect.
More Ways to Open up Aerial Attacks
in addition to improvements for the Kinsect, some moves add aerial attack initiation for the Glaive. Kinsect Glide essentially pulls you to the desired section on the monster - where you can start your aerial Insect Glaive combo.
Kinsect Slash is Good for Extract Harvesting and Repositioning
Not only did Insect Glaive receive new initiation moves, they also gave it a mid-flight combo mobility tool in Kinsect Slash. What's more, this also absorbs extract so it's a win-win!
Awakened Kinsect Slash as a Huge Burst Damage Option
When your extract is about to expire, Awakened Kinsect Slash is Silkbind Attack that Hunters can use to deal damage.
This move consumes all extracts and is more powerful when you have multiple so it's perfect as a last-ditch effort to deal damage before your extract effect expires.
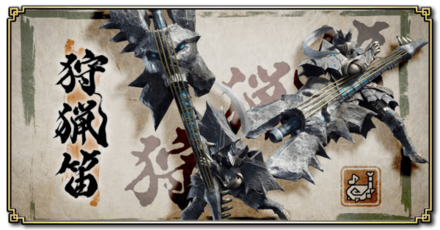
Hunting Horn

| MHRise Ranking | → | Sunbreak Ranking |
|---|---|---|
(S - A - B) 3 Level Tier |
(SS - S - A) 3 Level Tier |
| All Hunting Horn Guides | ||
|---|---|---|
 Trees & Full List Trees & Full List |
 How to Use How to Use |
 Best Builds Best Builds |
| Songs and Effects | ||
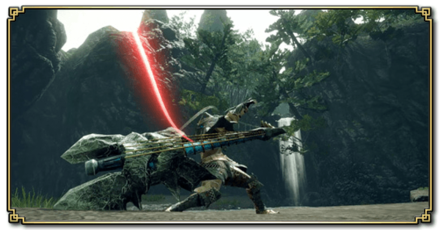
Burst Damage from Sonic Bloom
Sonic Bloom offers a way to deal burst damage while playing melodies on your Hunting Horn. It is crazy good when used to wake-up monsters to get that sweet wake-up damage multiplier.
What's more, you can leave this in front of a toppled monster and play your notes. Eventually, the bloom will pop dealing massive damage for free. Hunting Horn just keeps getting better in Sunbreak.
Sharpness Melody Maintains Sharpness for the Whole Team
One of the key points for Hunting Horn maintaining this high spot is the Sharpness Melody. This new Hunting Horn melody is found on multiple weapons in Sunbreak and can regenerate sharpness not just for yourself but for the whole team!
This useful melody makes sure that your purple sharpness is maintained for the whole fight and you get 100% uptime on the sharpness damage multiplier.
Doot Range Rampage Decoration Reaches Far Teammates
The introduction of Rampage Decorations enables multiple weapons to be slotted with specific rampage skills that were otherwise locked in a weapon in the base game.
The Doot Range decoration basically acts as an amplifier so your teammates far away from you can hear the notes and get the bonus. Helpful when you want to buff gunners that stay far away from the monster.
More Mobility from Swing Combo
Though mobile because it is usually built with Evade Extender, Swing Combo offers another avenue of mobility for the Hunting Horn. This allows Hunters to reposition and hit the intended target more effectively - especially when the target is moving a lot.
Benefits From the Elemental Damage Meta
Hunting Horn benefits from the elemental meta as of Title Update 3. Together with its burst damage, this boosted the Hunting Horn from A to S!
Bow

| MHRise Ranking | → | Sunbreak Ranking |
|---|---|---|
(S - A - B) 3 Level Tier |
(SS - S - A) 3 Level Tier |
| All Bow Guides | ||
|---|---|---|
 Trees & Full List Trees & Full List |
 How to Use How to Use |
 Best Builds Best Builds |
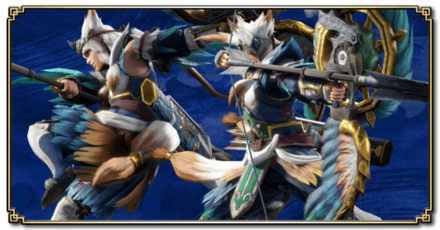
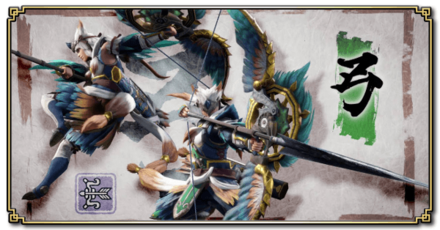
Charge Level 3 and 4 Were Nerfed
The biggest reason why the Bow was bumped down from S to A is a huge nerf on the Level 3 and Level 4 charge in the recent Update 10.0 balance patch for Sunbreak. This translates to an overall DPS decrease for the Bow since all Bow users maintain their Level 3/4 charges 100% of the time for maximum damage.
New Switch Skills Feels Lacking
Besides Bolt Boost, the addition of Butcher's Bind and Stake Thrust is underwhelming.
Butcher's Bind only gives the Bow capabilities to cut tails whenever you hit the bound spot. Stake Thrust requires the player to go near a monster to stab the stake - effectively exposing yourself to hits.
These new additions are welcome yes, but don't make up for the huge nerf the Bow received from the balance patch.
Bolt Boost is Risky, but Powerful
Bolt Boost shortens the critical distance to boost your damage while in Super Critical Range. Unless you're using Dodgebolt lowering your distance toward the monster increases your likelihood of getting hit by powerful attacks. This skill is great, but not with equally great risks.
New Bow Charge Plus Decoration Makes Builds Making Easier
Rejoice Bow users! With the addition of the Bow Charge Plus decoration, you are not stuck on using the Mighty Bow Feather as your headpiece!
It's a Level 4 Jewel though so it still requires the same level of socket but would make the builds much easier to make!
Some Bows Have Inherent Charge Level 4 in Sunbreak
In addition to Bow Charge Plus having a decoration in Sunbreak, some great good bows already have inherent Charge Level 4 even without the Bow Charge Plus skill. This opens up builds variety and widens the pool viable early to endgame builds!
Gunlance

| MHRise Ranking | → | Sunbreak Ranking |
|---|---|---|
(S - A - B) 3 Level Tier |
(SS - S - A) 3 Level Tier |
| All Gunlance Guides | ||
|---|---|---|
 Trees & Full List Trees & Full List |
 How to Use How to Use |
 Best Builds Best Builds |
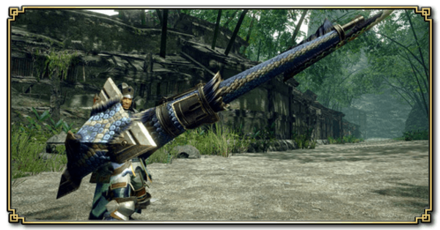
More Variety with Shelling Level Boost Augment
Since the Free Title Update 3, Gunlances can now reach Lv.8 Shelling with the Shelling Level Boost Augment, making the Gunlance even more viable than before! With this new feature, there is more variety to picking a Gunlance for each Shelling type.
Switch Skill Option Versatility
Gunlance received additional Switch Skills in the Sunbreak expansion that are versatile and used on the fly with Skill Swap. It can cater to any playstyle - either aggressive or defensive with a variety of Switch Skills that are tailored to both.
Additional Mobility Option with Reverse Dash
Reverse Dash is the opposite of Blast Dash - instead of dashing towards a monster, you dash away. This is a great repositioning and retreat tool for when you're in a pinch.
Huge Burst Damage from Bullet Barrage
Bullet Barrage loads your full arsenal of ammo and unleashes it into a huge burst explosion towards a monster. This huge explosion of concentrated damage makes it easier for Gunlance to break parts!
Really Strong for Breaking Parts
As mentioned above, the Gunlance is great at breaking parts. This makes it a perfect choice from some really strong armor skills like Bloodrite from the Malzeno armor that gives you Lifesteal whenever you attack a broken part.
Relies Too Heavily on Wirebugs
Gunlance is powerful, but it relies too much on silkbind attacks that uses wirebugs. This essentially hinders players to maximize the weapon without Wirebug Whisperer.
A Tier Weapon List
| Jump to a Tier! | |||
|---|---|---|---|
| SS Tier | S Tier | A Tier | |
| ▲ Back to Full Tier List ▲ | |||
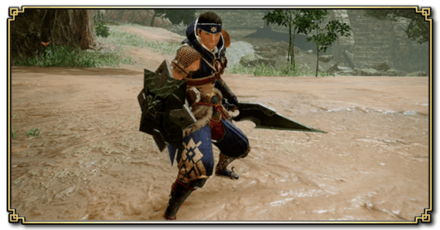
Sword and Shield

| MHRise Ranking | → | Sunbreak Ranking |
|---|---|---|
(S - A - B) 3 Level Tier |
(SS - S - A) 3 Level Tier |
| All Sword and Shield Guides | ||
|---|---|---|
 Trees & Full List Trees & Full List |
 How to Use How to Use |
 Best Builds Best Builds |
Choose Between More Elem/Status or More Stun
The addition of Twin Blade Combo to replace the mid-combo Shield Bash gave Sword and Shield users an option if they want to proc more elem./status damage. This is a great replacement if you're running a status/elemental SnS build on your hunts.
Destroyer Oil is a Nice Addition, But Not Strong Enough
We were hyped when oils got announced as a Switch Skill! It's not as good as the oils in MHGU though as Destroyer Oil only provided SnS players with an additional damage option and the ability to stagger monsters easily.
Destroyer Oil gives you a Sharpness Regeneration boost which can come in handy, but isn't enough to drastically improve the SnS's power.
Shield Bash Adds Mobility and Stun
The new Silkbind Attack, Shield Bash introduced a new way for the SnS user to deal stun damage while getting close to a monster. This is a welcome addition and can help greatly in keeping up with the very mobile monsters in Sunbreak.
Perfect Rush was Buffed
The staple bread-and-butter combo of Sword and Shield was also buffed in Update 10.0! This addition is great considering all SnS players weave this combo in whenever the opportunity arrives (toppled monster, huge monster opening, etc.).
Hammer

| MHRise Ranking | → | Sunbreak Ranking |
|---|---|---|
(S - A - B) 3 Level Tier |
(SS - S - A) 3 Level Tier |
| All Hammer Guides | ||
|---|---|---|
 Trees & Full List Trees & Full List |
 How to Use How to Use |
 Best Builds Best Builds |
Level 3 Charged Attack with Spinning Bludgeon: Charge
Spinning Bludgeon: Charge gives the Hunter an easy way to land multiple Level 3 charge attacks! This makes sure you deal maximum damage for every swing of your Hammer.
Great Mobility Option with Keeping Sway
Keeping Sway not only provides a sudden dash of movement but also maintains your Hammer's current charge level. Use this to reposition without sacrificing your hard-earned charge levels!
Additional Stun Damage From Impact Burst
Impact Burst is a great addition to the Hammer's arsenal that can deal additional stun damage to monsters. What's more, the initial burst damage from this silkbind attack is great too so use it when the monster is toppled down!
Stun Values Generally Increased
The Hammer also received stun value increases across the board. We think this is because it has been in the shadow of the SnS as the KO Machine of the game. These increases make sure the Hammer keeps up with other weapons that deal stun damage.
Lance

| MHRise Ranking | → | Sunbreak Ranking |
|---|---|---|
(S - A - B) 3 Level Tier |
(SS - S - A) 3 Level Tier |
| All Lance Guides | ||
|---|---|---|
 Trees & Full List Trees & Full List |
 How to Use How to Use |
 Best Builds Best Builds |
Overall Damage Buff in Update 10.0
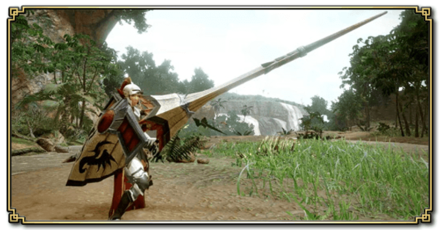
Lance received a very welcome general damage buff in Sunbreak with Update 10.0. The Lance sorely needed this as the damage has been mediocre in the base game. Good to see that the Monster Hunter Team looked into Lance's measly damage output and improved on it.
Old Switch Skills Were Improved
In addition, old silkbind attacks like the Twin Vine were improved.
It now costs 1 Wirebug to deploy and can have 100% uptime whenever you're using it! Anchor Rage and Insta-Block received buffs as well with Anchor Rage getting a longer effect duration and Insta-Block getting a wider counter window.
New Switch Skills Are Not Game-Changing
On another note though, the new Switch Skills aren't exactly game-changing for the Lance.
Shield Tackle is just a version of Guard Dash that deals stun damage on hit in exchange for shorter hops. Skyward Thrust deals huge damage but can only be used on wide monster openings because the wind-down animation for the skill leaves you open for attacks. Sheathing Retreat is good theoretically but suffers with how slow the Wirebug recovers after using the move.
Can Perform Well But Still Not Enough
The Lance received significant buffs to mitigate its problems in base Rise but that doesn't mean it can shine as much as other weapons. Yes, the Lance received improvements but so did other weapons, which offsets Lance's improvements in Sunbreak.
Sunbreak Weapon Popularity Ranking
Which Weapon Do You Think is The Best?
| Poll Update | ・Reset the poll on August 2022 ・Poll will run until September 2022 ・Updated most popular weapon table for data from June 2022 to July 2022 |
|---|
Why do you like this weapon?
Sound off in the comments!
Game8's Most Popular Weapons
(as of August 2022)
Game8 ran a poll from June 2022 to July 2022 to determine the most popular weapon used by readers and garnered a total of 1529 responses. This poll evaluates the popularity of each weapon since the start of the Sunbreak DLC up to near the start of the Free Title Update 1.
After the conclusion of the poll, Dual Blades had the lead at 245 votes which constitutes 16.02% of all votes!
| 1st Dual Blades 245 votes (16.02%) |
|||
| 2nd Long Sword 170 votes (11.12%) |
3rd Great Sword 153 votes (10.01%) |
||
| 4th | Switch Axe | 119 votes | 7.78% |
|---|---|---|---|
| 5th | Insect Glaive | 117 votes | 7.65% |
| 6th | Hunting Horn | 108 votes | 7.06% |
| 7th | Lance | 107 votes | 7.00% |
| 8th | Gunlance | 102 votes | 6.67% |
| 9th | Hammer | 90 votes | 5.89% |
| 10th | Sword and Shield | 84 votes | 5.49% |
| 11th | Charge Blade | 84 votes | 5.49% |
| 12th | Bow | 71 votes | 4.64% |
| 13th | Light Bowgun | 56 votes | 3.66% |
| 14th | Heavy Bowgun | 23 votes | 1.50% |
Monster Hunter Rise Related Guides

| Weapon Type Guides | ||
|---|---|---|
 Weapons and Weapon Types Weapons and Weapon Types |
 Weapon Type Tier List Weapon Type Tier List |
 Builds for Each Weapon Type Builds for Each Weapon Type |
Melee Weapon Guides
| Melee Weapons | ||
|---|---|---|
Guide | Weapon Tree |
Guide | Weapon Tree |
Guide | Weapon Tree |
Guide | Weapon Tree |
Guide | Weapon Tree |
Guide | Weapon Tree |
Guide | Weapon Tree |
Guide | Weapon Tree | Melodies |
Guide | Weapon Tree |
Guide | Weapon Tree |
Guide | Weapon Tree | Kinsects |
|
Ranged Weapon Guides
| Ranged Weapons | ||
|---|---|---|
Guide | Weapon Tree |
Guide | Weapon Tree |
Guide | Weapon Tree |
Comment
I feel like SnS and LBG should get bumped up in tiers due to their capabilities of providing support to allies, more or less as much as HH. Sure, say what you want about Wide Range but there’s nothing more satisfying as using SnS with WR and popping a sushi fish or mega pots to save people who are reckless and keeps them on the offensive constantly. With a 3-2-1 or 3-2 talisman with WR 2 and the hard friendship deco and even Inspire for more boosting. LBG doesnt need WR though.
Author
Sunbreak Best Weapon Tier List (March 2024)
improvement survey
03/2026
improving Game8's site?

Your answers will help us to improve our website.
Note: Please be sure not to enter any kind of personal information into your response.

We hope you continue to make use of Game8.
Rankings
- We could not find the message board you were looking for.
Gaming News
Popular Games

Genshin Impact Walkthrough & Guides Wiki

Honkai: Star Rail Walkthrough & Guides Wiki

Umamusume: Pretty Derby Walkthrough & Guides Wiki

Pokemon Pokopia Walkthrough & Guides Wiki

Resident Evil Requiem (RE9) Walkthrough & Guides Wiki

Monster Hunter Wilds Walkthrough & Guides Wiki

Wuthering Waves Walkthrough & Guides Wiki

Arknights: Endfield Walkthrough & Guides Wiki

Pokemon FireRed and LeafGreen (FRLG) Walkthrough & Guides Wiki

Pokemon TCG Pocket (PTCGP) Strategies & Guides Wiki
Recommended Games

Diablo 4: Vessel of Hatred Walkthrough & Guides Wiki

Cyberpunk 2077: Ultimate Edition Walkthrough & Guides Wiki

Fire Emblem Heroes (FEH) Walkthrough & Guides Wiki

Yu-Gi-Oh! Master Duel Walkthrough & Guides Wiki

Super Smash Bros. Ultimate Walkthrough & Guides Wiki

Pokemon Brilliant Diamond and Shining Pearl (BDSP) Walkthrough & Guides Wiki

Elden Ring Shadow of the Erdtree Walkthrough & Guides Wiki

Monster Hunter World Walkthrough & Guides Wiki

The Legend of Zelda: Tears of the Kingdom Walkthrough & Guides Wiki

Persona 3 Reload Walkthrough & Guides Wiki
All rights reserved
©CAPCOM CO., LTD. ALL RIGHTS RESERVED.
The copyrights of videos of games used in our content and other intellectual property rights belong to the provider of the game.
The contents we provide on this site were created personally by members of the Game8 editorial department.
We refuse the right to reuse or repost content taken without our permission such as data or images to other sites.


![Monster Hunter Stories 3 Review [First Impressions] | Simply Rejuvenating](https://img.game8.co/4438641/2a31b7702bd70e78ec8efd24661dacda.jpeg/thumb)


I gotta go with glaive.