Sunbreak Great Izuchi: Weakness and Drops
★ All Title Updates now available for ALL PLATFORMS!
┗ Title Update 4 | Title Update 5 | Bonus Update
┗ Check out all our Best Builds For Every Weapon!
┗ TU4 Monsters: Velkhana | Risen C.G. Valstrax
┗ TU5 Monsters: Amatsu | Risen Shagaru Magala
┗ Bonus Update Monster: Primordial Malzeno
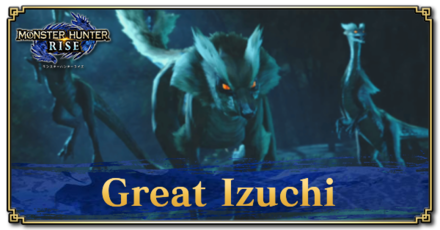
This is a hunting guide for Great Izuchi, a Large Monster in Monster Hunter Rise (MH Rise) and the Sunbreak DLC. Read on to learn Great Izuchi's weaknesses, forgeable weapons and armor, drops, and attack patterns for Master Rank!
 Great Izuchi Guide Great Izuchi Guide
|
 Great Izuchi Weapons Great Izuchi Weapons
|
 Great Izuchi Armor Great Izuchi Armor
|
List of Contents
Great Izuchi Weakness and Notes
| Great Izuchi オサイズチ |
|||
|---|---|---|---|
 |
|||
| Type | Bird Wyvern | ||
| Threat Level | 1/10 | Rampage Type |
|
| Major Weakness | Other Weakness | ||
| Blight / Elemental Damage | ー | Abnormal Status | ー |
| Characteristics | |||
| The alpha Izuchi of its pack, identified by its larger build, upended white fur and scythe-like tail. A Great Izuchi forms a herd of many smaller Izuchi and selects two from the group to accompany it on territory patrols. Once it spots prey or senses danger, the Great Izuchi issues commands to their fellow Izuchi, and coordinates their movements. Take care that you don't get overwhelmed. | |||
Hunt Great Izuchi in Sunbreak Demo
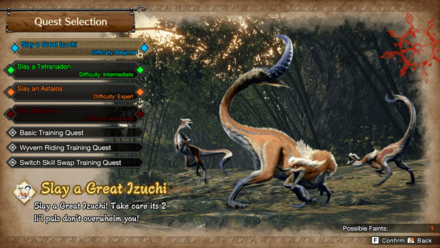
You can hunt Great Izuchi in the Sunbreak Demo! While the Great Izuchi in the Beginner quest is its Low Rank version, the Great Izuchi found in the Tetranadon Intermediate Quest is its Master Rank version!
Sunbreak Demo Guide and Monsters
How to Unlock Great Izuchi
Reach MR 1 in Master Rank
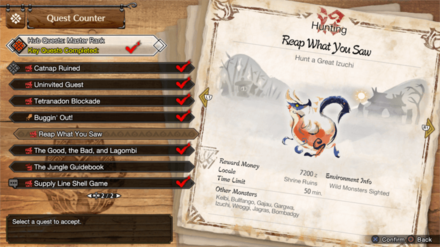
| Quest Name | Monster/Unlock |
|---|---|
| Reap What You Saw |
|
| Unlock Conditions: Finish the Quest "Uninvited Guest" |
MR Great Izuchi is unlocked by completing the Urgent Quest Uninvited Guest reaching MR 1 in the Sunbreak expansion.
MR Grinding Guide:
How to Get from MR 6 to MR 100 Fast
Reach HR 4 in High Rank
| Quest Name | Monster/Unlock |
|---|---|
|
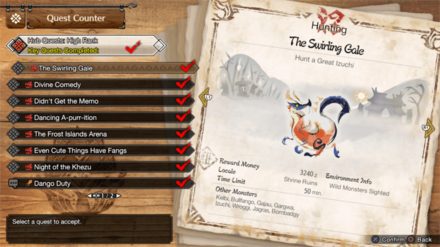
The Swirling Gale
(Key Quest) |
|
| Unlock Conditions: Finish the Quest "The Blue Apex" |
High Rank Great Izuchi is unlocked by completing the Urgent Quest The Blue Apex and reaching HR 4.
Hunter Rank Farm Guide:
How to Get from HR 7 to HR 100 Fast
Unlocked from the Start in Low Rank
| Quest Name | Monster/Unlock |
|---|---|
|
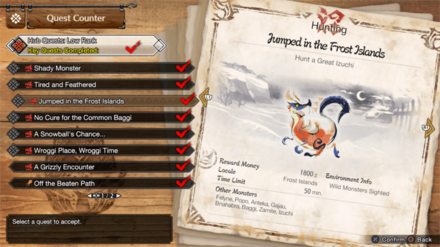
Jumped in the Frost Islands
(Key Quest) |
|
| Unlock Conditions: From the start |
Low Rank Great Izuchi is unlocked from the start at HR 1.
Great Izuchi Weakness and Resistance
| 61 | 61 | 56 | 11 |
| 13 | 20 | 11 | 5 |
Bold are the recommended Weapon Type and Elemental Damage.
Great Izuchi Weapon Damage Breakdown
| Part | |||
|---|---|---|---|
| Head | 80 | 80 | 75 |
| Torso | 45 | 45 | 40 |
| Foreleg | 50 | 50 | 55 |
| Tail | 55 | 50 | 35 |
| Tail Tip | 75 | 80 | 75 |
| Overall | 61 | 61 | 56 |
Great Izuchi Elemental Weakness Breakdown
| Part | |||||
|---|---|---|---|---|---|
| Head | 10 | 20 | 25 | 10 | 5 |
| Torso | 10 | 10 | 15 | 10 | 5 |
| Foreleg | 10 | 10 | 15 | 10 | 0 |
| Tail | 10 | 10 | 20 | 10 | 5 |
| Tail Tip | 15 | 15 | 25 | 15 | 10 |
| Overall | 11 | 13 | 20 | 11 | 5 |
Higher numbers indicate higher potential damage to the monster.
Great Izuchi Hunting Tips
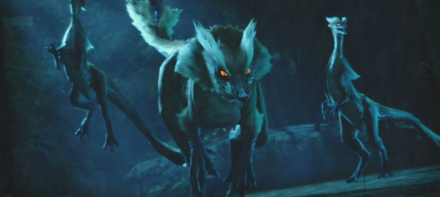
Their razor-sharp tail attacks in combination with their synchronicity make them a force to be reckoned with. Take out their leader to send the herd into disarray and pick them off easily.
Status Effect Vulnerabilities
| Poison | Stun | Paralysis | Sleep |
|---|---|---|---|
| ★★★ | ★★ | ★★★ | ★★★ |
| Blast | Exhaust | Fireblight | Waterblight |
| ★★ | ★★★ | ★ | ★ |
| Thunderblight | Iceblight | ||
| ★★ | ★ | ||
If an ailment has more stars it means that it has better effectiveness.
Item Vulnerabilities
| Pitfall Trap | Shock Trap | Flash Bomb |
|---|---|---|
| ◯ | ◯ | ◯ |
| Sonic Bomb | Meat Effects | Dung Bomb |
| ◯ | ◯ | ◯ |
◯ = Vulnerable; ✕ = Fully Resistant; ▲ = Situational
Kinsect Extracts
| Monster Part | Extract |
|---|---|
| Head |
|
| Torso |
|
| Foreleg |
|
| Tail |
|
| Tail Tip |
|
Red = Attack Increase, White = Movement Boost, Orange = Anti-knockback When Attacking
Great Izuchi Locations and Quests
Great Izuchi Known Habitat
| Map | Starting Area | Visited Areas | Rest Area |
|---|---|---|---|
 Shrine Ruins Shrine Ruins
|
7 / 8 / 9 | 3 / 4 / 6 / 7 / 8 / 9 | 3 |
 Frost Islands Frost Islands
|
2 / 4 | 1 / 2 / 3 / 4 / 5 / 6 / 9 | 5 |
Great Izuchi Quest Appearances
| Quest Type | Lvl | Quest Name |
|---|---|---|
| Anomaly Quest | A★1 | Anomaly Research: Great Izuchi |
| Event Quest | M★1 | Rookie Hunters Welcome! |
| Hub Quest | M★1 | Reap What You Saw |
| Hub Quest | M★2 | Shrine Ruined (Key Quest) |
| Hub Quest | M★2 | Now That's What I Call Great! (Key Quest) |
| Quest Type | Lvl | Quest Name |
|---|---|---|
| Hub Quest | ★4 | The Swirling Gale (Key Quest) |
| Hub Quest | ★4 | Honing your Hunting Horn |
| Event Quest | ★7 | Memories of That Day |
| Quest Type | Lvl | Quest Name |
|---|---|---|
| Event Quest | ★1 | Bird Wyverns of Ruin? |
| Hub Quest | ★1 | Jumped in the Frost Islands (Key Quest) |
| Urgent Village Quest | ★2 | Great Izuchi, Great Pain |
| Village Quest | ★5 | Special License Quest 2 |
How to Beat Great Izuchi
| Great Izuchi Tips | ||
|---|---|---|
|
|
Kill the Smaller Izuchis First
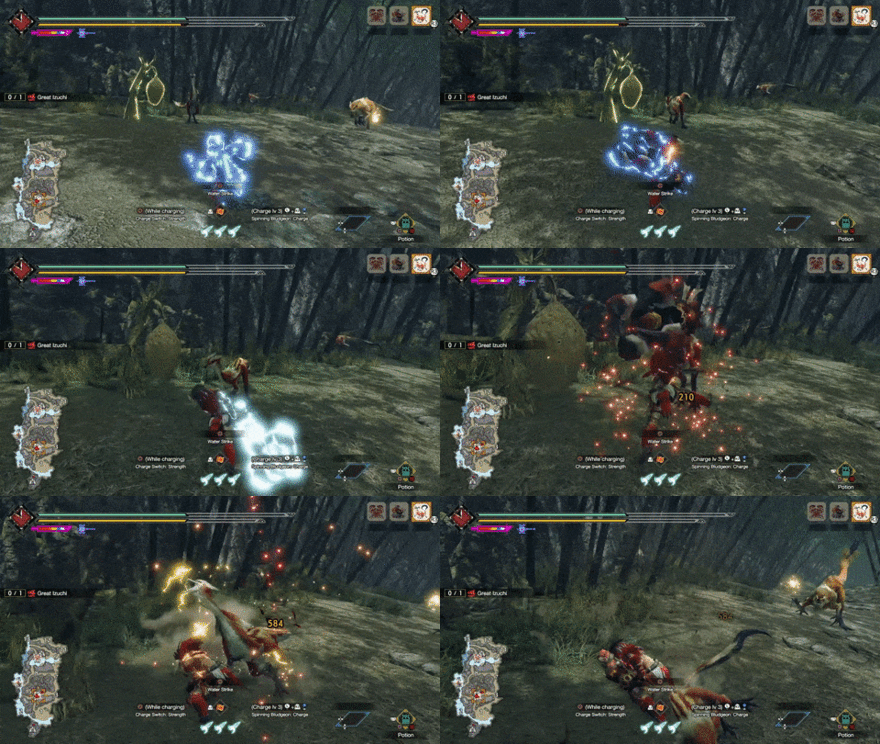
Killing the smaller Izuchis that follow Great Izuchi around is highly recommended. These smaller Izuchis mimic Great Izuchi's attacks and can interrupt you while you focus on the larger threat.
However, note that these small Izuchis can respawn after a short while since the Great Izuchi occasionally lets out a summoning howl when it needs help.
Open to Attacks After Tail Slams
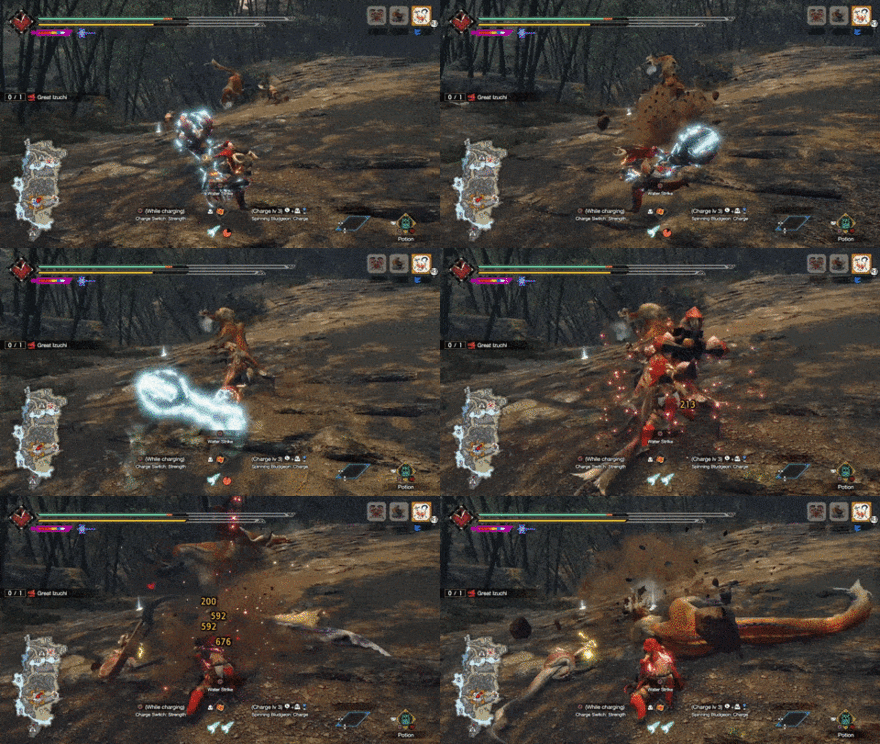
Great Izuchi's Tail Slam attack causes its tail to get stuck in the ground, leaving it vulnerable to attacks. Use this opportunity to land your strongest attacks and deal as much damage as possible to Great Izuchi!
Knock Great Izuchi Down
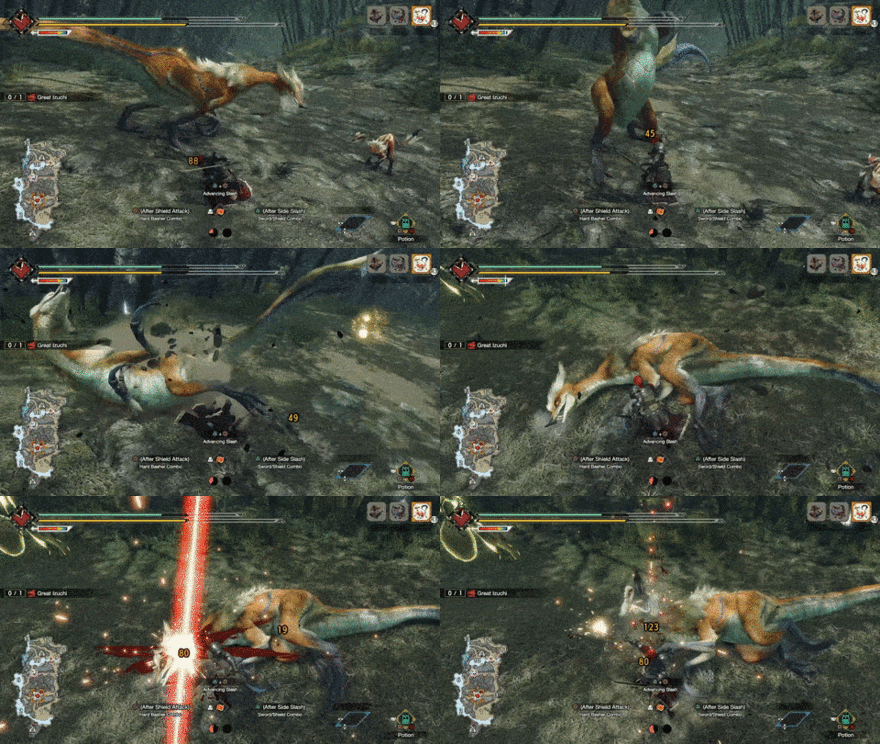
Dealing enough damage to Great Izuchi and breaking its body parts will cause it to get knocked down. Use this opportunity to deal as much damage as possible before it recovers.
Great Izuchi Master Rank Attack Patterns
Performs Tail Slam Attacks More Often
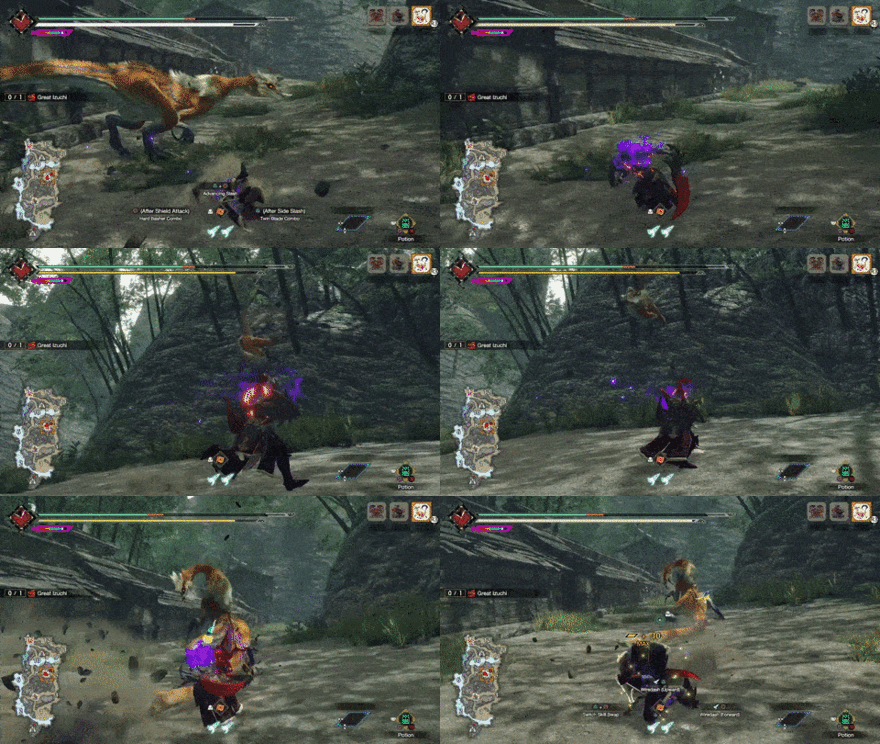
Great Izuchi does not get any new attacks in Master Rank. However, it tends to perform its Tail Slam and Hanging Tail Slam more often, so prepare to deal with these two attacks constantly throughout the hunt.
Great Izuchi General Attack Patterns
Great Izuchi uses the following attacks in Low and High Rank quests.
| Name | Description |
|---|---|
| Coordinated Attacks | Great Izuchi launches a coordinated attack together with its smaller Izuchi companions. |
| Clawing Rush | Great Izuchi bares its claws before rushing forwards, scratching at hunters caught in its path. |
| Claw Swipe | Great Izuchi raises one of its clawed forelegs before swiping forwards towards the hunter. |
| Forward Bite | Great Izuchi takes a few steps forward before biting at the hunter. |
| Spit Attack | Great Izuchi spits out a ball of rocks and saliva towards its target. |
| Tail Stab | Great Izuchi whips its tail above its head before swinging it around to stab the hunter. |
| Tail Sweep | Great Izuchi lifts its tail above its head before performing a wide tail sweep that knocks away hunters that get too close. |
| Tail Slam | Great Izuchi rapidly flips forward to land a heavy tail slam on top of the hunter. |
| Hanging Tail Slam | Great Izuchi hangs from a wall using its scythe-like tail before leaping off it to perform a heavy tail slam. |
| Consecutive Tail Spin Combo | Great Izuchi performs three consecutive tailspins that end in a tail slam. |
Coordinated Attacks
| Coordinated Attacks Attack Information |
|---|
 Coordinated Attacks: Great Izuchi can launch coordinated attacks together with its smaller Izuchi companions. These attacks can be any of Great Izuchi's grounded moves, so take care when all of the monsters prepare to attack. These coordinated attacks can be difficult to avoid as the monsters can attack in a row or from different angles. We suggest using Wiredash to quickly dodge or performing a dive-evade when caught out of position to avoid getting hit. |
Clawing Rush
| Scratch Attack Information |
|---|
 Scratch Attack: Great Izuchi bares its claws before rushing forwards, scratching at hunters caught in its path. This attack deals moderate damage and knocks away hunters on hit. Evade sideways from Great Izuchi's path to avoid getting hit. |
Claw Swipe
| Claw Swipe Attack Information |
|---|
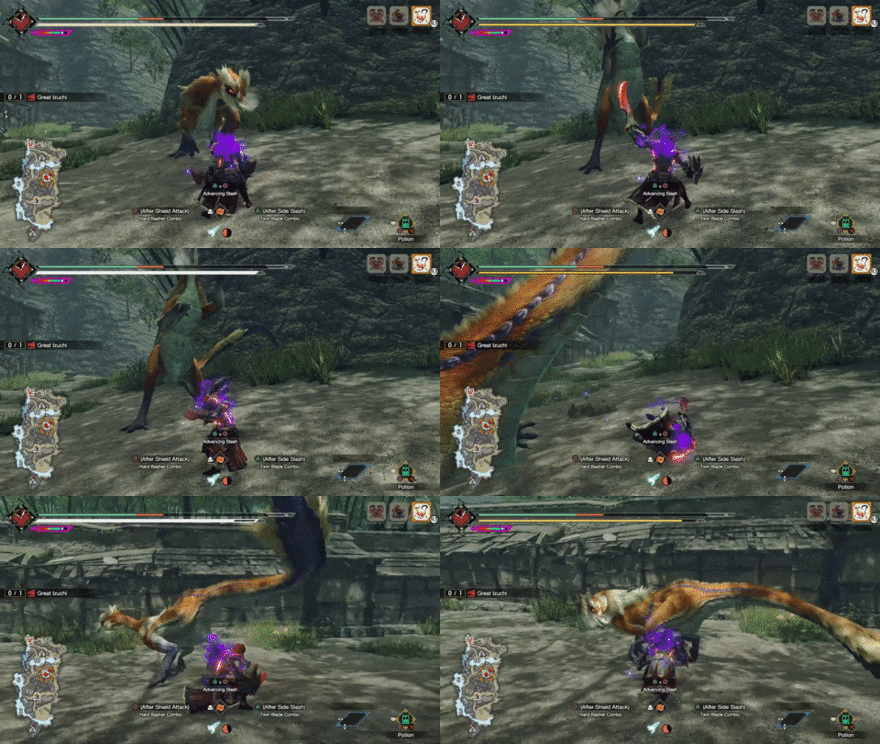 Claw Swipe: Great Izuchi raises one of its clawed forelegs before swiping forwards towards the hunter, dealing moderate damage on contact. Dodge toward Great Izuchi's sides as it raises its claws to avoid getting hit. |
Forward Bite
| Forward Bite Attack Information |
|---|
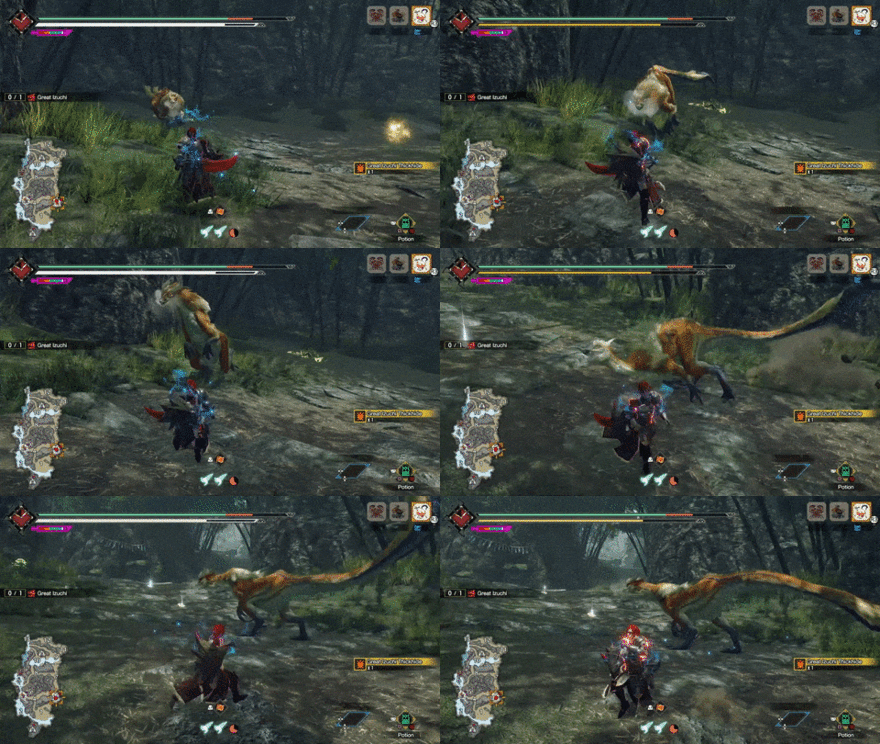 Forward Bite: Great Izuchi takes a few steps forward before biting at the hunter, dealing light damage on hit. Stay alert when positioning near Great Izuchi's head to avoid getting hit by this attack. |
Rock Spit
| Rock Spit Attack Information |
|---|
 Rock Spit: Great Izuchi spits out a ball of rocks and saliva towards its target, dealing light damage on impact. Keep an eye out for when Great Izuchi rears its head back to predict and avoid this attack. |
Tail Stab
| Tail Stab Attack Information |
|---|
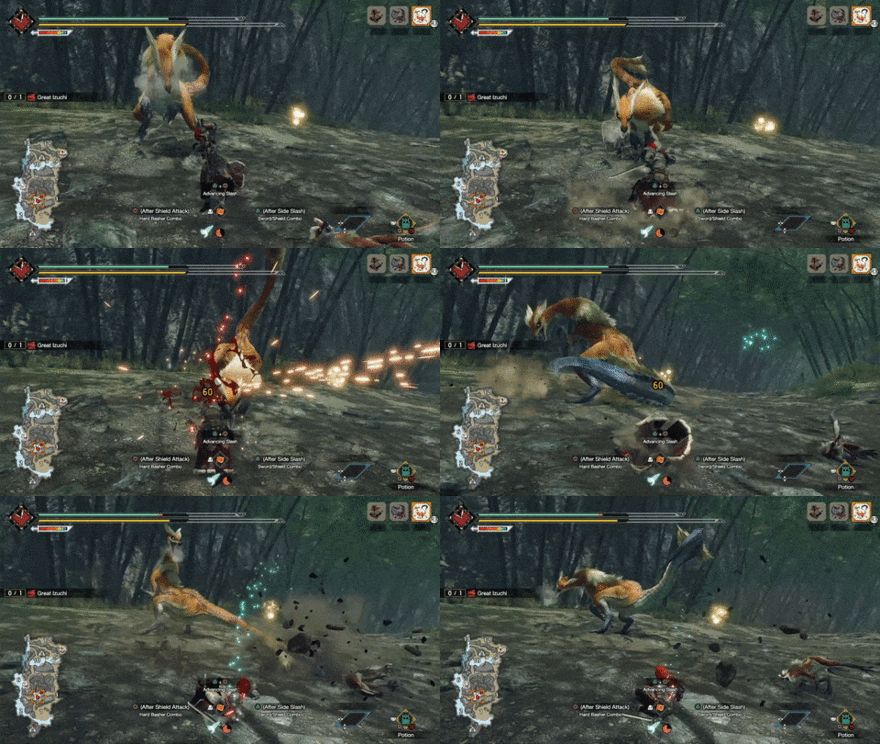 Tail Stab: Great Izuchi whips its tail above its head before swinging it around to stab the hunter, causing them to trip and dealing moderate damage on hit. Great Izuchi usually follows this move up with a Tail Slam, so prepare to guard or evade again after it performs this attack.. |
Tail Sweep
| Tail Sweep Attack Information |
|---|
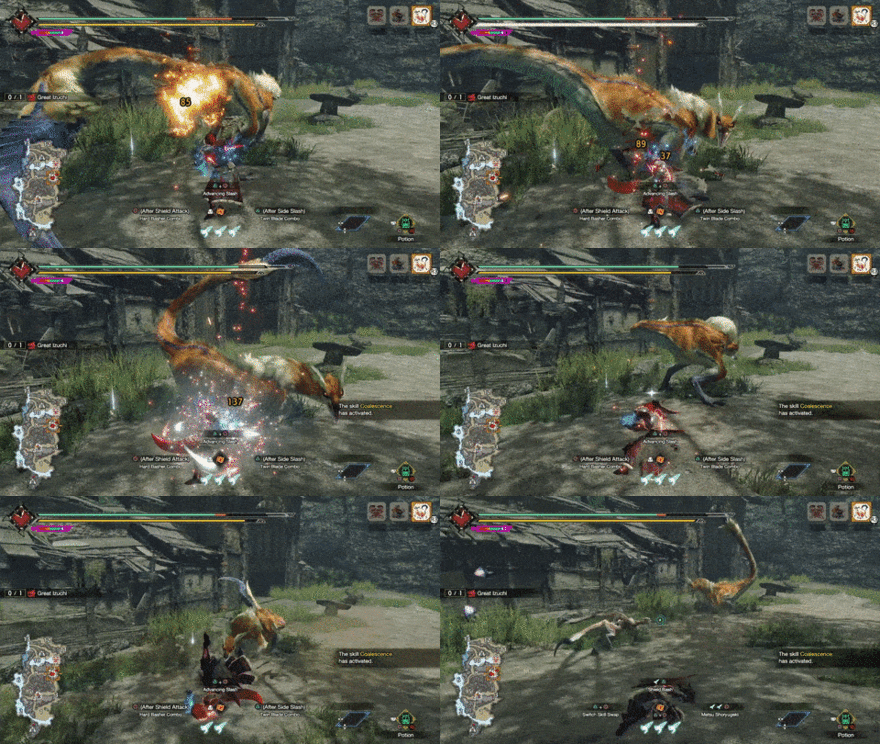 Tail Sweep: Great Izuchi lifts its tail above its head before performing a wide tail sweep that deals moderate damage and knocks away hunters that stay too close to it. |
Tail Slam
| Tail Slam Attack Information |
|---|
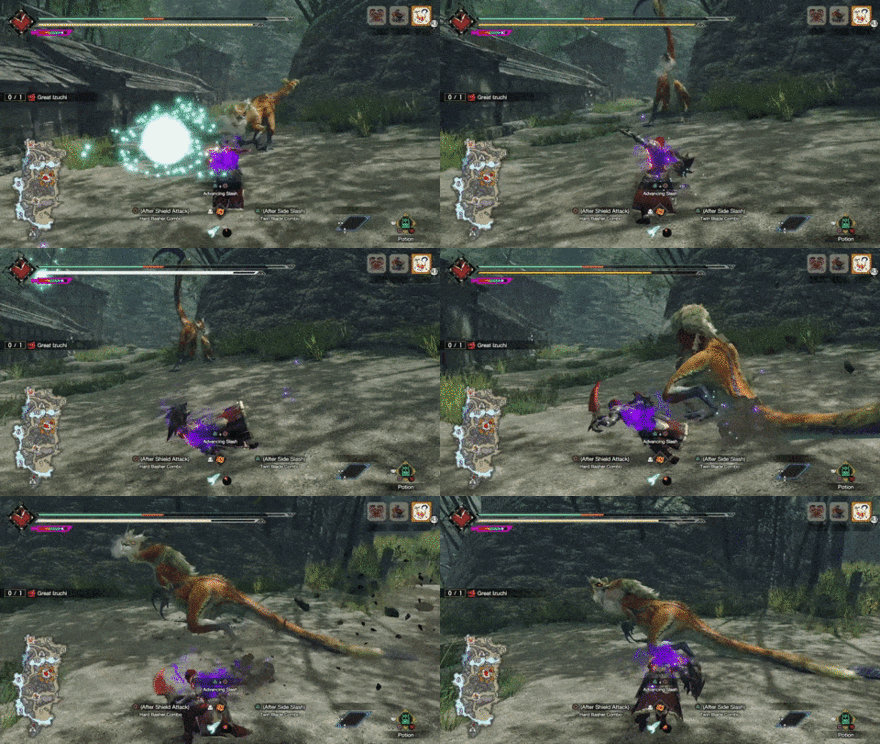 Tail Slam: Great Izuchi jumps back to let out a roar before rapidly flipping forward to slam its tail on top of the hunter, dealing heavy damage on hit and knocking them away. While this attack hits hard, it has a distinct tell and a linear path. React to Great Izuchi's roar and evade off to the side to avoid getting hit. |
Hanging Tail Slam
| Hanging Tail Slam Attack Information |
|---|
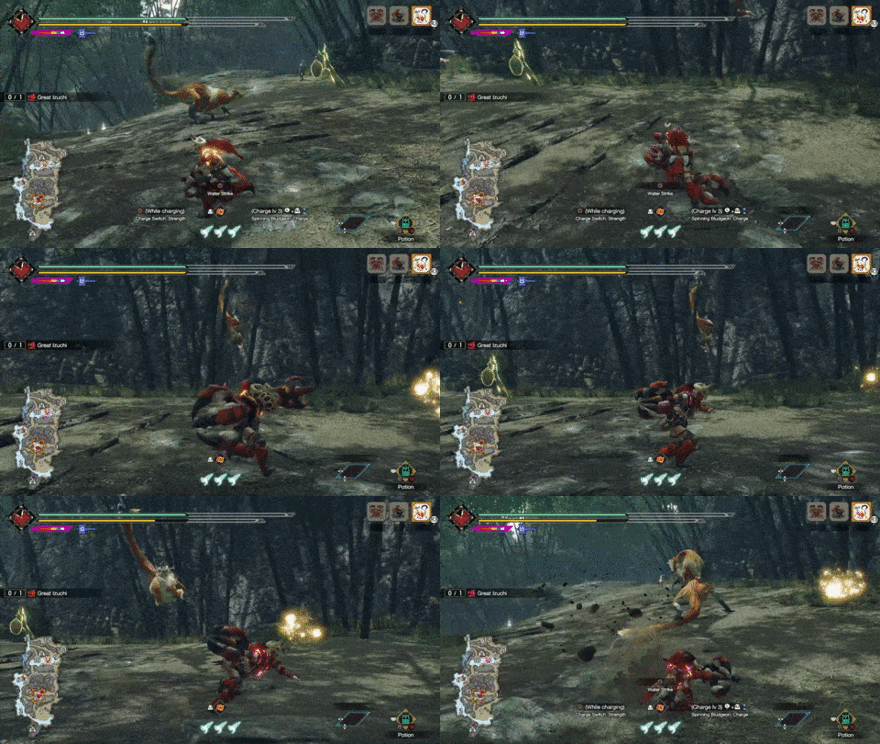 Hanging Tail Slam: Great Izuchi leaps onto a nearby wall, hanging onto it using its scythe-like tail. After locking onto the hunter, it rapidly jumps off the wall to slam its tail on top of them, knocking them away and dealing heavy damage. Wait for the moment when Great Izuchi jumps from the wall and evade perpendicular to the path of its tail slam to avoid getting hit. |
Consecutive Tail Spin Combo
| Consecutive Tail Spin Combo Attack Information |
|---|
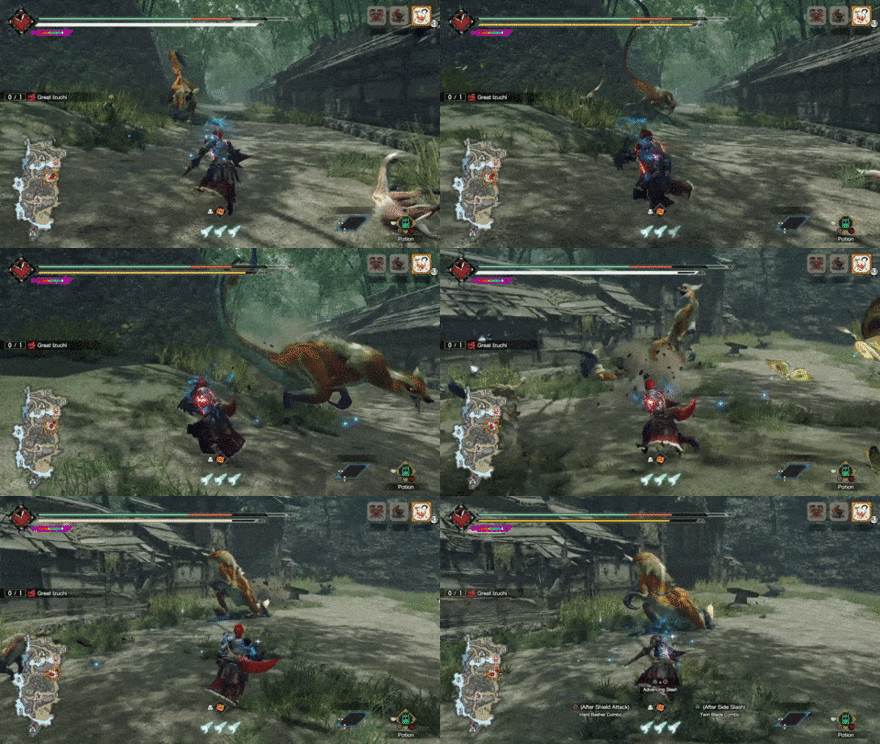 Consecutive Tail Spin Combo: Great Izuchi lifts its tail above its head before executing three consecutive tailspins that end in a tail slam. Each attack in this combo covers a wide range and deals heavy damage. To avoid this combo, sheathe your weapon and evade perpendicular to the path of Great Izuchi's attacks. |
Great Izuchi Materials and Drops
Master Rank Great Izuchi Materials
High Rank Great Izuchi Materials
Low Rank Great Izuchi Materials
Great Izuchi Dropped Materials
Monster Hunter Rise Related Guides
All Great Izuchi Guides
| All Great Izuchi Related Articles | ||
|---|---|---|
 Great Izuchi Guide Great Izuchi Guide
|
 Great Izuchi Weapons Great Izuchi Weapons
|
 Great Izuchi Armor Great Izuchi Armor
|
Sunbreak Monsters
| Sunbreak Monster Lists | ||
|---|---|---|
| Sunbreak Monsters List | Monster Subspecies List | Sunbreak Small Monsters List |
Large Monsters
MR6+ Large Monsters
| MR6+ Monsters | |||||
|---|---|---|---|---|---|
 Gaismagorm Gaismagorm(MR6) |
 Furious Rajang Furious Rajang(MR50) |
 Scorned Magnamalo Scorned Magnamalo(MR100) |
|||
Title Update 1 Monsters
| Sunbreak Title Update 1 Monsters | |||
|---|---|---|---|
 Seething Bazelgeuse Seething Bazelgeuse |
 Silver Rathalos Silver Rathalos |
 Gold Rathian Gold Rathian |
 Lucent Nargacuga Lucent Nargacuga |
Title Update 2 Monsters
| Sunbreak Title Update 2 Monsters | ||
|---|---|---|
 Flaming Espinas Flaming Espinas |
 Risen Chameleos Risen Chameleos |
 Violet Mizutsune Violet Mizutsune |
Title Update 3 Monsters
| Sunbreak Title Update 3 Monsters | ||
|---|---|---|
 Chaotic Gore Magala Chaotic Gore Magala |
 Risen Kushala Daora Risen Kushala Daora |
 Risen Teostra Risen Teostra |
Title Update 4 Monsters
| Sunbreak Title Update 4 Monsters | |
|---|---|
 Velkhana Velkhana |
 Risen Crimson Glow Valstrax Risen Crimson Glow Valstrax |
Title Update 5 Monsters
| Sunbreak Title Update 5 Monsters | |
|---|---|
 Amatsu Amatsu |
 Risen Shagaru Magala Risen Shagaru Magala |
Small Monsters
| Sunbreak Small Monsters | |||||
|---|---|---|---|---|---|
 Boggi Boggi |
 Ceanataur Ceanataur |
 Gowngoat Gowngoat |
|||
 Hermitaur Hermitaur |
 Hornetaur Hornetaur |
 Pyrantula Pyrantula |
 Vespoid Vespoid |
 Velociprey Velociprey |
|
Other Large Monsters
Elder Dragons
| Elder Dragons | |||||
|---|---|---|---|---|---|
 Narwa the Allmother Narwa the Allmother |
|||||
 Wind Serpent Ibushi Wind Serpent Ibushi |
 Thunder Serpent Narwa Thunder Serpent Narwa |
 Crimson Glow Valstrax Crimson Glow Valstrax |
|||
 Chameleos Chameleos |
 Kushala Daora Kushala Daora |
 Teostra Teostra |
|||
Apex Monsters
| Apex Monsters | ||
|---|---|---|
 Apex Arzuros Apex Arzuros |
 Apex Rathian Apex Rathian |
 Apex Mizutsune Apex Mizutsune |
 Apex Rathalos Apex Rathalos |
 Apex Diablos Apex Diablos |
 Apex Zinogre Apex Zinogre |
Other Small Monsters
Author
Sunbreak Great Izuchi: Weakness and Drops
improvement survey
03/2026
improving Game8's site?

Your answers will help us to improve our website.
Note: Please be sure not to enter any kind of personal information into your response.

We hope you continue to make use of Game8.
Rankings
- We could not find the message board you were looking for.
Gaming News
Popular Games

Genshin Impact Walkthrough & Guides Wiki

Honkai: Star Rail Walkthrough & Guides Wiki

Umamusume: Pretty Derby Walkthrough & Guides Wiki

Pokemon Pokopia Walkthrough & Guides Wiki

Resident Evil Requiem (RE9) Walkthrough & Guides Wiki

Monster Hunter Wilds Walkthrough & Guides Wiki

Wuthering Waves Walkthrough & Guides Wiki

Arknights: Endfield Walkthrough & Guides Wiki

Pokemon FireRed and LeafGreen (FRLG) Walkthrough & Guides Wiki

Pokemon TCG Pocket (PTCGP) Strategies & Guides Wiki
Recommended Games

Diablo 4: Vessel of Hatred Walkthrough & Guides Wiki

Cyberpunk 2077: Ultimate Edition Walkthrough & Guides Wiki

Fire Emblem Heroes (FEH) Walkthrough & Guides Wiki

Yu-Gi-Oh! Master Duel Walkthrough & Guides Wiki

Super Smash Bros. Ultimate Walkthrough & Guides Wiki

Pokemon Brilliant Diamond and Shining Pearl (BDSP) Walkthrough & Guides Wiki

Elden Ring Shadow of the Erdtree Walkthrough & Guides Wiki

Monster Hunter World Walkthrough & Guides Wiki

The Legend of Zelda: Tears of the Kingdom Walkthrough & Guides Wiki

Persona 3 Reload Walkthrough & Guides Wiki
All rights reserved
©CAPCOM CO., LTD. ALL RIGHTS RESERVED.
The copyrights of videos of games used in our content and other intellectual property rights belong to the provider of the game.
The contents we provide on this site were created personally by members of the Game8 editorial department.
We refuse the right to reuse or repost content taken without our permission such as data or images to other sites.

 Daimyo Hermitaur
 Blood Orange Bishaten
 Garangolm
 Aurora Somnacanth
 Shogun Ceanataur
 Lunagaron
 Astalos
 Seregios
 Magma Almudron
 Gore Magala
 Espinas
 Pyre Rakna-Kadaki
 Malzeno
 Shagaru Magala
 Arzuros
 Great Baggi
 Lagombi
 Aknosom
 Tetranadon
 Kulu-Ya-Ku
 Barroth
 Great Wroggi
 Royal Ludroth
 Khezu
Khezu Bishaten
 Somnacanth
 Barioth
 Rathian
 Tobi-Kadachi
 Volvidon
 Basarios
 Pukei-Pukei
 Magnamalo
 Nargacuga
 Zinogre
 Anjanath
 Mizutsune
 Rathalos
 Almudron
 Goss Harag
 Tigrex
 Diablos
 Jyuratodus
 Rajang
 Rakna-Kadaki
 Bazelgeuse
 Altaroth
 Anteka
 Baggi
Baggi Bnahabra
 Bombadgy
 Bullfango
 Delex
Delex Felyne
 Gajau
Gajau Gargwa
 Izuchi
 Jaggi
Jaggi Jaggia
 Jagras
 Kelbi
Kelbi Kestodon
 Ludroth
 Melynx
 Popo
Popo Rachnoid
 Remobra
 Rhenoplos
 Slagtoth
 Uroktor
 Wroggi
 Zamite


![Monster Hunter Stories 3 Review [First Impressions] | Simply Rejuvenating](https://img.game8.co/4438641/2a31b7702bd70e78ec8efd24661dacda.jpeg/thumb)


