Sunbreak Narwa the Allmother: Weakness and Drops
★ All Title Updates now available for ALL PLATFORMS!
┗ Title Update 4 | Title Update 5 | Bonus Update
┗ Check out all our Best Builds For Every Weapon!
┗ TU4 Monsters: Velkhana | Risen C.G. Valstrax
┗ TU5 Monsters: Amatsu | Risen Shagaru Magala
┗ Bonus Update Monster: Primordial Malzeno
This is a hunting guide for Narwa the Allmother, a Large Monster in Monster Hunter Rise (MH Rise) and the Sunbreak DLC. Read on to learn Narwa the Allmother's weaknesses, forgeable weapons, forgeable armor, drops, and attack patterns for Master Rank!
 Narwa the Allmother Guide Narwa the Allmother Guide
|
 Thunder Serpent Narwa Guide Thunder Serpent Narwa Guide
|
| Rise and Sunbreak Final Bosses | |
|---|---|
 Narwa the Allmother Narwa the Allmother(Rise) |
 Gaismagorm Gaismagorm(Sunbreak) |
List of Contents
Narwa the Allmother Weakness and Notes
| Narwa the Allmother 百竜ノ淵源ナルハタタヒメ |
|||
|---|---|---|---|
 |
|||
| Type | Elder Dragon | ||
| Threat Level | 10/10 | Rampage Type | ー |
| Major Weakness | Other Weakness | ||
| Blight / Elemental Damage | Abnormal Status | ||
| Characteristics | |||
| Having absorbed the lifeforce of her "king", Narwa has transformed and become imbued with new power. She now possesses Ibushi's mastery over wind as well as her own control over thunder, and lusts for utter annihilation. | |||
The Final Boss in Monster Hunter Rise
Narwa the Allmother is the final boss fight in the Monster Hunter Rise main storyline. This becomes available after the Update 3.0 of the game. Defeating Narwa the Allmother unlocks a new ending for the Monster RIse main storyline.
Story Walkthrough and Progression Guide
Update 3.0
Narwa the Allmother was added to Monster Hunter Rise in Free Title Update Version 3.0. Check below for the Version 3.0 full patch notes.
How to Unlock Narwa the Allmother
Reach MR 30 in Master Rank
| Quest Name | Monster/Unlock |
|---|---|
| Spine-Tingling Divinity - Reprise |
|
| Unlock Conditions: Finish the Quest "Spine-Tingling Divinity" |
|
| Spine-Tingling Divinity |
|
| Unlock Conditions: Reach MR 30 |
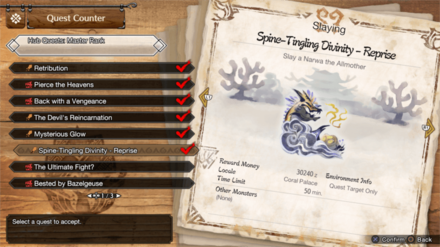
MR Narwa the Allmother is unlocked by defeating MR Wind Serpent Ibushi and reaching MR 30 in the Sunbreak expansion. Doing both of these unlocks the Urgent Quest Spine-Tingling Divinity, which allows you to fight it in the Coral Palace.
After completing its Urgent Quest, you can fight MR Narwa the Allmother in the regular quest Spine-Tingling Divinity - Reprise in the M★6 Quest Pool.
MR Grinding Guide:
How to Get from MR 6 to MR 100 Fast
Reach HR 50 in High Rank

| Quest Name | Monster/Unlock |
|---|---|
| The Allmother |
|
| Unlock Conditions: Reach HR 50 |
Narwa the Allmother is unlocked by reaching HR 50 in the Hub. When you reach HR 50, the Urgent Quest The Allmother will unlock giving you the ability to take on Narwa with Ibushi in the Coral Palace!
Hunter Rank Farm Guide:
How to Get from HR 7 to HR 100 Fast
Narwa the Allmother Weakness and Resistance
| 63 | 61 | 22 | 2 |
| 3 | 0 | 8 | 12 |
Bold are the recommended Weapon Type and Elemental Damage.
Narwa the Allmother Weapon Damage Breakdown
| Part | |||
|---|---|---|---|
| Head | 90 | 92 | 43 |
| Neck | 40 | 42 | 3 |
| Torso | 40 | 42 | 5 |
| Chest (Charged) | 70 | 65 | 15 |
| Wingarm | 35 | 30 | 5 |
| Wingarm (Charged) | 92 | 88 | 47 |
| Abdomen (Thundersac) | 63 | 61 | 22 |
| Back (Charged) | 60 | 50 | 15 |
| Leg Fin | 30 | 35 | 1 |
| Tail | 40 | 35 | 5 |
| Tail Tip (Charged) | 95 | 90 | 45 |
| Overall | 63 | 61 | 22 |
Narwa the Allmother Elemental Weakness Breakdown
| Part | |||||
|---|---|---|---|---|---|
| Head | 5 | 5 | 0 | 10 | 15 |
| Neck | 0 | 0 | 0 | 5 | 0 |
| Torso | 0 | 0 | 0 | 5 | 0 |
| Chest (Charged) | 0 | 5 | 0 | 10 | 15 |
| Wingarm | 0 | 5 | 0 | 5 | 10 |
| Wingarm (Charged) | 5 | 5 | 0 | 10 | 20 |
| Abdomen (Thundersac) | 2 | 3 | 0 | 8 | 12 |
| Back (Charged) | 5 | 5 | 0 | 10 | 15 |
| Leg Fin | 0 | 0 | 0 | 0 | 5 |
| Tail | 0 | 0 | 0 | 5 | 10 |
| Tail Tip (Charged) | 0 | 0 | 0 | 5 | 15 |
| Overall | 2 | 3 | 0 | 8 | 12 |
Higher numbers indicate higher potential damage to the monster.
Narwa the Allmother Hunting Tips

Narwa's ability to now command the wind like Ibushi as well as employ her usual attacks makes her twice as deadly. Keep your eye on her stance as she attacks so you aren't caught off guard. Attack the areas on her body that have accumulated energy to give yourself the edge over her.
Status Effect Vulnerabilities
| Poison | Stun | Paralysis | Sleep |
|---|---|---|---|
| -- | -- | -- | -- |
| Blast | Exhaust | Fireblight | Waterblight |
| ★★ | -- | ★ | ★ |
| Thunderblight | Iceblight | ||
| -- | ★★ | ||
If an ailment has more stars it means that it has better effectiveness.
Item Vulnerabilities
| Pitfall Trap | Shock Trap | Flash Bomb |
|---|---|---|
| ✕ | ✕ | ◯ |
| Sonic Bomb | Meat Effects | Dung Bomb |
| ✕ | ✕ | ✕ |
◯ = Vulnerable; ✕ = Fully Resistant; ▲ = Situational
Kinsect Extracts
| Monster Part | Extract |
|---|---|
| Head |
|
| Neck |
|
| Torso |
|
| Chest (Charged) |
|
| Wingarm |
|
| Wingarm (Charged) |
|
| Abdomen (Thundersac) |
|
| Back (Charged) |
|
| Leg Fin |
|
| Tail |
|
| Tail Tip (Charged) |
|
Red = Attack Increase, White = Movement Boost, Orange = Anti-knockback When Attacking
Narwa the Allmother Locations and Quests
Narwa the Allmother Known Habitat
| Map | Starting Area | Visited Areas | Rest Area |
|---|---|---|---|
 Coral Palace Coral Palace
|
- | - | - |
Narwa the Allmother Quest Appearances
| Quest Type | Lvl | Quest Name |
|---|---|---|
| Hub Quest | M★6 | Spine-Tingling Divinity - Reprise |
| Urgent Hub Quest | M★6 | Spine-Tingling Divinity |
| Quest Type | Lvl | Quest Name |
|---|---|---|
| Event Quest | ★7 | Advanced: Born of Paradise |
| Urgent Hub Quest | ★7 | The Allmother |
| No Quest in This Rank |
How to Beat Narwa the Allmother
Narwa the Allmother Appears After Beating Ibushi
Defeat Ibushi in Phase One

The battle against Narwa the Allmother will not start unless you defeat Ibushi in Phase One. You will meet him at the same Coral Palace arena where you fought Narwa in the quest Goddess Serpent of Thunder.
Thankfully, Ibushi is fairly easy to defeat. All of his moves are similar to the Ibushi fought during the Rampage so you may want to check out our guide below:
How to Beat Wind Serpent Ibushi
When Close to Dying, Ibushi Will Fall Underground
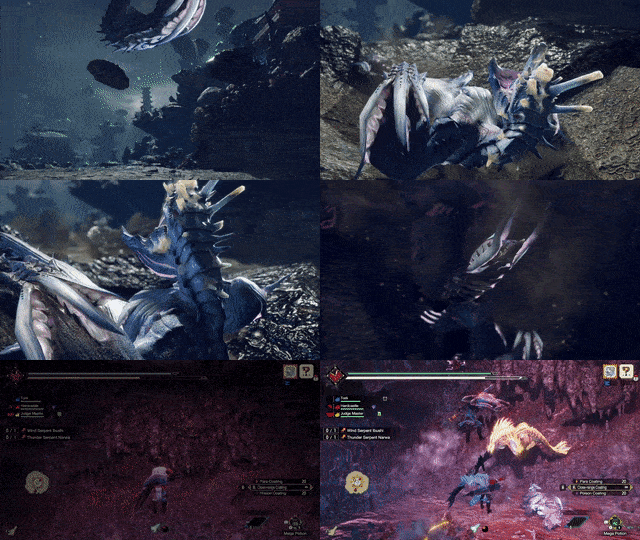
When close to dying, a cutscene will play where we see Ibushi falling underground to a cavern where Narwa is revealed to be resting. They will dance together and with his final breath, Ibushi gives his life energy to Narwa - effectively imbuing her with his wind power and transforming her into Narwa the Allmother!
Ignore Ibushi While They are Dancing!

When Ibushi and Narwa start their dance, man the ballista and focus on Narwa. Ibushi will die after Narwa takes all his life energy so it's pointless to focus on him at this point!
Gunners Are Not Recommended
Gunners are very powerful in Monster Hunter Rise (MH Rise), but they are not recommended for fighting Narwa the Allmother. The cavern is just too small that it's very hard to keep your distance from Narwa!
It is safer to use Blademaster weapons because you will be close to Narwa anyway but if you're confident enough, you are free to do so!
Attack Narwa the Allmother's Glowing Parts

Like the past Narwa fights, the glowing parts are the ones that should be focused on. These are usually found on the head, arms, and the tail.
When you deal enough damage to these parts, Narwa will fall and open up its Thundersac for tons of damage!
Use Farcasters to Avoid the Allmother Annihilation

Allmother Annihilation is manageable but can still cart you if you're not careful enough. If your party is down to one faint left, we suggest using Farcasters to return to base and avoid the Allmother Annihilation attack completely.
Remember to Wyvern Ride the Intruding Monster

In the middle of the fight, monsters like Magnamalo, Kushala Daora, or Teostra will start intruding on your stand-off with Narwa. Narwa will then focus on the newly arrived monster, attacking it until it is Mountable. Keep an eye out and mount the intruding monster, build up their gauge for the Mounted Punisher then finally deal that extra damage!
Don't worry, the intruding monster will leave immediately after as they are only there to help the hunter!
Invest in Thunder Resistance

Narwa the Allmother's attacks are mostly of Thunder element so we suggest gemming in Thunder Resistance into your armor if you're having a hard time with her Thunder attacks! Thankfully, Thunder Res Jewel 1 needs only Level 1 slots so it's very flexible to gem in!
Use Hunting Helpers Around the Arena
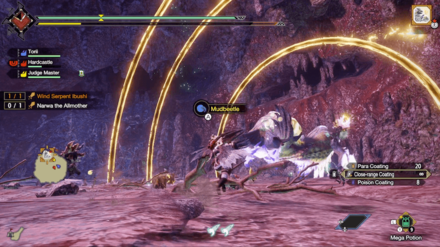
Hunting Helpers like Mudbeetles, Firebeetles, and Aurorturtles will be spawn randomly on the battlefield while fighting Narwa the Allmother. Pick these up and use them to your advantage!
Narwa the Allmother Master Rank Attack Patterns
In addition to its attacks in High Rank quests, Narwa the Allmother uses the following attacks in Master Rank.
| Name | Description |
|---|---|
| Lightning Tail Quake | Narwa the Allmother thrusts the tip of its tail into the ground, causing the ground to quake and emit delayed bursts of lightning. |
| Rapid Wind and Thunder Combo | Narwa the Allmother slams its arms into the ground and emits delayed bursts of wind and lightning around itself. |
| Spinning Coiled Burst | Narwa the Allmother summons six orbs of lightning which immediately detonate into spinning coils after the monster fires a Lightning Bomb through them |
Lightning Tail Quake
| Lightning Tail Quake Attack Information |
|---|
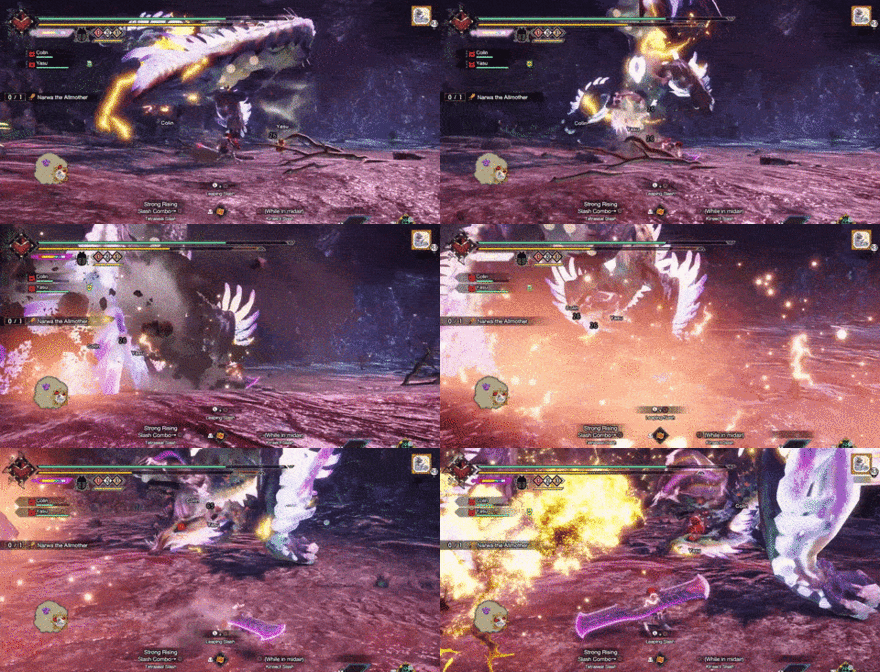 Lightning Tail Quake: Narwa the Allmother thrusts the tip of its tail into the ground, causing the ground to quake and emit delayed bursts of lightning that deal heavy damage. This move is heavily telegraphed, so react accordingly by moving out of the lightning's path to avoid getting hit. |
Rapid Wind and Thunder Combo
| Rapid Wind and Thunder Combo Attack Information |
|---|
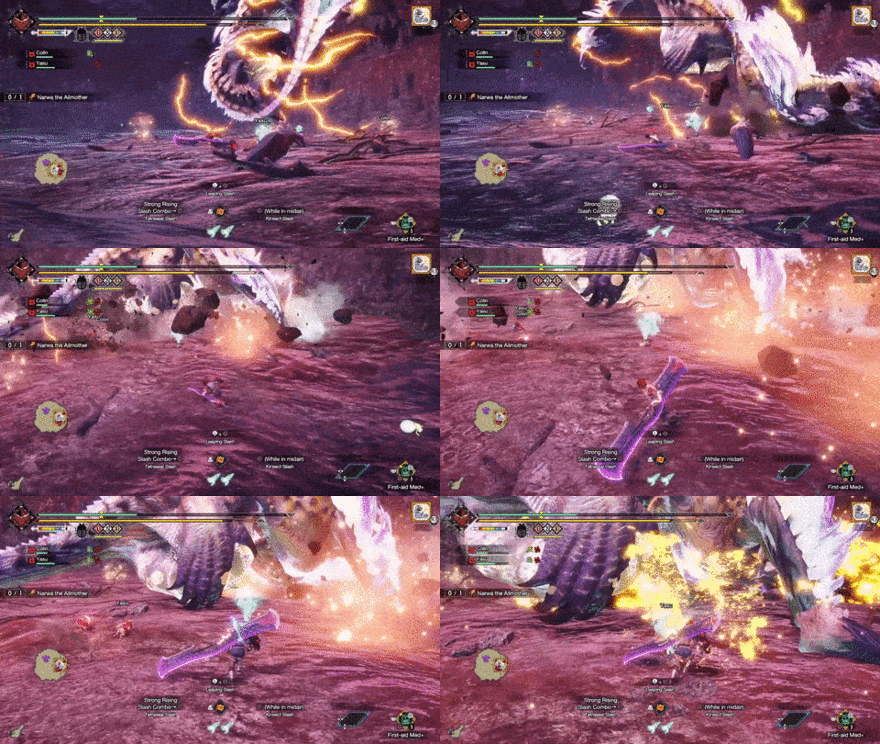 Rapid Wind and Thunder Combo: Narwa the Allmother performs a quicker variant of the Wind and Thunder Combo, where it slams its arms into the ground to emit delayed bursts of wind and lightning. To avoid this move, reposition away from Narwa the Allmother's upper torso as it performs this attack. |
Spinning Coiled Burst
| Spinning Coiled Burst Attack Information |
|---|
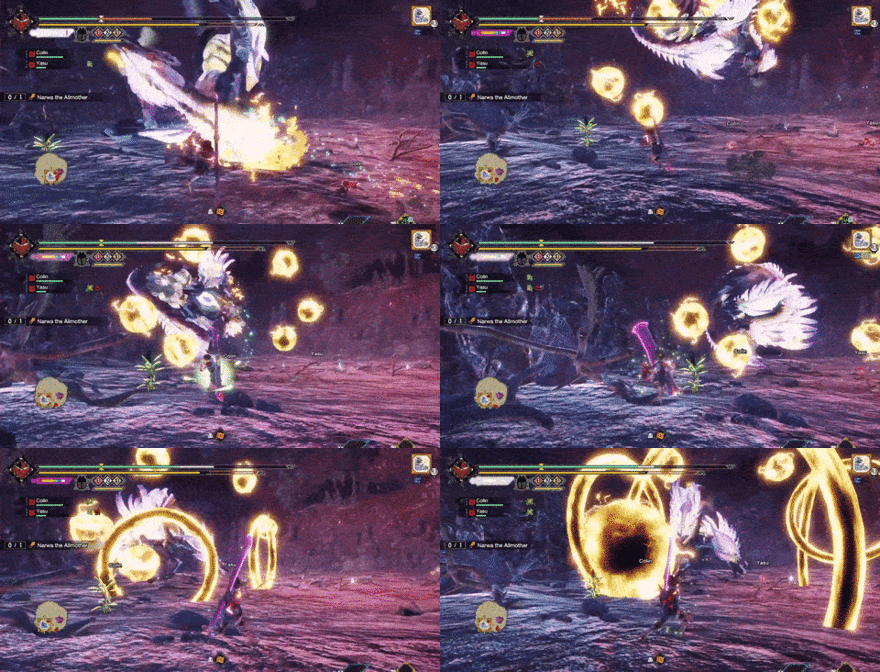 Spinning Coiled Burst: This attack is a variant of Thunder Serpent Narwa's Coiled Burst. Narwa the Allmother summons six orbs of lightning which immediately detonate into spinning coils after the monster fires a Lightning Bomb through them towards the hunter. Make use of Wirebugs and carefully maneuver through or away from the irregular trajectory of the lightning coils to avoid getting hit by this attack. |
Narwa the Allmother General Attack Patterns
Narwa the Allmother uses the following attacks in High Rank quests.
| Name | Description |
|---|---|
| Spinning Lightning Coils | Lightning coils that travels in a line created by the Allmother's arms. These coils also spin horizontally making it harder to evade than the regular Narwa's coils. |
| Thunder Tail Slam Attack | Allmother's tail attack imbued with thunder energy. A follow up thunder attack can catch any hunter who lets down their guard after evading the tail slam! |
| Wind and Thunder Combo | Testament to Ibushi's sacrifice, the Allmother can harness the wind then follow it up with a thunder attack. |
| Double Dragon's Maw | A pair of bite attack that the Allmother can follow up with a Thunderball attack. The bites can stun a hunter making them extra vulnerable to the ball! |
| Allmother Annihilation [DANGER] |
Allmother's two-phase ultimate attack that summons Dragonators and finishes with a star fall. The star fall will expand and deal huge damage to the whole arena! |
Spinning Lightning Coils
| Spinning Lightning Coils Attack Information |
|---|
 Spinning Lightning Coils: Narwa the Allmother also has lightning coil attacks like the regular Narwa - the difference is the coil rotates making it harder to evade! Wirebug away from the center or try evading into it when the timing is right! |
Thunder Tail Slam Attack
| Thunder Tail Slam Attack Attack Information |
|---|
 Thunder Tail Slam Attack: Narwa the Allmother's tail slam attack looks like that of regular Narwa - the difference lies on the extra linear lightning attack present after the tail slam! This can easily deal tons of damage as well as inflict Thunderblight on hunters! Evade just in time by roll-evading. |
Wind and Thunder Combo
| Wind and Thunder Combo Attack Information |
|---|
 Wind and Thunder Combo: Narwa the Allmother will slam itself on the ground while dealing wind damage in a straight line. Afterward, a lightning attack (also in a straight line) will follow! This can be easily telegraphed as you can see a pattern on the ground where the attacks will drop. Avoid these areas at all costs! |
Double Dragon's Maw
| Double Dragon's Maw Attack Information |
|---|
 Double Dragon's Maw: Narwa the Allmother will bite the hunter ferociously twice which can stun them and leave them open for attacks. It will then follow it up with a Thunder Ball attack that can deal a lot of damage! |
Allmother Annihilation
Considered to be the Allmother's ultimate attack, Narwa will summon multiple dragonators then finishes with a star fall. There are two phases for this attack:
| Allmother Annihilation Moves |
|---|
 Dragonator Phase: Narwa the Allmother will summon multiple dragonators that will spin radially outwards, both clockwise and counterclockwise while creating a Thunder ball that pulls hunters towards the center. During this phase, stay away from the center as the Thunder ball will explode after some time. When the Thunder ball has exploded, try hard to move to the center by going in between the spinning dragonators! If you have the Leap of Faith armor skill gemmed in, you can Dive Evade towards the center! |
 Allmother's Star Fall: After some time, Narwa the Allmother will charge and drop a small energy ball that expands outward as soon as it touches the ground! When you are at the center, this attack has the ability to one-shot hunters even at full health. If you go further from the center, the damage will not cart you but will still deplete a large chunk of your health. To manage this, you need to climb atop any floating platforms that the Allmother will spawn. This will let you effectively evade the explosion on the ground! |
Narwa the Allmother Materials and Drops
Master Rank Narwa the Allmother Materials
| You cannot capture this monster! |
High Rank Narwa the Allmother Materials
| You cannot capture this monster! |
Narwa the Allmother Dropped Materials
Monster Hunter Rise Related Links
Monster Guides by Rank
Village Rank ★2
| 2-Star Large Monsters | |||
|---|---|---|---|
 Great Izuchi Great Izuchi |
 Arzuros Arzuros |
 Great Baggi Great Baggi |
 Lagombi Lagombi |
Village Rank ★3
| 3-Star Large Monsters | |||
|---|---|---|---|
 Aknosom Aknosom |
 Tetranadon Tetranadon |
 Kulu-Ya-Ku Kulu-Ya-Ku |
 Barroth Barroth |
 Great Wroggi Great Wroggi |
 Royal Ludroth Royal Ludroth |
 Khezu Khezu |
|
Village Rank ★4
| 4-Star Large Monsters | |||
|---|---|---|---|
 Bishaten Bishaten |
 Somnacanth Somnacanth |
 Barioth Barioth |
 Rathian Rathian |
 Tobi-Kadachi Tobi-Kadachi |
 Volvidon Volvidon |
 Basarios Basarios |
 Pukei-Pukei Pukei-Pukei |
Village Rank ★5
| 5-Star Large Monsters | |||
|---|---|---|---|
 Magnamalo Magnamalo |
 Nargacuga Nargacuga |
 Zinogre Zinogre |
 Anjanath Anjanath |
 Mizutsune Mizutsune |
 Rathalos Rathalos |
||
Village Rank ★6
| 6-Star Large Monsters | |||
|---|---|---|---|
 Almudron Almudron |
 Goss Harag Goss Harag |
 Tigrex Tigrex |
 Diablos Diablos |
High Rank Hub Quests
| High Rank Large Monsters | |||
|---|---|---|---|
 Jyuratodus Jyuratodus |
 Rajang Rajang |
 Rakna-Kadaki Rakna-Kadaki |
 Bazelgeuse Bazelgeuse |
Elder Dragons
| Elder Dragons | |||||
|---|---|---|---|---|---|
 Narwa the Allmother Narwa the Allmother |
|||||
 Wind Serpent Ibushi Wind Serpent Ibushi |
 Thunder Serpent Narwa Thunder Serpent Narwa |
 Crimson Glow Valstrax Crimson Glow Valstrax |
|||
 Chameleos Chameleos |
 Kushala Daora Kushala Daora |
 Teostra Teostra |
|||
Apex Monsters
| Apex Monsters | ||
|---|---|---|
 Apex Arzuros Apex Arzuros |
 Apex Rathian Apex Rathian |
 Apex Mizutsune Apex Mizutsune |
 Apex Rathalos Apex Rathalos |
 Apex Diablos Apex Diablos |
 Apex Zinogre Apex Zinogre |
Small Monsters
Author
Sunbreak Narwa the Allmother: Weakness and Drops
improvement survey
03/2026
improving Game8's site?

Your answers will help us to improve our website.
Note: Please be sure not to enter any kind of personal information into your response.

We hope you continue to make use of Game8.
Rankings
- We could not find the message board you were looking for.
Gaming News
Popular Games

Genshin Impact Walkthrough & Guides Wiki

Honkai: Star Rail Walkthrough & Guides Wiki

Umamusume: Pretty Derby Walkthrough & Guides Wiki

Pokemon Pokopia Walkthrough & Guides Wiki

Resident Evil Requiem (RE9) Walkthrough & Guides Wiki

Monster Hunter Wilds Walkthrough & Guides Wiki

Wuthering Waves Walkthrough & Guides Wiki

Arknights: Endfield Walkthrough & Guides Wiki

Pokemon FireRed and LeafGreen (FRLG) Walkthrough & Guides Wiki

Pokemon TCG Pocket (PTCGP) Strategies & Guides Wiki
Recommended Games

Diablo 4: Vessel of Hatred Walkthrough & Guides Wiki

Cyberpunk 2077: Ultimate Edition Walkthrough & Guides Wiki

Fire Emblem Heroes (FEH) Walkthrough & Guides Wiki

Yu-Gi-Oh! Master Duel Walkthrough & Guides Wiki

Super Smash Bros. Ultimate Walkthrough & Guides Wiki

Pokemon Brilliant Diamond and Shining Pearl (BDSP) Walkthrough & Guides Wiki

Elden Ring Shadow of the Erdtree Walkthrough & Guides Wiki

Monster Hunter World Walkthrough & Guides Wiki

The Legend of Zelda: Tears of the Kingdom Walkthrough & Guides Wiki

Persona 3 Reload Walkthrough & Guides Wiki
All rights reserved
©CAPCOM CO., LTD. ALL RIGHTS RESERVED.
The copyrights of videos of games used in our content and other intellectual property rights belong to the provider of the game.
The contents we provide on this site were created personally by members of the Game8 editorial department.
We refuse the right to reuse or repost content taken without our permission such as data or images to other sites.

 Altaroth
 Anteka
 Baggi
Baggi Bnahabra
 Bombadgy
 Bullfango
 Delex
Delex Felyne
 Gajau
Gajau Gargwa
 Izuchi
 Jaggi
Jaggi Jaggia
 Jagras
 Kelbi
Kelbi Kestodon
 Ludroth
 Melynx
 Popo
Popo Rachnoid
 Remobra
 Rhenoplos
 Slagtoth
 Uroktor
 Wroggi
 Zamite


![Monster Hunter Stories 3 Review [First Impressions] | Simply Rejuvenating](https://img.game8.co/4438641/2a31b7702bd70e78ec8efd24661dacda.jpeg/thumb)


Allmother Annihilation can easily be dived through with Shrouded Vault (Dual Blades Silkbind Attack), but it's best to do it shortly before or just after the ball of lightning explodes so that you don't end the animation inside it. So ideally one would run outwards initially then once the ball is gone just SV in and beat on Narwa