This survey will take about 1 minute.
Your answers will help us to improve our website.
Monster Hunter Rise: Sunbreak
Sunbreak Charge Blade Builds (Master Rank)
★ All Title Updates now available for ALL PLATFORMS!
┗ Title Update 4 | Title Update 5 | Bonus Update
┗ Check out all our Best Builds For Every Weapon!
┗ TU4 Monsters: Velkhana | Risen C.G. Valstrax
┗ TU5 Monsters: Amatsu | Risen Shagaru Magala
┗ Bonus Update Monster: Primordial Malzeno
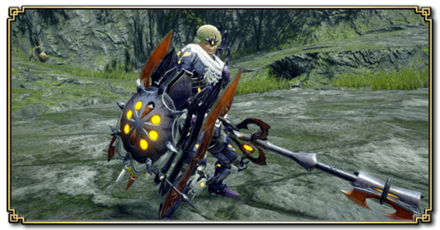
This is a guide to the best builds and equipment for Charge Blade in Monster Hunter Rise (MH Rise): Sunbreak. Learn about the best Charge Blades for Sunbreak and the best builds and Armor pieces to use with the Charge Blade for Low, High, and Master Rank.
| All Charge Blade Guides | ||
|---|---|---|
 Trees & Full List Trees & Full List |
 How to Use How to Use |
 Best Builds Best Builds |
List of Contents
Charge Blade Builds List & Progression
This is a quick section summarizing all the Charge Blade builds in this page. It is arranged from newest to oldest, and MR build progression is from bottom to top.
Click on the build name to see the build!
| Master Rank | Title Update | Build Name |
|---|---|---|
| MR140+ | BU | Blood Awakening Elemental Savage Axe |
| MR180+ | TU5 | Heaven-Sent, Dragon Conversion Elemental Savage Axe |
| MR160+ | TU4 | Dragon Conversion Elemental CBs |
| MR140+ | TU3 | Powder Mantle Elemental AED Build |
| MR120+ | TU3 | Mail of Hellfire Chaotic Gore Impact Phial |
| MR10+ | TU1 | Elemental AED Climber |
| MR10+ | TU2 | Elemental Savage Axe Climber |
| MR10+ | TU2 | Lucent Raw Balanced Blader |
| MR6+ | TU2 | Critical Savage Axe Climber |
| MR3-6 | Base | Mid Game Ultra Element Discharger |
| MR3-6 | Base | Mid Game Savage Axe Mode |
| MR1-2 | Base | Starting Balanced Impact Build |
Ultra Endgame MR Build: MR 100+
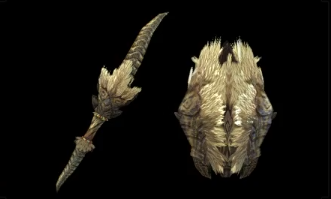
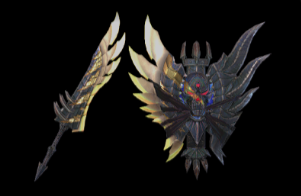
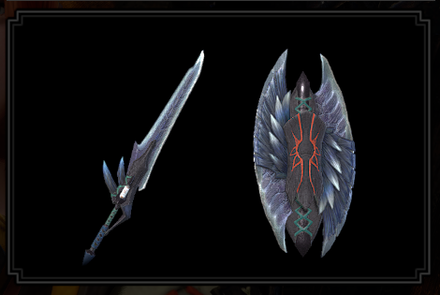
Blood Awakening Elemental Savage Axe (BU Build)
Recommended Charge Blades
| Weapon | ATK | DEF | Affinity | |
|---|---|---|---|---|
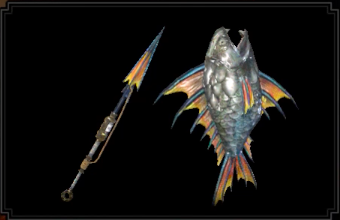
 Flamlion Blade Flamlion Blade
 |
320 | 0 | 0% | |
| Element / Status |
Slots | Rampage Slots | ||
| ②ーー | ③ | |||
| Phial Type | Impact Phial | |||
| Decorations |
|
|
|---|---|---|
| Weapon | ATK | DEF | Affinity | |
|---|---|---|---|---|
 Divine Fieldblade+ Divine Fieldblade+
 |
310 | 0 | 20% | |
| Element / Status |
Slots | Rampage Slots | ||
| ①ーー | ② | |||
| Phial Type | Impact Phial | |||
| Decorations | ||
|---|---|---|
| Weapon | ATK | DEF | Affinity | |
|---|---|---|---|---|
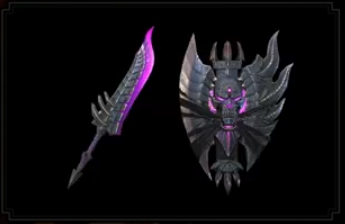
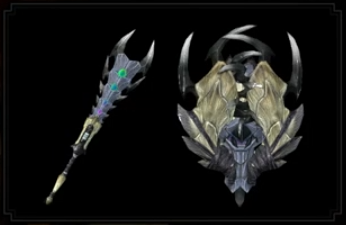
 Demonlord Blade Demonlord Blade
 |
330 | 0 | 0% | |
| Element / Status |
Slots | Rampage Slots | ||
| ②②ー | ① | |||
| Phial Type | Impact Phial | |||
| Decorations |
|
|
|---|---|---|
| Weapon | ATK | DEF | Affinity | |
|---|---|---|---|---|
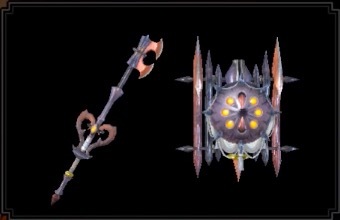
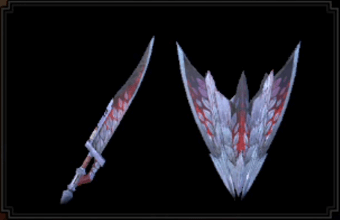
 Daora's Worldbearer Daora's Worldbearer
 |
320 | 0 | 10% | |
| Element / Status |
Slots | Rampage Slots | ||
| ①ーー | ③ | |||
| Phial Type | Impact Phial | |||
| Decorations | ||
|---|---|---|
| Weapon | ATK | DEF | Affinity | |
|---|---|---|---|---|
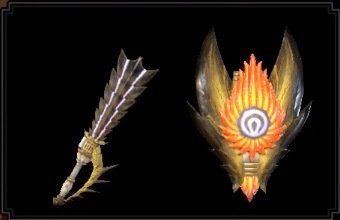
 Unheilskraft Unheilskraft
 |
320 | 0 | 20% | |
| Element / Status |
Slots | Rampage Slots | ||
| ②ーー | ② | |||
| Phial Type | Impact Phial | |||
| Decorations |
|
|
|---|---|---|
Recommended Armor Loadout
| Armor | Slots | Skills | |
|---|---|---|---|
|
|
③②① |
Wirebug Whisperer Lv. 3
Wind Mantle Lv. 1
|
|
|
|
④④② |
Burst Lv. 1
Blood Awakening Lv. 1
|
|
|
|
④④② |
Critical Boost Lv. 1
Blood Awakening Lv. 1
|
|
|
|
④③ー | ||
|
|
④④ー | ||
| Talisman | Weakness Exploit 2 with a ②②① slot or better | ||
| Rampage Decoration |
Alternative: |
||
| Skills | |
|---|---|
| Rampage Skill | Element Exploit to increase elemental damage against monsters weak to each element Alternative: Swap between Wyvern Exploit, Anti-Aerial Species, Anti-Aquatic Species, or Fanged Exploit depending on the monster. |
|
Critical Eye Lv. 5 | Element Attack Lv.5
Attack Boost Lv. 4 | Blood Awakening Lv. 3 Blood Rite Lv. 3 | Weakness Exploit Lv. 3 Wirebug Whisperer Lv. 3 | Partbreaker Lv. 3 Master's Touch Lv. 3 | Critical Boost Lv. 2 Guard Lv. 2 | Element Exploit Lv. 2 Critical Element Lv. 2 | Ballistics Lv. 2 Burst Lv. 1 | Powder Mantle Lv. 1 Wind Mantle Lv. 1 | Intrepid Heart Lv. 1 For the Fire and Dragon: Element Exploit Lv. 3 For the Water and Ice Build: Kushala Blessing Lv.1 For the Thunder Build: Element Exploit Lv. 3 | Critical Element Lv. 3 |
|
Build Merits and Augments
| Weapon Augments |
For Water/Thunder/Dragon Weapon: |
|---|---|
| Armor Augments |
Armor Augments for this build are not necessary. However, feel free to add as you please once you get comfortable with your build! Generally, you'd want to get better skills and more slots for your armor.
Replaceable skills already on the armor: ● Ballistics For damage, aim for any of the following: ● Powder Mantle ● Element Exploit ● Critical Boost ● Burst For comfort, aim for any of the following: ● Recovery Up ● Wind Mantle ● Frenzied Bloodlust ● Guard |
| Build Merits and Notes |
|---|
| Blood Awakening is a new aggressive comfort skill introduced in the Bonus Update. Paired with Blood Rite, this skill becomes formidable late in a hunt or when dealing with large monsters that inflict Bloodblight.
This build leans toward comfort. If seeking for more elemental damage and a consistently higher overall DPS, we recommend the Dragon Conversion build. For the Charge Blade play style, this focuses on the use of Condensed Spinning Slash. The switch skill Ready Stance is helpful in bringing out damage faster, since they can cancel Elemental Discharge axe swings. For sharpness maintenance, we included Risen Teostra's waist piece and maxed out Master's Touch. High affinity weapons and affinity-boosting skills are used to ensure that you get the most out of sharpness preservation. One level of Blood Rite can be exchanged for two more levels of Guard if needed since they share the same jewel slot requirement. However, recovering health and activating Blood Awakening will take longer, requiring more hits. Intrepid Heart comes handy in receiving Bloodblight since it significantly reduces damage and negates knockback when filled. If armor is to be augmented, you can put in Recovery Up which synergizes with Blood Rite. |
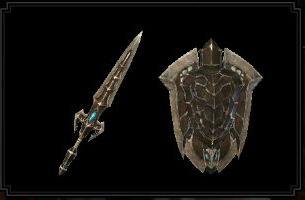
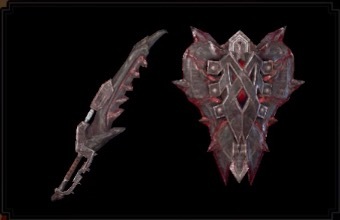
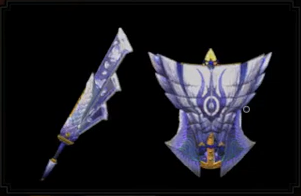
Heaven-Sent Dragon Conversion Elemental Savage Axe (TU5 Build)
| Weapon | ATK | DEF | Affinity | |
|---|---|---|---|---|
|
Flamlion Blade
|
320 | 0 | 0% | |
| Element / Status |
Slots | Rampage Slots | ||
| ②ーー | ③ | |||
| Phial Type | Impact Phial | |||
| Decorations |
*Depending on Talisman: or |
|
|---|---|---|
| Weapon | ATK | DEF | Affinity | |
|---|---|---|---|---|
|
Divine Fieldblade+
|
310 | 0 | 20% | |
| Element / Status |
Slots | Rampage Slots | ||
| ①ーー | ② | |||
| Phial Type | Impact Phial | |||
| Decorations |
*Depending on Talisman: or |
|
|---|---|---|
| Weapon | ATK | DEF | Affinity | |
|---|---|---|---|---|
|
Demonlord Blade
|
330 | 0 | 0% | |
| Element / Status |
Slots | Rampage Slots | ||
| ②②ー | ① | |||
| Phial Type | Impact Phial | |||
| Decorations |
*Depending on Talisman: or |
|
|---|---|---|
| Weapon | ATK | DEF | Affinity | |
|---|---|---|---|---|
|
Daora's Worldbearer
|
320 | 0 | 10% | |
| Element / Status |
Slots | Rampage Slots | ||
| ①ーー | ③ | |||
| Phial Type | Impact Phial | |||
| Decorations |
*Depending on Talisman: or |
|
|---|---|---|
| Weapon | ATK | DEF | Affinity | |
|---|---|---|---|---|
|
Unheilskraft
|
320 | 0 | 20% | |
| Element / Status |
Slots | Rampage Slots | ||
| ②ーー | ② | |||
| Phial Type | Impact Phial | |||
| Decorations |
*Depending on Talisman: or |
|
|---|---|---|
* = check Build Merits below.
Recommended Armor Loadout
| Armor | Slots | Skills | |
|---|---|---|---|
|
|
④②ー | ||
|
|
④④① |
Critical Boost Lv. 1
Heaven-Sent Lv. 1
|
|
|
|
④④① |
Latent Power Lv. 1
Heaven-Sent Lv. 1
|
|
|
|
④①① | ||
|
|
④④ー |
Critical Boost Lv. 2
Heaven-Sent Lv. 1
|
|
| Talisman |
(via Normal Melding): Weakness Exploit 2 with a ②① (via Qurious Melding): Weakness Exploit 3 | Rapid Morph 2 with a ②① slot or better |
||
| Rampage Decoration |
Fire and Ice Charge Blade:
Water and Dragon Charge Blade: Dragon Charge Blade: |
||
| Skills | |
|---|---|
| Rampage Skill | Fire and Ice Build: Element Exploit to increase elemental damage against monsters weak to each element Water and Dragon Build: Swap between Wyvern Exploit, Anti-Aerial Species, Anti-Aquatic Species, or Fanged Exploit depending on the monster. Dragon Build: WIrebug Wrangler to increase the time you can keep a wirebug, giving access to more Ready Stance |
|
Element Attack Lv.5
Critical Eye Lv.6 | Attack Boost Lv.4 Critical Boost Lv.3 | Weakness Exploit Lv.3 Latent Power Lv.3 | Guard Lv.2-3 Stamina Surge Lv.3 | Rapid Morph Lv.3 Heaven-Sent Lv.3 | Dragon Conversion Lv.2 Intrepid Heart Lv.1-2 | Shock Absorber Lv.1 Normal Talisman: Burst Lv.2-3 Qurious Melding Talisman: Burst Lv.3 | Critical Element Lv.2-3 For the Fire Build: Teostra Blessing Lv.2 For the Water and Ice Build: Kushala Blessing Lv.2 For the Thunder and Dragon Build: Defiance Lv.1 |
|
Build Merits and Augments
| Weapon Augments | |
|---|---|
| Armor Augments |
Armor Augments for this build are not necessary. However, feel free to add as you please once you get comfortable with your build! Generally, you'd want to get better skills and more slots for your armor.
Replaceable skills already on the armor: ● Stamina Surge ● Latent Power (only a single point) For damage, aim for any of the following: ● Dragon Conversion (to max it out) ● Powder Mantle ● Critical Element ● Burst For comfort, aim for any of the following: ● Rapid Morph ● Guard |
| Build Merits and Notes |
|---|
| *Note: Thanks to the new Qurious Melding introduced in Title Update 5, it's now easier to acquire great-value charms. For this build, try and meld for a talisman with a Weakness Exploit Lv.3 and a Rapid Morph Lv.2. This will open up slots in the build, making it possible to max out Burst and slot in Critical Element that can increase your DPS further. However, keep in mind that this is not a requirement and the build can still work without a secondary skill on the talisman recommended above.
In Free Title Update 5, the heavenly armor of Amatsu descended from the skies. Three pieces of this armor introduced a new skill; Heaven-Sent. This skill bestows its users powers when they manage to not get caught in any attacks. At level 3, it prevents sharpness loss and allows you to recover some after switching scrolls. This is perfect for the Charge Blade's Savage Axe playstyle, which usually depletes sharpness fast. Say goodbye to sharpening and say hello to continuous spinning (slash)! Risen Crimson Glow Valstrax's armor skill, Dragon Conversion, converts elemental resistances you get from attacking with the Blue Swap Scroll to elemental damage when you switch to the Red Swap Scroll. This is a powerful skill to use with elemental builds and for weapons that are able to land hits continuously. Be sure to start fights with the Blue Swap Scroll first and switch to Red only when the elemental resistance logo appears at the top of your health bar. Also take extra care when fighting with the Red Swap Scroll as your elemental resistances will all be 0. High affinity benefits the Savage Axe playstyle greatly. For this reason, we maxed out Critical Eye, along with Critical Boost and Weakness Exploit to get critical hits in. This will quickly bring the monster's health down to zero. Before venturing out and using this playstyle, don't forget to equip Condensed Spinning Slash and Ready Stance as your Switch Skills. This is the optimal build for Savage Axe that uses the new skill from the Amatsu armor. You can get continuous hits in and stun a monster once or twice for your team, since all of the selected Charge Blades have impact phials in them. However, if you're looking for more damage, we highly suggest our Dragon Conversion Elemental Builds on the next section. |
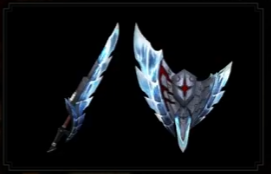
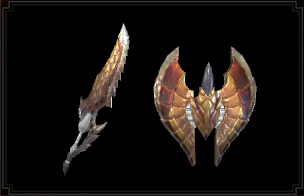
TU4 Dragon Conversion Elemental Charge Blade Builds (MR160+)
Elemental Charge Blades Selections
| Weapon | ATK | DEF | Affinity | |
|---|---|---|---|---|
 Crawling Crusher Crawling Crusher
 |
300 | 0 | 30% | |
| Element / Status |
Slots | Rampage Slots | ||
| ②①① | ② | |||
| Phial Type | Element Phial | |||
| Weapon | ATK | DEF | Affinity | |
|---|---|---|---|---|
 Armordraad Armordraad
 |
320 | 0 | 0% | |
| Element / Status |
Slots | Rampage Slots | ||
| ③①ー | ③ | |||
| Phial Type | Element Phial | |||
| Weapon | ATK | DEF | Affinity | |
|---|---|---|---|---|
 Flicker Blizzard Wail Flicker Blizzard Wail
 |
320 | 0 | 0% | |
| Element / Status |
Slots | Rampage Slots | ||
| ①①ー | ② | |||
| Phial Type | Element Phial | |||
| Weapon | ATK | DEF | Affinity | |
|---|---|---|---|---|
 Asylum Peal Asylum Peal
 |
310 | 0 | 0% | |
| Element / Status |
Slots | Rampage Slots | ||
| ーーー | ② | |||
| Phial Type | Element Phial | |||
| Weapon | ATK | DEF | Affinity | |
|---|---|---|---|---|
 Crimson Mechwing Crimson Mechwing
 |
340 | 0 | 0% | |
| Element / Status |
Slots | Rampage Slots | ||
| ③ーー | ② | |||
| Phial Type | Element Phial | |||
| Armor | Slots | Skills | |
|---|---|---|---|
|
|
④②ー | ||
|
|
④④ー | ||
|
|
④②ー | ||
|
|
④①① | ||
|
|
④ーー | ||
| Talisman | Rapid Morph 2 with ②① slot | ||
| Rampage Decoration |
|
||
| Decorations |
Hard Element Jewel+ 4 x1
Element Jewel 1 x1 For Fire, Water, and Dragon Build: For Fire Build: For Water and Ice Charge Blade: For Fire, Ice, Thunder, and Dragon Build: |
||
| Skills | |
|---|---|
| Rampage Skill | Element Exploit to increase elemental damage against monsters weak to each element |
|
Element Attack Lv.5
Guard Lv.4 (Lv.5 for the Fire, Water, and Dragon Build) Attack Boost Lv.4 | Weakness Exploit Lv.3 Stamina Surge Lv.3 | Offensive Guard Lv.3 Dragon Resistance Lv.3 | Flinch Free Lv.3 Rapid Morph Lv.3 | Element Exploit Lv.3 Dragon Conversion Lv.3 | Latent Power Lv.2 Loadshells Lv.2 | Intrepid Heart Lv.2 Razor Sharp Lv.2 | Spare Shot Lv.2 For Fire Charge Blade Build: Teostra Blessing Lv.2 For Water and Ice Charge Blade Build: Kushala Blessing Lv.2 For Fire, Ice, Thunder, and Dragon Charge Blade Build: Spiribird's Call Lv.1 |
|
Build Merits and Augments
| Weapon Augments | For Fire, Ice, Thunder, and Dragon Charge Blades |
|---|---|
| For the Water Charge Blade | |
| Armor Augments |
Armor Augments for this build are not necessary. However, feel free to add as you please once you get comfortable with your build! Generally, you'd want to get better skills and more slots for your armor.
For damage, aim for any of the following: ● Furious ● Powder Mantle ● Critical Element ● Burst For comfort, aim for any of the following: ● Wind Mantle ● Guard |
| Build Merits and Notes |
|---|
| Risen Crimson Glow Valstrax's armor introduced a new skill called Dragon Conversion. This skill converts elemental resistances you get from attacking with the Blue Swap Scroll to elemental damage when you switch to the Red Swap Scroll. This is a powerful skill to use with elemental builds and for weapons that are able to land hits continuosly. Be sure to start fights with this build with the Blue Swap Scroll first and switch to Red only when the elemental resistance logo appears at the top of your health bar. Also take extra care when fighting with the Red Swap Scroll as your elemental resistances will all be 0.
To build up the elemental resistance you get from attacking with the Blue Swap Scroll, it is important to get your combos or elemental discharge in without getting interrupted. Proper positioning and guarding can help with this, but to ensure that you do your combos consecutively, we maxed out the Intrepid Heart skill just in case an unexpected move delays your resistance buildup. For weapon choice, Charge Blades with the highest possible elemental values and an element phial type were chosen to take advantage of the power given by the Dragon Conversion skill. To further increase this damage, we maxed out the Element Exploit skill and, thanks to Weapon Augments, slotted in the Elembane as a Rampage Decoration. This will ensure a quick hunt against monsters weak to a specific element. |
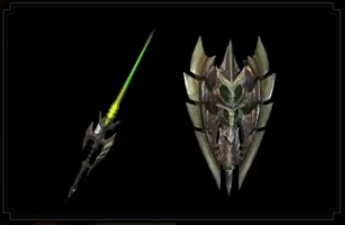
Powder Mantle Elemental AED Build (TU3)
Fire Charge Blade Powder Mantle Build
| Weapon | ATK | DEF | Affinity | |
|---|---|---|---|---|
|
Crawling Crusher
|
300 | 0 | 30% | |
| Element / Status |
Slots | Rampage Slots | ||
| ②①① | ② | |||
| Phial Type | Element Phial | |||
| Armor | Slots | Skills | |
|---|---|---|---|
|
|
③②ー | ||
|
|
④③① | ||
|
|
④②ー |
Burst Lv. 2
Wind Mantle Lv. 1
|
|
|
|
④③ー | ||
|
|
④ーー | ||
| Talisman | Attack Boost Lv.3, with a ②① slot | ||
| Rampage Decoration |
|
||
| Decorations |
|
||
| Skills | |
|---|---|
|
Attack Boost Lv.7 | Fire Attack Lv.5
Guard Lv.4 | Weakness Exploit Lv.3 Powder Mantle Lv.2 | Offensive Guard Lv.3 Flinch Free Lv.3 | Rapid Morph Lv.3 Burst Lv. 2 | Load Shells Lv.2 Master's Touch Lv.2 | Element Exploit Lv.2 Teostra Blessing Lv.2 | Wind Mantle Lv.1 Critical Eye Lv.2 | Critical Element Lv.1 Ballistics Lv.2 |
Build Merits and Augments
| Weapon Augments | |
|---|---|
| Armor Augments |
Armor Augments for this build are not necessary. However, feel free to add as you please once you get comfortable with your build! Generally, you'd want to get better skills and more slots for your armor.
Replaceable skills already on the armor: ● Ballistics For damage, aim for any of the following: ● Powder Mantle ● Burst For comfort, aim for any of the following: ● Wind Mantle ● Guard |
| Build Merits and Notes |
|---|
| Element Super Amped Elemental Discharge (AED) is still the king of damage. We choose the Crawling Crusher Charge Blade, as it still has the highest fire element value amongst all of the Charge Blades. Naturally, we're going for Lv.5 Element Boost for our weapon augment.
To increase the damage further, we slot in two Flamescale Jewels for the extra 10% Fire Attack from the Teostra Blessing skill. Powder Mantle's additional blast damage complements the AED playstyle, as phial discharge counts as hits needed to build up the skill. Firing of an AED will boost you damage, which can, potentially,speed up the hunt! |
Water and Ice Powder Mantle Charge Blade Build
| Weapon | ATK | DEF | Affinity | |
|---|---|---|---|---|
|
Armordraad
|
320 | 0 | 0% | |
| Element / Status |
Slots | Rampage Slots | ||
| ③①ー | ③ | |||
| Phial Type | Element Phial | |||
| Weapon | ATK | DEF | Affinity | |
|---|---|---|---|---|
|
Flicker Blizzard Wail
|
320 | 0 | 0% | |
| Element / Status |
Slots | Rampage Slots | ||
| ①①ー | ② | |||
| Phial Type | Element Phial | |||
| Armor | Slots | Skills | |
|---|---|---|---|
|
|
③②ー | ||
|
|
④③① | ||
|
|
④②ー |
Burst Lv. 2
Wind Mantle Lv. 1
|
|
|
|
④③ー | ||
|
|
④ーー | ||
| Talisman | Attack Boost Lv.3, with a ② slot | ||
| Rampage Decoration |
|
||
| Decorations |
Hard Element Jewel+ 4 x 1
Element Jewel 1 x 1 |
||
| Skills | |
|---|---|
|
Attack Boost Lv.6 | Element Attack Lv.5
Guard Lv.4 | Weakness Exploit Lv.3 Powder Mantle Lv.2 | Offensive Guard Lv.3 Flinch Free Lv.3 | Rapid Morph Lv.3 Burst Lv. 2 | Load Shells Lv.2 Master's Touch Lv.2 | Element Exploit Lv.1 Kushala Blessing Lv.2 | Wind Mantle Lv.1 Critical Eye Lv.2 | Critical Element Lv.1 Ballistics Lv.2 | Fire Attack Lv.3 |
Build Merits and Augments
| Weapon Augments | |
|---|---|
| Armor Augments |
Armor Augments for this build are not necessary. However, feel free to add as you please once you get comfortable with your build! Generally, you'd want to get better skills and more slots for your armor.
Replaceable skills already on the armor: ● Ballistics For damage, aim for any of the following: ● Powder Mantle ● Burst For comfort, aim for any of the following: ● Wind Mantle ● Guard |
| Build Merits and Notes |
|---|
| Element AED is still the king of damage. For the Water Charge Blade, we chose the Armordraad, and for the Ice Charge Blade, we chose the Flickering Blizzard Wail. These two Charge Blades have the highest elemental value in their respective elements and will surely pack a punch!. Naturally, we're going for Lv.5 Element Boost for our weapon augment.
To increase the damage further, we slot in two Ironshell Jewels for the extra 10% Water and Ice Attack from the Kushala Blessing skill. Powder Mantle's additional blast damage complements the AED playstyle, as phial discharge counts as hits needed to build up the skill. Firing of an AED will boost you damage, which can, potentially,speed up the hunt! |
Thunder and Dragon Powder Mantle Charge Blade Build
| Weapon | ATK | DEF | Affinity | |
|---|---|---|---|---|
|
Asylum Peal
|
310 | 0 | 0% | |
| Element / Status |
Slots | Rampage Slots | ||
| ーーー | ② | |||
| Phial Type | Element Phial | |||
| Weapon | ATK | DEF | Affinity | |
|---|---|---|---|---|
|
Crimson Mechwing
|
340 | 0 | 0% | |
| Element / Status |
Slots | Rampage Slots | ||
| ③ーー | ② | |||
| Phial Type | Element Phial | |||
| Armor | Slots | Skills | |
|---|---|---|---|
|
|
③②ー | ||
|
|
④③① | ||
|
|
④②ー |
Burst Lv. 2
Wind Mantle Lv. 1
|
|
|
|
④③ー | ||
|
|
④ーー | ||
| Talisman | Attack Boost Lv.3, with a ② slot | ||
| Rampage Decoration |
|
||
| Decorations |
Hard Element Jewel+ 4 x 1
Element Jewel 1 x 1 |
||
| Skills | |
|---|---|
|
Element Attack Lv.5 | Attack Boost Lv.4
Guard Lv.4 | Weakness Exploit Lv.3 Powder Mantle Lv.2 | Offensive Guard Lv.3 Flinch Free Lv.3 | Rapid Morph Lv.3 Element Exploit Lv.3 | Load Shells Lv.2 Burst Lv. 2 | Master's Touch Lv.2 Fire Attack Lv.3 | Wind Mantle Lv.1 Critical Eye Lv.2 | Critical Element Lv.1 Ballistics Lv.2 |
Build Merits and Augments
| Weapon Augments | |
|---|---|
| Armor Augments |
Armor Augments for this build are not necessary. However, feel free to add as you please once you get comfortable with your build! Generally, you'd want to get better skills and more slots for your armor.
Replaceable skills already on the armor: ● Ballistics For damage, aim for any of the following: ● Powder Mantle ● Burst For comfort, aim for any of the following: ● Wind Mantle ● Guard |
| Build Merits |
|---|
| Element AED is still the king of damage. For the Thunder Charge Blade, we chose the Asylum Peal, and for the Dragon Charge Blade, we chose the Crimson Mechwing. These two Charge Blades have the highest elemental value in their respective elements and will surely pack a punch! Naturally, we're going for Lv.5 Element Boost for our weapon augment.
Powder Mantle's additional blast damage complements the AED playstyle, as phial discharge counts as hits needed to build up the skill. Firing of an AED will boost you damage, which can, potentially,speed up the hunt! |
Mail of Hellfire Chaotic Gore Magala Impact Phial Build (TU3)
| Weapon | ATK | DEF | Affinity | |
|---|---|---|---|---|
 Friede/Désastre Friede/Désastre
 |
340 | 0 | -30% / 15% | |
| Element / Status |
Slots | Rampage Slots | ||
| ③①ー | ② | |||
| Phial Type | Impact Phial | |||
| Armor | Slots | Skills | |
|---|---|---|---|
|
|
③ーー |
Coalescence Lv. 2
Bloodlust Lv. 1
|
|
|
|
③②ー | ||
|
|
④②ー |
Burst Lv. 2
Wind Mantle Lv. 1
|
|
|
|
④②① |
Mail of Hellfire Lv. 1
Coalescence Lv. 1
|
|
|
|
④ーー | ||
| Talisman | Attack Boost Lv.3, with a ②① slot | ||
| Rampage Decoration |
|
||
| Decorations |
|
||
| Skills | |
|---|---|
|
Attack Boost Lv.4 | Guard Lv.4
Weakness Exploit Lv.3 | Offensive Guard Lv.3 Artillery Lv.3 | Rapid Morph Lv.3 Flinch Free Lv.3 | Load Shells Lv.2 Coalescence Lv.3 | Bloodlust Lv.1 Burst Lv. 3 | Mail of Hellfire Lv.1 Resentment Lv. 1 | Defiance Lv.3 Wind Mantle Lv.1 |
Build Merits and Augments
| Weapon Augments | |
|---|---|
| Armor Augments |
Armor Augments for this build are not necessary. However, feel free to add as you please once you get comfortable with your build! Generally, you'd want to get better skills and more slots for your armor.
For damage, aim for any of the following: ● Powder Mantle ● Mail of Hellfire For comfort, aim for any of the following: ● Wind Mantle ● Guard |
| Build Merits |
|---|
| Bloodlust is crucial in this build as it utilizes the unique mechanic present in all Chaotic Gore Magala Weapons; overcoming the Frenzy virus will turn the weapons' afiinity from negative to positive. With that in mind, it is important to be aggressive as possible while using this build. Overcoming the Frenzy virus will also activate Coalescence for an added boost in damage.
We equipped this build with the Mail of Hellfire for an extra boost in damage. You would mainly stay at the Red Swap Scroll, since this build focuses primarily on raw damage. However, it will also decrease your armor this way, so one point of this skill is enough. |
Endgame MR Build: MR 6+
Elemental AED Climber
Fire Elemental Charge Blade
| Weapon | ATK | DEF | Affinity | |
|---|---|---|---|---|
|
Crawling Crusher
|
300 | 0 | 30% | |
| Element / Status |
Slots | Rampage Slots | ||
| ②①① | ② | |||
| Phial Type | Element Phial | |||
| Weapon Augments | |
|---|---|
| Decorations |
|
Water Elemental Charge Blade
| Weapon | ATK | DEF | Affinity | |
|---|---|---|---|---|
|
Armordraad
|
320 | 0 | 0% | |
| Element / Status |
Slots | Rampage Slots | ||
| ③①ー | ③ | |||
| Phial Type | Element Phial | |||
| Weapon Augments | |
|---|---|
| Decorations |
|
Ice Elemental Charge Blade
| Weapon | ATK | DEF | Affinity | |
|---|---|---|---|---|
|
Flicker Blizzard Wail
|
320 | 0 | 0% | |
| Element / Status |
Slots | Rampage Slots | ||
| ①①ー | ② | |||
| Phial Type | Element Phial | |||
| Weapon Augments | |
|---|---|
| Decorations |
|
Thunder Elemental Charge Blade
| Weapon | ATK | DEF | Affinity | |
|---|---|---|---|---|
|
Asylum Peal
|
310 | 0 | 0% | |
| Element / Status |
Slots | Rampage Slots | ||
| ーーー | ② | |||
| Phial Type | Element Phial | |||
| Weapon Augments | |
|---|---|
| Decorations |
|
Dragon Elemental Charge Blades
| Weapon | ATK | DEF | Affinity | |
|---|---|---|---|---|
|
Crimson Mechwing
|
340 | 0 | 0% | |
| Element / Status |
Slots | Rampage Slots | ||
| ③ーー | ② | |||
| Phial Type | Element Phial | |||
| Weapon | ATK | DEF | Affinity | |
|---|---|---|---|---|
 Draquila Reaver+ Draquila Reaver+
 |
330 | 0 | -5% | |
| Element / Status |
Slots | Rampage Slots | ||
| ②①① | ③ | |||
| Phial Type | Element Phial | |||
| Weapon Augments | |
|---|---|
| Decorations |
|
Elemental AED Climber Armor Setup
| Armor | Slots | Skills | |
|---|---|---|---|
|
|
④①ー | ||
|
|
④③① | ||
|
|
②②ー | ||
|
|
④ーー |
Weakness Exploit Lv. 1
Burst Lv. 2
|
|
|
|
④ーー | ||
| Talisman | Attack Boost 3 with ②① slots or better | ||
| Rampage Decoration | |||
| Skills | |
|---|---|
| Rampage Skill | Defense Grinder II or Element Exploit |
Element Attack Lv.5
| Guard Lv.5
Attack Boost Lv.4 | Defiance Lv.3-Lv.5 Offensive Guard Lv.3 | Rapid Morph Lv.3 Weakness Exploit Lv.3 | Burst Lv.3 Flinch Free Lv.3 | Guard Up Lv.1-Lv.3 Load Shells Lv.2 | Agitator Lv.2 Defense Boost Lv.1 | Spread Up Lv.1 Element Exploit Lv.1 | Critical Element Lv.1 |
|
Build Merits and Augments
| Armor Augments |
Armor Augments for this build are not necessary. However, feel free to add as you please once you get comfortable with your build! Generally, you'd want to get better skills and more slots for your armor.
Replaceable skills already on the armor: For damage, aim for any of the following: ● Kushala Blessing ● Teostra Blessing For comfort, aim for any of the following: ● Wind Mantle |
|---|
| Build Merits and Notes |
|---|
| Elemental damage becomes more important for the Charge Blade in Sunbreak's endgame, as several options open up to amplify damage significantly over their Impact Phial counterparts. Defensive skills like Guard, Guard Up, and Defiance, are included to ensure counters don't cause knockback and that your AEDs are uninterrupted by roars and wind. Embolden may also be added or used in place of Guard, especially when solo, to reduce knockback against stronger attacks.
This build can be a great start as you grind up MR and anomaly research level, as the armor and decorations only require MR 10 to craft. The weapons suggested are the same as the ultra endgame sets, and should mostly be available by MR 50. Only the Crimson Mechwing unlocks at MR 70, but the Draquila Reaver+ may be used in the meantime. |
Elemental Savage Axe Climber
Fire Elemental Charge Blade
| Weapon | ATK | DEF | Affinity | |
|---|---|---|---|---|
|
Flamlion Blade
|
320 | 0 | 0% | |
| Element / Status |
Slots | Rampage Slots | ||
| ②ーー | ③ | |||
| Phial Type | Impact Phial | |||
| Weapon Augments | |
|---|---|
| Decorations |
|
Water Elemental Charge Blade
| Weapon | ATK | DEF | Affinity | |
|---|---|---|---|---|
|
Divine Fieldblade+
|
310 | 0 | 20% | |
| Element / Status |
Slots | Rampage Slots | ||
| ①ーー | ② | |||
| Phial Type | Impact Phial | |||
| Weapon Augments | |
|---|---|
| Decorations |
|
Ice Elemental Charge Blade
| Weapon | ATK | DEF | Affinity | |
|---|---|---|---|---|
 Gluttonous Glacier Gluttonous Glacier
 |
330 | 0 | 0% | |
| Element / Status |
Slots | Rampage Slots | ||
| ①①ー | ② | |||
| Phial Type | Impact Phial | |||
| Weapon Augments | |
|---|---|
| Decorations |
|
Thunder Elemental Charge Blade
| Weapon | ATK | DEF | Affinity | |
|---|---|---|---|---|
 Amagarex Blade+ Amagarex Blade+
 |
310 | 0 | 30% | |
| Element / Status |
Slots | Rampage Slots | ||
| ①ーー | ② | |||
| Phial Type | Impact Phial | |||
| Weapon Augments | |
|---|---|
| Decorations |
|
Dragon Elemental Charge Blade
| Weapon | ATK | DEF | Affinity | |
|---|---|---|---|---|
|
Friede/Désastre
|
340 | 0 | -30% / 15% | |
| Element / Status |
Slots | Rampage Slots | ||
| ③①ー | ② | |||
| Phial Type | Impact Phial | |||
| Weapon Augments | |
|---|---|
| Decorations |
|
Elemental Savage Axe Climber Armor Setup
| Armor | Slots | Skills | |
|---|---|---|---|
|
|
②②ー |
Critical Eye Lv. 2
Wirebug Whisperer Lv. 1
|
|
|
|
③①ー | ||
|
|
④②ー | ||
|
|
④ーー |
Weakness Exploit Lv. 1
Burst Lv. 2
|
|
|
|
③②ー | ||
| Talisman | Attack Boost Lv.3 with ②① slots or better | ||
| Rampage Decoration |
|
||
| Skills | |
|---|---|
| Rampage Skill | Swap between Wyvern Exploit, Anti-Aerial Species, Anti-Aquatic Species, or Fanged Exploit depending on the monster. |
Element Attack Lv.5
| Critical Eye Lv.4
Attack Boost Lv.4 | Burst Lv.3 Wirebug Whisperer Lv.3 | Critical Boost Lv.3 Razor Sharp Lv.3 | Spare Shot Lv.3 Guard Lv.3 | Speed Sharpening Lv.2-Lv.3 Weakness Exploit Lv.1-Lv.3 | Strife Lv.1 Intrepid Heart Lv.1 | Bloodlust Lv.1 Handicraft Lv.1-Lv.3 (Except Ice) Maximum Might Lv.1 (Ice Only) |
|
Build Merits and Augments
| Armor Augments |
Armor Augments for this build are not necessary. However, feel free to add as you please once you get comfortable with your build! Generally, you'd want to get better skills and more slots for your armor.
Replaceable skills already on the armor: For damage, aim for any of the following: ● Coalescence ● Powder Mantle ● Teostra Blessing For comfort, aim for any of the following: ● Blood Rite |
|---|
| Build Merits and Notes |
|---|
| While using Element Phial Charge Blades is the way to go for maximum DPS, the Condensed Spinning Slash (CSS) or Savage Axe can still be viable, especially if you can target weakpoints consistently. Impact Phials are still recommended for CSS, as stunning monsters remains useful in the endgame.
This build mostly only requires parts from monsters unlocked at MR 10, and it can be used to grind for better materials from higher-level Anomaly Investigations or Risen Elder Dragons later on. The Rare 9 versions of the weapons may be used while Afflicted Claws are unavailable. While the Handicraft Jewel+ 4 is not yet available, the Handicraft Jewel 3 can be used with a level of Sharpness Augment in the meantime. The Chaotic Gore Charge Blade can actually be used as a raw alternative when replacing the elemental boosts with an Attack Augment and Attack Boost Lv.7. The Dragon Attack decorations can be replaced with 3x Attack Jewel 2 and an Ironwall Jewel+ 3. As the playstyle requires staying in Axe Mode, equipping Ready Stance with Guard levels makes sure knockback is reduced. This also allows for guarding when necessary while being able to maintain CSS. Intrepid Heart works well for extra safety since it charges quickly with spinning attacks. |
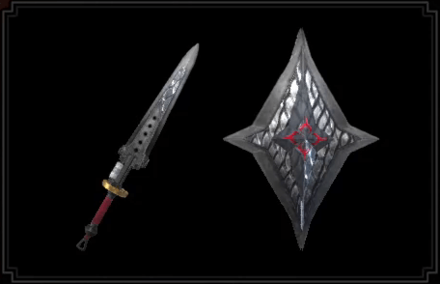
Lucent Raw Balanced Blader
| Weapon | ATK | DEF | Affinity | |
|---|---|---|---|---|
 Nunki's Asterism Nunki's Asterism
 |
340 | 0 | 0% | |
| Element / Status |
Slots | Rampage Slots | ||
| ④②ー | ① | |||
| Phial Type | Impact Phial | |||
| Armor | Slots | Skills | |
|---|---|---|---|
|
|
④②① |
Stun Resistance Lv. 2
Burst Lv. 1
|
|
|
|
③②ー | ||
|
|
④②① | ||
|
|
②ーー | ||
|
|
④①① | ||
| Talisman | Attack Boost Lv.3 | ||
| Rampage Decoration | |||
| Decoration | |||
| Skills | |
|---|---|
| Rampage Skill | Defense Grinder I |
Attack Boost Lv.7
| Critical Boost Lv.3 Weakness Exploit Lv.3 | Protective Polish Lv.3 Artillery Lv.3 | Windproof Lv.3 Speed Sharpening Lv.3 | Rapid Morph Lv.3 Burst Lv.3 | Load Shells Lv.2 Blight Resistance Lv.2 | Stun Resistance Lv.2 Peak Performance Lv.1 | Resentment Lv.1 Flinch Free Lv.1 |
|
Build Merits and Augments
| Weapon Augments |
|---|
| Build Merits and Notes |
|---|
| Free Title Update 1 gave us the opportunity to pack Savage Axe and Ultra Discharge playstyles into well-rounded package! Phial damage is maximized through Attack Boost and Artillery, while the sword and axe swings are bolstered through Weakness Exploit, Critical Boost, and Burst. QoL staples are present to provide maximum comfort as well.
For Qurious Crafting choices, we recommend Attack Boost or Rampage Slot Upgrade. The latter allows you to slide in Wyvern or Fanged Exploit for more damage depending on the target, while the former is a less potent, but universal improvement. |
TU2 Critical Savage Axe Climber
| Weapon | ATK | DEF | Affinity | |
|---|---|---|---|---|
 Pure Axe Omonshiro Pure Axe Omonshiro
 |
320 | 0 | 10% | |
| Element / Status |
Slots | Rampage Slots | ||
| ②②② | ① | |||
| Phial Type | Impact Phial | |||
| Armor | Slots | Skills | |
|---|---|---|---|
|
|
①①① |
Critical Eye Lv. 3
Critical Boost Lv. 1
|
|
|
|
③②ー | ||
|
|
④ーー | ||
|
|
④ーー |
Weakness Exploit Lv. 1
Burst Lv. 2
|
|
|
|
③②ー | ||
| Talisman | Attack Boost Lv.3 with one ② slot | ||
| Rampage Decoration | |||
| Decoration | |||
| Skills | |
|---|---|
| Rampage Skill | Swap between Wyvern Exploit, Anti-Aerial Species, Anti-Aquatic Species, or Fanged Exploit depending on the monster. |
Attack Boost Lv.7 | Critical Eye Lv.4 Critical Boost Lv.3 | Weakness Exploit Lv.3 Burst Lv.3 | Speed Sharpening Lv.3 Master's Touch Lv.3 | Rapid Morph Lv.3 Resentment Lv.1 | Wirebug Whisperer Lv.1 Blight Resistance Lv.1 | Bloodlust Lv.1 Razor Sharp Lv.1 | Spare Shot Lv.1 |
|
Build Merits and Augments
| Weapon Augments |
|---|
| Build Merits and Notes |
|---|
| The Pure Axe Omonshiro replaces the Fine Kamura Charge Blade for our Savage Axe (Condensed Spinning Slash) climber build thanks to its longer purple sharpness and three Lv.2 slots that allow us to finally hit 100% affinity on weakpoints. Damage across the board is improved via Attack Boost, Critical Boost, Weakness Exploit, and Burst. You'll need to augment the weapon with a Rampage Slot Upgrade to slot in the anti-species jewels and then add an Attack Boost augment to round it out. Levels in Guard may replace Rapid Morph to use Ready Stance without heavy knockback. |
Master Rank Build (Mid Game): MR 3-6
Mid Game Ultra Element Discharger
| Weapon | ATK | DEF | Affinity | |
|---|---|---|---|---|
 Aslat Charger+ Aslat Charger+
 |
320 | 0 | 10% | |
| Element / Status |
Slots | Rampage Slots | ||
-
|
①ーー | ② | ||
| Phial Type | Impact Phial | |||
| Armor | Slots | Skills | |
|---|---|---|---|
|
|
②②ー |
Power Prolonger Lv. 1
Rapid Morph Lv. 2
|
|
|
|
②①ー | ||
|
|
②②ー | ||
|
|
②②ー | ||
|
|
②①ー | ||
| Talisman | Attack Boost Lv.3 | ||
| Rampage Decoration | |||
| Decoration |
|
||
| Skills | |
|---|---|
| Rampage Skill | Defense Grinder I |
Attack Boost Lv.7
| Protective Polish Lv.3 Power Prolonger Lv.3 | Artillery Lv.3 Rapid Morph Lv.3 | Handicraft Lv.2 Load Shells Lv.2 | Pierce Up Lv.2 Speed Sharpening Lv.2 | Razor Sharp Lv.1 Guard Lv.1 | Special Ammo Boost Lv 1 Tremor Resistance Lv.1 | Flinch Free Lv.1 |
|
| Build Merits and Notes |
|---|
| Those who prefer to use the Charge Blade's elemental discharges may opt for this mid-game build. Damaged is pumped primarily through Attack Boost and Artillery while the usual cast of QoL skills ensure that you get as many comfortable element discharges as possible.Our MR1-2 starter build CB is solid enough for farming all the parts you need, while temporarily using Nargacuga's Howl in the Rain. Just make sure to upgrade their defense levels whenever possible! |
Mid Game Savage Axe Mode
| Weapon | ATK | DEF | Affinity | |
|---|---|---|---|---|
|
Aslat Charger+
|
320 | 0 | 10% | |
| Element / Status |
Slots | Rampage Slots | ||
-
|
①ーー | ② | ||
| Phial Type | Impact Phial | |||
| Armor | Slots | Skills | |
|---|---|---|---|
|
|
②②ー |
Power Prolonger Lv. 1
Rapid Morph Lv. 2
|
|
|
|
②①ー | ||
|
|
②ーー |
Attack Boost Lv. 2
Earplugs Lv. 2
|
|
|
|
④①① |
Attack Boost Lv. 2
|
|
|
|
②①ー | ||
| Talisman | Weakness Exploit Lv.2 | ||
| Rampage Decoration | |||
| Decoration | |||
| Skills | |
|---|---|
| Rampage Skill | Defense Grinder I |
Attack Boost Lv.5
| Critical Boost Lv.3 Weakness Exploit Lv.3 | Protective Polish Lv.3 Rapid Morph Lv.3 | Speed Sharpening Lv.3 Handicraft Lv. 2 | Pierce Up Lv.2 Earplugs Lv.2 | Flinch Free Lv.2 Power Prolonger Lv.1 | Tremor Resistance Lv.1 |
|
| Build Merits and Notes |
|---|
| Those who prefer to use the Charge Blade's Savage Axe Mode may opt for this mid-game build instead! Damage is bolstered through Attack Boost, Critical Boost, and Weakness Exploit while Speed Sharpening and Protective Polish help you maintain Aslat Charger+'s improved sharpness. Similar to our discharge build, you can use our MR1-2 starter build to get all the parts you need, while temporarily using Nargacuga's Howl in the Rain. |
Master Rank Build (Early Game): MR 1-2
Starting Balanced Impact Build
| Weapon | ATK | DEF | Affinity | |
|---|---|---|---|---|
 Kamura Warrior C. Blade Kamura Warrior C. Blade
 |
250 | - | 0% | |
| Element / Status |
Slots | Rampage Slots | ||
-
|
④①ー | ② | ||
| Phial Type | Impact Phial | |||
| Armor | Slots | Skills | |
|---|---|---|---|
|
|
②ーー |
Attack Boost Lv. 2
Item Prolonger Lv. 1
|
|
|
|
①ーー | ||
|
|
②②ー | ||
|
|
④①① |
Attack Boost Lv. 2
|
|
|
|
①ーー |
Evade Extender Lv. 2
Rapid Morph Lv. 2
|
|
| Talisman | Attack Boost Lv. 3; no slots required | ||
| Rampage Decoration | |||
| Decoration |
|
||
| Skills | |
|---|---|
Attack Boost Lv.7
| Weakness Exploit Lv. 3 Guard Lv.3 | Artillery Lv.3 Rapid Morph Lv.3 | Speed Sharpening Lv.3 Load Shells Lv.2 | Evade Extender Lv.2 Flinch Free Lv. 2 | Special Ammo Boost Lv. 1 Normal/Rapid Up Lv. 1 | Ammo Up Lv. 1 Item Prolonger Lv. 1 |
| Build Merits and Notes |
|---|
| This early game build combines both of our endgame High Rank CB builds into one package! Start off strong by maximizing the Charge Blade's strongest aspects: Savage Axe Mode and Ultra Element Discharges. Damage for both of these are improved through Attack Boost and Artillery respectively. This build also hosts Guard, Speed Sharpening, Evade Extender, and Load Shells as well — making your early hunts in Sunbreak relatively comfortable. |
Best Skills for Charge Blade
Best Damage Skills
These skills make it possible to deal extra damage! Aim for these skills for maximum DPS to defeat those monsters easier and finish those quests faster!
Main Damage Skills
| Best Skills | Explanation |
|---|---|
| Weakness Exploit ★★★ |
A staple skill for any meta builds. Use this skill to increase your DPS with your sword attacks, especially in between AEDs. |
| Element Attack ★★★ |
Sunbreak featured buffs for elemental damage, making elemental builds viable. Max out this skill to increase damage for Charge Blades with Element Phials! Fire | Water | Ice | Thunder | Dragon |
| Burst ★★★ |
Activate this skill with ease with both the Charge Blades AED and Savage Axe attacks, improving overall DPS. Available in Sunbreak Base Game |
| Element Exploit ★★ |
Amplify your elemental AED and Savage Axe hits with this skill. A single point of it is enough to deal significant damage. Available in Sunbreak Free Title Update 1 |
| Dragon Conversion ★★ |
When activated, this skill from the Risen Crimson Glow Valstrax Armor will benefit elemental builds, increasing DPS even further! Available in Sunbreak Free Title Update 4 |
| Powder Mantle ★★ |
This skill from the Risen Teostra Armor provides the Charge Blade with additional blast damage every time it activates, contributing greatly to DPS. Available in Sunbreak Free Title Update 3 |
| Dereliction ★★ |
Using the Red Scroll increases the Charge Blade's elemental values while using the Blue Scroll increases both attack and stun potency, improving overall damage. Just be wary of your health! Available in Sunbreak Base Game |
AED Charge Blade Playstyle
| Best Skills | Explanation |
|---|---|
| Attack Boost ★★★ |
Focus on maxing out this skill when using an Impact AED build. |
| Offensive Guard ★★★ |
Doing moves such as the Guard Point or Counter Peak Performance activates this skill, increasing your damage values. Be sure to max it out! |
| Artillery ★★ |
Improves phial hits for Impact Phial builds. |
| Slugger ★ |
Improves stun rate. Useful for solo play due to the lower enemy ailment resistance. Also useful for multiplayer to give the team openings to deal damage. Only viable with Impact AED Builds. |
| Partbreaker ★ |
Easily break monster parts with the AED's reach. |
Savage Axe Charge Blade Playstyle
| Best Skills | Explanation |
|---|---|
| Critical Eye ★★★ |
With the Savage Axe playstyle, this skill will provide more DPS the higher its level. Always aim for 80-100% affinity to amplify base damage efficiently! |
| Critical Boost ★★★ |
Further amplifies critical hit damage. Make sure to have high affinity first before equipping! |
| Attack Boost ★★ |
For the Savage Axe playstyle, 4 levels of this skill is more than enough. |
| Offensive Guard ★★ |
Get a boost in your DPS after blocking with Ready Stance. Only slot this if you can. |
| Critical Element ★★ |
Increases elemental attacks whenever you land critical hits. |
| Maximum Might ★ |
Doing Savage Axe combos won't consume stamina; with this skill, you can get up to 30% affinity whenever it's activated. |
| Bloodlust ★ |
Overcome the Frenzy Virus to power up with this skill; best paired with Coalescence. Available in Sunbreak Base Game |
Best Comfort Skills
These are skills that make managing weapon mechanics a lot easier. Damage is only part of the equation - taking time to slot in comfort skills that increase consistency & comfort will also increase overall DPS!
| Best Skills | Explanation |
|---|---|
| Rapid Morph ★★★ |
A Charge Blade's best friend. Rapid Morph is still an amazing skill for Charge Blade builds as it makes the transitions between its two forms as seamless as possible. The damage increase for its morphing attacks further improves its value. |
| Load Shells ★★★ |
Get your Charge Blade into full potential as soon as possible with this skill, decreasing the time it takes to fill all your bottles! |
| Guard ★★★ |
This skill decreases the impact and stamina consumption upon guarding a strong attack with Guard Point or Ready Stance, making it easier to get back into your combos! |
| Protective Polish or Master's Touch ★★★ |
Be sure to consider these skills for the Savage Axe Playstyle, which can eat up sharpness fast! |
| Guard Up ★★ |
Lets you guard normally unguardable attacks. A single point of this skill is enough for most fights. |
| Defiance ★★ |
Three levels of this skill prevent most roars, tremors, and winds from interrupting your charged attacks. The Cornerstone Jewel is a level 1 decoration, so slot it in whenever possible! Available in Sunbreak Free Title Update 1 |
| Wind Mantle ★★ |
This skill from the Risen Kushala Armor will recharge your Wirebugs faster after a Counter Peak Performance or Ready Stance. Available in Sunbreak Free Title Update 3 |
| Flinch Free ★★ |
Useful especially in multiplayer where minor attacks can interrupt your attacks, especially when trying to fill your bottles! |
| Speed Sharpening ★ |
Reduces a cycle for sharpening with each level. Useful for getting your sharpness level up mid-fight. |
| Handicraft ★ |
Increases sharpness. Be sure to consider this skill for the Savage Axe Playstyle |
| Intrepid Heart ★ |
Whenever the gauge above your health bar is full, this skill can be useful in preventing monster attacks from interrupting your combos, making it possible to pull off an extra charged attack before you can regroup. Available in Sunbreak Free Title Update 2 |
Monster Hunter Rise Related Links

|
• Weapons marked withNEW have been updated. • Weapons withUP have been reviewed and does not warrant an updated build from the Bonus Update. |
| All Weapon Build Guides | |
|---|---|
NEW Low Rank | High Rank Master Rank |
NEW Low Rank | High Rank Master Rank |
NEW Low Rank | High Rank Master Rank |
NEW Low Rank | High Rank Master Rank |
NEW Low Rank | High Rank Master Rank |
NEW Low Rank | High Rank Master Rank |
NEW Low Rank | High Rank Master Rank |
NEW Low Rank | High Rank Master Rank |
NEW Low Rank | High Rank Master Rank |
NEW Low Rank | High Rank Master Rank |
NEW Low Rank | High Rank Master Rank |
NEW Low Rank | High Rank Master Rank |
NEW Low Rank | High Rank Master Rank |
UP Low Rank | High Rank Master Rank |
Other Builds
| Other Build Guides | |
|---|---|
| General High Rank Builds and Best Equipment | Buddy Equipment Builds Palico | Palamute |
Comment
12  Anonymous over 1 year
this question may be a dumb question but is the part that says "for higher overall DPS, we recommend the Dragon Conversion build" referring to the dragon conversion + heaven sent build, or the pure dragon conversion build?
Author

Sunbreak Charge Blade Builds (Master Rank)
Please participate in our site
improvement survey
03/2026
improvement survey
03/2026
Would you assist in
improving Game8's site?
improving Game8's site?

×
We are listening to our users' valuable opinions and discussing how to act on them.
The information collected through this survey will be used for the purpose of improving our services. In addition, the information will only be disclosed a part of a statistic in a format that will not allow identification of personal information.
Begin Survey
Not Now
×
Please rate each item regarding Game8.co's Advertisements.
Amount of Ads
Very Dissatisfied
Somewhat Dissatisfied
Fine
Somewhat Satisfied
Highly Satisfied
Placement of Ads
Timing of Ad Display
Ad Loading Speed
Safeness of Ads
Content of Ads
×
Please rate each item regarding Game8.co's Quality of Articles.
Amount of information
Very Dissatisfied
Somewhat Dissatisfied
Fine
Somewhat Satisfied
Highly Satisfied
Frequency of updates
Speed of new information
Accuracy of articles
Understandibility of articles
Readability of sentences
×
Please rate each item regarding Game8.co's Usability of the Site.
Ease of finding information
Very Dissatisfied
Somewhat Dissatisfied
Fine
Somewhat Satisfied
Highly Satisfied
Loading Speed
Use of Color
Font Size
Visibility of Images
Easy to Understand Layout
×
Please rate each item regarding Game8.co's Message Boards, Comments.
Ease of Writing
Very Dissatisfied
Somewhat Dissatisfied
Fine
Somewhat Satisfied
Highly Satisfied
Readability
Ease in Finding Information
Comment Quality
Comment Quantity
Admin Response
×
Please rate each item regarding Game8.co's Site's new design.
Please rate our site's new design
Very Dissatisfied
Somewhat Dissatisfied
Fine
Somewhat Satisfied
Highly Satisfied
Do you think that the website's design change makes the site easier to use?
Has the new design made it easier for you to find information on the site?
Has the new design improved the overall visual appeal of the site?
How would you rate your overall satisfaction with the new design of the site?
×
How likely are you to recommend Game8 to someone you know?
Very Unlikely
0
1
2
3
4
5
6
7
8
9
10
Very Likely
If you have other opinions regarding potential improvement to the website, please share them with us. We would appreciate your honest opinion.
Note: This is a free response section, so you can proceed without entering anything.
Note: Please be sure not to enter any kind of personal information into your response.
Note: Please be sure not to enter any kind of personal information into your response.
×
Thank You
×
Thank you for participating in our survey! Your answers will help us to improve the quality of our website and services.
We hope you continue to make use of Game8.
We hope you continue to make use of Game8.
Close
Rankings
- We could not find the message board you were looking for.
Gaming News


![Everwind Review [Early Access] | The Shaky First Step to A Very Long Journey](https://img.game8.co/4440226/ab079b1153298a042633dd1ef51e878e.png/thumb)

![Monster Hunter Stories 3 Review [First Impressions] | Simply Rejuvenating](https://img.game8.co/4438641/2a31b7702bd70e78ec8efd24661dacda.jpeg/thumb)
Popular Games

Genshin Impact Walkthrough & Guides Wiki
Honkai: Star Rail Walkthrough & Guides Wiki
Umamusume: Pretty Derby Walkthrough & Guides Wiki
Pokemon Pokopia Walkthrough & Guides Wiki
Resident Evil Requiem (RE9) Walkthrough & Guides Wiki
Monster Hunter Wilds Walkthrough & Guides Wiki
Wuthering Waves Walkthrough & Guides Wiki
Arknights: Endfield Walkthrough & Guides Wiki
Pokemon FireRed and LeafGreen (FRLG) Walkthrough & Guides Wiki
Pokemon TCG Pocket (PTCGP) Strategies & Guides Wiki


Recommended Games
Diablo 4: Vessel of Hatred Walkthrough & Guides Wiki
Cyberpunk 2077: Ultimate Edition Walkthrough & Guides Wiki
Fire Emblem Heroes (FEH) Walkthrough & Guides Wiki
Yu-Gi-Oh! Master Duel Walkthrough & Guides Wiki
Super Smash Bros. Ultimate Walkthrough & Guides Wiki
Pokemon Brilliant Diamond and Shining Pearl (BDSP) Walkthrough & Guides Wiki
Elden Ring Shadow of the Erdtree Walkthrough & Guides Wiki
Monster Hunter World Walkthrough & Guides Wiki
The Legend of Zelda: Tears of the Kingdom Walkthrough & Guides Wiki
Persona 3 Reload Walkthrough & Guides Wiki


All rights reserved
©CAPCOM CO., LTD. ALL RIGHTS RESERVED.
The copyrights of videos of games used in our content and other intellectual property rights belong to the provider of the game.
The contents we provide on this site were created personally by members of the Game8 editorial department.
We refuse the right to reuse or repost content taken without our permission such as data or images to other sites.
The Elemental AED Climber Build is falsely stated to be available with TU1 but the Onmyo Sashiko are only available from TU 2 onward