Sunbreak Lance Builds (Master Rank)
★ All Title Updates now available for ALL PLATFORMS!
┗ Title Update 4 | Title Update 5 | Bonus Update
┗ Check out all our Best Builds For Every Weapon!
┗ TU4 Monsters: Velkhana | Risen C.G. Valstrax
┗ TU5 Monsters: Amatsu | Risen Shagaru Magala
┗ Bonus Update Monster: Primordial Malzeno

This is a guide to the best builds and equipment for Lance in Monster Hunter Rise (MH Rise): Sunbreak. Learn about the best Lance for Master Rank, and the best Skills and Armor pieces to use with the Lance for Master Rank from the early game until the end game!
| All Lance Guides | ||
|---|---|---|
 Trees & Full List Trees & Full List |
 How to Use How to Use |
 Best Builds Best Builds |
List of Contents
Lance Builds List & Progression
This is a quick section summarizing all the Lance builds in this page. It is arranged from newest to oldest, and MR build progression is from bottom to top.
Click on the build name to see the build!
| Master Rank | Title Update | Build Name |
|---|---|---|
| MR140+ | BU | Blood Awakening Buildup Boost |
| MR160+ | TU5 | Guard Bash Lance |
| MR160+ | TU4 | Offensive Dragon Conversion Lance |
| MR160+ | TU4 | Defensive Dragon Conversion Lance |
| MR140+ | TU3 | Aggressive Powder Mantle Build |
| MR140+ | TU3 | Defensive Powder Mantle Build |
| MR110+ | TU2 | Dubhe's Asterism Buildup Boost |
| MR6+ | TU3 | Abyssal Icicle Bloodlust |
| MR6+ | TU2 | Fine Kamura Spear Climber |
| MR6+ | TU1 | Elemental Lance Builds |
| MR6+ | Base | Rooksearer Bloodlust Blast |
| MR6+ | Base | Royal Order Dereliction Raw |
| MR3-6 | Base | Great Tigrex Lance Raw |
| MR1-2 | Base | Elder Babel Spear+ All-Rounder |
Ultra Endgame Build: MR 100+
Blood Awakening Buildup Boost BU Lance
Recommended Lance
| Weapon | ATK | DEF | Affinity |
|---|---|---|---|
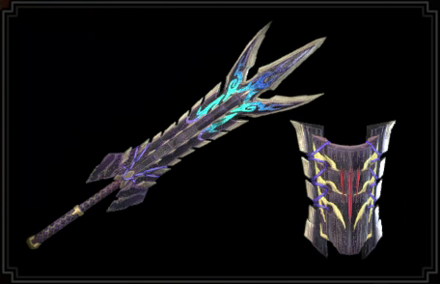 Devil's Deliverance Devil's Deliverance
 |
330 | 0 | 0% |
| Element / Status |
Slots | Rampage Slots | |
| ③②ー | ② |
| Decorations | ||
|---|---|---|
Recommended Armor Loadout
| Armor | Slots | Skills | |
|---|---|---|---|
|
|
③②ー | ||
|
|
④④② |
Burst Lv. 1
Blood Awakening Lv. 1
|
|
|
|
④④② |
Critical Boost Lv. 1
Blood Awakening Lv. 1
|
|
|
|
④③ー | ||
|
|
④④ー | ||
| Talisman | Buildup Boost 3 with a ②②② slot | ||
| Rampage Decoration |
|
||
| Skills | |
|---|---|
| Rampage Skill | Guard Bash for dealing blunt damage and stun with a regular block. This synergizes with the Guard skill. Swap between Wyvern Exploit, Anti-Aerial Species, Anti-Aquatic Species, or Fanged Exploit depending on the monster. |
|
Critical Eye Lv. 6 | Attack Boost Lv. 4
Guard Lv. 4 | Blast Attack Lv. 3 Weakness Exploit Lv. 3 | Master's Touch Lv. 3 Blood Rite Lv. 3 | Blood Awakening Lv. 3 Partbreaker Lv. 3 | Buildup Boost Lv. 3 Critical Boost Lv. 3 | Guard Up Lv. 2 Offensive Guard Lv. 2 | Ballistics Lv. 2 Powder Mantle Lv. 2 | Burst Lv. 1 |
|
Build Merits and Augments
| Weapon Augments | |
|---|---|
| Armor Augments |
Armor Augments for this build are not necessary. However, feel free to add as you please once you get comfortable with your build! Generally, you'd want to get better skills and more slots for your armor.
Replaceable skills already on the armor: ● Ballistics For damage, aim for any of the following: ● Buildup Boost (if lacking the skill) ● Offensive Guard ● Bloodlust For comfort, aim for any of the following: ● Wind Mantle ● Guard |
| Build Merits and Notes |
|---|
| Blood Awakening is a new aggressive comfort skill introduced in the Bonus Update. It pairs with Blood Rite and helps in dealing with large monsters that inflict Bloodblight.
Devil's Deliverance is the choice weapon for this build for fitting enough slots and to synergize with Buildup Boost. Teostra's Fire can serve as an alternative for more raw at the expense of weapon slots, but this can be compensated with armor augments. Master's Touch is included for sharpness management since we have high affinity. Four levels of Guard are fitted into this build for a comfortable blocking experience. Feel free to adjust this according to your preference. If you only have a Buildup Boost Lv. 2 talisman, you can still augment one more Buildup Boost skill for armor. Having Lv. 3 is recommended since you get a 20% attack power boost from landing attacks with a status weapon. Augmenting for Intrepid Heart can be helpful in case your are hit with an attack that inflicts Bloodblight to soften the blow with greatly reduced damage and knockback. Bloodlust as an augment can also prove useful since it comes with stamina reduction when under Frenzy. |
Guard Bash TU5 Lance
| Weapon | ATK | DEF | Affinity |
|---|---|---|---|
 Devil's Deliverance Devil's Deliverance
 |
330 | 0 | 0% |
| Element / Status |
Slots | Rampage Slots | |
| ③②ー | ② |
| Armor | Slots | Skills | |
|---|---|---|---|
|
|
③②ー | ||
|
|
④④① |
Critical Boost Lv. 1
Heaven-Sent Lv. 1
|
|
|
|
④④① |
Latent Power Lv. 1
Heaven-Sent Lv. 1
|
|
|
|
②②① | ||
|
|
④④ー |
Critical Boost Lv. 2
Heaven-Sent Lv. 1
|
|
| Talisman | Attack Boost 3 with ②① slot or better | ||
| Rampage Decoration | |||
| Decorations | |||
| Skills | |
|---|---|
| Rampage Skill | Guard Bash to deal stun damage while guarding. |
|
Attack Boost Lv.5 |
Agitator Lv.5
Critical Eye Lv.4 | Guard Lv. 4 Critical Boost Lv.3 | Weakness Exploit Lv.3 Heaven-Sent Lv.3 | Maximum Might Lv.2 Guard Up Lv. 2 | Offensive Guard Lv.2 Teostra Blessing Lv.2 | Latent Power Lv.1 Adrenaline Rush Lv.1 | Embolden Lv. 1 Powder Mantle Lv.1 | Shock Absorber Lv.1 Intrepid Heart Lv. 1 |
|
Build Merits and Augments
| Weapon Augments |
|
|---|---|
| Armor Augments |
Armor Augments for this build are not necessary. However, feel free to add as you please once you get comfortable with your build! Generally, you'd want to get better skills and more slots for your armor.
Replaceable skills already on the armor: ● Latent Power ● Adrenaline Rush For damage, aim for any of the following: ● Powder Mantle ● Offensive Guard ● Embolden |
| Build Merits and Notes |
|---|
| This build offers the best of both worlds in both offense and defense by utilizing TU5's new Lance-exclusive skill, Guard Bash. Guard Bash deals stun damage to monsters infront of the hunter when using the Guard Switch Skill, but this skill only procs if the attack that was blocked doesn't deal too much Impact Damage, hence, we have opted to include 4 points in Guard, and 2 points in Guard Up. These two skills combined with an active Embolden buff ensure most attacks in the game can be blocked and Guard Bashed. Additionally, we've included a full set of TU5's Heaven-Sent skill to nullify stamina loss and sharpness loss whenever you don't take damage. Assuming you Guard all the attacks thrown at you, you can keep the Heaven-Sent buff active indefinitely. Also included in this build are 5 points in Attack Boost and 2 points in Offensive Guard, as Guard Bash scales off of Attack, while the Guard Switch Skill can proc Offensive Guard if timed well. Full points in Weakness Exploit and Agitator allow hunters to reach high levels of affinity when combined with Latent Power's buffs and Critical Eye. And finally, Intrepid Heart acts as a failsafe that protects our Heaven-Sent buff whenever we take damage. Our weapon deals blast damage, so we've supplemented it with 2 points in Teostra Blessing for better blast build-up. Since Heaven-Sent solves our issues with sharpness and stamina, we are free to spam Guard Dash into Leaping Thrust, which also makes building Powder Mantle stacks easier. When monsters attack, Guard Bash them. If they have an opening, spam Leaping Thrust and proc Powder Mantle. |
Offensive Dragon Conversion Lance
| Weapon | ATK | DEF | Affinity |
|---|---|---|---|
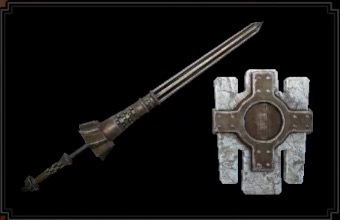 Raging Wyvern+ Raging Wyvern+
 |
330 | 30 | 0% |
| Element / Status |
Slots | Rampage Slots | |
| ②①ー | ③ |
| Armor | Slots | Skills | |
|---|---|---|---|
|
|
④②ー | ||
|
|
④④ー | ||
|
|
④ーー |
Weakness Exploit Lv. 2
Dragonheart Lv. 1
|
|
|
|
④①① | ||
|
|
③②② |
Resentment Lv. 1
Dereliction Lv. 1
|
|
| Talisman | Attack Boost 3 with ② slot or better | ||
| Rampage Decoration |
|
||
| Decorations |
|
||
| Skills | |
|---|---|
| Rampage Skill | Valstrax Soul to maximize damage with the Dragon Element |
|
Dragon Attack Lv.5 |
Attack Boost Lv.7
Dragon Heart Lv.5 | Weakness Exploit Lv.2 Stamina Surge Lv.3 | Dragon Resistance Lv.3 Flinch Free Lv. 1 | Dereliction Lv.1 Dragon Conversion Lv.3 | Resentment Lv.1 Latent Power Lv.2 | Guard Lv. 2 Guard Up Lv. 2 | Speed Sharpening Lv. 1 Master's Touch Lv. 1 | Stun Resistance Lv. 1 Embolden Lv. 1 |
|
Build Merits and Augments
| Weapon Augments | |
|---|---|
| Armor Augments |
Armor Augments for this build are not necessary. However, feel free to add as you please once you get comfortable with your build! Generally, you'd want to get better skills and more slots for your armor.
Replaceable skills already on the armor: ● Latent Power For damage, aim for any of the following: ● Powder Mantle ● Offensive Guard ● Embolden |
| Build Merits and Notes |
|---|
| This build focuses on maximizing damage with the Dragon element using TU4's Dragon Conversion with Dragonheart and Valstrax Soul. To consistently activate Dragonheart, we opted to include Dereliction in the build to act as its engine. As this build can be somewhat risky due to the constant HP drain, the presence of skills like Guard, Guard Up, and Embolden serve to provide some survivability. This build's playstyle consists of spamming Leaping Thrust into Charged Wide Sweep. Consider equipping defensive Switch Skills such as Shield Charge, Anchor Rage, and Sheathing Retreat to offset the offensive nature of the build. TU4 added new augments into their pool of skills, so if you have the resources to augment your equipment, consider aiming for Powder Mantle or Weakness Exploit for skills. Any increases to decoration slots may also afford you space for an Intrepid Jewel 1, Grinder Jewel 1, or Tenderizer Jewel 2. |
Defensive Dragon Conversion Lance
| Weapon | ATK | DEF | Affinity |
|---|---|---|---|
 Raging Wyvern+ Raging Wyvern+
 |
330 | 30 | 0% |
| Element / Status |
Slots | Rampage Slots | |
| ②①ー | ③ |
| Armor | Slots | Skills | |
|---|---|---|---|
|
|
④②ー | ||
|
|
④④ー | ||
|
|
②②ー | ||
|
|
④①① | ||
|
|
④ーー | ||
| Talisman | Attack Boost 3 with ② slot or better | ||
| Rampage Decoration |
|
||
| Decorations | |||
| Skills | |
|---|---|
| Rampage Skill | Swap between Wyvern Exploit, Anti-Aerial Species, Anti-Aquatic Species, or Fanged Exploit depending on the monster. |
|
Attack Boost Lv.7 |
Dragon Attack Lv.5
Guard Lv.5 | Stamina Surge Lv.3 Guard Up Lv.3 | Offensive Guard Lv. 3 Dragon Resistance Lv.3 | Dragon Conversion Lv.3 Flinch Free Lv. 3 | Razor Sharp Lv.3 Agitator Lv.2 | Weakness Exploit Lv.2 Latent Power Lv.2 | Stun Resistance Lv.1 Defiance Lv.1 | Embolden Lv. 1 |
|
Build Merits and Augments
| Weapon Augments | |
|---|---|
| Armor Augments |
Armor Augments for this build are not necessary. However, feel free to add as you please once you get comfortable with your build! Generally, you'd want to get better skills and more slots for your armor.
Replaceable skills already on the armor: ● Latent Power ● Furious For damage, aim for any of the following: ● Powder Mantle ● Embolden |
| Build Merits and Notes |
|---|
| This is a defensive variant of our Dragon Conversion build. Full points in traditional Lance skills such as Guard, Guard Up, and Offensive Guard make this build very survivable. Dragon Resistance paired with Dragon Conversion provide some defense against elemental attacks. Embolden supplements Guard, and works well with Agitator, as you get offensive and defensive boosts when the monster becomes enraged. Also included are a touch of offensive skills in Attack Boost, Latent Power, and Weakness Exploit. Staying on the Blue Scroll is the intended playstyle for this build. By hitting the monster, you eventually trigger bonus elemental resistances. This bonus lasts as long as you remain on the Blue Scroll, so equip your preferred Switch Skills there. |
Aggressive Powder Mantle Build
| Weapon | ATK | DEF | Affinity |
|---|---|---|---|
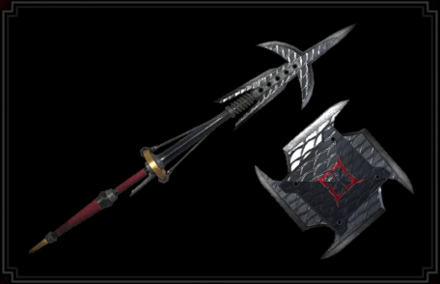 Fine Kamura Spear Fine Kamura Spear
 |
330 | 0 | 0% |
| Element / Status |
Slots | Rampage Slots | |
-
|
④②ー | ② |
| Armor | Slots | Skills | |
|---|---|---|---|
|
|
③②ー | ||
|
|
②②ー | ||
|
|
②②② | ||
|
|
④③ー | ||
|
|
④ーー | ||
| Talisman | Attack Boost Lv.3; ② slot or better | ||
| Rampage Decoration | |||
| Decoration |
|
||
| Skills | |
|---|---|
|
Attack Boost Lv.7 | Critical Eye Lv.7
Critical Boost Lv.3 | Weakness Exploit Lv.3 Master's Touch Lv.3 | Offensive Guard Lv.3 Flinch Free Lv. 3 | Guard Lv. 2 Guard Up Lv.2 | Powder Mantle Lv.2 Agitator Lv.2 | Ballistics Lv.2 Embolden Lv.1 | Stamina Surge Lv.1 Razor Sharp Lv.1| Spare Shot Lv.1 |
| Build Merits and Notes |
|---|
| This build incorporates the new Powder Mantle skill from the Risen Teostra armor. It provides additional explosive damage when your aura turns blue. Max the Attack Boost skill, as the damage from this explosion scales with your raw attack value.
This build makes use of the heavy counter damage from Insta-blocking, as it maximizes the boost you get when Offensive Guard activates. We put two points in the Guard Up skill to insta-block some of the unblockable monster attacks in the game. The Guard skill stacks with the Embolden skill, so two points in the former and the single point in the latter is enough to withstand the impact of most monster attacks. For Weapon Augmentations, we highly suggest going for Attack Boost Lv. 4. It will provide an additional +20 attack which can maximize your damage output. This build assumes that no Armor Augmentations have been made. |
Defensive Powder Mantle Build
| Weapon | ATK | DEF | Affinity |
|---|---|---|---|
 Fine Kamura Spear Fine Kamura Spear
 |
330 | 0 | 0% |
| Element / Status |
Slots | Rampage Slots | |
-
|
④②ー | ② |
| Armor | Slots | Skills | |
|---|---|---|---|
|
|
③②ー | ||
|
|
③①ー | ||
|
|
②②② | ||
|
|
②②① | ||
|
|
④ーー | ||
| Talisman | Critical Eye Lv.3; ②① slot | ||
| Rampage Decoration | |||
| Decoration |
|
||
| Skills | |
|---|---|
|
Critical Eye Lv.7 | Agitator Lv.5
Guard Lv. 5 | Defense Boost Lv.4 Critical Boost Lv.3 | Weakness Exploit Lv.3 Guard Up Lv.3 | Offensive Guard Lv.3 Flinch Free Lv. 3 | Kushala Blessing Lv.3 Defiance Lv.3 | Embolden Lv.2 Adrenaline Rush Lv.1 | Powder Mantle Lv.1 Stamina Surge Lv.1 | Strife Lv.1 |
| Build Merits and Notes |
|---|
| This build incorporates the new Powder Mantle skill from the Risen Teostra armor. It provides an additional explosive damage when your aura turns blue. To activate the skill quickly, always stick to the monster and poke away!
This build maxes out the staple Lance skills, Guard, Guard Up, and Offensive Guard. This will allow you to deal as much damage as possible while still being tanky. Taking chip damage is a thing of the past! We slotted in three points into the Kushala Blessing skill to recover the amount of damage you take while guarding powerful attacks, making this build as defensive as possible. For Weapon Augmentations, we highly suggest going for Attack Boost Lv. 4. It will provide an additional +20 attack which can maximize your damage output. We also recommended going for Sharpness Boost lv.3 or 5 if you don't want to frequently stop and sharpen. This build assumes that no Armor Augmentations have been made. |
Dubhe's Asterism Buildup Boost
| Weapon | ATK | DEF | Affinity |
|---|---|---|---|
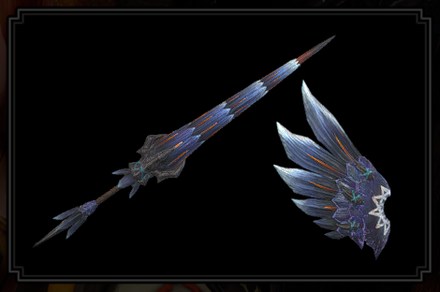 Dubhe's Asterism Dubhe's Asterism
 |
340 | 0 | 0% |
| Element / Status |
Slots | Rampage Slots | |
| ④②ー | ① |
| Armor | Slots | Skills | |
|---|---|---|---|
|
|
①①① |
Critical Eye Lv. 3
Critical Boost Lv. 1
|
|
|
|
②②ー | ||
|
|
④②① | ||
|
|
③ーー | ||
|
|
④ーー | ||
| Talisman | Critical Eye Lv.3 with ② slot or better | ||
| Rampage Decoration |
|
||
| Decorations |
|
||
| Skills | |
|---|---|
| Rampage Skill | Swap between Wyvern Exploit, Anti-Aerial Species, Anti-Aquatic Species, or Fanged Exploit depending on the monster. |
Critical Eye Lv.6 | Attack Boost Lv.4
Critical Boost Lv.3 | Weakness Exploit Lv.3 Offensive Guard Lv.3 | Chameleos Blessing Lv.3 Flinch Free Lv.3 | Guard Lv.3 Master's Touch Lv.3 | Speed Sharpening Lv.2 Marathon Runner Lv.2 | Handicraft Lv.2 Guard Up Lv.1 | Charge Master Lv.1 Buildup Boost Lv.1 | Foray Lv.1 |
|
| Build Merits and Notes |
|---|
| This build replaces our Royal Order's Guard+ all-rounder and takes advantage of the raw damage improvement of Buildup Boost. Typical Lance skills such as Guard, Guard Up, and Offensive Guard all help improve the usability and power of the weapon. Like the previous version of this build, you can choose to swap a level of Critical Boost for Evade Extender if you need more mobility.
To mitigate the low sharpness of Lucent Nargacuga's weapons, Handicraft and Master's Touch are used, allowing several more levels of purple sharpness than before when hitting weak points. Additional levels of Chameleos Blessing were added to extend Poison duration which helps with Foray uptime and makes up for the weapon's low Poison buildup. We recommend augmenting the weapon with a Rampage Slot Upgrade and Attack Boost. Doing this improves the build's overall damage output thanks to allowing the use of Anti-Species Rampage Decorations. |
Endgame MR Build: MR 6+
Abyssal Icicle Bloodlust Build
| Weapon | ATK | DEF | Affinity |
|---|---|---|---|
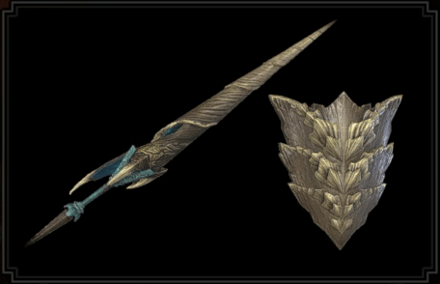 Abyssal Icicle Abyssal Icicle
 |
350 | 0 | -20% |
| Element / Status |
Slots | Rampage Slots | |
| ーーー | ③ |
| Rampage Decoration |
|
|
|---|---|---|
| Armor | Slots | Skills | |
|---|---|---|---|
|
|
③ーー |
Coalescence Lv. 2
Bloodlust Lv. 1
|
|
|
|
③①ー | ||
|
|
④②① | ||
|
|
④ーー |
Weakness Exploit Lv. 1
Burst Lv. 2
|
|
|
|
④ーー | ||
| Talisman | Critical Eye 3 with a ②① slot | ||
| Decorations |
|
||
| Skills | |
|---|---|
| Rampage Skill | Swap between Wyvern Exploit, Anti-Aerial Species, Anti-Aquatic Species, or Fanged Exploit depending on the monster. |
|
Critical Eye Lv.7 | Guard Lv.5
Critical Boost Lv.3 | Weakness Exploit Lv.3 Offensive Guard Lv.3 | Flinch Free Lv.3 Defiance Lv.3 | Burst Lv.3 Coalescence Lv.2 | Peak Performance Lv. 1 Guard Up Lv.1 | Bloodlust Lv.1 Strife Lv.1 |
|
Build Merits and Augments
| Weapon Augments | ||
|---|---|---|
| Build Merits and Notes |
|---|
| The Gaismogorm Lance build packs a punch, especially in long fights! Contributing to the damage this build can do are the skils Coalescence and Bloodlust from the Shagaru Magala helm, Critical Eye, Critical Boost, Weakness Exploit, and Burst. On the defensive side, we maxed the Guard and slotted in Guard Up skill. This will get you that mix of being tanky while still doing damage against the monster.
These builds assume that no Armor Augmentations have been made. |
Fine Kamura Spear Lance Climber Build
| Weapon | ATK | DEF | Affinity |
|---|---|---|---|
 Fine Kamura Spear Fine Kamura Spear
 |
330 | 0 | 0% |
| Element / Status |
Slots | Rampage Slots | |
-
|
④②ー | ② |
| Rampage Decoration |
|
|
|---|---|---|
| Armor | Slots | Skills | |
|---|---|---|---|
|
|
③②ー | ||
|
|
②②ー | ||
|
|
④②① | ||
|
|
②ーー | ||
|
|
④ーー | ||
| Talisman | Critical Eye 3 with a ② slot or better | ||
| Decorations |
|
||
| Skills | |
|---|---|
| Rampage Skill | Swap between Wyvern Exploit, Anti-Aerial Species, Anti-Aquatic Species, or Fanged Exploit depending on the monster. |
|
Attack Boost Lv.7 | Critical Eye Lv.7
Guard Lv.4 | Offensive Guard Lv.3 Critical Boost Lv.3 | Weakness Exploit Lv.3 Windproof Lv.3 | Flinch Free Lv.3 Marathon Runner Lv.2 | Peak Performance Lv. 1 Guard Up Lv.1 | Charge Master Lv.1 Burst Lv.1 | Spiribird's Call Lv.1 Razor Sharp Lv.1 | Spare Shot Lv.1 |
|
Build Merits and Augments
| Weapon Augments | ||
|---|---|---|
| Build Merits and Notes |
|---|
| Farm MR levels with ease! This build let's you deal significant damage, especially to weakspots, with skills like Weakness Exploit and Critical Boost. Amp up your damage with the Offensive Guard skill and the Insta-Block switch skill. On the defensive side, Guard and Guard Up were slotted in. This will get you that mix of being tanky while still doing damage against the monster.
These builds assume that no Armor Augmentations have been made. |
Elemental Lance Builds
Fire Elemental Lance
| Weapon | ATK | DEF | Affinity |
|---|---|---|---|
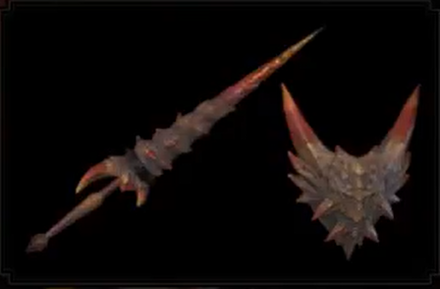 Kaktus Begierde Kaktus Begierde
 |
310 | 0 | 15% |
| Element / Status |
Slots | Rampage Slots | |
| ④①① | ③ |
Water Elemental Lance
| Weapon | ATK | DEF | Affinity |
|---|---|---|---|
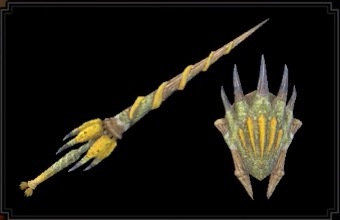 Spiral Vortex+ Spiral Vortex+
 |
330 | 0 | 0% |
| Element / Status |
Slots | Rampage Slots | |
| ②①① | ③ |
Thunder Elemental Lance
| Weapon | ATK | DEF | Affinity |
|---|---|---|---|
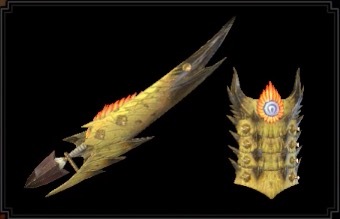 Skybore Discharge Skybore Discharge
 |
310 | 0 | 0% |
| Element / Status |
Slots | Rampage Slots | |
| ーーー | ② |
Ice Elemental Lance
| Weapon | ATK | DEF | Affinity |
|---|---|---|---|
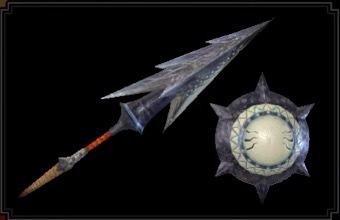 Spinetooth Spear Spinetooth Spear
 |
330 | 0 | 0% |
| Element / Status |
Slots | Rampage Slots | |
| ①①ー | ③ |
Dragon Elemental Lance Selections
| Weapon | ATK | DEF | Affinity |
|---|---|---|---|
 Raging Wyvern+ Raging Wyvern+
 |
330 | 30 | 0% |
| Element / Status |
Slots | Rampage Slots | |
| ②①ー | ③ |
| Weapon | ATK | DEF | Affinity |
|---|---|---|---|
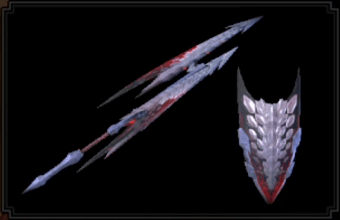 Crimson Sharpwing Crimson Sharpwing
 |
340 | 0 | 0% |
| Element / Status |
Slots | Rampage Slots | |
| ②ーー | ② |
Crimson Sharpwing is only available at MR 70+ after defeating Master Rank Crimson Glow Valstrax.
| Rampage Decoration |
|
|
|---|---|---|
| Armor | Slots | Skills | |
|---|---|---|---|
|
|
④①① | ||
|
|
①①ー | ||
|
|
②②② | ||
|
|
③ーー | ||
|
|
④ーー | ||
| Talisman | Critical Eye 3 with a ②① slot | ||
| Decorations |
Element Jewel 1 x5
Offensive Build Approach: (except Ice and Thunder Lance) Defensive Build Approach: (except Ice and Thunder Lance) For Fire, Water, and Ice Lance: For Raging Wyvern+ Lance: |
||
| Skills | |
|---|---|
| Rampage Skill | Element Exploit to increase elemental damage against each element or Swap between Wyvern Exploit, Anti-Aerial Species, Anti-Aquatic Species, or Fanged Exploit depending on the monster. |
|
Element Attack Lv.5
Critical Eye Lv.7 | Critical Element Lv.3 Critical Boost Lv.3 | Weakness Exploit Lv.3 Master's Touch Lv.3 | Offensive Guard Lv.3 Windproof Lv.3 | Flinch Free Lv.3 Agitator Lv.2 | Ballistics Lv.2 Guard Up Lv.2 | *Embolden Lv.1-2 Stamina Surge Lv.1 | *Burst Lv.1-2 Razor Sharp Lv.1 | Spare Shot Lv.1 For Fire, Water, and Ice Build: Speed Sharpening Lv.2 For Raging Wyvern+ Build: Spiribird's Call Lv.1 |
|
Build Merits and Augments
| Weapon Augments | ||
|---|---|---|
| Build Merits and Notes |
|---|
| This build is best utilized with the Guard Dash + Leaping Thrust combo that will help you deal consecutive elemental damage with each thrust! We maxed out the Critical Eye skill and synergized it with Critical Element to amplify the elemental damage this build can do. This build also focuses on Insta-Blocking attacks, then following up with the Cross-Sweep counter.
For an aggressive approach, equip a Chain Jewel for two levels on Burst which can help increase your elemental values and your Guard Dash + Leaping Thrust combo. For a more defensive approach, there are 2 options: (1) on Free Title Update 4, equip an Embolden Jewel for two levels on Embolden, which can help mitigate strong attacks while you're being targeted, or (2) switch out the Mastery Jewel 2 for a Shield Jewel 2 and swap the Shield Jewel+ 4 for an Ironwall Jewel+ 3, if Insta-blocking is not your playstyle. These builds assume that no Armor Augmentations have been made. |
Rooksearer Bloodlust Blast
| Weapon | ATK | DEF | Affinity |
|---|---|---|---|
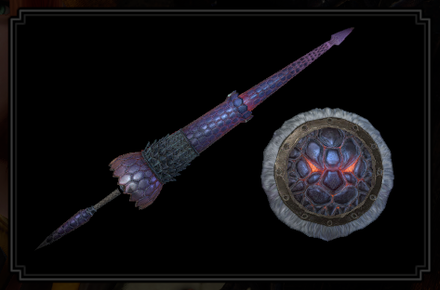 Bazel Rocket Rooksearer Bazel Rocket Rooksearer
 |
350 | 0 | -10% |
| Element / Status |
Slots | Rampage Slots | |
| ①ーー | ② |
| Armor | Slots | Skills | |
|---|---|---|---|
|
|
①①① |
Critical Eye Lv. 3
Critical Boost Lv. 1
|
|
|
|
③②ー | ||
|
|
②②ー | ||
|
|
②ーー | ||
|
|
③②ー | ||
| Talisman | Critical Eye 3 with ② slot or better | ||
| Rampage Decoration |
|
||
| Decorations |
|
||
| Skills | |
|---|---|
| Rampage Skill | Swap between Wyvern Exploit, Anti-Aerial Species, Anti-Aquatic Species, or Fanged Exploit depending on the monster. |
Critical Eye Lv.7 | Attack Boost Lv.4
Critical Boost Lv.3 | Weakness Exploit Lv.3 Windproof Lv.3 | Speed Sharpening Lv.3 Agitator Lv.2 | Offensive Guard Lv.2 Resentment Lv.1 | Razor Sharp Lv.1 Spare Shot Lv.1 | Guard Lv.1 Guard Up Lv.1 | Flinch Free Lv.1 Bloodlust Lv.1 | Burst Lv.1 |
|
| Build Merits and Notes |
|---|
| This build using the Bazel Rocket Rooksearer provides a good mix of offense and defense with a touch of Blast. It uses Attack Boost, Critical Boost, Critical Eye, Weakness Exploit, and a point in Burst to improve overall damage output. To enhance the Lance's defenses and blocking moves, it also uses Guard, Offensive Guard, and Guard Up. To round out the build's utility, it also runs Speed Sharpening and a point in Flinch Free.
To upgrade this build further, we recommend adding Attack Boost Augmentation to the weapon to improve overall damage output. |
Royal Order+ Dereliction Raw
| Weapon | ATK | DEF | Affinity |
|---|---|---|---|
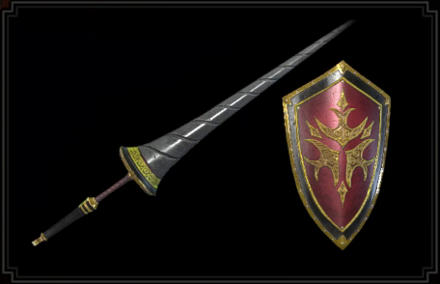 Royal Order's Guard+ Royal Order's Guard+
 |
320 | 50 | 10% |
| Element / Status |
Slots | Rampage Slots | |
-
|
②①ー | ② |
| Armor | Slots | Skills | |
|---|---|---|---|
|
|
①①① |
Critical Eye Lv. 3
Critical Boost Lv. 1
|
|
|
|
③②ー | ||
|
|
②②ー | ||
|
|
③ーー | ||
|
|
③②② |
Resentment Lv. 1
Dereliction Lv. 1
|
|
| Talisman | Attack Boost 3 with ② slot or better | ||
| Rampage Decoration |
|
||
| Decorations |
|
||
| Skills | |
|---|---|
| Rampage Skill | Swap between Wyvern Exploit, Anti-Aerial Species, Anti-Aquatic Species, or Fanged Exploit depending on the monster. |
Critical Eye Lv.7 | Attack Boost Lv.4
Critical Boost Lv.3 | Weakness Exploit Lv.3 Guard Lv.3 | Offensive Guard Lv.3 Speed Sharpening Lv.3 | Agitator Lv.2 Resentment Lv.2 | Guard Up Lv.1 Flinch Free Lv.1 | Dereliction Lv.1 Burst Lv.1 |
|
| Build Merits and Notes |
|---|
| This build using Royal Order's Guard+ features Dereliction and focuses on a combination of offense and defense. Aside from Dereliction, Critical Eye, Attack Boost, Critical Boost, Weakness Exploit, and a point in Burst are included to boost the weapon's raw damage output. To enhance the Lance's defenses and blocking moves, Guard, Guard Up, and Offensive Guard are also used. To round out the build, Speed Sharpening and Flinch Free are added for utility. Though this build lacks Evade Extender, it can still reposition well throughout fights using moves such as the Lance's backhop, Shield Tackle, and Spiral Thrust.
When using this build, always swap to your Blue Scroll when the hunt begins as Dereliction will only provide increased attack and stun potency when on the Blue Scroll. In addition, to help mitigate the health drain from Dereliction, we recommend eating Gourmet Fish and the Hide-and-Seek Dango as they both provide health regeneration over time. |
Master Rank Build (Mid Game): MR3-6
Great Tigrex Lance Raw
| Weapon | ATK | DEF | Affinity |
|---|---|---|---|
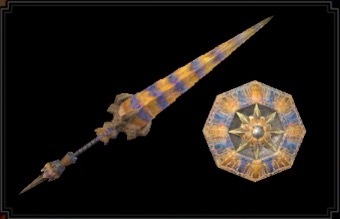 Great Tigrex Lance Great Tigrex Lance
 |
340 | 0 | -15% |
| Element / Status |
Slots | Rampage Slots | |
-
|
①ーー | ② |
| Armor | Slots | Skills | |
|---|---|---|---|
|
|
②②ー |
Critical Eye Lv. 2
Wirebug Whisperer Lv. 1
|
|
|
|
③ーー |
Guard Lv. 2
Offensive Guard Lv. 1
|
|
|
|
②②ー | ||
|
|
③①ー |
Agitator Lv. 2
Protective Polish Lv. 1
|
|
|
|
①①① | ||
| Talisman | Weakness Exploit 2 with ② slot or better | ||
| Rampage Decoration |
|
||
| Decorations |
|
||
| Skills | |
|---|---|
| Rampage Skill | Swap between Wyvern Exploit, Anti-Aerial Species, Anti-Aquatic Species, or Fanged Exploit depending on the monster. |
Agitator Lv.5 | Critical Eye Lv.3
Critical Boost Lv.3 | Weakness Exploit Lv.3 Guard Lv.3 | Protective Polish Lv.3 Speed Sharpening Lv.3 | Flinch Free Lv.3 Offensive Guard Lv.2 | Latent Power Lv.1 Guard Up Lv.1 | Diversion Lv.1 Wirebug Whisperer Lv.1 |
|
| Build Merits and Notes |
|---|
| This build takes advantage of the Great Tigrex Lance's high raw damage using Agitator, Critical Boost, Offensive Guard, and Weakness Exploit. Critical Eye is used to offset its base -15% affinity, and Protective Polish is used to help maintain its purple sharpness. To round out the build's tanking capability, it also features Guard, Guard Up, and Diversion. |
Master Rank Build (Early Game): MR 1-2
Elder Babel Spear+ All-Rounder
| Weapon | ATK | DEF | Affinity |
|---|---|---|---|
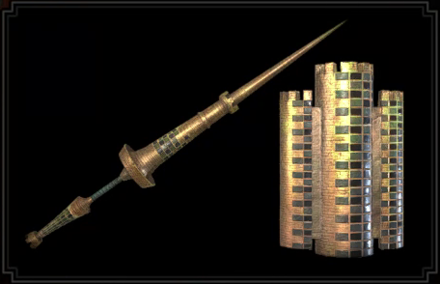 Elder Babel Spear+ Elder Babel Spear+
 |
240 | 30 | 0% |
| Element / Status |
Slots | Rampage Slots | |
-
|
③ーー | ② |
| Armor | Slots | Skills | |
|---|---|---|---|
|
|
④①ー | ||
|
|
④ーー | ||
|
|
①ーー | ||
|
|
①①① | ||
|
|
②①ー | ||
| Talisman | Weakness Exploit 2 with ② slot or better | ||
| Rampage Decoration |
|
||
| Decorations |
|
||
| Skills | |
|---|---|
| Rampage Skill | Swap between Wyvern Exploit, Anti-Aerial Species, Anti-Aquatic Species, or Fanged Exploit depending on the monster. |
Defense Boost Lv.6 | Attack Boost Lv.5 Guard Lv.4 | Critical Boost Lv.3 Offensive Guard Lv.3 | Speed Sharpening Lv.3 Stun Resistance Lv.3 | Weakness Exploit Lv.3 Muck Resistance Lv.2 | Slugger Lv.2 Agitator Lv.1 | Flinch Free Lv.1 Spread Up Lv.1 |
|
| Build Merits and Notes |
|---|
| A well-rounded Lance build great for starting out in Sunbreak's Master Rank. This build mixes high defense and strong offense with Guard, Offensive Guard, Attack Boost, and Critical Boost. This build also offers some added utility with Speed Sharpening, Slugger, and Flinch Free. |
Best Skills for Lance
Best Damage Skills
These skills make it possible to deal extra damage! Aim for these skills for maximum DPS to defeat those monsters easier and finish those quests faster!
| Best Skills | Explanation |
|---|---|
| Attack Boost ★★★ |
Increasing the Lance's base attack is one of the most efficient ways to increase its DPS. |
| Weakness Exploit ★★★ |
A staple skill for any meta build. Increases your affinity when hitting weak spots by 50% at max rank, increasing your DPS significantly. |
| Offensive Guard ★★★ |
Grants percentage attack boost when successfully using a perfectly timed guard against an enemy attack, which a Lance player can do, especially with Insta-block. |
| Critical Boost ★★★ |
Amplified critical strike damage. Works well with Weakness Exploit and the Lance's ability to hit weakspots with ease. |
| Critical Eye ★★★ |
Increasing Affinity is an efficient way to increase DPS for Lances due to their effectiveness at hitting weak spots. |
| Element Attack ★★ |
Sunbreak featured buffs for elemental damage, making elemental builds viable. Max out this skill to increase damage against monsters. Fire | Water | Ice | Thunder | Dragon |
| Powder Mantle ★★ |
This skill from the Risen Teostra Armor provides the Lance with additional blast damage every time it activates, contributing greatly to DPS. Available in Sunbreak Free Title Update 3 |
| Dereliction ★★ |
Using the Red Scroll increases the Lance's elemental values while using the Blue Scroll increases both attack and stun potency, improving overall damage. Just be wary of your health! Best paired with the Strife skill from the Chaotic Gore Magala Armor Set. Available in Sunbreak Base Game |
| Bloodlust ★★ |
Overcome the Frenzy Virus to power up with this skill; best paired with Coalescence. Available in Sunbreak Base Game |
| Dragon Conversion ★ |
When activated, this skill from the Risen Crimson Glow Valstrax Armor will benefit elemental builds, increasing DPS even further! Available in Sunbreak Free Title Update 4 |
| Element Exploit ★ |
Amplify your elemental damage against monsters weak to a specific element with this skill. A single point of it is enough to deal significant damage. Available in Sunbreak Free Title Update 1 |
| Burst ★ |
Only consider this skill if your playstyle revolves around the Guard Dash + Leaping Thrust combo. Available in Sunbreak Base Game |
| Slugger ★ |
Works well with the Lance's shield moves that deals blunt damage. |
Best Comfort Skills
These are skills that make managing weapon mechanics a lot easier. Damage is only part of the equation - taking time to slot in comfort skills that increase consistency & comfort will also increase overall DPS!
| Best Skills | Explanation |
|---|---|
| Master's Touch ★★★ |
Every time a critical strike hits, this skill prevents your weapon from losing sharpness. This is an ideal skill for most high affinity builds and for weapons with manageable sharpness. |
| Guard ★★ |
Improves the Lance's guarding capability. Getting at least 3 ranks to this skill is recommended. |
| Embolden ★★ |
If a monster focuses on you, this skill will buff you up defensively and impact from incoming attacks are lowered. If you can't max this skill out, it is best paired with the Guard skill, since both skills stack. |
| Guard Up ★★ |
For enemies that use otherwise unblockable moves. A single point of this skill is enough for most fights. |
| Defiance ★★ |
Three levels of this skill prevent most roars, tremors, and winds from interrupting attacks. The Cornerstone Jewel is a level 1 decoration, so slot it in whenever possible! Available in Sunbreak Free Title Update 1 |
| Speed Sharpening ★★ |
Reduces a cycle for sharpening with each level. |
| Flinch Free ★★ |
Useful especially in multiplayer where minor attacks can interrupt your attacks! |
| Intrepid Heart ★ |
Whenever the gauge above your health bar is full, this skill can be useful in preventing monster attacks from interrupting your combos, making it possible to pull off an extra charged attack before you can regroup. Available in Sunbreak Free Title Update 2 |
| Mind's Eye ★ |
Two points in Mind's Eye completely prevents your weapon from bouncing off of tough monster parts, allowing Lances to thrust without fear! Only slot this skill in when you can! | Evade Extender ★ |
Increases the evade distance of Lance's unsheathed hops. Only slot this in if you want more mobility with the weapon. |
Monster Hunter Rise Related Links

|
• Weapons marked withNEW have been updated. • Weapons withUP have been reviewed and does not warrant an updated build from the Bonus Update. |
| All Weapon Build Guides | |
|---|---|
NEW Low Rank | High Rank Master Rank |
NEW Low Rank | High Rank Master Rank |
NEW Low Rank | High Rank Master Rank |
NEW Low Rank | High Rank Master Rank |
NEW Low Rank | High Rank Master Rank |
NEW Low Rank | High Rank Master Rank |
NEW Low Rank | High Rank Master Rank |
NEW Low Rank | High Rank Master Rank |
NEW Low Rank | High Rank Master Rank |
NEW Low Rank | High Rank Master Rank |
NEW Low Rank | High Rank Master Rank |
NEW Low Rank | High Rank Master Rank |
NEW Low Rank | High Rank Master Rank |
UP Low Rank | High Rank Master Rank |
Other Builds
| Other Build Guides | |
|---|---|
| General High Rank Builds and Best Equipment | Buddy Equipment Builds Palico | Palamute |
Comment
Hi, SgtMeph! Thanks for pointing this out. We've fixed the decoration count accordingly.
Author
Sunbreak Lance Builds (Master Rank)
improvement survey
03/2026
improving Game8's site?

Your answers will help us to improve our website.
Note: Please be sure not to enter any kind of personal information into your response.

We hope you continue to make use of Game8.
Rankings
- We could not find the message board you were looking for.
Gaming News
Popular Games

Genshin Impact Walkthrough & Guides Wiki

Honkai: Star Rail Walkthrough & Guides Wiki

Umamusume: Pretty Derby Walkthrough & Guides Wiki

Pokemon Pokopia Walkthrough & Guides Wiki

Resident Evil Requiem (RE9) Walkthrough & Guides Wiki

Monster Hunter Wilds Walkthrough & Guides Wiki

Wuthering Waves Walkthrough & Guides Wiki

Arknights: Endfield Walkthrough & Guides Wiki

Pokemon FireRed and LeafGreen (FRLG) Walkthrough & Guides Wiki

Pokemon TCG Pocket (PTCGP) Strategies & Guides Wiki
Recommended Games

Diablo 4: Vessel of Hatred Walkthrough & Guides Wiki

Cyberpunk 2077: Ultimate Edition Walkthrough & Guides Wiki

Fire Emblem Heroes (FEH) Walkthrough & Guides Wiki

Yu-Gi-Oh! Master Duel Walkthrough & Guides Wiki

Super Smash Bros. Ultimate Walkthrough & Guides Wiki

Pokemon Brilliant Diamond and Shining Pearl (BDSP) Walkthrough & Guides Wiki

Elden Ring Shadow of the Erdtree Walkthrough & Guides Wiki

Monster Hunter World Walkthrough & Guides Wiki

The Legend of Zelda: Tears of the Kingdom Walkthrough & Guides Wiki

Persona 3 Reload Walkthrough & Guides Wiki
All rights reserved
©CAPCOM CO., LTD. ALL RIGHTS RESERVED.
The copyrights of videos of games used in our content and other intellectual property rights belong to the provider of the game.
The contents we provide on this site were created personally by members of the Game8 editorial department.
We refuse the right to reuse or repost content taken without our permission such as data or images to other sites.


![Monster Hunter Stories 3 Review [First Impressions] | Simply Rejuvenating](https://img.game8.co/4438641/2a31b7702bd70e78ec8efd24661dacda.jpeg/thumb)


The sharpness is wrong for the bazel rocket rooksearer.