Sunbreak Hammer Builds (Master Rank)
★ All Title Updates now available for ALL PLATFORMS!
┗ Title Update 4 | Title Update 5 | Bonus Update
┗ Check out all our Best Builds For Every Weapon!
┗ TU4 Monsters: Velkhana | Risen C.G. Valstrax
┗ TU5 Monsters: Amatsu | Risen Shagaru Magala
┗ Bonus Update Monster: Primordial Malzeno

This is a guide to the best builds and equipment for Hammers in Monster Hunter Rise (MH Rise): Sunbreak. Learn about the best Hammers for Master Rank, and the best Skills and Armor pieces to use with the Hammers for Master Rank from the early game until the end game!
| All Hammer Guides | ||
|---|---|---|
 Trees & Full List Trees & Full List |
 How to Use How to Use |
 Best Builds Best Builds |
List of Contents
Hammer Builds List & Progression
This is a quick section summarizing all the Hammer builds in this page. It is arranged from newest to oldest, and MR build progression is from bottom to top.
Click on the build name to see the build!
| Master Rank | Title Update | Build Name |
|---|---|---|
| MR120+ | BU | Blood Awakening Blast Hammer |
| MR180+ | TU5 | Frenzied Bloodlust Blast Strength Hammer |
| MR180+ | TU5 | Frenzied Bloodlust Elemental Courage Hammer |
| MR160+ | TU4 | Frostcraft Velkhana Hammer |
| MR140+ | TU3 | Powder Mantle Blast Build |
| MR110+ | TU2 | Poison + Buildup Boost Build |
| MR10+ | TU2 | KO Hammer Bloodlust (Dereliction / Non-Dereliction) |
| MR10+ | TU2 | KO Hammer Build (Dereliction / Non-Dereliction) |
| MR6+ | Base | Royal Order+ Dereliction |
| MR6+ | Base | Abyssal Windstorm Dragon Climber |
| MR3-6 | Base | Mid Game Hammer Raw + Blast |
| MR1-2 | Base | Atlas Hammer+ Raw Hammer Build |
Ultra Endgame MR Build: MR 100+
BU Blood Awakening Blast Hammer Build
Recommended Hammer
| Weapon | ATK | DEF | Affinity |
|---|---|---|---|
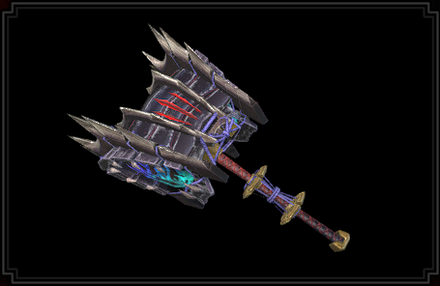 Devil's Die Devil's Die
 |
320 | 0 | 0% |
| Element / Status |
Slots | Rampage Slots | |
| ③②ー | ② |
| Decorations |
|
|
|---|---|---|
Recommended Armor Loadout
| Armor | Slots | Skills | |
|---|---|---|---|
|
|
③②① |
Wirebug Whisperer Lv. 3
Wind Mantle Lv. 1
|
|
|
|
④④② |
Burst Lv. 1
Blood Awakening Lv. 1
|
|
|
|
④②① | ||
|
|
③①ー | ||
|
|
④④ー | ||
| Talisman | Buildup Boost 2 with a ②② slot or better. | ||
| Rampage Decoration |
|
||
| Skills | Rampage Skill | Wyvern Exploit, Anti-Aerial Species, Anti-Aquatic Species, or Fanged Exploit depending on the monster. |
|---|---|
|
Attack Boost Lv. 4 | Critical Eye Lv. 4
Weakness Exploit Lv. 3 | Blast Attack Lv. 3 Recovery Up Lv. 3 | Parbreaker Lv. 3 Wirebug Whisperer Lv. 3 | Blood Rite Lv. 3 Charge Master Lv. 3 | Buildup Boost Lv. 3 Blood Awakening Lv. 2 | Kushala Blessing Lv. 2 Teostra Blessing Lv. 2 | Intrepid Heart Lv. 1 Burst Lv. 1 | Wind Mantle Lv. 1 Critical Boost Lv. 1 | Chameleos Blessing Lv. 1 Foray Lv. 1 | Handicraft Lv. 1 |
Build Merits & Augments
| Weapon Augments | |
|---|---|
| Armor Augments |
Armor Augments for this build are not necessary. However, feel free to add as you please once you get comfortable with your build! Generally, you'd want to get better skills and more slots for your armor.
Replaceable skills already on the armor: ● Chameleos Blessing ● Kushala Blessing For damage, aim for any of the following: ● Powder Mantle ● Critical Boost For comfort, aim for the following: ● Defiance ● Focus ● Frenzied Bloodlust |
| Build Merits and Notes |
The Bonus Update introduces a new comfort skill available for the hammer: Blood Awakening. Paired with Blood Rite, this skill is valuable when fighting against monsters with broken parts or Bloodblight.
If you can get Buildup Boost to Lv.3 through augments or a talisman, the Risen Mizuha arms can be swapped out for Primordial Vambraces to max out Blood Awakening and make more space for decorations. This build uses two pieces of Primordial Malzeno armor, Risen Chameleos arms, and two pieces of Risen Kushala Daora armor. The switch skill Charge Switch: Strength is best suited for this build to max out damage and health gained from Blood Rite. Considering that endgame monsters are significantly faster, Wirebug Whisperer and Wind Mantle have been included to support evasive switch skills such as Keeping Sway. Having Water Strike is also recommended when negating damage. Devil's Die is still the choice hammer for dealing high damage. Charge Master, Teostra Blessing, and Blast Attack have been added to increase the improve the weapon's blast potential. The included affinity skills and augments places this weapon at 80% affinity. You can at least safely recieve some Bloodblight by making use of Intrepid Heart, which significantly reduces damage and nullifies knockback when filled. |
|---|
TU5 Frenzied Bloodlust Blast Strength Hammer Build
| Weapon | ATK | DEF | Affinity |
|---|---|---|---|
 Devil's Die Devil's Die
 |
320 | 0 | 0% |
| Element / Status |
Slots | Rampage Slots | |
| ③②ー | ② |
| Armor | Slots | Skills | |
|---|---|---|---|
|
|
③②① |
Wirebug Whisperer Lv. 3
Wind Mantle Lv. 1
|
|
|
|
②②ー | ||
|
|
③①ー | ||
|
|
④③ー | ||
|
|
③②② |
Resentment Lv. 1
Dereliction Lv. 1
|
|
| Talisman |
(via Qurious Melding) Buildup Boost Lv. 3 with at least a ②②① slot or better |
||
| Rampage Decoration |
Any one of the following:
|
||
| Decorations |
|
||
| Skills | |
|---|---|
| Rampage Skill | Anti-Species/Exploit skill from your rampage decoration for further increasing damage. |
|
Attack Boost Lv. 4 | Critical Eye Lv. 4 Charge Master Lv. 3 | Weakness Exploit Lv. 3 Master's Touch Lv. 3 | Blast Attack Lv. 3 Focus Lv. 3 | Wirebug Whisperer Lv. 3 Buildup Boost Lv. 3 | Ballistics Lv. 2 Teostra Blessing Lv. 2 | Powder Mantle Lv. 2 Resentment Lv. 1 | Critical Boost Lv. 1 Bloodlust Lv. 1 | Dereliction Lv. 1 Wind Mantle Lv. 1 | Frenzied Bloodlust Lv. 1 Intrepid Heart Lv. 1 |
|
Build Merits and Augments
| Weapon Augments | |
|---|---|
| Armor Augments | Armor Augments for this build are not necessary. However, feel free to add as you please once you get comfortable with your build! Generally, you will want to get better skills and more slots for your armor.
Replaceable skills already on the armor: ● Ballistics For damage, aim for any of the following: ● Powder Mantle ● Buildup Boost For comfort, aim for any of the following: ● Slugger ● Constitution ● Stamina Surge ● Evade Extender ● Intrepid Heart |
| Build Merits and Notes |
|---|
| Title Update 5 introduces a skill that can give us more offensive and defensive options through increased Wirebugs: Frenzied Bloodlust. For this Hammer build, we focus on incorporating Frienzied Bloodlust into the damage-heavy Charge Switch: Strength play style.
The Strength style focuses on dealing large amounts of burst damage in a few swings. This is a lot riskier to play compared to the Courage style, but more evasion opportunities are opened up thanks to the Wirebug Whisperer, Wind Mantle, and Frenzied Bloodlust skills. Buildup Boost from a talisman and Dereliction is essential to this build in order to increase the Hammer's already limited damage ceiling. A Frostcraft Lv. 3 Qurious talisman may also be used to increase damage. However, there will be disadvantages to your Wirebug skills when sheathing for Frostcraft. Buildup Boost provides the most consistent increase. If you wish not to use Dereliction, you can switch it out for the more comfortable Valstrax Greaves - Epoch which gives full Stun Resistance. For DPS options, the added Wirebug skills benefit both Impact Burst and Impact Crater, allowing you to use them more often. Powder Mantle adds an explosive burst damage opportunity and Bloodlust for buffs to attack, affinity, and evasion. Affinity with this build stands at around 80% on weak points with Sharpness Boost augments, and potentially up to 100% for 60 seconds upon overcoming Frenzy from Bloodlust. Affinity should still be high enough for Master's Touch Lv. 3 to be effective for sharpness management. |
TU5 Frenzied Bloodlust Elemental Courage Hammer Build
| Weapon | ATK | DEF | Affinity |
|---|---|---|---|
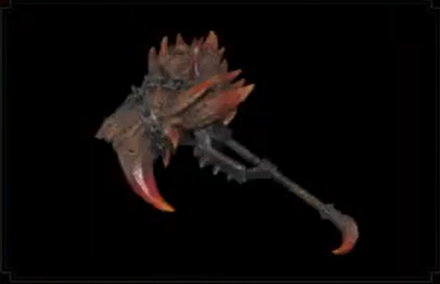 Kaktus Unwetter Kaktus Unwetter
 |
310 | 0 | 15% |
| Element / Status |
Slots | Rampage Slots | |
| ④①① | ③ |
| Decorations | ||
|---|---|---|
| Weapon | ATK | DEF | Affinity |
|---|---|---|---|
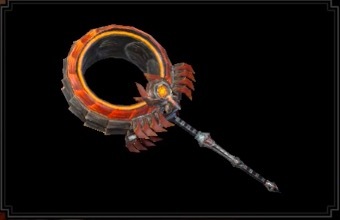 Doomsday Hammer Doomsday Hammer
 |
310 | 0 | 0% |
| Element / Status |
Slots | Rampage Slots | |
| ②①ー | ③ |
| Decorations | ||
|---|---|---|
| Weapon | ATK | DEF | Affinity |
|---|---|---|---|
 Skyfold Furyflash Skyfold Furyflash
 |
310 | 0 | 0% |
| Element / Status |
Slots | Rampage Slots | |
| ーーー | ② |
| Decorations | ||
|---|---|---|
| Weapon | ATK | DEF | Affinity |
|---|---|---|---|
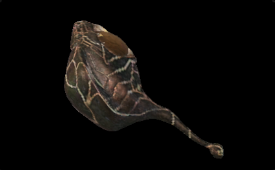 Daora's Hyperborea Daora's Hyperborea
 |
310 | 0 | 10% |
| Element / Status |
Slots | Rampage Slots | |
| ②ーー | ③ |
| Decorations | ||
|---|---|---|
| Weapon | ATK | DEF | Affinity |
|---|---|---|---|
 Dark Morte Dark Morte
 |
320 | 20 | 0% |
| Element / Status |
Slots | Rampage Slots | |
| ②②ー | ③ |
| Decorations | ||
|---|---|---|
| Armor | Slots | Skills | |
|---|---|---|---|
|
|
③②① |
Wirebug Whisperer Lv. 3
Wind Mantle Lv. 1
|
|
|
|
②②ー | ||
|
|
③①ー | ||
|
|
④③ー | ||
|
|
④①ー | ||
| Talisman |
(via Qurious Melding) Attack Boost 3 with at least a ②②① slot or better |
||
| Rampage Decoration | |||
| Skills | |
|---|---|
| Rampage Skill | Element Exploit for further increasing elemental damage. |
|
Attack Boost Lv. 6 | Ice Attack Lv. 5 Critical Eye Lv. 4 | Weakness Exploit Lv. 3 Critical Element Lv. 3 | Master's Touch Lv. 3 Focus Lv. 3 | Wirebug Whisperer Lv. 3 Element Exploit Lv. 3 | Ballistics Lv. 2 Powder Mantle Lv. 2 | Intrepid Heart Lv. 2 Critical Boost Lv. 1 | Bloodlust Lv. 1 Wind Mantle Lv. 1 | Frenzied Bloodlust Lv. 1 For Fire Build: Fire Attack Lv. 5 | Teostra Blessing Lv. 2 Critical Eye Lv. 5 | Handicraft Lv. 1 Shock Absorber Lv. 1 For Water Build: Water Attack Lv. 5 | Kushala Blessing Lv. 2 Handicraft Lv. 1 | Shock Absorber Lv. 1 For Thunder Build: Thunder Attack Lv. 5 | Speed Sharpening Lv. 1 Shock Absorber Lv. 1 For Ice Build: Kushala Blessing Lv. 2 | Handicraft Lv. 2 Critical Eye Lv. 5 For Dragon Build: Dragon Attack Lv. 5 | Speed Sharpening Lv. 1 Critical Eye Lv. 5 | Shock Absorber Lv. 1 Handicraft Lv. 1 |
|
Build Merits and Augments
| Weapon Augments |
Fire, Ice, and Dragon Hammer:
Water Hammer: Thunder Hammer: |
|---|---|
| Armor Augments |
Armor Augments for this build are not necessary. However, feel free to add as you please once you get comfortable with your build! Generally, you'd want to get better skills and more slots for your armor.
Replaceable skills already on the armor: ● Ballistics For damage, aim for any of the following: ● Powder Mantle ● Dragon Conversion For comfort, aim for any of the following: ● Slugger ● Constitution ● Stamina Surge ● Evade Extender ● Intrepid Heart |
| Build Merits |
|---|
| Title Update 5 introduced one fascinating skill that can give us more offensive and defensive capabilities through increased Wirebugs: Frenzied Bloodlust. For this Hammer build, we focus on incorporating Frienzied Bloodlust into an aggressive yet comfortable and mobile Charge Switch: Courage play style.
This build assumes no Qurious Armor Crafting. It, however, benefits the most out of Qurious Talismans. Make sure to have them when making this build! The Courage style incentivizes quick charged strikes and mobility in combat. Despite lacking the raw damage opportunities of Charge Switch: Strength, this is compensated with effectively dishing out Elemental Damage. The switch skills Water Strike and Keeping Sway are one of your best defensive options. The latter benefits from the skills Wirebug Whisperer, Wind Mantle, and Frenzied Bloodlust. This gives you more chances to i-frame through most monster moves, reposition, or quickly cancel your charges and attacks when about to be punished by a monster. For DPS options, the added Wirebug skills benefit both Impact Burst and Impact Crater, allowing you to use them more. Powder Mantle adds an explosive burst damage opportunity and Bloodlust for buffs to attack, affinity, and evasion. Element Exploit and Critical Element are present since we want to maximize elemental damage. Affinity with this build stands at around 70%-85% on weak points depending on your weapon and decorations, and potentially up to 90%-100% for 60 seconds upon overcoming Frenzy from Bloodlust. Taking advantage of high affinity, we use Master's Touch Lv. 3 for sharpness management. Some elemental weapons suggested here are near purple sharpness, so we highly recommend you augment them with a Sharpness Boost. |
TU4 Frostcraft Velkhana Hammer Build
| Weapon | ATK | DEF | Affinity |
|---|---|---|---|
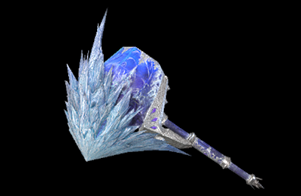 Victorious Northlein Victorious Northlein
 |
330 | 0 | 0% |
| Element / Status |
Slots | Rampage Slots | |
| ④ーー | ③ |
| Armor | Slots | Skills | |
|---|---|---|---|
|
|
③②ー | ||
|
|
④②① |
Quick Sheathe Lv. 3
Frostcraft Lv. 1
|
|
|
|
③②① |
Critical Draw Lv. 3
Frostcraft Lv. 1
|
|
|
|
③③② |
Focus Lv. 3
Frostcraft Lv. 1
|
|
|
|
④③ー | ||
| Talisman | Critical Eye 3 with a ②① slot | ||
| Rampage Decoration |
|
||
| Decorations |
|
||
| Skills | |
|---|---|
| Rampage Skill | Element Exploit to increase elemental damage against monsters weak to ice or Swap between Wyvern Exploit, Anti-Aerial Species, Anti-Aquatic Species, or Fanged Exploit depending on the monster. |
|
Critical Eye Lv.7 | Attack Boost Lv.6
Critical Boost Lv.3 | Weakness Exploit Lv.3 Focus Lv.3 | Critical Draw Lv.3 Quick Sheathe Lv.3 | Slugger Lv.3 Stun Resistance Lv.3 | Frostcraft Lv.3 Intrepid Heart Lv.2 | Razor Sharp Lv. 1 Spare Shot Lv. 1 | Flinch Free Lv.1 |
|
Build Merits and Notes
| Weapon Augments | |
|---|---|
| Armor Augments |
Armor Augments for this build are not necessary. However, feel free to add as you please once you get comfortable with your build! Generally, you'd want to get better skills and more slots for your armor.
Replaceable skills already on the armor: ● Critical Draw ● Spare Shot For damage, aim for any of the following: ● Powder Mantle For comfort, aim for any of the following: ● Slugger ● Stamina Surge ● Evade Extender ● Intrepid Heart |
| Build Merits and Notes |
|---|
| Title Update 4 saw the chilling return of the Frostcraft skill from the Velkhana armor set! Stay frosty during your hunts with this powerful skill which gives you an attack buff as long as you keep the gauge at the upper left side of your screen full. Do this by sheathing your weapon.
For weapon choice, the Victorious Northlein Hammer fits the build perfectly. As it's one of Velkhana's Weapons, it has faster Frostcraft gauge charge speed compared to other weapons. This will make the attack buffs from the Frostcraft skill frequently available. To further amp your dps, we also maxed out Slugger to make it easier to knock out a monster, providing you and/or your team an opening to deal significant damage. Get those bonks in! |
TU3 Powder Mantle Blast Build (MR140)
| Weapon | ATK | DEF | Affinity |
|---|---|---|---|
 Devil's Die Devil's Die
 |
320 | 0 | 0% |
| Element / Status |
Slots | Rampage Slots | |
| ③②ー | ② |
| Armor | Slots | Skills | |
|---|---|---|---|
|
|
③②ー | ||
|
|
②②ー | ||
|
|
④②① | ||
|
|
④③ー | ||
|
|
③②② |
Resentment Lv. 1
Dereliction Lv. 1
|
|
| Talisman | Attack Boost Lv.3; one ②① slot | ||
| Rampage Decoration | |||
| Decoration |
|
||
| Skills | |
|---|---|
|
Attack Boost Lv.7 | Critical Eye Lv.6
Critical Boost Lv.3 | Weakness Exploit Lv.3 Wirebug Whisperer Lv. 3 | Burst Lv. 3 Powder Mantle Lv.3 | Master's Touch Lv.2 Teostra Blessing Lv.2 | Resentment Lv.1 Chameleos Blessing Lv.1 | Dereliction Lv. 1 Foray Lv.1 | Buildup Boost Lv. 1 Ballistics Lv.2 |
Build Merits and Augments
| Weapon Augments | |
|---|---|
| Armor Augments |
Armor Augments for this build are not necessary. However, feel free to add as you please once you get comfortable with your build! Generally, you'd want to get better skills and more slots for your armor.
Replaceable skills already on the armor: ● Ballistics For damage, aim for any of the following: ● Buildup Boost For comfort, aim for any of the following: ● Master's Touch ● Stamina Surge ● Intrepid Heart |
| Build Merits and Notes | Powder Mantle with a blast weapon is an explosive nightmare! Maxing this skill out is important to get the blast aura as quickly as possible. Just wait for it to turn blue then attack for some eruptive damage! While waiting, get those extra blast damage in with Teostra Soul equipped.
Keep in mind that this build also runs the Dereliction skill. If you get hit while having the red blast aura from the Powder Mantle skill, it will damage you and the monster that hit you (as long as they're close-ranged). Always keep an eye on your health! Teostra Blessing is easy to incorporate in this blast build as the Flamescale Jewel is only a level one decoration. Slotting in two will increase your blast buildup by 10%, making it easier to proc those explosive hits! Another skill included in this build is the Buildup Boost skill. At level one, it increases your attack power by 10% while proccing blast. With the Teostra Blessing skill making it easier to build up this ailment, this will provide the much needed damage boost for your hunts. |
|---|
TU2 Poison + Buildup Boost Build (MR110)
| Weapon | ATK | DEF | Affinity |
|---|---|---|---|
 Kaktus Unwetter Kaktus Unwetter
 |
310 | 0 | 15% |
| Element / Status |
Slots | Rampage Slots | |
| ④①① | ③ |
| Armor | Slots | Skills | |
|---|---|---|---|
|
|
①①① |
Critical Eye Lv. 3
Critical Boost Lv. 1
|
|
|
|
④ーー | ||
|
|
④②① | ||
|
|
④ーー |
Weakness Exploit Lv. 1
Burst Lv. 2
|
|
|
|
③②② |
Resentment Lv. 1
Dereliction Lv. 1
|
|
| Talisman | Weakness Exploit Lv.2, with ②① slots | ||
| Rampage Decoration |
|
||
| Decorations |
|
||
| Skills | |
|---|---|
|
Critical Eye Lv.6
| Critical Boost Lv.3
Weakness Exploit Lv.3 | Poison Attack Lv.3 Speed Sharpening Lv.3 | Chameleos Blessing Lv.3 Wirebug Whisperer Lv.3 | Handicraft Lv.2 Protective Polish Lv.2 | Evade Extender Lv.2 Burst Lv.2 | Buildup Boost Lv.2 Resentment Lv.1 | Flinch Free Lv.1 Dereliction Lv.1 | Foray Lv.1 |
Build Merits and Augments
| Weapon Augments |
|
|---|---|
| Armor Augments |
Armor Augments for this build are not necessary. However, feel free to add as you please once you get comfortable with your build! Generally, you'd want to get better skills and more slots for your armor.
For increasing DPS, aim for: ● Attack Boost ● Charge Master For comfort skills, we suggest: ● Master's Touch ● Slugger ● Stun Resistance |
| Build Merits and Notes |
|---|
|
Considering Flaming Espinas weapons inflict both Fire and Poison, this Poison Hammer build takes advantage of the new Buildup Boost skill introduced in Title Update 2. Staple offensive skills are included in the build and are fit to synergize with the build's poison-centric skills: Chameleos Blessing, Poison Attack, Buildup Boost, and Foray. Common QoL skills are also included.
During hunts, aim to hit the monster's head to take advantage of the build's 90% affinity, which can be further improved by augmenting it and adding Affinity Boost for an additional 5% boost. Make sure to also constantly buildup and proc poison on your target for maximum damage! Additionally, remember to replace Anti-Species Jewel on the weapon's Rampage Decoration slot depending on the monster you'll hunt! When using this build, always swap to your Blue Scroll when the hunt begins as Dereliction will only provide increased attack and stun potency when on the Blue Scroll. We also recommend eating Gourmet Fish and Hide-and-Seek Dango to mitigate the health drain from Dereliction as they both provide health regeneration over time. |
Endgame MR Build: MR 6+
KO Hammer Bloodlust Build (MR6-100)
Dereliction and Non-Dereliction Builds
| Weapon | ATK | DEF | Affinity |
|---|---|---|---|
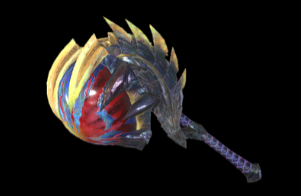 Vergehen/Naissance Vergehen/Naissance
 |
330 | 0 | -30% / 20% |
| Element / Status |
Slots | Rampage Slots | |
| ③①ー | ② |
| Armor | Slots | Skills | |
|---|---|---|---|
|
|
④①① | ||
|
|
②②ー | ||
|
|
③①① | ||
|
|
③②ー | ||
| 'Risky' Dereliction Build | |||
|
|
④ーー |
Resentment Lv. 1
Dereliction Lv. 2
|
|
| 'Safe' Non-Dereliction Build | |||
|
|
④②ー | ||
| Talisman | Attack Boost 3 with ②① slots | ||
| Rampage Decoration |
|
||
| Decorations |
x2 for the Dereliction Build x1 for the Non-Dereliction Build x1 for the Dereliction Build x2 for the Non-Dereliction Build x1 for the Non-Dereliction Build |
||
| Skills | |
|---|---|
| Rampage Skill | Swap between Wyvern Exploit, Anti-Aerial Species, Anti-Aquatic Species, or Fanged Exploit depending on the monster. |
Attack Boost Lv.7 | Defiance Lv.5
Resentment Lv.3 (Lv.2 for the Non-Dereliction Build) Critical Boost Lv.3 | Weakness Exploit Lv.3 Slugger Lv.3 | Windproof Lv.3 Razor Sharp Lv.1 (Lv.3 for the Non-Dereliction Build) Spare Shot Lv.1 (Lv.3 for the Non-Dereliction Build) Critical Eye Lv.2 | Marathon Runner Lv.2 Coalescence Lv.1 (Lv.2 for the Non-Dereliction Build) Bloodlust Lv.1 | Charge Master Lv.1 Critical Element Lv.1 | Flinch Free Lv.1 Strife Lv.1 Dereliction Build: Dereliction Lv.2 Non-Deriliction Build: Stun Resistance Lv.3 | Intrepid Heart Lv.1 |
|
Build Merits and Augments
| Weapon Augments |
|---|
| Build Merits and Notes |
|---|
| Nothing synergizes better than Bloodlust and Chaotic Gore Magala Weapons! Based on how they work and with Coalescence slotted in, overcoming the frenzy unlocks the true potential you and the weapons can do, granting boosts in damage. With Weakness Exploit equipped, it's easier to deal 100% affinity to monster weakspots, amping your dps that can speed-up hunts!
Two variations of this build is presented. The safer Non-Dereliction Build is for players who want that boost from Bloodlust while still staying safe from the health reduction. On the other hand, the Dereliction Build deals more damage, especially at max qurio. However, with Dereliction and Bloodlust equipped, your health drains a whole lot quicker at the start of a fight, so you have to be more careful and more precise with your positioning. Make sure to equip the one that suits your playstyle! Slugger is a useful skill to have when playing the Hammer; this will help you knock out monsters to give you and/or your team an opening to deal significant damage. All decos are available starting from MR 10, with the only exception being the Phoenix Jewel 2, which requires at least Anomaly Investigation Lv. 51. If you don't have the deco yet, it can be subsituted with the Furor Jewel 2 to increase the Resentment skill for the meantime |
KO Hammer Build
(Dereliction and Non-Dereliction)
Dereliction Hammer
| Weapon | ATK | DEF | Affinity |
|---|---|---|---|
 Abyssal Windstorm Abyssal Windstorm
 |
340 | 0 | -20% |
| Element / Status |
Slots | Rampage Slots | |
| ーーー | ③ |
Non-Dereliction Hammer
| Weapon | ATK | DEF | Affinity |
|---|---|---|---|
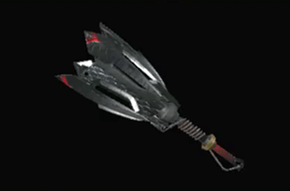 Fine Kamura Hammer Fine Kamura Hammer
 |
320 | 0 | 0% |
| Element / Status |
Slots | Rampage Slots | |
-
|
④②ー | ② |
| Armor | Slots | Skills | |
|---|---|---|---|
|
|
③②ー | ||
|
|
②②ー | ||
|
|
④②ー | ||
|
|
④ーー |
Weakness Exploit Lv. 1
Burst Lv. 2
|
|
| Dereliction Build | |||
|
|
③②② |
Resentment Lv. 1
Dereliction Lv. 1
|
|
| Non-Dereliction Build | |||
|
|
①①ー |
Attack Boost Lv. 2
Critical Eye Lv. 2
|
|
| Talisman | Critical Eye 3 with ②① slots | ||
| Rampage Decoration |
|
||
| Decorations |
For the Dereliction Build: For the Non-Dereliction Build: |
||
| Skills | |
|---|---|
| Rampage Skill | Swap between Wyvern Exploit, Anti-Aerial Species, Anti-Aquatic Species, or Fanged Exploit depending on the monster. |
Critical Eye Lv.7
Attack Boost Lv.7 (Lv.6 on the Dereliction Build) Critical Boost Lv.3 | Weakness Exploit Lv.3 Razor Sharp Lv.3 | Spare Shot Lv.3 Slugger Lv.3 (Lv.2 on the Dereliction Build) Marathon Runner Lv.2 | Burst Lv.2 Resentment Lv.1 | Charge Master Lv.1 Flinch Free Lv.1 | Intrepid Heart Lv.1 Dereliction Build: Dereliction Lv.1 Non-Deriliction Build: Constitution Lv.2 | Speed Sharpening Lv.2 |
|
Build Merits and Augments
| Weapon Augments |
For Dereliction Hammer:
For Non-Dereliction Hammer: |
|---|
| Build Merits and Notes |
|---|
| This Hammer build aims to maximize the damage you can do, whether you use the Dereliction or the Non-Dereliction one. The Dereliction build focuses on counteracting the negative affinity the Abyssal Windstorm has by prioritizing the Critical Eye skill. Critical Boost, Weakness Exploit, and Burst alleviates this further, contributing greatly to the dps you can do. The Non-Dereliction build uses the Fine Kamura Hammer, which has a level 4 and a level 2 slot. This allowed us to incorporate 2 levels of Constitution, which slow down stamina consumption while you're charging your Hammer.
Slugger is a useful skill to have when playing the Hammer; this will help you knock out monsters to give you and/or your team an opening to deal significant damage. With the slots available for the Non-Dereliction build, it's possible to max this skill out with decorations. For the Dereliction build, only 2 points are allocated. This is okay since fighting with Dereliction while on your Blue Swap Scroll will increase you stun potency so you can still get those knockout bonks in! |
Royal Order+ Dereliction Raw
| Weapon | ATK | DEF | Affinity |
|---|---|---|---|
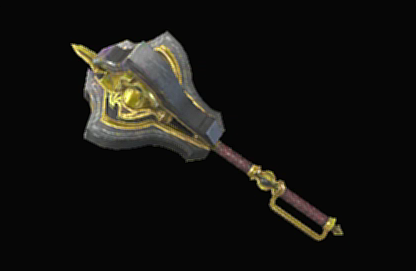 Royal Order's Bludgeon+ Royal Order's Bludgeon+
 |
310 | 50 | 10% |
| Element / Status |
Slots | Rampage Slots | |
-
|
②①ー | ② |
| Armor | Slots | Skills | |
|---|---|---|---|
|
|
①①① |
Critical Eye Lv. 3
Critical Boost Lv. 1
|
|
|
|
③②ー | ||
|
|
④ーー | ||
|
|
②ーー | ||
|
|
③②② |
Resentment Lv. 1
Dereliction Lv. 1
|
|
| Talisman | Attack Boost 3 with ② slot or better | ||
| Rampage Decoration |
|
||
| Decorations |
|
||
| Skills | |
|---|---|
| Rampage Skill | Swap between Wyvern Exploit, Anti-Aerial Species, Anti-Aquatic Species, or Fanged Exploit depending on the monster. |
Attack Boost Lv.7 | Critical Eye Lv.7
Critical Boost Lv.3 | Weakness Exploit Lv.3 Windproof Lv.3 | Speed Sharpening Lv.3 Wirebug Whisperer Lv.3 | Resentment Lv.2 Evade Extender Lv.1 | Blight Resistance Lv.1 Flinch Free Lv.1 | Dereliction Lv.1 Burst Lv.1 |
|
| Build Merits and Notes |
|---|
| This build using the Royal Order's Bludgeon+ features Dereliction and revolves around dealing high raw damage. Aside from Dereliction, this build uses Attack Boost, Critical Boost, Critical Eye, Weakness Exploit, and a point in Burst to improve its raw damage output. For utility, the build also runs maxed Speed Sharpening, Wirebug Whisperer, and a point in Evade Extender.
When using this build, always swap to your Blue Scroll when the hunt begins as Dereliction will only provide increased attack and stun potency when on the Blue Scroll. In addition, to help mitigate the health drain from Dereliction, we recommend eating Gourmet Fish and the Hide-and-Seek Dango as they both provide health regeneration over time. |
Abyssal Windstorm Dragon Climber
| Weapon | ATK | DEF | Affinity |
|---|---|---|---|
 Abyssal Windstorm Abyssal Windstorm
 |
340 | 0 | -20% |
| Element / Status |
Slots | Rampage Slots | |
| ーーー | ③ |
| Armor | Slots | Skills | |
|---|---|---|---|
|
|
①①① |
Critical Eye Lv. 3
Critical Boost Lv. 1
|
|
|
|
③②ー | ||
|
|
④ーー | ||
|
|
②ーー | ||
|
|
①①ー |
Attack Boost Lv. 2
Critical Eye Lv. 2
|
|
| Talisman | Wirebug Whisperer 2 with two ② slots or better | ||
| Rampage Decoration |
|
||
| Decorations |
|
||
| Skills | |
|---|---|
| Rampage Skill | Swap between Wyvern Exploit, Anti-Aerial Species, Anti-Aquatic Species, or Fanged Exploit depending on the monster. |
Critical Eye Lv.7 | Attack Boost Lv.6
Critical Boost Lv.3 | Weakness Exploit Lv.3 Windproof Lv.3 | Stun Resistance Lv.3 Speed Sharpening Lv.3 | Wirebug Whisperer Lv.3 Resentment Lv.1 | Recovery Speed Lv.1 Blight Resistance Lv.1 | Flinch Free Lv.1 Burst Lv.1 |
|
| Build Merits and Notes |
|---|
| This all-rounder Hammer build using Abyssal Windstorm mixes damage and utility, making it great to climb with in Master Rank. To boost the weapon's damage and counteract its negative affinity, Critical Eye, Attack Boost, Critical Boost, Weakness Exploit, and a point in Burst are used. To round out the build, max Speed Sharpening, Stun Resistance, and Wirebug Whisperer are included for utility and ease-of-use. |
Master Rank Build (Mid Game): MR 3-6
Mid Game Hammer Raw + Blast Build
| Weapon | ATK | DEF | Affinity |
|---|---|---|---|
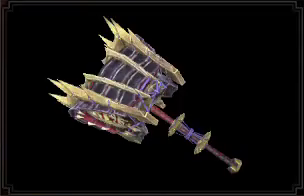 Mighty Souldevourer Mighty Souldevourer
 |
310 | 0 | 0% |
| Element / Status |
Slots | Rampage Slots | |
| ②①ー | ② |
| Armor | Slots | Skills | |
|---|---|---|---|
|
|
②②ー |
Critical Eye Lv. 2
Wirebug Whisperer Lv. 1
|
|
|
|
②②ー | ||
|
|
①ーー | ||
|
|
②ーー | ||
|
|
①①ー |
Attack Boost Lv. 2
Critical Eye Lv. 2
|
|
| Talisman | Weakness Exploit Lv. 2 With ② Slot. | ||
| Rampage Decoration | |||
| Decorations |
|
||
| Skills | |
|---|---|
| Rampage Skill | Teostra Soul |
|
Attack Boost Lv.7 |
Critical Eye Lv.7 Weakness Exploit Lv.3 | Critical Boost Lv.3 Slugger Lv.3 | Stamina Thief Lv.3 Blast Attack Lv.2 | Focus Lv.1 Agitator Lv.1 | Flinch Free Lv.1 Wirebug Whisperer Lv.1 |
|
| Build Merits and Notes |
|---|
|
A raw hammer build with a tinge of blast for Sunbreak's mid stages of master rank! Magnamalo Hammer has a higher raw base than other weapons with a few exception while retaining a high level of Sharpness. Coupled with the blast skills and the Teostra Soul and its damage output turns out higher than other hammer weapons at this stage of the game. [red]
Take note that even though we slotted in some blast skills, the main focus of the build is still dealing raw damage and the blast component is just a bonus./red] If you're still in the earlier stages of MR 3-6, we highly recommend the Nargacuga Hammer [Endless Eternia as it provides high affinity which allows you to reach high damage output even without the armor list and weapons provided! |
Master Rank Build (Early Game): MR 1-2
Atlas Hammer+ Raw Hammer Build
| Weapon | ATK | DEF | Affinity |
|---|---|---|---|
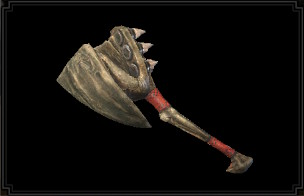 Atlas Hammer+ Atlas Hammer+
 |
270 | 0 | 0% |
| Element / Status |
Slots | Rampage Slots | |
-
|
③ーー | ① |
| Armor | Slots | Skills | |
|---|---|---|---|
|
|
①①ー | ||
|
|
③①ー |
Critical Eye Lv. 2
Windproof Lv. 2
|
|
|
|
①ーー | ||
|
|
④①① |
Attack Boost Lv. 2
|
|
|
|
①①ー |
Attack Boost Lv. 2
Critical Eye Lv. 2
|
|
| Talisman | Weakness Exploit 2 with a ② slot. | ||
| Rampage Decoration | |||
| Decorations | |||
| Skills | |
|---|---|
| Rampage Skill | Spiribird Doubled |
Critical Eye Lv.7
| Weakness Exploit Lv.3
Stamina Thief Lv.3 | Critical Boost Lv.3 Jump Master Lv.1 | Attack Boost Lv.6 Slugger Lv.2 | Constitution Lv.1 Windproof Lv.2 | Agitator Lv.1 |
|
| Build Merits and Notes |
|---|
| A raw damage output utilizing the Atlas Hammer, the hammer with the highest non-negative affinity hammer in the lower MR ranks. We utilize several anjanath armor pieces to get attack boosts and the Slugger skill. The build is also backed up with talismans and decorations to reach high affinity rates and damage via Critical Boost and Weakness Exploit. |
Best Skills and Explanations
Best Damage Skills
These skills make it possible to deal extra damage! Aim for these skills for maximum DPS to defeat those monsters easier and finish those quests faster!
| Best Skills | Explanation |
|---|---|
| Weakness Exploit ★★★ |
A staple skill for any meta builds. Most of the monsters in Rise and Sunbreak have their heads as their main weakspots. With the Hammer's playstyle of always going for KOs, this skill provides a significant boost to your DPS! Always max out this skill whenever possible. |
| Attack Boost ★★★ |
This skill increases the Hammer's damage values, which allow you to deal significant damage! |
| Critical Eye ★★★ |
Always aim for 80-100% affinity to amplify the Hammer's base damage efficiently! |
| Critical Boost ★★★ |
Further amplifies critical hit damage. Make sure to have high affinity first before equipping! |
| Slugger ★★ |
Improves stun rate. Useful for solo play due to the lower enemy ailment resistance. Also useful for multiplayer to give the team openings to deal damage. |
| Powder Mantle ★★ |
This skill from the Risen Teostra Armor provides the Hammer with additional blast damage every time it activates, contributing greatly to DPS. Available in Sunbreak Free Title Update 3 |
| Dereliction ★★ |
Using the Blue Scroll to increase both attack and stun potency, improving overall damage; just be wary of your health! Available in Sunbreak Base Game |
| Burst ★ |
Get a damage boost upon hit and a further boost after 5 consecutive attacks. Consider this skill for the Courage Hammer playstyle. Available in Sunbreak Base Game |
| Bloodlust ★ |
Overcome the Frenzy Virus to power up with this skill; best paired with Coalescence. Available in Sunbreak Base Game |
| Blood Rite ★ |
Get constant heals while attacking broken parts. Synergizes well with Partbreaker. Available in Sunbreak Base Game |
| Partbreaker ★ |
Easily break monster parts with this skill. Pair it with Blood Rite to get more utility out of it! |
| Bludgeoner ★ |
Increases attack power the more your weapon loses sharpness. Best skill to use for Hammers with either blue sharpness or below or sharpness that can quickly deplete (e.g., Gornir and Finishing Hammer, respectively). |
Best Comfort Skills
These are skills that make managing weapon mechanics a lot easier. Damage is only part of the equation - taking time to slot in comfort skills that increase consistency & comfort will also increase overall DPS!
| Best Skills | Explanation |
|---|---|
| Focus ★★★ |
This skill makes it easier to execute more charged attacks, increasing overall DPS. |
| Stamina Thief ★★★ |
Hammers can apply Exhaust whenever it hits the monster, especially the head. This skill can make exhausting a monster easier, providing more openings for you and your team to deal damage! |
| Defiance ★★ |
Three levels of this skill prevent most roars, tremors, and winds from interrupting your charged attacks. The Cornerstone Jewel is a level 1 decoration, so slot it in whenever possible! Available in Sunbreak Free Title Update 1 |
| Flinch Free ★★ |
Useful especially in multiplayer where minor attacks can interrupt your attacks. |
| Speed Sharpening ★★ |
Reduces a cycle for sharpening with each level. Useful for getting your sharpness level up mid-fight. |
| Intrepid Heart ★ |
Whenever the gauge above your health bar is full, this skill can be useful in preventing monster attacks from interrupting your combos, making it possible to pull off an extra charged attack before you can regroup. Available in Sunbreak Free Title Update 2 |
| Constitution ★ |
This skill will help you conserve stamina better while you're running around charging your hammer. Only slot this skill in whenever possible. |
| Stamina Surge ★ |
Another stamina conserving skill. Only slot this skill in whenever possible. |
| Marathon Runner ★ |
Reduces stamina depletion while charging the Hammer. Only slot this skill in whenever possible. |
Monster Hunter Rise: Sunbreak Related Guides

|
• Weapons marked withNEW have been updated. • Weapons withUP have been reviewed and does not warrant an updated build from the Bonus Update. |
| All Weapon Build Guides | |
|---|---|
NEW Low Rank | High Rank Master Rank |
NEW Low Rank | High Rank Master Rank |
NEW Low Rank | High Rank Master Rank |
NEW Low Rank | High Rank Master Rank |
NEW Low Rank | High Rank Master Rank |
NEW Low Rank | High Rank Master Rank |
NEW Low Rank | High Rank Master Rank |
NEW Low Rank | High Rank Master Rank |
NEW Low Rank | High Rank Master Rank |
NEW Low Rank | High Rank Master Rank |
NEW Low Rank | High Rank Master Rank |
NEW Low Rank | High Rank Master Rank |
NEW Low Rank | High Rank Master Rank |
UP Low Rank | High Rank Master Rank |
Other Builds
| Other Build Guides | |
|---|---|
| General High Rank Builds and Best Equipment | Buddy Equipment Builds Palico | Palamute |
Comment
Hello, Blu! Thank you for pointing this out. Upon checking, the deco list for Courage Hammer incorrectly displayed 1 more Expert Jewel 2 (x2), so that may have been what took the slot for Mastery Jewel 2. This has been corrected. Hope this helps!
Author
Sunbreak Hammer Builds (Master Rank)
improvement survey
03/2026
improving Game8's site?

Your answers will help us to improve our website.
Note: Please be sure not to enter any kind of personal information into your response.

We hope you continue to make use of Game8.
Rankings
- We could not find the message board you were looking for.
Gaming News
Popular Games

Genshin Impact Walkthrough & Guides Wiki

Honkai: Star Rail Walkthrough & Guides Wiki

Umamusume: Pretty Derby Walkthrough & Guides Wiki

Pokemon Pokopia Walkthrough & Guides Wiki

Resident Evil Requiem (RE9) Walkthrough & Guides Wiki

Monster Hunter Wilds Walkthrough & Guides Wiki

Wuthering Waves Walkthrough & Guides Wiki

Arknights: Endfield Walkthrough & Guides Wiki

Pokemon FireRed and LeafGreen (FRLG) Walkthrough & Guides Wiki

Pokemon TCG Pocket (PTCGP) Strategies & Guides Wiki
Recommended Games

Diablo 4: Vessel of Hatred Walkthrough & Guides Wiki

Cyberpunk 2077: Ultimate Edition Walkthrough & Guides Wiki

Fire Emblem Heroes (FEH) Walkthrough & Guides Wiki

Yu-Gi-Oh! Master Duel Walkthrough & Guides Wiki

Super Smash Bros. Ultimate Walkthrough & Guides Wiki

Pokemon Brilliant Diamond and Shining Pearl (BDSP) Walkthrough & Guides Wiki

Elden Ring Shadow of the Erdtree Walkthrough & Guides Wiki

Monster Hunter World Walkthrough & Guides Wiki

The Legend of Zelda: Tears of the Kingdom Walkthrough & Guides Wiki

Persona 3 Reload Walkthrough & Guides Wiki
All rights reserved
©CAPCOM CO., LTD. ALL RIGHTS RESERVED.
The copyrights of videos of games used in our content and other intellectual property rights belong to the provider of the game.
The contents we provide on this site were created personally by members of the Game8 editorial department.
We refuse the right to reuse or repost content taken without our permission such as data or images to other sites.


![Monster Hunter Stories 3 Review [First Impressions] | Simply Rejuvenating](https://img.game8.co/4438641/2a31b7702bd70e78ec8efd24661dacda.jpeg/thumb)


On the Blood Awakening blast hammer build it says that you should have blood rite level 3 however it only shows where one level of blood rite comes from which is from the bloodening jewel 3. where do the other two blood rite levels come from?