Sunbreak | List of All New Silkbind Attacks and Switch Skills
★ All Title Updates now available for ALL PLATFORMS!
┗ Title Update 4 | Title Update 5 | Bonus Update
┗ Check out all our Best Builds For Every Weapon!
┗ TU4 Monsters: Velkhana | Risen C.G. Valstrax
┗ TU5 Monsters: Amatsu | Risen Shagaru Magala
┗ Bonus Update Monster: Primordial Malzeno

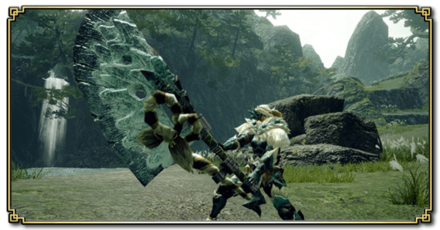
With Sunbreak and master rank comes new Silkbind Attacks and Switch Skills for all 14 weapons. Learn about your favorite weapon's new attacks and moves by reading on!
| Switch Skill Related Guides | |
|---|---|
 How to Unlock All Switch Skills How to Unlock All Switch Skills |
|
 Base Game MHRise Switch Skills Base Game MHRise Switch Skills |
 Sunbreak Expansion Switch Skills Sunbreak Expansion Switch Skills |
List of Contents
New Silkbind Attacks and Switch Skills for Sunbreak
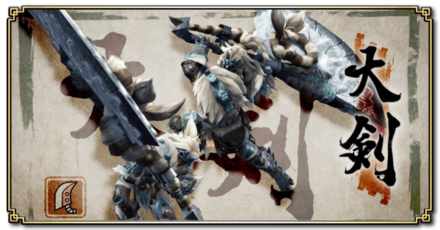
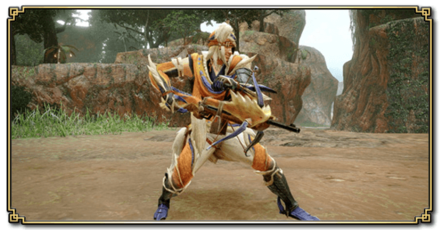
Great Sword
| All Great Sword Guides | ||
|---|---|---|
 Trees & Full List Trees & Full List |
 How to Use How to Use |
 Best Builds Best Builds |
Strongarm Stance

| Switched With | |
|---|---|
| Hunting Edge | |
| Description | |
| Reinforces the blade with Ironsilk to temporarily fend off attacks. If used while charging, you can quickly parry and unleash a True Charged Slash. Wirebug Gauge Recovery Speed: Fast Wirebug Cost: 2 |
|
| Controls | |
| Switch (zL while charging) PC (Middle Click while charging) PlayStation (L2 while charging) Xbox (LT while charging) |
|
Backslide

| Switched With | |
|---|---|
| Power Sheathe | |
| Description | |
| A quick evasive maneuver using a Wirebug. Maintains charge if using Surge Slash or and increases level while charging, making it an amazing repositioning tool. Wirebug Gauge Recovery Speed: Fast Wirebug Cost: 1 |
|
| Controls | |
| Switch PC PlayStation Xbox |
|
Surge Slash Combo
| Switched With | |
|---|---|
| Charging Slash Combo | |
| Description | |
| An offensive style that combines speed with the weight of the weapon to unleash a stream of powerful slashes. Proper footwork is required, but allows for a large number of combos. | |
| Controls | |
| Switch After executing a 3-hit combo, hold Analog + X to perform a Strong Charged Slash PC After executing a 3-hit combo, hold Directional + Left Click to perform a Strong Charged Slash PlayStation After executing a 3-hit combo, hold Analog + Triangle to perform a Strong Charged Slash Xbox After executing a 3-hit combo, hold Analog + Y to perform a Strong Charged Slash |
|
Long Sword
| All Long Sword Guides | ||
|---|---|---|
 Trees & Full List Trees & Full List |
 How to Use How to Use |
 Best Builds Best Builds |
Tempered Spirit Blade

| Switched With | |
|---|---|
| Soaring Kick | |
| Description | |
| A decisive maneuver that parries any incoming monster attack with a Spirit Blade. Time it properly to fill your Spirit Gauge and increase the Spirit Level by 1. Wirebug Gauge Recovery Speed: Fast Wirebug Cost: 1 |
|
| Controls | |
| Switch PC PlayStation Xbox |
|
Harvest Moon

| Switched With | |
|---|---|
| Serene Pose | |
| Description | |
| Casts out an Ironsilk ring that expands out like an arena. Within the ring, your Spirit Gauge will not deplete and performing counters will deal additional hits. Wirebug Gauge Recovery Speed: Fast Wirebug Cost: 2 |
|
| Controls | |
| Switch PC PlayStation Xbox |
|
Sacred Sheathe Combo
| Switched With |
|---|
| Special Sheathe Combo |
| Description |
| Slow, methodical sheathe that can be done after an attack. Before finishing the sheathe, Hunters will be impervious to damage then consumes one level of Spirit Gauge. When the sword is fully sheath, Hunters can focus and charge their Long Sword using the Spirit Gauge to let out a flurry of damage. |
| Controls |
| Switch Hold
Use
PC Hold
PlayStation Hold
Xbox Hold
|
Sword and Shield
| All Sword and Shield Guides | ||
|---|---|---|
 Trees & Full List Trees & Full List |
 How to Use How to Use |
 Best Builds Best Builds |
Shield Bash
| Switched With | |
|---|---|
| Falling Shadow | |
| Description | |
| A mix of offense and defense, allows the Hunter to use a Wirebug to dash forward with the shield raised. If the attack connects with a monster, the Hunter can follow up with more attacks. Can also parry an incoming attack - if timed right. Wirebug Gauge Recovery Speed: Fast Wirebug Cost: 1 |
|
| Controls | |
| Switch PC PlayStation Xbox |
|
Destroyer Oil

| Switched With | |
|---|---|
| Windmill | |
| Description | |
| Uses a Wirebug to cover your blade with a special ointment whose effects triggered by the friction with the shield. Also restores 20 Sharpness when used. While active, monsters flinch easily, creating more opening for attack. Wirebug Gauge Recovery Speed: Medium Wirebug Cost: 1 |
|
| Controls | |
| Switch PC PlayStation Xbox |
|
Twin Blade Combo
| Switched With | |
|---|---|
| Sword/Shield Combo | |
| Description | |
| Opens the combo with a circular attack then follows up with a blade thrust - both using the sword. Effective for dealing status and elemental damage. | |
| Controls | |
| Switch Press Use PC Press Use PlayStation Press Use Xbox Press Use |
|
Dual Blades
| All Dual Blades Guides | ||
|---|---|---|
 Trees & Full List Trees & Full List |
 How to Use How to Use |
 Best Builds Best Builds |
Spiral Slash
| Switched With | |
|---|---|
| Piercing Bind | |
| Description | |
| A silkbind attack that launches you spiraling forward. Once your attack connects, your body acts as a drill as your blades bore into your target's flesh. You can also perform Spiral Slash while midair. Wirebug Gauge Recovery Speed: Medium Wirebug Cost: 1 |
|
| Controls | |
| Switch PC PlayStation Xbox |
|
Ironshine Silk
| Switched With | |
|---|---|
| Shrouded Vault | |
| Description | |
| Evading just in time before an attack hits will sharpen your weapon. Works well with Shrouded Vault, and all other evasion moves. Effect lasts for 45s. Wirebug Gauge Recovery Speed: Fast Wirebug Cost: 1 |
|
| Controls | |
| Switch PC PlayStation Xbox |
|
Slide Slash Combo

| Switched With | |
|---|---|
| Roundslash Combo | |
| Description | |
| Allows Hunters to attack while evading! The distance is also pretty huge so it's a great reposition tool. | |
| Controls | |
| Switch Use →
PC Use PlayStation Use →
Xbox Use →
Note: If there is no directional input, Left Slide Slash is performed by default. |
|
Lance
| All Lance Guides | ||
|---|---|---|
 Trees & Full List Trees & Full List |
 How to Use How to Use |
 Best Builds Best Builds |
Sheathing Retreat
| Switched With | |
|---|---|
| Twin Vine | |
| Description | |
| Automatically sheathes your weapon while using a Wirebug to pull you backwards out of harms way. Effective for strategic retreats. Wirebug Gauge Recovery Speed: Slow Wirebug Cost: 1 |
|
| Controls | |
| Switch PC PlayStation Xbox |
|
Skyward Thrust
| Switched With | |
|---|---|
| Anchor Rage | |
| Description | |
| A technique where a Wirebug launches you high into the air. Thrust your Lance towards the heavens and then pierce downwards. The falling portion of the attack inflicts multiple hits. Wirebug Gauge Recovery Speed: Medium Wirebug Cost: 1 |
|
| Controls | |
| Switch PC PlayStation Xbox |
|
Shield Tackle
| Switched With | |
|---|---|
| Guard Dash | |
| Description | |
| A technique where you charge forward with your shield raised. You will be able to follow up with a variety of thrusting attacks afterwards. | |
| Controls | |
| Switch Press Press PC Press Press PlayStation Press Press Xbox Press Press |
|
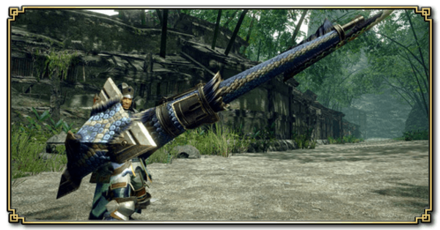
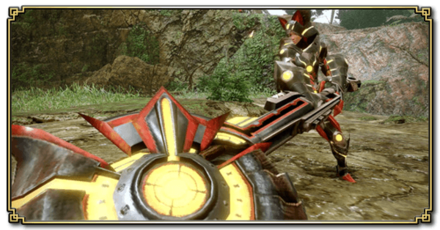
Gunlance
| All Gunlance Guides | ||
|---|---|---|
 Trees & Full List Trees & Full List |
 How to Use How to Use |
 Best Builds Best Builds |
Bullet Barrage

| Switched With | |
|---|---|
| Hail Cutter | |
| Description | |
| Uses a Wirebug to Blast dash toward your target, and unleashing all your ammo in one go. Shells, Wyrmstake Cannon, and Wyvern're will automatically be reloaded first before performing the attack so a windup animation is needed. Can also be used after firing in midair. Wirebug Gauge Recovery Speed: Medium Wirebug Cost: 2 |
|
| Controls | |
| Switch PC PlayStation Xbox |
|
Reverse Blast
| Switched With | |
|---|---|
| Guard Edge | |
| Description | |
| A rapid, backward evasive maneuver using a Wirebug to stop. If no shells are loaded, a quick reload will happen so be careful. Can be followed up with a Burst Fire. Wirebug Gauge Recovery Speed: Fast Wirebug Cost: 1 |
|
| Controls | |
| Switch PC PlayStation Xbox |
|
Erupting Cannon

| Switched With | |
|---|---|
| Wyrmstake Cannon | |
| Description | |
| The Gunlance fires an exploding stake onto your target. When using this, the tip of the Gunlance heats up and slashing attacks are enhances for a certain period. | |
| Controls | |
| Switch ↓
PC PlayStation ↓
Xbox ↓ |
|
Hammer
| All Hammer Guides | ||
|---|---|---|
 Trees & Full List Trees & Full List |
 How to Use How to Use |
 Best Builds Best Builds |
Keeping Sway
| Switched With | |
|---|---|
| Silkbind Spinning Bludgeon | |
| Description | |
| A quick evasion maneuver at a high speed. Maintains your charge level during the evade. Wirebug Gauge Recovery Speed: Fast Wirebug Cost: 1 |
|
| Controls | |
| Switch Hold zR to charge before launching the attack. PC Hold MB4 to charge before launching the attack. PlayStation Hold R2 to charge before launching the attack. Xbox Hold RT to charge before launching the attack. |
|
Impact Burst
| Switched With | |
|---|---|
| Impact Crater | |
| Description | |
| Makes any charge attack vibrate, creating a shockwave that makes it easier to flinch monsters. Activate and it will last for 55s so combo this with Impact Crater via Skill Swap to deal maximum damage! Wirebug Gauge Recovery Speed: Medium Wirebug Cost: 1 |
|
| Controls | |
| Switch PC PlayStation Xbox |
|
Spinning Bludgeon: Charge
| Switched With | |
|---|---|
| Spinning Bludgeon | |
| Description | |
| Stores released power and funnels it into the next Charge Switch attack. Power is build up when performing this move and charge level is maintained when executing a Charge Switch. Can be used to unleash a series of level 3 charged attacks! | |
| Controls | |
| Switch Hold Spinning Bludgeon: Charge → Hold Press
PC Hold Spinning Bludgeon: Charge → Hold Press
PlayStation Hold Spinning Bludgeon: Charge → Hold Press
Xbox Hold Spinning Bludgeon: Charge → Hold Press |
|
Hunting Horn
| All Hunting Horn Guides | ||
|---|---|---|
 Trees & Full List Trees & Full List |
 How to Use How to Use |
 Best Builds Best Builds |
| Songs and Effects | ||
Silkbind Shockwave
| Switched With | |
|---|---|
| Slide Beat | |
| Description | |
| For a short period, any attack performed causes the silk to vibrate while creating a time-delayed shockwave that triggers additional hits. Additional hits do major elemental, stun, exhaust, and part damage. Wirebug Gauge Recovery Speed: Medium Wirebug Cost: 1 |
|
| Controls | |
| Switch PC PlayStation Xbox |
|
Sonic Bloom
| Switched With | |
|---|---|
| Earthshaker | |
| Description | |
| Places a Wirebug cocoon on the ground. When attacking, vibrations are sent to the cocoon charging it up. When full, it would explode and deal huge stun and exhaust damage. Note: Playing Magnificent Trio pops the cocoon at the end of the combo. Wirebug Gauge Recovery Speed: Medium Wirebug Cost: 2 |
|
| Controls | |
| Switch PC PlayStation Xbox |
|
Swing Combo

| Switched With | |
|---|---|
| Crush Attack Combo | |
| Description | |
| Two-hit attack that can be delivered from either the left or right. Allows you to quickly shift directions, making it useful for repositioning. | |
| Controls | |
| Switch Use
PC Use
PlayStation Use
Xbox Use |
|
Switch Axe
| All Switch Axe Guides | ||
|---|---|---|
 Trees & Full List Trees & Full List |
 How to Use How to Use |
 Best Builds Best Builds |
Wire Step
| Switched With | |
|---|---|
| Invincible Gambit | |
| Description | |
| An evasion technique that allows you to morph into Axe Mode while flanking the enemy. Highly effective for maneuvering while in Axe Mode. Wirebug Gauge Recovery Speed: Fast Wirebug Cost: 1 |
|
| Controls | |
| Switch After jumping up, press X to perform a Forward Slash. PC After jumping up, press Left Click to perform a Forward Slash. PlayStation After jumping up, press Triangle to perform a Forward Slash. Xbox After jumping up, press Y to perform a Forward Slash. |
|
Elemental Burst Counter
| Switched With | |
|---|---|
| Switch Charger | |
| Description | |
| Compresses switch gauge energy that can be released as an elemental burst. Initial activation drains the Switch Gauge. If timed right, can counter all monster attack and the Switch Axe would go into the amped state. Wirebug Gauge Recovery Speed: Fast Wirebug Cost: 2 |
|
| Controls | |
| Switch Press zR to execute the counter Elemental Burst. PC Press MB4 to execute the counter Elemental Burst. PlayStation Press R2 to execute the counter Elemental Burst. Xbox Press RT to execute the counter Elemental Burst. |
|
2-Staged Morph Slash Combo
| Switched With | |
|---|---|
| Axe: Wide Sweep | |
| Description | |
| A two-stage attack that follows a Wild Swing. First stage morphs into Sword Mode, second stage morphs into Axe Mode. During this time, Axe Morph Slash fills the Switch Gauge and Sword Morph Slash increases amp gauge. | |
| Controls | |
| Switch Wild Swing →
Press
Press
PC Wild Swing →
Press
Press
PlayStation Wild Swing →
Press
Press
Xbox Wild Swing →
Press
Press |
|
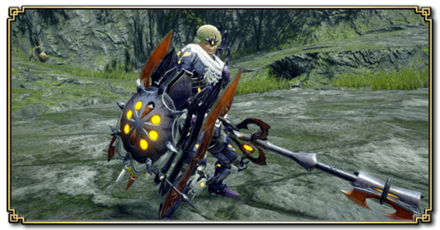
Charge Blade
| All Charge Blade Guides | ||
|---|---|---|
 Trees & Full List Trees & Full List |
 How to Use How to Use |
 Best Builds Best Builds |
Air Dash
| Switched With | |
|---|---|
| Morphing Advance | |
| Description | |
| Raises the Hunter up while whirling an axe then propels you away with Phial Explosion. Damage often leaves monsters mountable and you can control your fall direction to some degree. If no Phial explosion was triggered, you'll fall straight down. Wirebug Gauge Recovery Speed: Fast Wirebug Cost: 1 |
|
| Controls | |
| Switch PC PlayStation Xbox |
|
Ready Stance

| Switched With | |
|---|---|
| Counter Peak Performance | |
| Description | |
| Binds sword and shield with Ironsilk and enters a guard stance. After guarding, a heavy knockback leaves you in Sword Mode, and lowers your guard reaction so you're able to chain sword/axe attacks. Wirebug Gauge Recovery Speed: Fast Wirebug Cost: 1 |
|
| Controls | |
| Switch PC PlayStation Xbox |
|
Phial Follow-up: Firing Pin

| Switched With | Controls |
|---|---|
| Phial Follow-up | Switch Shield Thrust during Elemental Boost or sword attacks in Sword Boost Mode.
Continuing to attack will amplify the energy built up on your target |
| Description | |
| Lowers the pressure of elemental energy generated through Shield Thrust using Elemental Boost or sword attacks while in Sword Boost Mode. The elemental energy generated builds up on your target, but disappears over time. Can be detonated by any attack in Axe mode, and extending the time limit of the Elemental Boost. | |
Insect Glaive
| All Insect Glaive Guides | ||
|---|---|---|
 Trees & Full List Trees & Full List |
 How to Use How to Use |
 Best Builds Best Builds |
| Best Kinsects and How to Upgrade Them | ||
Kinsect Glide

| Switched With | |
|---|---|
| Silkbind Vault | |
| Description | |
| Sends your Kinsect out and uses a Wirebug to quickly jump to it. The Kinsect will aim for a marker, or if there is none it would fly forward or follow the reticle. When the Kinsect hits a monster, it will absorb extract. Wirebug Gauge Recovery Speed: Fast Wirebug Cost: 1 |
|
| Controls | |
| Switch PC PlayStation Xbox |
|
Awakened Kinsect Attack

| Switched With | |
|---|---|
| Recall Kinsect | |
| Description | |
| A technique that hurls a Kinsect forward to inflict massive damage. All extracts are consumed and the more extract you have, the stronger the attack will be. Afterwards, you'll close in to Kinsect using a Wirebug, while absorbing extract and marking your target. The move finishes with a Vaulting Dance. Wirebug Gauge Recovery Speed: Medium Wirebug Cost: 1 |
|
| Controls | |
| Switch PC PlayStation Xbox |
|
Kinsect Slash
| Switched With | |
|---|---|
| Jumping Advancing Slash | |
| Description | |
| Thrust forward with your glaive and Kinsect. If the slash connects, you'll perform a Vaulting Dance, absorbing the extract. However, absorbing the red extract won't allow you to absorb any other extract, but you'll be able to perform an Enhanced Insect Spiker as a trade-off. | |
| Controls | |
| Switch Press
PC Press
PlayStation Press
Xbox Press |
|
New Kinsect Bonus: Powder Vortex

Using Powder Vortex, the Kinsect collects dust particles within a set range and then concentrates them for an explosion.
New Kinsect Bonus: Boosted Powder Extract
After using assisted attacks, a powder containing all 3 extracts will appear in the air, allowing hunters to collect them by simply moving through it.
New Kinsect Bonus: Kinsect Charge
With Kinsect Charge, the Kinsect can automatically charge toward monsters even when it's not with you.
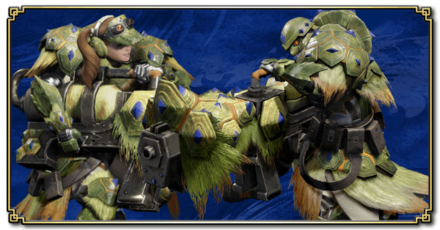
Light Bowgun
| All Light Bowgun Guides | ||
|---|---|---|
 Trees & Full List Trees & Full List |
 How to Use How to Use |
 Best Builds Best Builds |
Mech Silkbind Shot
| Switched With | |
|---|---|
| Silkbind Glide | |
| Description | |
| Unleashes an onslaught of attacks. Each shot is laced with Ironsilk, giving each the increased power to break parts or make the monster mountable. Only lasts for a certain amount of time. Wirebug Gauge Recovery Speed: Medium Wirebug Cost: 1 |
|
| Controls | |
| Switch PC PlayStation Xbox |
|
Wyvern Counter

| Switched With | |
|---|---|
| Fanning Vault | |
| Description | |
| An urgent retreat that fires a shot with massive recoil. Use this mainly for evasion only as the shot does not deal huge damage. Wirebug Gauge Recovery Speed: Fast Wirebug Cost: 1 |
|
| Controls | |
| Switch PC PlayStation Xbox |
|
Critical Firepower

| Switched With | |
|---|---|
| Marksman | |
| Description | |
| A shooting style that further raises the damage output but narrows down the critical distance and increases recoil. Normal shots deal 30% more damage, Spread increases by 20%, and Pierce increases by 10%. Does not apply to certain ammo types. | |
| Controls | |
| Switch Press zR
PC Press Left Click
PlayStation Press R2
Xbox Press RT |
|
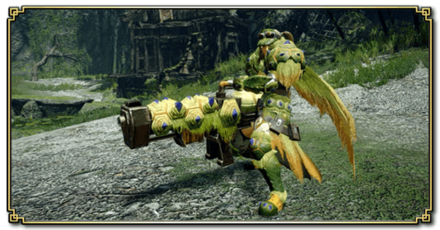
Heavy Bowgun
| All Heavy Bowgun Guides | ||
|---|---|---|
 Trees & Full List Trees & Full List |
 How to Use How to Use |
 Best Builds Best Builds |
Rising Moon
| Switched With | |
|---|---|
| Counter Shot | |
| Description | |
| Generates a ring of Ironsilk. When ammo passes through it, it extends the ammo's range extending some ammo's viability from father away. Wirebug Gauge Recovery Speed: Fast Wirebug Cost: 1 |
|
| Controls | |
| Switch PC PlayStation Xbox |
|
Setting Sun
| Switched With | |
|---|---|
| Free Silkbind Glide | |
| Description | |
| Generates a ring of Ironsilk. When ammo passes through it, range is decreased but firing pierce / multi-hit ammos will have increased number of hits upon impact. Wirebug Gauge Recovery Speed: Fast Wirebug Cost: 1 |
|
| Controls | |
| Switch PC PlayStation Xbox |
|
Crouching Shot

| Switched With | |
|---|---|
| Charged Shot | |
| Description | |
| Your Hunter crouches down and lets out a barrage of bullets, allowing you to fire in rapid succession. The longer you fire, the shorter the firing interval becomes. This also overheats your HBG so manage it properly, else you won't be able to use this technique in a long while. Does not apply to certain ammo types. | |
| Controls | |
| Switch Hold zR
PC Hold Left Click
PlayStation Hold R2
Xbox Hold RT |
|
Bow
| All Bow Guides | ||
|---|---|---|
 Trees & Full List Trees & Full List |
 How to Use How to Use |
 Best Builds Best Builds |
Bolt Boost

| Switched With | |
|---|---|
| Herculean Draw | |
| Description | |
| Activates Super Critical Range for a short time. All arrows fired at Super Critical Range will deal increased damage. The activation lasts for around 105s. Wirebug Gauge Recovery Speed: Medium Wirebug Cost: 1 |
|
| Controls | |
| Switch PC PlayStation Xbox |
|
Butcher's Bind
| Switched With | |
|---|---|
| Focus Shot | |
| Description | |
| Fires an arrow loaded with Ironsilk. Shooting the tether spot will deal sever damage. Missing any arrow would cancel the skill. Wirebug Gauge Recovery Speed: Medium Wirebug Cost: 1 |
|
| Controls | |
| Switch Press A, MB4, Circle, or B to continue firing arrows midair. Press X, MB5, Triangle, or Y to follow-up with an Aerial Diving Melee Attack. R + X Shift + MB5 R1 + Triangle RB + Y |
|
Stake Thrust
| Switched With | |
|---|---|
| Melee Attack | |
| Description | |
| Thrusts an explosive stake on your target. The stake reacts to follow-up attacks, dealing extra damage. The amount of damage dealt is determined by the type of arrow used. | |
| Controls | |
| Switch PC PlayStation Xbox |
|
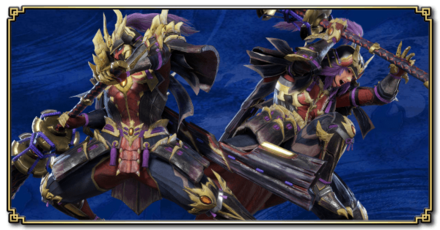
New Switch Skill Feature: Skill Swap

A new mechanic called Switch Skill Swap will also be introduced in Monster Hunter Rise: Sunbreak! This allows hunters to quickly switch between two Switch Skill and Silkbind Attack loadouts during hunts. In addition, a Swap Evade mechanic can be done right after switching, allowing for more freedom in play style.
Monster Hunter Rise: Sunbreak Related Guides

Tips To Start Monster Hunter Rise: Sunbreak
 Things to Do First
 Sunbreak Walkthrough
 New Silkbind Attacks and Switch Skills
 Weapon Balance Changes
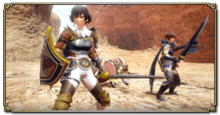 Follower Quests
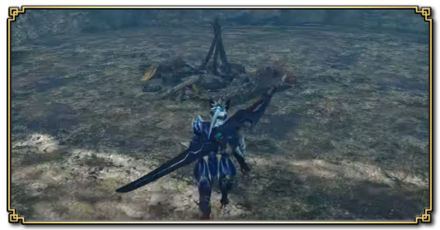 All Sunbreak Sub-Camps
 All Sunbreak Relic Records
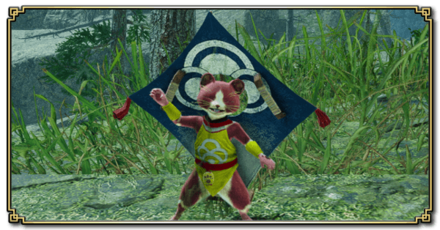 Buddy Recon Locations
 Palico Secret Support Skills
 Cohoot Locations
 Follower Collab Quests
 Talisman Farming
 Ore Locations by Map
 Ore Farming Routes
 Endgame Content
 Anomaly Quests
Sunbreak Monsters
 Astalos
 Aurora Somnacanth
 Blood Orange Bishaten
 Daimyo Hermitaur
 Espinas
 Furious Rajang
 Gaismagorm
 Garangolm
 Gore Magala
 Lucent Nargacuga
 Lunagaron
 Magma Almudron
 Malzeno
 Pyre Rakna-Kadaki
 Scorned Magnamalo
 Seething Bazelgeuse
 Seregios
 Shagaru Magala
 Shogun Ceanataur
 Boggi
Boggi Ceanataur
 Gowngoat
 Hermitaur
 Hornetaur
 Pyrantula
 Vespoid
 Velociprey
Sunbreak Locations
 Forlorn Arena Forlorn Arena |
 The Citadel The Citadel |
 Elgado Outpost Elgado Outpost |
 The Jungle The Jungle |
Sunbreak-Related News
 All Sunbreak Features
 Release Date and Time
 Silkbind Attacks & Switch Skills
 How to Switch Skill Swap
 Weapon Changes and Balance Predictions
 Follower Collab Quests
 How to Preload
 Demo Guide and Monsters
 How to Unlock Master Rank
 Things To Do Before Sunbreak
 Update 10.0 Patch Notes & Summary
Sunbreak Product Info
 Sunbreak Pro Controller Sunbreak Pro Controller |
 Amiibo Amiibo |
 Game Editions Game Editions |
 Preorder Bonuses and How to Preorder Preorder Bonuses and How to Preorder |
Author

Sunbreak | List of All New Silkbind Attacks and Switch Skills
Rankings
Gaming News


![Monster Hunter Stories 3 Review [First Impressions] | Simply Rejuvenating](https://img.game8.co/4438641/2a31b7702bd70e78ec8efd24661dacda.jpeg/thumb)
Popular Games

Genshin Impact Walkthrough & Guides Wiki
Honkai: Star Rail Walkthrough & Guides Wiki
Umamusume: Pretty Derby Walkthrough & Guides Wiki
Pokemon Pokopia Walkthrough & Guides Wiki
Resident Evil Requiem (RE9) Walkthrough & Guides Wiki
Monster Hunter Wilds Walkthrough & Guides Wiki
Wuthering Waves Walkthrough & Guides Wiki
Arknights: Endfield Walkthrough & Guides Wiki
Pokemon FireRed and LeafGreen (FRLG) Walkthrough & Guides Wiki
Pokemon TCG Pocket (PTCGP) Strategies & Guides Wiki


Recommended Games
Diablo 4: Vessel of Hatred Walkthrough & Guides Wiki
Cyberpunk 2077: Ultimate Edition Walkthrough & Guides Wiki
Fire Emblem Heroes (FEH) Walkthrough & Guides Wiki
Yu-Gi-Oh! Master Duel Walkthrough & Guides Wiki
Super Smash Bros. Ultimate Walkthrough & Guides Wiki
Pokemon Brilliant Diamond and Shining Pearl (BDSP) Walkthrough & Guides Wiki
Elden Ring Shadow of the Erdtree Walkthrough & Guides Wiki
Monster Hunter World Walkthrough & Guides Wiki
The Legend of Zelda: Tears of the Kingdom Walkthrough & Guides Wiki
Persona 3 Reload Walkthrough & Guides Wiki


All rights reserved
©CAPCOM CO., LTD. ALL RIGHTS RESERVED.
The copyrights of videos of games used in our content and other intellectual property rights belong to the provider of the game.
The contents we provide on this site were created personally by members of the Game8 editorial department.
We refuse the right to reuse or repost content taken without our permission such as data or images to other sites.