High Rank Sword and Shield Builds | Monster Hunter Rise
★ All Title Updates now available for ALL PLATFORMS!
┗ Title Update 4 | Title Update 5 | Bonus Update
┗ Check out all our Best Builds For Every Weapon!
┗ TU4 Monsters: Velkhana | Risen C.G. Valstrax
┗ TU5 Monsters: Amatsu | Risen Shagaru Magala
┗ Bonus Update Monster: Primordial Malzeno
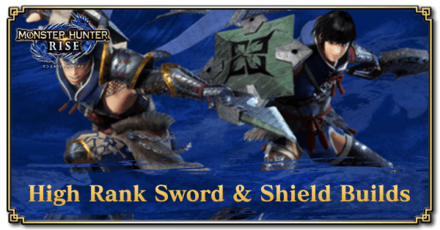
This is a guide to the best high rank builds Sword and Shields in Monster Hunter Rise (MH Rise). Learn about the best Sword and Shields from Update 3.0+, and the best Skills and Armor pieces to use with the Sword and Shields for High Rank, and Endgame.
List of Contents
Endgame Build (Update 3.0): HR 100+
Raw Damage
| Weapon | Slots | ATK | DEF |
|---|---|---|---|
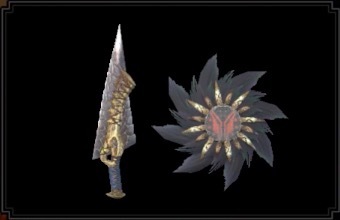 Flash in the Night Flash in the Night
 |
②ーー | 180 | - |
| Affinity | Element/Status | ||
| 30% |
-
|
||
| Armor | Slots | Skills |
|---|---|---|
|
|
②①ー |
Weakness Exploit Lv. 1
Dragonheart Lv. 1
|
|
|
③①ー |
Resuscitate Lv. 2
Dragonheart Lv. 1
|
|
|
②ーー |
Weakness Exploit Lv. 2
Dragonheart Lv. 1
|
|
|
②ーー | |
|
|
③①ー |
Resentment Lv. 1
Dragonheart Lv. 1
|
| Talisman Skill | Attack Boost Lv. 3 | |
| Decorations | ||
| Skills | |
|---|---|
|
Attack Boost Lv. 6
| Dragonheart Lv. 5 Resentment Lv. 3 | Resuscitate Lv. 3 Critical Boost Lv. 3 | Weakness Exploit Lv. 3 Speed Sharpening Lv. 2 | Flinch Free Lv. 1 |
| Build Merits | This build pumps as much damage as possible through the full Valstrax Set, Attack Boost, and Critical Boost. Flinch Free is included to negate flinches in multiplayer but you can swap it out for another level of Speed Sharpening whenever you're hunting solo. |
|---|
Dragon Slayer
| Weapon | Slots | ATK | DEF |
|---|---|---|---|
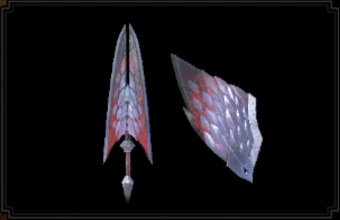 Vermilion Orgul Vermilion Orgul
 |
②ーー | 180 | - |
| Affinity | Element/Status | ||
| 0% | |||
| Armor | Slots | Skills |
|---|---|---|
|
|
②①ー |
Weakness Exploit Lv. 1
Dragonheart Lv. 1
|
|
|
③①ー |
Resuscitate Lv. 2
Dragonheart Lv. 1
|
|
|
②ーー |
Weakness Exploit Lv. 2
Dragonheart Lv. 1
|
|
|
②ーー | |
|
|
③①ー |
Resentment Lv. 1
Dragonheart Lv. 1
|
| Talisman Skill | Attack Boost Lv. 1
with two additional ① slots |
|
| Decorations | ||
| Skills | |
|---|---|
|
Dragon Attack Lv. 5
| Dragonheart Lv. 5 Attack Boost Lv. 4 | Resentment Lv. 3 Resuscitate Lv. 3 | Critical Boost Lv. 3 Weakness Exploit Lv. 3 |
| Build Merits | This build cranks as much Dragon Element as possible while increasing base attack and critical damage through the amazing synergy between the full Valstrax Set and Vermilion Orgul's Valstrax Soul ramp up skill. This set makes quick work of any monster that is vulnerable to Dragon Element. |
|---|
High Rank Build (Update 2.0): HR 40 to 99
Hi Ninja Build
| Weapon | Slots | ATK | DEF |
|---|---|---|---|
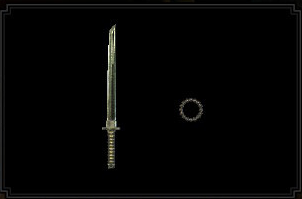 Hi Ninja Sword Hi Ninja Sword
 |
①①① | 200 | - |
| Affinity | Element/Status | ||
| 100% |
-
|
||
| The Hi Ninja Sword boasts a whopping 200 attack value and a 100% affinity rating. This means we can forget about the usual challenge of pumping affinity into weapons for increased damage and just focus on pumping overall damage directly instead! |
| Armor | Slots | Skills |
|---|---|---|
|
|
②ーー |
Protective Polish Lv. 1
|
|
|
①①ー |
Handicraft Lv. 1
Tremor Resistance Lv. 1
|
|
|
②ーー |
Attack Boost Lv. 2
|
|
|
②①① |
Attack Boost Lv. 2
|
|
|
①①ー |
Latent Power Lv. 1
Critical Boost Lv. 2
|
| Talisman Skill | Slugger Lv. 3 | |
| Decorations | ||
| Skills | |
|---|---|
|
Attack Boost Lv. 4
| Critical Boost Lv. 3 Protective Polish Lv. 3 | Slugger Lv. 3 Stun Resistance Lv. 3 | Speed Sharpening Lv. 3 Hunger Resistance Lv. 2 | Latent Power Lv. 1 Handicraft Lv. 1 | Tremor Resistance Lv. 1 Flinch Free Lv. 1 |
| Build Merits | Built around the Hi Ninja Sword, this build allows the Sword and Shield to reach a touch of Blue Sharpness by using Lv. 1 Handicraft but maintains it through Grinder and Protective Polish. Damage is improved through Critical and Attack Boost while the addition of Slugger drastically improve the Sword and Shield's KO potential through its various shield bash attacks. This set is also flexible in terms of utility. Aside from your static Brace Jewel to prevent flinches and trips, you still have enough slots for either maxed out Stun Resistance or Elemental Resistances. |
|---|
Mind's Eye Bludgeoner
| Weapon | Slots | ATK | DEF |
|---|---|---|---|
 Hi Ninja Sword Hi Ninja Sword
 |
①①① | 200 | - |
| Affinity | Element/Status | ||
| 100% |
-
|
||
| Armor | Slots | Skills |
|---|---|---|
|
|
①ーー | |
|
|
③②① | No Skills |
|
|
②ーー |
Attack Boost Lv. 2
|
|
|
②①① |
Attack Boost Lv. 2
|
|
|
②ーー |
Attack Boost Lv. 2
Stun Resistance Lv. 1
|
| Talisman Skill | Bludgeoner Lv. 1
with an additional ② slot |
|
| Decorations | ||
| Skills | |
|---|---|
|
Attack Boost Lv. 7
| Critical Boost Lv. 3 Bludgeoner Lv. 3 | Speed Sharpening Lv. 3 Hunger Resistance Lv. 3 | Mind's Eye Lv. 2 Ballistics Lv. 2 | Evade Window Lv. 2 Stun Resistance Lv. 1 | Flinch Free Lv. 1 |
| Build Merits | A mix up build from our first Hi Ninja Sword build. Instead of amping up its damage via an increase in Sharpness Level, we instead embrace the large green bar and combine it with Bludgeoner and Mind's Eye. While the damage numbers may be near identical, the QoL skill of Mind's Eye makes it easier to use against enemy monsters like the Basarios, Almudron (front leg), and other tough monster parts! |
|---|
Master's Touch
| Weapon | Slots | ATK | DEF |
|---|---|---|---|
 Flash in the Night Flash in the Night
 |
②ーー | 180 | - |
| Affinity | Element/Status | ||
| 30% |
-
|
||
| Armor | Slots | Skills |
|---|---|---|
|
|
①ーー |
Critical Eye Lv. 3
Critical Boost Lv. 1
|
|
|
③②① | No Skills |
|
|
②ーー |
Attack Boost Lv. 2
|
|
|
②①① |
Attack Boost Lv. 2
|
|
|
②ーー |
Attack Boost Lv. 2
Stun Resistance Lv. 1
|
| Talisman Skill | Weakness Exploit Lv. 2 | |
| Decorations | ||
| Skills | |
|---|---|
|
Attack Boost Lv. 6
| Critical Eye Lv. 3 Critical Boost Lv. 3 | Weakness Exploit Lv. 3 Master's Touch Lv. 3 | Speed Sharpening Lv. 3 Stun Resistance Lv. 1 | Flinch Free Lv. 1 |
| Build Merits | Master's Touch prevents sharpness loss 80% of the time everytime you hit with a critical strike. By maxing out our affinity, we can maintain a quasi-permanent white sharpness value which will greatly amp up our damage throughout the entire hunt! Flash in the Night, when using it's Affinity Boost II ramp up skill, allows us to reach 101% total affinity on weak spots. |
|---|
Endgame Build (Update 2.0): HR 8 to 40
Critical Slugger
| Weapon | Slots | ATK | DEF |
|---|---|---|---|
 Flash in the Night Flash in the Night
 |
②ーー | 180 | - |
| Affinity | Element/Status | ||
| 30% |
-
|
||
| Flash in the Night's great stats and white sharpness make it a great weapon to climb the early stages uncapped High Rank. |
| Armor | Slots | Skills |
|---|---|---|
|
|
①ーー |
Latent Power Lv. 1
Weakness Exploit Lv. 1
|
|
|
①ーー |
Latent Power Lv. 1
Weakness Exploit Lv. 1
|
|
|
①ーー |
Attack Boost Lv. 2
Slugger Lv. 2
|
|
|
①ーー | |
|
|
①①ー |
Latent Power Lv. 1
Critical Boost Lv. 2
|
| Talisman Skill | Weakness Exploit Lv. 1 | |
| Decorations | ||
| Skills | |
|---|---|
|
Latent Power Lv. 3
| Weakness Exploit Lv. 3 Critical Boost Lv. 3 | Slugger Lv. 3 Speed Sharpening Lv. 3 | Stun Resistance Lv. 3 Attack Boost Lv. 2 | Heroics Lv. 1 Maximum Might Lv. 1 |
| Build Merits | Flash in the Night, when combined with Weakness Exploit and Latent Power, can easily reach 100% affinity. The damage is further amplified with Critical Boost while Slugger allows you to KO monsters more efficiently. This is an optimized damage dealing set build that can efficiently stun monsters as well! |
|---|
High Rank Build: HR 6 and 7
Critical Build
| Weapon | Slots | ATK | DEF |
|---|---|---|---|
 Flash in the Night Flash in the Night
 |
②ーー | 180 | - |
| Affinity | Element/Status | ||
| 30% |
-
|
||
| Flash in the Night is a great rarity 6 weapon that has a white sharpness and 30% affinity. To top it off, it has a base attack stat of 180 — making it the perfect weapon to reach the very end of Hub 7★ Quests. |
| Armor | Slots | Skills |
|---|---|---|
|
|
①ーー |
Latent Power Lv. 1
Weakness Exploit Lv. 1
|
|
|
①ーー |
Latent Power Lv. 1
Weakness Exploit Lv. 1
|
|
|
①ーー |
Attack Boost Lv. 2
Slugger Lv. 2
|
|
|
①ーー | |
|
|
①①ー |
Latent Power Lv. 1
Critical Boost Lv. 2
|
| Skills | |
|---|---|
|
Attack Boost Lv. 4
| Critical Boost Lv. 3 Latent Power Lv. 2 | Weakness Exploit Lv. 2 Slugger Lv. 2 | Critical Draw Lv. 1 |
| Build Merits | This set build utilizes damage boosting skills like Attack Boost, Critical Boost, and Weakness Exploit. This build can easily reach 100% affinity whenever Latent Power is active. Lastly, Slugger is added to improve the Sword and Shield's KO potential during hunts. |
|---|
High Rank Build: HR 4 and 5
Crit Starter
| Weapon | Slots | ATK | DEF |
|---|---|---|---|
 Dirty Marquis Dirty Marquis
 |
①①ー | 140 | - |
| Affinity | Element/Status | ||
| 0% | |||
| Dirty Marquis is an excellent High Rank starter due to its decent stats and Poison Element. |
| Armor | Slots | Skills |
|---|---|---|
|
|
①①ー |
Critical Eye Lv. 1
|
|
|
①ーー |
Critical Eye Lv. 2
Recovery Speed Lv. 1
|
|
|
②ーー |
Critical Eye Lv. 2
Heroics Lv. 1
|
|
|
①ーー |
Attack Boost Lv. 2
Sleep Resistance Lv. 1
|
|
|
①ーー |
Attack Boost Lv. 2
Critical Eye Lv. 2
|
| Skills | |
|---|---|
|
Critical Eye Lv. 7
| Attack Boost Lv. 4 Heroics Lv. 1 | Recovery Speed Lv. 1 Sleep Resistance Lv. 1 |
| Build Merits | This straightforward build that prioritizes affinity and attack, this is a great setup to start your High Rank adventures with. |
|---|
Recommended Skills for Sword and Shield
| Skills | Effect |
|---|---|
| Critical Eye ★★★ |
Critical Eye is a near necessity for critical builds. |
| Critical Boost ★★★ |
Amplifies critical damage by 5%/10%/15% (based on level). A must have skill for any affinity build. |
| Weakness Exploit ★★★ |
Increases affinity by 10/30/50% when hitting enemy weakspots. Easier to max out than critical eye and gives higher affinity if used properly. Goes well together with Critical Boost. |
| Attack Boost ★★★ |
More damage is always welcome. It gains a percentage bonus at rank 4 which is a good level to always aim for. |
| Razor Sharp ★★ |
Chance to negate sharpness loss when attacking. |
| Slugger ★★ |
Makes it easier to stun monsters. It works for the Sword and Shield thanks to its various shield bash moves. |
| Handicraft ★★ |
Some endgame Sword and Shields tend to have a lot of room for improvement regarding their sharpness. With that in mind, consider using Handicraft for your builds! |
| Guard ★ |
Guard reduces stamina depletion which makes the SnS a really tanky weapon. |
| Speed Sharpening ★ |
For those crucial times in the middle of fights where you need to raise your sharpness. Less value due to the ability to die palamutes. |
| Flinch Free ★ |
Great for multiplayer. Never get flinched by ally attacks again! |
Monster Hunter Rise Related Links

|
• Weapons marked withNEW have been updated. • Weapons withUP have been reviewed and does not warrant an updated build from the Bonus Update. |
| All Weapon Build Guides | |
|---|---|
NEW Low Rank | High Rank Master Rank |
NEW Low Rank | High Rank Master Rank |
NEW Low Rank | High Rank Master Rank |
NEW Low Rank | High Rank Master Rank |
NEW Low Rank | High Rank Master Rank |
NEW Low Rank | High Rank Master Rank |
NEW Low Rank | High Rank Master Rank |
NEW Low Rank | High Rank Master Rank |
NEW Low Rank | High Rank Master Rank |
NEW Low Rank | High Rank Master Rank |
NEW Low Rank | High Rank Master Rank |
NEW Low Rank | High Rank Master Rank |
NEW Low Rank | High Rank Master Rank |
UP Low Rank | High Rank Master Rank |
Other Builds
| Other Build Guides | |
|---|---|
| General High Rank Builds and Best Equipment | Buddy Equipment Builds Palico | Palamute |
Comment
I think there's a mistake on the HR8-40 set where you used KO Jewel 2. When all the slots are level 1
Author
High Rank Sword and Shield Builds | Monster Hunter Rise
improvement survey
03/2026
improving Game8's site?

Your answers will help us to improve our website.
Note: Please be sure not to enter any kind of personal information into your response.

We hope you continue to make use of Game8.
Rankings
- We could not find the message board you were looking for.
Gaming News
Popular Games

Genshin Impact Walkthrough & Guides Wiki

Honkai: Star Rail Walkthrough & Guides Wiki

Umamusume: Pretty Derby Walkthrough & Guides Wiki

Pokemon Pokopia Walkthrough & Guides Wiki

Resident Evil Requiem (RE9) Walkthrough & Guides Wiki

Monster Hunter Wilds Walkthrough & Guides Wiki

Wuthering Waves Walkthrough & Guides Wiki

Arknights: Endfield Walkthrough & Guides Wiki

Pokemon FireRed and LeafGreen (FRLG) Walkthrough & Guides Wiki

Pokemon TCG Pocket (PTCGP) Strategies & Guides Wiki
Recommended Games

Diablo 4: Vessel of Hatred Walkthrough & Guides Wiki

Cyberpunk 2077: Ultimate Edition Walkthrough & Guides Wiki

Fire Emblem Heroes (FEH) Walkthrough & Guides Wiki

Yu-Gi-Oh! Master Duel Walkthrough & Guides Wiki

Super Smash Bros. Ultimate Walkthrough & Guides Wiki

Pokemon Brilliant Diamond and Shining Pearl (BDSP) Walkthrough & Guides Wiki

Elden Ring Shadow of the Erdtree Walkthrough & Guides Wiki

Monster Hunter World Walkthrough & Guides Wiki

The Legend of Zelda: Tears of the Kingdom Walkthrough & Guides Wiki

Persona 3 Reload Walkthrough & Guides Wiki
All rights reserved
©CAPCOM CO., LTD. ALL RIGHTS RESERVED.
The copyrights of videos of games used in our content and other intellectual property rights belong to the provider of the game.
The contents we provide on this site were created personally by members of the Game8 editorial department.
We refuse the right to reuse or repost content taken without our permission such as data or images to other sites.


![Everwind Review [Early Access] | The Shaky First Step to A Very Long Journey](https://img.game8.co/4440226/ab079b1153298a042633dd1ef51e878e.png/thumb)

![Monster Hunter Stories 3 Review [First Impressions] | Simply Rejuvenating](https://img.game8.co/4438641/2a31b7702bd70e78ec8efd24661dacda.jpeg/thumb)


oops, my bad. Didn't see the weapon. It makes sense now