This survey will take about 1 minute.
Your answers will help us to improve our website.
Monster Hunter Rise: Sunbreak
Sunbreak Long Sword Guide: Combos, Controls and Moveset
★ All Title Updates now available for ALL PLATFORMS!
┗ Title Update 4 | Title Update 5 | Bonus Update
┗ Check out all our Best Builds For Every Weapon!
┗ TU4 Monsters: Velkhana | Risen C.G. Valstrax
┗ TU5 Monsters: Amatsu | Risen Shagaru Magala
┗ Bonus Update Monster: Primordial Malzeno
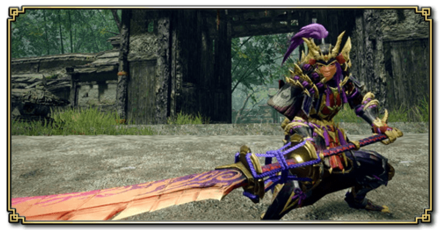
This is a guide to the Long Sword, a weapon in Monster Hunter Rise: Sunbreak (MH Rise). Read on to learn about new Long Sword controls and combos, how to use Long Sword counters, the Spirit Helm Breaker, as well as details on Long Sword Switch Skills.
| All Long Sword Guides | ||
|---|---|---|
 Trees & Full List Trees & Full List |
 How to Use How to Use |
 Best Builds Best Builds |
List of Contents
Long Sword Balance Changes
Update 15.0
| Long Sword Balance Changes and Fixes (Update 15.0) |
|---|
| The following adjustments were made to the long sword's Harvest Moon: 1. Increased the radius of the circle that spawns. 2. Removed 'sheathing your weapon' as a condition for canceling the effect. 3. Players will no longer be knocked back when touching the ring. 4. Decreased the cooldown time. 5. Slightly increased the height of the display position for the circle. |
This change focuses on making Harvest Moon easier to execute and use. This will surely make the Long Sword more powerful and easier to use!
Update 10.0
| Long Sword Balance Changes and Fixes (Update 10.0) |
|---|
| ・ Adjusted all of the following weapon actions: ・ Spirit Blade I (Spirit Gauge): Attack power slightly increased ・ Spirit Blade II: Attack power slightly increased ・ Spirit Blade III (1st Hit): Attack power slightly increased ・ Spirit Blade III (2nd Hit): Attack power slightly increased ・ Spirit Blade III (3rd Hit): Attack power slightly increased ・ Jumping Spirit Blade: Attack power slightly increased ・ Jumping Spirit Blade (1st Hit - Red Gauge): Attack power slightly increased ・ Jumping Spirit Blade (2nd Hit - Red Gauge): Attack power slightly increased ・ Rising Slash (From Spirit Blade): Attack power slightly increased ・ Jumping Spirit Blade (Landing): Attack power slightly increased ・ Jumping Spirit Blade II (1st Hit): Attack power slightly increased ・ Jumping Spirit Blade II (2nd Hit): Attack power slightly increased ・ Jumping Spirit Blade II (2nd Hit - Ground): Attack power slightly increased ・ Jumping Spirit Blade II (3rd Hit): Attack power slightly increased ・ Spirit Reckoning (2nd Hit): Attack power slightly decreased ・ Plunging Thrust: Attack power decreased ・ Iai Spirit Slash (Counter Failed): Attack power decreased ・ Iai Spirit Slash (Counter Succeeded): Attack power decreased ・ Iai Spirit Slash (Counter Succeeded - Followup): Attack power decreased ・ Thrust (From Spirit Blade I): Attack power slightly increased ・ Rising Slash (From Spirit Blade II): Attack power slightly increased ・ Several adjustments have been made to the Spirit Gauge aura levels. ・ White Aura: Physical damage scaling slightly decreased; Elemental scaling slightly decreased ・ Yellow Aura: Physical damage scaling slightly decreased; Elemental scaling slightly decreased ・ Red Aura: Physical damage scaling decreased; Elemental scaling decreased ・ Adjusted the Spirit Gauge aura level effects when you chain a Soaring Kick into a Spirit Helm Breaker. ・ White Aura: Physical damage scaling decreased ・ Yellow Aura: Physical damage scaling decreased ・ Red Aura: Physical damage scaling decreased ・ Soaring Kick: Wirebug Gauge recovers more slowly. ・ Fixed a bug where the blades of certain Long Swords would jut out of their sheaths when performing a Special Sheathe. |
Lots of moves have changed for the Long Sword, mainly to nerf the usual counter move that players used in Rise - Iai Slashes.
This will significantly lessen Long Sword attack power but with the addition of more counterattack silkbinds in Sunbreak, we do not see this actually affecting Long Sword users. They will just find a new counterattack gameplay loop to use.
Long Sword New Sunbreak Attack and Moves
Official Long Sword Preview Video
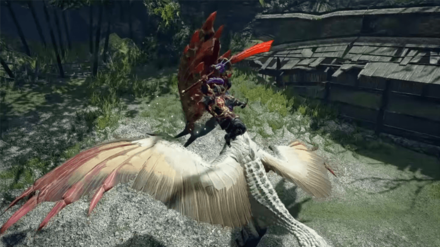
Silkbind Attack: Harvest Moon

Harvest Moon is a new Silkbind Attack for the Long Sword added in Sunbreak.
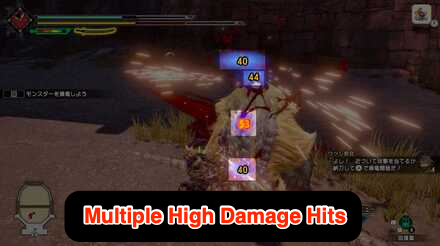
An Ironsilk ring is summoned on the field and limits the range where the user can attack. While inside the ring, any move that will use the Spirit Gauge will not deplete the meter, and all counter attacks will have additional hits.
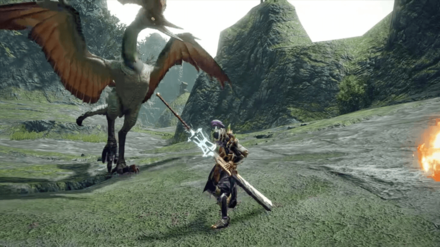
Switch Skill: Sacred Sheathe Combo
Sacred Sheathe Combo is a new Switch Skill for the Long Sword added in Sunbreak.
After an attack, the weapon is slowly sheathed and charged. This is then followed by a slash, with the damage dealt based on the level of the Spirit Gauge.
This move also acts as an automatic counter if the user gets hit with an attack before the move is finished, adding another powerful counter to the Long Sword's kit.
Tempered Spirit Blade

A move not introduced in any trailer. Tempered Spirit Blade is a quick and decisive silkbind counterattack for any monster attacks. When done correctly, the spirit gauge level would go up one level - perfect way to prime your Long Sword to Red really quickly.
Monster Hunter Rise: Sunbreak
Release Date and New Monsters
How Good Is the Long Sword?
Tier List Ranking
| MHRise Ranking | → | Sunbreak Ranking |
|---|---|---|
(S - A - B) 3 Level Tier |
(SS - S - A) 3 Level Tier |
The Long Sword continues to dominate in Sunbreak despite the massive nerf. It is by far the only weapon to utilize all Switch Skills effectively because they synergize with each other extremely well.
All the additional mechanics and Switch Skills more than makes up for the nerfs, making the Long Sword more effective than ever!
Long Sword Strengths
Use Spirit Gauge For a More Powerful Attack
The Spirit Gauge, indicated by a sword/katana bar next to the sharpness bar, is a mechanic exclusive to the Long Sword that gives certain moves more attack power. It is built up progressively through attack hits.
You can consume Spirit Gauge charges to give more power to your attacks. One of the more powerful Long Sword attacks, the Spirit Helm Breaker, consumes an entire Spirit Gauge Level, so always keep that Spirit Gauge topped up!
Attack Power Increases with the Spirit Gauge Level
The color of the Spirit Gauge changes from white → yellow → red. White has the lowest attack damage bonus, and red provides the most. Generally, the rule of thumb is to keep it red.
Counterattack Abilities
The Long Sword has various counterattack abilities with Foresight Slash and Special Sheathe, both of which returned from Monster Hunter World. With Monster Hunter Rise, a new Silkbind Attack called Serene Pose adds another counterattack move to the Long Sword's arsenal.
Long Sword Weaknesses
Low Single-Hit Damage Without Spirit Levels
The Long Sword's firepower comes from the level of the Spirit Gauge. If you do not change the color of the Spirit Gauge, the Long Sword's attack damage is very low.
No Guarding Options
The Long Sword does not have any guarding capabilities. This is compensated with the capability of counterattacking monsters by executing certain moves, but this requires timing and precision.
Long Sword Controls
| Controls | Action | |
|---|---|---|
| PC |
PS |
Overhead Slash |
| Switch |
Xbox |
|
| PC |
PS |
Thrust |
| Switch |
Xbox |
|
| PC While attacking, Directional Button + Left Click + Right Click |
PS While attacking, Left Stick + Triangle + Circle |
Directional Fade Slash |
| Switch While attacking, Left Stick + X + A |
Xbox While attacking, Left Stick + Y + B |
|
| PC Left Click + Right Click |
PS Triangle + Circle |
Fade Slash |
| Switch X + A |
Xbox Y + B |
|
| PC |
PS |
Spirit Slash |
| Switch |
Xbox |
|
| PC MB4 + Right Click |
PS R2 + Circle |
Foresight Slash |
| Switch zR + A |
Xbox RT + B |
|
| PC MB4 + Space |
PS R2 + X |
Special Sheathe |
| Switch zR + B |
Xbox RT + A |
|
| PC While in Special Sheathe, |
PS While in Special Sheathe, |
Iai Slash |
| Switch While in Special Sheathe, |
Xbox While in Special Sheathe, |
|
| PC While in Special Sheathe, |
PS While in Special Sheathe, |
Iai Spirit Slash |
| Switch While in Special Sheathe, |
Xbox While in Special Sheathe, |
|
| PC Middle Click + Left Click |
PS L2 + Triangle |
Soaring Kick |
| Switch zL + X |
Xbox LT + Y |
|
| PC After Soaring Kick hits, |
PS After Soaring Kick hits, |
Spirit Helm Breaker/Falling Thrust |
| Switch After Soaring Kick hits, |
Xbox After Soaring Kick hits, |
|
| PC Middle Click + Right Click |
PS L2 + Circle |
Serene Pose |
| Switch zL + A |
Xbox LT + B |
|
Useful Combos
| Basic Combo | |||
|---|---|---|---|
| Step Slash | Overhead Slash | Thrust | Rising Slash |
| Spirit Blade Combo (Needs Spirit Gauge) | |||
|---|---|---|---|
| Spirit Blade I |
Spirit Blade II |
Spirit Blade III |
Spirit Blade Roundslash |
| Fade Slash Combo (Needs Spirit Gauge) | |||
|---|---|---|---|
| Fade Slash | Spirit Jumping Slash | Spirit Blade III | Spirit Roundslash |
| Special Sheathe Combo 1 | |||
|---|---|---|---|
| Step Slash | Special Sheathe | Iai Slash | Spirit Blade II |
| Special Sheathe Combo 2 | |||
|---|---|---|---|
| Step Slash | Foresight Slash | Spirit Roundslash | |
| Foresight Slash Combo (When Successful) | |||
|---|---|---|---|
| Step Slash | Foresight Slash | Spirit Roundslash | |
Long Sword Silkbind Attacks
Harvest Moon
| Switch Controls | zL + A |
|---|---|
| PC Controls | Middle Click + Right Click |
| PS Controls | L2 + Circle |
| Xbox Controls | LT + B |
A ring around the user is spawned. As long as the hunter is inside the ring, all attacks that use up the Spirit Gauge will not use the meter. Furthermore, all successful counters will have additional hits.
Going outside the ring depletes your Spirit Gauge and cancels the move.
This move costs two Wirebug charges and has a medium recovery speed.
Soaring Kick
| Switch Controls | zL + X |
|---|---|
| PC Controls | Middle Click + Left Click |
| PS Controls | L2 + Triangle |
| Xbox Controls | LT + Y |
The Soaring Kick is a Silkbind Attack that lets you jump off a monster upward. By default, your hunter will execute a Plunging Thrust that turns your Spirit Gauge meter blue and gradually fills it.
While airborne, you may also press zR, MB4, R2, or RT to execute the Spirit Helm Breaker! This move deals massive damage but decreases your Long Sword Spirit Level by one. To maximize the damage, do this while in red Spirit Gauge.
Serene Pose
| Switch Controls | zL + A |
|---|---|
| PC Controls | Middle Click + Right Click |
| PS Controls | L2 + Circle |
| Xbox Controls | LT + B |
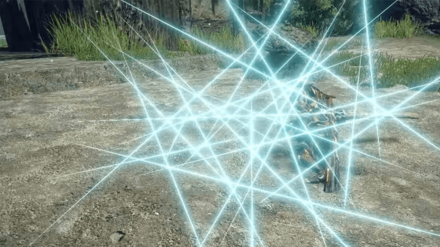
Serene Pose is a Silkbind Attack that scatters Wirebugs in front of the hunter and puts them in a counter stance. Any attack received during the counter stance duration will be negated and countered.
You can use this on anything that can damage the hunters, including barrel bombs. It can even be used as a wake-up move against monsters by utilizing barrel bomb explosions.
Silkbind Sakura Slash

| Switch Controls | zL + X |
|---|---|
| PC Controls | Middle Click + Left Click |
| PS Controls | L2 + Triangle |
| Xbox Controls | LT + Y |
The Silkbind Sakura Slash has the hunter spin around to dash and slice foe. This can be switched out with Soaring Kick.
Not only does the attack inflict multiple hits over time, causing additional damage, but it also grants 1 free Spirit Gauge on landing.
This skill is great for elemental damage builds due to its multiple hits.
Tempered Spirit Blade
| Switch Controls | zL + X |
|---|---|
| PC Controls | Middle Click + Left Click |
| PS Controls | L2 + Triangle |
| Xbox Controls | LT + Y |
A quick and decisive counterattack for all moves. When done correctly, the spirit gauge level would go up one level. This is the perfect way to prime your Long Sword to Red really quickly.
Long Sword Switch Skills
Switch Skills are unlocked with different conditions as you progress in the game. Base game MHRise provides Hunters with three (3) slots of Switch Skills, with the Sunbreak expansion adding two (2) more.
Note: Skills in red are exclusive to the Sunbreak expansion.
| Skill Slot | Switch Skill Choices |
|---|---|
| 1 | ・Step Slash ・Drawn Double Slash |
| 2 | ・Spirit Roundslash Combo ・Spirit Reckoning Combo |
| 3 | ・Special Sheathe Combo ・Sacred Sheathe Combo |
| 4 | ・Soaring Kick ・Silkbind Sakura Slash ・Tempered Spirit Blade |
| 5 | ・Serene Pose ・Harvest Moon |
Switch Skills Guide: How to Use and Unlock
Drawn Double Slash

| Switched With | |
|---|---|
| Step Slash | |
| Description | |
| A draw attack that unleashes two attacks in a row. You can absorb attacks while moving forward and combo straight to Spirit Blade II with R or Shift! | |
| Controls | |
(Draw weapon while sheathed) X, Left Click, Triangle, or Y (Draw weapon while sheathed) |
|
This Switch Skill replaces the draw attack of the Long Sword with a double slash attack. This deals damage twice and also negates an attack at the start of the draw.
This can also combo into Spirit Slash II but not Fade Slash.
Spirit Reckoning Combo

| Switched With | |
|---|---|
| Spirit Roundslash Combo | |
| Description | |
| Changes into a Spirit Blade at the third strike. Drives forward using Dividing Slash then finishes with the Spirit Reckoning combo. Difficult to pull off, but has high damage. | |
| Controls | |
| After Spirit Blade II After Spirit Blade II press zR, MB4, R2, or RT |
|
This Switch Skill replaces the Spirit Roundslash that normally ends the Spirit combo.
This also has a move that allows you to input a direction and rush towards that direction before executing the Reckoning combo. This increases your Spirit Gauge by one, like the Roundslash.
Silkbind Sakura Slash
| Switched With | |
|---|---|
| Soaring Kick | |
| Description | |
| A whirlwind-like attack, dashing past the target with a Wirebug. Increases the Spirit Gauge by 1. Wirebug Gauge Recovery Speed: Slow Wirebug Cost: 1 |
|
| Controls | |
This Silkbind Attack Switch Skill has your hunter dash forward while swinging your sword twice in a circle. This also instantly increases your Spirit Gauge level by 1.
The point where the blades hit will receive lingering damage. This is great for status and elemental builds!
Though this Switch Skill is viable for some, we don't recommend switching it out for Soaring Kick. Soaring Kick is the only way to execute the Spirit Helm Breaker, which is too strong to pass on.
Tempered Spirit Blade
| Switched With | |
|---|---|
| Soaring Kick | |
| Description | |
| A decisive maneuver that parries any incoming monster attack with a Spirit Blade. Time it properly to fill your Spirit Gauge and increase the Spirit Level by 1. Wirebug Gauge Recovery Speed: Fast Wirebug Cost: 1 |
Controls |
A quick and decisive counterattack for all moves. When done correctly, the spirit gauge level would go up one level. This is the perfect way to prime your Long Sword to Red really quickly.
Sacred Sheathe Combo
| Switched With |
|---|
| Special Sheathe Combo |
| Description |
| Slow, methodical sheathe that can be done after an attack. Before finishing the sheathe, Hunters will be impervious to damage then consumes one level of Spirit Gauge. When the sword is fully sheath, Hunters can focus and charge their Long Sword using the Spirit Gauge to let out a flurry of damage. |
| Controls |
Hold
Use
Hold
Hold
Hold
|
A variation to the Special Sheathe Combo that utilizes instantaneous countering than waiting on a monster to attack the Hunter.
The Hunter can even finish the sheathing animation to enter the charging state, consuming all spirit gauge charges into a devastating flurry of attacks. Pretty awesome move, to be honest.
Harvest Moon
| Switched With | |
|---|---|
| Serene Pose | |
| Description | |
| Casts out an Ironsilk ring that expands out like an arena. Within the ring, your Spirit Gauge will not deplete and performing counters will deal additional hits. Wirebug Gauge Recovery Speed: Fast Wirebug Cost: 2 |
|
| Controls | |
This creates a pseudo-arena that requires you to go toe-to-toe with the monster inside it. Perform coutnerattacks to dish out extra hits and deal increased damage! Careful, you can't get out of the ring so use then when you're confident enough!
Long Sword Attacks and Moves
Spirit Helm Breaker
| Switch Controls | After Soaring Kick, After Soaring Kick, press zR |
|---|---|
| PC Controls | After Soaring Kick, After Soaring Kick, press MB4 |
| PS Controls | After Soaring Kick, After Soaring Kick, press R2 |
| Xbox Controls | After Soaring Kick, After Soaring Kick, press RT |
The Spirit Helm Breaker is a returning move in Monster Hunter Rise. This is generally considered the highest damage skill for the Long Sword. It is also recommended due to its ease of use since it can be executed following a Soaring Kick. Note that this will reduce your Spirit Level by 1 and cannot be used if your Spirit Gauge has no color.
Foresight Slash
| Switch Controls | During combo, During combo, zR + A |
|---|---|
| PC Controls | During combo, During combo, MB4 + Right Click |
| PS Controls | During combo, During combo, R2 + Circle |
| Xbox Controls | During combo, During combo, RT + B |
The Foresight Slash also makes a return in Monster Hunter Rise! It's an evasive maneuver that completely depletes your Spirit Gauge but fills it again after connecting the attack. It can be followed up with a Spirit Roundslash to increase your current Spirit Level by 1, but only when you successfully hit the final slash.
Remember, this move is executed in-between combos, and the counter-slash must hit the monster to execute the final Spirit Roundslash.
Special Sheathe

| Switch Controls | After an attack,
After an attack, zR + B then press X to execute Iai Slash or zR for Iai Spirit Slash |
|---|---|
| PC Controls | After an attack,
After an attack, MB4 + Space then press Left Click to execute Iai Slash or MB4 for Iai Spirit Slash |
| PS Controls | After an attack,
After an attack, R2 + X then press Triangle to execute Iai Slash or R2 for Iai Spirit Slash |
| Xbox Controls | After an attack,
After an attack, RT + A then press Y to execute Iai Slash or RT for Iai Spirit Slash |
Special Sheathe is a move that sheathes your weapon, as the name suggests, but only after performing an attack.
You can follow this up with X, Left-click, Triangle, or Y to execute an Iai Slash. Press zR, MB4, R2, or RT instead to execute an Iai Spirit Slash.
Iai Slash
| Switch Controls | During Special Sheathe, During Special Sheathe, press X |
|---|---|
| PC Controls | During Special Sheathe, During Special Sheathe, press Left Click |
| PS Controls | During Special Sheathe, During Special Sheathe, press Triangle |
| Xbox Controls | During Special Sheathe, During Special Sheathe, press Y |
Iai Slash is one of the two possible moves you can perform while using Special Sheathe. It's a quick two-hit combo that can be used to chain your combos and set your Spirit Gauge meter to blue (Spirit Gauge will charge bit-by-bit automatically).
It also doesn't cost any resources to use, so it's going to be your default move to use if you can't properly counter with Iai Spirit Slash.
Iai Spirit Slash
| Switch Controls | While in Special Sheathe While in Special Sheathe press zR |
|---|---|
| PC Controls | While in Special Sheathe, While in Special Sheathe press MB4 |
| PS Controls | While in Special Sheathe While in Special Sheathe press R2 |
| Xbox Controls | While in Special Sheathe While in Special Sheathe press RT |
A strong evasive move that raises your Spirit Level by 1 when the counterattack hits successfully. Three additional slashes follow the counterattack. It also has a huge number of invulnerability frames, so it can be used to dodge and counter monster attacks with perfect timing.
What's more, you can follow it up with Spirit Blade III and then a Spirit Roundslash to charge up another Spirit Gauge Level quickly.
Recommended Combos For the Long Sword
Sakura Slash Spam Cancel
| Switch Controls | |
|---|---|
| PC Controls | |
| PS Controls | |
| Xbox Controls |
This combo uses the quick motion nature of Special Sheathe to enable usage of Silkbind Sakura Slash one after the other. Since Silkbind Sakura Slash increases your gauge level on successful hit, this combo essentially elevates your spirit level by 2!
Sakura Slash to Helmbreaker Swap Loop
| Switch Controls | |
|---|---|
| PC Controls | |
| PS Controls | |
| Xbox Controls | |
| Silkbind Sakura Slash → Skill Swap → Soaring Kick → Spirit Helm Breaker Silkbind Sakura Slash and Soaring Kick are both required to be on the Red or Blue Skill Swap Loadouts. Must start with the loadout that includes Silkbind Sakura Slash. |
|
In Base MH Rise, you can only choose between Silkbind Sakura Slash and Soaring Kick. With the introduction of Skill Swap in the Sunbreak expansion, you can now easily swap between the two.
This combo makes use of the spirit gauge increase nature of Sikbind Sakura Slash to maintain a topped up spirit gauge then expends it with Soaring Kick to Spirit Helm Breaker when needed.
Sacred Sheathe to Spirit Roundslash Quick Level Gain
| Switch Controls | |
|---|---|
| PC Controls | |
| PS Controls | |
| Xbox Controls |
This combo is a quick way to gain spirit gauge level while finishing with the Spirit Roundslash! This can even be executed mid-combo as you only have to successfully execute the first part of Sacred Sheathe.
Big Damage Combo
| Switch Controls | zL + X → zR → zR + B → X → zR (x3) |
|---|---|
| PC Controls | Middle Click + Left Click → MB4 → MB4 + Space → Left Click → MB4 (x3) |
| PS Controls | L2 + Triangle → R2 → R2 + X → Triangle → R2 (x3) |
| Xbox Controls | LT + Y → RT → RT + A → Y → RT (x3) |
This combo is used to maximize the damage output whenever there is an opening, like when the monster is down or trapped. The combo utilizes the Spirit Helm Breaker, Special Sheathe, and the Spirit Roundslash for maximum damage!
Iai Spirit Slash to Silkbind Sakura Slash

| Switch Controls | zR + B → zR → zL + X → zR + B |
|---|---|
| PC Controls | MB4 + Space → MB4 → Middle Click + Left Click → MB4 + Space |
| PS Controls | R2 + X → R2 → L2 + Triangle → R2 + X |
| Xbox Controls | RT + A → RT → LT + Y → RT + A |
This combo utilizes the seamless transition between Iai Spirit Slash and the Switch Skill Silkbind Sakura Slash.
This is a great way of increasing your gauge level because successfully executing both the Iai Spirit Slash and the Silkbind Sakura Slash increases your Spirit Gauge level by one (1) each or a total of two (2)!
This combo also has high DPS and can be executed as long as you have Wirebugs.
Fast Spirit Gauge Up Combo
| Switch Controls | X + A → zR (x3) |
|---|---|
| PC Controls | Left Click + Right Click → MB4 (x3) |
| PS Controls | Triangle + Circle → R2 (x3) |
| Xbox Controls | Y + B → RT (x3) |
This combo replaces the initial Spirit Slash I for a Fade Slash for maximum mobility. This combo replaces Spirit Blade II with a Spirit Jumping Slash and then goes straight to Spirit Blade III!
Spirit Gauge Collection + Fast Spirit Gauge Up Combo
| Switch Controls | X (x2) → X + A → zR (x3) |
|---|---|
| PC Controls | Left Click (x2) → Left Click + Right Click → MB4 (x3) |
| PS Controls | Triangle (x2) → Triangle + Circle → R2 (x3) |
| Xbox Controls | Y (x2) → Y + B → RT (x3) |
This combo is useful when your Spirit Gauge is empty and you want to increase it by one level. The first three inputs give you enough energy for the Spirit Slash Combo in the second half. Use this when you have big openings!
Instant Red Gauge Combo
| Switch Controls | A → zR + A → zR → zR + B → zR (x3) |
|---|---|
| PC Controls | Right Click → MB4 + Right Click → MB4 → MB4 + Space → MB4 (x3) |
| PS Controls | Circle → R2 + Circle → R2 → R2 + X → R2 (x3) |
| Xbox Controls | B → RT + B → RT → RT + A → RT (x3) |
This combo utilizes both the Foresight Slash and Iai Spirit Slash and their ability to finish with a Spirit Roundslash after counterattacking.
This is the fastest way to raise your Spirit Level from colorless to red, but it requires precision for counterattacking two consecutive times!
Tips on How to Use the Long Sword
Get a Quick Sheath Build

Quick Sheath works extremely well with the Special Sheath move of the Long Sword. An armor set with Quick Sheath Lv 3 almost doubles the animation speed of sheathing that it just becomes so fast, that it can be spammed for gaining easy Spirit Gauge levels.
Long Sword Builds and Best Armor
Maintain a Red Spirit Gauge

To effectively use the Long Sword, always keep your Spirit Gauge on red. You can see this on the Spirit Gauge meter in the HUD or on the color of the blade. This maximizes the Long Sword's firepower for a more efficient hunt.
Increase Damage by Leveling Up the Spirit Gauge
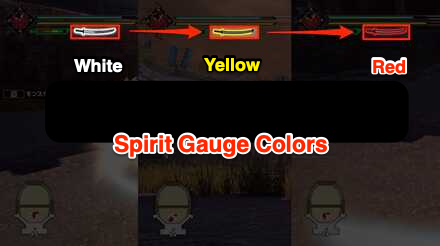
Long Sword's Spirit Gauge changes color from ''colorless → white → yellow → red'', increasing your attack damage per level. It is strongly recommended to keep this on red at all times.
You can increase your Spirit Gauge by one (1) level using the following moves:
| Silkbind Sakura Slash | Foresight Slash |
| Iai Spirit Slash | Spirit Reckoning Combo |
| Spirit Roundslash Combo | --- |
|---|
Foresight Slash is Your Friend

In addition to it being a Long Sword counterattack, Foresight Slash is also one of the fastest ways to gain Spirit Levels (together with Special Sheathe). It takes time to master this, but once you do, you are unstoppable!
Aim for the Spirit Helm Breaker
Considered the greatest damage-dealing move of the Long Sword, it would be a shame for you to not use this. This move follows a Soaring Kick and deals tons of damage. Also, make sure to use this when with a Red Spirit Gauge Level to maximize the firepower.
Always Try to Counter
The primary gameplay style for the Long Sword revolves around effective counterattacks. The Foresight Slash, Special Sheathe, and now Serene Pose give the Long Sword more opportunities to counterattack - use them effectively.
Changes from MHW: Iceborne
Monster Hunter Rise (MH Rise) Related Guides

| Weapon Type Guides | ||
|---|---|---|
 Weapons and Weapon Types Weapons and Weapon Types |
 Weapon Type Tier List Weapon Type Tier List |
 Builds for Each Weapon Type Builds for Each Weapon Type |
Melee Weapon Guides
| Melee Weapons | ||
|---|---|---|
Guide | Weapon Tree |
Guide | Weapon Tree |
Guide | Weapon Tree |
Guide | Weapon Tree |
Guide | Weapon Tree |
Guide | Weapon Tree |
Guide | Weapon Tree |
Guide | Weapon Tree | Melodies |
Guide | Weapon Tree |
Guide | Weapon Tree |
Guide | Weapon Tree | Kinsects |
|
Ranged Weapon Guides
| Ranged Weapons | ||
|---|---|---|
Guide | Weapon Tree |
Guide | Weapon Tree |
Guide | Weapon Tree |
Author

Sunbreak Long Sword Guide: Combos, Controls and Moveset
Please participate in our site
improvement survey
03/2026
improvement survey
03/2026
Would you assist in
improving Game8's site?
improving Game8's site?

×
We are listening to our users' valuable opinions and discussing how to act on them.
The information collected through this survey will be used for the purpose of improving our services. In addition, the information will only be disclosed a part of a statistic in a format that will not allow identification of personal information.
Begin Survey
Not Now
×
Please rate each item regarding Game8.co's Advertisements.
Amount of Ads
Very Dissatisfied
Somewhat Dissatisfied
Fine
Somewhat Satisfied
Highly Satisfied
Placement of Ads
Timing of Ad Display
Ad Loading Speed
Safeness of Ads
Content of Ads
×
Please rate each item regarding Game8.co's Quality of Articles.
Amount of information
Very Dissatisfied
Somewhat Dissatisfied
Fine
Somewhat Satisfied
Highly Satisfied
Frequency of updates
Speed of new information
Accuracy of articles
Understandibility of articles
Readability of sentences
×
Please rate each item regarding Game8.co's Usability of the Site.
Ease of finding information
Very Dissatisfied
Somewhat Dissatisfied
Fine
Somewhat Satisfied
Highly Satisfied
Loading Speed
Use of Color
Font Size
Visibility of Images
Easy to Understand Layout
×
Please rate each item regarding Game8.co's Message Boards, Comments.
Ease of Writing
Very Dissatisfied
Somewhat Dissatisfied
Fine
Somewhat Satisfied
Highly Satisfied
Readability
Ease in Finding Information
Comment Quality
Comment Quantity
Admin Response
×
Please rate each item regarding Game8.co's Site's new design.
Please rate our site's new design
Very Dissatisfied
Somewhat Dissatisfied
Fine
Somewhat Satisfied
Highly Satisfied
Do you think that the website's design change makes the site easier to use?
Has the new design made it easier for you to find information on the site?
Has the new design improved the overall visual appeal of the site?
How would you rate your overall satisfaction with the new design of the site?
×
How likely are you to recommend Game8 to someone you know?
Very Unlikely
0
1
2
3
4
5
6
7
8
9
10
Very Likely
If you have other opinions regarding potential improvement to the website, please share them with us. We would appreciate your honest opinion.
Note: This is a free response section, so you can proceed without entering anything.
Note: Please be sure not to enter any kind of personal information into your response.
Note: Please be sure not to enter any kind of personal information into your response.
×
Thank You
×
Thank you for participating in our survey! Your answers will help us to improve the quality of our website and services.
We hope you continue to make use of Game8.
We hope you continue to make use of Game8.
Close
Rankings
- We could not find the message board you were looking for.
Gaming News


![Monster Hunter Stories 3 Review [First Impressions] | Simply Rejuvenating](https://img.game8.co/4438641/2a31b7702bd70e78ec8efd24661dacda.jpeg/thumb)
Popular Games

Genshin Impact Walkthrough & Guides Wiki
Honkai: Star Rail Walkthrough & Guides Wiki
Umamusume: Pretty Derby Walkthrough & Guides Wiki
Pokemon Pokopia Walkthrough & Guides Wiki
Resident Evil Requiem (RE9) Walkthrough & Guides Wiki
Monster Hunter Wilds Walkthrough & Guides Wiki
Wuthering Waves Walkthrough & Guides Wiki
Arknights: Endfield Walkthrough & Guides Wiki
Pokemon FireRed and LeafGreen (FRLG) Walkthrough & Guides Wiki
Pokemon TCG Pocket (PTCGP) Strategies & Guides Wiki


Recommended Games
Diablo 4: Vessel of Hatred Walkthrough & Guides Wiki
Cyberpunk 2077: Ultimate Edition Walkthrough & Guides Wiki
Fire Emblem Heroes (FEH) Walkthrough & Guides Wiki
Yu-Gi-Oh! Master Duel Walkthrough & Guides Wiki
Super Smash Bros. Ultimate Walkthrough & Guides Wiki
Pokemon Brilliant Diamond and Shining Pearl (BDSP) Walkthrough & Guides Wiki
Elden Ring Shadow of the Erdtree Walkthrough & Guides Wiki
Monster Hunter World Walkthrough & Guides Wiki
The Legend of Zelda: Tears of the Kingdom Walkthrough & Guides Wiki
Persona 3 Reload Walkthrough & Guides Wiki


All rights reserved
©CAPCOM CO., LTD. ALL RIGHTS RESERVED.
The copyrights of videos of games used in our content and other intellectual property rights belong to the provider of the game.
The contents we provide on this site were created personally by members of the Game8 editorial department.
We refuse the right to reuse or repost content taken without our permission such as data or images to other sites.
I wonder that you have not mentioned any combos with Sacred Sheathe Combo. You call it a pretty awesome move, but dont mention it anywhere... I am not a good counter attacker and like it with the Silkbind Sakura Slash as Spirit Gauge level builder..