Sunbreak Great Sword Builds (Master Rank)
★ All Title Updates now available for ALL PLATFORMS!
┗ Title Update 4 | Title Update 5 | Bonus Update
┗ Check out all our Best Builds For Every Weapon!
┗ TU4 Monsters: Velkhana | Risen C.G. Valstrax
┗ TU5 Monsters: Amatsu | Risen Shagaru Magala
┗ Bonus Update Monster: Primordial Malzeno

This is a guide to the best builds and equipment for Great Swords in Monster Hunter Rise (MH Rise): Sunbreak. Learn about the best Great Swords for Sunbreak and the best builds and Armor pieces to use with the Great Swords for Low, High, and Master Rank.
| All Great Sword Guides | ||
|---|---|---|
 Trees & Full List Trees & Full List |
 How to Use How to Use |
 Best Builds Best Builds |
List of Contents
Great Sword Builds List & Progression
This is a quick section summarizing all the Long Sword builds in this page. It is arranged from newest to oldest, and MR build progression is from bottom to top.
Click on the build name to see the build!
| Master Rank | Title Update | Build Name |
|---|---|---|
| MR180+ | BU | Blood Awakening Status Frostcraft Build |
| MR10+ | TU5 | Frostcraft Amatsu Build |
| MR10+ | TU4 | Frostcraft Velkhana Build |
| MR10+ | TU4 | Frostcraft Build w/ Partbreaker and Blood Rite |
| MR140+ | TU3 | Blast Buildup Build |
| MR110+ | TU2 | Merak's Asterism Strongarm Raw |
| MR6+ | TU1 | Fine Kamura Cleaver Dereliction Strongarm |
| MR6+ | TU1 | Elemental TCS GS |
| MR6+ | TU1 | Elemental Surge Slash GS |
| MR6+ | Base | Royal Order+ All-Rounder GS |
| MR6+ | Base | Abyssal Eruption Raw Climber |
| MR3-MR6 | Base | Royal Order Strongarm |
| MR3-MR6 | Base | Astalos Thunder Surge Slash |
| MR1+ | Base | Kamura Warrior Cleaver Raw Affinity |
Ultra Endgame MR Build: MR 100+
Blood Awakening Status Frostcraft Greatsword (BU Build)
Recommended Great Sword
| Weapon | ATK | DEF | Affinity |
|---|---|---|---|
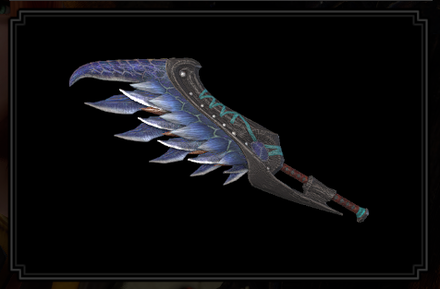 Merak's Asterism Merak's Asterism
 |
340 | 0 | 0% |
| Element / Status |
Slots | Rampage Slots | |
| ④②ー | ① |
| Decorations | ||
|---|---|---|
Recommended Armor Loadout
| Armor | Slots | Skills | |
|---|---|---|---|
|
|
④④ー |
Blood Rite Lv. 3
|
|
|
|
④④② |
Burst Lv. 1
Blood Awakening Lv. 1
|
|
|
|
④④② |
Critical Boost Lv. 1
Blood Awakening Lv. 1
|
|
|
|
④②ー | ||
|
|
④④ー | ||
| Talisman | Frostcraft 3 with a ②②① slot or better | ||
| Rampage Decoration |
If only ① Rampage Slot: |
||
| Skills | |
|---|---|
| Rampage Skill | Swap between Wyvern Exploit, Anti-Aerial Species, Anti-Aquatic Species, or Fanged Exploit depending on the monster.
If only using ① Rampage Slot, you can use Wirebug Wrangler for keeping extra Wirebugs longer. |
|
Critical Eye Lv. 7 | Attack Boost Lv. 4
Frostcraft Lv. 3 | Weakness Exploit Lv. 3 Stun Resistance Lv. 3 | Blood Rite Lv. 3 Blood Awakening Lv. 3 | Speed Sharpening Lv. 3 Partbreaker Lv. 3 | Quick Sheathe Lv. 3 Wirebug Whisperer Lv. 3 | Critical Boost Lv. 3 Coalescence Lv. 2 | Evade Extender Lv. 1 Frenzied Bloodlust Lv. 1 | Burst Lv. 1 Bloodlust Lv. 1 | Intrepid Heart Lv. 1 |
|
Build Merits and Augments
| Weapon Augments | |
|---|---|
| Armor Augments |
Armor Augments for this build are not necessary. However, feel free to add as you please once you get comfortable with your build! Generally, you'd want to get better skills and more slots for your armor.
For damage, aim for any of the following: ● Powder Mantle ● Buildup Boost For comfort, aim for any of the following: ● Recovery Up ● Wind Mantle ● Frenzied Bloodlust |
| Build Merits and Notes |
|---|
| Blood Awakening is a new aggressive comfort skill introduced in the Bonus Update. It pairs with Blood Rite and helps in dealing with large monsters that inflict Bloodblight.
Merak's Asterism is the choice weapon for this build. Another alternartive would be Scorned Magnamalo's Azure Blaze Great Sword, having a ③ decoration slot instead of ④, and a ② rampage slot. You can get more damage out of these Status Effect weapons are rolling Buildup Boost as armor augments. If you do not yet have a Frostcraft talisman, you can use Buildup Boost as an alternative. Quick Sheathe, Stun Resistance, and Speed Sharpening are added for comfort use. Critical Eye, paired with Weakness Exploit, is maxed out to make the most out of Critical Boost. These damage skills will help in part breaks, leading to a quicker activation of Blood Awakening. Wirebug Whisperer is recommended if Strongarm Stance is used often. If not needed, you can swap it out and max out Attack Boost to Lv. 7 with decorations. In addition to helping you tank hits and land charged attacks uninterrupted, Intrepid Heart can make it less risky for you to receive Bloodblight. You can use this to your advantage to get the most out of Blood Rite. |
Frostcraft Amatsu Greatsword
(TU5 Build)
| Weapon | ATK | DEF | Affinity |
|---|---|---|---|
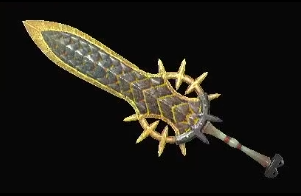 Roilcloud Sword Roilcloud Sword
 |
360 | 0 | -25% |
| Element / Status |
Slots | Rampage Slots | |
| ーーー | ③ |
| Decorations | ||
|---|---|---|
* = check Build Merits below.
Recommended Armor Loadout
| Armor | Slots | Skills | |
|---|---|---|---|
|
|
③②ー | ||
|
|
④②① |
Quick Sheathe Lv. 3
Frostcraft Lv. 1
|
|
|
|
③②① |
Critical Draw Lv. 3
Frostcraft Lv. 1
|
|
|
|
③③② |
Focus Lv. 3
Frostcraft Lv. 1
|
|
|
|
④ーー | ||
| Talisman |
Critical Eye 3 with a ②① slot or better Secondary Skill Recommendations: Wirebug Whisperer Lv.3 |
||
| Rampage Decoration |
|
||
| Skills | |
|---|---|
| Rampage Skill | Swap between Wyvern Exploit, Anti-Aerial Species, Anti-Aquatic Species, or Fanged Exploit depending on the monster. |
|
Attack Boost Lv.7 | Critical Eye Lv.7
Critical Boost Lv.3 | Weakness Exploit Lv.3 Focus Lv.3 | Offensive Guard Lv.3 Critical Draw Lv.3 | Quick Sheathe Lv.3 Flinch Free Lv.3 | Frostcraft Lv.3 Intrepid Heart Lv.2 | Powder Mantle Lv.1 Shock Absorber Lv.1 Talisman with Recommended Secondary Skill: Wirebug Whisperer Lv.3 See Build Merits |
|
Build Merits and Augments
| Weapon Augments | |
|---|---|
| Armor Augments |
Armor Augments for this build are not necessary. However, feel free to add as you please once you get comfortable with your build! Generally, you'd want to get better skills and more slots for your armor.
Replaceable skills already on the armor: ● Flinch Free ● Quick Sheathe For damage, aim for any of the following: ● Mail of Hellfire For comfort, aim for any of the following: ● Wind Mantle |
| Build Merits and Notes |
|---|
| *Note: Thanks to the new Qurious Melding introduced in Title Update 5, it's easier to acquire great-value charms. For this build, you can go and try to meld for the recommended talisman with a Wirebug Whisperer Lv.3. This will help your DPS, as it allows you to exceute more Strongarm Stance during a fight. However, keep in mind that this is not a requirement and the build can still work without a secondary skill on the talisman recommended above.
Title Update 4 saw the chilling return of the Frostcraft skill from the Velkhana armor set! This skill is perfect for hunters looking to get back into the old-school playstyle of getting hits in with the Greatsword and sheathing to reposition. The three-piece Velkhana armor included in the build also sports powerful skills for the Greatsword, such as Focus, Critical Draw, and Quick Sheathe. This contributes significantly to DPS while still providing you with decent mobility. The build is heavily modified to increase raw damage values, in spite of the inherent Water Element in the Amatsu Great Sword. To do this, we first maxed out Attack Boost to increase damage values. Then we focused maxing out Critical Eye to mitigate the Great Sword's negative affinity. Finally, we maxed out Offensive Guard to utilize the Strongarm Stance playstyle. With all of this combined, this build outputs huge damage numbers, making hunts a little bit quicker! |
Frostcraft Velkhana Greatsword Build (TU4)
| Weapon | ATK | DEF | Affinity |
|---|---|---|---|
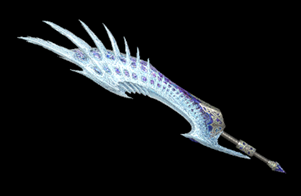 Winged Seraphyd Winged Seraphyd
 |
340 | 0 | 0% |
| Element / Status |
Slots | Rampage Slots | |
| ④ーー | ③ |
| Armor | Slots | Skills | |
|---|---|---|---|
|
|
③②ー | ||
|
|
④②① |
Quick Sheathe Lv. 3
Frostcraft Lv. 1
|
|
|
|
③②① |
Critical Draw Lv. 3
Frostcraft Lv. 1
|
|
|
|
③③② |
Focus Lv. 3
Frostcraft Lv. 1
|
|
|
|
④①ー | ||
| Talisman | Attack Boost 3 with ② slot or better | ||
| Rampage Decoration |
|
||
| Decorations | |||
| Skills | |
|---|---|
| Rampage Skill | Element Exploit to increase elemental damage against monsters weak to ice |
|
Attack Boost Lv.7 | Ice Attack Lv.5
Critical Boost Lv.3 | Weakness Exploit Lv.3 Critical Element Lv.3 | Focus Lv.3 Offensive Guard Lv.3 | Critical Draw Lv. 3 Quick Sheathe Lv.3 | Element Exploit Lv.3 Frostcraft Lv.3 | Kushala Blessing Lv.2 Charge Master Lv. 2 | Razor Sharp Lv. 1 Spare Shot Lv. 1 | Flinch Free Lv.1 |
|
Build Merits and Augments
| Weapon Augments | |
|---|---|
| Armor Augments |
Armor Augments for this build are not necessary. However, feel free to add as you please once you get comfortable with your build! Generally, you'd want to get better skills and more slots for your armor.
Replaceable skills already on the armor: ● Spare Shot For damage, aim for any of the following: ● Powder Mantle For comfort, aim for any of the following: ● Wind Mantle ● Intrepid Heart |
| Build Merits and Notes |
|---|
| Title Update 4 saw the chilling return of the Frostcraft skill from the Velkhana armor set! This skill is perfect for hunters looking to get back into the old-school playstyle of getting hits in with the Greatsword and sheathing to reposition. The three-piece Velkhana armor included in the build also sports powerful skills for the Greatsword, such as Focus, Critical Draw, and Quick Sheathe. This provides significant dps while still providing you decent mobility.
For weapon choice, the Winged Seraphyd represents the icy theme of this build. The maxed elemental attack from the greaves plus the two levels from the Kushala Blessing skill amplifies the damage this Greatsword can do. This is ideal for monsters weak to the ice element, such as Rajang, Furious Rajang, or Seething Bazelgeuse. This build still makes use of the Offensive Guard skill when you get the opening to pull-off a Strongarm Stance. This is especially useful for Afflicted Monsters when you have dealt enough damage to knock it out of it's delirious state! |
Frostcraft Greatsword Build w/ Partbreaker and Blood Rite (TU4)
| Weapon | ATK | DEF | Affinity |
|---|---|---|---|
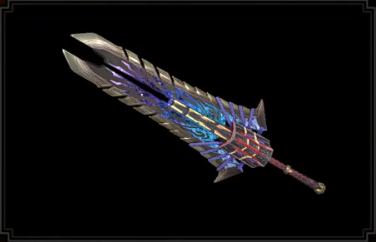 Azure Blaze Great Sword Azure Blaze Great Sword
 |
330 | 0 | 0% |
| Element / Status |
Slots | Rampage Slots | |
| ③②ー | ② |
| Armor | Slots | Skills | |
|---|---|---|---|
|
|
③②ー | ||
|
|
④②① |
Quick Sheathe Lv. 3
Frostcraft Lv. 1
|
|
|
|
③②① |
Critical Draw Lv. 3
Frostcraft Lv. 1
|
|
|
|
③③② |
Focus Lv. 3
Frostcraft Lv. 1
|
|
|
|
④ーー | ||
| Talisman | Attack Boost 3 with ② slot or better | ||
| Rampage Decoration |
|
||
| Decorations | |||
| Skills | |
|---|---|
| Rampage Skill | Teostra Soul to increase Blast Damage or Swap between Wyvern Exploit, Anti-Aerial Species, Anti-Aquatic Species, or Fanged Exploit depending on the monster. |
|
Attack Boost Lv.7 | Critical Boost Lv.3
Weakness Exploit Lv.3 | Focus Lv.3 Offensive Guard Lv.3 | Critical Draw Lv. 3 Quick Sheathe Lv.3 | Partbreaker Lv.3 Flinch Free Lv.3 | Charge Master Lv. 3 Frostcraft Lv.3 | Teostra Blessing Lv.2 Blood Rite Lv.2| Razor Sharp Lv. 1 Spare Shot Lv. 1 |
|
Build Merits and Augments
| Weapon Augments | |
|---|---|
| Armor Augments |
Armor Augments for this build are not necessary. However, feel free to add as you please once you get comfortable with your build! Generally, you'd want to get better skills and more slots for your armor.
Replaceable skills already on the armor: ● Quick Sheathe For damage, aim for any of the following: ● Powder Mantle For comfort, aim for any of the following: ● Wind Mantle |
| Build Merits and Notes |
|---|
| Title Update 4 saw the chilling return of the Frostcraft skill from the Velkhana armor set! This skill is perfect for hunters looking to get back into the old-school playstyle of getting hits in with the Greatsword and sheathing to reposition. The three-piece Velkhana armor included in the build also sports powerful skills for the Greatsword, such as Focus, Critical Draw, and Quick Sheathe. This provides significant dps while still providing you decent mobility.
We maxed out the Partbreaker skill and slotted in two levels of Blood Rite for this build to incorporate survivability. With the Greatsword's charged attacks, it will take no time at all to break monster parts, which you can then target to heal yourself significantly. For weapon choice, we chose the Scorned Magnamalo Greatsword for it's damage, blast status, and its decoration slots. The Teostra Soul Rampage Skill will increase the blast damage this weapon can do. We maxed out the Charge Master skill and slotted in two levels of Teostra Blessing to speed up blast buildup. This build still makes use of the Offensive Guard skill when you get the opening to pull-off a Strongarm Stance. This is especially useful for Afflicted Monsters when you have dealt enough damage to knock it out of it's delirious state! |
Blast Buildup Greatsword Build (TU3)
| Weapon | ATK | DEF | Affinity |
|---|---|---|---|
 Azure Blaze Great Sword Azure Blaze Great Sword
 |
330 | 0 | 0% |
| Element / Status |
Slots | Rampage Slots | |
| ③②ー | ② |
| Armor | Slots | Skills | |
|---|---|---|---|
|
|
③②ー | ||
|
|
②②ー | ||
|
|
④②① | ||
|
|
②②① | ||
|
|
④①① | ||
| Talisman | Attack Boost 3 with ② slot or better | ||
| Rampage Decoration |
|
||
| Decorations | |||
| Skills | |
|---|---|
| Rampage Skill | Swap between Wyvern Exploit, Anti-Aerial Species, Anti-Aquatic Species, or Fanged Exploit depending on the monster. |
|
Critical Eye Lv.7 |
Attack Boost Lv.7
Weakness Exploit Lv.3 | Agitator Lv.3 Critical Boost Lv.3 | Offensive Guard Lv.3 Powder Mantle Lv.2 | Buildup Boost Lv.2 Chameleos Blessing Lv.2 | Evade Window Lv.2 Teostra Blessing Lv.2 | Foray Lv.1 Embolden Lv.1 | Adrenaline Rush Lv.1 Flinch Free Lv.1 | Defiance Lv.1 |
|
| Build Merits and Notes |
|---|
| This build focuses on utilizing the Scorned Magnamalo's Blast Greatsword Azure Blaze Great Sword. It features a decent amount or Raw damage and a solid amount of Purple Sharpness. With TU3, we now have access to level 1 decorations of Teostra Blessing and while not game changing, definitely still helps the greatsword in applying blast procs. We slot these gems in for a larger blast buildup which when paired with Buildup Boost further increases our raw damage. When used together with Guard Boost (which can be used together with Strong Arm Stance), your raw damage shoots up pretty high in value. We do want to note that Powder Mantle is not a core skill and is simply obtained through the new Teostra armor pieces. Also, the number of hits a level two Powder Mantle requires from the GS is high (around 10-12) which normally seems small but with the Greatsword's slow attacks, this number becomes not easily achieved. We do not recommend playing around the skill but do remember that if the Powder Mantle is active, avoid getting hit and attack the monster when the skill (the aura surrounding your character) is colored blue to deal additional damage. Alternatively, you can also reduce one Guardian Jewel 3 in the build to slot in a Wirebug Jewel+ 4. This will reduce the armount of raw damage, but it adds a faster cooldown to your Strong Arm Stance and is a completely personal choice depending on the player. |
Merak's Asterism Strongarm Raw (TU2)
| Weapon | ATK | DEF | Affinity |
|---|---|---|---|
 Merak's Asterism Merak's Asterism
 |
340 | 0 | 0% |
| Element / Status |
Slots | Rampage Slots | |
| ④②ー | ① |
| Armor | Slots | Skills | |
|---|---|---|---|
|
|
①①① |
Critical Eye Lv. 3
Critical Boost Lv. 1
|
|
|
|
②②ー | ||
|
|
④②① | ||
|
|
④②① |
Mail of Hellfire Lv. 1
Coalescence Lv. 1
|
|
|
|
④ーー | ||
| Talisman | Attack Boost 3 with ② slot or better | ||
| Rampage Decoration |
|
||
| Decorations |
|
||
| Skills | |
|---|---|
| Rampage Skill | Swap between Wyvern Exploit, Anti-Aerial Species, Anti-Aquatic Species, or Fanged Exploit depending on the monster. |
Attack Boost Lv.7 | Critical Eye Lv.4
Critical Boost Lv.3 | Weakness Exploit Lv.3 Offensive Guard Lv.3 | Chameleos Blessing Lv.3 Flinch Free Lv.3 | Speed Sharpening Lv.3 Maximum Might Lv.3 | Handicraft Lv.2 Marathon Runner Lv.2 | Charge Master Lv.1 Buildup Boost Lv.1 | Foray Lv.1 Mail of Hellfire Lv.1 | Coalescence Lv.1 |
|
| Build Merits and Notes |
|---|
| This build using Merak's Asterism focuses on dealing high damage counterattacks with Strongarm Stance. To increase the weapon's damage output, Attack Boost, Critical Boost, and Offensive Guard are used. In addition, a combination of Critical Eye, Weakness Exploit, and Maximum Might allows the weapon to always land a critical hit on weakspots.
New to this build are the additions of Buildup Boost, which is essentially a raw boost for status weapons, and Mail of Hellfire which gives a higher boost compared to Burst. Additional levels of Chameleos Blessing were added to extend Poison duration which helps with Foray uptime and makes up for the weapon's low Poison buildup. We recommend augmenting the weapon with a Rampage Slot Upgrade and Attack Boost. Doing this improves the build's overall damage output thanks to allowing the use of Anti-Species Rampage Decorations. |
Endgame MR Build: MR 6+
Fine Kamura Cleaver Dereliction Strongarm Build
| Weapon | ATK | DEF | Affinity |
|---|---|---|---|
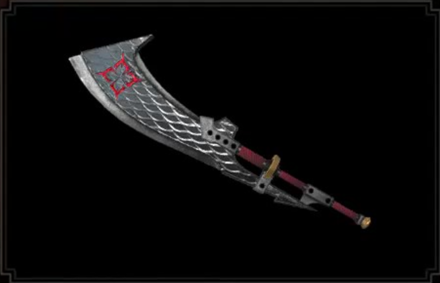 Fine Kamura Cleaver Fine Kamura Cleaver
 |
330 | 0 | 0% |
| Element / Status |
Slots | Rampage Slots | |
-
|
④②ー | ② |
| Weapon Augments |
|
|
|---|---|---|
| Rampage Decoration |
|
|
| Armor | Slots | Skills | |
|---|---|---|---|
|
|
③②ー | ||
|
|
②②ー | ||
|
|
④②ー | ||
|
|
③①① | ||
|
|
③②② |
Resentment Lv. 1
Dereliction Lv. 1
|
|
| Talisman | Critical Eye Lv.3 with a ②① slot | ||
| Decorations |
|
||
| Skills | |
|---|---|
| Rampage Skill | Swap between Wyvern Exploit, Anti-Aerial Species, Anti-Aquatic Species, or Fanged Exploit depending on the monster. |
|
Attack Boost Lv.7 | Critical Eye Lv.7
Resentment Lv.3 | Critical Boost Lv.3 Weakness Exploit Lv.3 | Razor Sharp Lv.3 Spare Shot Lv.3 | Offensive Guard Lv.3 Marathon Runner Lv.2 | Stun Resistance Lv.2 Flinch Free Lv.1 | Dereliction Lv.1 Charge Master Lv.1 | Intrepid Heart Lv.1 Strife Lv.1 |
|
| Build Merits and Notes |
|---|
| This build using the Fine Kamura Cleaver focuses on dealing high damage hits with Dereliction and Strongarm Stance. To boost damage output, Attack Boost, Critical Boost, Offensive Guard, and Dereliction's Blue Scroll ability are used. Critical Eye and Weakness Exploit are also added to increase chances of critical hits during your combos. Qurios will be depleting your health, making sure that you have recoverable damage; with this in mind, Resentment is useful to amp damage even more. To mitigate some of the health depletion, we suggest eating for a Lv.4 Super Recovery Dango.
These builds assume that no Armor Augmentations have been made. |
Elemental TCS Great Sword Builds
| Weapon | ATK | DEF | Affinity |
|---|---|---|---|
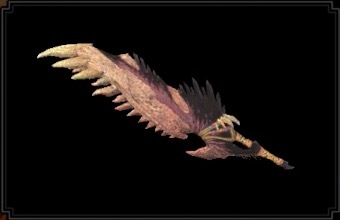 Lohenzahn+ Lohenzahn+
 |
350 | 0 | -20% |
| Element / Status |
Slots | Rampage Slots | |
| ③①ー | ② |
| Weapon | ATK | DEF | Affinity |
|---|---|---|---|
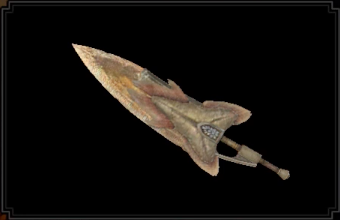 Valtos Rapier+ Valtos Rapier+
 |
350 | 0 | -10% |
| Element / Status |
Slots | Rampage Slots | |
| ③①ー | ② |
| Weapon | ATK | DEF | Affinity |
|---|---|---|---|
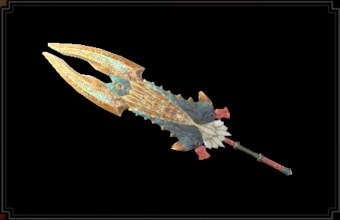 Oppressor's Forger Oppressor's Forger
 |
330 | 0 | 0% |
| Element / Status |
Slots | Rampage Slots | |
| ②①ー | ② |
| Weapon | ATK | DEF | Affinity |
|---|---|---|---|
 Winged Seraphyd Winged Seraphyd
 |
340 | 0 | 0% |
| Element / Status |
Slots | Rampage Slots | |
| ④ーー | ③ |
| Weapon | ATK | DEF | Affinity |
|---|---|---|---|
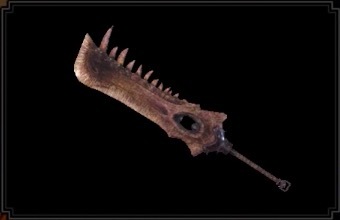 Wyvern Gnasher+ Wyvern Gnasher+
 |
330 | 0 | 0% |
| Element / Status |
Slots | Rampage Slots | |
| ②②① | ③ |
| Weapon | ATK | DEF | Affinity |
|---|---|---|---|
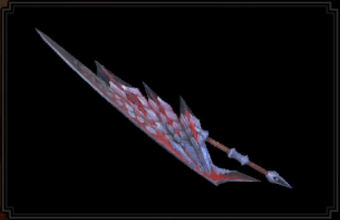 Crimson Vastwing Crimson Vastwing
 |
340 | 0 | 0% |
| Element / Status |
Slots | Rampage Slots | |
| ③ーー | ② |
Crimson Vastwing is only available at MR 70+ after defeating Master Rank Crimson Glow Valstrax.
| Weapon Augments | ||
|---|---|---|
| Rampage Decoration |
|
|
| Armor | Slots | Skills | |
|---|---|---|---|
|
|
④①① | ||
|
|
②②ー | ||
|
|
②ーー |
Attack Boost Lv. 2
Earplugs Lv. 2
|
|
|
|
④①① | ||
|
|
④ーー | ||
| Talisman | Critical Eye Lv.3 with a ②① slot | ||
| Decorations |
Element Jewel 1 x5
(except Ice and Crimson Vastwing) |
||
| Skills | |
|---|---|
| Rampage Skill | Swap between Wyvern Exploit, Anti-Aerial Species, Anti-Aquatic Species, or Fanged Exploit depending on the monster. For Ice and Wyvern Gnasher+ GS: Element Exploit to increase elemental damage against each element |
|
Element Attack Lv.5
Attack Boost Lv.7 | Critical Eye Lv.4 Critical Boost Lv.3 | Weakness Exploit Lv.3 Critical Element Lv.3 | Marathon Runner Lv.3 Offensive Guard Lv.3 | Windproof Lv.3 Flinch Free Lv.3 | Charge Master Lv.3 Earplugs Lv.2 | Burst Lv. 1 Spiribird's Call Lv.1 (except Ice and Crimson Vastwing GS) |
|
| Build Merits and Notes |
|---|
| The True Charge Slash (TCS) Build main focus is executing a well-placed True Charge Slash on a monster, either through your normal combo or using the Strongarm Stance. With this in mind, we focused on maxing out Offensive Guard to deal significant damage with your TCS.
These builds assume that no Armor Augmentations have been made. |
Elemental Surge Slash Great Sword Builds
| Weapon | ATK | DEF | Affinity |
|---|---|---|---|
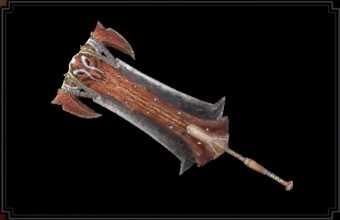 Blood Baph Blood Baph
 |
330 | 20 | 0% |
| Element / Status |
Slots | Rampage Slots | |
| ③①ー | ③ |
| Weapon | ATK | DEF | Affinity |
|---|---|---|---|
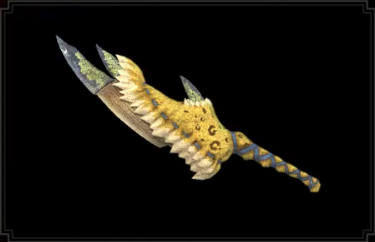 Aquatic Cataclysm+ Aquatic Cataclysm+
 |
330 | 0 | 0% |
| Element / Status |
Slots | Rampage Slots | |
| ③①① | ③ |
| Weapon | ATK | DEF | Affinity |
|---|---|---|---|
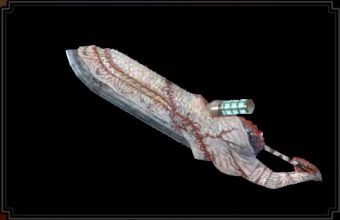 Khezu Shock Full+ Khezu Shock Full+
 |
330 | 0 | 0% |
| Element / Status |
Slots | Rampage Slots | |
| ④ーー | ③ |
| Weapon | ATK | DEF | Affinity |
|---|---|---|---|
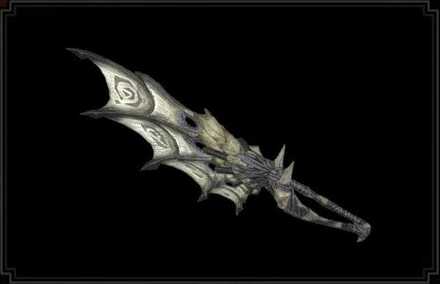 Flicker Blizzard Blade Flicker Blizzard Blade
 |
320 | 0 | 0% |
| Element / Status |
Slots | Rampage Slots | |
| ②②ー | ② |
| Weapon | ATK | DEF | Affinity |
|---|---|---|---|
 Wyvern Gnasher+ Wyvern Gnasher+
 |
330 | 0 | 0% |
| Element / Status |
Slots | Rampage Slots | |
| ②②① | ③ |
| Weapon Augments | ||
|---|---|---|
| Rampage Decoration |
|
|
| Armor | Slots | Skills | |
|---|---|---|---|
|
|
③②ー | ||
|
|
②②ー | ||
|
|
④①① | ||
|
|
④①① | ||
|
|
②②① | ||
| Talisman | Critical Eye 3 with a ②① slot | ||
| Decorations |
Element Jewel 1 x5
(x2 for Ice and Dragon GS) For Fire and Dragon Builds: For Water GS Build: |
||
| Skills | |
|---|---|
| Rampage Skill | Element Exploit to increase elemental damage against each element For Ice GS: Swap between Wyvern Exploit, Anti-Aerial Species, Anti-Aquatic Species, or Fanged Exploit depending on the monster. |
|
Element Attack Lv.5
Attack Boost Lv.7 | Critical Eye Lv.4 Critical Boost Lv.3 | Weakness Exploit Lv.3 Critical Element Lv.3 | Marathon Runner Lv.3 Charge Master Lv.3 | Maximum Might Lv.2 Constitution Lv.2 | Razor Sharp Lv.1 Spare Shot Lv.1 | Flinch Free Lv.1 Redirection Lv.1 | Element Exploit Lv. 1 Burst Lv.1 Fire and Dragon Builds: Spiribird's Call Lv.1 Water Build: Stun Resistance Lv.2 |
|
| Build Merits | The Surge Slash Build takes a more aggressive route, relying on your Surge Slash combos to do continuous elemental damage. With this playstyle in mind, we focused on maxing out affinity with skills like Critical Eye and Maximum Might, which synergize well with Critical Element, amping your elemental damage even further. Since you'll be more aggressive with this build, we suggest also equipping Rage Slash on your Switch Skills.
These builds assume that no Armor Augmentations have been made. |
|---|
Royal Order+ All-Rounder
| Weapon | ATK | DEF | Affinity |
|---|---|---|---|
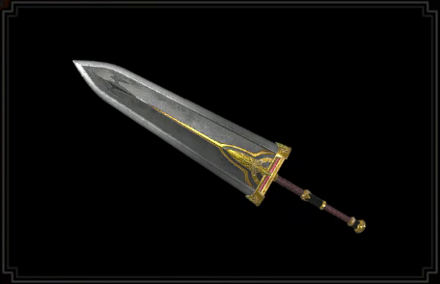 Royal Order's Great Sword+ Royal Order's Great Sword+
 |
320 | 50 | 10% |
| Element / Status |
Slots | Rampage Slots | |
-
|
②①ー | ② |
| Armor | Slots | Skills | |
|---|---|---|---|
|
|
①①① |
Critical Eye Lv. 3
Critical Boost Lv. 1
|
|
|
|
③②ー | ||
|
|
②①ー | ||
|
|
③ーー | ||
|
|
④①① | ||
| Talisman | Critical Eye 3 with ② slot or better | ||
| Rampage Decoration |
|
||
| Decorations |
|
||
| Skills | |
|---|---|
| Rampage Skill | Swap between Wyvern Exploit, Anti-Aerial Species, Anti-Aquatic Species, or Fanged Exploit depending on the monster. |
Critical Eye Lv.7 | Attack Boost Lv.4
Critical Boost Lv.3 | Weakness Exploit Lv.3 Focus Lv.3 | Offensive Guard Lv.3 Stun Resistance Lv.3 | Speed Sharpening Lv.3 Blight Resistance Lv.2 | Resentment Lv.1 Affinity Sliding Lv.1 | Spread Up Lv.1 Flinch Free Lv.1 | Wirebug Whisperer Lv.1 Burst Lv.1 |
|
| Build Merits and Notes |
|---|
| This all-rounder build using the Royal Order's Great Sword+ combines damage and utility to make a build fit for any Master Rank hunt. Attack Boost, Critical Boost, Offensive Guard, and a point in Burst are used to improve the weapon's overall damage. In addition, Critical Eye and Weakness Exploit are used for guaranteed critical hits on weakspots thanks to the weapon's innate 10% affinity. For ease-of-use and utility, the build is rounded out by maxed Focus, Stun Resistance, Speed Sharpening, and a point in Wirebug Whisperer. |
Abyssal Eruption Raw Climber
| Weapon | ATK | DEF | Affinity |
|---|---|---|---|
 Abyssal Eruption Abyssal Eruption
 |
340 | 0 | -15% |
| Element / Status |
Slots | Rampage Slots | |
| ーーー | ③ |
| Armor | Slots | Skills | |
|---|---|---|---|
|
|
①①① |
Critical Eye Lv. 3
Critical Boost Lv. 1
|
|
|
|
③①ー | ||
|
|
③ーー |
Focus Lv. 3
Wirebug Whisperer Lv. 1
|
|
|
|
③ーー | ||
|
|
④①① | ||
| Talisman | Attack Boost 3 with ② slot or better | ||
| Rampage Decoration |
|
||
| Decorations |
|
||
| Skills | |
|---|---|
| Rampage Skill | Swap between Wyvern Exploit, Anti-Aerial Species, Anti-Aquatic Species, or Fanged Exploit depending on the monster. |
Critical Eye Lv.7 | Attack Boost Lv.4
Critical Boost Lv.3 | Weakness Exploit Lv.3 Focus Lv.3 | Stun Resistance Lv.3 Speed Sharpening Lv.3 | Offensive Guard Lv.2 Blight Resistance Lv.2 | Evade Window Lv.1 Flinch Free Lv.1 | Wirebug Whisperer Lv.1 |
|
| Build Merits and Notes |
|---|
| This Abyssal Eruption climbing build focuses on the weapon's high raw damage while backing it up with some utility skills. The quartet of Attack Boost, Critical Eye, Critical Boost, and Weakness Exploit improve the weapon's overall damage, while Offensive Guard helps increase Strongarm Stance's powerful counter-attack. For utility, the build also includes max Focus, Stun Resistance, Speed Sharpening, and a point of Wirebug Whisperer. |
Master Rank Build (Mid Game): MR 3-6
Royal Order Strongarm
| Weapon | ATK | DEF | Affinity |
|---|---|---|---|
 Royal Order's Great Sword Royal Order's Great Sword
 |
310 | 50 | 10% |
| Element / Status |
Slots | Rampage Slots | |
-
|
②ーー | ② |
| Armor | Slots | Skills | |
|---|---|---|---|
|
|
②②ー |
Critical Eye Lv. 2
Wirebug Whisperer Lv. 1
|
|
|
|
①①ー | ||
|
|
②①ー | ||
|
|
③ーー | ||
|
|
①①① | ||
| Talisman | Attack Boost 3 with ② slot or better | ||
| Rampage Decoration |
|
||
| Decorations |
|
||
| Skills | |
|---|---|
| Rampage Skill | Swap between Wyvern Exploit, Anti-Aerial Species, Anti-Aquatic Species, or Fanged Exploit depending on the monster. |
Attack Boost Lv.4 | Critical Eye Lv.4
Critical Boost Lv.3 | Weakness Exploit Lv.3 Focus Lv.3 | Offensive Guard Lv.3 Stun Resistance Lv.3 | Speed Sharpening Lv.3 Flinch Free Lv.3 | Latent Power Lv.1 Maximum Might Lv.1 | Razor Sharp Lv.1 Quick Sheath Lv.1 | Wirebug Whisperer Lv.1 |
|
| Build Merits and Notes |
|---|
| This build is focused around the new Strongarm Stance Silkbind Skill, enhancing the powerful counter with skills such as Offensive Guard, Attack Boost, and Critical Boost. The build also features maxed Focus to cover for Strongarm Stance's downtime and maxed Speed Sharpening to return to purple sharpness faster. |
Astalos Thunder Surge Slash
| Weapon | ATK | DEF | Affinity |
|---|---|---|---|
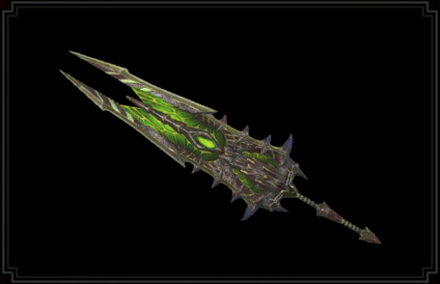 Astalos Crashblade+ Astalos Crashblade+
 |
310 | 0 | 20% |
| Element / Status |
Slots | Rampage Slots | |
| ①ーー | ② |
| Armor | Slots | Skills | |
|---|---|---|---|
|
|
④②① |
Stun Resistance Lv. 2
Burst Lv. 1
|
|
|
|
①①① | ||
|
|
④②ー |
Thunder Attack Lv. 3
|
|
|
|
③ーー | ||
|
|
①①ー |
Attack Boost Lv. 2
Critical Eye Lv. 2
|
|
| Talisman | Attack Boost 3 with ② slot or better | ||
| Rampage Decoration |
|
||
| Decorations |
|
||
| Skills | |
|---|---|
| Rampage Skill | Swap between Wyvern Exploit, Anti-Aerial Species, Anti-Aquatic Species, or Fanged Exploit depending on the monster. |
Attack Boost Lv.5 | Thunder Attack Lv.5
Critical Boost Lv.3 | Weakness Exploit Lv.3 Critical Element Lv.3 | Stun Resistance Lv.3 Speed Sharpening Lv.3 | Flinch Free Lv.3 Critical Eye Lv.2 | Latent Power Lv.2 Focus Lv.2 | Offensive Guard Lv.1 Burst Lv.1 |
|
| Build Merits and Notes |
|---|
| This build is focused around dealing high Thunder damage with the new Surge Slash Combo Switch Skill, enhancing its quick high-damage hits with Attack Boost, Thunder Attack, Critical Boost, and Critical Element. For a smoother hunting experience, this build also features maxed Stun Resistance, Speed Sharpening, and Focus Lv.2 for utility. |
Master Rank Build (Early Game): MR 1-2
Kamura Warrior Cleaver Raw Affinity
| Weapon | ATK | DEF | Affinity |
|---|---|---|---|
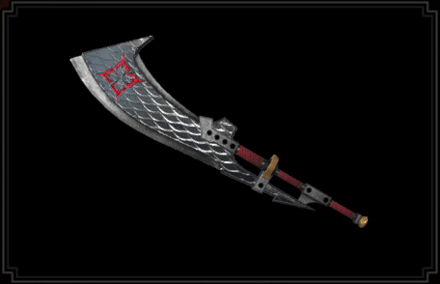 Kamura Warrior Cleaver Kamura Warrior Cleaver
 |
250 | 0 | 0% |
| Element / Status |
Slots | Rampage Slots | |
-
|
④①ー | ② |
| Armor | Slots | Skills | |
|---|---|---|---|
|
|
②ーー |
Attack Boost Lv. 2
Item Prolonger Lv. 1
|
|
|
|
③①ー |
Critical Eye Lv. 2
Windproof Lv. 2
|
|
|
|
②①ー |
Critical Eye Lv. 2
Water Attack Lv. 1
|
|
|
|
④①① |
Attack Boost Lv. 2
|
|
|
|
①①ー |
Attack Boost Lv. 2
Critical Eye Lv. 2
|
|
| Talisman | Weakness Exploit 2 with ② slot or better | ||
| Rampage Decoration |
|
||
| Decorations |
|
||
| Skills | |
|---|---|
| Rampage Skill | Swap between Wyvern Exploit, Anti-Aerial Species, Anti-Aquatic Species, or Fanged Exploit depending on the monster. |
Attack Boost Lv.6 | Critical Eye Lv.6
Critical Boost Lv. 3 | Defense Boost Lv.3 Focus Lv.3 | Weakness Exploit Lv.3 Stun Resistance Lv.3 | Windproof Lv.2 Water Attack Lv.1 | Item Prolonger Lv. 1 Flinch Free Lv.1 |
|
| Build Merits and Notes |
|---|
| A well-rounded Great Sword build great for starting out in Sunbreak's Master Rank. It features high raw damage and 75% Affinity on weak spots thanks to Attack Boost, Weakness Exploit, and Critical Boost, while also sporting good survivability with Defense Boost and Stun Resistance. The build also sports Focus 3, making it easier to charge up the Great Sword's attacks. |
Best Skills for Great Sword
Best Damage Skills
These skills make it possible to deal extra damage! Aim for these skills for maximum DPS to defeat those monsters easier and finish those quests faster!
| Best Skills | Explanation |
|---|---|
| Attack Boost ★★★ |
This skill increases the Great Sword's damage values, especially when hitting a successful True Charge Slash! |
| Offensive Guard ★★★ |
Increases overall damage output for the Strongarm Stance playstyle. |
| Weakness Exploit ★★★ |
A staple skill for any meta builds. The Great Sword's playstyle requires targeting weakspots to inflict optimal damage, so having this skill provides a significant boost to your DPS. Always max out this skill whenever possible. |
| Critical Boost ★★★ |
Further amplifies critical hit damage. Make sure to have high affinity first before equipping! |
| Critical Eye ★★★ |
Always aim for 80-100% affinity to amplify the Great Sword's base damage efficiently! It is best to max this out when you're using a Surge Slash-focused build. |
| Frostcraft ★★ |
With Velkhana's return to Sunbreak, this skill is a must-have for the old-school playstyle of hitting the monster then running away to regroup! With this in mind, we highly recommend the gloves from the Velkhana Armor Set for a level of this skill plus max level of Critical Draw. Available in Sunbreak Free Title Update 4 |
| Critical Draw ★★ |
Grants up to a 60% affinity on draw attacks. On Free Title Update 4, this skill is best paired with the Frostcraft skill. |
| Element Attack ★★ |
Sunbreak featured buffs for elemental damage, making elemental builds viable. Be sure to max out this skill to get the most out of its potential. Fire | Water | Ice | Thunder | Dragon |
| Element Exploit ★★ |
This skill is ideal to have on elemental builds because of the Great Sword's playstyle of targeting a monster's weakspots, making sure you pull off significant damage every time you hit them! Available in Sunbreak Free Title Update 1 |
| Charge Master ★★ |
Provides extra elemental damage every time a charged attack hits. |
| Powder Mantle ★ |
This skill from the Risen Teostra Armor provides the Great Sword with additional blast damage every time it activates, contributing greatly to DPS. Available in Sunbreak Free Title Update 3 |
| Dereliction ★ |
Using the Red Scroll for elemental builds and the Blue Scroll for raw builds improves overall damage; just be wary of your health, especially when you're doing the small barrel bomb counter technique! Available in Sunbreak Base Game |
| Bloodlust ★ |
Overcome the Frenzy Virus to power up with this skill; best paired with Coalescence. Available in Sunbreak Base Game |
| Critical Element ★ |
For elemental builds, this skill contributes greatly to the damage dealt to a monster. Consider this skill when doing a Surge Slash-focused build. |
Best Comfort Skills
These are skills that make managing weapon mechanics a lot easier. Damage is only part of the equation - taking time to slot in comfort skills that increase consistency & comfort will also increase overall DPS!
| Best Skills | Explanation |
|---|---|
| Focus ★★★ |
Speeds up the Great Sword's charge attacks and is a must-have skill for any Great Sword player. |
| Defiance ★★ |
Three levels of this skill prevent most roars, tremors, and winds from interrupting your charged attacks. The Cornerstone Jewel is a level 1 decoration, so slot it in whenever possible! Available in Sunbreak Free Title Update 1 |
| Quick Sheathe ★★ |
Makes Power Sheathe quicker, providing enough time to reposition for a counterattack or regroup. |
| Handicraft ★ |
Consider slotting this skill in when a single point is enough to get your Great Sword to a decent amount of purple sharpness. |
| Flinch Free ★ |
Useful especially in multiplayer where minor attacks can interrupt your attacks. |
| Speed Sharpening ★ |
Reduces a cycle for sharpening with each level. Useful for getting your sharpness level up mid-fight. |
| Intrepid Heart ★ |
Whenever the gauge above your health bar is full, this skill can be useful in preventing monster attacks from interrupting your combos, making it possible to pull off an extra charged attack before you can regroup. Available in Sunbreak Free Title Update 2 |
Monster Hunter Rise Related Links

|
• Weapons marked withNEW have been updated. • Weapons withUP have been reviewed and does not warrant an updated build from the Bonus Update. |
| All Weapon Build Guides | |
|---|---|
NEW Low Rank | High Rank Master Rank |
NEW Low Rank | High Rank Master Rank |
NEW Low Rank | High Rank Master Rank |
NEW Low Rank | High Rank Master Rank |
NEW Low Rank | High Rank Master Rank |
NEW Low Rank | High Rank Master Rank |
NEW Low Rank | High Rank Master Rank |
NEW Low Rank | High Rank Master Rank |
NEW Low Rank | High Rank Master Rank |
NEW Low Rank | High Rank Master Rank |
NEW Low Rank | High Rank Master Rank |
NEW Low Rank | High Rank Master Rank |
NEW Low Rank | High Rank Master Rank |
UP Low Rank | High Rank Master Rank |
Other Builds
| Other Build Guides | |
|---|---|
| General High Rank Builds and Best Equipment | Buddy Equipment Builds Palico | Palamute |
Comment
I agree, i'm MR 3, I can't make the weapons listed for MR 3 - 6 at MR 3.
Author
Sunbreak Great Sword Builds (Master Rank)
improvement survey
03/2026
improving Game8's site?

Your answers will help us to improve our website.
Note: Please be sure not to enter any kind of personal information into your response.

We hope you continue to make use of Game8.
Rankings
- We could not find the message board you were looking for.
Gaming News
Popular Games

Genshin Impact Walkthrough & Guides Wiki

Honkai: Star Rail Walkthrough & Guides Wiki

Umamusume: Pretty Derby Walkthrough & Guides Wiki

Pokemon Pokopia Walkthrough & Guides Wiki

Resident Evil Requiem (RE9) Walkthrough & Guides Wiki

Monster Hunter Wilds Walkthrough & Guides Wiki

Wuthering Waves Walkthrough & Guides Wiki

Arknights: Endfield Walkthrough & Guides Wiki

Pokemon FireRed and LeafGreen (FRLG) Walkthrough & Guides Wiki

Pokemon TCG Pocket (PTCGP) Strategies & Guides Wiki
Recommended Games

Diablo 4: Vessel of Hatred Walkthrough & Guides Wiki

Cyberpunk 2077: Ultimate Edition Walkthrough & Guides Wiki

Fire Emblem Heroes (FEH) Walkthrough & Guides Wiki

Yu-Gi-Oh! Master Duel Walkthrough & Guides Wiki

Super Smash Bros. Ultimate Walkthrough & Guides Wiki

Pokemon Brilliant Diamond and Shining Pearl (BDSP) Walkthrough & Guides Wiki

Elden Ring Shadow of the Erdtree Walkthrough & Guides Wiki

Monster Hunter World Walkthrough & Guides Wiki

The Legend of Zelda: Tears of the Kingdom Walkthrough & Guides Wiki

Persona 3 Reload Walkthrough & Guides Wiki
All rights reserved
©CAPCOM CO., LTD. ALL RIGHTS RESERVED.
The copyrights of videos of games used in our content and other intellectual property rights belong to the provider of the game.
The contents we provide on this site were created personally by members of the Game8 editorial department.
We refuse the right to reuse or repost content taken without our permission such as data or images to other sites.


![Everwind Review [Early Access] | The Shaky First Step to A Very Long Journey](https://img.game8.co/4440226/ab079b1153298a042633dd1ef51e878e.png/thumb)

![Monster Hunter Stories 3 Review [First Impressions] | Simply Rejuvenating](https://img.game8.co/4438641/2a31b7702bd70e78ec8efd24661dacda.jpeg/thumb)


My time in this earth is way too limited for my ADHD aah to be playing greatsword without focus, thank you very much, I'd trade a few hundred points of damage for the minimum amount of comfort.