Sunbreak Hammer Guide: Combos, Controls and Moveset
★ All Title Updates now available for ALL PLATFORMS!
┗ Title Update 4 | Title Update 5 | Bonus Update
┗ Check out all our Best Builds For Every Weapon!
┗ TU4 Monsters: Velkhana | Risen C.G. Valstrax
┗ TU5 Monsters: Amatsu | Risen Shagaru Magala
┗ Bonus Update Monster: Primordial Malzeno
This is a guide to the Hammer, a weapon in Monster Hunter Rise: Sunbreak (MH Rise). Read on to learn about new Hammer controls and combos, how to use Hammer Charge Switch as well as details on Hammer Switch Skills.
| All Hammer Guides | ||
|---|---|---|
 Trees & Full List Trees & Full List |
 How to Use How to Use |
 Best Builds Best Builds |
List of Contents
Hammer Balance Changes
Update 15.0
| Hammer Balance Changes and Fixes (Update 15.0) |
|---|
| ・Increased the elemental correction value for the hammer's Charged Big Bang and Big Bang I ~ Finisher. |
Update 13.0
| Hammer Balance Changes and Fixes (Update 13.0) |
|---|
| ・Fixed an issue where the skill Intrepid Heart would not properly activate if you were hit right as the Hammer's Water Stright animation begins. ・Dash Breaker: Attack power has been slightly increased. Also, performing a charge right before Dash Breaker ends will start you at max charge instead of continuing from your previous charge level. ・Silkbind Spinning Bludgeon: Attack power increased; elemental scaling slightly increased. |
Dash Breaker has received a significant buff. Its attack power has been increased and it now preserves max charge if you charge before the end of the move, giving way to more damage potential.
Silkbind Spinning Bludgeon's attack power and elemental scaling has also slightly been increased, increasing the overall damage potential of using this attack paired with their respective decorations.
Update 10.0
| Hammer Balance Changes and Fixes (Update 10.0) |
|---|
| ・Adjusted all of the following weapon actions: ・[Regular Moves] ・ Side Smash: Elemental scaling increased; Status effect scaling increased ・[Charged Moves] ・ Spinning Bludgeon (1st through 5th Hits): Elemental scaling increased (increases per consecutive hit); Status effect scaling increased (increases per consecutive hit) ・ Charged Big Bang (1st Hit): Attack power increased ・ Charged Big Bang (Finisher): Attack power increased ・ Big Bang Finisher (2nd Hit): Attack power increased ・[Charge Switch: Strength] ・ Power Swing: Stun value increased ・ Charged Brutal Upswing: Attack power increased ・ Charged Brutal Big Bang (1st Hit): Attack power increased ・ Charged Brutal Big Bang (2nd Hit): Attack power increased ・ Charged Brutal Big Bang (Finisher): Attack power increased; Stun value increased ・ Step Smash (1st Hit): Attack power increased; Stun value increased ・ Step Smash (Finisher): Attack power increased; Stun value increased ・[Charge Switch: Courage] ・ Charged Side Blow (and Additional Swing): Attack power increased; Elemental scaling increased; Exhaust value increased ・ Charged Upswing (and Additional Upswing): Attack power increased; Elemental scaling increased; Exhaust value increased ・ Additional Hammer Down (1st Hit): Exhaust value increased ・ Additional Hammer Down (Finisher): Attack power increased; Elemental scaling increased; Exhaust value increased ・ Bonus Damage (1st Charged Attack): Attack power increased; Elemental scaling increased; Status effect scaling increased; Exhaust value increased ・ Bonus Damage (2nd Charged Attack): Attack power increased; Elemental scaling increased; Status effect scaling increased; Exhaust value increased ・ Bonus Damage (3rds Charged Attack): Attack power increased; Elemental scaling increased; Exhaust value increased ・Side Smash / Water Strike: It is now possible to chain into Side Smash or Water Strike from Overhead Smash or Charged Follow-up. ・Charge Switch: Courage: Charge times are now shorter. ・Water Strike: The window of time for a successful Water Strike has been increased. ・Impact Crater: Fixed a bug where terrain effects would not trigger when Impact Crater is used on magma terrain. ・Impact Crater: Fixed a bug where the end of the timing window was set incorrectly when chaining Impact Crater (Level 0 - No Charge) into a grounded Charged Attack. ・Impact Crater: Fixed a bug where you could still perform Impact Crater even when your Wirebug Gauge is at level 1 during bubbleblight slipping animations. ・Charge Switch: Courage: Fixed a bug where adjustments to the direction the player faces would not work correctly when performing an Additional Upswing (2nd Charged Attack in the chain) when level 3 of the Focus skill is active. |
Hammer lived in the shadow of the great KO Sword and Shield builds in Monster Hunter Rise so we aren't surprised that we're getting buffs for its stun and exhaust value in this update!
This overall will enable the Hammer to keep up with what it's known for: a KO machine.
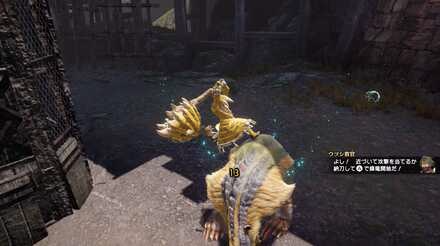
Hammer New Sunbreak Attack and Moves
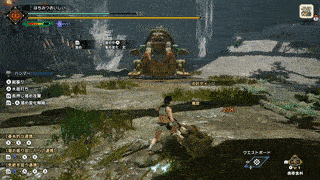
Official Hammer Preview Video
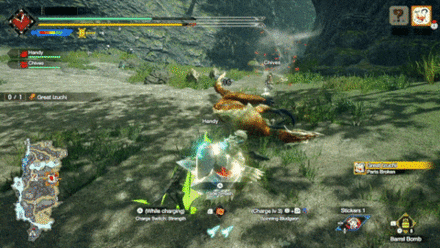
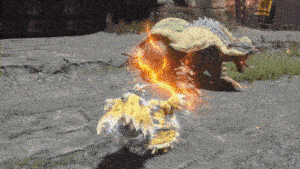
Silkbind Attack: Impact Burst
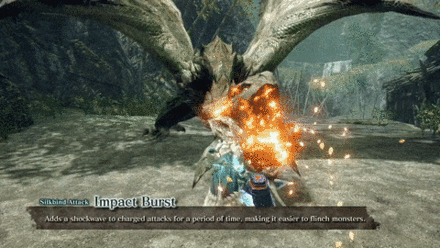
Impact Burst is a new Silkbind Attack for the Hammer in Sunbreak.
Upon using this move, the Hammer will be wrapped in Ironsilk, making every charged attack produce shockwaves upon hitting the target.
The shockwaves will deal residual damage and make it easier to make monsters flinch.
Focus on Hitting Monster Heads
Since this new Silkbind Attack adds more hits to the weapon's attacks, it is recommended to focus on targeting and hitting a monster's head while Impact Burst is in effect to quickly flinch and stun it.
Lasts For a Minute
The effects of Impact Burst in the Sunbreak demo lasts for a solid minute. The cooldown of the Wirebug used by this move will also be finished right before the effect of Impact Burst dissipates, so you can easily and readily use it again.
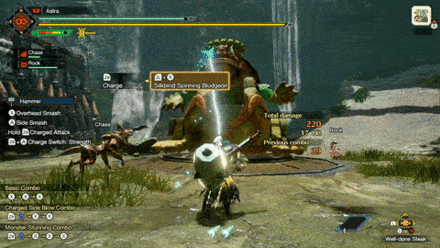
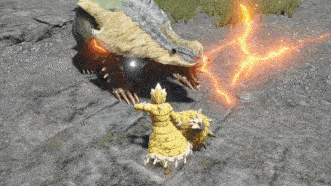
Switch Skill: Spinning Bludgeon: Charge
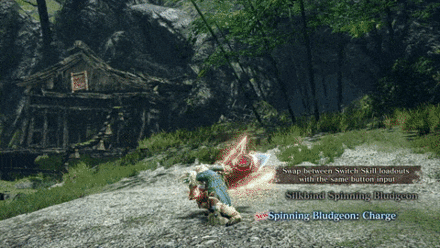
Spinning Bludgeon: Charge is a new Switch Skill for the Hammer added in Sunbreak. This new move allows Spinning Bludgeon to be charged up to level 3 to deal more damage.
After doing this move, the charge is stored and will be unleashed at the next Charge Switch attack, allowing the use of successive charged attacks.
Silkbind Attack: Keeping Sway
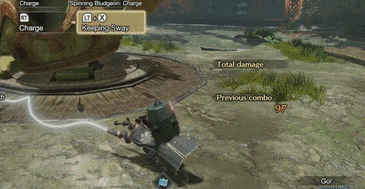
Not introduced in any trailer, Keeping Sway is an additional Silkbind Attack added to the Sunbreak Expansion. It is a high mobility Switch Skill that allows you to reposition whilst keeping you Hammer's charge level. Definitely a quality-of-life change that makes the Hammer more fun to use.
Monster Hunter Rise: Sunbreak
Release Date and New Monsters
How Good is the Hammer?
Tier List Ranking
| MHRise Ranking | → | Sunbreak Ranking |
|---|---|---|
(S - A - B) 3 Level Tier |
(SS - S - A) 3 Level Tier |
The Hammer continues to do what it does best in the Sunbreak expansion: dishing out lots and lots of stun damage.
Like the Hunting Horn however, the Hammer cannot fully utilize the elemental damage meta present today. What's more, it usually just stays in the head making it a bad pick against Afflicted Monsters considering you have to pop Qurio spots around their bodies.
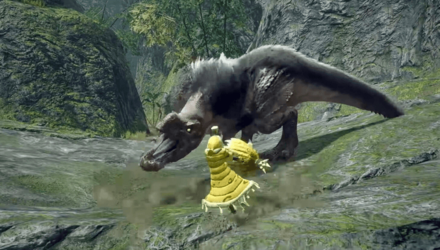
Hammer Strengths

Can Stun Monsters
Hammers dishes out blunt damage which could trigger stuns to monsters when hit on the head enough!
High Single-Hit Damage
Like the Great Sword, the Hammer has high single-hit attack damage. This can be achieved when the weapon is fully charged!
High Mobility
Unlike the Great Sword though, the hunter can move freely while the Hammer is unsheathed. You can even charge while moving but this consumes stamina so be careful!
Counter with Water Strike
Water Strike is a great addition to the Hammer's arsenal, allowing it to block an attack followed by a counter with an Upswing!
Hammer Weaknesses
Very Short Reach
The Hammer has a very short reach that cannot reach the heads of some monsters like Anjanath and Jyuratodus. The aerial attacks that come with the Silkbind Attacks make up for this though!
Cannot Cut Tails
Because it outputs blunt damage and not cutting damage, the Hammer cannot cut tails. This is okay though as most Hammer users focus on the head - and only the head.
No Guarding Options
The Hammer also does not have guarding options but is mitigated by its high mobility. Take advantage of this and position yourself properly!
Hammer Controls
| Controls | Action | |
|---|---|---|
| PC |
PS |
Overhead Smash |
| Switch |
Xbox |
|
| PC |
PS |
Upswing |
| Switch |
Xbox |
|
| PC |
PS |
Side Smash |
| Switch |
Xbox |
|
| PC |
PS |
Charge |
| Switch |
Xbox |
|
| PC Release while Charge Lv 1 |
PS Release while Charge Lv 1 |
Charged Side Blow |
| Switch Release while Charge Lv 1 |
Xbox Release while Charge Lv 1 |
|
| PC Release while Charge Lv 2 |
PS Release while Charge Lv 2 |
Charged Upswing |
| Switch Release while Charge Lv 2 |
Xbox Release while Charge Lv 2 |
|
| PC Release while Charge Lv 3 |
PS Release while Charge Lv 3 |
Charged Big Bang |
| Switch Release while Charge Lv 3 |
Xbox Release while Charge Lv 3 |
|
| PC Release while Charge Lv 3 |
PS Release while Charge Lv 3 |
Spinning Bludgeon |
| Switch Release while Charge Lv 3 |
Xbox Release while Charge Lv 3 |
|
| PC While charging |
PS While charging |
Charge Switch |
| Switch While charging |
Xbox While charging |
|
| PC |
PS |
Guard |
| Switch |
Xbox |
|
| PC Middle Click + Left Click |
PS L2 + Triangle |
Silkbind Spinning Bludgeon |
| Switch zL + X |
Xbox LT + Y |
|
| PC Middle Click + Right Click |
PS L2 + Circle |
Impact Crater |
| Switch zL + A |
Xbox LT + B |
|
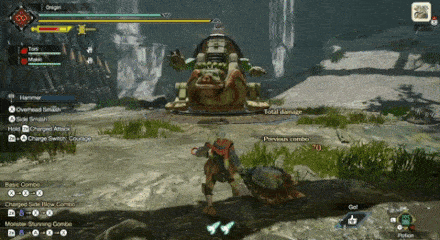
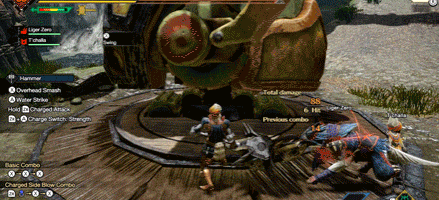
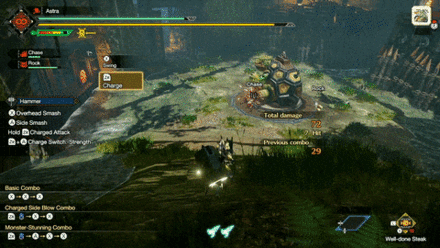
Useful Combos
| Basic Combo | ||
|---|---|---|
| Overhead Smash I | Overhead Smash I | Upswing |
| Charged Side Blow Combo | ||
|---|---|---|
| Charged Side Blow | Charged Follow-up | Overhead Smash I |
| Hold, |
||
| Hold, |
||
| Hold, |
||
| Hold, |
||
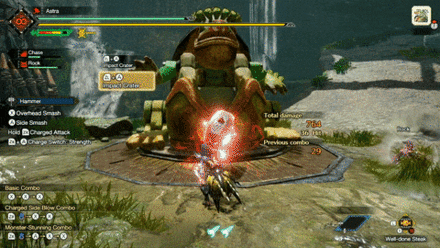
| Monster Stunning Combo | |||
|---|---|---|---|
| Charged II Side Blow |
Side Smash | Overhead Smash II | Upswing |
| Hold, |
Hold, |
Hold, |
Hold, |
| Hold, |
Hold, |
Hold, |
Hold, |
| Hold, |
Hold, |
Hold, |
Hold, |
| Hold, |
Hold, |
Hold, |
Hold, |
| Spinning Bludgeon Follow-Ups (release |
||
|---|---|---|
| Charge | Spinning Bludgeon | Spinning Side Smash |
| Hold, |
Hold, |
During first spin, |
| Hold, |
Hold, CTRL + CTRL + MB4 |
During first spin, |
| Hold, |
Hold, |
During first spin, |
| Hold, |
Hold, |
During first spin, |
| ↳ | Spinning Follow-up 2nd to 3rd spin, 2nd to 3rd spin, 2nd to 3rd spin, 2nd to 3rd spin, |
|
| ↳ | Spinning Follow-up 4th to 5th spin, 4th to 5th spin, 4th to 5th spin, 4th to 5th spin, |
|
Hammer Silkbind Attacks
Impact Burst
| Switch Controls | zL + A |
|---|---|
| PC Controls | Middle Click + Right Click |
| PS Controls | L2 + Circle |
| Xbox Controls | LT + B |
The new Impact Burst Silkbind Attack can be used in the Sunbreak demo and replaces Impact Crater.
The weapon is wrapped with Ironsilk for one minute, adding shockwaves that deal additional damage to every attack with the Hammer. The effect is active as long as a blue flare is attached at the hunter.
This move makes it more easy to flinch monsters by solely hitting their heads and taking advantage of the additional hits produced by Impact Burst
Impact Burst costs one Wirebug charge and has a medium recovery speed.
Silkbind Spinning Bludgeon
| Switch Controls | zL + X |
|---|---|
| PC Controls | Middle Click + Left Click |
| PS Controls | L2 + Triangle |
| Xbox Controls | LT + Y |
Silkbind Spinning Bludgeon sends the hunter flying upwards while making a spinning attack. You can opt to charge the attack initially for more damage!
Dash Breaker
| Switch Controls | zL + X |
|---|---|
| PC Controls | Middle Click + Left Click |
| PS Controls | L2 + Triangle |
| Xbox Controls | LT + Y |
Dash Breaker sends the hunter rushing forward to attack. It has the bonus effect of negating all enemy damage while launching forward.
Impact Crater
| Switch Controls | zL + A |
|---|---|
| PC Controls | Middle Click + Right Click |
| PS Controls | L2 + Circle |
| Xbox Controls | LT + B |
Impact Crater is a Silkbind Attack that launches the hunter in the air then slamming the hammer downwards with great force, creating a crater on the ground.
Keeping Sway
| Switch Controls | zL + X |
|---|---|
| PC Controls | Middle Click + Left Click |
| PS Controls | L2 + Triangle |
| Xbox Controls | LT + Y |
A high mobility Switch Skill that allows you to reposition whilst keeping you Hammer's charge level. Definitely a quality-of-life change that makes the Hammer more fun to use.
Hammer Switch Skills
Switch Skills are unlocked with different conditions as you progress in the game. Base game MHRise provides Hunters with three (3) slots of Switch Skills, with the Sunbreak expansion adding two (2) more.
Note: Skills in red are exclusive to the Sunbreak expansion.
| Skill Slot | Switch Skill Choices |
|---|---|
| 1 | ・ Side Smash ・ Water Strike |
| 2 | ・ Charge Switch: Strength ・ Charge Switch: Courage |
| 3 | ・ Spinning Bludgeon ・ Spinning Bludgeon: Charge |
| 4 | ・ Silkbind Spinning Bludgeon ・ Dash Breaker ・ Keeping Sway |
| 5 | ・ Impact Crater ・ Impact Burst |
Switch Skills Guide: How to Unlock Switch Skills
Water Strike
| Switched With | |
|---|---|
| Side Smash | |
| Description | |
| Attack that allows you to absorb an enemy attack. Perform before getting hit to negate the damage. Can be followed-up by an upswing hammer attack. | |
| Controls | |
Press If successful, press A or X to follow-up with an upswing.
Press If successful, press Right Click or Left Click to follow-up with an upswing.
Press If successful, press Circle or Triangle to follow-up with an upswing.
|
|
This Switch Skill unlocks a damage negation property in your Overhead Smash then you can follow up with an Upswing when successful. When you unlock this, use it immediately. The buff this Switch Skill gives is just too much to pass on.
Dash Breaker
| Switched With | |
|---|---|
| Silkbind Spinning Bludgeon | |
| Description | |
| Forward rush using Wirebugs. Enemy attack damage is negated while launching forward! Wirebug Gauge Recovery Speed: Fast Wirebug Cost: 1 |
|
| Controls | |
Hold zR to charge before launching the attack. Hold MB4 to charge before launching the attack. Hold R2 to charge before launching the attack. Hold RT to charge before launching the attack. |
|
This move brings out a Wirebug and dashes you forward while side swinging. The main difference between Dash Breaker and Silkbind Spinning Bludgeon is the direction of attack: Dash Breaker dashes you forward while Silkbind Spinning Bludeon propels you upward. We suggest switching between them depending on the monster.
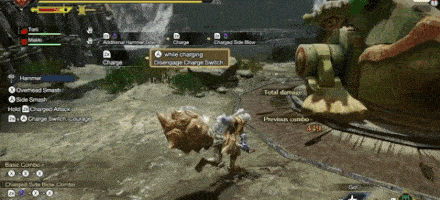
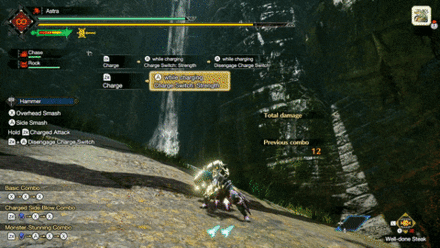
Charge Switch: Courage
| Switched With | |
|---|---|
| Charge Switch: Strength | |
| Description | |
| Decreases charging levels, but allows you to follow from one charge into another more quickly. | |
| Controls | |
Press Press again to disengage. Charge level increases to maximum when disengaged. Press Press again to disengage. Charge level increases to maximum when disengaged. Press Press again to disengage. Charge level increases to maximum when disengaged. Press Press again to disengage. Charge level increases to maximum when disengaged. |
|
This Switch Skill allows you to chain multiple charge attacks. When coupled with a Focus build, this could work but this also removes the second charge level and just brings you from Lvl 1 to Lvl 3 (but with the same charge time). This also enables you to get access to the powerful downswing attack by just hitting the hammer charges consecutively.
Keeping Sway
| Switched With | |
|---|---|
| Silkbind Spinning Bludgeon | |
| Description | |
| A quick evasion maneuver at a high speed. Maintains your charge level during the evade. Wirebug Gauge Recovery Speed: Fast Wirebug Cost: 1 |
|
| Controls | |
| Switch Hold zR to charge before launching the attack. PC Hold MB4 to charge before launching the attack. PlayStation Hold R2 to charge before launching the attack. Xbox Hold RT to charge before launching the attack. |
|
A high mobility Switch Skill that allows you to reposition whilst keeping you Hammer's charge level. Definitely a quality-of-life change that makes the Hammer more fun to use.
Spinning Bludgeon: Charge
| Switched With | |
|---|---|
| Spinning Bludgeon | |
| Description | |
| Stores released power and funnels it into the next Charge Switch attack. Power is build up when performing this move and charge level is maintained when executing a Charge Switch. Can be used to unleash a series of level 3 charged attacks! | |
| Controls | |
| Switch Hold Spinning Bludgeon: Charge → Hold Press
PC Hold Spinning Bludgeon: Charge → Hold Press
PlayStation Hold Spinning Bludgeon: Charge → Hold Press
Xbox Hold Spinning Bludgeon: Charge → Hold Press |
|
Allows Hunters to store charged energy then drop it in the next Charge Switch attack. This combo can be used to dish out a flurry of level 3 charged attacks for maximum damage!
Impact Burst
| Switched With | |
|---|---|
| Impact Crater | |
| Description | |
| Makes any charge attack vibrate, creating a shockwave that makes it easier to flinch monsters. Activate and it will last for 55s so combo this with Impact Crater via Skill Swap to deal maximum damage! Wirebug Gauge Recovery Speed: Medium Wirebug Cost: 1 |
|
| Controls | |
| Switch PC PlayStation Xbox |
|
This silkbind attack rewards an ultra-offensive playstyle. While under the effects of Impact Burst, attacks will deal extra hits - quickly exhausting and stunning monsters in the process!
Hammer Attacks and Moves
Charge Mode Switch
| Switch Controls | While charging, press |
|---|---|
| PC Controls | While charging, press |
| PS Controls | While charging, press |
| Xbox Controls | While charging, press |
The hammer gains an alternate charge attack for Monster Hunter Rise! It's a new move that switches the hammer's default spinning charge attack into one strong slam. To know the mode you currently have, refer to the color of the hammer icon on the right side of the sharpness gauge.
| New Charge Mode | Default Charge Mode |
|---|---|
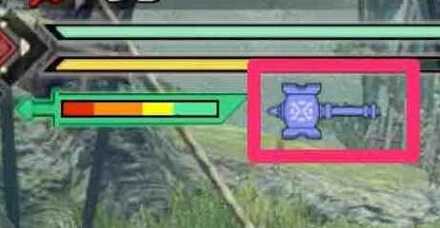 |
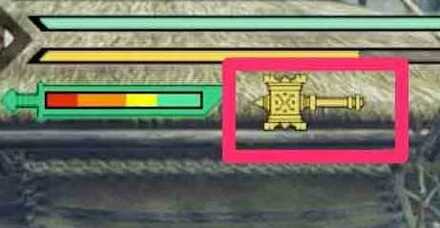 |
Spinning Jump Attack
| Switch Controls | Slide on a slope while charging using |
|---|---|
| PC Controls | Slide on a slope while charging using |
| Switch Controls | Slide on a slope while charging using |
| PC Controls | Slide on a slope while charging using |
The Hammer's spinning jump attack makes its return in Monster Hunter Rise. It's a strong jump attack that can deal damage multiple times in a single move. Furthermore, it is also great against tall monsters since you can hit them from the jump's peak until you reach the ground.
Recommended Combos For the Hammer
Stun to Spinning Attack + Impact Crater
| Switch Controls | While in Default Charge Mode, X → A (x5) → zL + A |
|---|---|
| PC Controls | While in Default Charge Mode, Left Click → Right Click (x5) → Middle Click + Right Click |
| PS Controls | While in Default Charge Mode, Triangle → Circle (x5) → L2 + Circle |
| Xbox Controls | While in Default Charge Mode, Y → B (x5) → LT + B |
This combo gives you the ability to combine a stun with a charged attack and finishing it off with a Silkbind Attack, specifically the Impact Crater.
Basic Stun Combo
| Switch Controls | While in the New Charge Mode, X (A) → X → X |
|---|---|
| PC Controls | While in the New Charge Mode, Left Click (Right Click) → Left Click → Left Click |
| PS Controls | While in the New Charge Mode, Triangle (Circle) → Triangle → Triangle |
| Xbox Controls | While in the New Charge Mode, Y (B) → Y → Y |
From a medium distance, this combo will let you do a slam attack and vertical hit combo which has a high chance of stunning the monster you are hitting.
Close Ranged Basic Combo
| Switch Controls | A → X → X |
|---|---|
| PC Controls | Right Click → Left Click → Left Click |
| PS Controls | Circle → Triangle → Triangle |
| Xbox Controls | B → Y → Y |
A close-ranged basic combo that does not use a charged attack but deals decent damage. It is ideal to use this when you are backed into a corner by a monster.
Tips on How to Use the Hammer
Aim For the Head!
Take advantage of the blunt damage and always aim for the head to accumulate stun!
Make Sure the Charge Attack Hits

Hammers have one of the highest single-hit damage for any weapon so when you charge the Hammer, make sure it hits! It can charge up to 3 levels which can be stored while moving so reposition properly and make it count!
Counter Using Water Strike and Evade When Needed
Water Strike Switch Skill is the greatest addition to the Hammer so far. This allows the Hunter to negate an incoming attack and then counter with an upswing. When evasion is not available, use this to block incoming attacks! However, when it is too awkward to use Water Strike, just evade!
iFrame When Switching Between Charge Modes
When charge switching from the new mode to the default, there is an iFrame at the start. This could be used as an evasion technique during emergencies! Careful though, the iFrame is not very long so you need to time it as precisely as possible which should be at the start of the dash.
Changes from MHW: Iceborne
The First Attack is a Side Smash
When pressing A, Right Click, Circle, or B, the attack is now a Side Smash. In Iceborne, you cannot attack with A, Right Click, Circle, or B as the first attack in a combo.
Charged Upswing Does Not Throw Allies Up
The Charged Upswing does not throw up allies in the air anymore! If you are a Hammer main and feels guilty for executing Charged Upswing beside allies, you can continue to do so (guilt-free!) in MH Rise!
Monster Hunter Rise Related Guides

| Weapon Type Guides | ||
|---|---|---|
 Weapons and Weapon Types Weapons and Weapon Types |
 Weapon Type Tier List Weapon Type Tier List |
 Builds for Each Weapon Type Builds for Each Weapon Type |
Melee Weapon Guides
| Melee Weapons | ||
|---|---|---|
Guide | Weapon Tree |
Guide | Weapon Tree |
Guide | Weapon Tree |
Guide | Weapon Tree |
Guide | Weapon Tree |
Guide | Weapon Tree |
Guide | Weapon Tree |
Guide | Weapon Tree | Melodies |
Guide | Weapon Tree |
Guide | Weapon Tree |
Guide | Weapon Tree | Kinsects |
|
Ranged Weapon Guides
| Ranged Weapons | ||
|---|---|---|
Guide | Weapon Tree |
Guide | Weapon Tree |
Guide | Weapon Tree |
Author

Sunbreak Hammer Guide: Combos, Controls and Moveset
Rankings
- We could not find the message board you were looking for.
Gaming News


![Monster Hunter Stories 3 Review [First Impressions] | Simply Rejuvenating](https://img.game8.co/4438641/2a31b7702bd70e78ec8efd24661dacda.jpeg/thumb)
Popular Games

Genshin Impact Walkthrough & Guides Wiki
Honkai: Star Rail Walkthrough & Guides Wiki
Umamusume: Pretty Derby Walkthrough & Guides Wiki
Pokemon Pokopia Walkthrough & Guides Wiki
Resident Evil Requiem (RE9) Walkthrough & Guides Wiki
Monster Hunter Wilds Walkthrough & Guides Wiki
Wuthering Waves Walkthrough & Guides Wiki
Arknights: Endfield Walkthrough & Guides Wiki
Pokemon FireRed and LeafGreen (FRLG) Walkthrough & Guides Wiki
Pokemon TCG Pocket (PTCGP) Strategies & Guides Wiki


Recommended Games
Diablo 4: Vessel of Hatred Walkthrough & Guides Wiki
Cyberpunk 2077: Ultimate Edition Walkthrough & Guides Wiki
Fire Emblem Heroes (FEH) Walkthrough & Guides Wiki
Yu-Gi-Oh! Master Duel Walkthrough & Guides Wiki
Super Smash Bros. Ultimate Walkthrough & Guides Wiki
Pokemon Brilliant Diamond and Shining Pearl (BDSP) Walkthrough & Guides Wiki
Elden Ring Shadow of the Erdtree Walkthrough & Guides Wiki
Monster Hunter World Walkthrough & Guides Wiki
The Legend of Zelda: Tears of the Kingdom Walkthrough & Guides Wiki
Persona 3 Reload Walkthrough & Guides Wiki


All rights reserved
©CAPCOM CO., LTD. ALL RIGHTS RESERVED.
The copyrights of videos of games used in our content and other intellectual property rights belong to the provider of the game.
The contents we provide on this site were created personally by members of the Game8 editorial department.
We refuse the right to reuse or repost content taken without our permission such as data or images to other sites.