This survey will take about 1 minute.
Your answers will help us to improve our website.
Monster Hunter Rise: Sunbreak
Arena Quest 05 - Rajang: How to Get S Rank | Monster Hunter Rise
★ All Title Updates now available for ALL PLATFORMS!
┗ Title Update 4 | Title Update 5 | Bonus Update
┗ Check out all our Best Builds For Every Weapon!
┗ TU4 Monsters: Velkhana | Risen C.G. Valstrax
┗ TU5 Monsters: Amatsu | Risen Shagaru Magala
┗ Bonus Update Monster: Primordial Malzeno
This is a comprehensive guide on the Arena Quest 05 found in Monster Hunter Rise (MH Rise). Read on for a guide on how to beat Rajang in the Arena, how to get S Rank, armor and weapon loadouts, and more!
List of Contents
Arena Quest 05 Basic Information
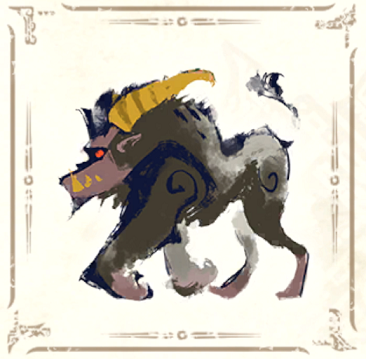
| Slay a Rajang | |
|---|---|
|
|
| Locale | Arena |
| Time Limit | 50 min. |
| Avaliable Weapons | |
Rank Clear Times
| S Rank | 4 min 30 sec |
|---|---|
| A Rank | 10 min |
| B Rank | 50 min |
Arena Quest 05 Rewards
Target Rewards
Quest Rewards
Coming soon!
| Rewards | Drop Rate |
|---|---|
| Ace Hunter Coin | - |
| Rajang Coin | - |
Weapon and Armor Sets
Dual Blades

| Weapon | Armor | Items | |
|---|---|---|---|
| Ashigara Axes | ・Tigrex Helm S ・Tigrex Mail S ・Tigrex Braces S ・Tigrex Coil S ・Tigrex Greaves S | ・Potion x10 ・Mega Potion x10 ・Whetstone ・Throwing Kunai ・BBQ Spit | |
| Switch Skills | |||
| Demon Flurry Rush | Feral Demon Mode | Piercing Bind | |
Great Sword

| Weapon | Armor | Items | |
|---|---|---|---|
| Abominable Great Sword | ・Barioth Helm S ・Barioth Mail S ・Barioth Vambraces S ・Barioth Coil S ・Barioth Greaves S | ・Potion x10 ・Mega Potion x10 ・Whetstone ・Throwing Kunai ・BBQ Spit | |
| Switch Skills | |||
| Tackle | Rage Slash | Adamant Charge Slash | |
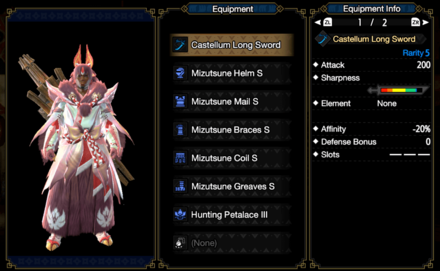
Long Sword
| Weapon | Armor | Items | |
|---|---|---|---|
| Castellum Long Sword | ・Mizutsune Helm S ・Mizutsune Mail S ・Mizutsune Braces S ・Mizutsune Coil S ・Mizutsune Greaves S | ・Potion x10 ・Mega Potion x10 ・Whetstone ・Throwing Kunai ・BBQ Spit | |
| Switch Skills | |||
| Drawn Double Slash | Spirit Roundslash Combo | Soaring Kick | |
Lance

| Weapon | Armor | Items | |
|---|---|---|---|
| Night Rains Black | ・Diablos Helm S ・Diablos Armor S ・Diablos Vambraces S ・Diablos Coil S ・Diablos Greaves S | ・Potion x10 ・Mega Potion x10 ・Whetstone ・Throwing Kunai ・BBQ Spit | |
| Switch Skills | |||
| Spiral Thrust | Shield Charge | Insta-Block | |
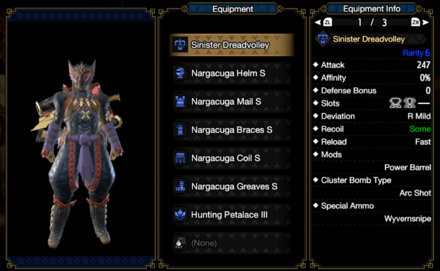
Heavy Bowgun
| Weapon | Armor | Items | |
|---|---|---|---|
| Sinister Dreadvolley | ・Nargacuga Helm S ・Nargacuga Mail S ・Nargacuga Braces S ・Nargacuga Coil S ・Nargacuga Greaves S | ・Potion x10 ・Mega Potion x10 ・Max Potion x2 ・Normal Ammo 1 ・Throwing Kunai ・BBQ Spit | |
| Switch Skills | |||
| Tackle | Counter Shot | Mech-Wyvernsnipe | |
| Heavy Bowgun Ammo | ||
|---|---|---|
| Normal Ammo 3 x99 | Pierce Ammo 3 x60 | Spread Ammo 3 x60 |
| Sticky Ammo 3 x9 | Exhaust Ammo 1 x12 | Exhaust Ammo 2 x8 |
| Demon Ammo x5 | Slicing Ammo x30 | |
S Rank Guide: Dual Blades
| Dual Blades Tips |
|---|
Binding Pierce is Key
In order to keep the hunting time as low as possible, constant use of the Binding Pierce Switch Skill on Rajang's face and tail is paramount.
Binding Pierce should be the opening move against Rajang when the quest starts as it takes a few moments to aggro and level 3 Earplugs will ignore the initial roar.
Rajang also has several openings that can be used to successfully apply Binding Pierce:
| Binding Pierce Openings | |
|---|---|
| Thunder Beam | Rajang's head and tail are extremely vulnerable during Thunder Beam's animation, allowing you to use Binding Pierce on either of these parts with ease. |
| Fists of Fury | Keep your distance or position behind Rajang while it performs Fists of Fury. Close in after Rajang plants both fists on the ground to avoid the tremor-inducing shockwave. |
| Jumping Slam | Dodge through or away from Rajang's Jumping Slam. You can plant a Binding Pierce on either the head or tail after the slam safely afterward. |
Demon Flurry Rush
The first hit of the Demon Flurry Rush combo (Demon Mode + A Button) should be used as the main combo until longer burst damage chances are possible.
The first hit spins the hunter in the desired direction allowing them to stay mobile against Rajang's wild swinging attacks as well as remain within optimal melee range.
Be careful not to over commit to the Demon Flurry Rush Combo as the second and third hits have locked animations that may cause you to take an unwanted hit resulting in a DPS loss.
Focus Tail and Arms
While Rajang's head should be dealt as much damage as possible, this may not always be possible due to its powerful frontal attacks.
Staying at its sides right under its arms is a great way to deal damage with Demon Flurry Rush combos. Focusing the tail, especially when in Enrage Mode, is recommended as well.
Keep Within Melee Range
Rajang jumps and moves a lot which can cost a lot of time if it moves to far. Using Demon Flurry Rush try to keep as close as possible while dodging Rajang's powerful attacks.
Rajang uses its Thunder Breath, Grab attacks and charge attacks like Spinning Fist and Furious Zig Zag more often if too much distance is created, resulting in a potential time added to the hunt.
S Rank Guide: Great Sword
| Great Sword Tips |
|---|
Sheathed Charge Slashes are Crucial
Charged Slashes from the sheathed position will be our constant and main source of damage for S Rank clears. The key to taking down Rajang as soon as possible lies in our ability to anticipate its position after performing its attacks.
Refer to the table below for Charged Slash openings during the fight:
| Charge Slash Openings | |
|---|---|
| Thunder Beam | Rajang's head and tail are extremely vulnerable during Thunder Beam's animation.
Always anticipate this move whenever Rajang Cannon Balls away during its normal or enraged (red arms) modes |
| Fists of Fury | Keep your distance or position behind Rajang while it performs Fists of Fury. Close in after Rajang plants both fists on the ground to avoid the tremor-inducing shockwave. |
| Jumping Slam | Dodge through or away from Rajang's Jumping Slam. Power Sheathe can be used to dodge and reposition towards its head or tail. |
| Lunging Grab | Rajang stays in position for a few seconds after performing a Lunging Grab. Position at the edge of its lunge to land an easy level three Charged Slash. |
| Backstep | Rajang hops back a few meters after Furious Zig Zag and Spinning Fist while enraged.
Positioning just at the tip of its trajectory allows you to land a level two or three Charge Slash on its tail. |
Utilize Power Sheath
Power Sheath is extremely important due to the mobility and damage buff it provides. The damage buff should be maintained at all times throughout the fight to ensure maximum damage.
S Rank Guide: Long Sword
| Long Sword Tips |
|---|
Counter Rajang's Attacks
The key to S Rank with the Long Sword is taking advantage of Rajang's extreme aggression by countering as many hits as possible using Iai Spirit Slash and unleashing a max level Spirit Helm Breaker. The more attacks successfully countered, the higher the DPS and shorter the clear time. Since this is a high risk, high reward play style, hunters may find themselves in a pinch from a single badly timed counter.
Countering Roars
Rajang's intial roar and enraged mode roar can be countered with Iai Spirit Slash or Foresight Slash. An optimal opener would be gaining 2 Spirit Gauge levels by countering the initial encounter roar with Iai Sprity Slash then using the Sprit Roundslash combo immediately after.
Foresight Slash in a Pinch
This build does not include Quick Sheath so the Iai Special Stance will be at the default speed. Using Foresight Slash may be more optimal in situations where Special Stance into Iai Spirit Slash would take too long.
Spirit Helm Breaker Positioning
Having a max level Spirit Helm Breaker hit anywhere other than Rajang's head or tail will be a DPS loss and will add time to your run. Be strategic in your positioning and aim to deal the most damage to Rajang's weak points.
Utilize Bubbly Dance and Resuscitate
Taking advantage of the Resuscitate and Bubbly Dance attack buff can also help increase overall DPS if you can find a window for 3 dodges. Iai Spirit Slash and Foresight Slash are excellent attacks to maintain Bubbly Dance efficiently.
S Rank Guide: Lance
| Lance Tips |
|---|
Spiral Thrust Counter
The key to achieveing S Rank clears is maximizing the Spiral Thrust Switch Skill. Take note that perfectly-timed counters with Spiral Thrust can also trigger Offensive Guard.
Spiral Thrust to Reposition
Spiral Thrust causes the hunter to wiredash and thrust attack in the desired direction twice. Use this to reposition when Rajang's attacks create unwanted distance or to ensure lance attacks are hitting weak spots.
Grab the Extra Wirebug
Pick up the extra Wirebug in the southwest area of the arena to maximize the number of Spiral Thrust counters.
Insta-Block In a Pinch
If wirebugs are on cooldown then hunters will want to rely on the Insta-Block Switch skill to maintain the attack boost from Offensive Guard as well as create thrust or wide sweep openings.
Incorporate Charged Wide Sweeps
A fully charged Wide Sweep does massive damage on the head or tail due to the damage increase from Spiral Thrust and Offensive Guard. It is recommended that it only be used when an ample attack window is available such as when Rajang is knocked down.
S Rank Guide: Heavy Bowgun
Use Sticky, Slicing, and Normal Ammo
Open With Sticky Ammo
Opening with Sticky Ammo 3 on Rajang's head will ensure a fast knock out and potentially a broken horn. This creates a huge DPS window very early on in the fight allow hunters to safely fire power shots at point blank range. Rajang will most likely go into Enrage Mode following this opening.
Slicing Ammo to Break Parts
Slicing Ammo is recommended as the main ammo type once the first knockout has been executed. Not only does it deal consistent damage to Rajang's weak points, but can also break parts and knock Rajang out of Enrage Mode when used on its tail.
Normal Ammo 3 Usage
Normal Ammo 3 should be used once all Slicing Ammo is exhausted. Adjust your range accordingly.
Compensate for Deviation
Shots from the Sinister Dreadvolley Heavy Bowgun deviate to the right mildly and should be accounted for when firing from beyond mid range. Compensate for this deviation by aiming slightly left at mid-range, particularly when using Normal Ammo 3.
Counter Shot Rajang's Thunder Beam
Using the Heavy Bowgun Counter Shot Switch Skill is a key technique to boost DPS. Landing the shot on Rajang's head the first time often leads to a quick Wyvern Ride — Always take this into consideration and close in immediately once the opportunity presents itself!
Monster Hunter Rise Related Guides

Quest Types and List of Quests
All Quest Guides by Type
| Quest Types | |
|---|---|
 Village Quests Village Quests |
 Urgent Quests Urgent Quests
|
 Gathering Hub Quests Gathering Hub QuestsBase Game | Sunbreak |
 Arena Quests Arena Quests |
 Side Quests Side Quests |
 Requests Requests |
 Event Quests Event Quests(Rewards) |
 Collaboration Quests Collaboration Quests |
 Challenge Quests Challenge Quests |
 Anomaly Quests Anomaly Quests |
 Follower Quests Follower Quests |
 Support Surveys Support Surveys |
Author

Arena Quest 05 - Rajang: How to Get S Rank | Monster Hunter Rise
Please participate in our site
improvement survey
03/2026
improvement survey
03/2026
Would you assist in
improving Game8's site?
improving Game8's site?

×
We are listening to our users' valuable opinions and discussing how to act on them.
The information collected through this survey will be used for the purpose of improving our services. In addition, the information will only be disclosed a part of a statistic in a format that will not allow identification of personal information.
Begin Survey
Not Now
×
Please rate each item regarding Game8.co's Advertisements.
Amount of Ads
Very Dissatisfied
Somewhat Dissatisfied
Fine
Somewhat Satisfied
Highly Satisfied
Placement of Ads
Timing of Ad Display
Ad Loading Speed
Safeness of Ads
Content of Ads
×
Please rate each item regarding Game8.co's Quality of Articles.
Amount of information
Very Dissatisfied
Somewhat Dissatisfied
Fine
Somewhat Satisfied
Highly Satisfied
Frequency of updates
Speed of new information
Accuracy of articles
Understandibility of articles
Readability of sentences
×
Please rate each item regarding Game8.co's Usability of the Site.
Ease of finding information
Very Dissatisfied
Somewhat Dissatisfied
Fine
Somewhat Satisfied
Highly Satisfied
Loading Speed
Use of Color
Font Size
Visibility of Images
Easy to Understand Layout
×
Please rate each item regarding Game8.co's Message Boards, Comments.
Ease of Writing
Very Dissatisfied
Somewhat Dissatisfied
Fine
Somewhat Satisfied
Highly Satisfied
Readability
Ease in Finding Information
Comment Quality
Comment Quantity
Admin Response
×
Please rate each item regarding Game8.co's Site's new design.
Please rate our site's new design
Very Dissatisfied
Somewhat Dissatisfied
Fine
Somewhat Satisfied
Highly Satisfied
Do you think that the website's design change makes the site easier to use?
Has the new design made it easier for you to find information on the site?
Has the new design improved the overall visual appeal of the site?
How would you rate your overall satisfaction with the new design of the site?
×
How likely are you to recommend Game8 to someone you know?
Very Unlikely
0
1
2
3
4
5
6
7
8
9
10
Very Likely
If you have other opinions regarding potential improvement to the website, please share them with us. We would appreciate your honest opinion.
Note: This is a free response section, so you can proceed without entering anything.
Note: Please be sure not to enter any kind of personal information into your response.
Note: Please be sure not to enter any kind of personal information into your response.
×
Thank You
×
Thank you for participating in our survey! Your answers will help us to improve the quality of our website and services.
We hope you continue to make use of Game8.
We hope you continue to make use of Game8.
Close
Rankings
- We could not find the message board you were looking for.
Gaming News


![Monster Hunter Stories 3 Review [First Impressions] | Simply Rejuvenating](https://img.game8.co/4438641/2a31b7702bd70e78ec8efd24661dacda.jpeg/thumb)
Popular Games

Genshin Impact Walkthrough & Guides Wiki
Honkai: Star Rail Walkthrough & Guides Wiki
Umamusume: Pretty Derby Walkthrough & Guides Wiki
Pokemon Pokopia Walkthrough & Guides Wiki
Resident Evil Requiem (RE9) Walkthrough & Guides Wiki
Monster Hunter Wilds Walkthrough & Guides Wiki
Wuthering Waves Walkthrough & Guides Wiki
Arknights: Endfield Walkthrough & Guides Wiki
Pokemon FireRed and LeafGreen (FRLG) Walkthrough & Guides Wiki
Pokemon TCG Pocket (PTCGP) Strategies & Guides Wiki


Recommended Games
Diablo 4: Vessel of Hatred Walkthrough & Guides Wiki
Cyberpunk 2077: Ultimate Edition Walkthrough & Guides Wiki
Fire Emblem Heroes (FEH) Walkthrough & Guides Wiki
Yu-Gi-Oh! Master Duel Walkthrough & Guides Wiki
Super Smash Bros. Ultimate Walkthrough & Guides Wiki
Pokemon Brilliant Diamond and Shining Pearl (BDSP) Walkthrough & Guides Wiki
Elden Ring Shadow of the Erdtree Walkthrough & Guides Wiki
Monster Hunter World Walkthrough & Guides Wiki
The Legend of Zelda: Tears of the Kingdom Walkthrough & Guides Wiki
Persona 3 Reload Walkthrough & Guides Wiki


All rights reserved
©CAPCOM CO., LTD. ALL RIGHTS RESERVED.
The copyrights of videos of games used in our content and other intellectual property rights belong to the provider of the game.
The contents we provide on this site were created personally by members of the Game8 editorial department.
We refuse the right to reuse or repost content taken without our permission such as data or images to other sites.