This survey will take about 1 minute.
Your answers will help us to improve our website.
Starfield Shattered Space
Alternating Currents Walkthrough and Choices
Alternating Currents is a side quest in Starfield. See if you should give the evidence to Louisa or Zoe, how to unlock Alternating Currents, all bugs, quest endings, rewards, best choice, and how to complete it.
List of Contents
Alternating Currents Rewards and Unlock Condition
How to Unlock and Rewards
| Planet Started | Jemison, Alpha Centauri |
|---|---|
| Location | New Atlantis |
| Prerequisites | Complete Tapping The Grid |
| Quest Giver | Louisa Reyez |
| Rewards | ・EXP: 75 ・Credits: Leveled Amount of Credits |
Alternating Currents Walkthrough and Objectives
Main Objectives
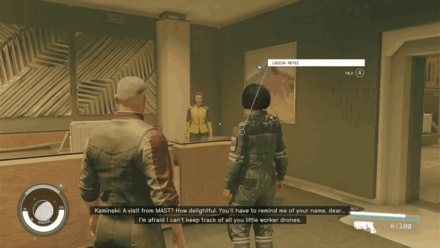
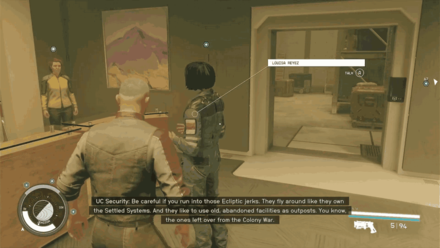
1. Talk to Louisa Reyez

Follow the quest marker down the Well in New Atlantis to find Louisa Reyez. She will ask you to accompany her to the Trade Authority. Tell her that you've got her back to progress to the next objective.
2. Follow Louisa Reyez
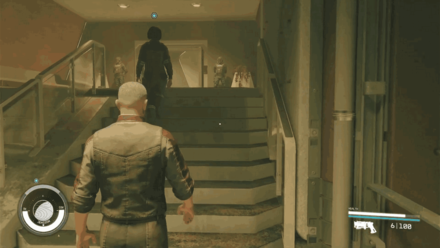
Follow behind Louisa as she walks into the lobby of the Trade Authority building and confronts Zoe Kaminski. Wait patiently for their conversation to finish.
3. Talk to Louisa Reyez and Wait
Once Zoe Kaminski leaves, talk to Louisa again. She will tell you to be prepared for anything as she doesn't know what will happen next. Don't worry, there won't be a fight for now. Wait until Kaminski comes back to the lobby.
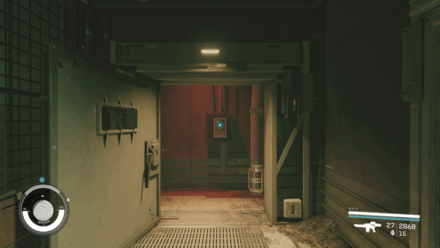
4-5. Locate and Power Down the Junction Box
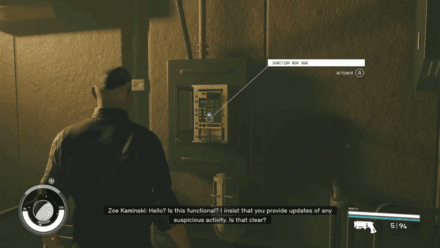
After Kaminski discusses the problem with you and Louisa, you will be asked to locate a Junction box in the Well. Follow the quest marker out of the lobby.
Turn left and go up the first flight of stairs beside the Trade Authority building. Keep straight, then turn right by the restaurant, and head up to the upper level. Continue down the path from the stairs until you find the Junction Box at the end of the rails.
Activate the Junction Box to power it down, and then head back to look for a couple more Junction Boxes.
6. Locate Junction Box 45A or Junction Box 47B
| Junction Box 45A | Junction Box 47B |
|---|---|
 |
 |
Junction Box 45A is a bit farther from your last location. Instead, find Junction Box 47B since it is closer and located at the other room on the same level. Power down this box again and look for the last one.
Going to Junction Box 45A
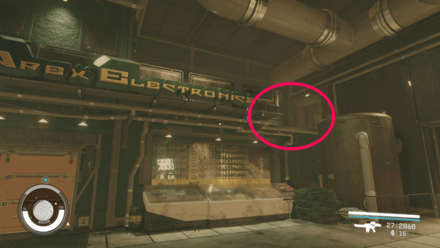
There's a broken railing that you can climb onto above Apex Electronics near the Trade Authority. Go left after climbing into the doorway, then turn right to see the Junction Box behind a door.
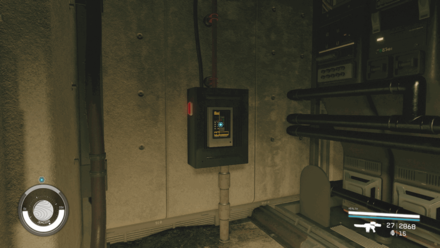
Junction Box 47B
Opening your Hand Scanner puts directions towards Junction Box 47B since it's closer. It is found in the other room on the same level as the previous Junction Box you recently powered down.
7. Locate the Junction Box
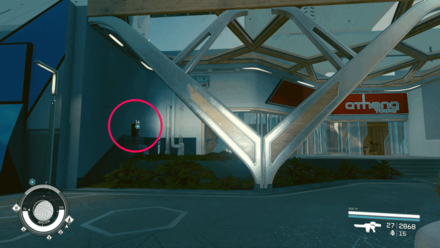
The last Junction Box is located outside of the Well. Exit into the Spaceport and follow the marker to the Residential District. The box should be on the wall just outside a building called the Athena Tower. Power down the last Junction Box.
8-9. Locate the Power Drain's Source and Access the Apartment
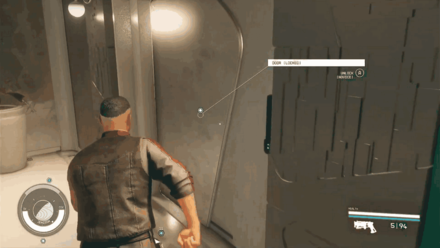
Head inside the Athena Tower and into the elevator that takes you to the apartments. Follow the marker to a locked door. Digipick the locks to access the apartment.
10. Find Evidence
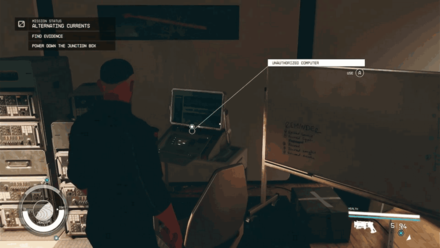
Fine and access the Unauthorized Computer on the desk. Then read the files on the desktop.
11. Deliver Evidence to Louisa Reyez or to Zoe Kaminski
Head back to the Trade Authority building in the Well and give the evidence to either Louisa or Zoe. Who you choose to give it to will not affect the quest or its rewards.
Yo can give it to Louisa Reyez since she was the one who initially asked for your help, or give it to Zoe as she promises you that the Trade Authority will not forget this favor.
Alternating Currents All Endings
Should You Give the Evidence to Louisa or Zoe?
| Choice | Consequences |
|---|---|
| Give Evidence to Louisa | Quest ends normally |
| Give Evidence to Zoe | Louisa says she's disappointed in you, then quest ends. |
Your choice does not change the ending of Alternating Currents significantly. If you choose to give the evidence to Louisa, the quest will end normally with no consequence.
If you choose to give it to Zoe, the only consequence is Louisa saying she is disappointed in you, and the quest will still end normally with the same rewards.
Should You Give Evidence to Louisa or Zoe?
Alternating Currents Bugs
Objective Markers Not Disappearing
During the objectives where you have to Power Down the Junction Box, the quest markers and objectives might not disappear, even after gaining access to the apartment.
Do not worry, as you can still progress and complete the quest, as long as you get and give out the evidence.
Louisa and Zoe Just Standing
During the Talk to Louisa and Wait for Louisa Reyez objectives inside the Trade Authority building, it is possible for both Louisa and Zoe to get stuck and just stand in the lobby without proceeding to the next objective.
If waiting to skip time in the game does not help, reload the game to a time before you started the quest or talked to Louisa.
All Bugs, Glitches, and Known Issues
Requires Computer
Junction Boxes with a Requires Computer prompt means that it's not the right Junction Box to interact with yet, as you have to do something first before having the option to interact with the Junction Box.
Starfield Related Guides

List of All Side Quests and Rewards
List of All Side Quests
Comment
Author

Alternating Currents Walkthrough and Choices
Please participate in our site
improvement survey
03/2026
improvement survey
03/2026
Would you assist in
improving Game8's site?
improving Game8's site?

×
We are listening to our users' valuable opinions and discussing how to act on them.
The information collected through this survey will be used for the purpose of improving our services. In addition, the information will only be disclosed a part of a statistic in a format that will not allow identification of personal information.
Begin Survey
Not Now
×
Please rate each item regarding Game8.co's Advertisements.
Amount of Ads
Very Dissatisfied
Somewhat Dissatisfied
Fine
Somewhat Satisfied
Highly Satisfied
Placement of Ads
Timing of Ad Display
Ad Loading Speed
Safeness of Ads
Content of Ads
×
Please rate each item regarding Game8.co's Quality of Articles.
Amount of information
Very Dissatisfied
Somewhat Dissatisfied
Fine
Somewhat Satisfied
Highly Satisfied
Frequency of updates
Speed of new information
Accuracy of articles
Understandibility of articles
Readability of sentences
×
Please rate each item regarding Game8.co's Usability of the Site.
Ease of finding information
Very Dissatisfied
Somewhat Dissatisfied
Fine
Somewhat Satisfied
Highly Satisfied
Loading Speed
Use of Color
Font Size
Visibility of Images
Easy to Understand Layout
×
Please rate each item regarding Game8.co's Message Boards, Comments.
Ease of Writing
Very Dissatisfied
Somewhat Dissatisfied
Fine
Somewhat Satisfied
Highly Satisfied
Readability
Ease in Finding Information
Comment Quality
Comment Quantity
Admin Response
×
Please rate each item regarding Game8.co's Site's new design.
Please rate our site's new design
Very Dissatisfied
Somewhat Dissatisfied
Fine
Somewhat Satisfied
Highly Satisfied
Do you think that the website's design change makes the site easier to use?
Has the new design made it easier for you to find information on the site?
Has the new design improved the overall visual appeal of the site?
How would you rate your overall satisfaction with the new design of the site?
×
How likely are you to recommend Game8 to someone you know?
Very Unlikely
0
1
2
3
4
5
6
7
8
9
10
Very Likely
If you have other opinions regarding potential improvement to the website, please share them with us. We would appreciate your honest opinion.
Note: This is a free response section, so you can proceed without entering anything.
Note: Please be sure not to enter any kind of personal information into your response.
Note: Please be sure not to enter any kind of personal information into your response.
×
Thank You
×
Thank you for participating in our survey! Your answers will help us to improve the quality of our website and services.
We hope you continue to make use of Game8.
We hope you continue to make use of Game8.
Close
Rankings
- We could not find the message board you were looking for.
Gaming News


![Monster Hunter Stories 3 Review [First Impressions] | Simply Rejuvenating](https://img.game8.co/4438641/2a31b7702bd70e78ec8efd24661dacda.jpeg/thumb)
Popular Games

Genshin Impact Walkthrough & Guides Wiki
Honkai: Star Rail Walkthrough & Guides Wiki
Umamusume: Pretty Derby Walkthrough & Guides Wiki
Pokemon Pokopia Walkthrough & Guides Wiki
Resident Evil Requiem (RE9) Walkthrough & Guides Wiki
Monster Hunter Wilds Walkthrough & Guides Wiki
Wuthering Waves Walkthrough & Guides Wiki
Arknights: Endfield Walkthrough & Guides Wiki
Pokemon FireRed and LeafGreen (FRLG) Walkthrough & Guides Wiki
Pokemon TCG Pocket (PTCGP) Strategies & Guides Wiki


Recommended Games
Diablo 4: Vessel of Hatred Walkthrough & Guides Wiki
Cyberpunk 2077: Ultimate Edition Walkthrough & Guides Wiki
Fire Emblem Heroes (FEH) Walkthrough & Guides Wiki
Yu-Gi-Oh! Master Duel Walkthrough & Guides Wiki
Super Smash Bros. Ultimate Walkthrough & Guides Wiki
Pokemon Brilliant Diamond and Shining Pearl (BDSP) Walkthrough & Guides Wiki
Elden Ring Shadow of the Erdtree Walkthrough & Guides Wiki
Monster Hunter World Walkthrough & Guides Wiki
The Legend of Zelda: Tears of the Kingdom Walkthrough & Guides Wiki
Persona 3 Reload Walkthrough & Guides Wiki


All rights reserved
© 2023 Bethesda Softworks LLC, a ZeniMax Media company. Trademarks belong to their respective owners. All Rights Reserved.
The copyrights of videos of games used in our content and other intellectual property rights belong to the provider of the game.
The contents we provide on this site were created personally by members of the Game8 editorial department.
We refuse the right to reuse or repost content taken without our permission such as data or images to other sites.