Shattered Space Walkthrough
This is a list of all Shattered Space main quests (House Va'Ruun Faction Quests) in Starfield. Read on for a Shattered Space walkthrough.
| Shattered Space Walkthrough | |
|---|---|
| Shattered Space Walkthrough | Shattered Space Quest List (Main and Side) |
List of Contents
Shattered Space Walkthrough
Shattered Space Main Quest List
| # | DLC Main Quest | ||
|---|---|---|---|
| 1 | ▼ What Remains | ||
| 2 | ▼ The Promised, Broken | ||
| 3 | ▼ Aligning the Houses | ||
| - | House Dul'kehf | House Veth'aal | House Ka'dic |
| 4-6 | ▼ Exhuming the Past | ▼ Conflict in Conviction | ▼ Zealous Overreach |
| 7 | ▼ The Other Side (Complete any 1 of the above quests) |
||
| 8 | ▼ The Scaled Citadel | ||
Click the links above to jump to a walkthrough section.
There are 8 Main Quests in the Shattered Space DLC. After doing the first 2 quests, you are free to do the quests of the different Houses in any order. After doing any 1 of the House Quests, you unlock The Other Side. After you complete all 7 main quests, the DLC questline concludes with The Scaled Citadel.
1. What Remains

| 1 | Starting Shattered Space |
|---|---|
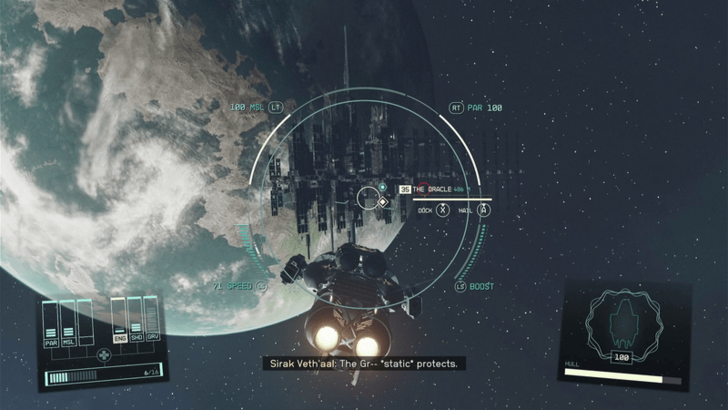 To start Shattered Space, you have to encounter The Oracle space station. It'll spawn after you jump to any star system, just make sure that you don't have an active quest in that star system, you won't immediately be scanned for contraband upon entering that star system, and you won't immediately be attacked by hostile ships. These affect if the Oracle will spawn. |
|
| 2 | Witness the Scene and Kill Basira Mir |
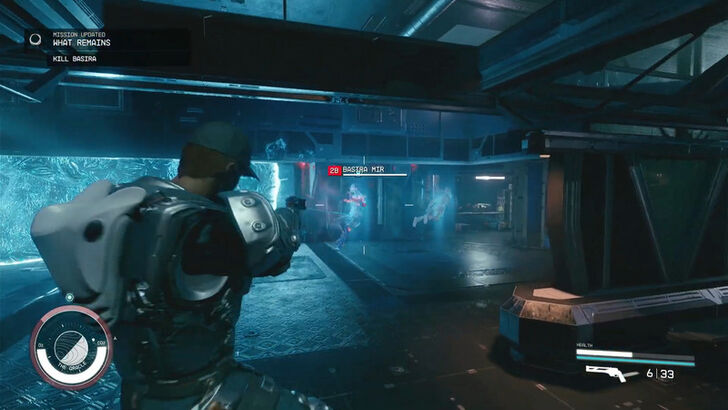 After docking The Oracle and witnessing the scene between Basira Mir and Sirak Veth'aal, Basira Mir will turn hostile. Kill her and loot her corpse to get the Oracle Access Card. |
|
| 3 | Find the Engineering Bay Controls |
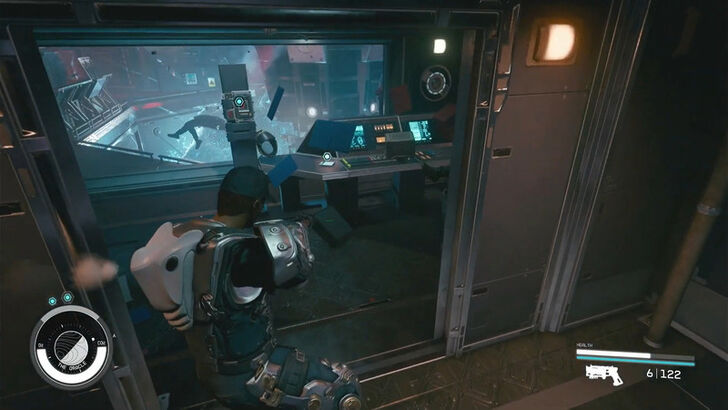 Head north into The Oracle with the Oracle Access Card. The Engineering Bay Controls are at the end of the first hallway to the right, after the blue ooze. Interact with the Access Card Reader after. (The optional objective of finding Sirak's logs doesn't affect the outcome of the quest.) |
|
| 4 | Find an Engineering Bay Access Card |
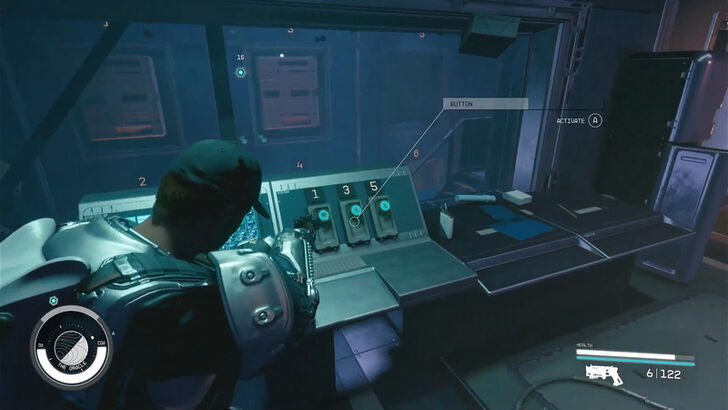 Head to the lower floors of The Oracle. If you get lost, simply turn on survey mode to see a path to the next objective. You will find that a crate will be blocking you from getting the Engineering Bay Access Card. Go to the room in front of the crates. There, you will find buttons that control the crate. Press the button with 3 on it to get to the path leading to the Engineering Bay Access Card. |
|
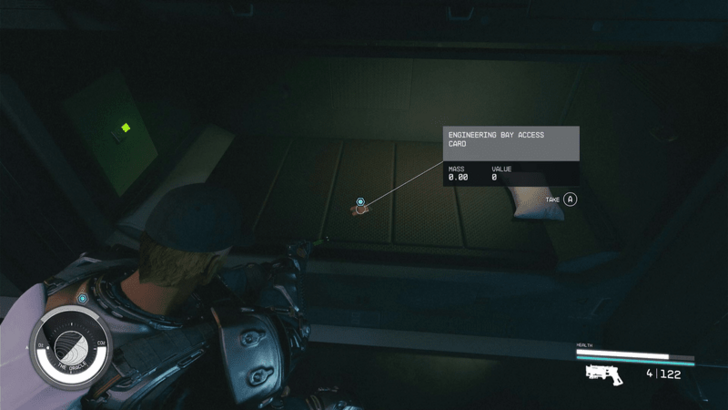 The Engineering Bay Access Card is found on top of a bed near a safe in a room one level up after exiting the showers/restroom. Go back to the Engineering Bay Controls and interact with it. Afterward, restore The Oracle to full power. |
|
| 5 | Alternate Path to The Gravity Controls |
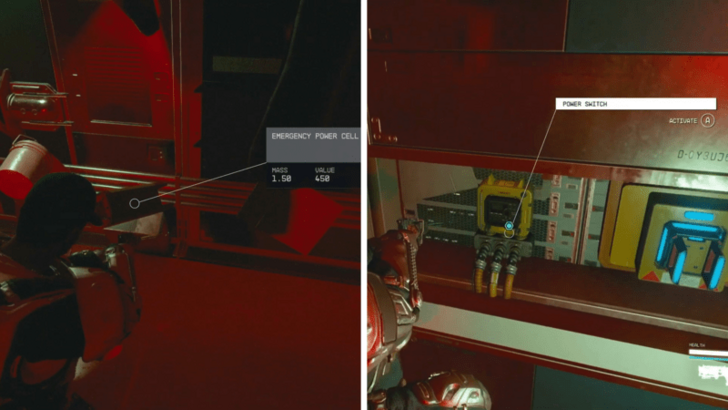 Head to the upper levels above Sirak and pass through the room with Sirak's Log 4 for the alternate path to the gravity controls. There's a backway, where you need to get the Emergency Power Cell. This is among the floating objects (you can use your scanner to easily highlight it). Flip the switch, pass through the door, and restore the Oracle's gravity. |
|
| 6 | Return to the Engineering Bay Controls |
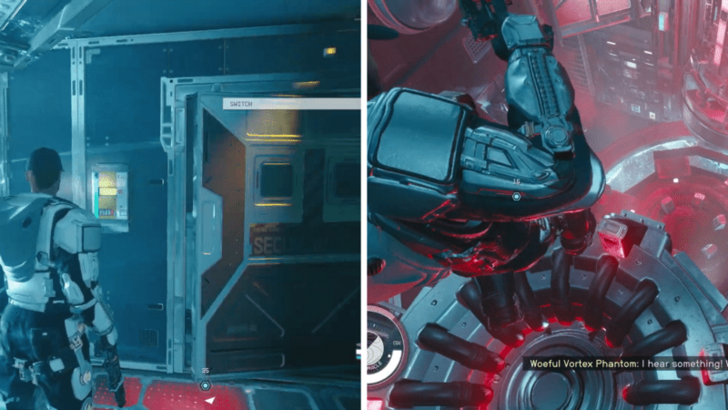 Interact with the switch to the left of the Gravity controls to open the door that was previously locked. Now is a good time to quicksave since you'll be encountering a bunch of enemies in the next area. If you die, you'll be sent back to your last save point, which is likely when you first entered the Oracle. Platform your way down to the Engineering Bay Controls and restore power. |
|
| 7 | Go to the Operations Center and Kill Sirak |
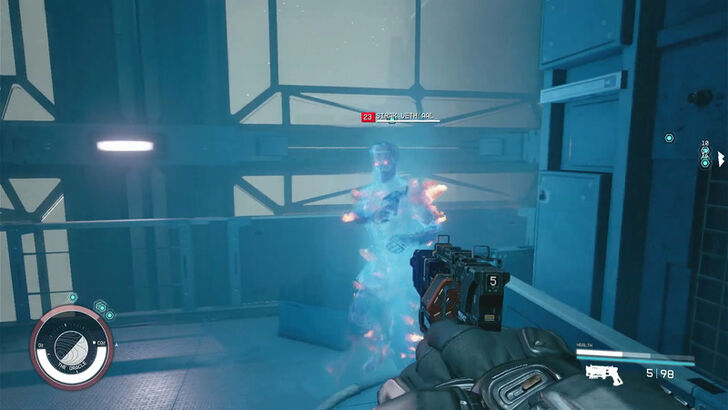 Follow the quest marker leading you to the Operations Center and kill Sirak along with the Vortex Phantoms. |
|
| 8 | Reboot the Oracle's Mainframe |
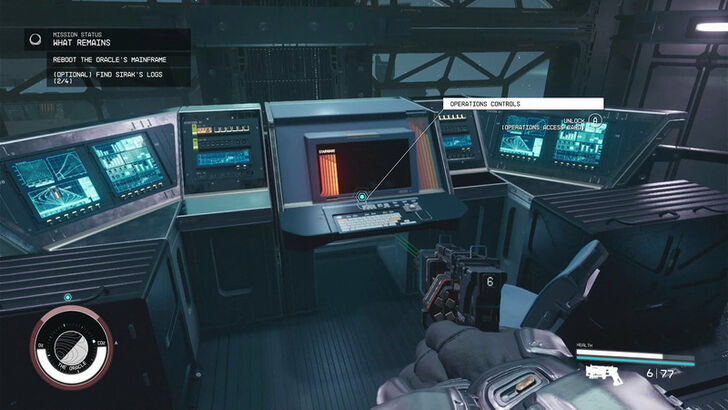 Go to the Operations Control, as seen in the image above, and reboot the Oracle's Mainframe. The quest will end after you wait for the Mainframe to reboot, complete the protocol, and listen to the transmission. |
2. The Promised, Broken

The Promised, Broken Walkthrough
| 9 | Go to the City of Dazra and Talk to the NPCs |
|---|---|
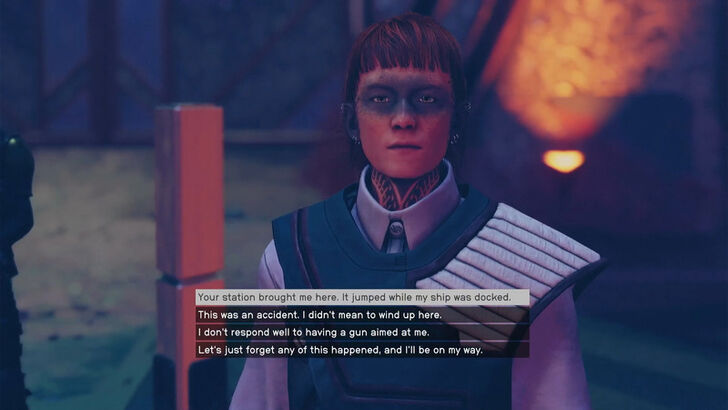 After completing the above quest, you'll have unlocked the Kavnyk System, which you can now enter and leave freely at any point. Go to Dazra City located on the moon Va'ruun'kai. This is where most of the Shattered Space questline will take place. Talk to all the necessary NPCs to progress this quest. |
|
| 10 | Follow Malibor Dul'kehf and Talk to Inaza |
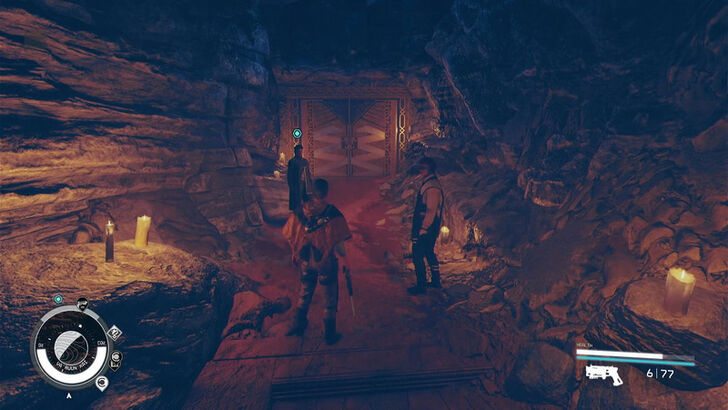 Follow Malibor Dul'kehf, and he will eventually lead you to Inaza Kaisir. Talk to her and tell her that you are ready to progress the quest. |
|
| 11 | Walk the Serpent's Path |
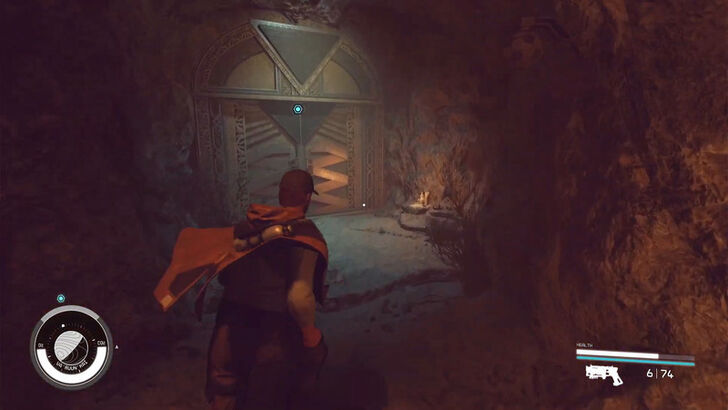 Walk the Serpent's Path by heading to the marked statues and listening to Inaza's ritual dialogue. Note that you will have to wait for Inaza's dialogues to finish before the quest markers change and lead you to the next area. There are optional objectives related to the ritual that you can complete. These have no major effect on the story. Inaza just tells you "there is always more we can do to serve." if you don't complete them all. |
|
| 12 | (Optional) Cast Aside Your Burdens |
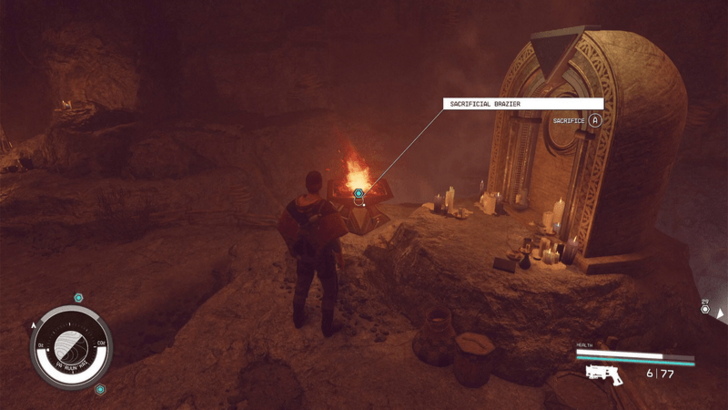 One of the optional objectives of the Serpent's Path is to Cast Aside Your Burdens in the Sacrificial Brazier. You just need to store 1 item in the flame. It can be any item, so we recommend dropping a resource, unimportant note, or miscalleaneous item. Don't sacrifice anything important, as there doesn't seem to be a way to get it back aside from reloading to a previous save. |
|
| 13 | Finish the Ritual and Talk to Inaza |
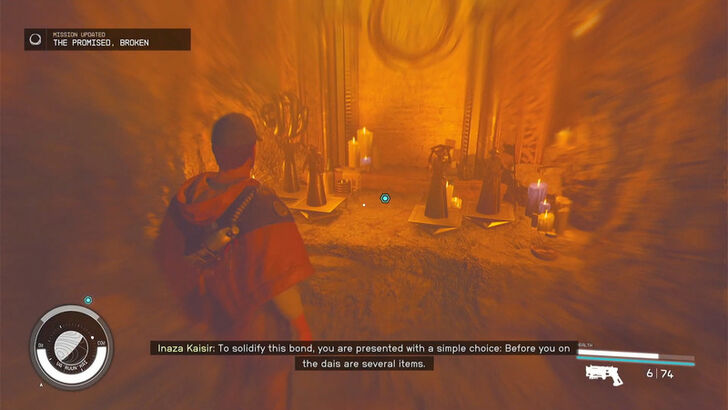 Finish the Ritual by selecting two effigies and placing them on the altar. Depending on which effigies you choose, the NPCs will give you a different name. ▶︎ The Promised, Broken Effigy Choice Guide |
|
| 14 | Talk to Malibor Dul'kehf |
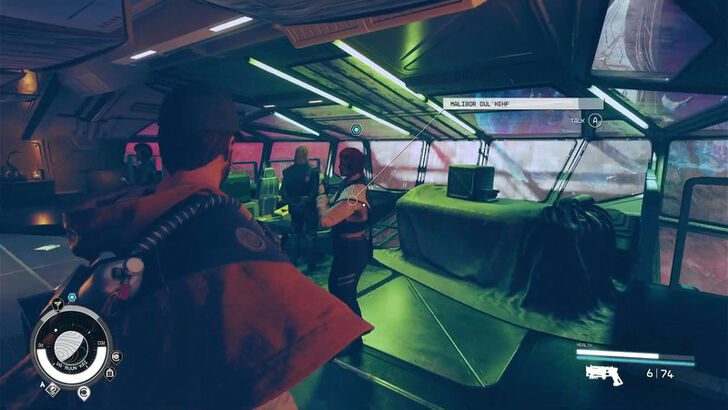 Head up the stairs, through the airlock, and take the elevator to the Mourning Ship Cockpit, where you can talk to Malibor Dul'kehf. |
|
| 15 | Talk to Ekris |
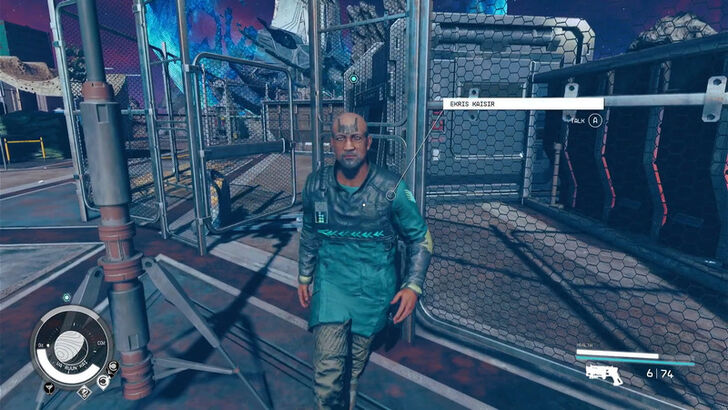 Go outside and head a bit north of Jinan Plaza to talk to Ekris. This will unlock the next set of quests. |
3. Aligning the Houses

Aligning the Houses Walkthrough
| Objective | Related Quest |
|---|---|
| Assist House Dul'khef | Exhuming the Past |
| Assist House Veth'aal | Conflict in Conviction |
| Assist House Ka'dic | Zealous Overreach |
The objective of Aligning the Houses is basically to do the next 3 quests given to you by each of the 3 Houses. You can do them in any order. You also unlock The Other Side quest after doing any 1 of them, and you can also complete that at any time.
For the following walkthrough, we recommend the following order: Conflict in Conviction, Zealous Overreach, Exhuming the Past, then The Other Side so that you start from the easiest quest then proceed to the hardest.
4. Conflict in Conviction

Conflict in Conviction Walkthrough
| 16 | Assist House Veth'aal |
|---|---|
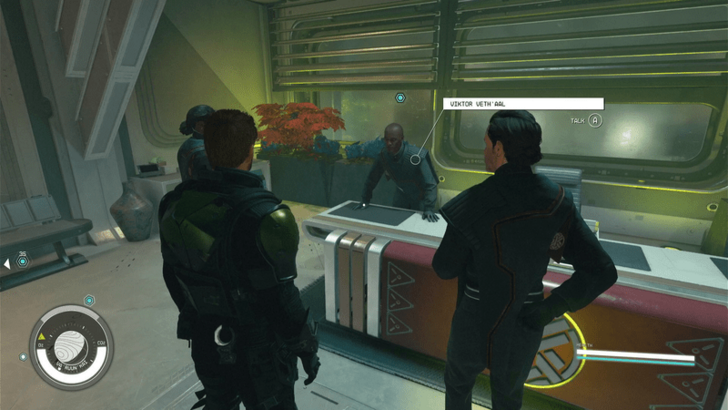 Talk to Viktor Veth'aal in the Command room on the second floor of The Keep Armory to begin the quest. |
|
| 17 | Inquire about Vaeric at the Herald's Rest |
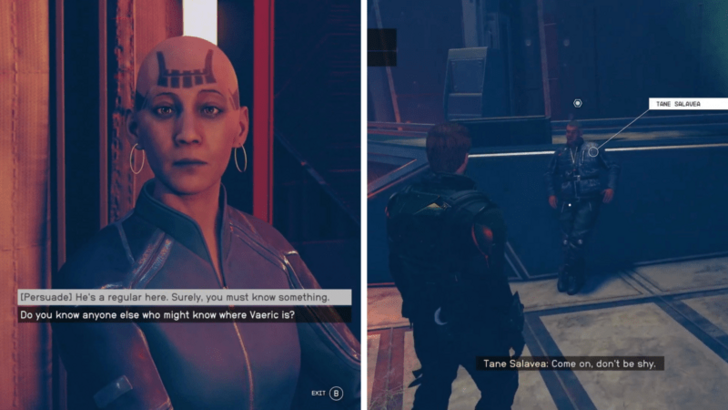 Talk to the NPCs in Herald's Rest about Vaeric. To pass to the next objective, you have to pass a Persuasion check with at least one of them. The bartender Genna Dubari is the easiest one to pass with. However, even if you fail all Persuasion checks, the outcome is the same: you will talk with Tane Salavea. |
|
| 18 | Search Northwest of Dazra for Vaeric |
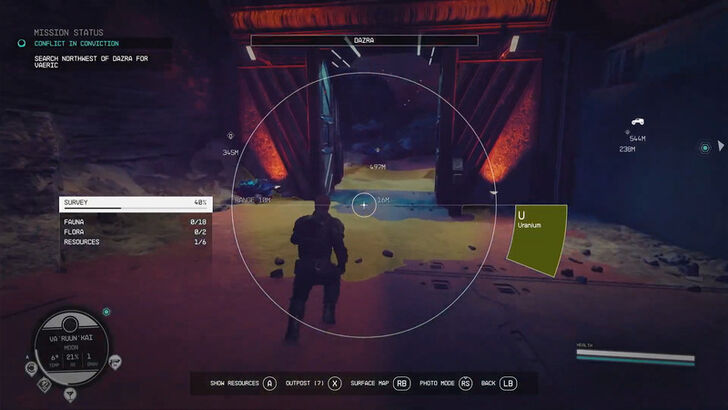 Head out of Dazra through the northwest gate. Make sure to head out on foot. The quest marker becomes bugged if you fast travel outside the city and don't pass through the gate. |
|
| 19 | Follow the Tracker's Ping |
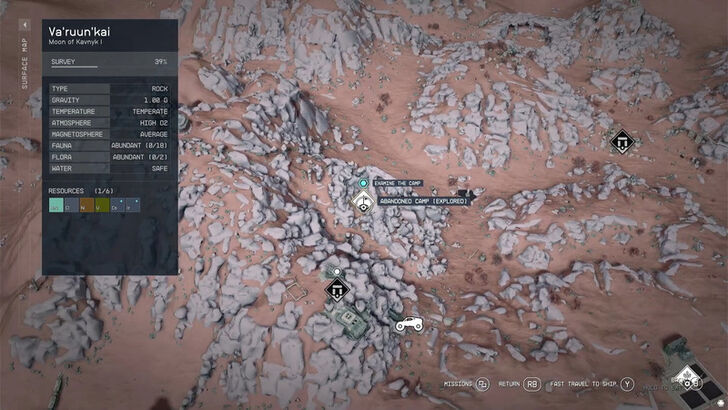 Follow the tracker's ping until you reach the Abandoned Camp. Your distance from the Abandoned Camp will show up on the upper right of the screen. |
|
| 20 | Examine the Camp |
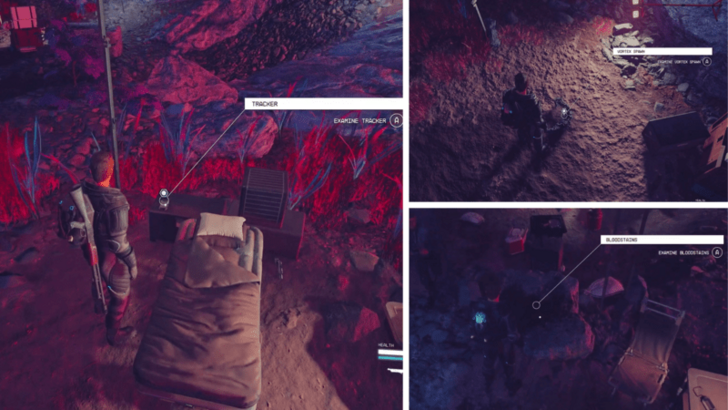 To progress the quest, you have to examine the Tracker, the Vortex Spawn, the Footsteps by the Vortex Spawn, and the Bloodstain. |
|
| 21 | Kill the Vortex Horrors and Talk to Tane |
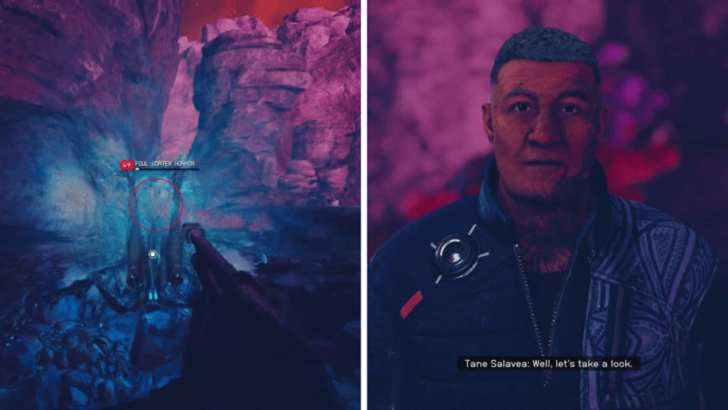 After examining the camp, Vortex Horrors will spawn. Kill them, talk to Tane, then wait for him finish to examining the area. |
|
| 22 | Determine Which Way Vaeric Fled |
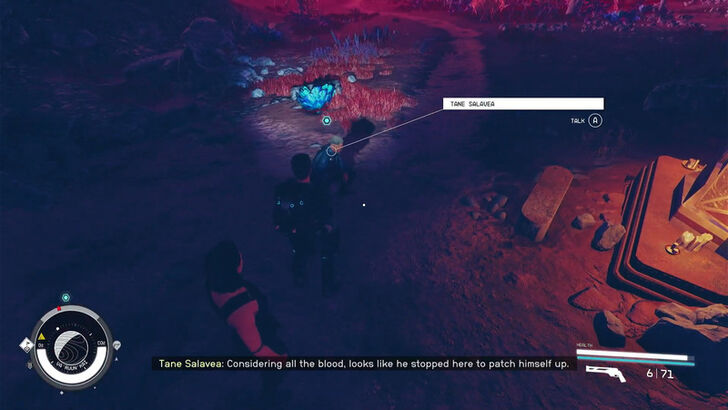 Follow the quest marker and wait for Tane to finish examining the area where the bench is to progress the quest. |
|
| 23 | Search Northwest of the Camp for Vaeric |
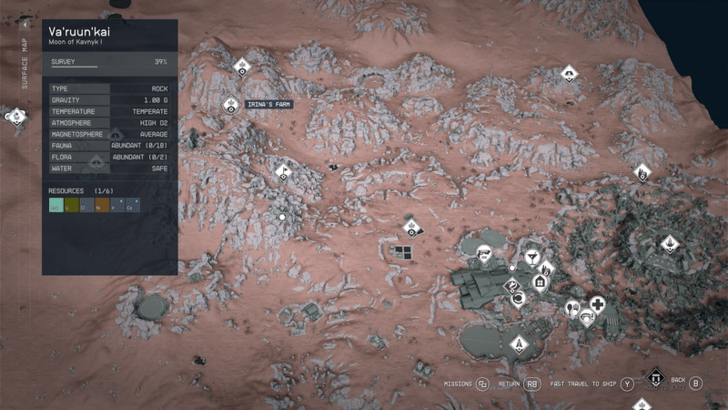 Head to Irina's Farm next. Talk to Irina and get her to give information about Vaeric to progress the quest. |
|
| 24 | Find the Abandoned Farm |
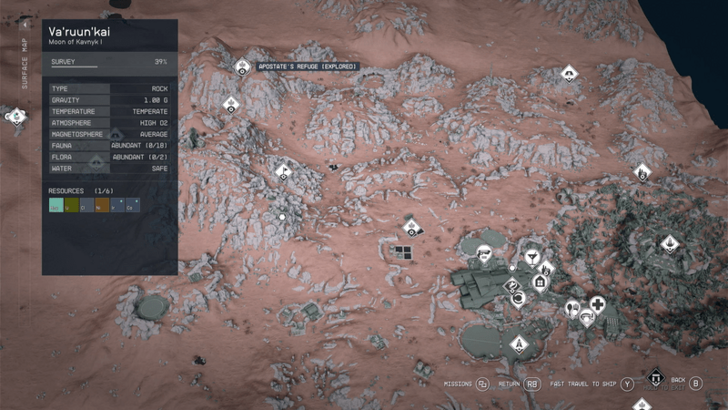 Irina's information will lead you to Apostate's Refuge. |
|
| 25 | Search the Dwelling |
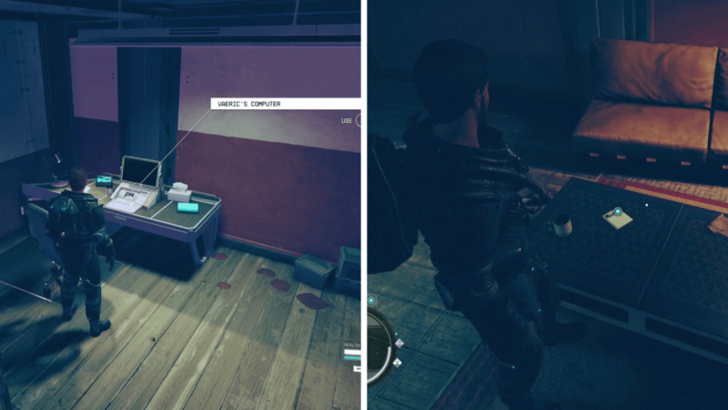 Once at the abadoned farm, interact with the computer in Vaeric's room and take his log, as seen in the images above. The quest marker will then move to Tane. Talk to him then Vaeric will abruptly appear. |
|
| 26 | Tak to Vaeric and Make Your Choice |
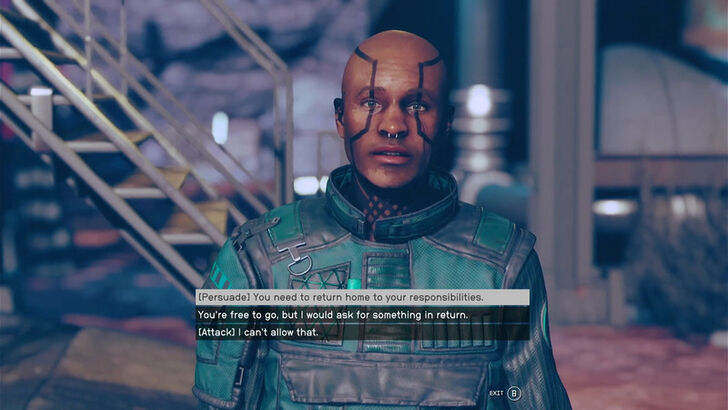 Talk to Vaeric. If you successfully Persuade him, he will come with you to The Keep and talk to Viktor. If you choose to spare Vaeric, you can ask him for 10,000 Credits on top of the ring that will act as proof his death. If you choose to kill Vaeric, you'll just loot the ring from him and around 1,000-2,000 credits. There is also an option to kill both Vaeric and Tane, but you will not be able to get Tane as a companion anymore. Unlike the Persuasion outcome, there's no difference whether you kill or spare Vaeric. ▶︎ Should You Kill Vaeric? |
|
| 27 | Return To Viktor and Talk to Ekris After |
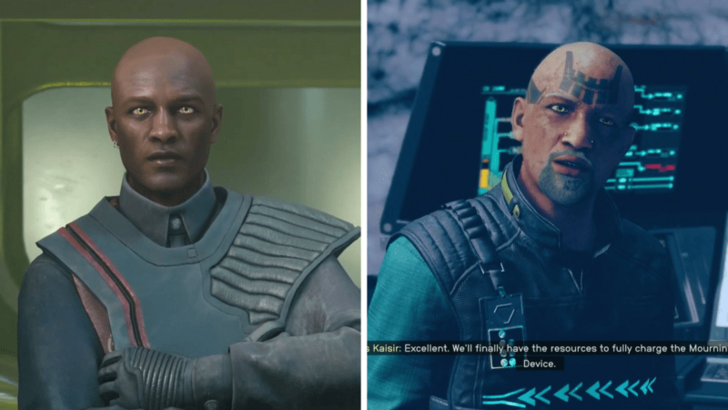 Talk to Victor to get the access code, then talk to Ekris right after to conclude the quest. Note that none of the dialogue options with Viktor result in a different outcome. They are all similar regardless if you Lie or not. The only major difference in dialogue is if you manage to persuade Vaeric to come back. They will have a long conversation, and Viktor will forgive Vaeric in the end. |
5. Zealous Overreach

| 28 | Assist House Ka'dic |
|---|---|
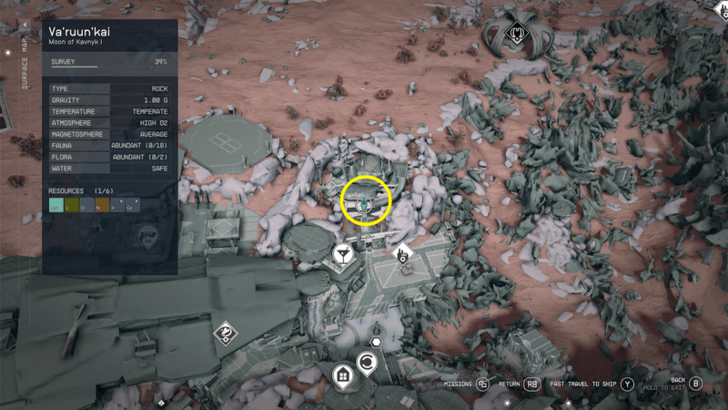 Head to House Ka'dic in Dazra and talk to Razma Ka'dic. |
|
| 29 | Talk to Mirek Ka'dic and Return to Razma |
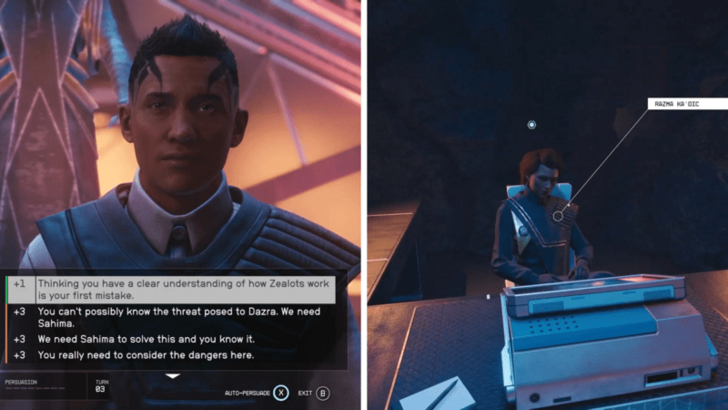 Go and talk to Mirek Ka'dic, who should be nearby after talking to Razma Ka'dic. You can persuade him to tell you the location of the Zealots, but if you fail the persuasion check, you can go to his computer and use a digipick to discover the location. After discovering the location, go back to Razma and talk to her. |
|
| 30 | Talk to Dijmal Ka'dic |
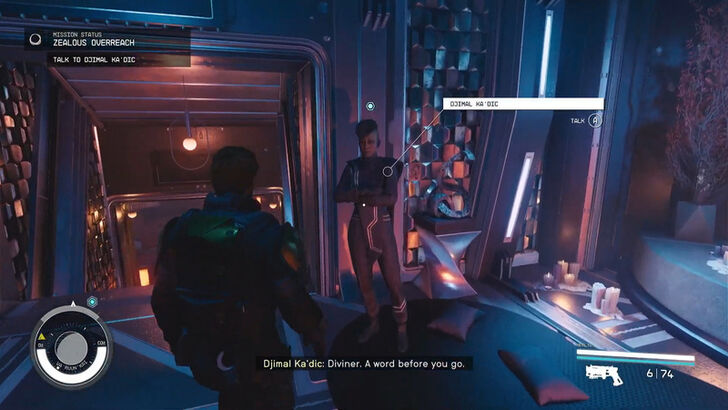 Talk to Dijmal Ka'dic afterward. Don't worry about making a decision to help her or not right now, since with whatever dialogue option you choose now, the actual choice only occurs later on in the quest. |
|
| 31 | Find Sahima at Shadow Station Epsilon |
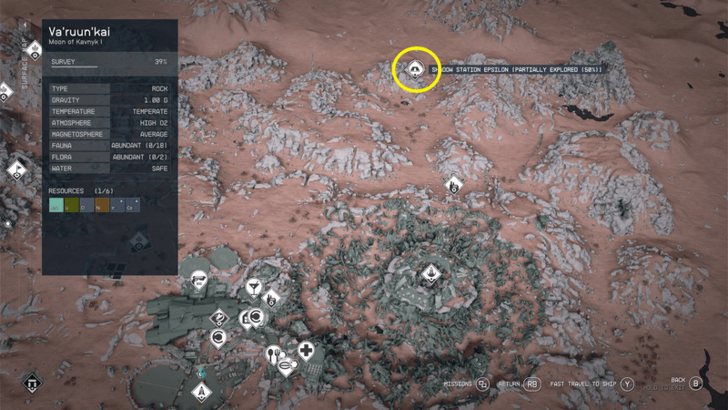 Head north to Shadow Station Epsilon. You will be attacked by Phantoms on your way there and by the Va'ruun Zealots once you get there. Once you exit Dazra through the gate, you could just fast travel to your Rev-8 at the landing pad, then use the boost on that to get there faster. |
|
| 32 | Talk to Sahima Or Kill Her |
 Go to the lower levels of the Shadow Station Epsilon, fighting your way past Zealots, to get to Sahima. If you talk to her, you will get the Free the Hostages sub-objective. If you decide to kill Sahima, you will get the Leave No Witnesses sub-objective. Sparing or killing Sahima only changes the dialogue at the end of the quest slightly. ▶︎ Should You Kill Sahima? |
|
| 32a | (Killed Sahima) Leave No Witnesses |
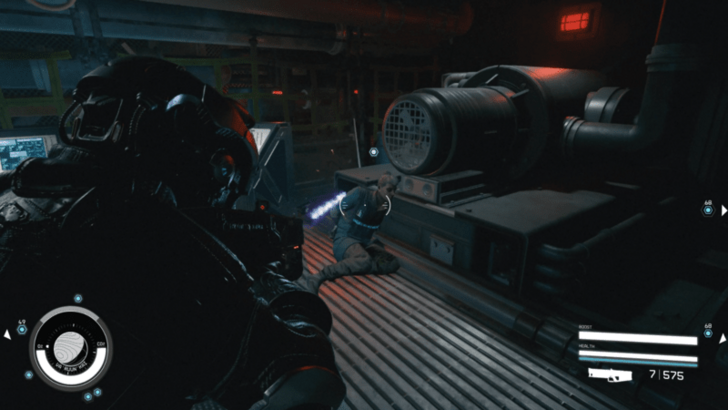 Kill everyone in the station, both Zealots and hostages. Note that the markers are bugged, and you will have to kill Zealots without markers to get the remaining markers and progress the quest. |
|
| 32b | (Spared Sahima) Free the Hostages and Talk to Gavin Ka'dic |
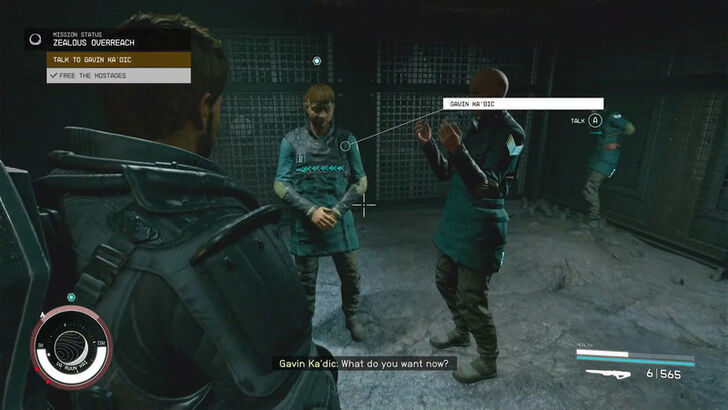 Go a level deeper in the station from where you found Sahima to get to the Hostages. You will find Gavin Ka'dic among the hostages. Talk to him to progress the quest. |
|
| 32c | Free the Remaining Hostages (1) |
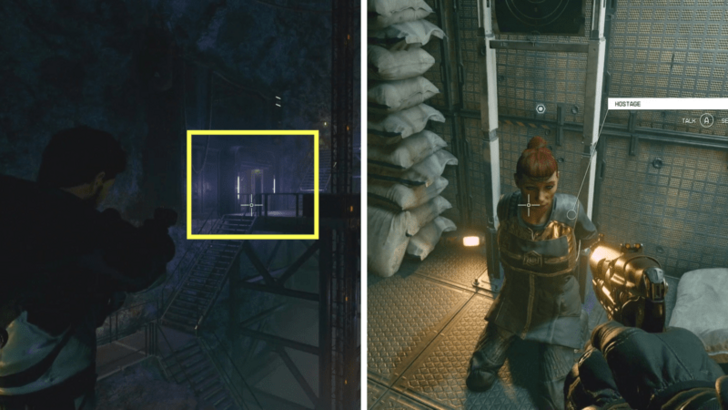 Before you are able to free the remaining hostages, as seen in the image above, you must take out all the remaining Va'ruun Zealots. |
|
| 32d | Free the Remaining Hostages (2) |
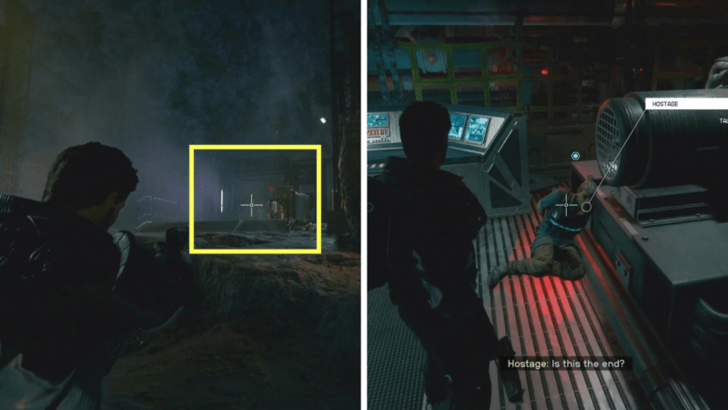 Free the other remaining hostage in the room near the entrance. |
|
| 32e | Meet Sahima and the Others Outside |
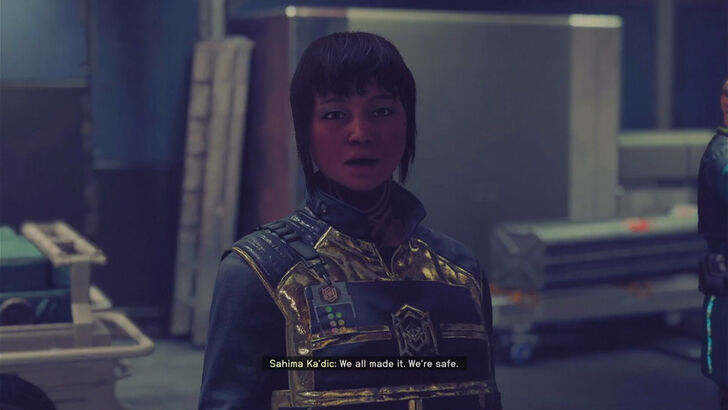 Go outside and talk to Sahima to progress the quest. |
|
| 33 | Head to the Badlands Power Station |
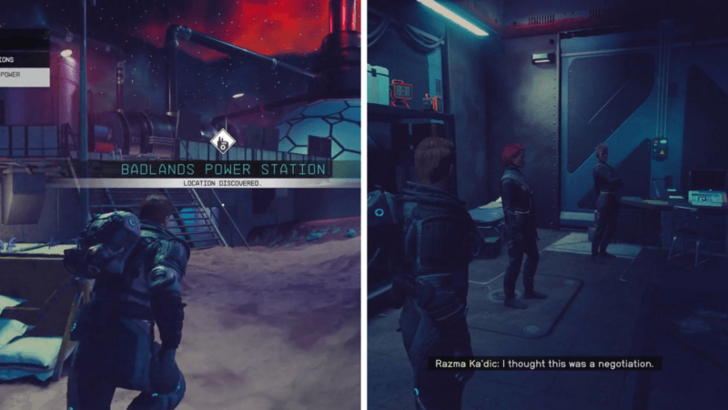 Head south to the Badlands Power Station. Once there, head inside and interrupt the negotiations by talking to Razma and Mihael Dziri. If you killed Sahima, you will lie to Razma that the Zealots killed her. Again, other than different dialogue, it does not change the outcome of the quest. |
|
| 34 | Persuade Or Kill Mihael |
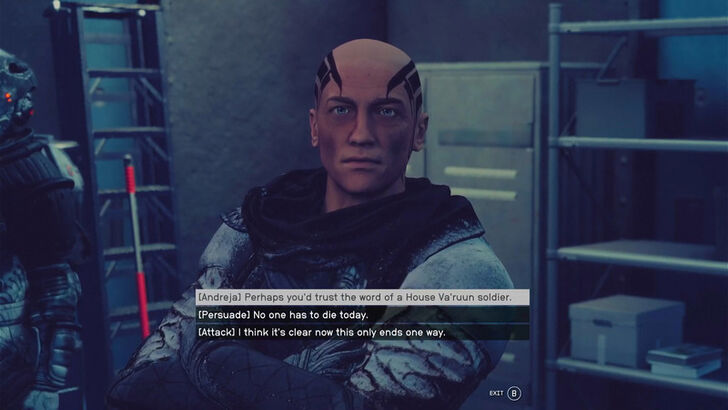 During the dialogue between you, Razma, and Mihael, you can choose to persuade him to stand down or attack him. If you attack or fail to persuade him, the Zealots will start attacking, and you will have to kill them. The dialogue between you and Razma does not change regardless of whether they stand down and leave or if you kill them. If you kill Sahima, you will get 10,000 Credits from Djimal after Mihael and the Zealots leave or after you kill them. If you have Andreja as your companion, you have the option to let her talk to end the dialogue without any conflict. |
|
| 35 | Return to Ekris |
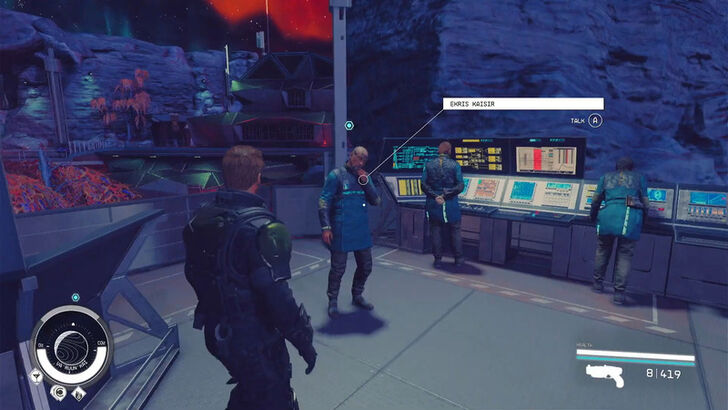 Go back to Ekris at the Mourning Device and talk to him to finish the quest. |
6. Exhuming the Past

| 36 | Assist House Dul'khef |
|---|---|
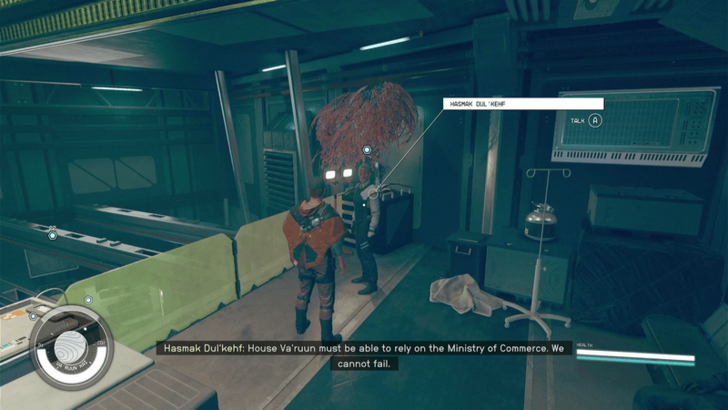 Talk to Hasmak Dul'khef at the Halls of Healing to start the quest. |
|
| 37 | Reach Ma'leen Dam |
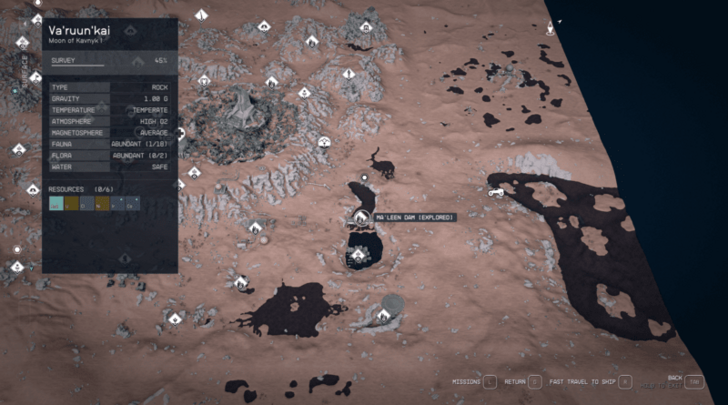 Head to Ma'leen Dam, east of Dazra City. You can use the Rev-8 to get there faster. Once you get there, interact with the ID Card Reader to discover you need an ID Card to enter. |
|
| 38 | Find Out How to Access the Dam |
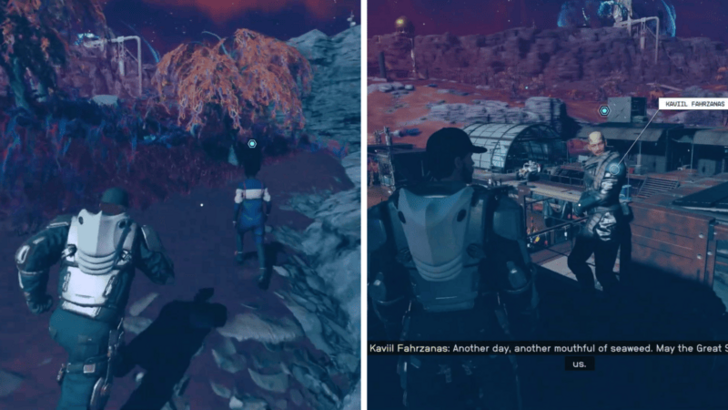 Drop down to the ground and talk to the kid Comrak Abbas nearby. You will be directed to the Abbas Seaweed Farm nearby. Once there, talk to Kaviil Fahrzanas and ask him to give you the Dam Access Card. You will then be able to access the dam. |
|
| 39 | Explore the Dam |
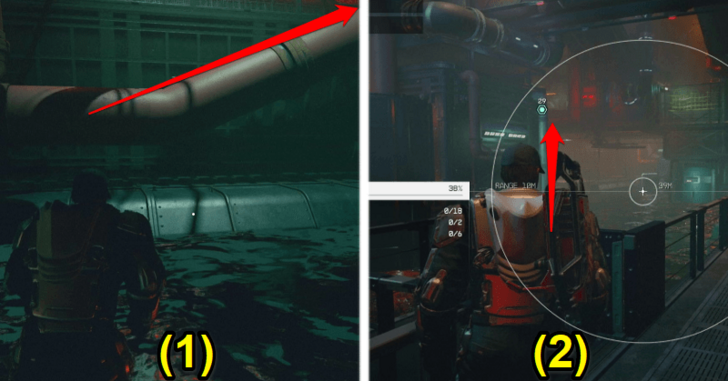 (1) Head through the corridors of the dam and keep going down levels until you reach a floor submerged in corrosive liquid, where you can find contraband. Hop up the red pipes and head upward to a desolated area. (2) In this desolated area, head up to the room with a computer. |
|
| 40 | Destroy the Modulator and Drain the Water |
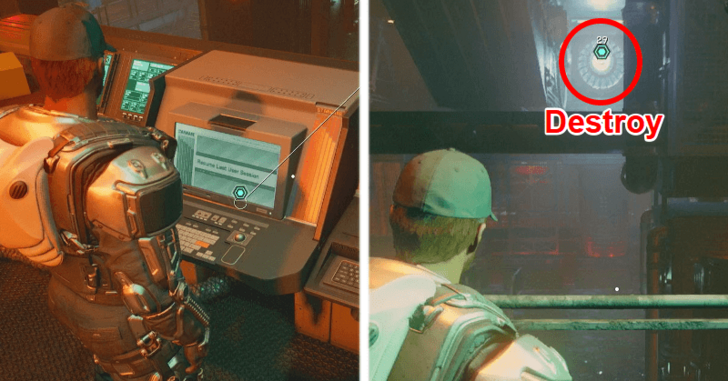 Interact with the computer. You will then have to follow the quest marker leading you to the modulator and destroy it. Go back to the computer to drain the water. |
|
| 41 | Open the Secure Access Door |
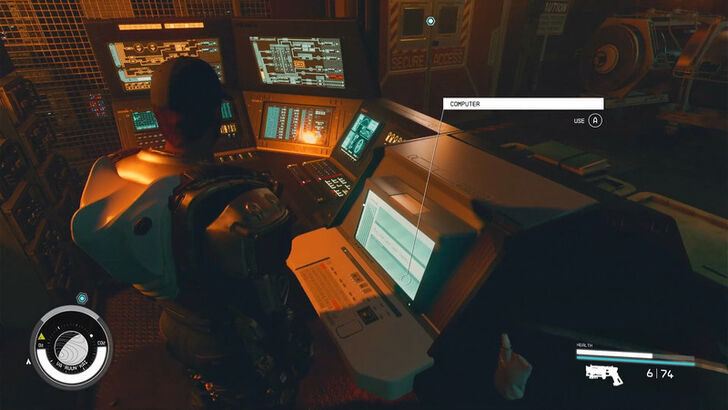 Head to the new area revealed by the drained water. Go to the computer beside the Secure Access Door to open it. |
|
| 42 | Defeat the Phantom |
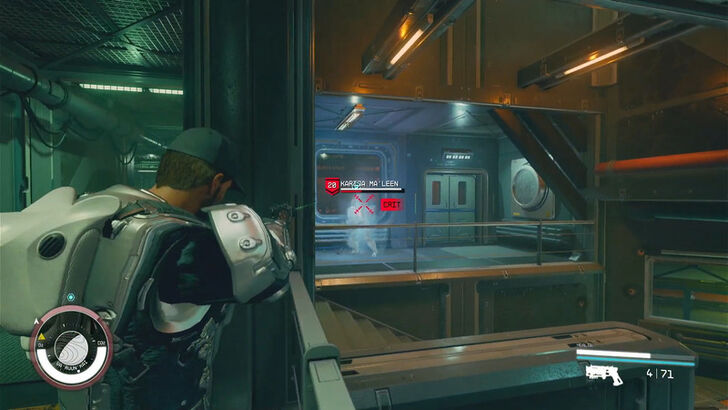 The Phantom you talk to will eventually turn hostile. |
|
| 43 | Find a Way to Open the Door |
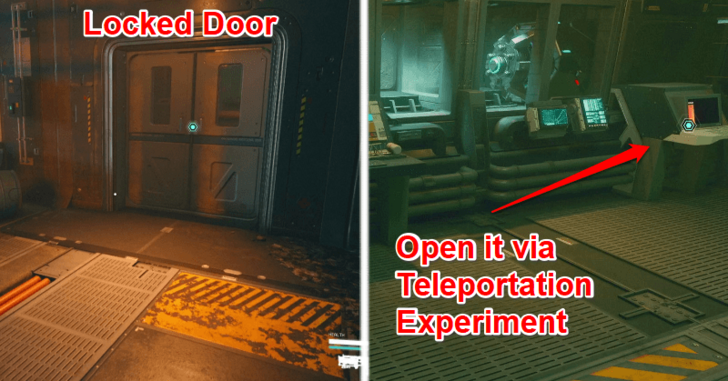 After defeating her, head to the locked door that is marked as an objective. You need to open it via the computer and the Teleportation Experiment nearby. |
|
| 44 | Complete the Teleportation Experiment |
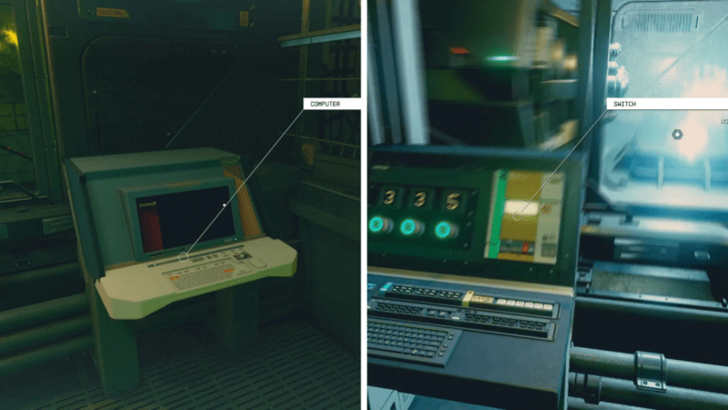 The Experiment Keycard code is 3-3-5 when completing the teleportation experiment. |
|
| 45 | Activate the Console |
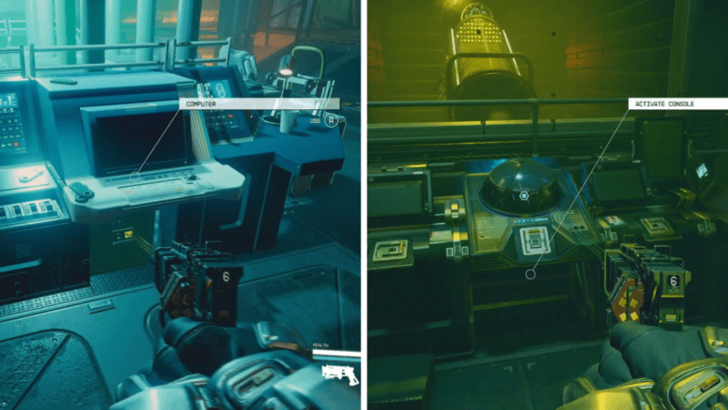 Head to the next area where you'll have to fight 2 Phantoms. After beating them, access the computer seen in the image above and read all the research logs to get the next objective. Activate the console afterward. |
|
| 46 | Divert Power to the Interlock Console |
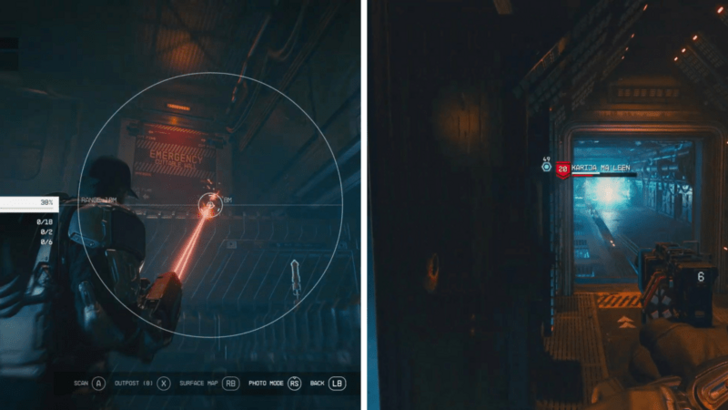 Use a Drilling Rig to cut open the wall seen in the image above and get to the Interlock Console. You will be attacked by multiple phantoms. Since there's basically no cover in that room, try using the narrow vent/hallway you entered to funnel in the phantoms and avoid them teleporting behind you. |
|
| 47 | Retrieve the Vortex Interlock |
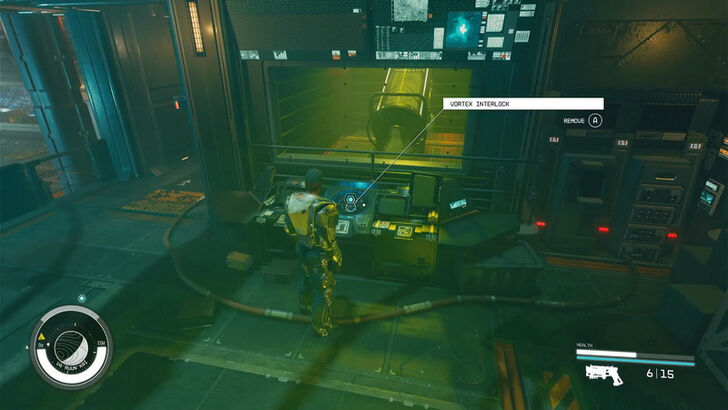 Interact with all the levers to retrieve the Vortex Interlock. |
|
| 48 | Make Your Choice |
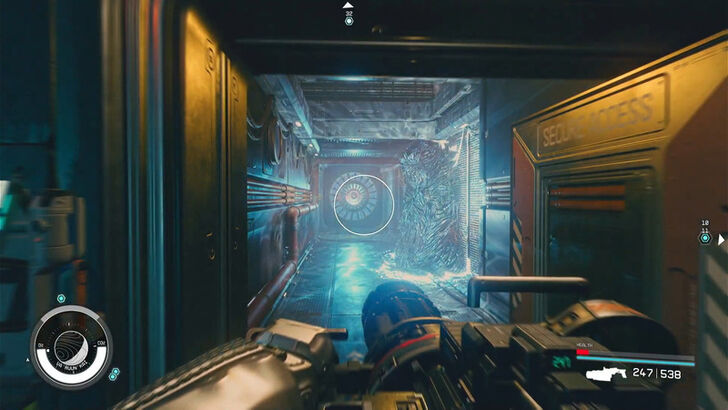 You can choose to exit the dam immediately or remove the remaining Vortex Interlock before exiting. If you choose to remove the remaining Interlock, you will have to open the security door near the unpowered Interlock Console and shoot the modulator to restore power. Interact with all the levers again and retrieve the second Vortex Interlock. Removing the remaining interlock will flood the town nearby, but it does not affect the end of the mission since visiting the town is an optional objective. |
|
| 49 | Deliver the Interlock to Ekris |
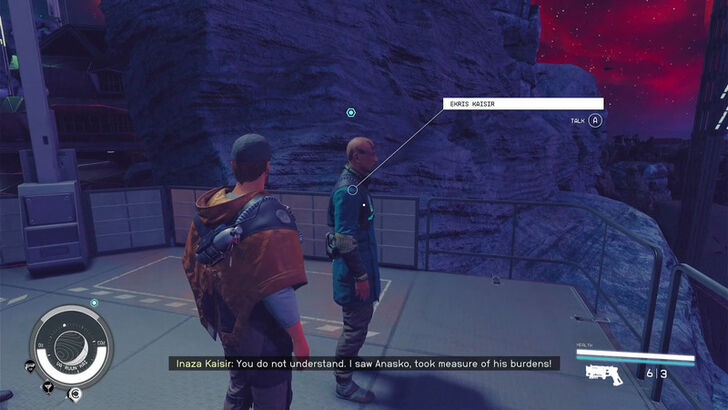 Go back to Ekris and give him the Interlock. |
7. The Other Side

| 50 | Talk to Inaza Kaisir |
|---|---|
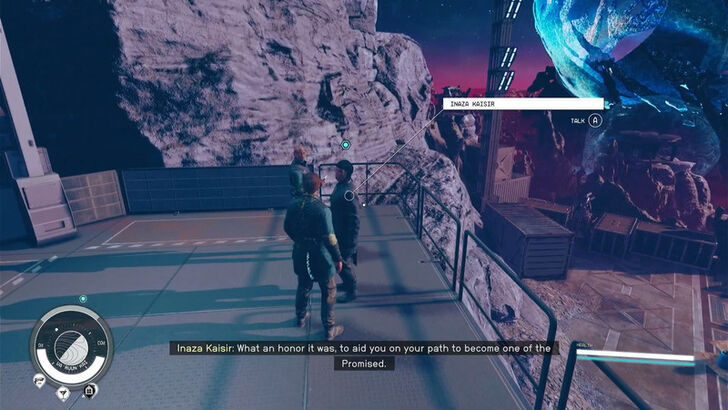 Talk to Inaza Kaisir, which should be beside Ekris after finishing any 1 of the House quests (Exhuming the Past, Conflict in Conviction, or Zealous Overreach). |
|
| 51 | Investigate the Anomalous Cave |
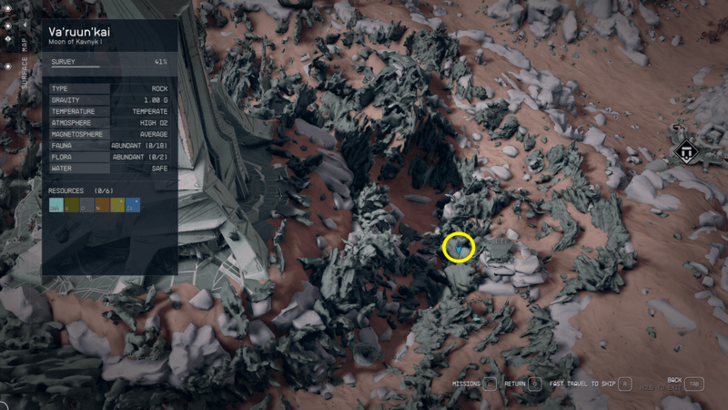 Follow the quest marker, which will lead you to the Anomalous Cave. You will have to fight your way through multiple phantoms on your way to the Anomalous Cave. |
|
| 52 | Find Anasko Va'ruun |
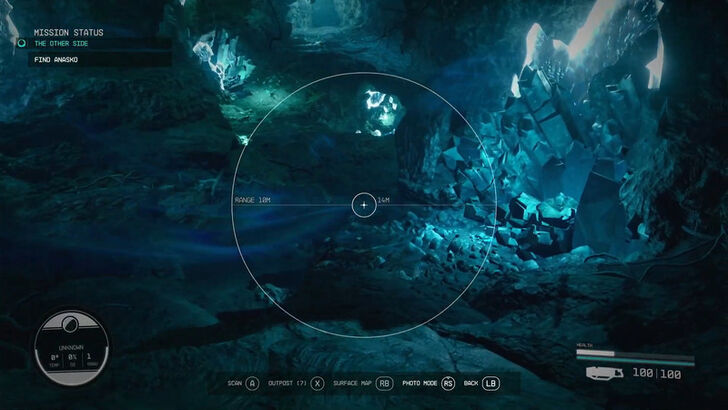 Follow the blue wind blowing animation, which will lead you to Anasko. |
|
| 53 | Escape the Anomalous Cave |
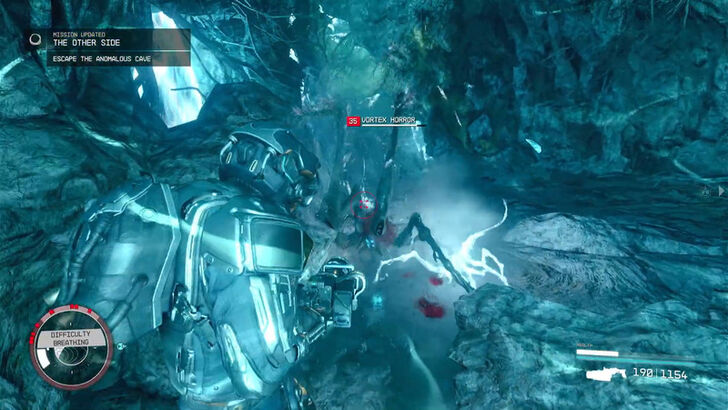 Head back to the path you took earlier to escape the Anomalous Cave. Be careful, as hordes of Vortex Horrors will be spawning as you make your escape. The optional objective of collapsing the cave to seal the horrors does not seem to have a noticeable impact on the outcome of the quest or even DLC questline, so you don't need to bother with it. |
|
| 54 | Return to Inaza |
 Return to Inaza and talk to her. After some dialogue, the quest will end along with the Assist Inaza sub-objective of the Aligning the Houses quest. |
8. The Scaled Citadel

The Scaled Citadel Walkthrough
| 55 | Fire the Mourning Device |
|---|---|
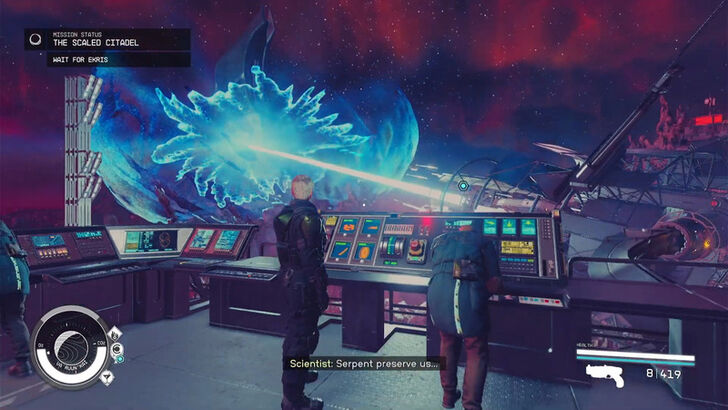 Aim and fire the Mourning Device by interacting with the buttons by the console where Ekris is. |
|
| 56 | Talk to Malibor Dul'kehf |
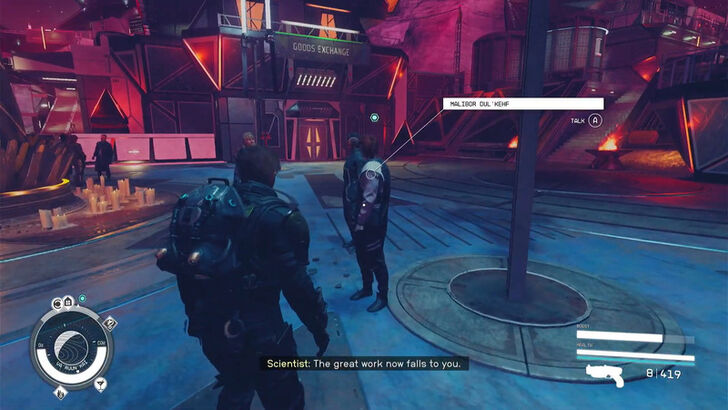 Talk to Malibor, who should be nearby to progress the quest. |
|
| 57 | Enter the Scaled Citadel and talk to Anasko |
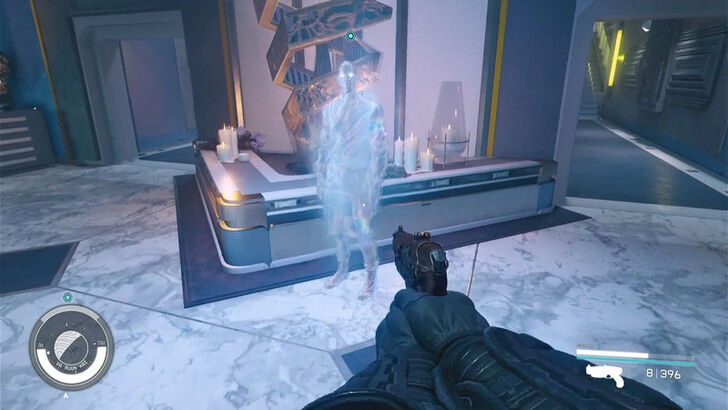 Follow the quest marker and make your way to The Scaled Citadel. You will have to fight Phantoms and Vortex Horrors on your way there. Talk to Anasko Va'ruun once you make it inside The Scaled Citadel to progress the quest. |
|
| 58 | Reach the Reactor Level |
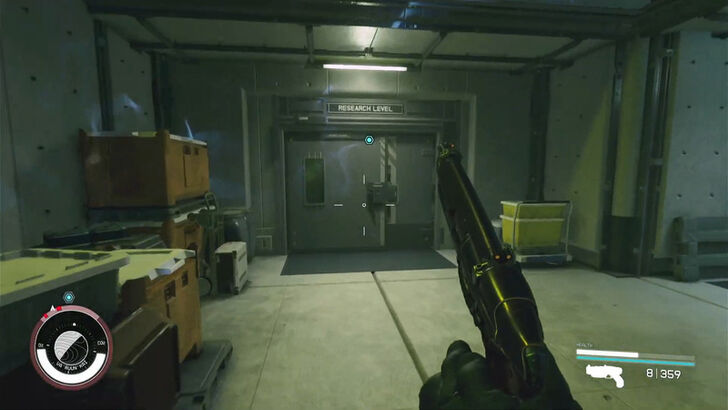 Go to lower levels of The Scaled Citadel and follow the quest marker to reach the Reactor Level. |
|
| 59 | Cut the Wall and Digipick the Vent |
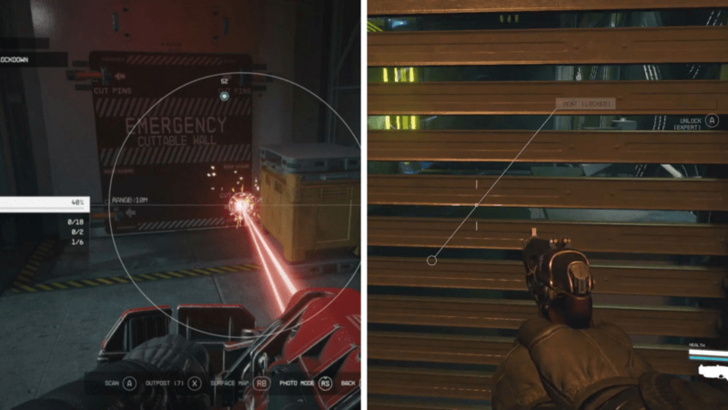 Use a Drilling Rig to cut the wall and a Digipick to get through the vent seen in the images above. |
|
| 60 | Destroy the Modulator |
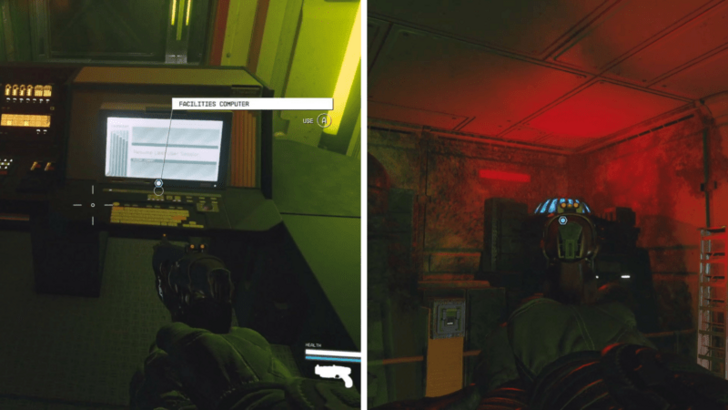 Interact with the Facilities Computer and override the lockdown. It will fail initially. Afterward, destroy the Modulator by interacting with the Modulator Containment Release and shooting the Modulator. Go back to the computer and override the lockdown. Tip: Better to use a Heavy Weapon or automatic rifle to destroy the Modulator. |
|
| 61 | Replace the Vortex Interlock |
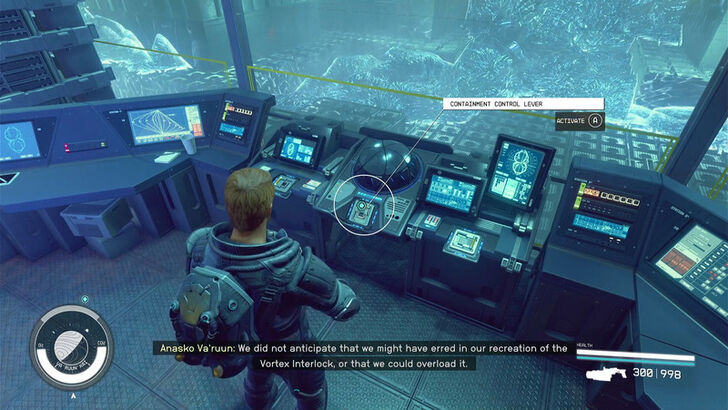 Follow the quest marker until you reach the Reactor Level and replace the Vortex Interlock by interacting with the levers. |
|
| 62 | Follow and Talk to Anasko Va'ruun |
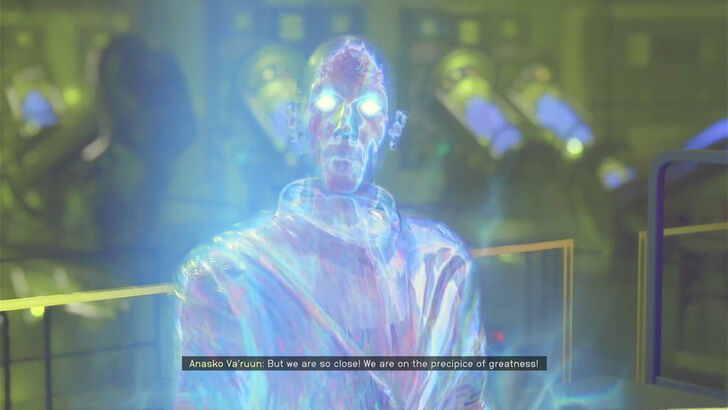 Follow Anasko and talk to him. |
|
| 63 | Make Your Choice |
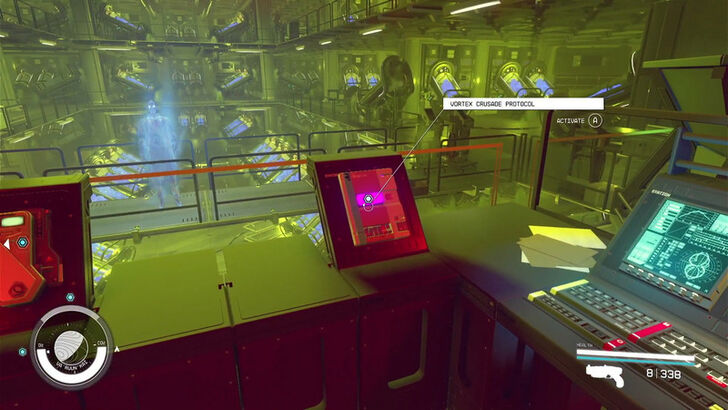 Here, you can choose to release the phantoms or terminate pod life support. Your choice here will not affect the mission or the ending. The only difference is with Anasko's dialogue. ▶︎ Release the Phantoms or Terminate Pod Life Support? | |
| 64 | Reach the Pinnacle |
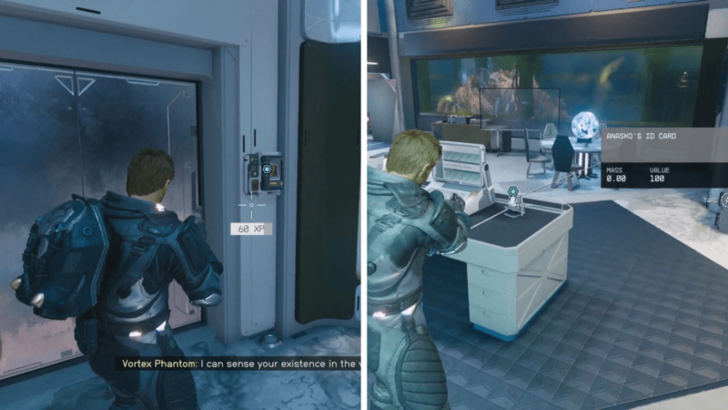 Follow the quest marker, which will lead you to the elevator that leads to the Pinnacle. Interact with the ID Card Reader next to it, and the quest marker will change to the location of Anasko's ID Card. Get it in the room across and take the elevator going to the Pinnacle. Tip: The Phantoms and Zealots will be fighting each other as you make your way to the Pinnacle. Best to just sprint past all of them instead of fighting. |
|
| 65 | Overload the Vortex Gate |
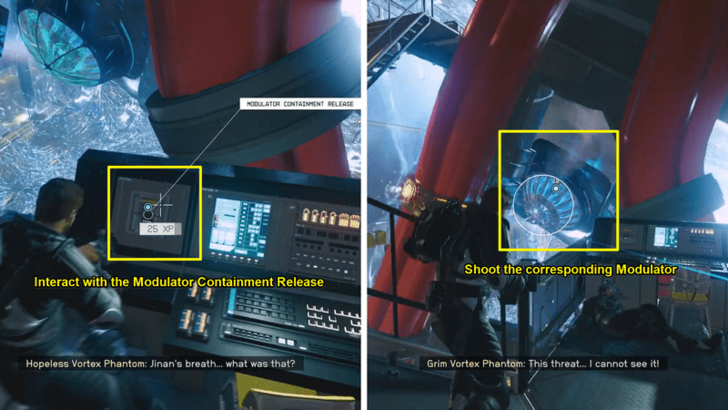 Overload the Vortex Gate by interacting with the Modulator Containment Releases and shooting the corresponding Modulators. You have to do this four times to finish the sub-objective. Tip: Better to use a Heavy Weapon or automatic rifle to destroy the Modulators. |
|
| 66 | Kill Anasko Va'ruun |
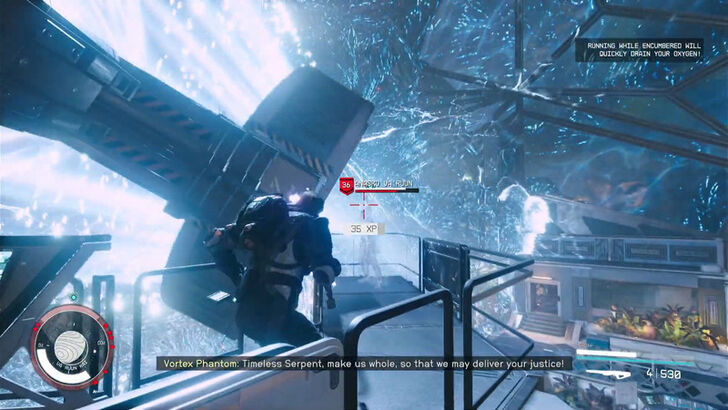 You have to kill Anasko Va'ruun once to clear the objective. Although, he will keep spawning even after killing him multiple times. |
|
| 67 | Escape the Scaled Citadel |
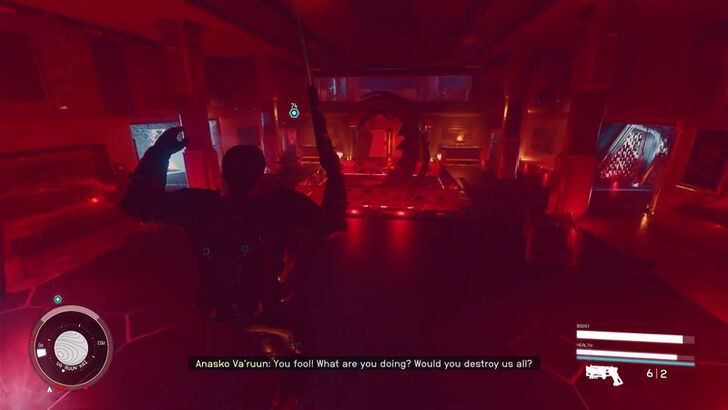 Follow the quest marker and get out of the Scaled Citadel. |
Shattered Space Ending Choice and Best Ending Guide
How to Start Shattered Space
Jump to a Star System to Start DLC Questline

To start the DLC Questline, jump to a star system where you don't have a quest active and where you won't be scanned for contraband immediately. After the fast travel loading screen, you'll encounter The Oracle. Respond to their call for help to start the What Remains quest.
Shattered Space Required Level
Level 35 is Recommended Level
There is no level requirement for Shattered Space, although Level 35 is the official recommended level when starting the DLC—as you're sure to encounter bosses that reach up to Level 50.
For context, the enemies in the first quest of Shattered Space are around Level 28.
How to Level Up and Farm Skill Points Fast
Starfield Related Guides

List of All DLC Guides
Comment
Author
Shattered Space Walkthrough
improvement survey
03/2026
improving Game8's site?

Your answers will help us to improve our website.
Note: Please be sure not to enter any kind of personal information into your response.

We hope you continue to make use of Game8.
Rankings
- We could not find the message board you were looking for.
Gaming News
Popular Games

Genshin Impact Walkthrough & Guides Wiki

Honkai: Star Rail Walkthrough & Guides Wiki

Umamusume: Pretty Derby Walkthrough & Guides Wiki

Pokemon Pokopia Walkthrough & Guides Wiki

Resident Evil Requiem (RE9) Walkthrough & Guides Wiki

Monster Hunter Wilds Walkthrough & Guides Wiki

Wuthering Waves Walkthrough & Guides Wiki

Arknights: Endfield Walkthrough & Guides Wiki

Pokemon FireRed and LeafGreen (FRLG) Walkthrough & Guides Wiki

Pokemon TCG Pocket (PTCGP) Strategies & Guides Wiki
Recommended Games

Diablo 4: Vessel of Hatred Walkthrough & Guides Wiki

Cyberpunk 2077: Ultimate Edition Walkthrough & Guides Wiki

Fire Emblem Heroes (FEH) Walkthrough & Guides Wiki

Yu-Gi-Oh! Master Duel Walkthrough & Guides Wiki

Super Smash Bros. Ultimate Walkthrough & Guides Wiki

Pokemon Brilliant Diamond and Shining Pearl (BDSP) Walkthrough & Guides Wiki

Elden Ring Shadow of the Erdtree Walkthrough & Guides Wiki

Monster Hunter World Walkthrough & Guides Wiki

The Legend of Zelda: Tears of the Kingdom Walkthrough & Guides Wiki

Persona 3 Reload Walkthrough & Guides Wiki
All rights reserved
© 2023 Bethesda Softworks LLC, a ZeniMax Media company. Trademarks belong to their respective owners. All Rights Reserved.
The copyrights of videos of games used in our content and other intellectual property rights belong to the provider of the game.
The contents we provide on this site were created personally by members of the Game8 editorial department.
We refuse the right to reuse or repost content taken without our permission such as data or images to other sites.





![Monster Hunter Stories 3 Review [First Impressions] | Simply Rejuvenating](https://img.game8.co/4438641/2a31b7702bd70e78ec8efd24661dacda.jpeg/thumb)


