Sekhem Hall Puzzles and Treasure Guide
✉ Send your thoughts in our Genshin 6.4 Patch Survey!
★ Exclusive: Dive back in time with the Meta History
◆ Hot: Version 6.4, Luna 5 Codes
◆ Builds: Varka, Flins, Skirk, Escoffier
◆ Events: Travelers' Tales, He Who Caught the Wind
◆ Future: Linnea, Version 6.5 Luna VI

See how to solve the Sekhem Hall puzzle and where to find the treasure locations in this guide! Sekhem Hall is an underground ruin found inside a cave under The Mausoleum of King Deshret in Genshin Impact.
Sekhem Hall Location
Under the Mausoleum of King Deshret

Sekhem Hall is found under the Mausoleum of King Deshret, from an entrance in Khemenu Temple. Players will need to have the Dual Evidence quest unlocked, and enough clearance from the same quest to be able to get to this location.
Dual Evidence Puzzles and Quest Guide
Entrance from Khemenu Temple
| How to Get to Sekhem Hall | |
|---|---|
| 1 | 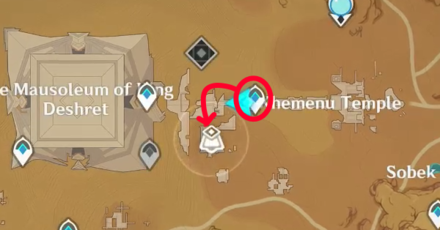 Teleport to Khemenu Temple's waypoint during Dual Evidence quest. Having the quest is necessary. |
| 2 |  Enter the left corridor inisde the main room. |
| 3 |  Head inside the door with the blue Plinth of the Secret Rites. |
| 4 | 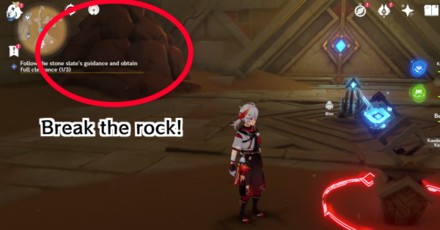 Break the rock by the beam puzzle, then rotate the cell to open the door. |
| 5 | 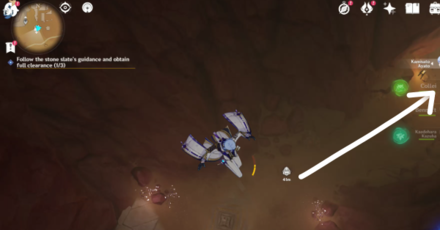 Drop down to the underground cavern and move forward. |
| 6 |  Continue moving, then up the rocky ramp until you get to a triangular ruin entrance. |
| 7 |  Enter Sekhem Hall! |
Sekhem Hall Puzzle Guides
Draining Sekhem Hall
You can drain the water in Sekhem Hall by activating the two Hydro Monuments. Move the two cells to the opposite ends of the room to accomplish this. You can access the room's treasure chest puzzle afterwards.
See the Luxurious Chest Puzzle
Reaching the Dendroculus
The Dendroculus high above Sekhem Hall is reachable by activating the two Anemo Monuments. Move the two cells in between the Electro and Hydro Monuments to create an updraft that lets you glide up the room.
Other Sekhem Hall Puzzles
Place of Breath
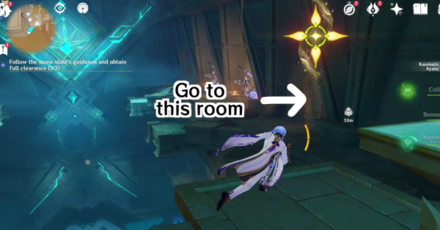
Place of Breath is a point of interest inside Sekhem Hall. You will need to complete this during the Dual Evidence quest to get an additional level of clearance! You can check the in-depth guide below for the full walkthrough.
Sekhem Hall Treasure Chests
Sekhem Hall Luxurious Chest
| How to Get the Luxurious Chest in Sekhem Hall | |
|---|---|
| 1 |  Move the two cells and point them to the two Electro Totems to get the floating treasure. |
| 2 |  Move the two cells and point them to the two Hydro Totems to reduce the water level. |
| 3 | 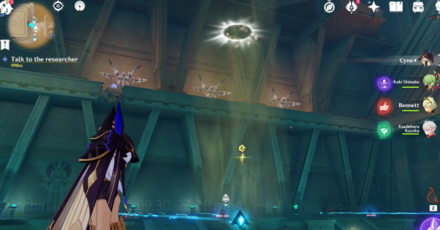 Move the two cells and point them to the two Anemo Totems to create an updraft (you will need this later). |
| 4 |  Release the Primal Ember at the entrance. |
| 5 |  Follow it as it goes down the drained room and into the first Primal Torch. |
| 6 | 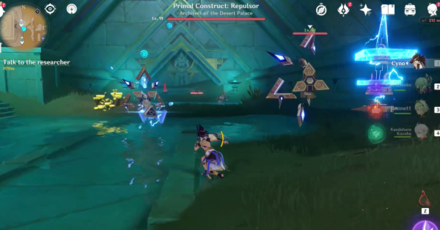 Defeat the Primal Construct: Replusor. |
| 7 |  Before anything, activate the Large Fan Blades in the middle of the room. You need Clearance Level 2. |
| 8 | 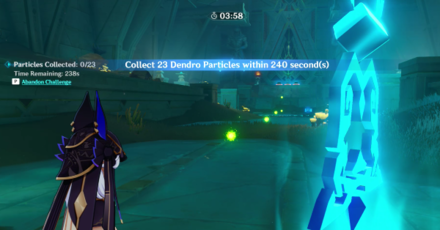 Activate the Time Trial Challenge and collect all 23 Dendro Particles. The updrafts you created earlier will help you get the particles! |
| 9 | 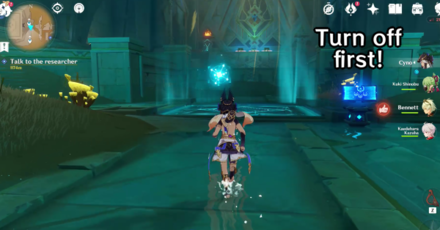 Before releasing the Primal Ember, turn off the Large Fan Blades first. |
| 10 | 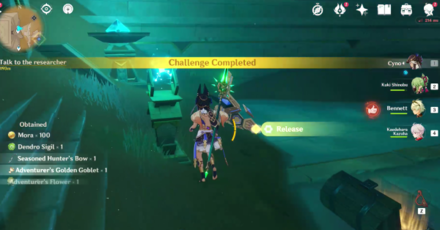 Release the Primal Ember afterwards. |
| 11 |  Once the second Primal Ember reaches the Primal Torch, the Luxurious Chest and two Precious Chests will open. In addition, a path to Duat Hall will also open! |
Sekhem Hall Sacred Seals
| Sekhem Hall Sacred Seal Locations | |
|---|---|
| 1 |  Sacred Seal: Raised Arm • Drain the water, then check the glowing mushrooms by the side of the large statue. |
| 2 | 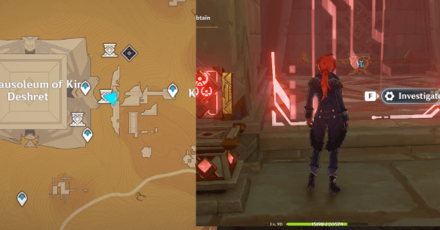 Sacred Seal: Forest • Inside the right room at the highest floor from the entrance. You need Clearance Level 3. |
Sacred Seals Locations and Puzzle Guide
Sekhem Hall Dendroculus
| Sekhem Hall Dendroculus Locations | |
|---|---|
| 1 |  Move the two cells parallel to the two Anemo Monuments to create an updraft to the Dendroculus. |
| 1 |  Deep inside the right room to the Place of Breath. You can find it just in front of the horizontal blowing fan. |
Genshin Impact Related Guides
All Tips and Tricks Guides

All Version 3.1 Tips & Tricks
Other Regional Tips & Tricks
Comment
Author
Sekhem Hall Puzzles and Treasure Guide
improvement survey
03/2026
improving Game8's site?

Your answers will help us to improve our website.
Note: Please be sure not to enter any kind of personal information into your response.

We hope you continue to make use of Game8.
Rankings
Gaming News
Popular Games

Genshin Impact Walkthrough & Guides Wiki

Honkai: Star Rail Walkthrough & Guides Wiki

Umamusume: Pretty Derby Walkthrough & Guides Wiki

Pokemon Pokopia Walkthrough & Guides Wiki

Resident Evil Requiem (RE9) Walkthrough & Guides Wiki

Monster Hunter Wilds Walkthrough & Guides Wiki

Wuthering Waves Walkthrough & Guides Wiki

Arknights: Endfield Walkthrough & Guides Wiki

Pokemon FireRed and LeafGreen (FRLG) Walkthrough & Guides Wiki

Pokemon TCG Pocket (PTCGP) Strategies & Guides Wiki
Recommended Games

Diablo 4: Vessel of Hatred Walkthrough & Guides Wiki

Fire Emblem Heroes (FEH) Walkthrough & Guides Wiki

Yu-Gi-Oh! Master Duel Walkthrough & Guides Wiki

Super Smash Bros. Ultimate Walkthrough & Guides Wiki

Pokemon Brilliant Diamond and Shining Pearl (BDSP) Walkthrough & Guides Wiki

Elden Ring Shadow of the Erdtree Walkthrough & Guides Wiki

Monster Hunter World Walkthrough & Guides Wiki

The Legend of Zelda: Tears of the Kingdom Walkthrough & Guides Wiki

Persona 3 Reload Walkthrough & Guides Wiki

Cyberpunk 2077: Ultimate Edition Walkthrough & Guides Wiki
All rights reserved
Copyright© 2012-2024 HoYoverse — COGNOSPHERE. All Rights Reserved.
The copyrights of videos of games used in our content and other intellectual property rights belong to the provider of the game.
The contents we provide on this site were created personally by members of the Game8 editorial department.
We refuse the right to reuse or repost content taken without our permission such as data or images to other sites.


![Monster Hunter Stories 3 Review [First Impressions] | Simply Rejuvenating](https://img.game8.co/4438641/2a31b7702bd70e78ec8efd24661dacda.jpeg/thumb)


