Khemenu Temple Puzzle Guide
✉ Send your thoughts in our Genshin 6.4 Patch Survey!
★ Exclusive: Dive back in time with the Meta History
◆ Hot: Version 6.4, Luna 5 Codes
◆ Builds: Varka, Flins, Skirk, Escoffier
◆ Events: Travelers' Tales, He Who Caught the Wind
◆ Future: Linnea, Version 6.5 Luna VI
Khemenu Temple is a ruin located in Hypostyle Desert, which can be found in front of The Mausoleum of King Deshret in Genshin Impact. Learn how to solve each puzzle, get all the chests in Khemenu Temple, and obtain all Dendroculi and Sacred Seals by reading on!
List of Contents
Khemenu Temple Location
Beside The Mausoleum of King Deshret
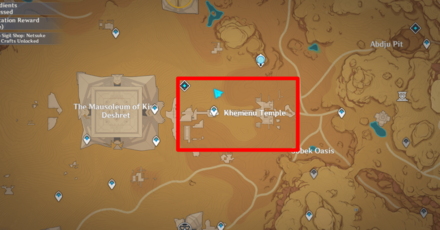
Khemenu Temple is located just outside The Mausoleum of King Deshret in Hypostyle Desert. It will become available after finishing Lost in the Sands and starting the An Introduction to Indoor Archaeology sub-quest.
Part of An Introduction to Indoor Archaeology Quest

Khemenu Temple is accessible at the start of the sub-quest for Golden Slumber called An Introduction to Indoor Archaeology. However, there are several puzzles that requires you to have the highest Clearance to unlock them, so you'll have to clear the Dual Evidence sub-quest first and go back to them.
An Introduction to Indoor Archaeology Quest
Khemenu Temple Puzzle Guides
Common Chests Puzzle Guide
| Puzzle Guide Chests | |||
|---|---|---|---|
| Common | Exquisite | Remarkable | Precious |
Common Chest #1
| How to Get Common Chest #1 | |
|---|---|
| 1 | 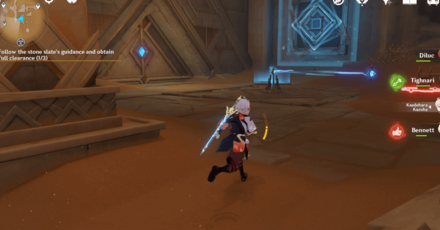 Go to the area with a large fan blade after you jump down in a hole when you're on the way to the Place of Breath during the Dual Evidence sub-quest. |
| 2 | 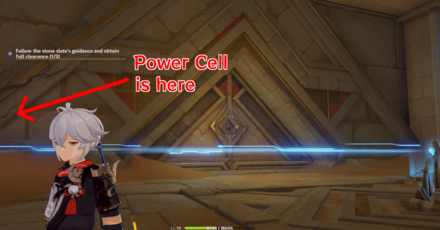 Open the door by letting the Power Cell emitting a beam point out on a Power Cell hiding under a boulder on the left corner of the room. |
| 3 | 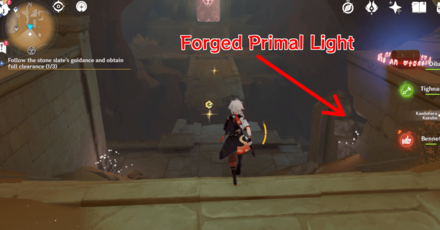 Get the Forged Primal Light outside, near the locked common chest and put it in the replicator. |
| 4 | Once done placing the Forged Primal Light, it will spawn a Power Cell. |
| 5 | Rotate the Power Cell that's emitting out a beam and point it towards the new Power Cell unlocked. |
| 6 | Loot the common chest before it gets locked again! |
Common Chest #2
| How to Get Common Chest #2 | |
|---|---|
| 1 | 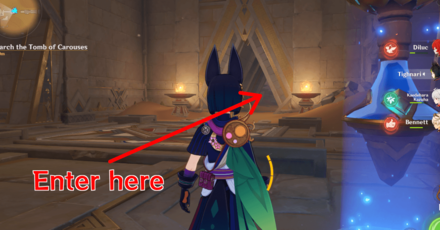 Teleport to the Khemenu Temple Teleport Waypoint and go to the furthest Room. It is accessible during the An Introduction to Indoor Archaeology sub-quest. |
| 2 | 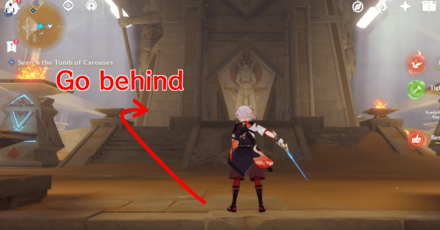 Go behind the huge door to see a Time Trial challenge. |
| 3 | 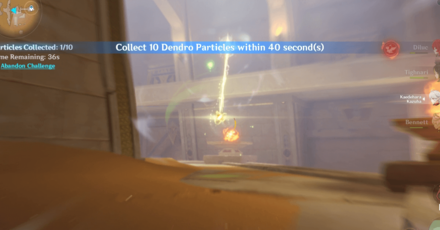 Activate the challenge and collect all 8 Dendro Particles. Use the Four-Leaf Sigils to move around quickly. |
| 4 | 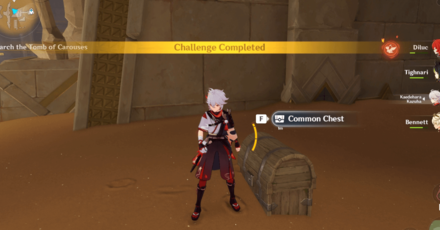 Open the common chest after successfully completing the challenge. |
Common Chest #3
| How to Get Common Chest #3 | |
|---|---|
| 1 | 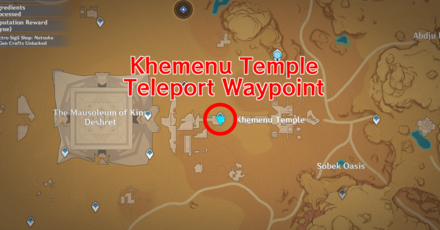 Go inside the Khemenu Temple and walk straight until you reach an underground Teleport Waypoint. You can unlock this part of the temple by progressing through the An Introduction to Indoor Archaeology sub-quest. |
| 2 |  Go to the hallway to the right from the waypoint and drop down from the trap. |
| 3 | 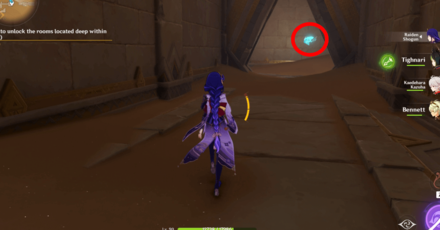 Look around once down and you'll eventually see a Seelie from a distance. |
| 4 | 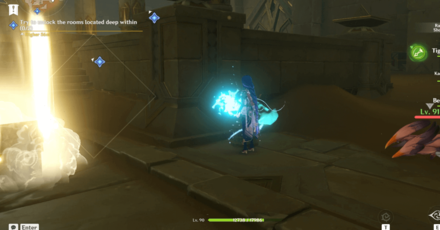 Follow the Seelie until it reaches its statue on the room where you can find three Primal Sandglasses. |
Common Chest #4
| How to Get Common Chest #4 | |
|---|---|
| 1 | 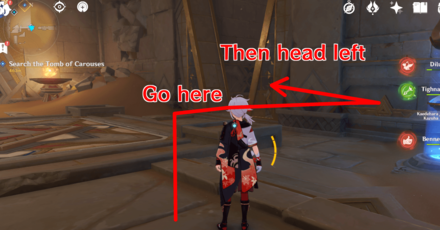 Go inside the Khemenu Temple inside the room with three Primal Sandglasses, located on the right room from the teleporter. |
| 2 | 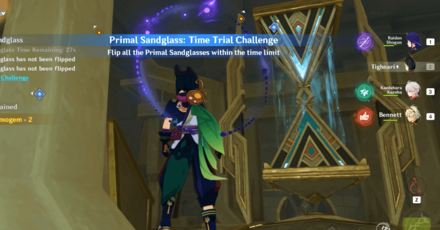 Climb up to one of the Sandglasses and flip it to start the challenge. |
| 3 | 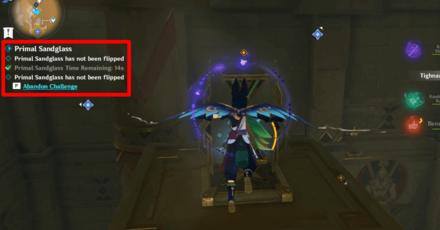 Flip all of them before the timer on them runs out to complete the challenge. You can use the Four-Leaf Sigils around to get to them quickly. |
| 4 | 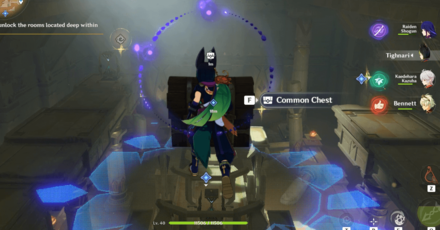 Claim the rewards from the common chest, near the location of the Primal Ember during the An Introduction to Indoor Archaeology sub-quest. |
Common Chest #5
| How to Get Common Chest #5 | |
|---|---|
| 1 | 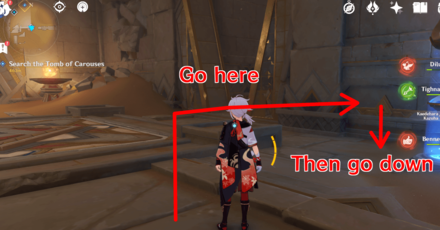 Go back to the location where you found the locked Verity Cell and a nearby Seelie on Common Chest #3. |
| 2 | 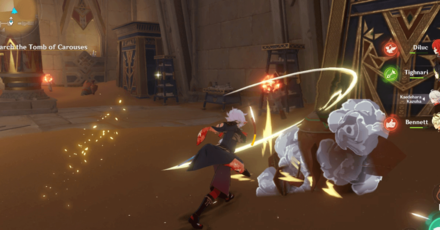 Destroy all the vases inside. Be careful as there will be Scorpions spawning once you break them. |
| 3 | 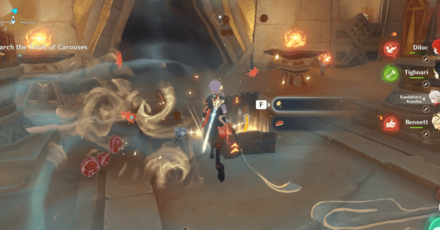 Kill all the Scorpions and a common chest will come out in the room. |
Exquisite Chests Puzzle Guide
| Puzzle Guide Chests | |||
|---|---|---|---|
| Common | Exquisite | Remarkable | Precious |
Exquisite Chest #1
| How to Get Exquisite Chest #1 | |
|---|---|
| 1 | 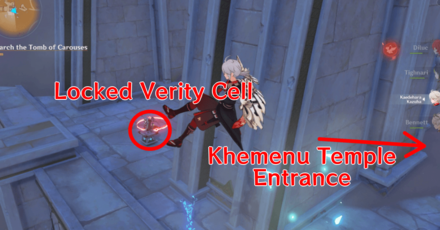 Go left outside the Khemenu Temple entrance to a locked Verity Cell. |
| 2 | 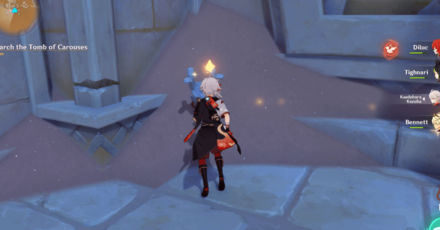 Get Level 4 Clearance to unlock the Verity Cell and show the torches. |
| 3 | 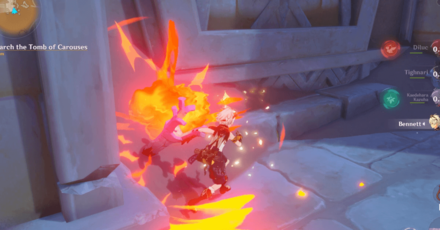 Go near torches while you have the Verity Cell and light them up using Pyro. |
| 4 | 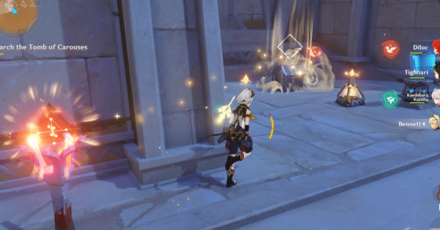 Open the Exquisite Chest after lighting them all up. |
Exquisite Chest #2
| How to Get Exquisite Chest #2 | |
|---|---|
| 1 | 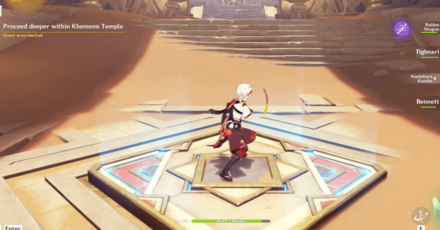 Go inside the Khemenu Temple, inside a room with a Keystone Replicator in the middle. |
| 2 | 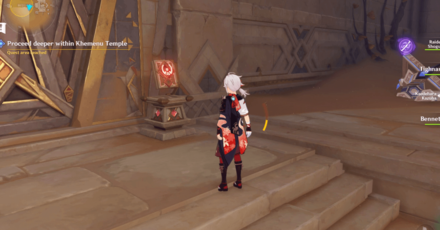 Open up all the rooms with Level 1 Clearance and get a Forged Primal Light. |
| 3 | Put the Forged Primal Light to all the Keystone Replicators to summon Primal Sandglass. |
| 4 | 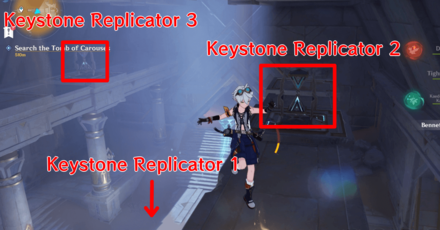 There are two replicators on elevated platforms and one on the ground. Use characters that can go up quickly (like Venti or Kazuha) to activate the replicators before the Forged Primal Light disappear on you. |
| 5 | Begin flipping all the Primal Sandglasses to start and finish the challenge. You can use the Four-Leaf Sigils that will appear to get to them quickly. |
| 6 | Loot the Exquisite Chest afterward. |
Exquisite Chest #3
| How to Get Exquisite Chest #3 | |
|---|---|
| 1 | 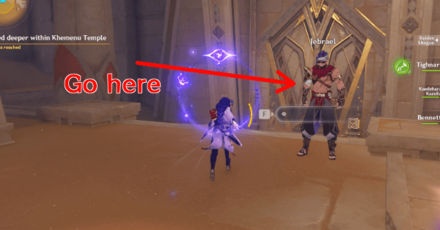 Go back to the room where you got the Primal Ember to open up the door leading deeper into the Khemenu Temple during the An Introduction to Indoor Archaeology sub-quest. |
| 2 | 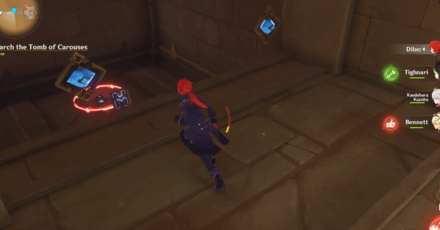 Go to the inactive Power Cells and unlock the Obscuring Cell. |
| 3 | 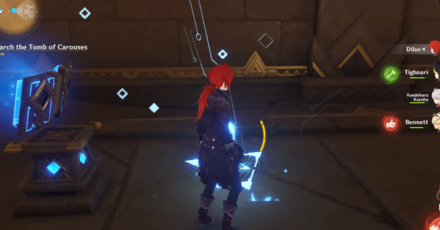 Use the Obscuring Cell to make the wall transparent and let the beam from the other room hit the Power Cells. |
| 4 | 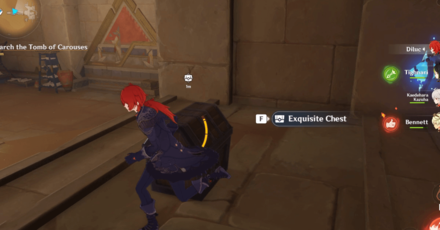 Loot the Exquisite Chest that'll spawn afterward. |
Remarkable Chest Puzzle Guide
| Puzzle Guide Chests | |||
|---|---|---|---|
| Common | Exquisite | Remarkable | Precious |
Remarkable Chest #1
| How to Get Remarkable Chest #1 | |
|---|---|
| 1 |  Head back to the room with a locked Verity Cell and a nearby Seelie (used to unlock Common Chest #3). |
| 4 | 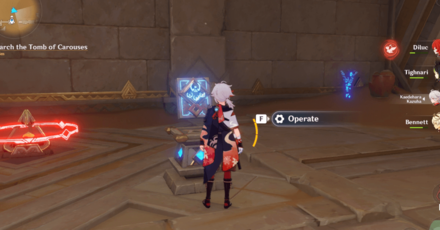 Unlock the Verity Cell, but it requires Level 4 Clearance, so be sure to finish the chain quest up to Dual Evidence sub-quest. |
| 5 | 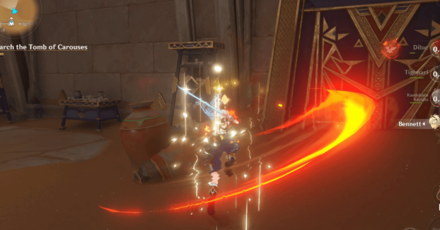 Activate the Verity Cell and go near the torches on the four corners of the room. |
| 6 | 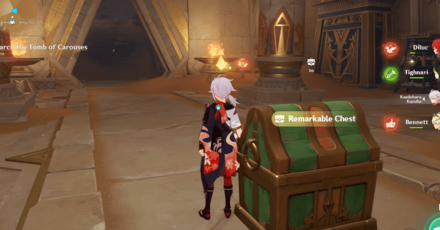 Light those torches up using Pyro and loot the Remarkable Chest afterward. |
Precious Chests Puzzle Guide
| Puzzle Guide Chests | |||
|---|---|---|---|
| Common | Exquisite | Remarkable | Precious |
Precious Chest #1
| How to Get Precious Chest #1 | |
|---|---|
| 1 | 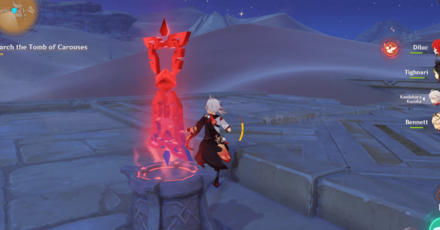 Activate the Time Trial challenge above the Khemenu Temple. |
| 2 | 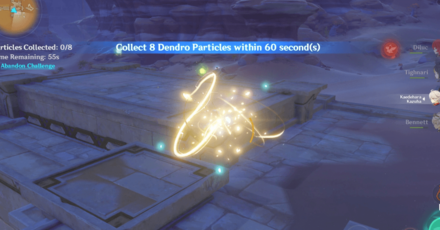 Follow 8 Dendro Particles to complete the challenge. You can easily get them if you follow and use the Four-Leaf Sigils that'll appear. |
| 3 | 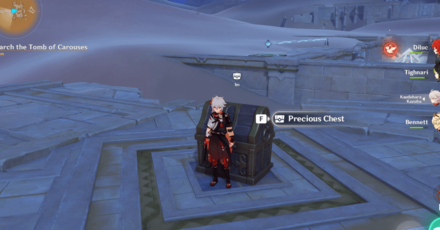 Go back to the Time Trial challenge and open the Precious Chest. |
Precious Chest #2
| How to Get Precious Chest #2 | |
|---|---|
| 1 | 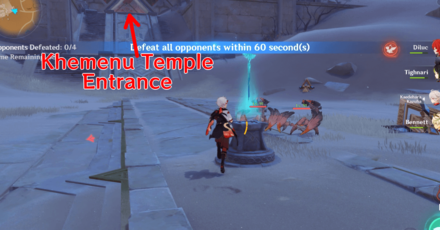 Activate the Time Trial challenge in front of the Khemenu Temple entrance. |
| 2 | 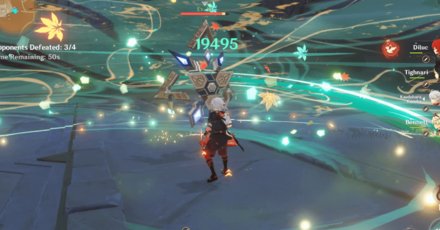 Defeat 3 Scorpion and 1 Primal Construct to finish the challenge. |
| 3 |  Loot the Precious Chest once done. |
Khemenu Temple Sacred Seals
| Khemenu Temple Sacred Seals Location | |
|---|---|
| 1 | 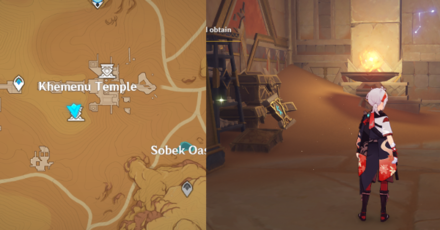 Sacred Seal: Thunderstrike • Inside the KhemenuTemple, on the left room from the entrance. It's recommended that you complete up to the Dual Evidence quest to get enough Clearance. |
| 2 | 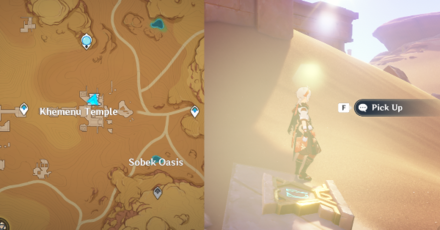 Sacred Seal: Raised Arm • Outside of Khemenu Temple on the right side from the entrance. |
| 3 |  Sacred Seal: Valley • It can be found to the right side of Waypoint then down the trap and into the corner of the next room during Golden Slumber Part 2 World Quest. |
| 4 | 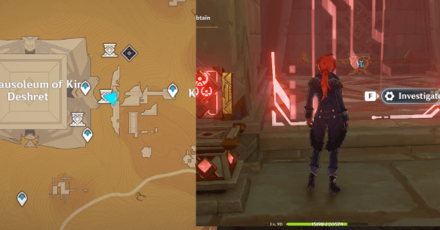 Sacred Seal: Sunrise • Play through the An Introduction to Indoor Archeology World Quest, part of the Golden Slumber Chain Quest! Solve the quest puzzle there to get it in the room deep within. |
| 5 |  Sacred Seal: Forest • Can be found during the Dual Evidence quest, near the underground waypoint in the Mausoleum of King Deshret. You need at least Level 3 Clearance. |
Sacred Seals Locations and Puzzle Guide
Khemenu Temple Dendroculus
| Khemenu Temple Dendroculus Location | |
|---|---|
| 1 |  Gain enough Clearance then fast travel to Khemenu Temple. Head west until you reach the main elevator room. In the room north, follow the path to find a plinth. Operate it to open the door and find the Dendroculus on the other side of the room. |
| 2 |  Can be found on top of a headless statue in Khemenu Temple. You can get to this location during the An Introduction to Indoor Archaeology quest sub-quest. |
| 3 |  Located on the west end of Khemenu Temple's invisible ceiling. |
Desert Dendroculus Locations and Map Guide
Genshin Impact Related Guides
All Tips and Tricks Guides

All Version 3.1 Tips & Tricks
Other Regional Tips & Tricks
Comment
Author
Khemenu Temple Puzzle Guide
improvement survey
03/2026
improving Game8's site?

Your answers will help us to improve our website.
Note: Please be sure not to enter any kind of personal information into your response.

We hope you continue to make use of Game8.
Rankings
Gaming News
Popular Games

Genshin Impact Walkthrough & Guides Wiki

Honkai: Star Rail Walkthrough & Guides Wiki

Umamusume: Pretty Derby Walkthrough & Guides Wiki

Pokemon Pokopia Walkthrough & Guides Wiki

Resident Evil Requiem (RE9) Walkthrough & Guides Wiki

Monster Hunter Wilds Walkthrough & Guides Wiki

Wuthering Waves Walkthrough & Guides Wiki

Arknights: Endfield Walkthrough & Guides Wiki

Pokemon FireRed and LeafGreen (FRLG) Walkthrough & Guides Wiki

Pokemon TCG Pocket (PTCGP) Strategies & Guides Wiki
Recommended Games

Diablo 4: Vessel of Hatred Walkthrough & Guides Wiki

Cyberpunk 2077: Ultimate Edition Walkthrough & Guides Wiki

Fire Emblem Heroes (FEH) Walkthrough & Guides Wiki

Yu-Gi-Oh! Master Duel Walkthrough & Guides Wiki

Super Smash Bros. Ultimate Walkthrough & Guides Wiki

Pokemon Brilliant Diamond and Shining Pearl (BDSP) Walkthrough & Guides Wiki

Elden Ring Shadow of the Erdtree Walkthrough & Guides Wiki

Monster Hunter World Walkthrough & Guides Wiki

The Legend of Zelda: Tears of the Kingdom Walkthrough & Guides Wiki

Persona 3 Reload Walkthrough & Guides Wiki
All rights reserved
Copyright© 2012-2024 HoYoverse — COGNOSPHERE. All Rights Reserved.
The copyrights of videos of games used in our content and other intellectual property rights belong to the provider of the game.
The contents we provide on this site were created personally by members of the Game8 editorial department.
We refuse the right to reuse or repost content taken without our permission such as data or images to other sites.


![Monster Hunter Stories 3 Review [First Impressions] | Simply Rejuvenating](https://img.game8.co/4438641/2a31b7702bd70e78ec8efd24661dacda.jpeg/thumb)


