Envisaged Echoes Guide
✉ Send your thoughts in our Genshin 6.4 Patch Survey!
★ Exclusive: Dive back in time with the Meta History
◆ Hot: Version 6.4, Luna 5 Codes
◆ Builds: Varka, Flins, Skirk, Escoffier
◆ Events: Travelers' Tales, He Who Caught the Wind
◆ Future: Linnea, Version 6.5 Luna VI
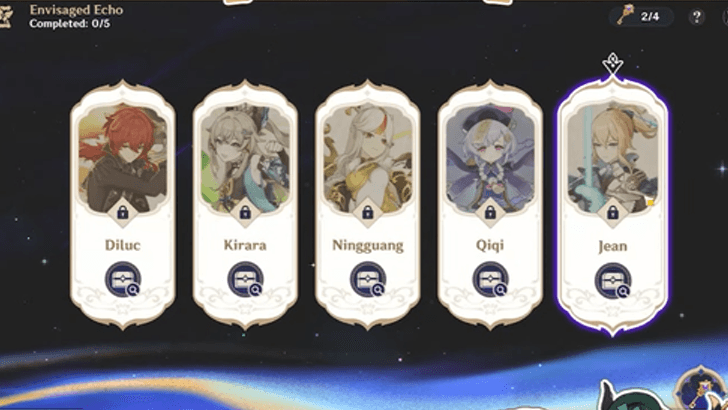
Envisaged Echoes are challenges to acquire character trail effects for various characters in Genshin Impact. See guides for each Envisaged Echo challenge, previews of the Echo cosmetics, and how to unlock them here!
Envisaged Echoes Domain Guides
| Jump to Envisaged Echoes Characters | |
|---|---|
| Diluc | Kirara |
| Ningguang | Qiqi |
| Jean | Keqing |
| Zhongli | Kazuha |
| Ganyu | Venti |
| Dehya | Raiden Shogun |
| Shenhe | Yelan |
| Nahida | Albedo |
| Klee | Ayaka |
| Ayato | - |
Diluc
| Challenge Objectives | Phase 01 • Light up all the Pyro Monuments within a short time Phase 02 • Defeat 10 Enemies within 70 seconds |
|---|---|
| Special Rules | Phase 01 • Characters will periodically regenerate energy Phase 02 • None |
| Recommended Weapons |
▲Since you will be fighting alone, we recommend weapons that provide CRIT Stats, or have high personal damage and benefits for Diluc. |
| Recommended Artifacts |
▲Due to Diluc not having access to any Elemental Reactions, we recommend running 2-pc. combinations of Pyro DMG and ATK, or even a 4-pc. set of Gladiator's Finale to boost his own personal damage. |
| Guidelines | As a general rule of thumb, try to focus on building ATK and CRIT for this challenge. Due to the mechanics of the domain challenge, you can forego both Energy Recharge and Elemental Mastery. |
Kirara
| Challenge Objectives | Phase 01 • Collect 73 Electro particles within 120 seconds Phase 02 • Defeat 3 enemies within 60 seconds |
|---|---|
| Special Rules | Phase 01 • None Phase 02 • Enemies will be affected by Hydro |
| Recommended Weapons |
3.
▲During Phase 2, Kirara will have to constantly apply Dendro to the opponents, which makes Sacrifical Sword the prime choice to take here. |
| Recommended Artifacts |
▲As most of Kirara's damage in the second phase will be Dendro, picking Deepwood Memories as your artifact set will help boost its damage and give you a better chance at clearing within the time limit. |
| Guidelines | Try to focus on stacking Kirara's HP to build up her shields, as the self-bloom damage in Phase 2 may also prove deadly to you. |
Ningguang
| Challenge Objectives | Phase 01 • Defeat 12 enemies while protecting the Monolith |
|---|---|
| Special Rules | Phase 01 • None |
| Recommended Weapons |
▲This is a DPS check with Skill Knowledge, so we recommend packing a 5-star weapon that either boosts Ningguang's Normal, Charged, or Elemental DMG. |
| Recommended Artifacts |
▲Go for either of these sets, whichever has better substats as the only thing Ningguang needs here is good ATK, and good CRIT stats. |
| Guidelines | Enemies will try to focus down the Monolith in the center. Use Ningguang's Jade Screen to cut off their ranged attacks while you deal with the melee units first. |
Ningguang Envisaged Echoes Guide
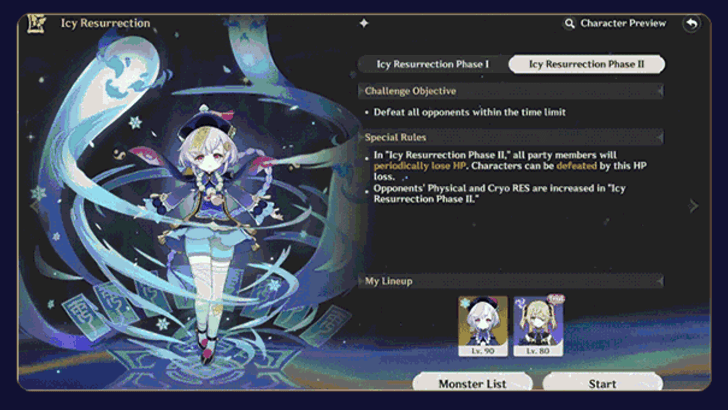
Qiqi
| Challenge Objectives | Phase 01 • Light up all the Cryo Monuments within a short time Phase 02 • Defeat 1 enemy within 90 seconds |
|---|---|
| Special Rules | Phase 01 • None Phase 02 • All Party Members periodically lose HP • Enemy Physical and Cryo resistance increased |
| Recommended Weapons |
▲During Phase 2, having Qiqi's Elemental Skill up will be necessary for her survival, so the Sacrificial Sword is your best option here. |
| Recommended Artifacts |
▲Take advantage of the arena's decaying HP mechanic to empower Qiqi's Elemental Skill to do damage. Using 4-pc. Song of Days Past can especially help in damage contribution if you have it available. |
| Guidelines | Stack up on ATK in Qiqi's artifacts and weapons to ensure that she can keep both her and Fischl in healthy conditions, as you will need both units to complete this challenge. |
Jean
| Challenge Objectives | Phase 01 • Protect the target and defeat all opponents |
|---|---|
| Special Rules | Phase 01 • Your character will be periodically inflicted with Smoldering Flames during this challenge, causing you to continuously take Pyro DMG until the inflicted element is removed. |
| Recommended Weapons |
▲The gimmick here is to toss enemies away using Jean's Elemental Skill, so having the Sacrificial Sword allows for more frequent usage of this skill. |
| Recommended Artifacts |
▲Due to the Smoldering Flames, you want to be able to use your Elemental Burst as often as possible to cleanse the Smoldering Flame aura off of you for a short time, as well as healing you. |
| Guidelines | We recommend focusing on your Energy Recharge to keep yourself alive. As you will be dealing with enemies via throwing them away with your Elemental Skill, you can forego damage stats. |
Keqing
| Challenge Objectives | Phase 01 • Light up all the Electro Monuments within a short time Phase 02 • Defeat all opponents within the time limit |
|---|---|
| Special Rules | Phase 02 • During the "Driving Thunder Phase II" challenge, every 3 targets destroyed will grant the following buff for 30s: Character gains an Electro DMG Bonus and increased Elemental Mastery. • During the "Driving Thunder Phase II" challenge, Fruits of the Vine will periodically appear and pursue characters, applying Dendro to opponents they touch. Fruits of the Vine will explode after touching a character, applying Dendro to characters and opponents within their AoE once more. |
| Recommended Weapons |
3.
▲Keqing will be fighting alone, so pack any weapon that unconditionally benefits her, whether it is an ATK or a CRIT weapon. |
| Recommended Artifacts |
▲A pair of 2-pc. Thundering Fury and 2-pc. Gladiator's Finale or any ATK +18% set can give Keqing the solo edge she needs to kill off all the opponents. |
| Guidelines | Keqing has quick Normal and Charged Attack animations, and these should be taken advantage of, especially when her Charged Attacks are infused with Electro, as it will make up a good chunk of her solo damage. |
Zhongli
| Challenge Objectives | Phase 01 • Use the Resonant Stone Pillars to break the rock barrier Phase 02 • Defeat all opponents within the time limit |
|---|---|
| Special Rules | Phase 02 • During the "Vago Mundo Phase II" challenge, every 5 Assisting Crystals you destroy will grant this buff for 30s: When characters use Normal Attacks, a shockwave will be unleashed at the character's position, dealing Physical DMG. This effect can be triggered once every 4.5s. • During the "Vago Mundo Phase II" challenge, opponents deal increased DMG to characters not protected by shields. |
| Recommended Weapons |
3.
▲Zhongli needs weapons that increase his CRIT stats, as both his Normal Attacks and Elemental Burst can benefit from it. |
| Recommended Artifacts |
▲Use a combination of 2-pc. Archaic Petra and 2-pc. Noblesse Oblige to buff Zhongli's Elemental damage, or use 4-pc. Gladiator's Finale to buff his Normal Attacks. |
| Guidelines | Zhongli's success for this challenge is dictated by how fast he can charge his Elemental Burst, how hard he hits with his Normal Attacks, and especially how often he can destroy Assisting Crystals. |
Zhongli Envisaged Echoes Guide
Kazuha
 |
|
| Challenge Objectives | Phase 01 • Defeat all opponents within the time limit Phase 02 • Defeat all Bounty opponents within the time limit |
|---|---|
| Special Rules | Phase 02 • In "Scarlet Leaves Pursue Wild Waves: Phase II," the All Elemental and Physical RES of opponents is increased. Trigger mechanisms on the field by using Plunging Attacks with the designated Elemental Infusion to release shockwaves and weaken opponents. |
| Recommended Weapons |
3.
▲Kazuha highly benefits from EM and ER weapons generally, and CRIT or ATK weapons if running him as a hybrid. |
| Recommended Artifacts |
▲Use 4-piece Viridescent Venerer for general usage, especially if running him with his Elemental Mastery build, or use 2-piece combinations to give more power to his Normal Attacks between skill cooldowns. |
| Guidelines | Take note of Kazuha's range for his abilities, as well as the PHEC (Pyro, Hydro, Electro, Cryo) hierarchy when swirling the slimes. Use Charged Attacks to forcibly separate smaller opponents if looking to Swirl a particular element. |
Ganyu
 |
|
| Challenge Objectives | Phase 01 • Destroy all targets with 3 or less Normal/Charged Attacks Phase 02 • Defeat all opponents within the time limit |
|---|---|
| Special Rules | Phase 02 • In "Plenilune Gaze: Phase II," opponents will deal decreased DMG to Ice Lotuses. • In "Plenilune Gaze: Phase II," opponents' HP percentages will periodically become the same as the HP percentage of the opponent with the highest current HP percentage. • In "Plenilune Gaze: Phase II," moving rain clouds will appear on the field which apply Hydro to characters and opponents. |
| Recommended Weapons |
▲Ganyu benefits the most from Bows that boost her personal DMG either via synergistic passives or by virtue of being a CRIT or ATK stick. |
| Recommended Artifacts |
▲Ganyu can make great use of Blizzard Strayer due to her ability to perpetually Freeze all of the opponents in Phase II. |
| Guidelines | Focus on keeping the enemies Frozen in Phase II, keep them grouped up and deal damage to all of them consistently to prevent healing. |
Venti
 |
|
| Challenge Objectives | Phase 01 • Reach successive checkpoints within the time limit Phase 02 • Defeat all opponents within the time limit |
|---|---|
| Special Rules | Phase 01 • In the "Windborne Bard Phase I" challenge, collecting three Anemo particles will generate a Wind Current. Trigger mechanisms on the field by using Plunging Attacks with the designated Elemental Infusion to release shockwaves and weaken opponents. Phase 02 • In the "Windborne Bard Phase II" challenge, pullable floating bombs will intermittently appear. Attacking these bombs will cause them to explode after a short delay. • In the "Windborne Bard Phase II" challenge, torches will be extinguished one by one. |
| Recommended Weapons |
4.
▲Venti prefers Bows that either give Energy Recharge, Elemental Mastery, or increase Elemental or Swirl damage. |
| Recommended Artifacts |
▲Use 4-piece Viridescent Venerer for general usage, especially if running him with his Elemental Mastery build, or use 2-piece combinations with good substats to achieve a similar effect. |
| Guidelines | Remember to distance yourself slightly away from your targets when using Venti's Elemental Burst in order to group opponents better and Swirl the right elements. |
Dehya
 |
|
| Challenge Objectives | Defeat opponents within the time limit |
|---|---|
| Special Rules | • During the "Flame-Mane" challenge, where Dehya takes DMG, she gains "Flamerage": Each stack of Flamerage increases her DMG by 10%, CRIT Rate by 6%, and CRIT DMG by 18%. This effect lasts for 12 seconds and can stack up to 5 times, with each stack having an independent duration. • During the "Flame-Mane" challenge, a bolt of lightning dealing Electro DMG will strike at Dehya's position every 10 seconds. • During the "Flame-Mane" challenge, Dehya will periodically regenerate Energy. |
| Recommended Weapons |
▲Dehya values weapons that either increase her CRIT, ATK, or Elemental Skill and Burst DMG. |
| Recommended Artifacts |
▲Dehya can make full use of 4-pc. Vourukasha's Glow to boost her damage, but can also clear the challenge without a specific set bonus so long as you have tthe correct stats. |
| Guidelines | Keep your Elemental Skill up as long as possible while weaving in your Elemental Burst between casts. Repeat this process until the Jadeplume Terrorshroom falls. |
Raiden Shogun
 |
|
| Challenge Objectives | Defeat all opponents within the time limit |
|---|---|
| Special Rules | • "Thunder Surges" will appear at intervals during the "Plane of Euthymia" challenge. During Thunder Surges, Raiden Shogun's CRIT DMG will be increased by 150%. • When an active character hits an opponent with an attack during the "Plane of Euthymia" challenge, 4 Electro Elemental Particles will be generated. This effect can trigger once every 25s. |
| Recommended Weapons |
2.
▲Raiden Shogun simply wants weapons that can boost her Elemental Burst's damage as she will be using her Burst in tandem with the Thunder Surges. |
| Recommended Artifacts |
▲Raiden Shogun wants to reach around 280% Energy Recharge for comfort during this challenge. Emblem complements this requirement perfectly, and the Thunder Surges will allow you to forego CRIT DMG for more ER. |
| Guidelines | Funnel all your support's Energy into Raiden during the first few seconds, then use her Elemental Burst every Thunder Surge. All your Supports should be able to use their Elemental Bursts every time after the first rotation. |
Raiden Shogun Envisaged Echoes Guide
Shenhe
 |
|
| Challenge Objectives | Defeat all opponents within the time limit |
|---|---|
| Special Rules | • Maguu Kenki will receive the protection of a special ward during the Lonesome Transcendence challenge: When protected by Kenki Ward: Form One, the DMG it takes from characters' Normal/Charged/Plunging Attacks is increased by 150%. When protected by Kenki Ward: Form Two, the DMG it takes from characters' Elemental Skills/Bursts is increased by 150%. • During the "Lonesome Transcendence" challenge, characters affected by Shenhe's Icy Quill deal 50% increased DMG. |
| Recommended Weapons |
▲Shenhe either values weapons that allow her to increase the team's ATK or ER to let her Burst more often. Both are viable in this challenge as you will not be doing direct damage. |
| Recommended Artifacts |
▲Shenhe wants to be able to support the team's damage by providing ATK bonuses, which is something Noblesse can do. Otherwise, any Energy Recharge set works for her for more Burst uptime. |
| Guidelines | At the start and the halfway marks of every bar, use Shenhe's Hold Skill. You are free to weave Ayaka and Chongyun's Elemental Skills during the Normal Attack phase for more chip damage, but save both of their Elemental Bursts for their proper phases. Make sure that Ayaka's Elemental Burst is under the effect of either Shenhe's Elemental Skill or her Skill and Burst as that can singlehandedly burn through an entire phase. |
Yelan
 |
|
| Challenge Objectives | Phase 01 • Complete 3 objectives within the time limit: Collect the designated number of Anemo particles within the time limit Destroy the designated number of targets Defeat the designated number of opponents Phase 02 • Defeat opponents within the time limit |
|---|---|
| Special Rules | • During the Valley Orchid Phase II challenge, Elemental Nuclei will sequentially appear at the Pyro Regisvine's corolla and roots. Destroy both these Nuclei to stun the Pyro Regisvine. |
| Recommended Weapons |
▲Yelan either wants her signature weapon for damage, or Bows that provide Energy Recharge to get her Burst back up faster. |
| Recommended Artifacts |
▲Equipping Yelan with 4-pc. Emblem passively gives more Energy Recharge with its 2-pc. passive and an increase to Elemental Burst DMG with the 4-pc. bonus. |
| Guidelines | Save your Elemental Skill for when you meet enemies in the first phase, then use your Elemental Skill to recharge your Burst during the fight with the Pyro Regisvine. |
Nahida
 |
|
| Challenge Objectives | First half: Defeat as many opponents as possible within the time limit. Second half: Defeat opponents within the time limit. |
|---|---|
| Special Rules | • During the Physic of Purity challenge, the battle will be split into two halves. If a character defeats 10/20/30 opponents in the first half, then the Burning, Bloom, Hyperbloom, and Burgeon reaction DMG all party members deal in the second half will be increased by 50%/200%/400%. Additionally, the Hydro Tulpa in the second half of the battle will summon 3 Half-Tulpas at once. • During the first half battle of the Physic of Purity challenge, all party members will deal 50% increased Burning, Bloom, Hyperbloom, and Burgeon reaction DMG for 10s when Nahida deals Elemental Skill DMG to opponents. This effect can occur once every 1s. Max 4 stacks. |
| Recommended Weapons |
4.
▲Nahida values mainly Elemental Mastery weapons that help improve the Elemental DMG Bonus and CRIT Rate that her Ascension Passive gives her. |
| Recommended Artifacts |
▲Nahida can make use of 4-pc. Deepwood Memories for the Dendro RES shred benefits that it offers her as she will be On-Field for the duration of the challenge. |
| Guidelines | Utilize Burgeon in Phase 1 to take down groups of enemies and Hyperbloom in Phase 2 to effectively chip HP off of the Hydro Tulpa. |
Albedo
 |
|
| Challenge Objectives | Defeat all opponents within the time limit while protecting the alchemy equipment. |
|---|---|
| Special Rules | • In the "Kreideprinz" challenge, Albedo becomes a Hexerei character and gains the Hexerei: Secret Rite effect. • In the "Kreideprinz" challenge, use Geo attacks to break the crystals on the field. Doing so triggers an explosion that deals AoE Geo DMG. Crystals will spawn in waves. When all crystals within a wave are destroyed, new crystals will respawn after 10 seconds. |
| Recommended Weapons |
▲Albedo greatly values DEF-scaling weapons as this improves his Elemental Skill and part of his Elemental Burst, which are the main sources of his damage. |
| Recommended Artifacts |
▲Albedo makes use of 4-pc. Husk of Opulent Dreams due to it improving both his DEF and Geo DMG Bonus, thus improving his overall damage output. |
| Guidelines | Use your Charge Attack to knock enemies into the Solar Isotoma's range or to interrupt attacks, especially if the enemy is Ranged. |
Klee
 |
|
| Challenge Objectives | Defeat all opponents within the time limit while protecting the Bouncy Castle. |
|---|---|
| Special Rules | • In the "Fleeing Sunlight" challenge, Klee becomes a Hexerei character and gains the Hexerei: Secret Rite effect. • In the "Fleeing Sunlight" challenge, the Bouncy Castle has three modes: Charge, Defense, Attack. In Charge mode, the castle will continuously accumulate energy on its own. If an enemy enters its detection range, the castle will stop charging and enter Defense mode. If Klee defeats an enemy while the castle is in Charge or Defense mode, the castle's charging progress will increase. Once fully charged, the castle enters Attack mode, where it fires a barrage of bullets at the enemy and restores to Klee 50% of her Max HP. However, the castle will be defenseless in this state, so you'll have to protect it and keep it from being destroyed! • When the Bouncy Castle is in Attack mode, Klee's combat capabilities are also enhanced — each time she deals Pyro DMG, she gains a Bouncy mark that lasts 10s, and at 3 marks, all marks are consumed to deal AoE Pyro DMG. Bouncy marks can be gained once every 2s, and the AoE Pyro DMG can be triggered once every 5s. This effect is removed when the Bouncy Castle exits Attack mode. |
| Recommended Weapons |
4.
▲Klee values most Catalyst weapons that give her either CRIT, ATK, or Elemental DMG Bonus. |
| Recommended Artifacts |
▲All of Klee's attacks deal Pyro DMG, and with her being alone, Lavawalker becomes her Best-in-Slot for her particular Echo challenge. |
| Guidelines | Use Klee's Charged Attacks to lump enemies together or displace them to prevent them from dealing damage to the Bouncy Castle. |
Ayaka
 |
|
| Challenge Objectives | Phase 01 • Collect the designated number of Electro particles within the time limit. • Destroy the designated number of targets. Phase 02 • Defeat all opponents within the time limit. |
|---|---|
| Special Rules | Phase 01 • None Phase 02 • In the "Frostflake Heron Phase II" challenge, within the time limit, defeat opponents on the field to recharge the amplification device. When the device is fully charged, it will be activated, periodically unleashing shockwaves that apply Hydro to opponents and restoring Stamina to characters. When characters are within range of the device, CRIT DMG of Cryo ATKs increases by 200%. If time runs out before all opponents are defeated, the device will deactivate and will not provide any buffs. |
| Recommended Weapons |
▲Ayaka either wants her signature weapon for damage, or other swords that provide high CRIT Rate, CRIT DMG, or ATK. |
| Recommended Artifacts |
▲Equipping Ayaka with 4-pc. Blizzard passively gives more Cryo DMG Bonus and increased CRIT Rate when an enemy gets hit by Cryo or gets Frozen. |
| Guidelines | Phase 01 • Utilize Ayaka's alternate sprint to gather all the Electro particles in the water and make Cryo platforms for her to stand and recover stamina. Phase 02 • Take advantage of Ayaka's Cryo-infused Normal Attacks to freeze all the enemies at the pond. You will also get help of the Hydro device in the middle of the battle area that provides AoE Hydro attacks and restores stamina. |
Ayato
 |
|
| Challenge Objectives | Defeat all opponents within the time limit |
|---|---|
| Special Rules | • In the "Pillar of Fortitude" challenge, there will be a Leader. The Leader also has Attendants that serve as its guards. Each Attendant will increase the Leader's All Elemental RES and Physical RES by 50%. The Attendants will restore the Leader's HP every 5s, with each Attendant able to restore 35% HP. When there are no Attendants on the field, the Leader will lose the above enhancement and restoration effects. • In the "Pillar of Fortitude" challenge, a Pyro amplification device periodically applies Pyro to nearby opponents. Before the Pyro application is removed, the opponents' All Elemental RES and Physical RES are increased. • In the "Pillar of Fortitude" challenge, for every Pyro target destroyed, a number of Elemental Particles will be generated. For every 3 Pyro targets destroyed, characters gain a buff that increases ATK SPD by 35% and reduces the CD of Elemental Skills and Elemental Bursts by 35% for 20s. |
| Recommended Weapons |
▲ Ayato values any weapon that can give him increases to CRIT or ATK, or give bonus damage some other way. |
| Recommended Artifacts |
▲Ayato can utilize either Heart of Depth or Gladiator's Finale, with priority placed on whichever set gives him better substats. |
| Guidelines | • Make sure to break all the Pyro Balls when they spawn, as these give substantial buffs and Elemental Energy that make it easier to have empowered and more potent rotations during combat. • Balance your damage when facing the Kairagi in Wave 2 as it is imperative to defeat both of them at the same time in order to clear the Echo Challenge. |
How to Unlock Envisaged Echoes
Collect Keys of Echoes
Envisaged Echoes can be unlocked using Key of Echoes. These keys come from completing challenges during the Imaginarium Theater season, with one key per season!
Get the Required Characters to Level 90 and Friendship Level 8
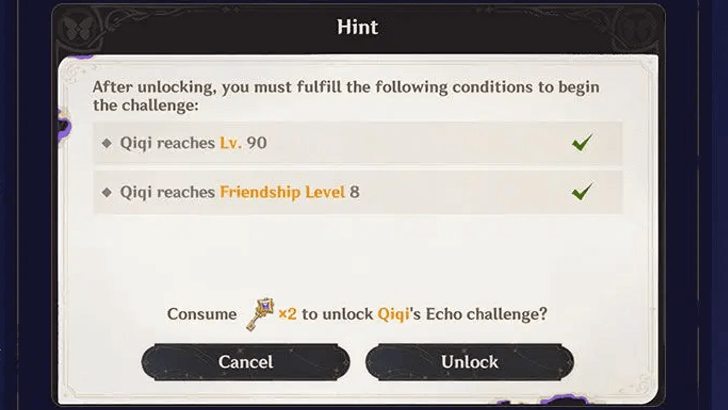
In order to participate in a character's Envisaged Echoes challenge, you need to have them at Character Level 90, as well as have them at Friendship Level 8!
Take note that you can unlock their challenges first and then coming back later once your character meets the performance requirements.
| Available Characters | ||
|---|---|---|
|
|
|
|
|
|
|
|
|
|
|
|
|
|
|
|
|
|
|
|
|
|
|
|
|
|
- | - |
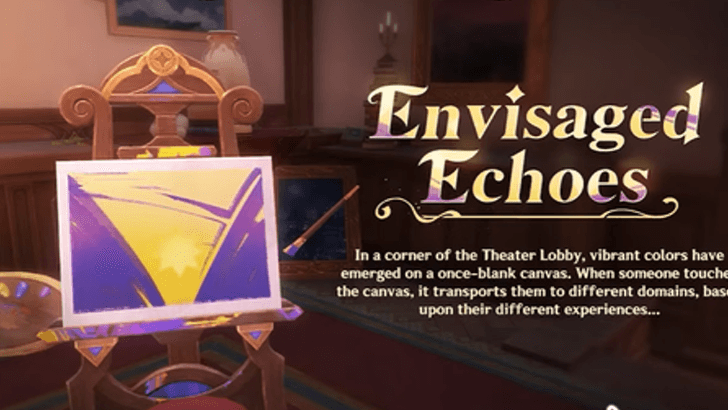
What are Envisaged Echoes?
New Character Effects and Cosmetics
New character effects were previewed in the 4.8 Livestream, showcasing character trail effects when they move!
These effects are called Envisaged Echoes, and are similar to Thespian Tricks that you can obtain through Imaginarium Theater.
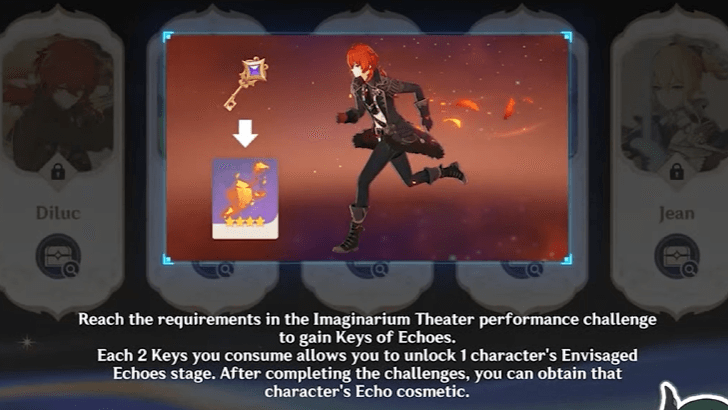
Use 2 Keys for Character Challenges

When gaining 2 Keys of Echoes, you can use them to unlock a character's Envisaged Echoes challenge. Completing this stage with that character earns you their Echo cosmetic.
You can obtain 2 keys from unlocking the Envisaged Echoes feature the first time, and 1 key every Imaginarium Theater season.
Individual Character Challenges
Players must go through a challenge designed for the specific character in order to earn their Echo cosmetic.
These challenges may be as straightforward as regular combat, or as complicated as using character-specific mechanics.
Envisaged Echoes Preview
These are only sneak peeks of the now-available character trail effects. Judging from Imaginarium Theater being a permanent gamemode, we can expect more trails for more characters as the days pass.
These cosmetics serve as proof of your mastery over that character and their mechanics!
Released in Version 4.8
Envisaged Echoes was released into the Imaginarium Theater permanent gamemode in Version 4.8 on July 17, 2024!
Version 4.8 Release Date and Characters
Genshin Impact Related Guides

Performance Tour Season 21 Guide
| Performance Tour March 2026 |
|---|
 How to Beat Season 21 (March 2026) How to Beat Season 21 (March 2026) |
Other Gameplay Guides
| Imaginarium Theater Guides | |
|---|---|
 Supporting Cast Request Board Supporting Cast Request Board |
 List of All Thespian Tricks List of All Thespian Tricks |
 How to Use Toy Medals How to Use Toy Medals |
 How to Use Fantasia Flowers How to Use Fantasia Flowers |
 Unbegun, Unending Story Quest Unbegun, Unending Story Quest |
Envisaged Echoes |
 How to Get Lunar Arcana How to Get Lunar Arcana |
|
Envisaged Echoes Stage Guides
 The Dark Side of Dawn
 Dandelion Knight
 Eclipsing Star
 Cat Upon the Eaves
 Icy Resurrection
 Driving Thunder
 Vago Mundo
Comment
Keqing is hard - done only with stats - 2300 dmg 65% crit 220% crit dmg + 123% energy recharge + electric dmg artifact + 2x18% dmg sets
Author

Envisaged Echoes Guide


Rankings
Gaming News


![Monster Hunter Stories 3 Review [First Impressions] | Simply Rejuvenating](https://img.game8.co/4438641/2a31b7702bd70e78ec8efd24661dacda.jpeg/thumb)
Popular Games

Genshin Impact Walkthrough & Guides Wiki
Honkai: Star Rail Walkthrough & Guides Wiki
Umamusume: Pretty Derby Walkthrough & Guides Wiki
Pokemon Pokopia Walkthrough & Guides Wiki
Resident Evil Requiem (RE9) Walkthrough & Guides Wiki
Monster Hunter Wilds Walkthrough & Guides Wiki
Wuthering Waves Walkthrough & Guides Wiki
Arknights: Endfield Walkthrough & Guides Wiki
Pokemon FireRed and LeafGreen (FRLG) Walkthrough & Guides Wiki
Pokemon TCG Pocket (PTCGP) Strategies & Guides Wiki


Recommended Games
Diablo 4: Vessel of Hatred Walkthrough & Guides Wiki
Cyberpunk 2077: Ultimate Edition Walkthrough & Guides Wiki
Fire Emblem Heroes (FEH) Walkthrough & Guides Wiki
Yu-Gi-Oh! Master Duel Walkthrough & Guides Wiki
Super Smash Bros. Ultimate Walkthrough & Guides Wiki
Pokemon Brilliant Diamond and Shining Pearl (BDSP) Walkthrough & Guides Wiki
Elden Ring Shadow of the Erdtree Walkthrough & Guides Wiki
Monster Hunter World Walkthrough & Guides Wiki
The Legend of Zelda: Tears of the Kingdom Walkthrough & Guides Wiki
Persona 3 Reload Walkthrough & Guides Wiki


All rights reserved
Copyright© 2012-2024 HoYoverse — COGNOSPHERE. All Rights Reserved.
The copyrights of videos of games used in our content and other intellectual property rights belong to the provider of the game.
The contents we provide on this site were created personally by members of the Game8 editorial department.
We refuse the right to reuse or repost content taken without our permission such as data or images to other sites.
why are we putting trial characters with the most horrendous builds ever in here PLEASE STOOOOOPP