Geoculus Locations and Interactive Map
✉ Send your thoughts in our Genshin 6.4 Patch Survey!
★ Exclusive: Dive back in time with the Meta History
◆ Hot: Version 6.4, Luna 5 Codes
◆ Builds: Varka, Flins, Skirk, Escoffier
◆ Events: Travelers' Tales, He Who Caught the Wind
◆ Future: Linnea, Version 6.5 Luna VI
There are 131 Geoculus used to upgrade Liyue Statues of the Seven in Genshin Impact. See all Geoculus locations and how to get and use them here!
| Elemental Oculus Items | |||
|---|---|---|---|
 All Oculi All Oculi |
 Anemoculus Anemoculus |
 Geoculus Geoculus |
 Electroculus Electroculus |
 Dendroculus Dendroculus |
 Hydroculus Hydroculus |
 Pyroculus Pyroculus |
 Lunoculus Lunoculus |
List of Contents
Geoculus Interactive Map and Locations
Geoculus Map
| ・Click on the arrow in the upper left corner to access our sidebar to check all other pins and even search for individual pins. ・Pins checked off the map will reflect in the list below. We encourage users to sign up and log in to save your progress with the map. |
| Item | Area | How to Get |
|---|---|---|
| Geoculus 1 |
Bishui Plain | 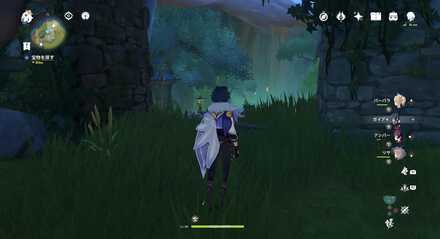 Location: In the deepest part of the ruins. Must complete The Chi of Yore world quest first. Use the Geo Traveler's Elemental Skill and create a platform to reach it. |
| Geoculus 2 |
Bishui Plain | 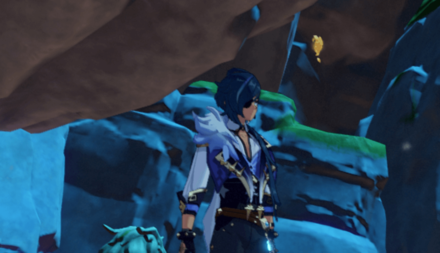 Location: Hidden inside the cave above a Ruin Guard. |
| Geoculus 3 |
Bishui Plain | 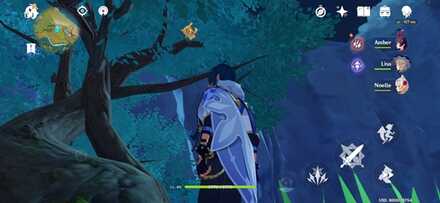 Location: Climb the tree to get to the geoculus. |
| Geoculus 4 |
Bishui Plain |  Location: Inside a small cave near the pond with waterfalls. |
| Geoculus 5 |
Bishui Plain |  Location: Create a scaffold with Geo Traveler's skill on the bridge and jump from there. |
| Geoculus 6 |
Bishui Plain |  Location: Climb a nearby house, jump off, and glide from there. |
| Geoculus 7 |
Bishui Plain |  Location: Under the eaves of a house, just climb the walls to get it. |
| Geoculus 8 |
Bishui Plain | 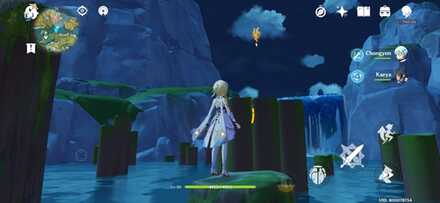 Location: Create scaffold on top of some logs to reach the Geoculus. |
| Geoculus 9 |
Bishui Plain | 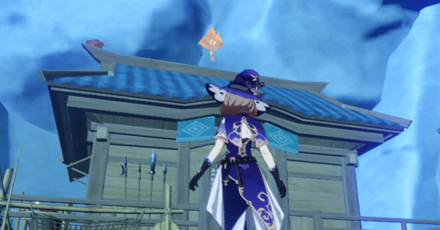 Location: The Geoculus is on top of the roof, you'll need to climb the nearby mountain wall and jump from there to land on the roof. |
| Geoculus 10 |
Bishui Plain |  Location: Jump off the nearby tree and glide to the Geoculus in the middle of the path. |
| Geoculus 11 |
Bishui Plain | 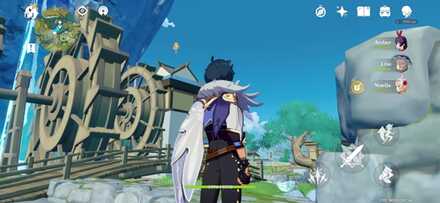 Location: On top of a tower, climb the nearby mountain and drop down from there. |
| Geoculus 12 |
Bishui Plain | 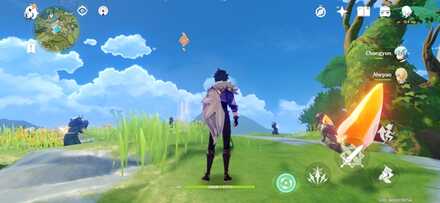 Location: Climb the tree on top of the mountain and glide from there. |
| Geoculus 13 |
Bishui Plain | 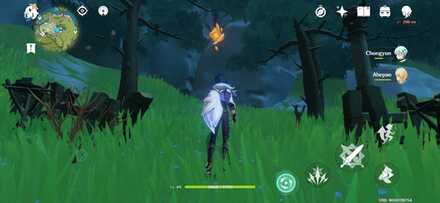 Location: Up in the air on top of a chest. |
| Geoculus 14 |
Bishui Plain |  Location: Jump on top of a rock right by the water. |
| Geoculus 15 |
Bishui Plain | 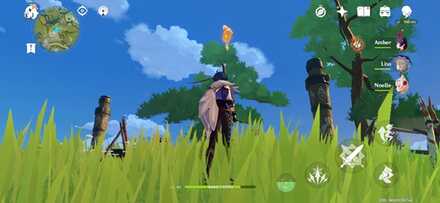 Location: On top of a hill, you can get it by jumping from one of the nearby poles. |
| Geoculus 16 |
Bishui Plain | 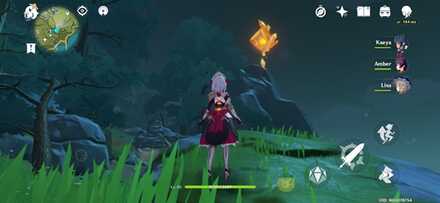 Location: Jump on top of the rock south of Wuwang Hill. |
| Geoculus 17 |
Bishui Plain | 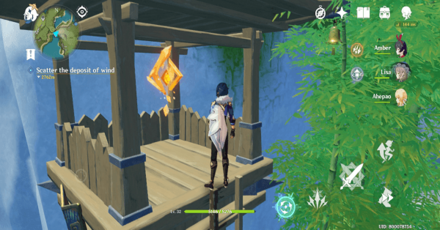 Location: Climb the tower near the Teleport Waypoint. |
| Geoculus 18 |
Bishui Plain |  Location: Up in the air above a bridge, climb the nearby hill and glide from there. |
| Geoculus 19 |
Bishui Plain |  Location: Climb the bamboo pole by the Treasure Hoarder camp. |
| Geoculus 20 |
Bishui Plain |  Location: In between the circular ruins, guarded by a Ruin Hunter. |
| Geoculus 21 |
Bishui Plain |  Location: Glide between the hole to catch the Geoculus. |
| Geoculus 22 |
Bishui Plain |  Location: Swim under the bridge. |
| Geoculus 23 |
Bishui Plain |  Location: Under a gap in the ruins. |
| Geoculus 24 |
Bishui Plain |  Location: Climb the ruin walls around the pond and jump to the Geoculus. |
| Geoculus 25 |
Bishui Plain |  Location: Climb the giant rock overlooking the water. |
| Geoculus 26 |
Bishui Plain |  Location: On top of the rock, you can climb the tree next to it to reach it. |
| Geoculus 27 |
Bishui Plain |  Location: Above the rock is a Geoculus, you'll need to use Geo Traveler's Elemental Skill to create a scaffold. |
| Geoculus 28 |
Bishui Plain |  Location: Climb the tree stump on the hill. |
| Geoculus 29 |
Bishui Plain |  Location: Climb the roof of one of the Hilichurl houses. |
| Geoculus 30 |
Bishui Plain |  Location: Inside a wind barrier, climb the nearby hill and glide from there. |
| Geoculus 31 |
Bishui Plain |  Location: Hidden up on a tree on top of a hill. |
| Geoculus 32 |
Bishui Plain |  Location: Climb one of the supporting beams at Wangshu Inn. |
| Geoculus 33 |
Bishui Plain | 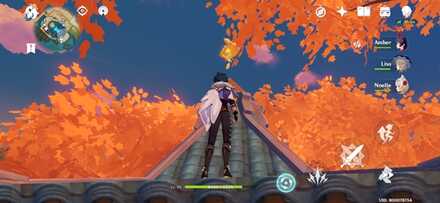 Location: At the very top of the roof of Wangshu Inn. |
| Geoculus 34 |
Bishui Plain | 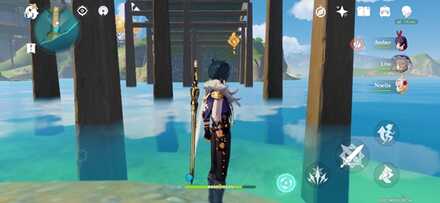 Location: Under the bridge exiting Wangshu Inn. |
| Geoculus 35 |
Bishui Plain | 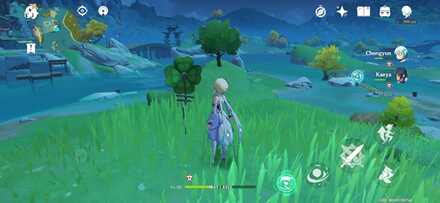 Location: Use Anemo Skill on the windmill to activate a wind current and use it to reach the Geoculus. |
| Geoculus 36 |
Bishui Plain | 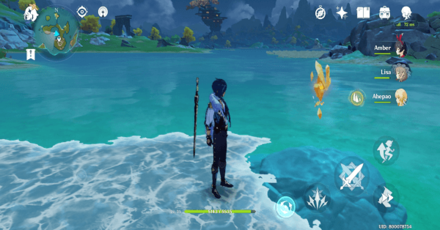 Location: The Geoculus is in the middle of the lake being guarded by an Abyss Mage and some Slimes. |
| Geoculus 37 |
Bishui Plain |  Location: Use the pressure plate to activate the wind current. |
| Geoculus 38 |
Bishui Plain |  Location: Climb the big tree with red leaves. |
| Geoculus 39 |
Bishui Plain |  Location: Above the water, climb the nearby log to reach it. |
| Geoculus 40 |
Bishui Plain |  Location: Activate the windmill with Anemo skill and use the wind current tunnel. |
| Geoculus 41 |
Bishui Plain |  Location: Use the Geo Skill to create a scaffold to reach the Geoculus. |
| Geoculus 42 |
Qiongji Estuary | 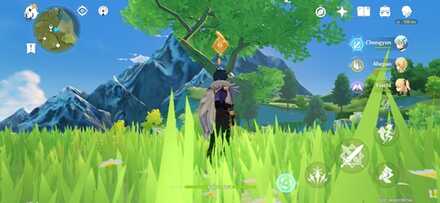 Location: Climb the tree near the teleport waypoint. |
| Geoculus 43 |
Qiongji Estuary |  Location: On the tracks inside the abandoned mine. |
| Geoculus 44 |
Qiongji Estuary | 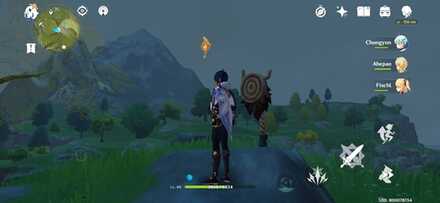 Location: Use Geo Skill to create a scaffold to reach the Geoculus. |
| Geoculus 45 |
Qiongji Estuary | 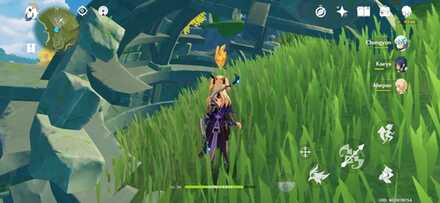 Location: Inside the ruins of the roof. |
| Geoculus 46 |
Qiongji Estuary | 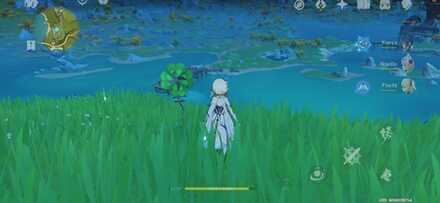 Location: Use an Anemo Elemental Skill on the windmill to activate a wind current and ride it. |
| Geoculus 47 |
Qiongji Estuary | 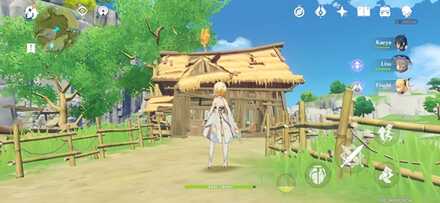 Location: Climb the roof of the straw house. |
| Geoculus 48 |
Qiongji Estuary |  Location: Glide down from the Statue of the Seven to the Geoculus on a rock. |
| Geoculus 49 |
Qiongji Estuary |  Location: Use Geo Skill to create a scaffold to reach the Geoculus. |
| Geoculus 50 |
Qiongji Estuary | 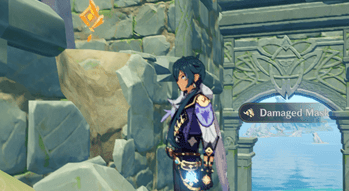 Location: Go through the tunnel and climb the ledge. |
| Geoculus 51 |
Qiongji Estuary |  Location: Climb on top of a pillar. |
| Geoculus 52 |
Qiongji Estuary | 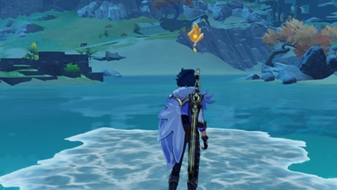 Location: Use Cryo Skill to freeze the water and jump to get the Geoculus. |
| Geoculus 53 |
Qiongji Estuary |  Location: Climb the steep rock near the Teleport Waypoint. |
| Geoculus 54 |
Qiongji Estuary |  Location: Climb the rocks and use Geo Traveler's construct to reach the Geoculus. |
| Geoculus 55 |
Qiongji Estuary |  Location: Use the Geo Skill on the wharf to reach the Geoculus. |
| Geoculus 56 |
Qiongji Estuary |  Location: Under the broken bridge. |
| Geoculus 57 |
Qiongji Estuary | 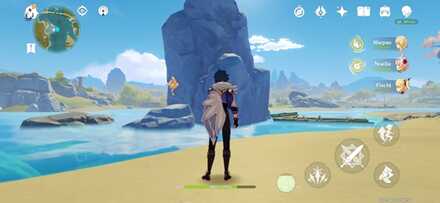 Location: Hidden behind the giant rock. |
| Geoculus 58 |
Qiongji Estuary | 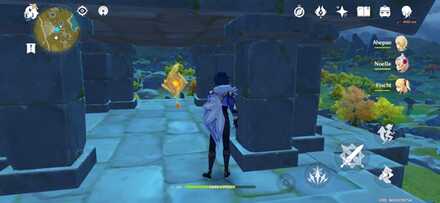 Location: Climb the second floor of the large building. |
| Geoculus 59 |
Qiongji Estuary | 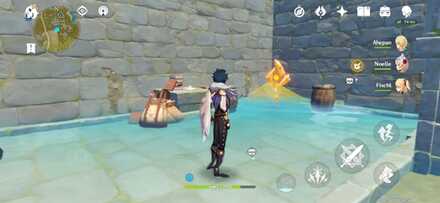 Location: Blow up the rocks to reveal the entrance underground and defeat the Ruin Guard. |
| Geoculus 60 |
Qiongji Estuary | 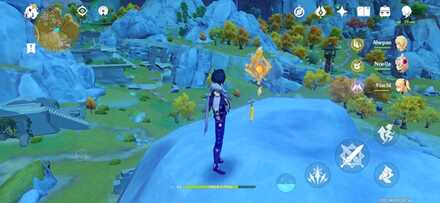 Location: Climb the mountain of rocks. |
| Geoculus 61 |
Qiongji Estuary |  Location: Use Anemo Skill on the windmill to activate a wind current to fly you to the Geoculus. |
| Geoculus 62 |
Qiongji Estuary |  Location: Glide across the bridge. |
| Geoculus 63 |
Qiongji Estuary | 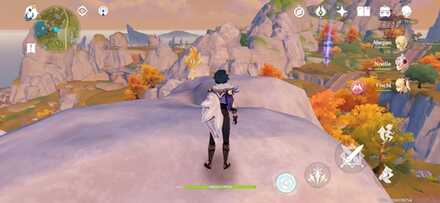 Location: Climb the mountain. |
| Geoculus 64 |
Qiongji Estuary | 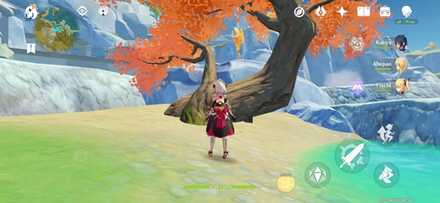 Location: Climb the tree. |
| Geoculus 65 |
Minlin | 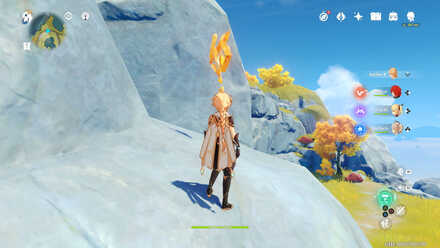 Location: Along a cliff, watch out for the 2 Eye of the Storms nearby. |
| Geoculus 66 |
Minlin | 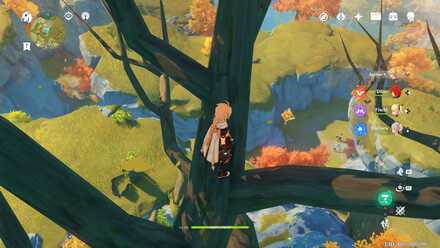 Location: Climb the huge tree next to it, then glide to the Geoculus. |
| Geoculus 67 |
Minlin |  Location: Climb the rock to get the Geoculus on top. |
| Geoculus 68 |
Minlin | 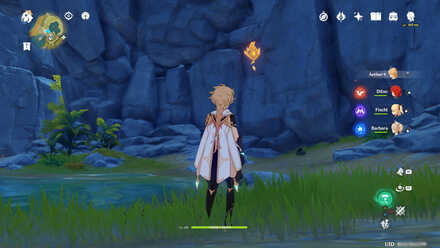 Location: Inside a cave, accessible from a lake in the Huaguang Stone Forest. |
| Geoculus 69 |
Minlin | 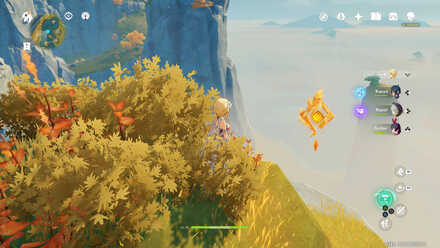 Location: On a mountain. It's recommended to glide starting from the Teleport Waypoint at Mt. Aozang. |
| Geoculus 70 |
Minlin | 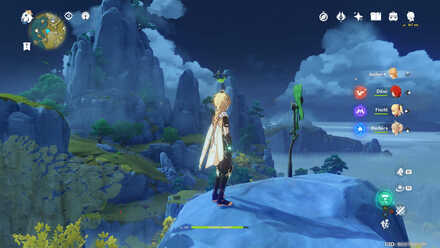 Location: Use Anemo skill on the windmill to activate a wind current and use it to get the Geoculus. |
| Geoculus 71 |
Minlin | 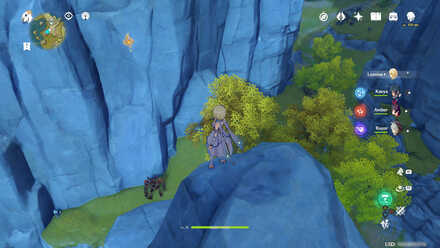 Location: Glide from a nearby mountain to get the midair Geoculus, but watch for the Ruin Guard when you land. |
| Geoculus 72 |
Minlin | 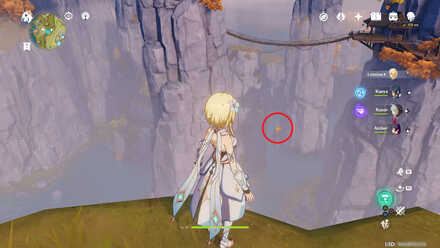 Location: In midair over the chasm. Accessible by gliding from a high place. |
| Geoculus 73 |
Minlin | 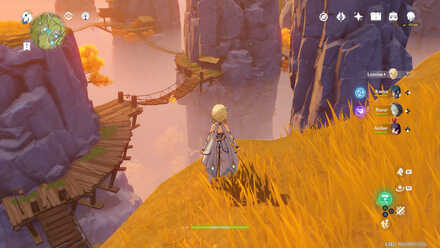 Location: Glide from a high place again, but watch for the Ruin Guard when you land. |
| Geoculus 74 |
Minlin | 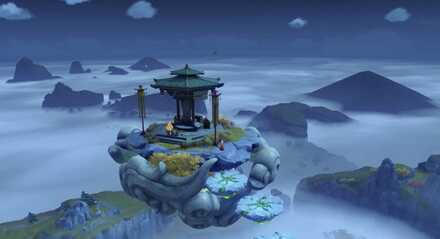 Location: Align 3 crane statues to create an upward wind current and fly to the floating island |
| Geoculus 75 |
Minlin | 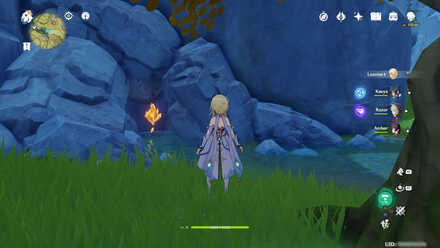 Location: In the gap between the rocks, at the end of the river. |
| Geoculus 76 |
Minlin | 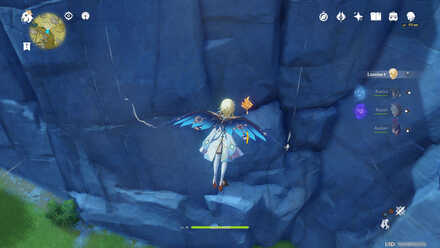 Location: Along the cliff, accessible by climbing from below or gliding from above. |
| Geoculus 77 |
Minlin | 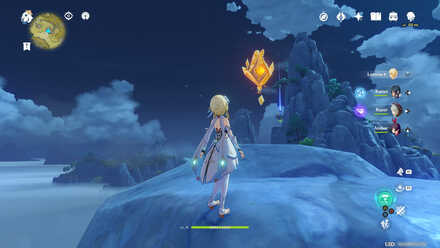 Location: On the rock on top of the mountain. Mind your stamina while climbing. |
| Geoculus 78 |
Minlin | 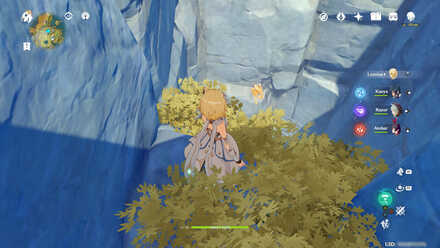 Location: In midair inside a cave. You grab it from the hole above or use the upward wind currents to glide towards it from below. |
| Geoculus 79 |
Minlin |  Location: On the roof of a small pagoda. It's recommended to glide from the Mt. Hulao Teleport Waypoint. |
| Geoculus 80 |
Minlin | 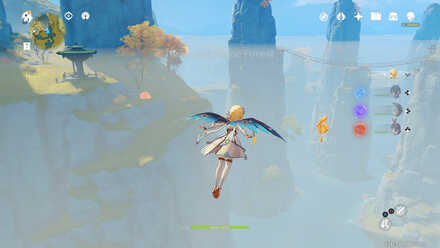 Location: In midair, a short distance away from the #79 Geoculus. Accessible by gliding from the Mt. Hulao Teleport Waypoint. |
| Geoculus 81 |
Minlin | 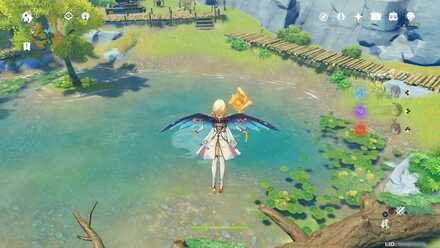 Location: Over a log in the pond. Glide from a nearby hill to reach it. |
| Geoculus 82 |
Minlin | 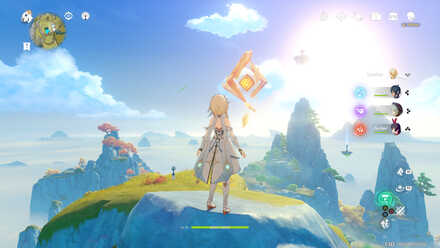 Location: On top of a mountain, accessible by climbing. |
| Geoculus 83 |
Minlin | 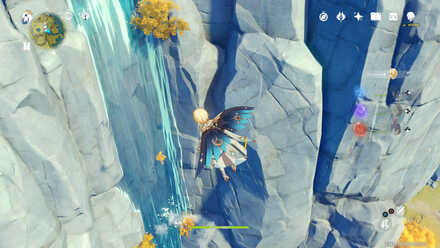 Location: Located along a waterfall, accessible by gliding from the Mt. Hulao Teleport Waypoint. |
| Geoculus 84 |
Minlin |  Location: Under the bridge. |
| Geoculus 85 |
Minlin | 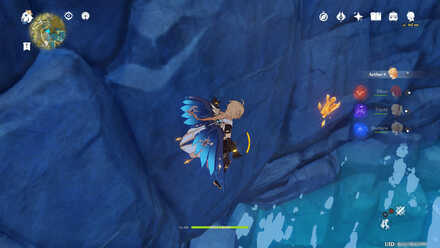 Location: Under the waterfall, accessible by gliding to the waterfall's basin from #84. |
| Geoculus 86 |
Minlin |  Location: Found underwater. You can drain the lake using the nearby switches. |
| Geoculus 87 |
Minlin | 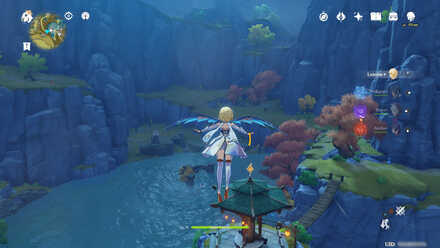 Location: On the roof of a small pagoda. Accessible by gliding from the nearby cliffs. |
| Geoculus 88 |
Minlin | 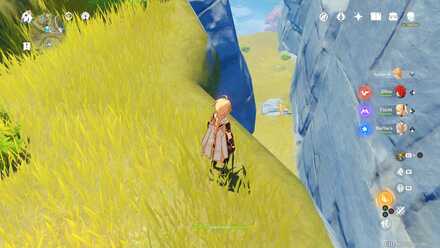 Location: In midair over the valley, accessible by gliding. |
| Geoculus 89 |
Minlin | 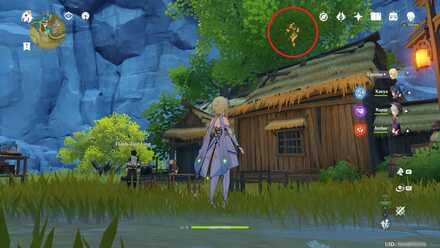 Location: On the roof of a house, accessible by climbing the tree next to it. |
| Geoculus 90 |
Minlin |  Location: In midair, next to a high mountain. Mind your stamina while climbing. |
| Geoculus 91 |
Minlin |  Location: In midair. You can grab this by going through the ruins on the side, but watch out for multiple Ruins Guards nearby. |
| Geoculus 92 |
Minlin | 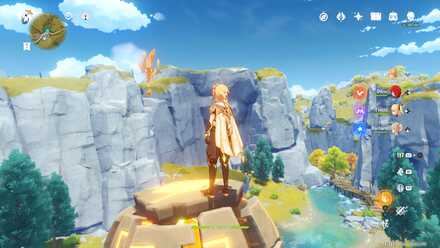 Location: On top of a rocky hill. accessible by using Geo Traveler's Elemental Skill to make stepping stones. |
| Geoculus 93 |
Minlin |  Location: In midair, accessible by climbing the hill next to it. |
| Geoculus 94 |
Minlin |  Location: Underground inside a cave. |
| Geoculus 95 |
Minlin | 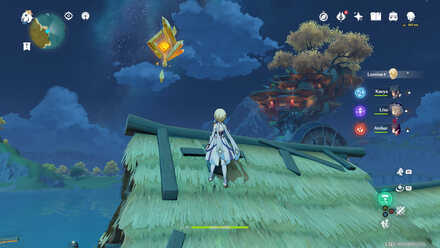 Location: On the roof of a building next to the water, accessible by climbing. |
| Geoculus 96 |
Minlin |  Location: On a rock, accessible by using Geo Traveler's Elemental Skill to make stepping stones. |
| Geoculus 97 |
Minlin |  Location: On top of one of the Nine PIllars of Peace. |
| Geoculus 98 |
Minlin |  Location: Climb the tree on the highest point of Cuijue Slope. |
| Geoculus 99 |
Minlin |  Location: On top of a broken bridge. Accessible by using Geo Elemental Skills to make stepping stones or gliding from the cliffs above. |
| Geoculus 100 |
Minlin | 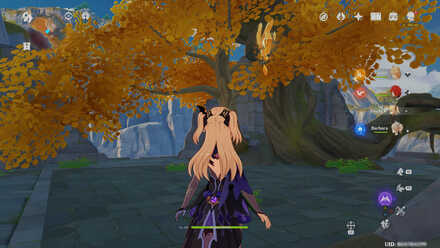 Location: On top of the ruins, accessible by climbing. |
| Geoculus 101 |
Minlin |  Location: Inside a broken tower at the lowest level. |
| Geoculus 102 |
Sea of Clouds | 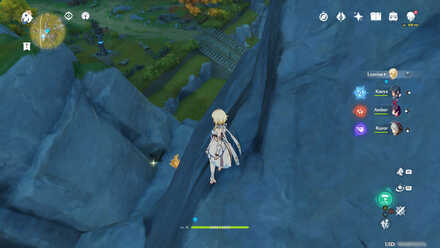 Location: Between the mountains near the Statue of the Seven. |
| Geoculus 103 |
Sea of Clouds | 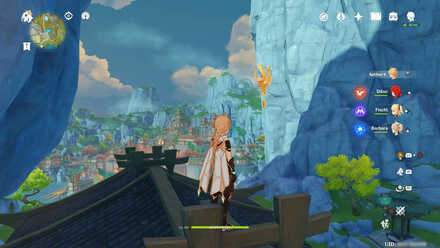 Location: Climb the roof of the building under the stone mountain arch. |
| Geoculus 104 |
Sea of Clouds | 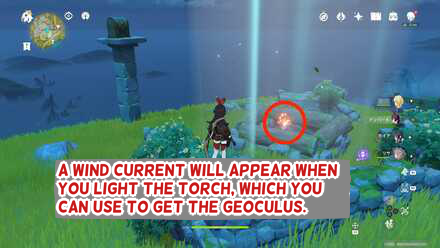 Location: Ignite the Pyro mechanism to generate a wind current. |
| Geoculus 105 |
Sea of Clouds | 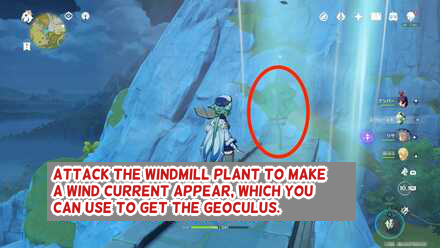 Location: Use an Anemo Elemental Skill on the windmill plant. |
| Geoculus 106 |
Sea of Clouds | 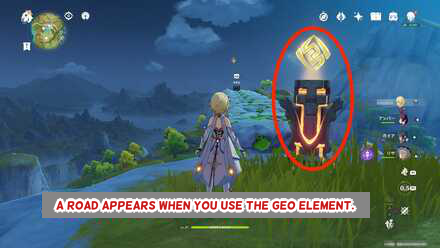 Location: Use a Geo Elemental Skill on the Geo mechanism. |
| Geoculus 107 |
Sea of Clouds | 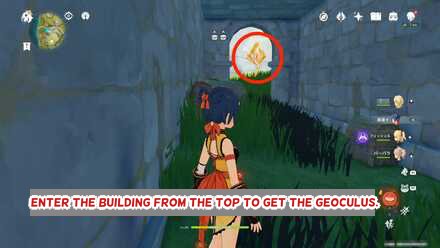 Location: Inside the ruins. You can enter from the top floor. |
| Geoculus 108 |
Sea of Clouds | 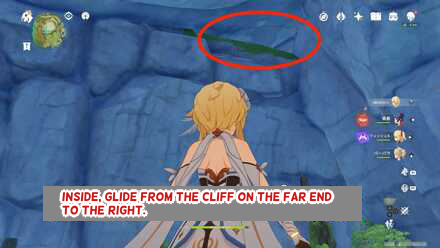 Location: Midair, located in a cavern under Mt. Tianheng with the entrance south of the mountain. |
| Geoculus 109 |
Sea of Clouds | 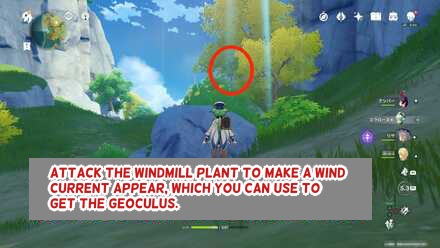 Location: Generate a wind current by using an Anemo Elemental Skill on the windmill plant. |
| Geoculus 110 |
Sea of Clouds | 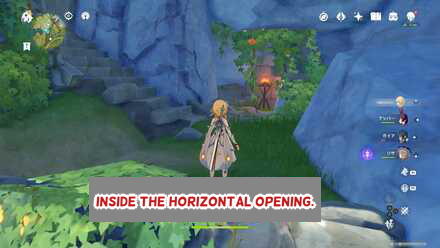 Location: Inside a cave, enter through the side gap. |
| Geoculus 111 |
Sea of Clouds | 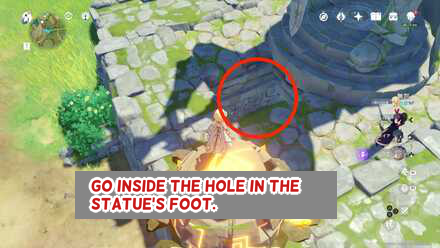 Location: Inside the hole under the foot of the statue. |
| Geoculus 112 |
Sea of Clouds |  Location: On the ship, a small distance from Liyue Harbor. Geo Elemental Skills will be needed here. |
| Geoculus 113 |
Sea of Clouds |  Location: Climb the tree branch on the ground. |
| Geoculus 114 |
Sea of Clouds | 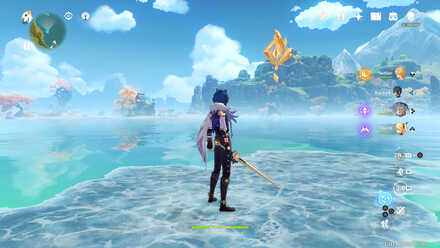 Location: On the water. You can use Cryo Elemental Skills to make a bridge. |
| Geoculus 115 |
Sea of Clouds | 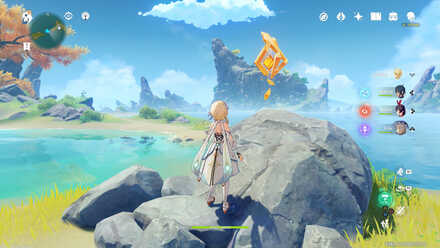 Location: On a boulder. Can be seen in the open. |
| Geoculus 116 |
Sea of Clouds |  Location: On top of a small mountain. |
| Geoculus 117 |
Sea of Clouds |  Location: On top of the largest mountain's peak at Guyun Stone Forest. Geo Elemental Skills may be needed as stepping stones. |
| Geoculus 118 |
Sea of Clouds | 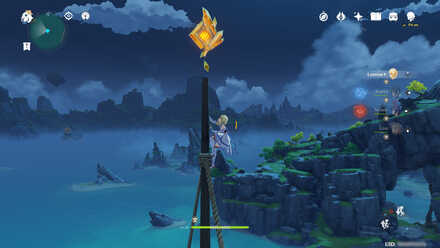 Location: On top of the ship. Accessible by gliding to the ship from a cliff and climbing up the central mast. |
| Geoculus 119 |
Sea of Clouds | 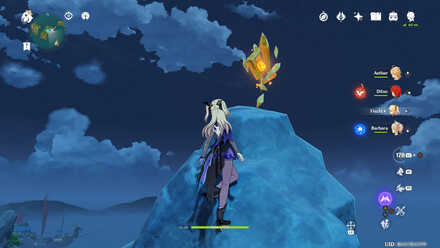 Location: On top of the mountain. Accessible by climbing, but watch for Ruin Guards. |
| Geoculus 120 |
Sea of Clouds | 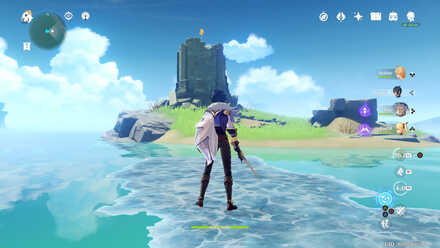 Location: Located in a broken tower, on a remote island on the eastern end of the area. |
| Geoculus 121 |
Lisha | 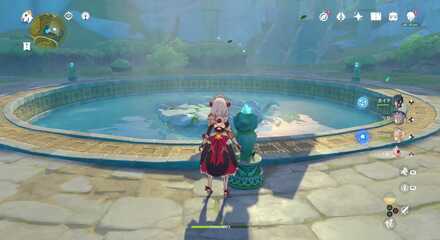 Location: Located underwater. You will need to drain the water by triggering the switches, and then by gathering the 3 Seelies around the wind barrier. Unlock a challenge to defeat 4 giant Hydro slimes within 60 seconds. Afterwards, you can open the Luxurious Chest to generate an upward wind current to grab the Geoculus above. |
| Geoculus 122 |
Lisha |  Location: Located above the Pyro elemental monument on the ruin's pillars. Accessible by gliding from a high point. |
| Geoculus 123 |
Lisha | 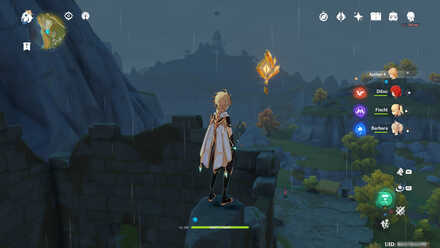 Location: In the ruins, located at the top of a half-destroyed tower which you can climb up to. |
| Geoculus 124 |
Lisha | 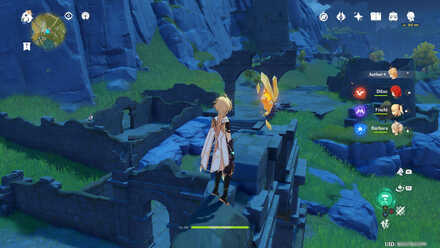 Location: In the ruins. Watch for Ruin Guards in the vicinity. |
| Geoculus 125 |
Lisha | 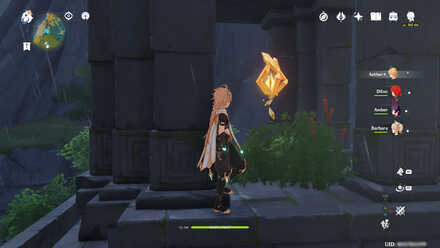 Location: In the ruins as well, accessible by climbing. Watch for Treasure Hoarders in the vicinity. |
| Geoculus 126 |
Lisha |  Location: On top of a machine located in the coal mine. Accessible by climbing. |
| Geoculus 127 |
Lisha |  Location: On top of the cliff next to the waterfall. |
| Geoculus 128 |
Lisha |  Location: Inside a Hilichurl house. Watch out for the Pyro Abyss Mage inside. |
| Geoculus 129 |
Lisha |  Location: In midair. Use Geo Elemental Skills to make stepping stones or glide from the nearby tower. |
| Geoculus 130 |
Lisha |  Location: On the roof of a Hilichurl house, accessible by gliding from the cliffs above. Watch for Hilichurls in the area. |
| Geoculus 131 |
Lisha |  Location: On the highest point of the ruins in Qingxu Pool. |
There are a total of 131 Geoculus that you can collect in the region of Liyue.
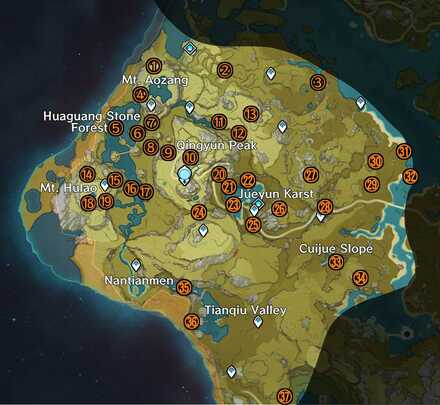
All Bishui Plain Geoculus Locations
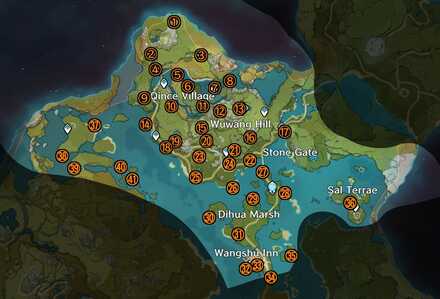 Click to open image in new tab |
|
| Tip: Use your browser's page search function to navigate the page by searching a Geoculus number from the map! |
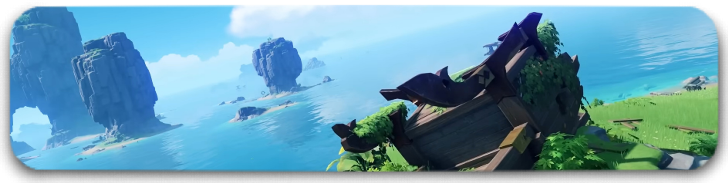
All Qiongji Estuary Geoculus Locations
 click to open image in new tab |
All Minlin Geoculus Locations
 click to open image in new tab |
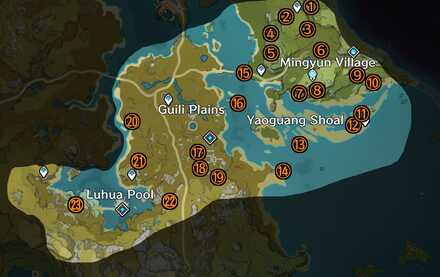
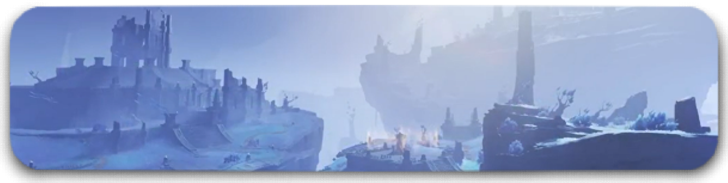
All Sea of Clouds Geoculus Locations
 click to open in new tab |
All Lisha Geoculus Locations
 click to open in new tab |
How to Use Geoculus
Upgrade Statue of the Seven
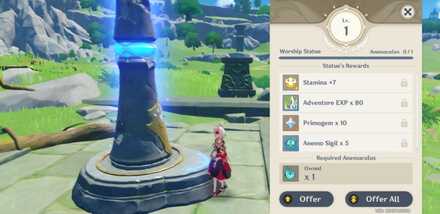
Geoculus is a collectible item found in the Liyue region. They are the equivalent of the Anemoculus in the Mondstadt region. Geoculus can be found in the wild and by exploring just like the Anemoculus.
Geoculus is used to level up the Statues of the Seven in Liyue to increase your stamina and claim rewards.
There are 130 total Geoculus to find and collect.
Extra Geoculus
After collecting all the Geoculi and leveling up the Statues of the Seven in Liyue, there would be 1 Geoculus left in your inventory. There are no known uses yet for the extra Geoculus.
How to Level Up Statues of the Seven
Search with Friends
If you're finding it hard to explore the terrains of Liyue, bring a friend or two to help you! Check out our friend request and co-op boards for potential exploration buddies:
| Genshin Co-Op Boards | ||
|---|---|---|
Needed to Complete Nine Pillars of Peace quest

Each time you level up the Statue of the Seven, you will be awarded with a Stone of Remembrance used for the Nine Pillars of Peace quest.
There are 9 Stone of Remembrance to collect. Completing the quest will reward you with a 5-star artifact.
Nine Pillars of Peace Quest Guide
Genshin Impact Related Guides

Map Guides for Teyvat Nations
| List of Region Map Guides | |
|---|---|
 Mondstadt Map Guide Mondstadt Map Guide
|
 Liyue Map Guide Liyue Map Guide |
 Inazuma Map Guide Inazuma Map Guide |
 Sumeru Map Guide Sumeru Map Guide |
 Fontaine Map Guide Fontaine Map Guide |
 Natlan Map Guide Natlan Map Guide |
 Nod-Krai Map Guide Nod-Krai Map Guide |
|
Map Guides for Other Areas
| List of Map Guides | |
|---|---|
 Enkanomiya Enkanomiya |
 Golden Archipelago Golden Archipelago |
 Dragonspine Dragonspine |
 The Chasm The Chasm |
 Sumeru Rainforest Sumeru Rainforest |
 Sumeru Desert Sumeru Desert |
 Veluriyam Mirage Veluriyam Mirage |
 Chenyu Vale Chenyu Vale |
 Simulanka Simulanka |
 Sacred City of Tollan Sacred City of Tollan |
 Easybreeze Holiday Resort Easybreeze Holiday Resort |
|
Oculi Location Guides
| Teyvat Oculus Guides | |||
|---|---|---|---|
| All Oculi |
Anemoculus |
Geoculus |
Electroculus |
| Dendroculus |
Hydroculus |
Pyroculus |
Lunoculus |
Other Oculus Map Guides
| Dendroculus Guides | |
|---|---|
| Rainforest Dendroculus | All Desert Dendroculus |
| Hadramaveth Dendroculus | Girdle of the Sands Dendroculus |
Comment
SAME HERE AND ITS DRIVING ME NUTS 🥜. how to fix ;-;
Author

Geoculus Locations and Interactive Map


Rankings
Gaming News


![Monster Hunter Stories 3 Review [First Impressions] | Simply Rejuvenating](https://img.game8.co/4438641/2a31b7702bd70e78ec8efd24661dacda.jpeg/thumb)
Popular Games

Genshin Impact Walkthrough & Guides Wiki
Honkai: Star Rail Walkthrough & Guides Wiki
Umamusume: Pretty Derby Walkthrough & Guides Wiki
Pokemon Pokopia Walkthrough & Guides Wiki
Resident Evil Requiem (RE9) Walkthrough & Guides Wiki
Monster Hunter Wilds Walkthrough & Guides Wiki
Wuthering Waves Walkthrough & Guides Wiki
Arknights: Endfield Walkthrough & Guides Wiki
Pokemon FireRed and LeafGreen (FRLG) Walkthrough & Guides Wiki
Pokemon TCG Pocket (PTCGP) Strategies & Guides Wiki


Recommended Games
Diablo 4: Vessel of Hatred Walkthrough & Guides Wiki
Cyberpunk 2077: Ultimate Edition Walkthrough & Guides Wiki
Fire Emblem Heroes (FEH) Walkthrough & Guides Wiki
Yu-Gi-Oh! Master Duel Walkthrough & Guides Wiki
Super Smash Bros. Ultimate Walkthrough & Guides Wiki
Pokemon Brilliant Diamond and Shining Pearl (BDSP) Walkthrough & Guides Wiki
Elden Ring Shadow of the Erdtree Walkthrough & Guides Wiki
Monster Hunter World Walkthrough & Guides Wiki
The Legend of Zelda: Tears of the Kingdom Walkthrough & Guides Wiki
Persona 3 Reload Walkthrough & Guides Wiki


All rights reserved
Copyright© 2012-2024 HoYoverse — COGNOSPHERE. All Rights Reserved.
The copyrights of videos of games used in our content and other intellectual property rights belong to the provider of the game.
The contents we provide on this site were created personally by members of the Game8 editorial department.
We refuse the right to reuse or repost content taken without our permission such as data or images to other sites.
Does anybody know where to find Sea of Clouds #5? I can't find it for the life of me smh