Elemental Reactions Guide and How it Works
★ Exclusive: Dive back in time with the Meta History
◆ Hot: Version 6.4, 6.4 Codes, Linnea, Version 6.5
◆ Builds: Varka, Flins, Skirk, Escoffier
◆ Events: Travelers' Tales, Sightseeing With Friends
◆ Endgame: Spiral Abyss (March 2026)
Elemental Reaction is a basic combat mechanic in Genshin Impact that occurs when two Elements are applied together, triggering a combination of effects. See how each Elemental Reactions work, chart for all reactions, and the best characters for it in this guide!
List of Contents
Elemental Reaction Mechanics
Two Elements Trigger a Reaction

An Elemental Reaction occurs when an entity affected with an Element is triggered by another. For example, a Cryo-affected enemy will cause Melt when hit by a Pyro attack. If the same Element was applied, the status will simply prolong.
Some reactions are more effective based on which Element was applied first. For example, Vaporize is 2x as effective if Hydro is the triggerer to an enemy with a Pyro status. Otherwise, a Pyro attack on a Hydro-afflicted enemy will only be 1.5x effective.
More Effective with Elemental Mastery

Elemental Mastery is a character stat that increases the effectiveness or damage of your Elemental Reactions. You can get Elemental Mastery by equipping weapons, levelling your artifacts, or activating character buffs.
List of All Elemental Reactions
Depending on the Elemental combination, each reactions will have different effects.
Here is the list of all Elemental Reactions in Genshin Impact:
| Elemental Reaction | Effect |
|---|---|
|
|
Deals AoE damage based on the reacted Element, then spreads that element to nearby enemies. |
|
|
Creates a crystal shard that you can pick up, which provides a shield effective against the element that created the reaction. |
| An instance of damage dealt will be multiplied based on the reacting Element. | |
| An instance of damage dealt will be multiplied based on the reacting Element. | |
| Target takes Electro damage over time. | |
| Target is temporarily frozen in place and stopping all enemy actions except Bosses. | |
| When a Frozen enemy is hit by Geo, or blunt attacks from a Claymore, Plunging or other heavy attacks, the enemy will Shatter, dealing Physical damage and removing the Frozen status. | |
| Target explodes, knocking back enemies in proximity and deals AoE Pyro damage. | |
| AoE Cryo damage occurs and decreases Physical resistance. | |
| Deals Pyro damage over time. | |
| Creates a Dendro Core. Dendro Cores explode when too many are made or after a set durtion. | |
| Pyro damage detones a Dendro Core, dealing AoE Dendro damage. | |
| Electro damage detones a Dendro Core, transforming it into a Sprawling Shot that deals Dendro damage. | |
| Afflicts the enemy with Quicken. This enables follow-up catalyze reactions. | |
| Deals increased Electro damage to a Quickened enemy. | |
| Deals increased Dendro damage to a Quickened enemy. |
Swirl
| Elemental Status | Reactor |
|---|---|
⬅︎
|
|
| Effect | |
| ・Current Elemental Status spreads and remains on the enemy. ・Anemo cannot be applied as an Elemental Status. |
|
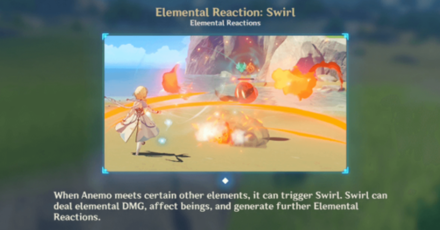
The Swirl elemental reaction activates when Anemo is used on an enemy that has Pyro, Hydro, Electro, or Cryo already applied to it. When a Swirl reaction occurs, the element reacted will spread to nearby enemies as AoE damage and apply that element to them as well.
For example, when Hilichurls and Cryo Slimes are standing on water, hitting the Cryo Slime with Anemo will spread Cryo to all nearby enemies, freezing the Hilichurls due to the Frozen reaction!
The only way to increase Swirl DMG is by increasing the Elemental Mastery of the character triggering the reaction.
Crystallize

| Elemental Status | Reactor |
|---|---|
⬅︎
|
|
| Effect | |
| ・Creates a Crystallize Shard, which provides an elemental shield to the active character. ・Shield created is more effective against the Element it reacted from. ・Status is removed until the element is depleted. |
|
Crystallize activates when a Geo attack hits an enemy that has Pyro, Hydro, Electro, or Cryo applied to it. When a Crystallize reaction occurs, the applied element on the enemy will disappear and a pickable elemental shield shard corresponding to the element will spawn.
The shield spawned will protect the player based on Geo character's Elemental Mastery. However, it will be more efficient in protecting against attacks corresponding to the element of the shield.
Vaporize

| Elemental Status | Reactor |
|---|---|
⬅︎
⬅︎
|
|
| Effect | |
| ・Increases an instance of Pyro or Hydro damage dealt multiplied based on which Element was used second. ・Elemental Mastery increases the damage dealt before the damage is multiplied. ・Status is removed until the element is depleted. |
|
Vaporize activates when Pyro comes into contact with Hydro and vice versa. When Vaporize occurs, the target will take increased multiplicative damage and their previously applied element will be removed.
Melt
| Elemental Status | Reactor |
|---|---|
⬅︎
⬅︎
|
|
| Effect | |
| ・Increases an instance of Cryo or Pyro damage dealt multiplied based on which Element was used second. ・Elemental Mastery increases the damage dealt before the damage is multiplied. ・Status is removed until the element is depleted. |
|
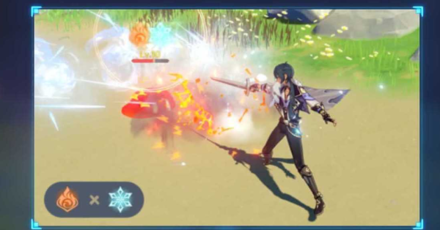
Melt occurs when Pyro and Cryo come into contact with one another. When a target is hit with Melt, the target will take increased multiplicative damage and their previously applied element will be removed.
Electro-Charged
| Elemental Status | Reactor |
|---|---|
| Effect | |
| ・Deals Electro damage over time and affects enemies affected with Hydro. ・Electro and Hydro statuses both remain briefly on the original enemy, and can trigger two effects at once. ・Electro status will be used and removed first when the DoT ends or when an additional reaction is triggered. |
|
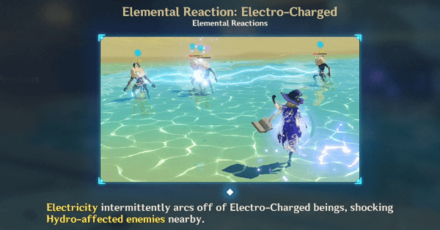
Electro-Charged occurs when Hydro or Electro come into contact with each other, which deals Electro damage over time. When an Electro-Charged reaction activates, nearby targets with Hydro status will also take the effect, but will not receive the Electro-Charged status.
When it's raining, the Wet status will be applied to everything in the area, making it easy to cause an Electro-Charged reaction. Increasing the Elemental Mastery of the character triggering Electro-Charged will increase the damage over time caused by the reaction!
Electro-Charged Reaction Guide
Frozen

| Elemental Status | Reactor |
|---|---|
| Effect | |
| ・Immobilizes freezable enemies except Bosses or Cryo-immune enemies. ・Cryo status will remain until a different Element is applied. ・Frozen enemies hit by a strong blunt attack such as Claymore hits will Shatter the enemy, which removes the Frozen status and deals damage based on the shatterer's Elemental Mastery. |
|
Frozen occurs when Hydro and Cryo come into contact with one another. When Frozen activates, the target will be unable to move. Frozen can be set off against enemies in water or rain.
Frozen enemies can be shattered, which deals Physical Damage. Examples of attacks that can shatter frozen enemies are Claymores, Plunging Attacks and Geo Attacks. Increasing the Elemental Mastery of the character triggering the shatter will cause it to deal more damage.
Overloaded
| Elemental Status | Reactor |
|---|---|
| Effect | |
| ・Explodes an area and deals Pyro AoE damage. ・Lightweight enemies will be knocked away from the source of the explosion. ・Frozen enemies or objects around the reaction can break from the reaction. ・Status is removed until the element is depleted. |
|
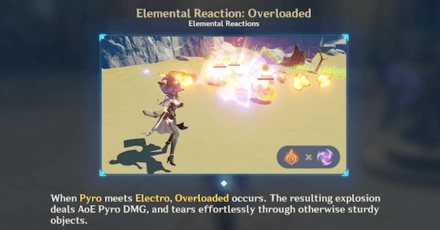
Overloaded occurs when Electro and Pyro come into contact. When Overloaded activates, AoE Pyro damage will hit all nearby enemies. However, enemies will also be knocked back, which can cause other attacks to miss!
Damage dealt by the Overloaded reaction can be increased by increasing the Elemental Mastery of the character triggernig the overload effect.
Superconduct

| Elemental Status | Reactor |
|---|---|
| Effect | |
| ・Damages an area and deals Cryo AoE damage. ・Lowers the Physical Resistance of enemies hit by the explosion. ・Status is removed until the element is depleted. |
|
Superconduct occurs when Electro and Cryo come into contact. When a Superconduct reaction activates, AoE Cryo damage will hit nearby enemies and will lower their physical resistance for 12 seconds.
The damage of Superconduct can be increased by the amount of Elemental Mastery the character who is triggering the reaction has. The amount of the physical resistance reduced will always be a fixed amount of about -40%.
Burning

| Elemental Status | Reactor |
|---|---|
| Effect | |
| ・Deals Pyro damage over time. ・A burning enemy will be under a strong Pyro and Dendro status that can be used to create reactions such as Melt until the Dendro aura is depleted from the burning. ・Burning status is removed until the Dendro aura depletes, but only the Pyro status will remain. |
|
Burning activates when Pyro comes into contact with Dendro. When a Burning reaction occurs, Pyro damage will be dealt over time for around 5 seconds. Burning can also remain on an enemy to set-up reactions like Melt as long as Dendro and Pyro are constantly applied.
Bloom
| Elemental Status | Reactor |
|---|---|
| Effect | |
| ・Leaves a Dendro Core beside the enemy. These cores are used for Burgeon or Hyperbloom reactions. ・Dendro Cores will remain on the field until Electro or Pyro is applied to it. Otherwise, the Dendro Core will simply explode after a few seconds, dealing minor AoE Dendro DMG. ・Only a maximum of five cores can remain on the field. All subsequent creations of such cores will immediately detonate the oldest Bloom core. ・Hydro is removed from the enemy, but the Dendro status may remain until the max usage of its aura is depleted. |
|
Hydro and Dendro mixing together will trigger Bloom and create a Dendro Core. Dendro cores can interact with Pyro, which will make the seed explode, or with Electro, which turns it into a homing missile. Dendro Cores can explode on their own after a set time or if too many are on the field.
Burgeon
| Elemental Status | Reactor |
|---|---|
⬅︎
|
|
| Effect | |
| ・Dendro Cores detonate after a Pyro attack is applied to it, dealing AoE Dendro damage based on the Pyro character's Elemental Mastery. ・The Dendro Core disappears after the reaction. |
|
Dendro Cores will explode when it comes into contact with Pyro to cause Burgeon. The explosion will cause AoE Dendro DMG, but can also affect the player.
Hyperbloom
| Elemental Status | Reactor |
|---|---|
⬅︎
|
|
| Effect | |
| ・Dendro Cores transforms into Sprawling Shots after an Electro attack is applied to it, which will home to the nearest enemy and deal AoE Dendro damage based on the Electro character's Elemental Mastery. ・The Dendro Core disappears after the reaction. |
|
Dendro Cores will transform into homing missiles when it comes into contact with the Electro Element to cause Hyperbloom. These missiles seek out the nearest enemy and deals AoE Dendro damage, but may also affect the player.
Quicken
| Elemental Status | Reactor |
|---|---|
| Effect | |
| ・Afflicts enemy with the Quicken status. Dendro or Electro attacks applied against a Quickened enemy will increase the damage dealt based on their Elemental Mastery. ・The aura lasts for 7 seconds. |
|
When Electro and Dendro comes into contact with each other, it will apply the Quicken status. This status remains on the enemy for 7 seconds, signified by the greenish charges that emanate from the enemy.
This status will open enemies up to other Catalyze Reactions: Aggravate and Spread.
Aggravate
| Elemental Status | Reactor |
|---|---|
⬅︎
|
|
| Effect | |
| ・Increases the damage dealt of an Electro attack to a Quickened enemy. ・Quickened enemy can be prolonged with Electro as long as Dendro is still present. |
|
Electro damage to a Quickened (Electro + Dendro) enemy will deal bonus damage in Aggravate. This is additive and not multiplicative to the base DMG.
Spread
| Elemental Status | Reactor |
|---|---|
⬅︎
|
|
| Effect | |
| ・Increases the damage dealt of an Dendro attack to a Quickened enemy. ・Quickened enemy can be prolonged with Dendro as long as Electro is still present. |
|
Dendro damage to a Quickened (Electro + Dendro) enemy will deal bonus damage in Spread. This is additive and not multiplicative to the base DMG.
Best Characters for Elemental Reactions
Recommended Characters to Set-Up Elemental Reactions
| Best Characters for Setting Up Elemental Reactions | |
|---|---|
|
|
• Kazuha can infuse his Elemental Skill and Elemental Burst with the Element applied to himself. You can easily set-up reactions by self-applying an Element to Kazuha then Swirling it to buff and apply that element with your Burst! |
|
|
• Sucrose can spread an Element to all nearby enemies while gathering them to a single location. Sucrose can also give Elemental Mastery to your teammates for more damage potential! |
|
|
• Venti's infuses an Element with his Elemental Burst vortex, allowing you to freely hit enemies trapped there with any Element like Hydro and Cryo for Freeze. |
|
|
• Ayaka's kit allows her to apply Cryo especially when she infuses her blade by using her special Sprint. With her Elemental Burst, you can also set-up constant Freeze with Hydro characters. |
|
|
• Ganyu's wide AoE range on her Elemental Burst can apply Cryo to all enemies inside. She can set-up constant Freezes when paired up with Hydro characters like Mona or Kokomi. |
|
|
• Xingqiu constantly applies Hydro to enemies with his Elemental Burst. Most of the time, Xingqiu will apply Hydro first, allowing you to set-up reactions like Vaporize with Pyro Main DPS's like Diluc or Hu Tao. |
|
|
• Tartaglia is similar to Xingqiu, but instead of being a Sub-DPS, he can function like a Main-DPS as an enabler for Pyro Sub-DPS's like Xiangling. You can do tons of damage with Vaporize or Electro-Charged! |
|
|
• When Fischl summons Oz, Oz will continuously attack enemies with Electro. This can set-up Superconducts or Electro-Charged reactions when fighting with enemies! |
|
|
• Raiden Shogun's Elemental Skill constantly apply Electro when enemies are hit by any attacks from you or your party members. This sets up constant Superconducts for Physical characters like Eula. |
|
|
• Shinobu's ring in her Elemental Skill is best for Hyperbloom team comps where she can shine as a Sub-DPS. She can also fill in the healer role at once. |
|
|
• Bennett's fast Elemental Skill cooldown and powerful Elemental Burst ATK buff to your teammates while also applying Pyro can set-up big numbers for your main DPS. His burst field can also stick elements to your active character |
|
|
• Xiangling's fast Pyro attacks on her Elemental Burst is currently the best when it comes to Pyro application. Her only issue is that her burst has an 80 energy cost. |
|
|
• Nahida's Elemental Skill is the most powerful when it comes to applying Dendro. She can also buff the active character by giving them Elemental Mastery during her burst. |
Genshin Impact Related Links
All Tips and Tricks Guides

All Version 1.0 Tips & Tricks
Other Game Mechanic Tips & Tricks
Author
Elemental Reactions Guide and How it Works
Rankings
- We could not find the message board you were looking for.
Gaming News
Popular Games

Genshin Impact Walkthrough & Guides Wiki

Umamusume: Pretty Derby Walkthrough & Guides Wiki

Pokemon Pokopia Walkthrough & Guides Wiki

Honkai: Star Rail Walkthrough & Guides Wiki

Monster Hunter Stories 3: Twisted Reflection Walkthrough & Guides Wiki

Arknights: Endfield Walkthrough & Guides Wiki

Wuthering Waves Walkthrough & Guides Wiki

Zenless Zone Zero Walkthrough & Guides Wiki

Pokemon TCG Pocket (PTCGP) Strategies & Guides Wiki

Monster Hunter Wilds Walkthrough & Guides Wiki
Recommended Games

Diablo 4: Vessel of Hatred Walkthrough & Guides Wiki

Cyberpunk 2077: Ultimate Edition Walkthrough & Guides Wiki

Fire Emblem Heroes (FEH) Walkthrough & Guides Wiki

Yu-Gi-Oh! Master Duel Walkthrough & Guides Wiki

Super Smash Bros. Ultimate Walkthrough & Guides Wiki

Pokemon Brilliant Diamond and Shining Pearl (BDSP) Walkthrough & Guides Wiki

Elden Ring Shadow of the Erdtree Walkthrough & Guides Wiki

Monster Hunter World Walkthrough & Guides Wiki

The Legend of Zelda: Tears of the Kingdom Walkthrough & Guides Wiki

Persona 3 Reload Walkthrough & Guides Wiki
All rights reserved
Copyright© 2012-2024 HoYoverse — COGNOSPHERE. All Rights Reserved.
The copyrights of videos of games used in our content and other intellectual property rights belong to the provider of the game.
The contents we provide on this site were created personally by members of the Game8 editorial department.
We refuse the right to reuse or repost content taken without our permission such as data or images to other sites.


![Monster Hunter Stories 3 Review [First Impressions] | Simply Rejuvenating](https://img.game8.co/4438641/2a31b7702bd70e78ec8efd24661dacda.jpeg/show)
![Monster Hunter Stories 3 Review [First Impressions] | Simply Rejuvenating](https://img.game8.co/4438641/2a31b7702bd70e78ec8efd24661dacda.jpeg/thumb)
![The Seven Deadly Sins: Origin [First Impressions] | A Promising Start](https://img.game8.co/4440581/584e0bfb87908f12c4eab6e846eb1afd.png/thumb)


It is true that if you apply hydro to an enemy and then apply electro, neither element will remain after the reaction. However, if you apply electro to an enemy and then apply hydro, both electro and hydro will remain after the reaction (electro-charged). This is a great way to cause multiple reactions if you bring in pyro or cryo!