Sayu Rating and Best Builds
✉ Send your thoughts in our Genshin 6.4 Patch Survey!
★ Exclusive: Dive back in time with the Meta History
◆ Hot: Version 6.4, Luna 5 Codes
◆ Builds: Varka, Flins, Skirk, Escoffier
◆ Events: Travelers' Tales, He Who Caught the Wind
◆ Future: Linnea, Version 6.5 Luna VI

Sayu is a 4-Star Anemo Claymore character in Genshin Impact. Learn about Sayu's Sub-DPS and Support builds, ascension materials, best weapons, best artifacts, talent priority, skills, teams, and our rating of the character in this build guide!
| Sayu's Character Guides | |||
|---|---|---|---|
|
|
|
||
List of Contents
Sayu Rating and Info
Character Information
| Sayu | ||
|---|---|---|
 |
Rating |
|
| Rarity | ||
| Element | ||
| Weapon | ||
| Voice Actors |
Lilypichu (Lily Ki) (EN)
Suzaki Aya (JP) |
|
Tier List Rankings
| Main DPS | Sub-DPS | Support | Exploration |
|---|---|---|---|
| - |
|
|
|
Character Tier List | Best Characters
Sayu's Stats
| Stat | Base Value |
|---|---|
| HP | 2553 |
| ATK | 53 |
| DEF | 160 |
| Elemental Mastery | 0 |
| Stat | Max Value |
|---|---|
| HP | 11854 |
| ATK | 244 |
| DEF | 745 |
| Elemental Mastery | 96 |
Base Stat Calculations
 | Stats indicated above are obtained from Sayu's base values. These numbers also exclude the character's equipped weapon, artifacts, talents, or other passive effects that are not innate to the character. |
|---|---|
 | All characters start with 5% CRIT Rate, 50% CRIT DMG, 100% Energy Recharge, 0 Elemental Mastery, 0% Healing Bonus, and 0% Elemental DMG bonus before any additional stats are applied. The table above includes such values. |
 | The Level 20 stats indicated for this character are calculated before their first ascension. |
Sayu's Ascension and Talent Material Summary
| All Ascension Materials Needed |
|---|
|
|
| All Talent Materials Needed |
|
|
Sayu Strengths and Weaknesses
| Strengths | |||
|---|---|---|---|
|
• Able to fill both the healer and buffer roles when using Viridescent Venerer. • Swirl reactions restore HP when Sayu is active. • Able to act as an on-field driver to spread elemental reactions with her Elemental Skill. • Activating her Burst triggers an emergency party-wide healing. |
|||
| Weaknesses | |||
|
• Simultaneous healing and swirling on her Burst is locked behind C1. • Without C6, ATK and Elemental Mastery split-scaling limits the effectiveness of either her healing or her swirl damage. • High energy requirement. |
|||
Best Builds for Sayu
Sayu Sub DPS Builds
Swirl Driver
| Best Weapon | |
|---|---|
| Replacement Weapons |
2.
|
| Best Artifacts | |
| Main Stats | |
| Substats | Energy Recharge, ATK%, Elemental Mastery |
| Sample Teams | Rainbow:
Freeze:
|
Elemental Mastery build for Sayu enables her to drive reactions with her Elemental Skill or Burst. As such, you will need Elemental Mastery artifacts and weapons. Makhaira Aquamarine specifically increases both her ATK and Elemental Mastery!
Crit Sub DPS
| Best Weapon | |
|---|---|
| Replacement Weapons |
2.
|
| Best Artifacts | |
| Main Stats | |
| Substats | CRIT Rate, CRIT DMG, ATK%, Energy Recharge, Elemental Mastery |
| Sample Teams | Rainbow:
Freeze:
|
A crit build paves way for Sayu to get more ATK, which in turn provides a bit of healing on her Elemental Burst. This is one of the builds you can do to balance damage, debuff, and healing at pre-C6, although with much less impact.
Sayu Support Build
Healer Support (Pre-C6)
| Best Weapon | |
|---|---|
| Replacement Weapons |
3.
|
| Best Artifacts | |
| Main Stats | |
| Substats | ATK%, Energy Recharge, Elemental Mastery |
| Sample Teams | Rainbow:
Freeze:
|
If not on C6, Sayu on a healer build stacks as much ATK% as she can to increase her healing. You will also need around 200% Energy Recharge so she can have her burst ready. You may also use Maiden Beloved should you wish to further increase her healing.
Healer Support (C6)
| Best Weapon | |
|---|---|
| Replacement Weapons | |
| Best Artifacts | |
| Main Stats | |
| Substats | ATK%, Energy Recharge, Elemental Mastery |
| Sample Teams | Rainbow:
Freeze:
|
At C6, building Elemental Mastery stats become more desirable alongside ATK due to its added healing effect, which scales on the amount of Elemental Mastery she has. It also enables her to unlock the damage for her Swirls without a huge trade-off on her healing.
Sayu's Talent Priority
| Sub-DPS | Support | |
|---|---|---|
| 1st | Elemental Skill | Elemental Burst |
| 2nd | Elemental Burst | Elemental Skill |
| 3rd | Normal Attack | |
Depending on her role, Sayu as a DPS focuses more on the damage of her Elemental Skill, while healer focuses on the Burst. You may leave the Normal Attacks alone as she will not use it in practice.
Best Artifacts for Sayu
Best Artifacts Ranked
| Artifact | Artifact Bonuses | |
|---|---|---|
| 1st |
|
2-PC: Anemo DMG Bonus +15% 4-PC: Increases Swirl DMG by 60%. Decreases opponent's Elemental RES to the element infused in the Swirl by 40% for 10s. |
| 2nd |
|
2-PC: Anemo DMG Bonus +15% |
|
|
2-PC: ATK +18%. | |
| 3rd |
|
2-PC: Elemental Burst DMG +20%. 4-PC: Using an Elemental Burst increases all party members' ATK by 20% for 12s. This effect cannot stack. |
Best 4-Star Artifact for Sayu
| Artifact | Artifact Bonuses |
|---|---|
 Instructor Instructor
|
2-PC: Increases Elemental Mastery by 80. 4-PC: Upon triggering an Elemental Reaction, increases all party members' Elemental Mastery by 120 for 8s. |
List of Artifacts and Set Bonuses
Sayu Best Weapons
Paths for Sayu's Best Weapons
Depending on your build path, the best weapons for Sayu is divided between Elemental Mastery, ATK, or Energy Recharge weapons.
Weapons for Elemental Mastery Builds
| Weapon | Weapon Information | |
|---|---|---|
| 1st |
 Makhaira Aquamarine Makhaira Aquamarine
|
Base ATK: 510 Bonus Stat: Elemental Mastery 165 Skill Effect: The following effect will trigger every 10s: The equipping character will gain 24% of their Elemental Mastery as bonus ATK for 12s, with nearby party members gaining 30% of this buff for the same duration. Multiple instances of this weapon can allow this buff to stack. This effect will still trigger even if the character is not on the field. |
| 2nd |
 Mailed Flower Mailed Flower
|
Base ATK: 565 Bonus Stat: Elemental Mastery 110 Skill Effect: Within 8s after the character's Elemental Skill hits an opponent or the character triggers an Elemental Reaction, their ATK and Elemental Mastery will be increased by 12% and 48 respectively. |
| 3rd |
 Rainslasher Rainslasher
|
Base ATK: 510 Bonus Stat: Elemental Mastery 165 Skill Effect: Increases DMG against enemies affected by Hydro or Electro by 20% |
Weapons for Healer Support (Pre-C6) or Crit Sub DPS
| Weapon | Weapon Information | |
|---|---|---|
| 1st |
 Wolf's Gravestone Wolf's Gravestone
|
Base ATK: 608 Bonus Stat: ATK 49.6% Skill Effect: Increases ATK by 20%. On hit, attacks against enemies with less than 30% HP increases all party members' ATK by 40% for 12s. Can only occur once every 30s. |
| 2nd |
 Beacon of the Reed Sea Beacon of the Reed Sea
|
Base ATK: 608 Bonus Stat: CRIT Rate 33.1% Skill Effect: After the character's Elemental Skill hits an opponent, their ATK will be increased by 20% for 8s. After the character takes DMG, their ATK will be increased by 20% for 8s. The 2 aforementioned effects can be triggered even when the character is not on the field. Additionally, when not protected by a shield, the character's Max HP will be increased by 32%. |
| 3rd |
 Tidal Shadow Tidal Shadow
|
Base ATK: 510 Bonus Stat: ATK 41.3% Skill Effect: After the wielder is healed, ATK will be increased by 24% for 8s. This can be triggered even when the character is not on the field. |
Weapons for Energy Recharge
| Weapon | Weapon Information | |
|---|---|---|
| 1st |
 Favonius Greatsword Favonius Greatsword
|
Base ATK: 454 Bonus Stat: Energy Recharge 61.3% Skill Effect: CRIT Hits have a 60% chance to generate a small amount of Elemental Particles, which will regenerate 6 Energy for the character. Can only occur once every 12s. |
| 2nd |
 Katsuragikiri Nagamasa Katsuragikiri Nagamasa
|
Base ATK: 510 Bonus Stat: Energy Recharge 45.9% Skill Effect: Increases Elemental Skill DMG by 6%. After Elemental Skill hits an opponent, the character loses 3 Energy but regenerates 3 Energy every 2s for the next 6s. This effect can occur once every 10s. Can be triggered even when the character is not on the field. |
| 3rd |
 Sacrificial Greatsword Sacrificial Greatsword
|
Base ATK: 565 Bonus Stat: Energy Recharge 30.6% Skill Effect: After damaging an opponent with an Elemental Skill, the skill has a 40% chance to end its own CD. Can only occur once every 30s. |
All Recommended Weapons for Sayu
| Recommended Weapons | How to Get |
|---|---|
| Gacha | |
| Gacha | |
| Gacha | |
| Gacha | |
| Gacha | |
| Event | |
| Crafted | |
| Gacha | |
| Crafted | |
| Starglitter Exchange | |
Sayu Best Team Comp
Sayu Driver Teams
| Main DPS | Sub-DPS | Sub-DPS | Support |
|---|---|---|---|
|
|
|
|
|
|
|
|
|
|
When using Sayu with her Swirl build, she can use her Elemental Skill while having an off-field Electro, Pyro, Hydro, or Cryo ability to drive and combine reactions. As her ascension passive can already heal the entire party, you may swap a healer for another character.
Sayu Healer Teams
| Main DPS | Sub-DPS | Sub-DPS | Support |
|---|---|---|---|
|
|
|
|
|
|
|
|
|
|
Sayu in a healer build supports the party by buffing reactions that can be affected by Swirl with Viridescent Venerer, like Freeze, Vaporize, Melt, or Electro-Charged, while also acting as your healer. Building ATK is recommended for these teams at pre-C6.
Sayu Best Constellations
| Nyctereutes Minor |
|---|
 |
Constellation and Effects
| Sayu's Constellations | |
|---|---|
| C1 |
Multi-Task no Jutsu The Muji-Muji Daruma created by Yoohoo Art: Mujina Flurry will ignore HP limits and can simultaneously attack nearby opponents and heal characters. |
| C2 |
Egress Prep Yoohoo Art: Fuuin Dash gains the following effects: - DMG of Fuufuu Whirlwind Kick in Press Mode increased by 3.3%. - Every 0.5s in the Fuufuu Windwheel state will increase the DMG of this Fuufuu Whirlwind Kick by 3.3%. The maximum DMG increase possible through this method is 66%. |
| C3 |
Eh, the Bunshin Can Handle It Increases the Level of Yoohoo Art: Mujina Flurry by 3. Maximum upgrade level is 15. |
| C4 |
Skiving: New and Improved Sayu recovers 1.2 Energy when she triggers a Swirl reaction. This effect occurs once every 2s. |
| C5 |
Speed Comes First Increases the Level of Yoohoo Art: Fuuin Dash by 3. Maximum upgrade level is 15. |
| C6 |
Sleep O'Clock The Muji-Muji Daruma created by Yoohoo Art: Mujina Flurry will now also benefit from her Elemental Mastery. Each point of Sayu's Elemental Mastery will produce the following effects: - Increases the damage dealt by the Muji-Muji Daruma's attacks by 0.2% ATK. A maximum of 400% ATK can be gained via this method. - Increases the HP restored by the Muji-Muji Daruma by 3. A maximum of 6,000 additional HP can be restored in this manner. |
Best Constellations Rating and Explanation
| Rating | Constellation Effect / Merits | |
|---|---|---|
| C1 | ★★★ | • Healing at 70% HP limit removed. Muji-Muji Daruma can now simultaneously heal and swirl enemies at once. |
| C6 | ★★★ | • Increases Muji-Muji Daruma DMG and Healing based on Sayu's Elemental Mastery. |
C6 for a Sub-DPS and Healer Hybrid
By unlocking C6 for Sayu, you can forgo any healing artifact and focus a Viridescent Venerer 4pc. set with EM main stats on her. This will give you the best of both worlds for a Sub-DPS and Healer Anemo character.
Sayu Ascension and Talent Materials
Sayu Ascension Materials
| Lv.20→Lv.40 | |
|---|---|
| Lv.40→Lv.50 |
|
| Lv.50→Lv.60 |
|
| Lv.60→Lv.70 |
|
| Lv.70→Lv.80 |
|
| Lv.80→Lv.90 |
|
Sayu Talent Level-Up Materials
| Daily Domain Drops | Enemy Drops | Weekly Boss Drops |
|---|---|---|
| Wed/Sat/Sun |
Whopperflowers |
Azhdaha Challenge Reward |
|
|
|
|
|
|
|
Sayu Talents and How to Use
Normal Attack
| Normal Attack: Shuumatsuban Ninja Blade |
|---|
| Perform up to 4 consecutive strikes.
Charge Attack Drains Stamina over time to perform continuous spinning attack against all nearby opponents. At the end of the sequence, perform a more powerful slash. Plunge Attack: Plunges from mid-air to strike the ground below, damaging opponents along the path and dealing AoE DMG upon impact. |
| Attribute | Effect (Lvl 1) |
|---|---|
| 1-Hit DMG | 72.2% |
| 2-Hit DMG | 71.4% |
| 3-Hit DMG | 43.4%+43.4% |
| 4-Hit DMG | 98.1% |
| Charged Attack Spinning DMG | 62.5% |
| Charged Attack Final DMG | 113% |
| Charged Attack Stamina Cost | 40.0/s |
| Max Duration | 5.0s |
| Plunge DMG | 74.6% |
| Low/High Plunge DMG | 74.6% |
| Low/High Plunge DMG | 149%/186% |
Elemental Skill
| Yoohoo Art: Fuuin Dash |
|---|
| The special technique of the Yoohoo Ninja Arts! Sayu curls up into a rolling Fuufu Windwheel and smashes into opponents at high speed, dealing Anemo DMG. When the duration ends, she unleashes a Fuufuu Whirlwind Kick, dealing AoE Anemo DMG. Press Enters Fuufuu Windwheel state, rolling forward a short distance before using Fuufuu Whirlwind Kick. Hold Attack: Hold Rolls about in Fuufuu Windwheel State that increases Sayu's resistance to interruption. During that, she can control the roll's direction and can use the skill again to end the state and use a stronger Fuufuu Whirlwind Kick. Hold triggers Elemental Absorption. The maximum skill duration is 10s. The longer she remains in that state, the longer the CD. Elemental Absorption: If Sayu comes into contact with Hydro/Pyro/Cryo/Electro while in her Whirlwind state, she will deal additional DMG of that type. Elemental Absorption may only occur once per use of this skill. Flavor Text: Sayu can pull this skill off with her eyes closed. This technique was originally created for escaping, but now that she's got a Vision, might as well make her foes eat dirt while she's at it. |
| Attribute | Effect (Lvl 1) |
|---|---|
| Fuufuu Windwheel DMG | 36.0% |
| Fuufuu Whirlwind Kick Press DMG | 158.4% |
| Fuufuu Whirlwind Kick Hold DMG | 217.6% |
| Fuufuu Windwheel Elemental DMG | 16.8% |
| Fuufuu Whirlwind Kick Elemental DMG | 76.2% |
| Max Duration (Hold) | 10.0s |
| CD | 6.0 to 11.0s |
Roll and Absorb Elements with Elemental Skill

Sayu's Elemental Skill allows her to roll at high speeds! Holding it lets you roll around while dealing continuous Anemo DMG. When in contact with Electro, Pyro, Cryo, and Hydro, she can spread that Element to her enemies or surroundings.
Tapping her Elemental Skill instead curls her into a ball to shoot a short-distance forward to attack an enemy in range.
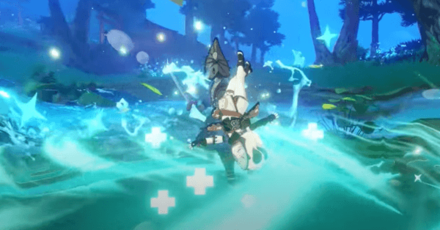
Top-Tier Speed When Rolling
| Sayu's Speed with Other Characters | ||
|---|---|---|
 Sayu |
 Ayaka |
 Razor |
When using her Elemental Skill's hold function, Sayu becomes one of the fastest characters in-game! Her roll is faster than Ayaka and Mona's Dash, so it's useful for exploring. Take note that you can't roll on water unless you absorb Cryo!
Elemental Burst
| Yoohoo Art: Mujina Flurry |
|---|
| The other super special technique of the Yoohoo Ninja Arts! It summons a pair of helping hands for Sayu. Deals Anemo DMG to nearby opponents and heals all nearby party members. The amount of HP restored is based on Sayu's ATK. This skill then summons a Muji-Muji Daruma. Muji-Muji Daruma At intervals, the Daruma will take an action: ・If all nearby characters' HP is above 70%, it will deal Anemo DMG to a nearby opponent. ・If nearby active characters' HP is 70% or less, it will heal the active character with the lowest HP. If no opponents are nearby, it will heal all active characters nearby. Flavor Text: People who don't know the first thing about ninjutsu love to watch Sayu show off this skill, and some have tried to learn it from her. But Sayu just wants to sleep and not be disturbed. |
| Attribute | Effect (Lvl 1) |
|---|---|
| Skill Activation DMG | 117% |
| Skill Activation Healing | 92.2% ATK+577 |
| Muji-Muji Daruma DMG | 52% |
| Muji-Muji Daruma Healing | 79.9% ATK+500 |
| Duration | 12.0s |
| CD | 20.0s |
| Energy Cost | 80 |
Elemental Burst Can Heal and Attack
Sayu's Elemental Burst, can heal the entire party while also dealing Anemo DMG to nearby enemies! After using her Elemental Burst, Sayu will leave behind a Muji-Muji Daruma.
Functions of Muji-Muji Daruma
The Muji-Muji Daruma can either heal your party or deal Anemo DMG to nearby enemies, depending on your active characters' HP.
If your HP is above 70%, the Muji-Muji Daruma will deal Anemo DMG to nearby enemies. Otherwise, it will switch to a healing function. This limit is removed at 1 Constellation, letting Sayu heal and attack without any conditions.
Passive Talent 1
| Someone More Capable |
|---|
| When Sayu triggers a Swirl reaction while active, she heals all your characters and nearby allies for 300 HP. She will also heal an additional 1.2 HP for every point of Elemental Mastery she has. This effect can be triggered once every 2s. |
Passive Talent 2
| No Work Today! |
|---|
| The Muji-Muji Daruma created Yoohoo Art: Mujina Flurry gains the following effects: ・When healing a character, it will also heal characters near that healed character for 20% the amount of HP. ・Increases the AoE of its attack against opponents. |
Passive Talent 3
| Yoohoo Art: Silencer's Secret |
|---|
| When Sayu is in the party, your characters will not startle Cystalflies and certain other animals when getting near them. Check the "Other" sub-category of the "Living Beings / Wildlife" section in the Archive for the creatures this skill works on. |
Passive Skill Useful for Crystalflies
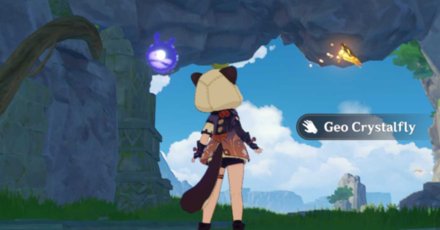
Sayu's Passive Talent, Yoohoo Art: Silencer's Secret, allows her to sneak up on certain wildlife. This skill works on animals in the “Other”' sub-category of the Living Beings Archive. It's perfect for Crystalfly-hunting!
How to Get Sayu
Pull from Any Active Banner
| All Current Wish Banners | |
|---|---|
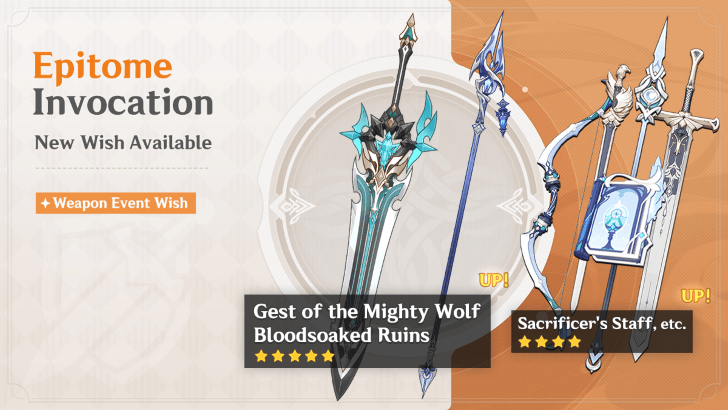 Epitome Invocation Epitome Invocation
|
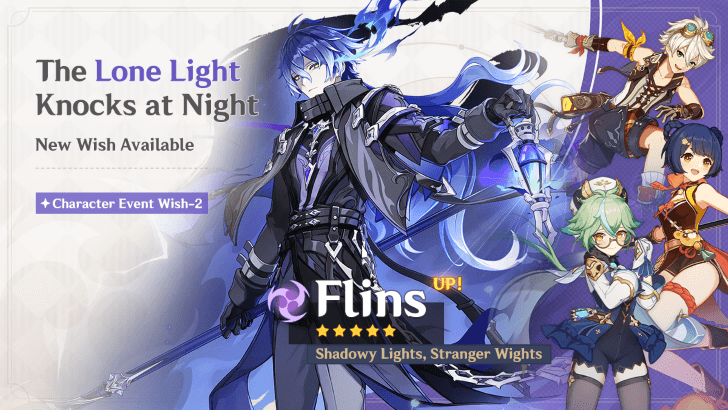 The Lone Light Knocks at Night The Lone Light Knocks at Night
|
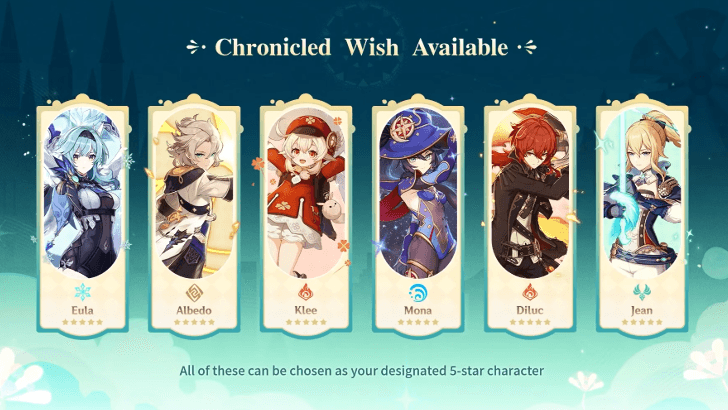 6.4 Chronicled Wish Mondstadt 6.4 Chronicled Wish Mondstadt
|
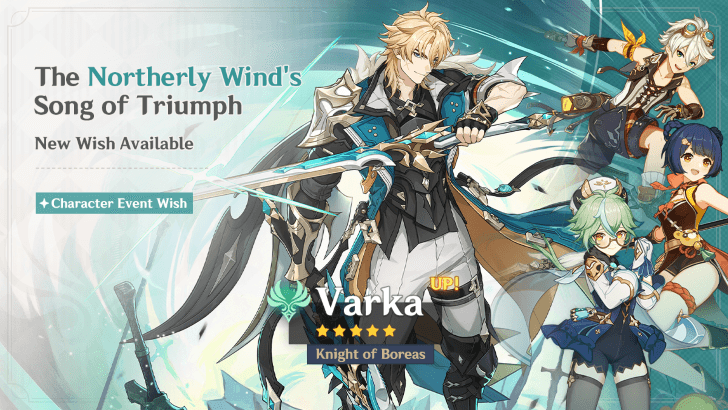 The Northerly Wind's Song of Triumph The Northerly Wind's Song of Triumph
|
 Wanderlust Invocation Wanderlust Invocation
|
|
Sayu is available at a normal rate on all Standard Wish Banners except Beginner's Wish. This means you can get her from Wanderlust Invocation, Epitome Invocation, and the current Character Event Wishes.
She was last featured as a rate-up 4-star in the character banners for Phase 1 of Version 5.4 from February 12, 2025 to March 4, 2025. She was featured in Sigewinne rerun banner and Yumemizuki Mizuki's debut banner.
Genshin Impact 5.4 Banners and Characters
Sayu's In-Game Information
Sayu Character Profile
| Nation | |
|---|---|
| Title | Mujina Ninja |
| Vision | |
| Gender | Female |
| Race | Human |
| Height | Small Girl |
| Faction | Shuumatsuban |
| Constellation | Nyctereutes Minor |
| Birthday | October 19 |
| Special Dish | Dizziness-Be-Gone no Jutsu Version 2.0 |
| Story Quest |
|
Sayu Voicelines
Thoughts About Sayu
| Character | In-Game Thoughts |
|---|---|
 Ayaka Ayaka
|
Ah, little Sayu. She hasn't been causing you any trouble lately, has she? Hehe, if you ever notice her slacking off, please let me know. |
 Ayato Ayato
|
She looks awfully idle the majority of the time, and yet when it counts, she always rises to the occasion and provides indispensable assistance. Of course, you'd know far more about that than me, wouldn't you? |
 Gorou Gorou
|
Hmm, according to our intel, she is a ninja proficient in the art of infiltration — a skill set which could prove very useful in some of Her Excellency's special operations... However, our intel also indicates that she could be difficult to recruit as she is rather unruly, and often disappears without a trace. Hmm? She's with the Yashiro Commission? Oh, well forget it then. |
 Itto Itto
|
All I did was give her a little pat on the head this one time when she wasn't looking, and now, she pounces to attack every time she lays eyes on me. Haha, what can I say? Tanuki are adorable! What am I supposed to do — not pat one on the head? ...Oh yeah, and that's the other thing — she beats you up for calling her a tanuki, too! What's up with that? I mean, a tanuki's what she's going for, right? Sheesh, talk about getting your fur all ruffled over nothing... |
 Mizuki Mizuki
|
Hehe, she's quite the carefree little mujina, her only trouble, of course, being the desire to grow taller... I'm sure her dreams are exceedingly sweet. I'd love to invite her to come work at the bathhouse, but she's always avoiding me. Heh, perhaps she can see through my intentions... |
 Thoma Thoma
|
Ah Sayu, stubborn Sayu. I've asked her countless times to teach me ninjutsu, but she always refuses. She even goes out of her way to avoid me now... I'm just a student looking for a teacher, am I really that out of line? |
 Yae Miko Yae Miko
|
Ah yes, the little ninja child... If there's one thing she can do, it's stay hidden. Kano Nana constantly complains to me about it. Apparently, she now spends so much of her time searching for Sayu that she barely has any time to read anymore. If you as me, I'd say that Sayu has a secret ally who is helping her hide all the time... |
 Yoimiya Yoimiya
|
Let me know if you see her, alright? I'd really love to take her to one of the festivals and introduce her to lots of new friends. She always looks a little down, but if she meets some people she can hang out with, maybe she'll slowly pick herself up again! |
Sayu's Thoughts About Others
| Character | In-Game Thoughts |
|---|---|
|
Ayaka
|
About Ayaka As the eldest daughter of the Kamisato Clan, she always looks very graceful and elegant. But she got one of the shrine maidens to keep tabs on me and make sure I don't slack off... Why would she do that? |
|
Ayato
|
About Ayato Sometimes, when I'm taking a rest up in a tree, I overhear the shrine maidens talking about him. Sounds like he's pretty important and super busy most the time. I don't get it, though - it's only work, or whatever, so why doesn't he just... not do it? |
|
Itto
|
About Itto Why does he have to make such a racket? And how did he get so tall!? |
 Kirara Kirara
|
About Kirara One time, when I woke up from an afternoon nap, I felt something warm against my back. I turned around and saw a cat curled up fast asleep. You wouldn't believe this- it had not only one, but two fluffy tails! I almost fell from the tree in surprise. I—Is this some form of ninjutsu too? |
 Raiden Raiden
|
About Raiden Shogun Her Excellency? Definitely not someone I'd ever get to meet. If you've got questions, maybe Miss Ayaka's the person to ask. |
 Shinobu Shinobu
|
About Shinobu Doesn't ring a bell, umm... What? Arataki Itto's little sidekick? Ugh, well she's definitely gotta be a sleep disturbance then. Birds of a feather flock together... |
|
Thoma
|
About Thoma He's got a Vision, and yet for some reason he pesters me about learning ninjutsu every time I run into him. I don't know what his deal is. It's not like I'd have the time to teach him anyway, I barely get enough sleep as it is. |
|
Yae Miko
|
About Yae Miko She's always patting me on the head... I've never bitten her, though, or even said anything, because I'm frightened of how she'd react if I stood up to her. But what am I gonna do? Because if she keeps on patting my head, I'm gonna get stuck at this height forever! |
|
Yoimiya
|
About Yoimiya Every time she sees me she says, "Hey, little tanuki! Let's go hang out at the festival." Firstly, I'm not a tanuki. Secondly, I don't wanna go to a festival. Thirdly, she says she wants to hang out — but really, she just wants me to do a ninjutsu performance during the fireworks show. That's not even related to my work for the Shuumatsuban! |
Sayu Release Date
| Genshin Impact Version 2.0 Phase 2 | |
|---|---|
 |
|
| Release Date | August 10, 2021 |
Sayu was released on August 10, 2021 in the second phase of the Version 2.0.
Version 2.0 Banners and Patch Notes
Genshin Impact Character Guides

All Characters and Voice Actors
List of All Characters
| Characters by Element | |||
|---|---|---|---|
Playable Characters
 Chasca
 Faruzan
 Heizou
 Ifa
Ifa Jahoda
 Jean
Jean Kazuha
 Lan Yan
 Lynette
 Sayu
Sayu
 Sucrose
 Traveler (Anemo)
 Varka
Varka Venti
Venti Wanderer
 Xianyun
 Xiao
Xiao Aloy
Aloy Charlotte
 Chongyun
 Citlali
 Diona
Diona Escoffier
 Eula
Eula Freminet
 Ganyu
Ganyu Kaeya
Kaeya Layla
Layla Mika
Mika Qiqi
Qiqi Rosaria
 Shenhe
 Skirk
Skirk Wriothesley
 Alhaitham
 Baizhu
 Collei
 Emilie
 Kaveh
Kaveh Kinich
 Lauma
Lauma Nahida
 Nefer
Nefer Tighnari
 Traveler (Dendro)
 Yaoyao
 Beidou
 Clorinde
 Cyno
Cyno Dori
Dori Fischl
 Flins
Flins Iansan
 Ineffa
 Keqing
 Lisa
Lisa Ororon
 Razor
Razor Sara
Sara Sethos
 Traveler (Electro)
 Varesa
 Albedo
 Chiori
 Illuga
 Kachina
 Navia
Navia Ningguang
 Noelle
 Traveler (Geo)
 Xilonen
 Yun Jin
 Zhongli
 Zibai
Zibai Aino
Aino Barbara
 Candace
 Columbina
 Dahlia
 Furina
 Kokomi
 Mona
Mona Mualani
 Neuvillette
 Nilou
Nilou Sigewinne
 Tartaglia
 Traveler (Hydro)
 Xingqiu
 Yelan
Yelan Amber
Amber Arlecchino
 Bennett
 Chevreuse
 Dehya
Dehya Diluc
Diluc Durin
Durin Gaming
 Hu Tao
 Klee
Klee Lyney
Lyney Mavuika
 Traveler (Pyro)
 Xiangling
 Xinyan
 Yanfei
Upcoming Characters
| All Upcoming Characters |
 Alice Alice
|
 Capitano Capitano
|
 Dainsleif Dainsleif
|
 Dottore Dottore
|
|---|---|---|---|
 Linnea Linnea
|
 Lohen Lohen
|
 Nicole Nicole
|
 Pantalone Pantalone
|
 Pierro Pierro
|
 Pulcinella Pulcinella
|
 Rerir Rerir
|
 Sandrone Sandrone
|
 Tsaritsa Tsaritsa
|
|||
Character Lists
| Characters by Rarity | |
|---|---|
| 5-Star Characters | 4-Star Characters |
| Free Characters | |
| Characters by Weapon Used | |
| Sword Users | Claymore Users |
| Polearm Users | Bow Users |
| Catalyst Users | |
| Characters by Role | |
| Main DPS Characters | Sub DPS Characters |
| Support Characters | Healers |
| Shield Characters | Buff Providers |
| Best for Exploration | Local Specialty Passives |
| Double Reward Passives | |
| Characters by Gender | |
| Male Characters | Female Characters |
| Short Male Characters | Short Female Characters |
| Medium Male Characters | Medium Female Characters |
| Tall Male Characters | Tall Female Characters |
| Characters by Height | |
| Short Characters | Medium Characters |
| Tall Characters | |
| Characters by Region | |
| Mondstadt Characters | Liyue Characters |
| Inazuma Characters | Sumeru Characters |
| Fontaine Characters | Natlan Characters |
| Nod-Krai Characters | |
Author

Sayu Rating and Best Builds


Rankings
Gaming News

![Monster Hunter Stories 3 Review [First Impressions] | Simply Rejuvenating](https://img.game8.co/4438641/2a31b7702bd70e78ec8efd24661dacda.jpeg/show)


![Monster Hunter Stories 3 Review [First Impressions] | Simply Rejuvenating](https://img.game8.co/4438641/2a31b7702bd70e78ec8efd24661dacda.jpeg/thumb)
Popular Games

Genshin Impact Walkthrough & Guides Wiki
Honkai: Star Rail Walkthrough & Guides Wiki
Umamusume: Pretty Derby Walkthrough & Guides Wiki
Pokemon Pokopia Walkthrough & Guides Wiki
Resident Evil Requiem (RE9) Walkthrough & Guides Wiki
Monster Hunter Wilds Walkthrough & Guides Wiki
Wuthering Waves Walkthrough & Guides Wiki
Arknights: Endfield Walkthrough & Guides Wiki
Pokemon FireRed and LeafGreen (FRLG) Walkthrough & Guides Wiki
Pokemon TCG Pocket (PTCGP) Strategies & Guides Wiki


Recommended Games
Diablo 4: Vessel of Hatred Walkthrough & Guides Wiki
Cyberpunk 2077: Ultimate Edition Walkthrough & Guides Wiki
Fire Emblem Heroes (FEH) Walkthrough & Guides Wiki
Yu-Gi-Oh! Master Duel Walkthrough & Guides Wiki
Super Smash Bros. Ultimate Walkthrough & Guides Wiki
Pokemon Brilliant Diamond and Shining Pearl (BDSP) Walkthrough & Guides Wiki
Elden Ring Shadow of the Erdtree Walkthrough & Guides Wiki
Monster Hunter World Walkthrough & Guides Wiki
The Legend of Zelda: Tears of the Kingdom Walkthrough & Guides Wiki
Persona 3 Reload Walkthrough & Guides Wiki


All rights reserved
Copyright© 2012-2024 HoYoverse — COGNOSPHERE. All Rights Reserved.
The copyrights of videos of games used in our content and other intellectual property rights belong to the provider of the game.
The contents we provide on this site were created personally by members of the Game8 editorial department.
We refuse the right to reuse or repost content taken without our permission such as data or images to other sites.
She should be SS tier(Swirl Sustain)😏