Spiral Abyss Floor 12 Guide for Version 6.4 (March 2026)
★ Exclusive: Dive back in time with the Meta History
◆ Hot: Version 6.4, 6.4 Codes, Linnea, Version 6.5
◆ Builds: Varka, Flins, Skirk, Escoffier
◆ Events: Travelers' Tales, Sightseeing With Friends
◆ Endgame: Spiral Abyss (March 2026)

Spiral Abyss Floor 12 is the final floor of the Spiral Abyss domain in Genshin Impact. Check out Spiral Abyss Floor 12 in Version 6.4 (March 2026), the best teams and characters, chamber enemies and guides, and the rewards here!
Floor 12 Basic Information
Floor 12 Information and Rewards
| Ley Line Disorder |
・1st Half Anemo DMG dealt by the active character is increased by 75%. ・ 2nd Half Characters' Normal Attack Cryo DMG increased by 75%. |
|---|---|
| Enemy Level | Lv. 95 - Lv. 100 |
| Star Bounty (All 9★) |
|
| Rewards |
Blessing of the Abyssal Moon: Windlash Moon
| Blessing Effect | |
|---|---|
 When a character triggers a Swirl reaction on an opponent, they gain 1 stack fo Windlash, and when the stack count reaches 4, a shockwave is unleashed at the opponent's position, dealing True DMG and consuming all stacks of Windlash at the same time. Up to 1 stack of Windlash can be gained every 0.1s A shockwave can be unleashed this way every 6s. |
|
| Blessing Reset | 2026/04/16 04:00 (Server Time) |
Floor 12 Recommended Teams
Best Team Comps For Floor 12
First Half
| Swirl-Pyro | |||
|---|---|---|---|
|
|
|
Any | Any |
| Swirl-Electro | |||
|
|
|
Any | Any |
While the Abyss Blessing favors Anemo for this half, Pyro is also required to handle the Yumkasaur Mountain King and the Radiant Glacial Wolf's mechanics. In particular, the Glacial Wolf wants Pyro-Swirl or Electro-Swirl specifically, meaning you will have to bring an Anemo character that can infuse or swirl attacks with Pyro or Electro.
You can either bring Swirl-Pyro or Swirl-Electro teams from Varka's team, or regular Pyro teams but with a Swirler like Kazuha.
Second Half
| Freeze | |||
|---|---|---|---|
|
|
|
Any | Any |
Unlike Floor 11, this floor only shills Cryo and Freeze teams due to the Elite Treasure Hoarder and Secret Source Automaton Overseer Device which wants Freeze reactions. Do not bring Pyro as the Radiant Moonfly specifically is heavily resistant to Pyro.
Bring a Healer as well for the Radiant Moonfly to remove the Radiant Cocoon status which brings down your CRIT Rate unless your health is back to 100%.
Best Characters to Use
First Half
| Sample Teams | |||
|---|---|---|---|
|
|
|
|
|
|
|
|
|
|
| Other Recommendations | |||
| Main DPS | |||
| Sub DPS | |||
| Support | |||
Second Half
| Sample Teams | |||
|---|---|---|---|
|
|
|
|
|
|
|
|
|
|
| Other Recommendations | |||
| Main DPS/ Driver |
|||
| Sub DPS | |||
| Support | |||
Floor 12 - Chamber 1 Guide
Chamber Information
| Challenge |
Defeat 2 Opponents Defeat 2 Opponents |
||||
|---|---|---|---|---|---|
| Goal |
★Remaining challenge time longer than 180 sec. ★Remaining challenge time longer than 300 sec. ★Remaining challenge time longer than 420 sec. |
||||
Floor 12 - Chamber 1 First Half
Floor 12-1-1 Enemies
| Wave 1 |
|---|
|
|
| Wave 2 |
|
|
Floor 12-1-1 Strategy
Defeat the Mek as fast as you can to give yourself more time to deal with the Perpetual Mechanical Array. As usual, bring down the Array's health down to around 20% to enter the 2nd phase. Afterwards, focus fire on the spawning mech that glows. Defeating it will remove the boss's invulnerability.
Floor 12 - Chamber 1 Second Half
Floor 12-1-2 Enemies
| Wave 1 |
|---|
|
|
| Wave 2 |
|
|
Floor 12-1-2 Strategy
As the Wind Operative is rather annoying to fight against, if you're using the Freeze team, lock the Operative stuck in one place to prevent it from jumping anywhere or inflict Bond of Life on your characters.
For the Radiant Moonfly boss, be wary of the Radiant Cocoon debuff the boss will inflict on your team. This will reduce your CRIT and DMG dealt. Remove this debuff by healing your characters to 100%. You can also i-frame the Radiant Cocoon attack but this takes precise dodging.
Floor 12 - Chamber 2 Guide
Chamber Information
| Challenge |
Defeat 1 Opponent Defeat 2 Opponents |
||||
|---|---|---|---|---|---|
| Goal |
★Remaining challenge time longer than 180 sec. ★Remaining challenge time longer than 300 sec. ★Remaining challenge time longer than 420 sec. |
||||
Floor 12 - Chamber 2 First Half
Floor 12-2-1 Enemies
| Wave 1 |
|---|
|
|
Floor 12-2-1 Strategy
The Yumkasaur King is the sole enemy for this half. As usual, attack the Pomegranates with Pyro when they spawn to stun and deal a chunk of damage to it. Be wary of the spinning attack it does especially if you have Bennett as you may get the Burning status.
Floor 12 - Chamber 2 Second Half
Floor 12-2-2 Enemies
| Wave 1 |
|---|
|
|
| Wave 2 |
|
|
Floor 12-2-2 Strategy
Defeat the fodder Oprichniki elite as fast as you can to give yourself time for Hiljetta, the Battle-Hardened Elite Treasure Hoarder. Hiljetta is lightweight and can be carried by Anemo crowd control from Venti or Jean.
Eventually, Hiljetta will undergo a charging state where she'll absorb devices that spawn nearby. Directly cause Freeze or Overloaded on Hiljetta to prevent her from absorbing these devices. Failing to do so will empower her attacks and may kill your active character (unless you skillfully dodge her attacks).
Interrupting this process also shatters and deals damage to Hiljetta.
Floor 12 - Chamber 3 Guide
Chamber Information
| Challenge |
Defeat 1 Opponent Defeat 1 Opponent |
||||
|---|---|---|---|---|---|
| Goal |
★Remaining challenge time longer than 180 sec. ★Remaining challenge time longer than 300 sec. ★Remaining challenge time longer than 420 sec. |
||||
Floor 12 - Chamber 3 First Half
Floor 12-3-1 Enemies
| Wave 1 |
|---|
|
|
Floor 12-3-1 Strategy
The Radiant Glacial Wolf functions the same as the Overworld Valiant Chronicles boss in which it spawns a clone of itself with a Cryo shield. This shield can only be broken with Pyro-Swirl or Electro-Swirl, which means regular Pyro/Electro attacks won't be able to damage it. Have an Anemo swirl a Pyro/Electro attack on the boss to remove the clone's shield, which will stun the Glacial Wolf.
Floor 12 - Chamber 3 Second Half
Floor 12-3-2 Enemies
| Wave 1 | |
|---|---|
|
|
Floor 12-3-2 Strategy
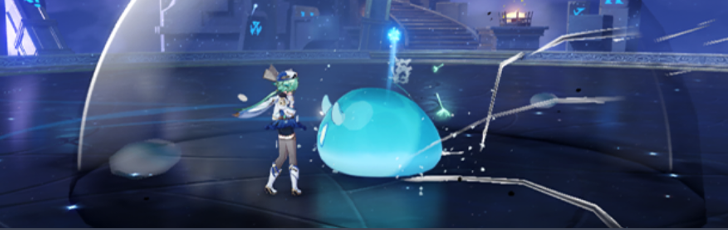
The Secret Source Automaton Overseer Device immediately starts with the laser phase with heavy resistances to all elements. Use Cryo attacks to cool down the gauge from the Automaton, which will remove its resistances and cause the lasers to stop.
You will need constant Cryo application at all times so if you have two Cryo characters like Skirk, Wriothesley, Escoffier, Kaeya, Rosaria, Layla, or Charlotte, this should make the boss a sitting duck for the majority of the fight, and your only worry is the massive health it has.
Floor 12 Clear Rewards
Chamber's Bounty
| Chamber 1 |
|
|---|---|
| Chamber 2 |
|
| Chamber 3 |
|
The Chamber's Bounty is the set of rewards you receive simply for clearing a Chamber for the first time. This can only be received once.
Star's Bounty
| 3★ |
|
|---|---|
| 6★ |
|
| 9★ |
|
The Star's Bounty can only be received if you clear the star requirements displayed during the challenge. Each Chamber has 3 stars each with 1 prize for every 3 earned. These can also only be received once.
Genshin Impact Related Guides
Spiral Abyss Guides

Spiral Abyss Floor Guides
| Spiral Abyss Floors | |||
|---|---|---|---|
 Floor 1 Floor 1 |
 Floor 2 Floor 2 |
 Floor 3 Floor 3 |
 Floor 4 Floor 4 |
 Floor 5 Floor 5 |
 Floor 6 Floor 6 |
 Floor 7 Floor 7 |
 Floor 8 Floor 8 |
 Floor 9 Floor 9 |
 Floor 10 Floor 10 |
 Floor 11 Floor 11 |
 Floor 12 Floor 12 |
Comment
This is such a horrible abyss, so who the **** designed this and thought it was ok? Floor 12 chamber 1 is already a nightmare, as room 1 mobs runaway and are way too durable, if you don't have specific characters and room 2 boss takes forever due to elemental shield, even if you purposefully try to force in non main damage element.
Author

Spiral Abyss Floor 12 Guide for Version 6.4 (March 2026)


Rankings
Gaming News

![The Liar Princess and the Blind Prince Review [PC] | Lovely to Look at but Tedious to Play](https://img.game8.co/4442586/8d95f5faf05780f1765ce7e0938bd825.jpeg/show)
![Monster Hunter Stories 3 Review [First Impressions] | Simply Rejuvenating](https://img.game8.co/4438641/2a31b7702bd70e78ec8efd24661dacda.jpeg/thumb)
![The Seven Deadly Sins: Origin [First Impressions] | A Promising Start](https://img.game8.co/4440581/584e0bfb87908f12c4eab6e846eb1afd.png/thumb)

Popular Games

Genshin Impact Walkthrough & Guides Wiki
Umamusume: Pretty Derby Walkthrough & Guides Wiki
Pokemon Pokopia Walkthrough & Guides Wiki
Honkai: Star Rail Walkthrough & Guides Wiki
Monster Hunter Stories 3: Twisted Reflection Walkthrough & Guides Wiki
Arknights: Endfield Walkthrough & Guides Wiki
Wuthering Waves Walkthrough & Guides Wiki
Zenless Zone Zero Walkthrough & Guides Wiki
Pokemon TCG Pocket (PTCGP) Strategies & Guides Wiki
Monster Hunter Wilds Walkthrough & Guides Wiki


Recommended Games
Diablo 4: Vessel of Hatred Walkthrough & Guides Wiki
Cyberpunk 2077: Ultimate Edition Walkthrough & Guides Wiki
Fire Emblem Heroes (FEH) Walkthrough & Guides Wiki
Yu-Gi-Oh! Master Duel Walkthrough & Guides Wiki
Super Smash Bros. Ultimate Walkthrough & Guides Wiki
Pokemon Brilliant Diamond and Shining Pearl (BDSP) Walkthrough & Guides Wiki
Elden Ring Shadow of the Erdtree Walkthrough & Guides Wiki
Monster Hunter World Walkthrough & Guides Wiki
The Legend of Zelda: Tears of the Kingdom Walkthrough & Guides Wiki
Persona 3 Reload Walkthrough & Guides Wiki


All rights reserved
Copyright© 2012-2024 HoYoverse — COGNOSPHERE. All Rights Reserved.
The copyrights of videos of games used in our content and other intellectual property rights belong to the provider of the game.
The contents we provide on this site were created personally by members of the Game8 editorial department.
We refuse the right to reuse or repost content taken without our permission such as data or images to other sites.
Just put Marvuika preiuem replace xiolen with an anemo on VV first half and second half lunar charge.