Chevreuse Best Builds and Teams
✉ Send your thoughts in our Genshin 6.4 Patch Survey!
★ Exclusive: Dive back in time with the Meta History
◆ Hot: Version 6.4, 6.4 Codes, Linnea, Version 6.5
◆ Builds: Varka, Flins, Skirk, Escoffier
◆ Events: Travelers' Tales, Sightseeing With Friends
◆ Endgame: Spiral Abyss (March 2026)

Chevreuse is a 4-star Pyro Polearm user in Genshin Impact. See her best builds as an Overloaded Support with her recommended weapons and artifacts, team comps, and our rating of this character in this guide!
| Chevreuse's Character Guides | |||
|---|---|---|---|
|
|
|
||
List of Contents
Chevreuse Character Profile
Character Information
| Chevreuse | ||
|---|---|---|
 |
Rating |
|
| Rarity | ||
| Element | ||
| Weapon | ||
| Voice Actors |
Erica Lindbeck (EN)
Shimoji Shino (JP) |
|
Tier List Rankings
| Main DPS | Sub-DPS | Support | Exploration |
|---|---|---|---|
| - | - |
|
|
Character Tier List | Best Characters
Chevreuse's Stats
| Stat | Base Value |
|---|---|
| HP | 2577 |
| ATK | 42 |
| DEF | 130 |
| HP% | 0% |
| Stat | Max Value |
|---|---|
| HP | 11962 |
| ATK | 193 |
| DEF | 605 |
| HP% | 24.0% |
Base Stat Calculations
 | Stats indicated above are obtained from Chevreuse's base values. These numbers also exclude the character's equipped weapon, artifacts, talents, or other passive effects that are not innate to the character. |
|---|---|
 | All characters start with 5% CRIT Rate, 50% CRIT DMG, 100% Energy Recharge, 0 Elemental Mastery, 0% Healing Bonus, and 0% Elemental DMG bonus before any additional stats are applied. The table above includes such values. |
 | The Level 20 stats indicated for this character are calculated before their first ascension. |
Chevreuse's Ascension and Talent Material Summary
| All Ascension Materials Needed |
|---|
|
|
| All Talent Materials Needed |
|
|
Chevreuse Strengths and Weaknesses
| Strengths | |||
|---|---|---|---|
|
• Strong buffer with her potent Pyro and Electro RES Shred and ATK buffs for the entire party simply by triggering Overloaded and using her Skill. Moreover, her ATK buffs lasts for 30 long seconds. • Chevreuse's buffs makes up for the lack of Anemo support from Viridescent Venerer in her dedicated teams. She can substitute the likes of Kazuha for those who want to insert him in other team comps. In addition, he's mostly comparable to C0 Kazuha, but her C6 can potentially surpass his buffs in an Overloaded team. • On top of all the buffs, she can also heal the active character with her Elemental Skill. • Can generate around 4 energy orbs, while only having 60 energy cost. |
|||
| Weaknesses | |||
|
• Her team comps must only consist of Pyro and Electro or else she'll lose her important RES shred utility as a support. • You'll want to pull more constellations should you wish to invest in her teams, as these constellations greatly smoothens her damaging and supporting capabilities (on top of the buffs it gives), also fixing the following weaknesses: → Skill cooldown is 15 seconds, but C4 allows her to use it more than once. → Healing is only for active character, but C6 unlocks initial party recovery for her entire team. |
Chevreuse Best Builds
Chevreuse Support Build
Overloaded Full Support
| Best Weapon | |
|---|---|
| Replacement Weapons | |
| Best Artifacts | |
| Artifact Main Stats | |
| Artifact Sub Stats | HP%, Energy Recharge |
| Sample Teams | Overloaded:
Overloaded:
|
Stacking full HP stats with Black Tassel with buffs from Noblesse Oblige is Chevreuse's best build for Overloaded-focused team comps as a healer-buffer support. Try to achieve 40,000 HP to gain the full ATK buffs of her passive! You may also use Favonius Lance or Rightful Reward if you've already reached the HP threshold.
Energy Recharge is the only other relevant stat for this specific build. This way, you will have enough energy to fund your burst to activate the buffs of Noblesse Oblige!
You may also use Song of Days Past if a party member is already equipping Noblesse Oblige, or if you have a Hypercarry in your team.
Chevreuse Hybrid Build
Hybrid Pyro Support-DPS
| Best Weapon | |
|---|---|
| Replacement Weapons |
3.
|
| Best Artifacts | |
| Artifact Main Stats | HP% (with high ATK% weapon or substats) ATK% (with high HP% weapon or substats) |
| Artifact Sub Stats | HP%, ATK%, CRIT Rate, CRIT DMG, Energy Recharge |
| Sample Teams | Overloaded:
Overloaded:
|
If you already have Noblesse Oblige buffers in your team comp like Kujou Sara or Bennett, you may build Chevreuse with Crimson Witch of Flames set with offensive substats like CRIT and ATK as a hybrid Support and Sub-DPS in Overloaded teams.
This means you will have to balance HP, CRIT Rate, CRIT DMG, and Energy Recharge. Because her damaging skills do not scale with HP, you will also have to focus on ATK depending on your chosen weapon. If you have Staff of Homa, this should help her solve this issue!
Chevreuse Sub-DPS Build
Overloaded Pyro Sub-DPS
| Best Weapon | |
|---|---|
| Replacement Weapons |
3.
|
| Best Artifacts | |
| Artifact Main Stats | |
| Artifact Sub Stats | CRIT Rate, CRIT DMG, ATK%, Energy Recharge, Elemental Mastery |
| Sample Teams | Overloaded:
Overloaded:
|
This build shifts the focus to increase Chevreuse's overall personal damage. She will be mostly used as a quickswap unit to trigger her Skill and Burst, before switching out.
The Crimson Witch of Flames boosts both Pyro Damage and Overload Reaction damage, making it a suitable choice for Sub-DPS Chevreuse as long as you also have ATK%, CRIT Rate, CRIT DMG, and Elemental Mastery.
Chevreuse Goal Stat Values
| Stat | Goal Value |
|---|---|
| HP | 35,000 ~ 40,000 HP |
| Energy Recharge | 160 ~ 200% |
Chevreuse wants to reach as close to 40,000 HP as possible in order to max out the ATK increase from her passive. Afterwards, the rest of her stats should go into Energy Recharge to let her cast her Elemental Burst off cooldown.
Chevreuse Talent Priority
| 1st | 2nd | 3rd |
|---|---|---|
| Elemental Skill | Elemental Burst | Normal Attack |
Chevreuse should prioritize levelling up her Elemental Skill as her Overcharged Ball DMG and healing scales with this talent, regardless if you are using her Sub-DPS or Support builds. Her Burst also deals substantial damage, which you should focus afterwards.
You may ignore her Normal Attacks as she won't use it in her kit.
Chevreuse Best Weapons
Chevreuse Weapon Rankings
Best Weapons for Support
| Weapon | Weapon Information | |
|---|---|---|
| 1st |
 Black Tassel Black Tassel
|
Base ATK: 354 Bonus Stat: HP 46.9% Skill Effect: Increases DMG against slimes by 40%. |
| 2nd |
 Dialogues of the Desert Sages Dialogues of the Desert Sages
|
Base ATK: 510 Bonus Stat: HP 41.3% Skill Effect: When the wielder performs healing, restore 8 Energy. This effect can be triggered once every 10s and can occur even when the character is not on the field. |
| 3rd |
 Favonius Lance Favonius Lance
|
Base ATK: 565 Bonus Stat: Energy Recharge 30.6% Skill Effect: CRIT Hits have a 60% chance to generate a small amount of Elemental Particles, which will regenerate 6 Energy for the character. Can only occur once every 12s. |
Best Weapons for Sub-DPS
| Weapon | Weapon Information | |
|---|---|---|
| 1st |
 Staff of Homa Staff of Homa
|
Base ATK: 608 Bonus Stat: CRIT DMG 66.2% Skill Effect: HP increased by 20%. Additionally, provides an ATK Bonus based on 0.8% of the wielder’s Max HP. When the wielder's HP is less than 50%, this ATK Bonus is increased by an additional 1% of Max HP. |
| 2nd |
 Staff of the Scarlet Sands Staff of the Scarlet Sands
|
Base ATK: 542 Bonus Stat: CRIT Rate 44.1% Skill Effect: The equipping character gains 52% of their Elemental Mastery as bonus ATK. When an Elemental Skill hits opponents, the Dream of the Scarlet Sands effect will be gained for 10s: The equipping character will gain 28% of their Elemental Mastery as bonus ATK. Max 3 stacks. |
| 3rd |
Favonius Lance
|
Base ATK: 565 Bonus Stat: Energy Recharge 30.6% Skill Effect: CRIT Hits have a 60% chance to generate a small amount of Elemental Particles, which will regenerate 6 Energy for the character. Can only occur once every 12s. |
Best Free-to-Play Weapon for Chevreuse
| Weapon | Weapon Information |
|---|---|
|
Black Tassel
|
Base ATK: 354 Bonus Stat: HP 46.9% Skill Effect: Increases DMG against slimes by 40%. |
 Rightful Reward Rightful Reward
|
Base ATK: 565 Bonus Stat: HP 27.6% Skill Effect: When the wielder is healed, restore 8 Energy. This effect can be triggered once every 10s, and can occur even when the character is not on the field. |
All Recommended Weapons for Chevreuse
| Recommended Weapons | How to Get |
|---|---|
| Gacha | |
| Gacha | |
| Gacha | |
| Gacha | |
| Gacha | |
| Event | |
| Crafted | |
| Gacha | |
| Gacha | |
| Gacha | |
| Crafted | |
| Gacha | |
| Inazuma Fishing Association | |
| Event | |
Chevreuse Best Artifacts
Chevreuse Artifact Rankings
Best Artifacts for Support
| Artifact | Artifact Bonuses | |
|---|---|---|
| Best |
|
2-PC: Elemental Burst DMG +20%. 4-PC: Using an Elemental Burst increases all party members' ATK by 20% for 12s. This effect cannot stack. |
| 2nd |
|
2-PC: Healing Bonus +15% 4-PC: When the equipping character heals a party member, the Yearning effect will be created for 6s, which records the total amount of healing provided (including overflow healing). When the duration expires, the Yearning effect will be transformed into the Waves of Days Past effect: When your active party member hits an opponent with a Normal Attack, Charged Attack, Plunging Attack, Elemental Skill, or Elemental Burst, the DMG dealt will be increased by 8% of the total healing amount recorded by the Yearning effect. The Waves of Days Past effect is removed after it has taken effect 5 times or after 10s. A single instance of the Yearning effect can record up to 15,000 healing, and only a single instance can exist at once, but it can record the healing from multiple equipping characters. Equipping characters on standby can still trigger this effect. |
| 3rd |
|
2-PC: HP +20% |
|
|
2-PC: HP +20% |
Best Artifacts for Sub-DPS
| Artifact | Artifact Bonuses | |
|---|---|---|
| Best |
|
2-PC: Pyro DMG Bonus +15%. 4-PC: Increases Overloaded, Burning, and Burgeon DMG by 40%. Increases Vaporize and Melt DMG by 15%. Using an Elemental Skill increases 2-Piece Set effects by 50% for 10s. Max 3 stacks. |
| 2nd |
|
2-PC: Elemental Burst DMG +20% |
|
|
2-PC: Elemental Skill DMG +20% | |
| 3rd |
|
2-PC: Energy Recharge +20%. 4-PC: Increases Elemental Burst DMG by 25% of Energy Recharge. A maximum of 75% bonus DMG can be obtained in this way. |
Alternative 4-Star Artifacts
| Artifact | Artifact Bonuses |
|---|---|
 Instructor Instructor
|
2-PC: Increases Elemental Mastery by 80. 4-PC: Upon triggering an Elemental Reaction, increases all party members' Elemental Mastery by 120 for 8s. |
 The Exile The Exile
|
2-PC: Energy Recharge +20% 4-PC: Using an Elemental Burst regenerates 2 Energy for all party members (excluding the wearer) every 2s for 6s. This effect cannot stack. |
List of Artifacts and Set Bonuses
Chevreuse Best Team Comps
On Overloaded Team Comps
Chevreuse's kit is intended for Overloaded teams, and her teams must all be Pyro and Electro for her passive to work. In a full Pyro and Electro team, that team must also have one Electro and one Pyro, meaning you can have just one Electro and three Pyro characters in a team.
Notable Overload Teammates
| Character | Explanation |
|---|---|
|
|
DPS With Varesa's plunge scalings, she takes full advantage of Chevreuse's damage buffs in her Overload teams, making her one of Chevreuse's best DPS teammates. |
|
|
DPS Mavuika is also a great candidate to take advantage of Chevreuse's Overload buffs due to her dual playstyle, with more impact on her Normal Attack playstyle. |
|
|
DPS Raiden and Chevreuse can already trigger Overload on their own due to Raiden's potent Elemental application. Combine these two with another Pyro teammate to enable Pyro resonance and Raiden significantly gains a boost in damage. |
|
|
DPS Arlecchino and Chevreuse can both slot into an Overload team, but requires the use of Electro applicators in order to proc Overload reliably due to the overwhelming Pyro presence of Arlecchino. |
|
|
DPS Clorinde and Chevreuse can function well in an Overload team, but requires the use of another Pyro teammate with more application as Clorinde has faster application than someone like Raiden. |
|
|
Sub-DPS When running an Electro On-Field DPS, Xiangling becomes the staple choice to add as a potent Pyro Sub-DPS, and Chevreuse can further this damage just by being present. |
|
|
Sub-DPS Dehya is an alternative choice when it comes to Pyro application, and can be a step-up above Xiangling due to her on-contact application as opposed to Xiangling's Pyronado. Chevreuse aids with this by powering up her contact damage. |
|
|
Sub-DPS When switching around and having a Pyro On-Field DPS, Fischl becomes the prime choice for an Overload team as Chevreuse's buffs will cause her already-strong Electro damage and application to skyrocket. |
|
|
Sub-DPS Ororon can take advantage of Chevreuse's buffs to Overload and do more damage with his Off-Field lightning strikes. However, this is only viable when he is placed in a team with Chevreuse and Mavuika. |
|
|
Support Most Overload DPS units can benefit off Bennett's healing and ATK boost as they are mostly ATK-scaling. Bennett also fulfills the 2nd Pyro teammate requirement along with Chevreuse for activating Pyro resonance in Electro On-Field teams. |
|
|
Support Iansan and Chevreuse do not directly interact with each other, but serve as two staple supports for movement-based DPS units like Varesa and Clorinde. |
Chevreuse Raiden Hypercarry Team
| Sub-DPS/ Support |
Main-DPS | Sub-DPS/ Support |
Support |
|---|---|---|---|
|
|
|
|
|
|
|
|
|
|
In Raiden's Hypercarry teams, Chevreuse replaces Kazuha for the ATK buffs and Electro RES Shred. This in combination with Sara and Bennett buffs, Raiden Shogun's damage should skyrocket more or less at a similar height!
If your Raiden is not at C2, then you may want to swap out Sara for another damage dealer like Xiangling.
Chevreuse Clorinde Overloaded Team
| Sub-DPS/ Support |
Main-DPS | Sub-DPS | Sub-DPS/ Support |
|---|---|---|---|
|
|
|
|
|
|
|
|
|
|
Clorinde also thrives with Chevreuse's Overloaded comps so long as you have these two types of characters: an energy-giving Sub-DPS like Fischl or Raiden, a defensive that can help with interruption resistance like Thoma or Dehya.
If you have no issues with dodging attacks, you may also substitute your defensive supports for someone like Sara or Bennett.
Chevreuse Yoimiya Overloaded Team
| Sub-DPS/ Support |
Main-DPS | Sub-DPS | Sub-DPS/ Support |
|---|---|---|---|
|
|
|
|
|
|
|
|
|
|
Yoimiya is one of the best partners for Chevreuse as the knockback effect from the Overloaded reaction isn't a big issue with her ranged attacks. Chevreuse essentially works as the support buffer for this team.
For your party members, you may use a combination of Raiden, Fischl, Beidou, Yae Miko, or Sara for Electro, but you can still have one more Pyro with Bennett or Thoma should you wish to give her more buffs and protection.
Chevreuse Mono-Pyro Lyney Team
| Sub-DPS/ Support |
Main-DPS | Sub-DPS | Sub-DPS/ Support |
|---|---|---|---|
|
|
|
|
|
Chevreuse replaces Anemo supports for Lyney triple-Pyro mono team as she gives him ATK buffs and Pyro RES reduction. Your Electro character can be any off-fielders or buffer supports, but we recommend slower Electro or faster Pyro application for Lyney's passive to work.
Chevreuse Overloaded Free-to-Play Teams
| Support | Main-DPS | Sub-DPS | Sub-DPS/ Support |
|---|---|---|---|
|
|
|
|
|
|
|
|
|
|
If you're looking for F2P options, Yanfei and Xiangling are usable as the Main DPS for Chevreuse support. Yanfei specifically is ranged, so she can follow-up on enemies launched by the knockback effect of Overloaded.
Best Constellation Rating and Explanation
| Rating | Constellation Effect / Merits | |
|---|---|---|
| C4 | ★★☆ | • Chevreuse can use her Elemental Skill two more times. Good for Sub-DPS builds. |
| C6 | ★★★ | • Chevreuse's ultimate buffs for both Pyro and Electro DMG, and access to party healing. |
Like most 4-stars nowadays, Chevreuse's fullest potential is unlocked at C6. She is perfectly fine at C0 however, as the most important part of her kit, RES Shred, is already unlocked from her passive, and it's easy to activate.
Improve her Damage, Healing, and Buffing with Constellations
Her best constellation is at C6, which gives her access to party healing and 60% Pyro DMG and Electro DMG bonus to a party member healed at max!
Since the party healing only happens after 12s of the skill's effect, all the other party members can only get the 20% party buff once this period has ended.
Chevreuse Talents and How to Use
Locked to Overloaded Teams
One of Chevreuse's passive, shreds the Pyro and Electro RES of enemies hit with the Overloaded Elemental Reaction only if the team composes of only Electro and Pyro characters. This locks her to team comps only with such characters similar to Nilou.
Gains Overcharged Balls from Overload Reactions
Everytime someone in the team causes the Overload reaction, Chevreuse gains an Overcharged Ball, which can cause an improved AoE Pyro Damage from her Hold Elemental Skill.
She can only gain 1 stack of Overcharged Ball at a time.
Normal Attack
| Normal Attack: Line Bayonet Thrust EX |
|---|
| Performs up to 4 consecutive spear strikes.
Charge Attack Consumes a certain amount of Stamina to lunge forward, dealing damage to opponents along the way. Plunge Attack: Plunges from mid-air to strike the ground below, damaging opponents along the path and dealing AoE DMG upon impact. |
| Attribute | Effect (Lvl 1) |
|---|---|
| 1-Hit DMG | 53.1% |
| 2-Hit DMG | 49.3% |
| 3-Hit DMG | 27.6% + 32.5% |
| 4-Hit DMG | 77.3% |
| Charged Attack Cyclic DMG | 121.7% |
| Charged Attack Stamina Cost | 25 |
| Plunge DMG | 63.9% |
| Low/High Plunge DMG | 128%/160% |
Elemental Skill
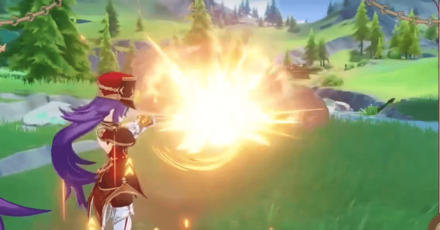
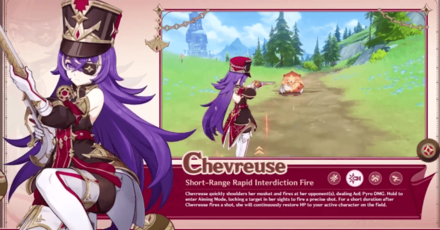
| Short-Range Rapid Interdiction Fire |
|---|
| Chevreuse quickly shoulders her musket and fires at her opponent(s), dealing AoE Pyro DMG. For a short duration after Chevreuse fires a shot, she will continously restore HP to the active character on the field. The amount healed is based on her Max HP. Hold to fire in a different fashion. Hold Attack: Enter Aiming Mode, locking a target in sights to fire a precise interdiction shot. If Chevreuse has an Overcharged Ball, then she will fire the Overcharged Ball instead, dealing greater Pyro DMG in a larger area. Chevreuse gains 1 Overcharged Ball every time a nearby character in the party triggers an Overloaded reaction, and can have up to 1 Overcharged Ball at a time. Arkhe: Ousia Periodically, after Chevreuse's Short-Rapid Interdiction Fire hits, a Surging Blade wil be called forth that deals Ousia-aligned Pyro DMG. |
| Attribute | Effect (Lvl 1) |
|---|---|
| Press DMG | 115.2% |
| Hold DMG | 172.8% |
| Overcharged Ball DMG | 282.4% |
| HP Regeneration Over Time | 2.67% Max HP +256 |
| Healing Duration | 12s |
| Surging Blade DMG | 28.8% |
| Surging Blade Interval | 10s |
| CD | 15s |
Two-Part Elemental Skill
Chevreuse shoulders her musket and deals AoE Damage. This skill has different effects depending on if it is pressed or held.
Press Mode
Chevreuse fires her musket directly to the opponent in front of her. This deals AoE Pyro Damage. After the shot is fired, any characters on field will be healed based on Chevreuse's Max HP. This version of her skill will not use the Overcharged Ball.
Hold Mode
Chevreuse brings out her musket and will enter a manual aiming mode to precisely attack an enemy. If she has an Overcharged Ball, doing this can cause a greater AoE of Pyro Damage.
Elemental Burst
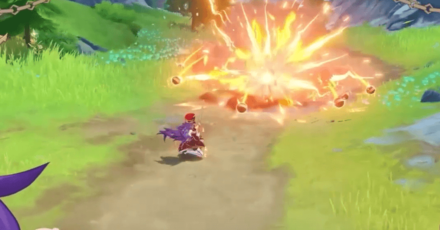
| Ring of Bursting Grenades |
|---|
| Chevreuse fires an explosive grenade at opponents with her musket, dealing AoE Pyro DMG. After the projectile hits, it will split into many secondary explosive shells. The secondary explosive shells will burst after a short interval, dealing Pyro DMG to nearby opponents. |
| Attribute | Effect (Lvl 1) |
|---|---|
| Explosive Grenade DMG | 368.2% |
| Secondary Explosive Shell DMG | 49.1% |
| CD | 15s |
| Energy Cost | 60 |
Multiple Instances of AoE Pyro Damage
Chevreuse fires an explosive grenade dealing AoE Pyro Damage. Once the explosive grenade hits an opponent, the projectile will split into secondary explosive shells.
These explosive shells will then explode after a short interval, dealing another around of Pyro Damage.
Passive Talent 1
| Vanguard's Coordinated Tactics |
|---|
| When all party members are Pyro and Electro characters and there is at least one Pyro and one Electro character each in the party: Chevreuse grants "Coordinated Tactics" to nearby party members: After a character triggers the Overloaded reaction, the Pyro and Electro RES of the opponent(s) affected by this Overloaded reaction will be decreased by 40% for 6s. The "Coordinated Tactics" effect will be removed when the Elemental Types of the characters in the party do not meet the basic requirements for the Passive Talent. |
Passive Talent 2
| Vertical Force Coordination |
|---|
| After Chevreuse fires an Overcharged Ball using Short-Range Rapid Interdiction Fire, neaby Pyro and Electro characters in the party gain 1% increased ATK for every 1,000 Max HP Chevreuse has for 30s. ATK can be increased by up to 40% in this way. |
Passive Talent 3
| Double Time March |
|---|
| Decreases sprinting Stamina consumption for your own party members by 20%. Not stackable with Passive Talents that provide the exact same effects. |
Chevreuse Ascension and Talent Materials
Chevreuse Ascension
| Lv.20→Lv.40 |
|
|---|---|
| Lv.40→Lv.50 |
|
| Lv.50→Lv.60 |
|
| Lv.60→Lv.70 |
|
| Lv.70→Lv.80 |
|
| Lv.80→Lv.90 |
|
Chevreuse Talent Level-Up Materials
| Daily Domain Drops | Enemy Drops | Weekly Boss Drops |
|---|---|---|
| Wed/Sat/Sun |
Clockwork Meka |
All-Devouring Narwhal Challenge Reward |
|
|
|
|
|
|
|
Chevreuse Constellations
| Sclopetum Ensiferum |
|---|
 |
Constellation and Effects
| Chevreuse's Constellations | |
|---|---|
| C1 |
Stable Front Line's Resolve When the active character with the "Coordinated Tactics" status (not including Chevreuse herself) triggers the Overloaded reaction, they will recover 6 Energy. This effect can be triggered once every 10s. You must first unlock the Passive Talent "Vanguard's Coordinated Tactics." |
| C2 |
Sniper Induced Explosion After Holding Short-Range Rapid Interdiction Fire and hitting a target, 2 chain explosions will be triggered near the location where said target is hit. Each explosion deals Pyro DMG equal to 120% of Chevreuse's ATK, This effect con be triggered up to once every 10s, and DMG dealt this way is Elemental Skill DMG. |
| C3 |
Practiced Field Stripping Technique Increase the Level of Short-Range Rapid Interdiction Fire by 3. Maximum upgrade level is 15. |
| C4 |
The Secret to Rapid-Fire Multishots After using Ring of Bursting Grenades, the Hold mode of Short-Range Rapid Interdiction Fire will not go on cooldown when Chevreuse uses it. This effect is removed after Short-Range Rapid Interdiction Fire has been fired twice using Hold or after 6s. |
| C5 |
Enhanced Incendiary Firepower Increase the Level of Ring of Bursting Grenades by 3. Maximum upgrade level is 15. |
| C6 |
In Pursuit of Ending Evil After 12s of the healing effect from Short-Range Rapid Interdiction Fire, all nearby party members recover HP equivalent to 10% of Chevreuse's Max HP once. After a party member is healed by Short-Range Rapid Interdiction Fire, they gain a 20% Pyro DMG Bonus and Electro DMG Bonus for 8s. Max 3 stacks. Each stack's duration is counted independently. |
How to Get Chevreuse
Pull from Any Banner
| All Current Wish Banners | |
|---|---|
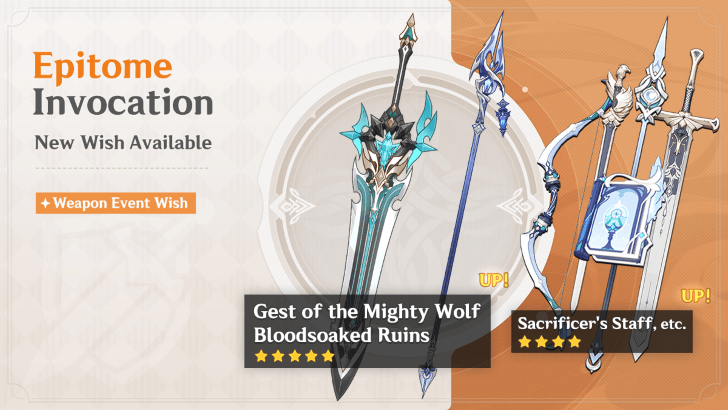 Epitome Invocation Epitome Invocation
|
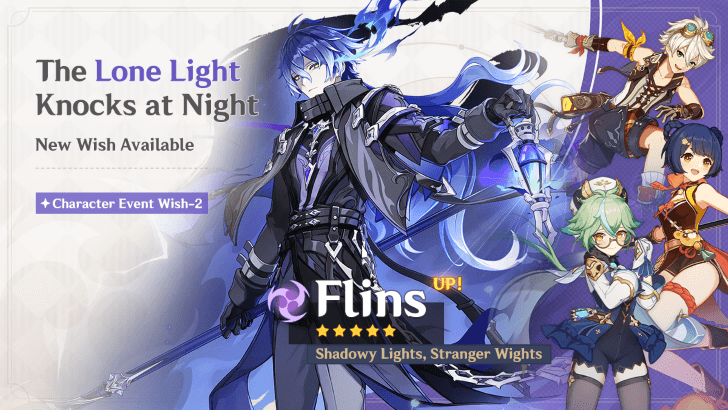 The Lone Light Knocks at Night The Lone Light Knocks at Night
|
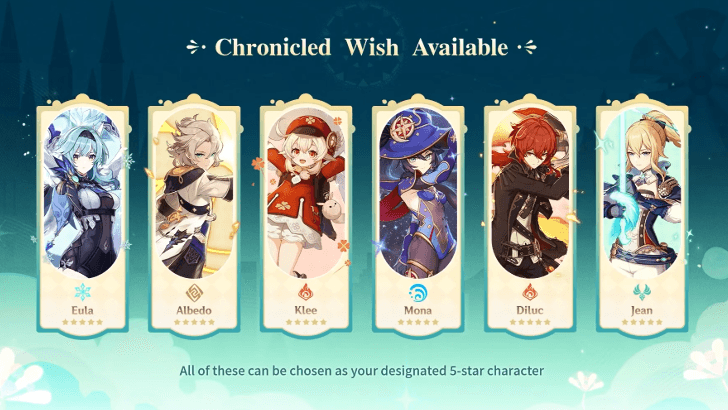 6.4 Chronicled Wish Mondstadt 6.4 Chronicled Wish Mondstadt
|
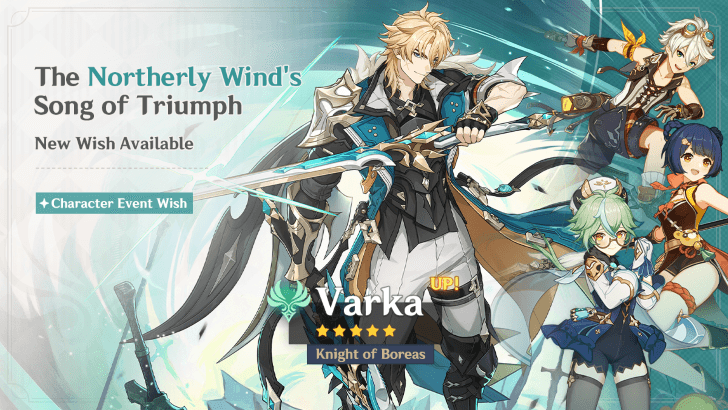 The Northerly Wind's Song of Triumph The Northerly Wind's Song of Triumph
|
 Wanderlust Invocation Wanderlust Invocation
|
|
Chevreuse is available at a normal rate on all Wish Banners except Beginner's Wish. This means you can get her from Wanderlust Invocation, and Epitome Invocation.
Chevreuse was last featured as a rate-up character during Phase 2 of Version 6.2 Luna III from December 23, 2025 to January 13, 2026, in both Varesa and Xilonen's rerun banners!
Chevreuse's In-Game Information
Chevreuse Character Profile
| Nation | |
|---|---|
| Title | Executor of Justice |
| Vision | |
| Gender | Female |
| Race | Human |
| Height | Medium Girl |
| Faction | Special Security and Surveillance Patrol |
| Constellation | Sclopetum Ensiferum |
| Birthday | January 10 |
| Special Dish | Sin: The Kind that Doesn't Need to be Dealt With |
| Story Quest |
|
Chevreuse Voicelines
Thoughts About Chevreuse
| Character | In-Game Thoughts |
|---|---|
 Chiori Chiori
|
Working with Chevreuse and talking with her are a cinch. So easy, in fact, that whenever I say goodbye to her and return to tending to my customers again, it takes me a moment to shift gears mentally. |
 Clorinde Clorinde
|
Ah yes, Captain Chevreuse. That's a name I've heard before. She has been landed with lawsuits on several occasions, after being accused of using excessive force when arresting culprits. She refuted the allegations just as forcefully during her testimony, leaving the plaintiff speechless. I think she's outstanding. |
 Freminet Freminet
|
I hear that Chevreuse is a regular customer of Beaumont Workshop. She always purchases the most expensive and advanced components for her musket. If I make enough Mora, maybe one day I can afford to upgrade Pers's components. |
 Wriothesley Wriothesley
|
Most inmates seem to gain a new level of respect for the rules after receiving attention from the Special Security and Surveillance Patrol. As the captain, Chevreuse is an instrumental part of that team. |
Chevreuse's Thoughts About Others
| Character | In-Game Thoughts |
|---|---|
 Charlotte Charlotte
|
About Charlotte Charlotte is the type of reporter that really gives you a headache. Whenever there's a major case, she's always one of the first people in the vicinity no matter how hard we try to secure the scene. One time, she was even detained as a suspect for half a month, but she was still able to finish her article while in custody... I really do need to find the time to have a formal conversation with her editor about her behavior. |
|
Chiori
|
About Chiori Chiori's method of resolving disputes is bit radical. But, she has quite the network at her disposal and has provided the Special Security and Surveillance Patrol with intelligence on more than one occasion. In return, I turn a blind eye whenever she throws someone out the door or runs a malignant competitor out of business. If you look into it, you'll find that Chiori is always in the right. She's just not the type to waste her breath on explanations. |
|
Clorinde
|
About Clorinde Clorinde has built quite the reputation for herself in Fontaine as a Champion Duelist. Our positions are different, so I'm not at liberty to make any comments about her work. But I trust that she takes on those duels out of her own sense of justice. |
 Emilie Emilie
|
About Emilie Emilie is a good friend. Her expert knowledge of chemistry has been a great help to me many times when analyzing evidence or tracking down a killer. She helps us discover information that no one else can see, like what type of perfume a suspect wore or what type of flowers they sent as a gift. She can even determine the places they've been right down to the very dirt they've stepped in... Plus, she's never been wrong. |
|
Freminet
|
About Freminet I once saw Freminet in a shop when we both reached for the same gadget. It was the last one available, but just as I was about to tell him he could have it, he withdrew his hand and ran out of the store. It might sound odd, but he fled like the Gardes were after him. |
 Furina Furina
|
About Furina Lady Furina once ordered us to carry out some sort of... ceremonial musketeer performance. She not only wanted each of us outfitted with special "ceremonial muskets," but she wanted us to practice all sorts of specialized drill formations as well. Luckily, in the end, she couldn't find the right song to pair with the performance and the matter was dropped entirely. |
 Lyney Lyney
|
About Lyney Lyney is quite the famous magician. We once had a case where we arrested a magician suspected of deliberate harm, fraudulent behavior, and murder, but we could never figure out his methods. In the end, we brought on Lyney as a consultant. He helped us find a crucial piece of evidence that led to the successful conviction of the suspect. I heard that an author actually used that case as the basis for their mystery novel about a magician who used their craft to commit crimes. Unfortunately... the author ended up going a little overboard on the graphic detail, and since the crime is still fresh in everyone's minds, it'll be a while before they're able to get it published. |
 Navia Navia
|
About Navia I've heard about the murder case involving Navia's father. It caused quite the stir in the Maison Gardiennage at the time. It was the source of many disagreements, I believe. Fortunately, the truth has come to light and the true culprit has been held accountable... Justice may not always be swift, but it always prevails in the end. |
 Neuvillette Neuvillette
|
About Neuvillette Everyone knows that the Iudex abstains himself of all personal emotion when presiding over a trial. Some even say he lacks the warmth of human emotion. But the way I see it, justice should remain uncorrupted by personal feelings. Those who break the law bear guilt. It's as simple as that. |
 Sigewinne Sigewinne
|
About Sigewinne The Special Security and Surveillance Patrol has a long-lasting friendship with the Melusines. We often collaborate with the Melusines who work in the Marechaussee Phantom. They're kind, honest, and reliable. When it comes to handling major cases, the role they play is irreplaceable. I, myself, am quite close to several Melusines, Sigewinne included. Melusines have long been one of our most indispensable partners. If there continue to be those who dare to slander and belittle their name, then they'll find themselves looking down the barrels of our muskets. |
|
Wriothesley
|
About Wriothesley The work Wriothesley does is highly effective. As least all criminals know that the Fortress of Meropide isn't the type of place you want to stay at long enough to grow old. That fact comes in handy during our interrogation work. |
Genshin Impact Related Guides

All Characters and Voice Actors
List of All Characters
| Characters by Element | |||
|---|---|---|---|
Playable Characters
 Chasca
 Faruzan
 Heizou
 Ifa
Ifa Jahoda
 Jean
Jean Kazuha
 Lan Yan
 Lynette
 Mizuki
 Sayu
Sayu Sucrose
 Traveler (Anemo)
 Varka
Varka Venti
Venti Wanderer
 Xianyun
 Xiao
Xiao Aloy
Aloy Ayaka
Ayaka Chongyun
 Citlali
 Diona
Diona Escoffier
 Eula
Eula Ganyu
Ganyu Kaeya
Kaeya Layla
Layla Mika
Mika Qiqi
Qiqi Rosaria
 Shenhe
 Skirk
Skirk Alhaitham
 Baizhu
 Collei
 Kaveh
Kaveh Kinich
 Kirara
 Lauma
Lauma Nahida
 Nefer
Nefer Tighnari
 Traveler (Dendro)
 Yaoyao
 Beidou
 Cyno
Cyno Dori
Dori Fischl
 Flins
Flins Iansan
 Ineffa
 Keqing
 Lisa
Lisa Ororon
 Raiden
 Razor
Razor Sara
Sara Sethos
 Shinobu
 Traveler (Electro)
 Varesa
 Yae Miko
 Albedo
 Gorou
Gorou Illuga
 Itto
Itto Kachina
 Ningguang
 Noelle
 Traveler (Geo)
 Xilonen
 Yun Jin
 Zhongli
 Zibai
Zibai Aino
Aino Ayato
Ayato Barbara
 Candace
 Columbina
 Dahlia
 Kokomi
 Mona
Mona Mualani
 Nilou
Nilou Tartaglia
 Traveler (Hydro)
 Xingqiu
 Yelan
Yelan Amber
Amber Arlecchino
 Bennett
 Chevreuse
 Dehya
Dehya Diluc
Diluc Durin
Durin Gaming
 Hu Tao
 Klee
Klee Mavuika
 Thoma
Thoma Traveler (Pyro)
 Xiangling
 Xinyan
 Yanfei
 Yoimiya
Upcoming Characters
| All Upcoming Characters |
 Alice Alice
|
 Capitano Capitano
|
 Dainsleif Dainsleif
|
 Dottore Dottore
|
|---|---|---|---|
 Linnea Linnea
|
 Lohen Lohen
|
 Nicole Nicole
|
 Pantalone Pantalone
|
 Pierro Pierro
|
 Pulcinella Pulcinella
|
 Rerir Rerir
|
 Sandrone Sandrone
|
 Tsaritsa Tsaritsa
|
|||
Character Lists
| Characters by Rarity | |
|---|---|
| 5-Star Characters | 4-Star Characters |
| Free Characters | |
| Characters by Weapon Used | |
| Sword Users | Claymore Users |
| Polearm Users | Bow Users |
| Catalyst Users | |
| Characters by Role | |
| Main DPS Characters | Sub DPS Characters |
| Support Characters | Healers |
| Shield Characters | Buff Providers |
| Best for Exploration | Local Specialty Passives |
| Double Reward Passives | |
| Characters by Gender | |
| Male Characters | Female Characters |
| Short Male Characters | Short Female Characters |
| Medium Male Characters | Medium Female Characters |
| Tall Male Characters | Tall Female Characters |
| Characters by Height | |
| Short Characters | Medium Characters |
| Tall Characters | |
| Characters by Region | |
| Mondstadt Characters | Liyue Characters |
| Inazuma Characters | Sumeru Characters |
| Fontaine Characters | Natlan Characters |
| Nod-Krai Characters | |
Comment
Mandatory C6 for better overlord team. OMG They better give free all playable 4star selector (not liyue only bullshit) this new year.
Author

Chevreuse Best Builds and Teams


Rankings
Gaming News

![The Liar Princess and the Blind Prince Review [PC] | Lovely to Look at but Tedious to Play](https://img.game8.co/4442586/8d95f5faf05780f1765ce7e0938bd825.jpeg/show)
![Marathon Cryo Archive Map Teased as [REDACTED] on Selection Screen](https://img.game8.co/4442236/6357203e58172f6de57f1991e7c39b22.png/thumb)
![The Liar Princess and the Blind Prince Review [PC] | Lovely to Look at but Tedious to Play](https://img.game8.co/4442586/8d95f5faf05780f1765ce7e0938bd825.jpeg/thumb)

Popular Games

Genshin Impact Walkthrough & Guides Wiki
Umamusume: Pretty Derby Walkthrough & Guides Wiki
Pokemon Pokopia Walkthrough & Guides Wiki
Honkai: Star Rail Walkthrough & Guides Wiki
Monster Hunter Stories 3: Twisted Reflection Walkthrough & Guides Wiki
Arknights: Endfield Walkthrough & Guides Wiki
Wuthering Waves Walkthrough & Guides Wiki
Zenless Zone Zero Walkthrough & Guides Wiki
Pokemon TCG Pocket (PTCGP) Strategies & Guides Wiki
Monster Hunter Wilds Walkthrough & Guides Wiki


Recommended Games
Diablo 4: Vessel of Hatred Walkthrough & Guides Wiki
Cyberpunk 2077: Ultimate Edition Walkthrough & Guides Wiki
Fire Emblem Heroes (FEH) Walkthrough & Guides Wiki
Yu-Gi-Oh! Master Duel Walkthrough & Guides Wiki
Super Smash Bros. Ultimate Walkthrough & Guides Wiki
Pokemon Brilliant Diamond and Shining Pearl (BDSP) Walkthrough & Guides Wiki
Elden Ring Shadow of the Erdtree Walkthrough & Guides Wiki
Monster Hunter World Walkthrough & Guides Wiki
The Legend of Zelda: Tears of the Kingdom Walkthrough & Guides Wiki
Persona 3 Reload Walkthrough & Guides Wiki


All rights reserved
Copyright© 2012-2024 HoYoverse — COGNOSPHERE. All Rights Reserved.
The copyrights of videos of games used in our content and other intellectual property rights belong to the provider of the game.
The contents we provide on this site were created personally by members of the Game8 editorial department.
We refuse the right to reuse or repost content taken without our permission such as data or images to other sites.
Only took 190 pulls, but I finally have her...