How to Solve Cascade Pools and Spouts Puzzle Guide
✉ Send your thoughts in our Genshin 6.4 Patch Survey!
★ Exclusive: Dive back in time with the Meta History
◆ Hot: Version 6.4, Luna 5 Codes
◆ Builds: Varka, Flins, Skirk, Escoffier
◆ Events: Travelers' Tales, He Who Caught the Wind
◆ Future: Linnea, Version 6.5 Luna VI

Cascade Pools and Spouts are temple puzzles located in the Sumeru Desert for Genshin Impact. Check out how to solve Cascade Pools and Spouts and all their locations in this puzzle guide!
List of Contents
How to Solve Cascade Pools and Spouts in the Desert
Shoot with a Charged Attack
Position yourself to have the Cascade Spout in your line of sight. Strike them perfectly and you can guide the flow of sand down to the Cascade Pools and Spouts below it.
Cascade Pools and Spouts Rewards
Once all the Cascade Pools were filled with sand, you will get various rewards like chests!
Where to Find Cascade Pools and Spouts in the Desert
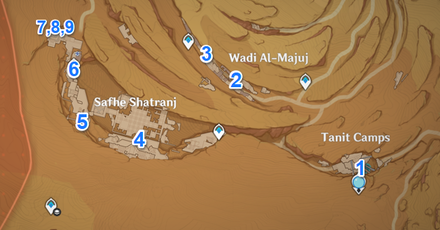
Located in the Desert of Hadramaveth
 |
||
| Area 1 | Area 2 | Area 3 |
| Area 4 | Area 5 | Area 6 |
| Area 7 | Area 8 | Area 9 |
These mechanisms are found around the abandoned ruins of the ancient city in the desert. There are no required quests to access these puzzles.
Area 1
Map Location
| Location | 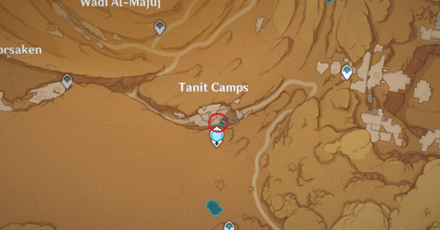 |
|---|---|
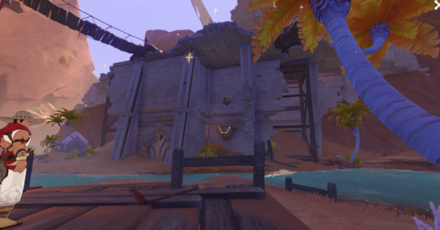 |
You can find the first puzzle at the bottom of the Tanit Camps. It is right across from where Yuften is standing.
How to Solve
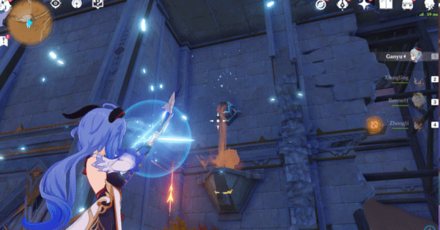
The first puzzle is very straightforward to solve. Simply shoot the sprout and wait for the pool to fill with sand. You will get a Common Chest as a reward right after.
Area 2
Map Location
| Location | 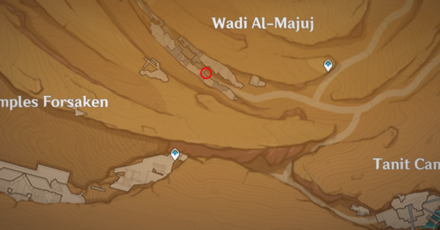 |
|---|---|
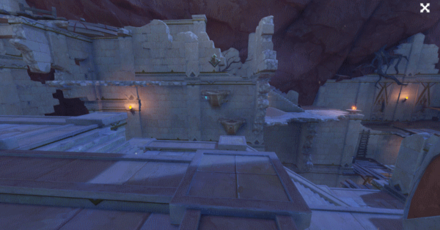 |
You can find the second puzzle in the ruins of Wadj Al-Majuj, in front of some stairs.
How to Solve
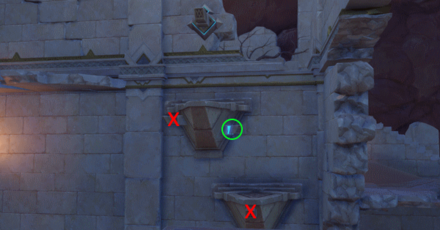
For this puzzle, you will need to make sure the flow of the sand fills the pool on the right and the left.
For the pool on right, you will need to close the sprouts marked with an X marked on the image above and open the sprout marked with a green circle before opening the main sprout.
For the pool on the left, you will need to close the previously opened sprout to prevent sand from leaking.
Area 3
Map Location
| Location | 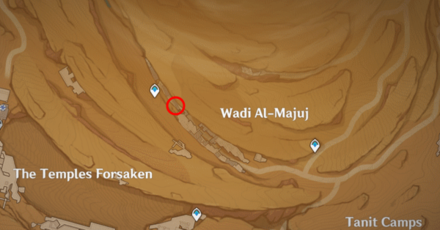 |
|---|---|
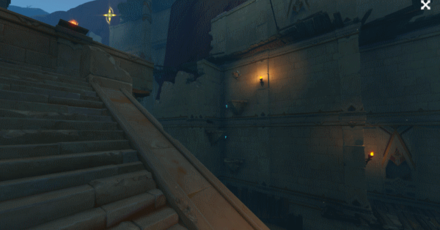 |
You can find the second puzzle in the ruins of Wadj Al-Majuj, in front of some stairs.
How to Solve
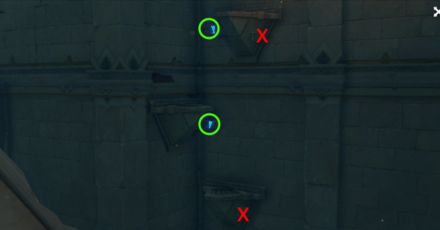
For this puzzle, you will need to fill up 3 pools with sand. Focus on first closing the two sprouts marked with an x on the image above and have the ones circled in green open. After closing and opening the appropriate sprouts, let the sand flow.
First off, fill the bottom pool. Afterwards, close the leaking sprout on the second pool to fill it up. After that, close the leaking sprout on the top pool to get the common chest!
Area 4
Map Location
| Location | 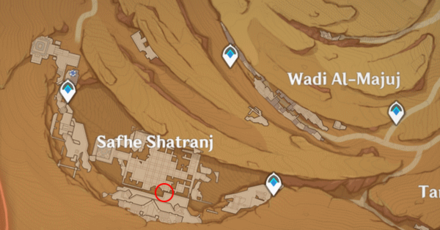 |
|---|---|
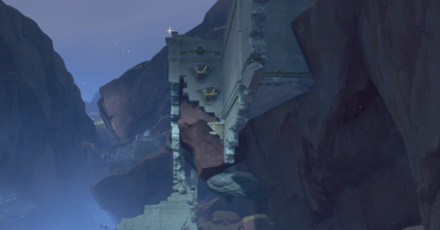 |
You can find this puzzle along the edge of the ruins.
How to Solve
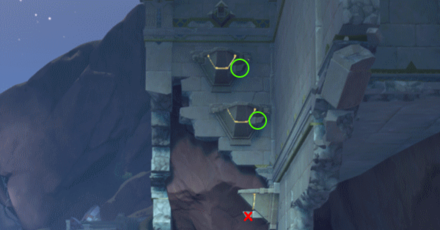
For this puzzle, you will need to fill 3 pools with sand. Close the bottom sprout and let the sand flow!
After filling up the bottom pool, slowly fill up the middle pool by closing the leaking sprout then do the same for the top pool!
Area 5
Map Location
| Location | 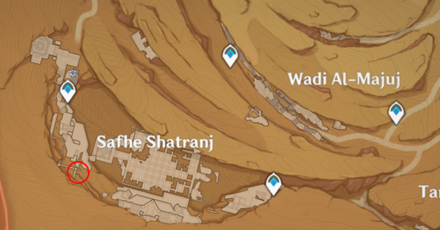 |
|---|---|
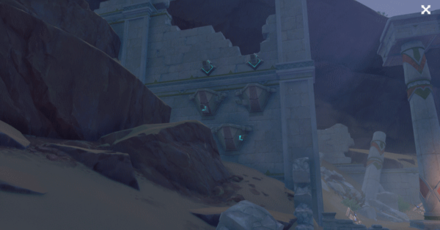 |
You can find this puzzle at the corner of the ruins.
How to Solve
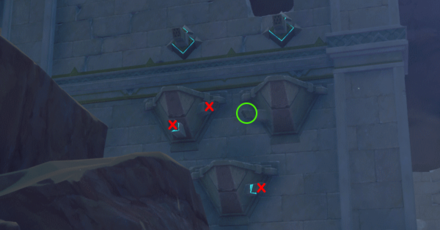
For this puzzle, you will need to fill 3 pools. Close all the sprouts marked with an X on the image above and open the sprout on the top right pool before letting the sand flow! After filling the bottom spool, close the sprout and fill it up to get the chest.
Area 6
Map Location
| Location | 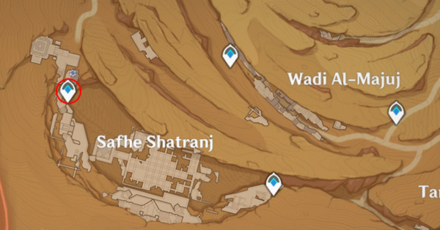 |
|---|---|
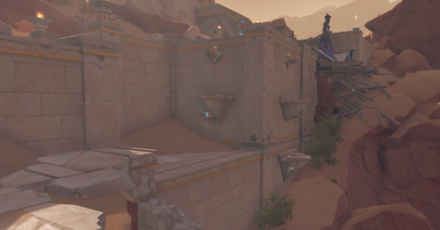 |
This puzzle can be found right underneath the waypoint teleporter of Safhe Shatranj / The Temples of Forsaken.
How to Solve
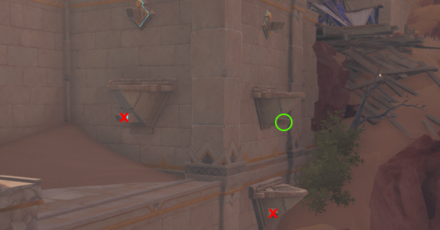
For this puzzle, you will need to fill three pools along the edge of a corner wall. Close the sprouts on the bottom and left pool them let the sand flow! Once the bottom is filled, close the sprout on the right pool and fill it up to get the chest!
Areas 7, 8, and 9
These three puzzles can all be found in one area. We will be combining them into one section.
Map Location
| Location | 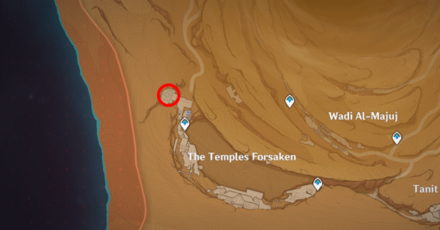 |
|---|---|
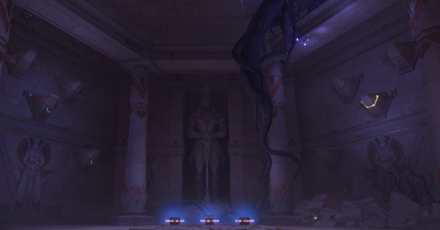 |
After using the waypoint teleporter, turn around and head up the stairs, the entrance will be on the left. After entering the room, go behind the monument and take the elevator down to the puzzle area.
How to Solve - Step 1
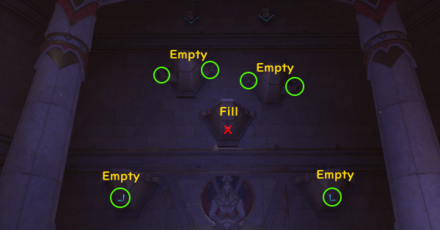
First, you will need to look at which pools are filled on the right wall and apply it to the left wall. In this case, you will need to fill up the pool in the middle and empty all other pools
To do this, you will need to redirect the sand coming from the top and close the leaking sprout on the middle pool.
Afterward, empty the pools on the top so that so there's no sand inside. You can empty it by hitting the sprouts that point away from the middle
How to Solve - Step 2
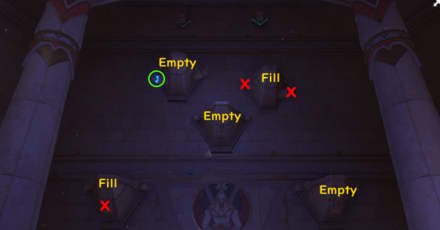
After defeating the enemies, a new pattern will appear on the right wall. In this case, we need to imitate it on the left wall by filling the top right and bottom left pools.
This can be quickly done by closing all sprouts marked with an X and opening the ones marked with a circle on the image above.
How to Solve - Step 3
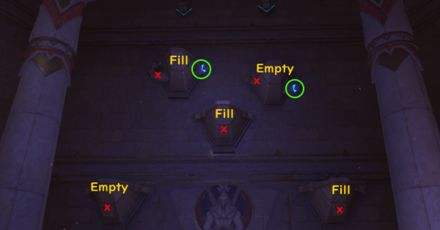
Again, after defeating the enemies, the last pattern will appear. This time, you need to fill up 3 pools; the top left, the middle, and the bottom right.
After emptying the previous pools with sand, you can quickly complete this puzzle by following which sprouts to open by following the image above. Make sure to fill up the top left sprout after filling up the middle one by closing the leaking sprout!
Cascade Pools and Spouts Information
Available in Genshin 3.4
| Genshin Impact Version 3.4 | |
|---|---|
 |
|
| Release Date | January 18, 2023 |
These Cascade Pools and Spouts were released in the Version 3.4 Update alongside the Sumeru Desert area expansion on January 18, 2023!
Version 3.4 Release Date & Patch Notes
Genshin Impact Related Guides
All Tips and Tricks Guides

All Version 3.4 Tips & Tricks
Other Regional Tips & Tricks
Author
How to Solve Cascade Pools and Spouts Puzzle Guide
improvement survey
03/2026
improving Game8's site?

Your answers will help us to improve our website.
Note: Please be sure not to enter any kind of personal information into your response.

We hope you continue to make use of Game8.
Rankings
Gaming News
Popular Games

Genshin Impact Walkthrough & Guides Wiki

Honkai: Star Rail Walkthrough & Guides Wiki

Umamusume: Pretty Derby Walkthrough & Guides Wiki

Pokemon Pokopia Walkthrough & Guides Wiki

Resident Evil Requiem (RE9) Walkthrough & Guides Wiki

Monster Hunter Wilds Walkthrough & Guides Wiki

Wuthering Waves Walkthrough & Guides Wiki

Arknights: Endfield Walkthrough & Guides Wiki

Pokemon FireRed and LeafGreen (FRLG) Walkthrough & Guides Wiki

Pokemon TCG Pocket (PTCGP) Strategies & Guides Wiki
Recommended Games

Diablo 4: Vessel of Hatred Walkthrough & Guides Wiki

Fire Emblem Heroes (FEH) Walkthrough & Guides Wiki

Yu-Gi-Oh! Master Duel Walkthrough & Guides Wiki

Super Smash Bros. Ultimate Walkthrough & Guides Wiki

Pokemon Brilliant Diamond and Shining Pearl (BDSP) Walkthrough & Guides Wiki

Elden Ring Shadow of the Erdtree Walkthrough & Guides Wiki

Monster Hunter World Walkthrough & Guides Wiki

The Legend of Zelda: Tears of the Kingdom Walkthrough & Guides Wiki

Persona 3 Reload Walkthrough & Guides Wiki

Cyberpunk 2077: Ultimate Edition Walkthrough & Guides Wiki
All rights reserved
Copyright© 2012-2024 HoYoverse — COGNOSPHERE. All Rights Reserved.
The copyrights of videos of games used in our content and other intellectual property rights belong to the provider of the game.
The contents we provide on this site were created personally by members of the Game8 editorial department.
We refuse the right to reuse or repost content taken without our permission such as data or images to other sites.


![Monster Hunter Stories 3 Review [First Impressions] | Simply Rejuvenating](https://img.game8.co/4438641/2a31b7702bd70e78ec8efd24661dacda.jpeg/thumb)


Completing all these sand puzzle give you achievement "The Ancient Orchard and Spring"